Before completing the integration in Kandji, you will need to install the Kandji ServiceNow application in the ServiceNow Integration Hub, create an OAuth API application, and add a service account user in your ServiceNow console.
Install the Kandji ServiceNow App
If not already, you will need to install the Kandji ServiceNow Integration Hub app in your ServiceNow instance. Installing the app will set up some of the required dependencies in your ServiceNow tenant.
Go to the ServiceNow store.
Find Kandji.
Install the Kandji integration application by clicking on Get. You may need to authenticate to the ServiceNow store before being able to install the app. The credentials used should have the ability to install Integration Hub Store apps.
Create an OAuth App
Kandji uses a ServiceNow OAuth API client that leverages the Grant Type “Resource Owner Password Credentials (ROPC)” to request access and refresh tokens to interact with the ServiceNow instance.
Using a ServiceNow admin account, log in to your ServiceNow tenant ({yourtenant}.service-now.com).
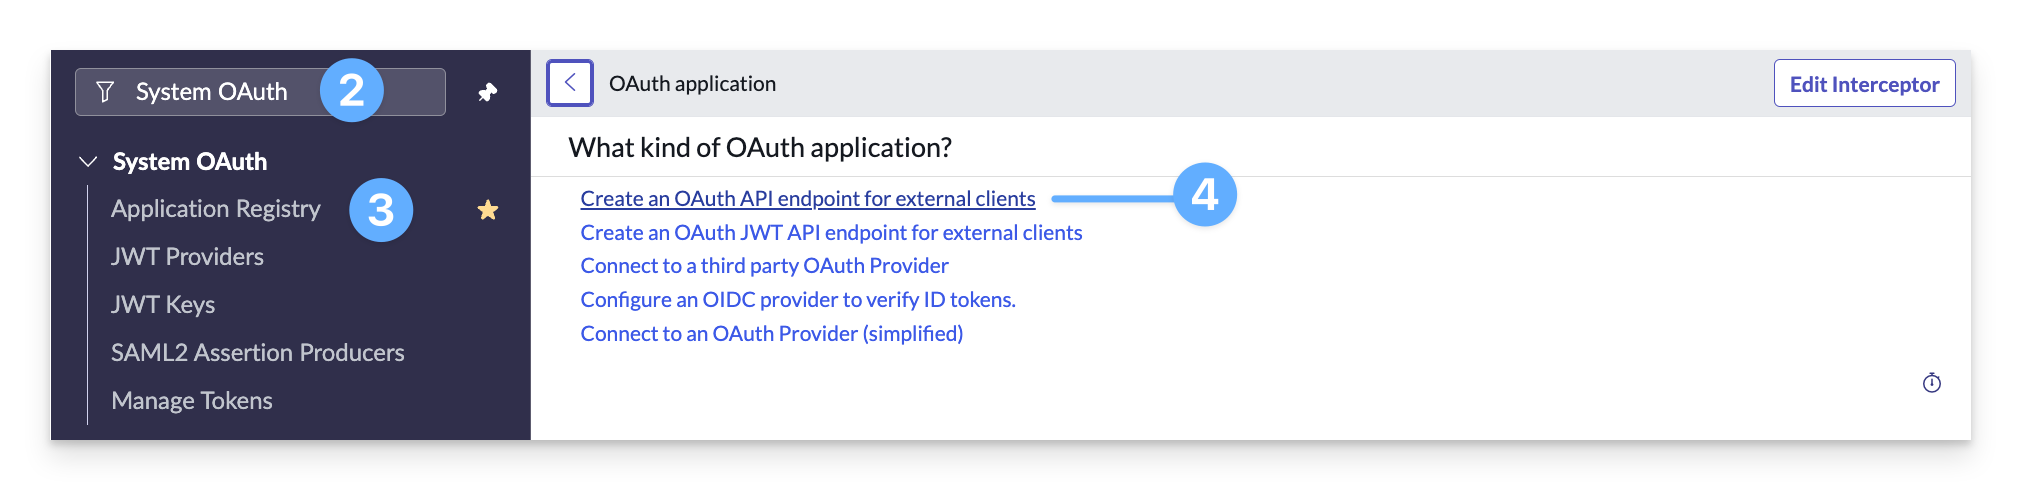
In the Filter navigator, search for System OAuth.
Click Application Registry.
Click Create an OAuth API endpoint for external clients.
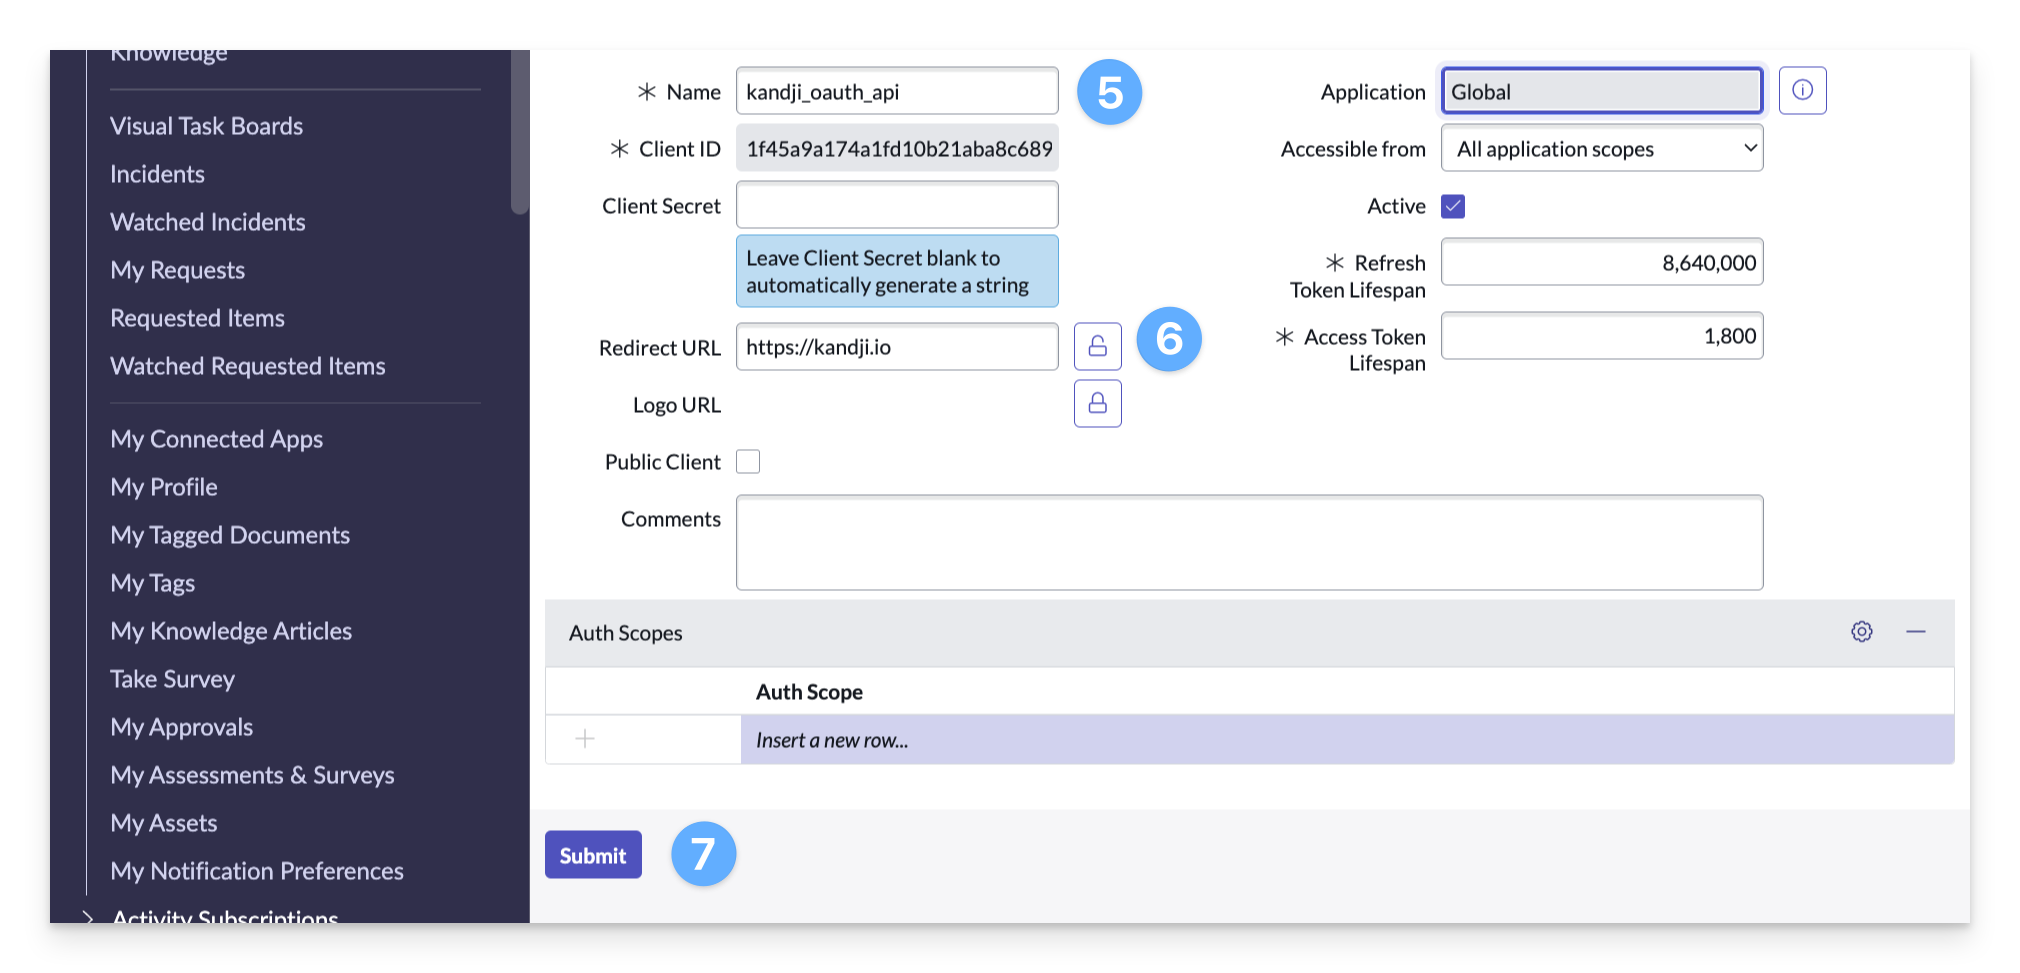
Give the OAuth app a name. (Example: kandji_oauth_api)
In the Redirect URL field enter https://kandji.io.
Click Submit.
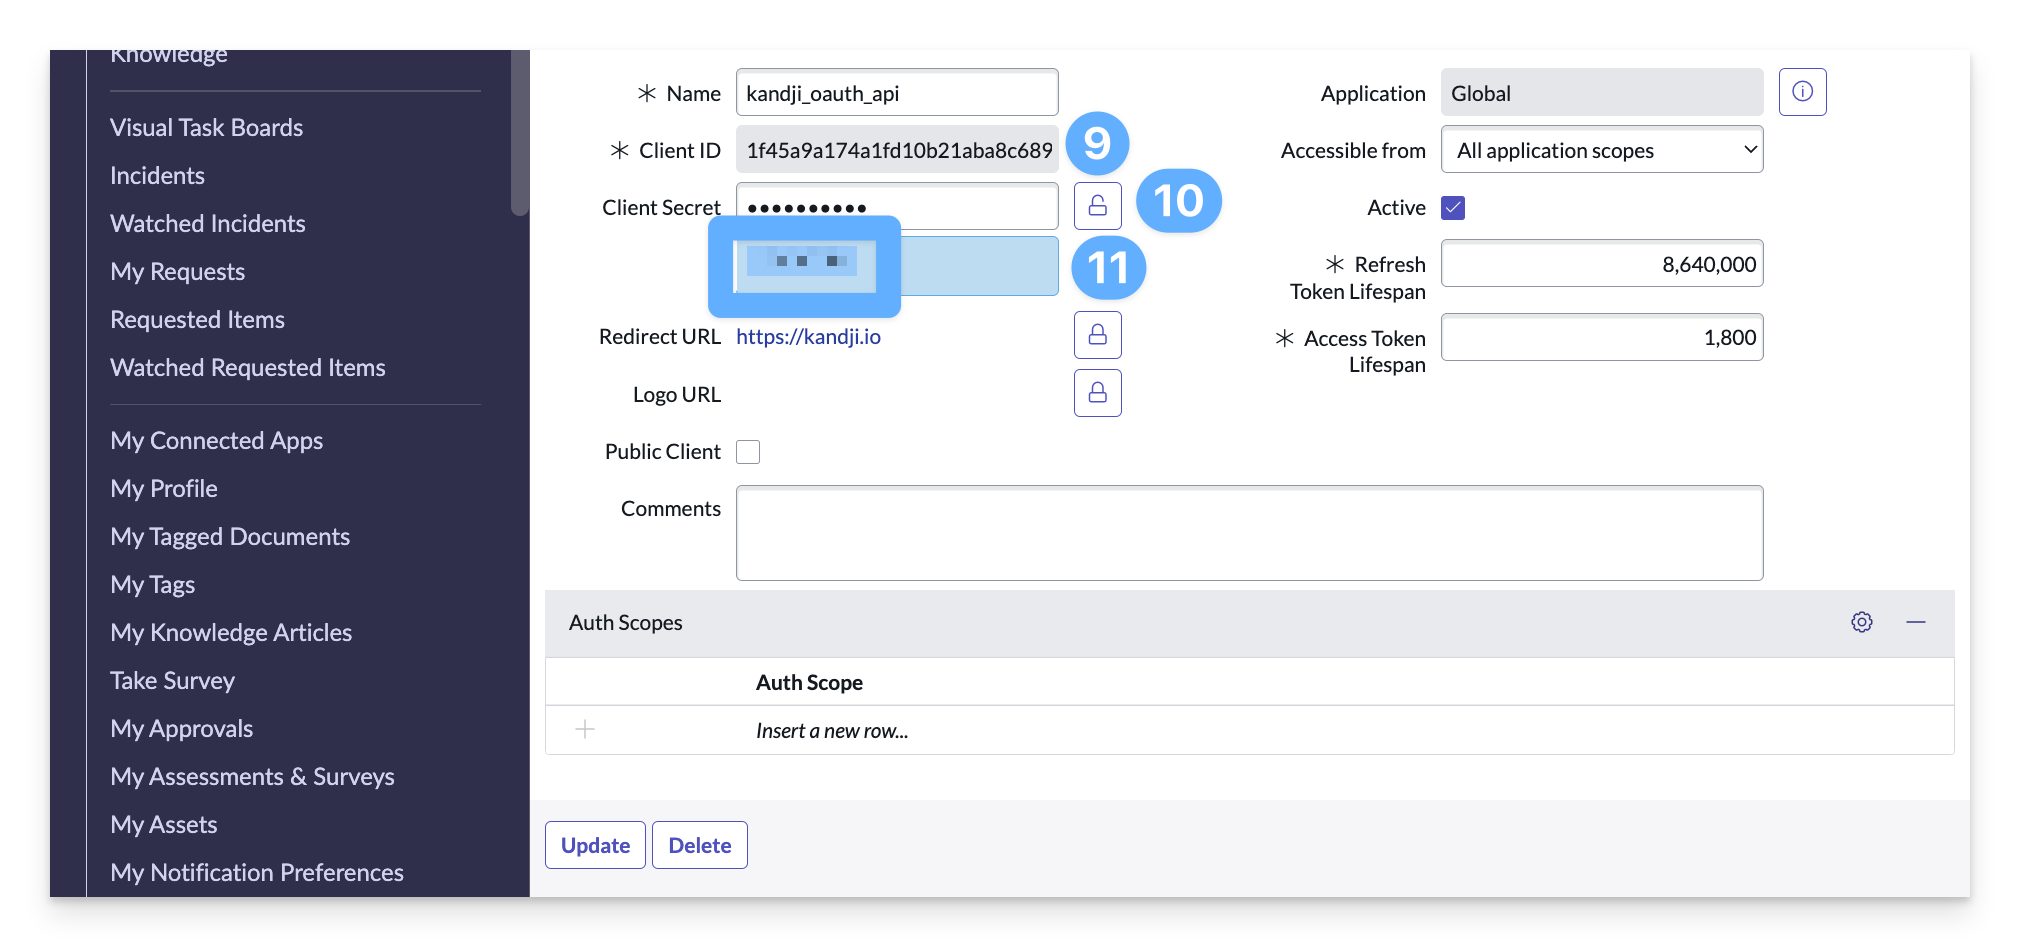
Go back to the OAuth app that you just created.
Highlight and copy the Client ID.
Reveal the Client Secret by clicking the padlock.
Highlight and copy the Client Secret, or optionally, If you enter your own client secret, be sure to click update to save the change.
Adding a Service Account
The service account user credentials are used to configure the ServiceNow integration in Kandji.
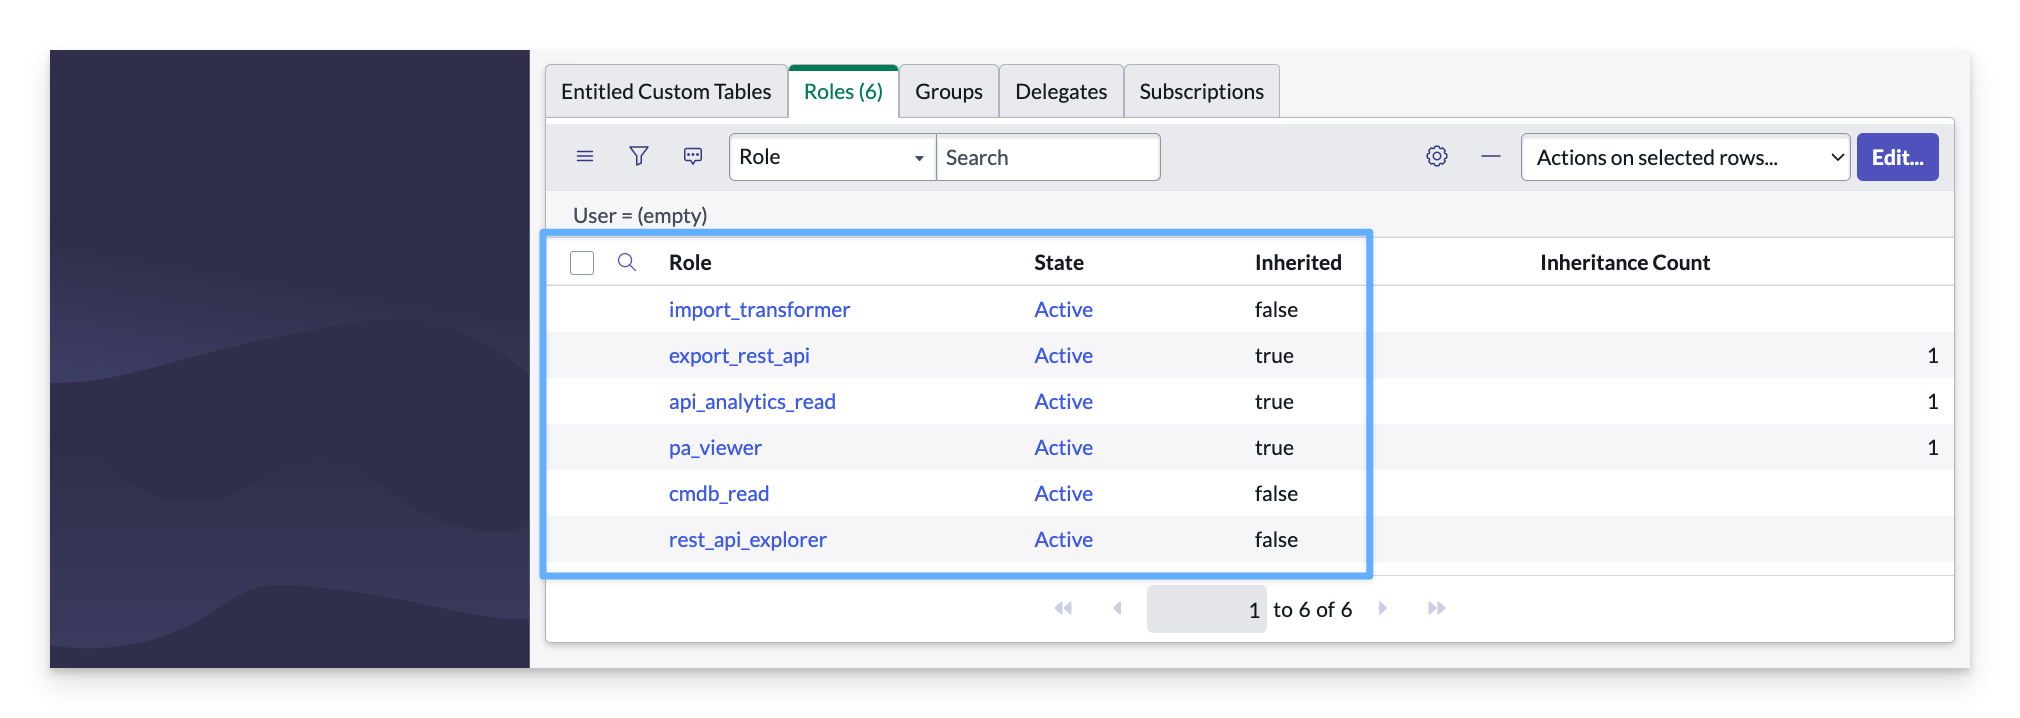
Any ServiceNow user account can be used as long as it has access to web services, and has the following roles assigned: cmdb_read, import_transformer, and rest_api_explorer. However, In general, it is good practice to create separate service accounts for each integration.
Using a ServiceNow admin account, log in to your ServiceNow tenant ({yourtenant}.service-now.com).
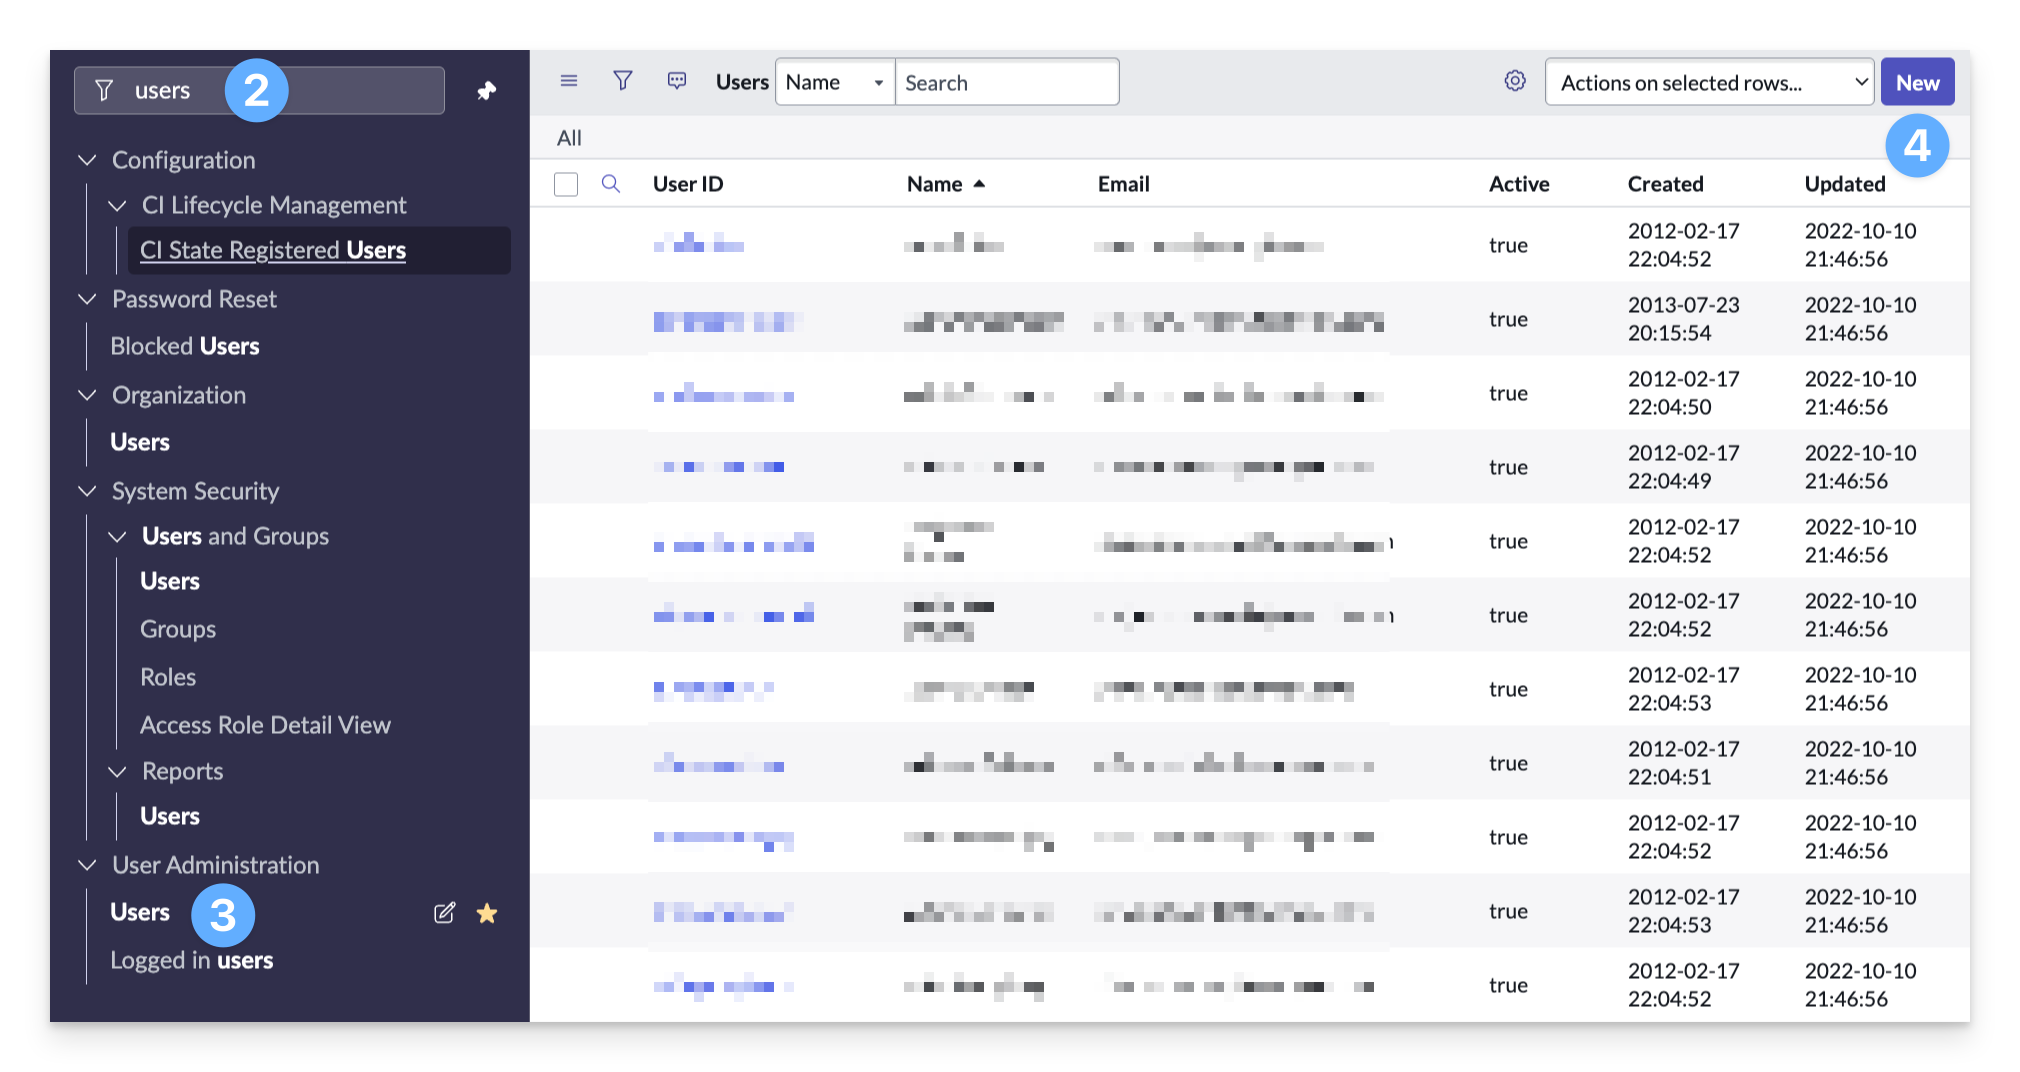
In the Filter navigator, search for Users.
Under User Administration, click Users.
Click New to add a new user.
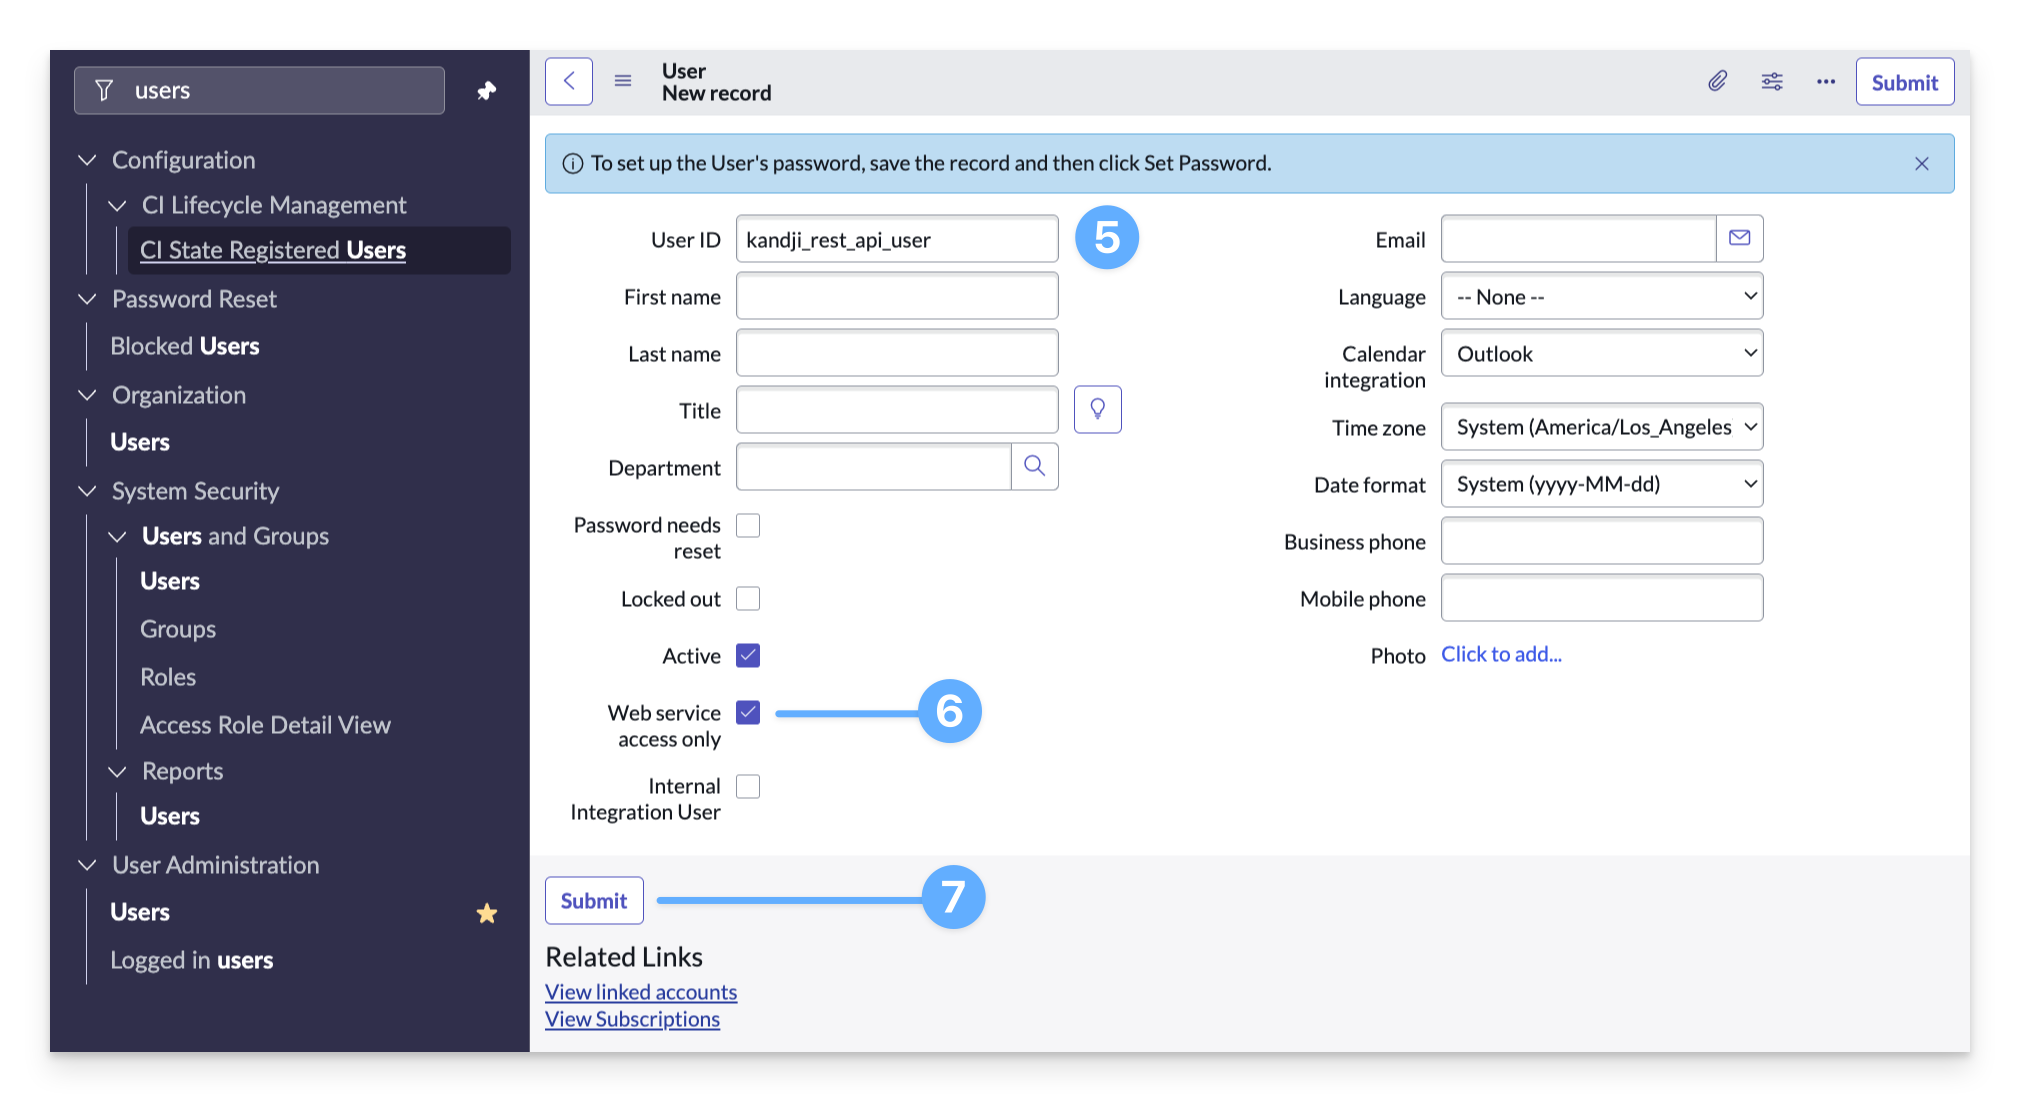
Enter a descriptive name for the user. (Example:
kandji_rest_api_user). Copy the username to a safe place. You will use this credential when setting up the integration in Kandji.Optionally, enter any additional information required by your organization.
Be sure to select Web service access only.
Click Submit.
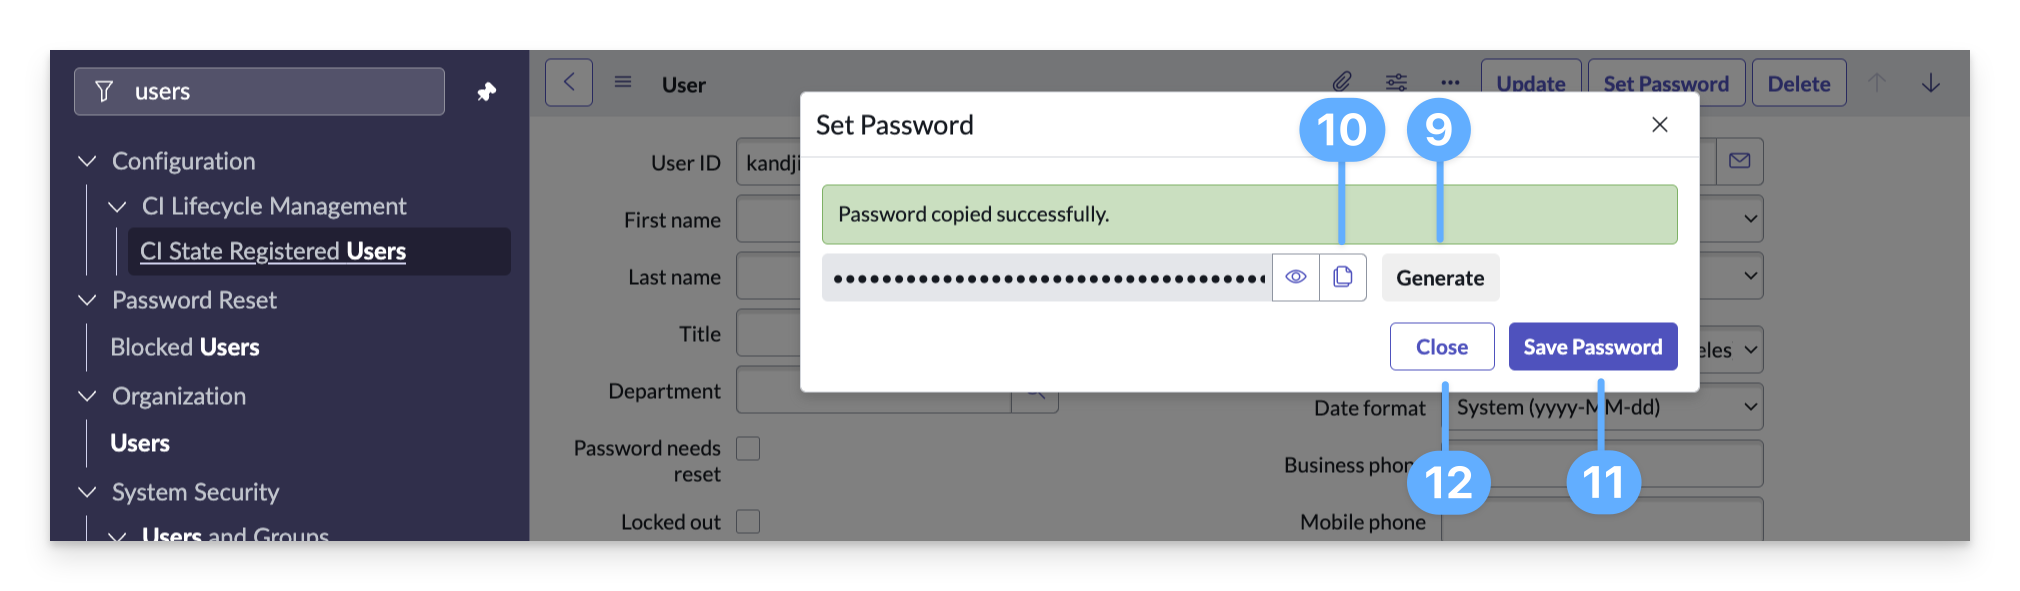
Click on the new user that was just created, and click Set Password.
Click Generate to create the new password.
Copy the new password.
Click Save Password. Be sure to save this password in a safe place. This password will be used in Kandji when configuring the ServiceNow integration.
Click Close to go back to the Users page.
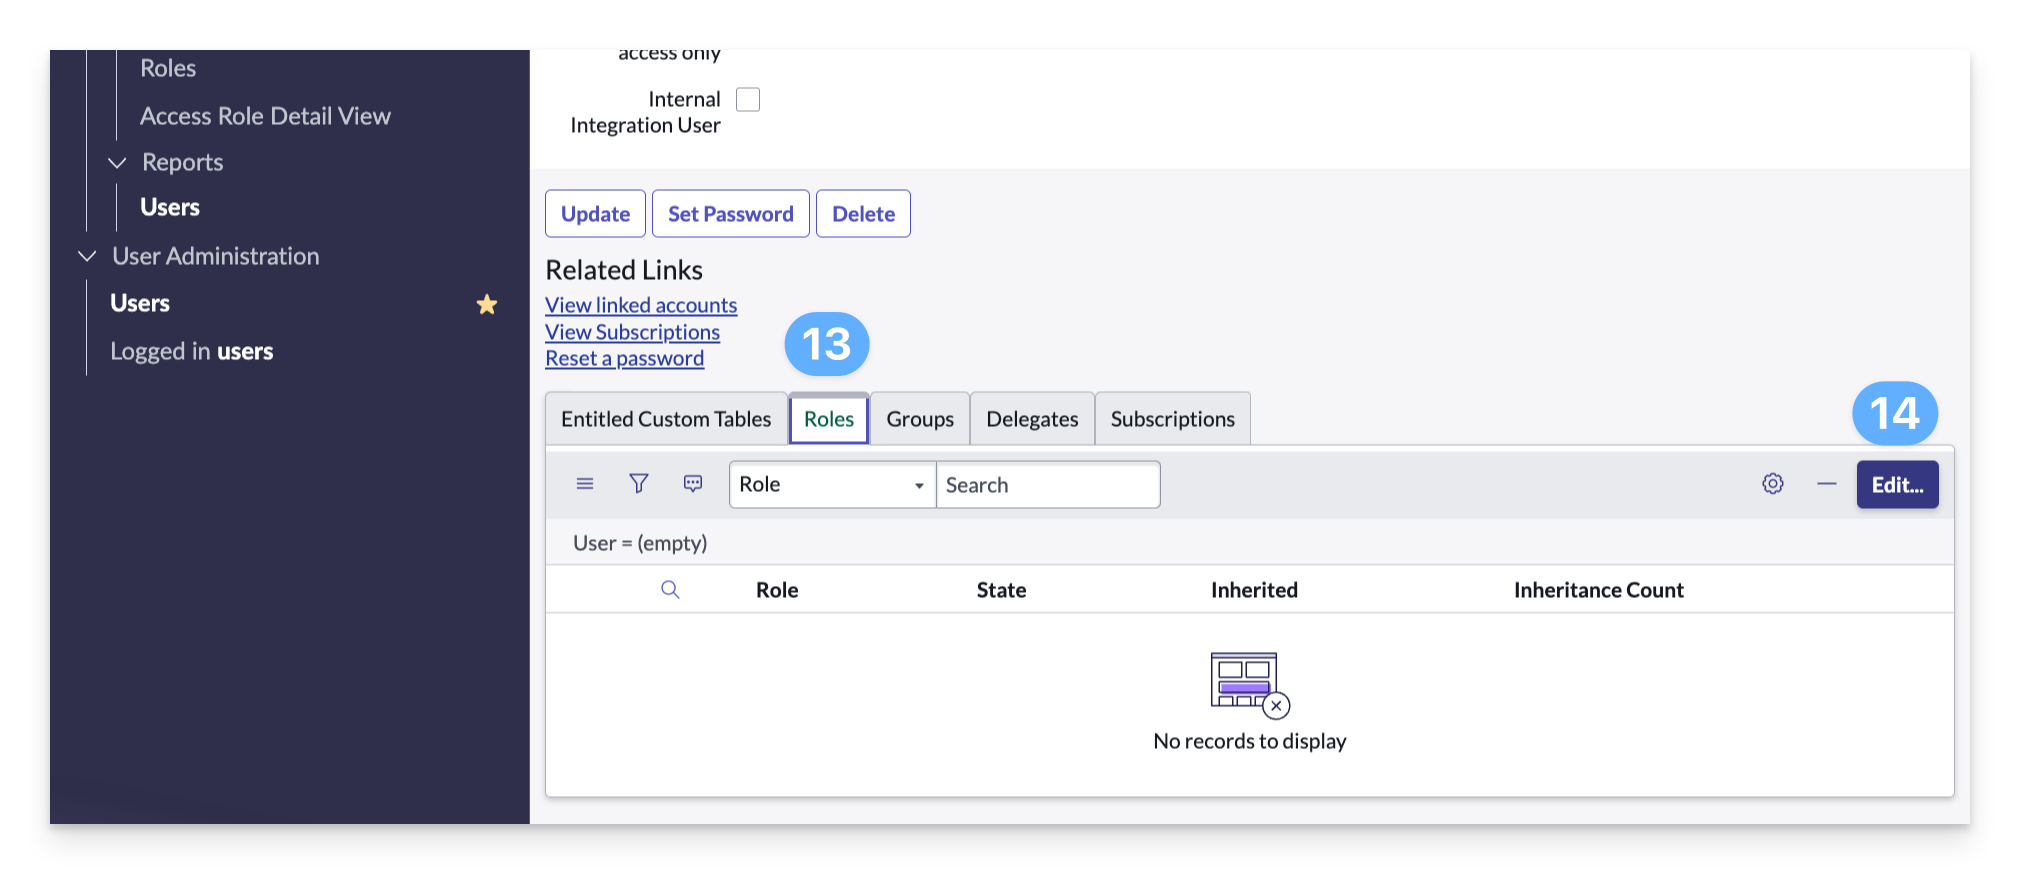
While still on the user page, go to Roles.
Click Edit.
Add the following roles to the service account user.
cmdb_read
import_transformer
rest_api_explorer
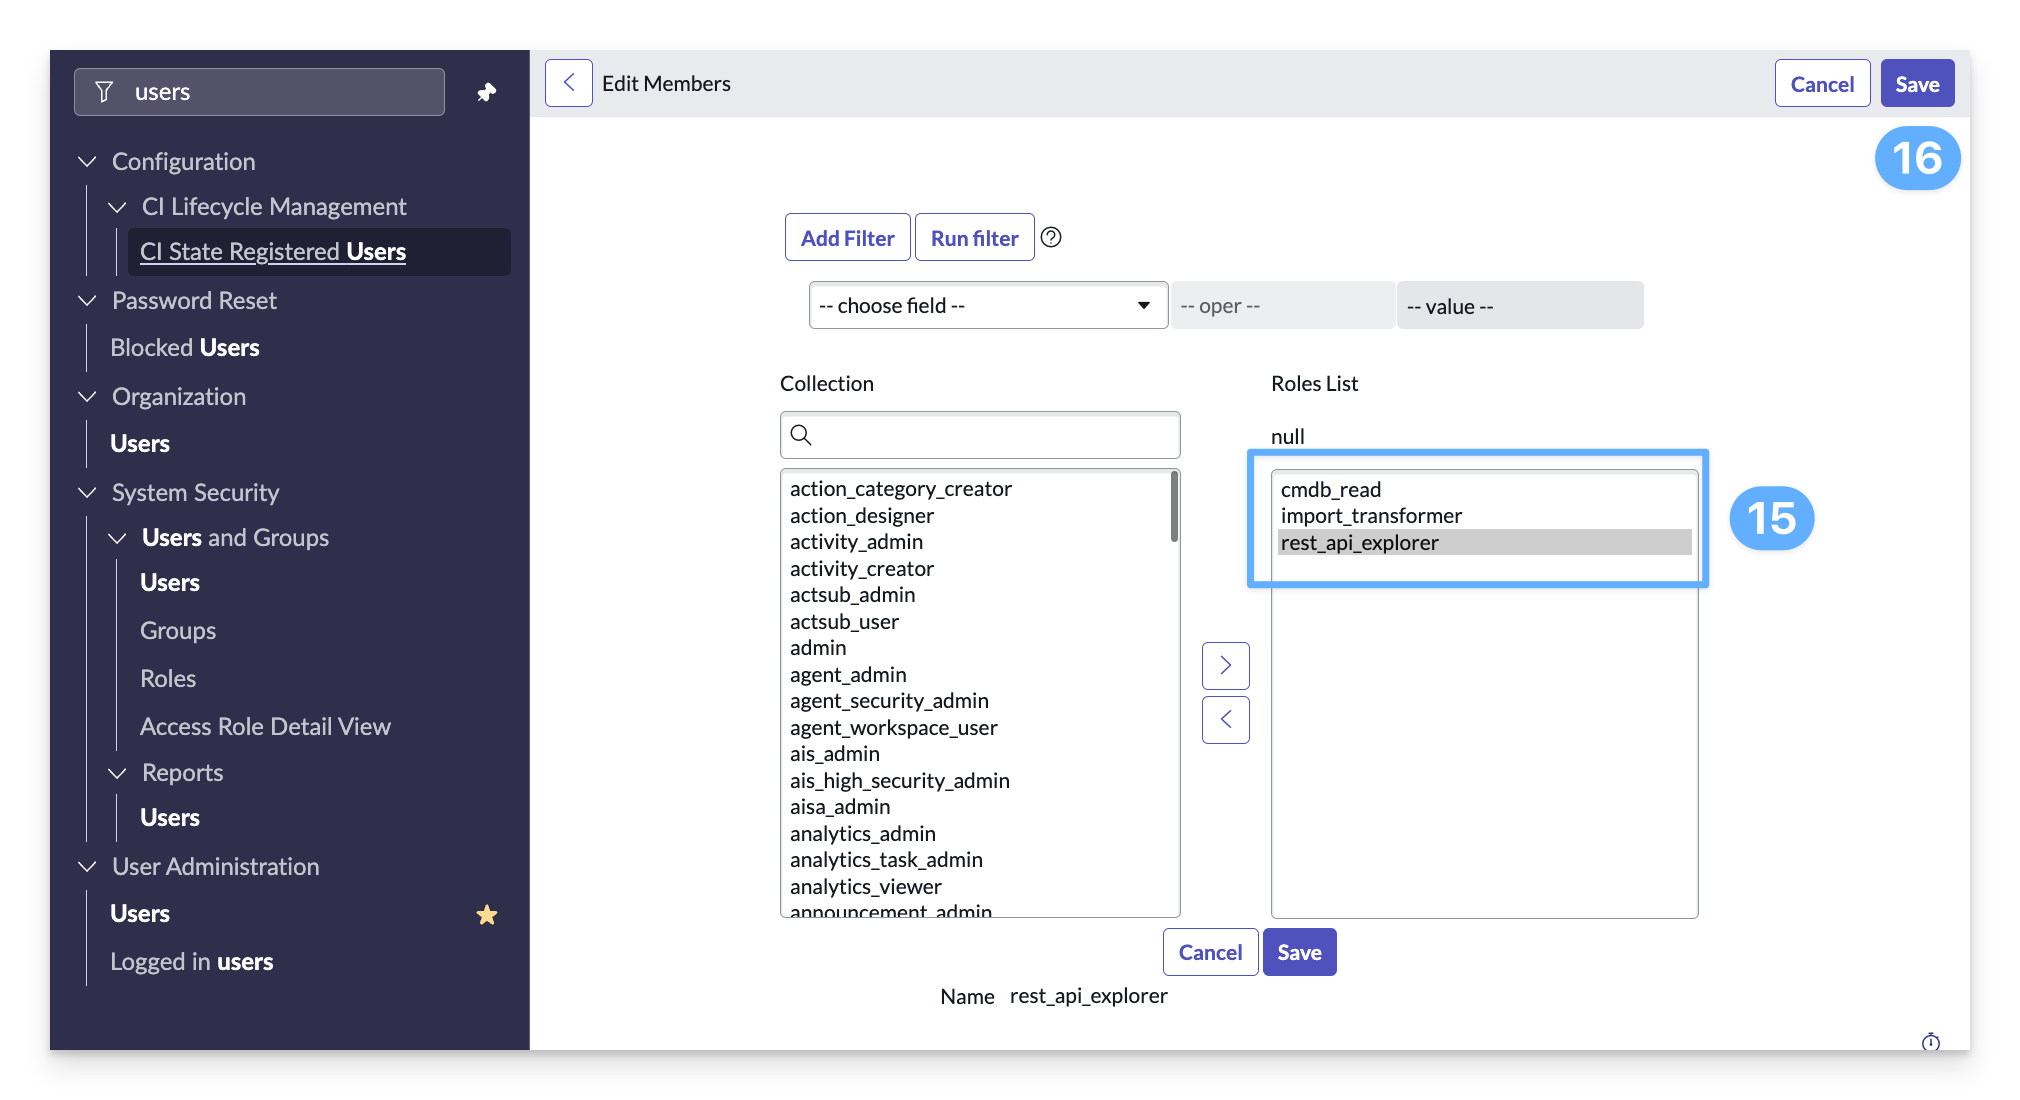
There should be a total of six new roles assigned. Three assigned and three inherited.
To complete the user creation, click Save.
Troubleshooting
Verify that Kandji is a Discovery Source
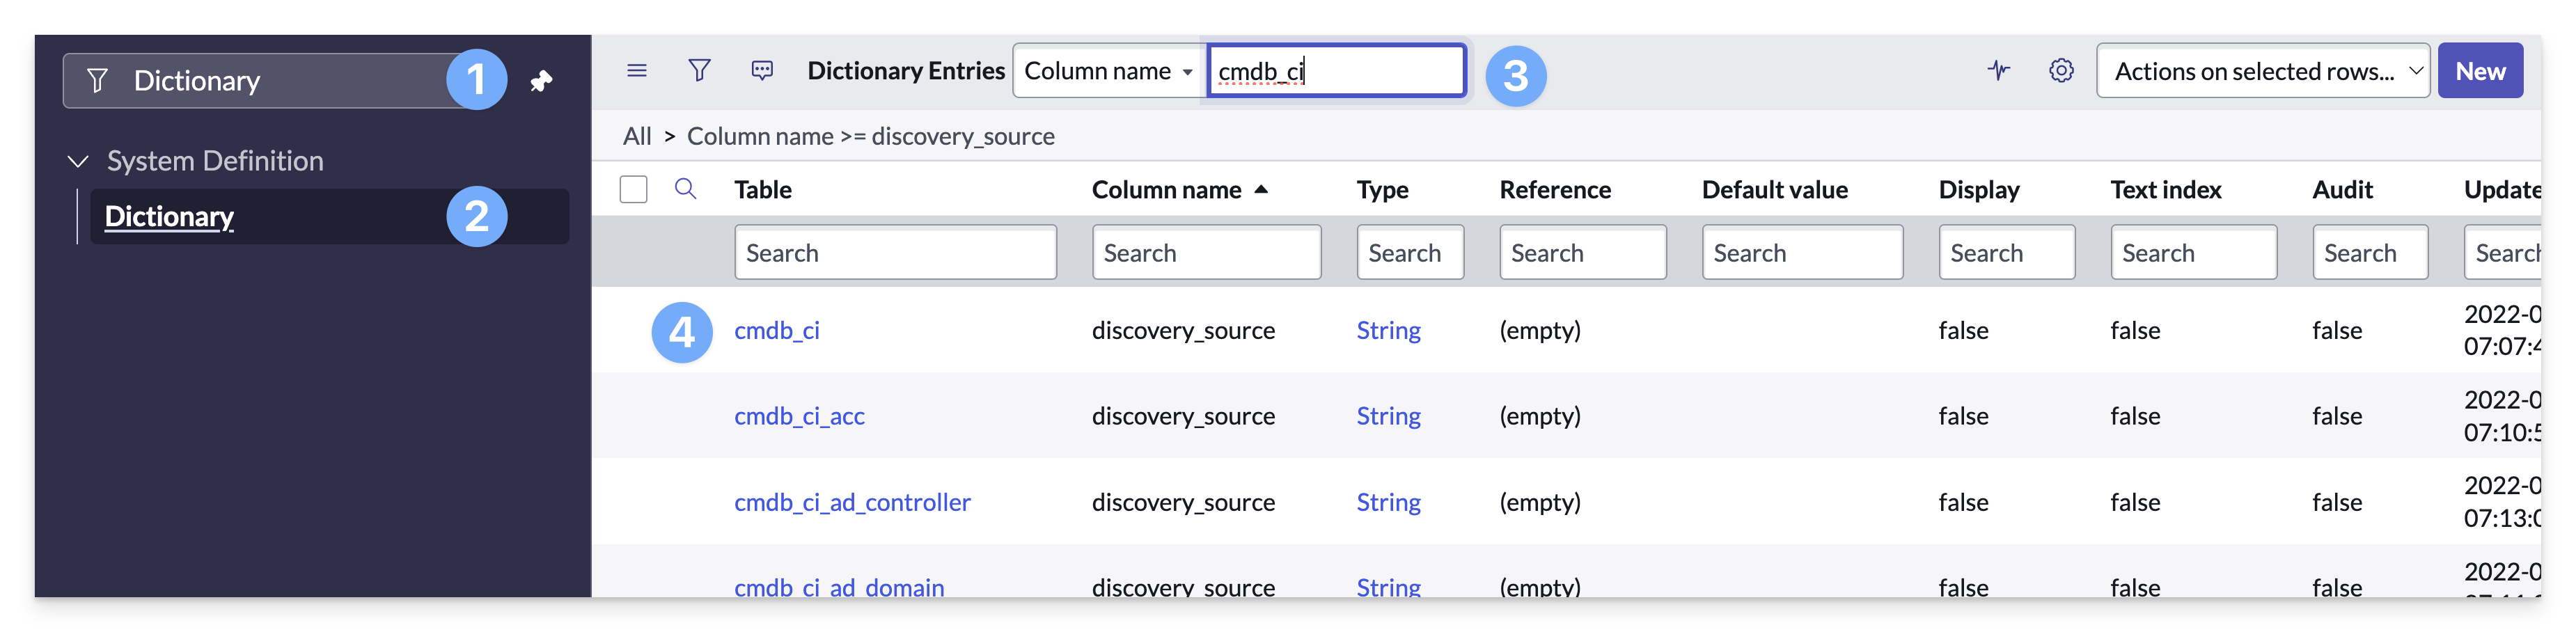
In ServiceNow, enter Dictionary in the Filter navigator.
Under System Definition, click Dictionary.
In the Dicionary Entires search ensure that Column name is selected and then enter the column name dicovery_source.
Click on the cmdb_ci table.
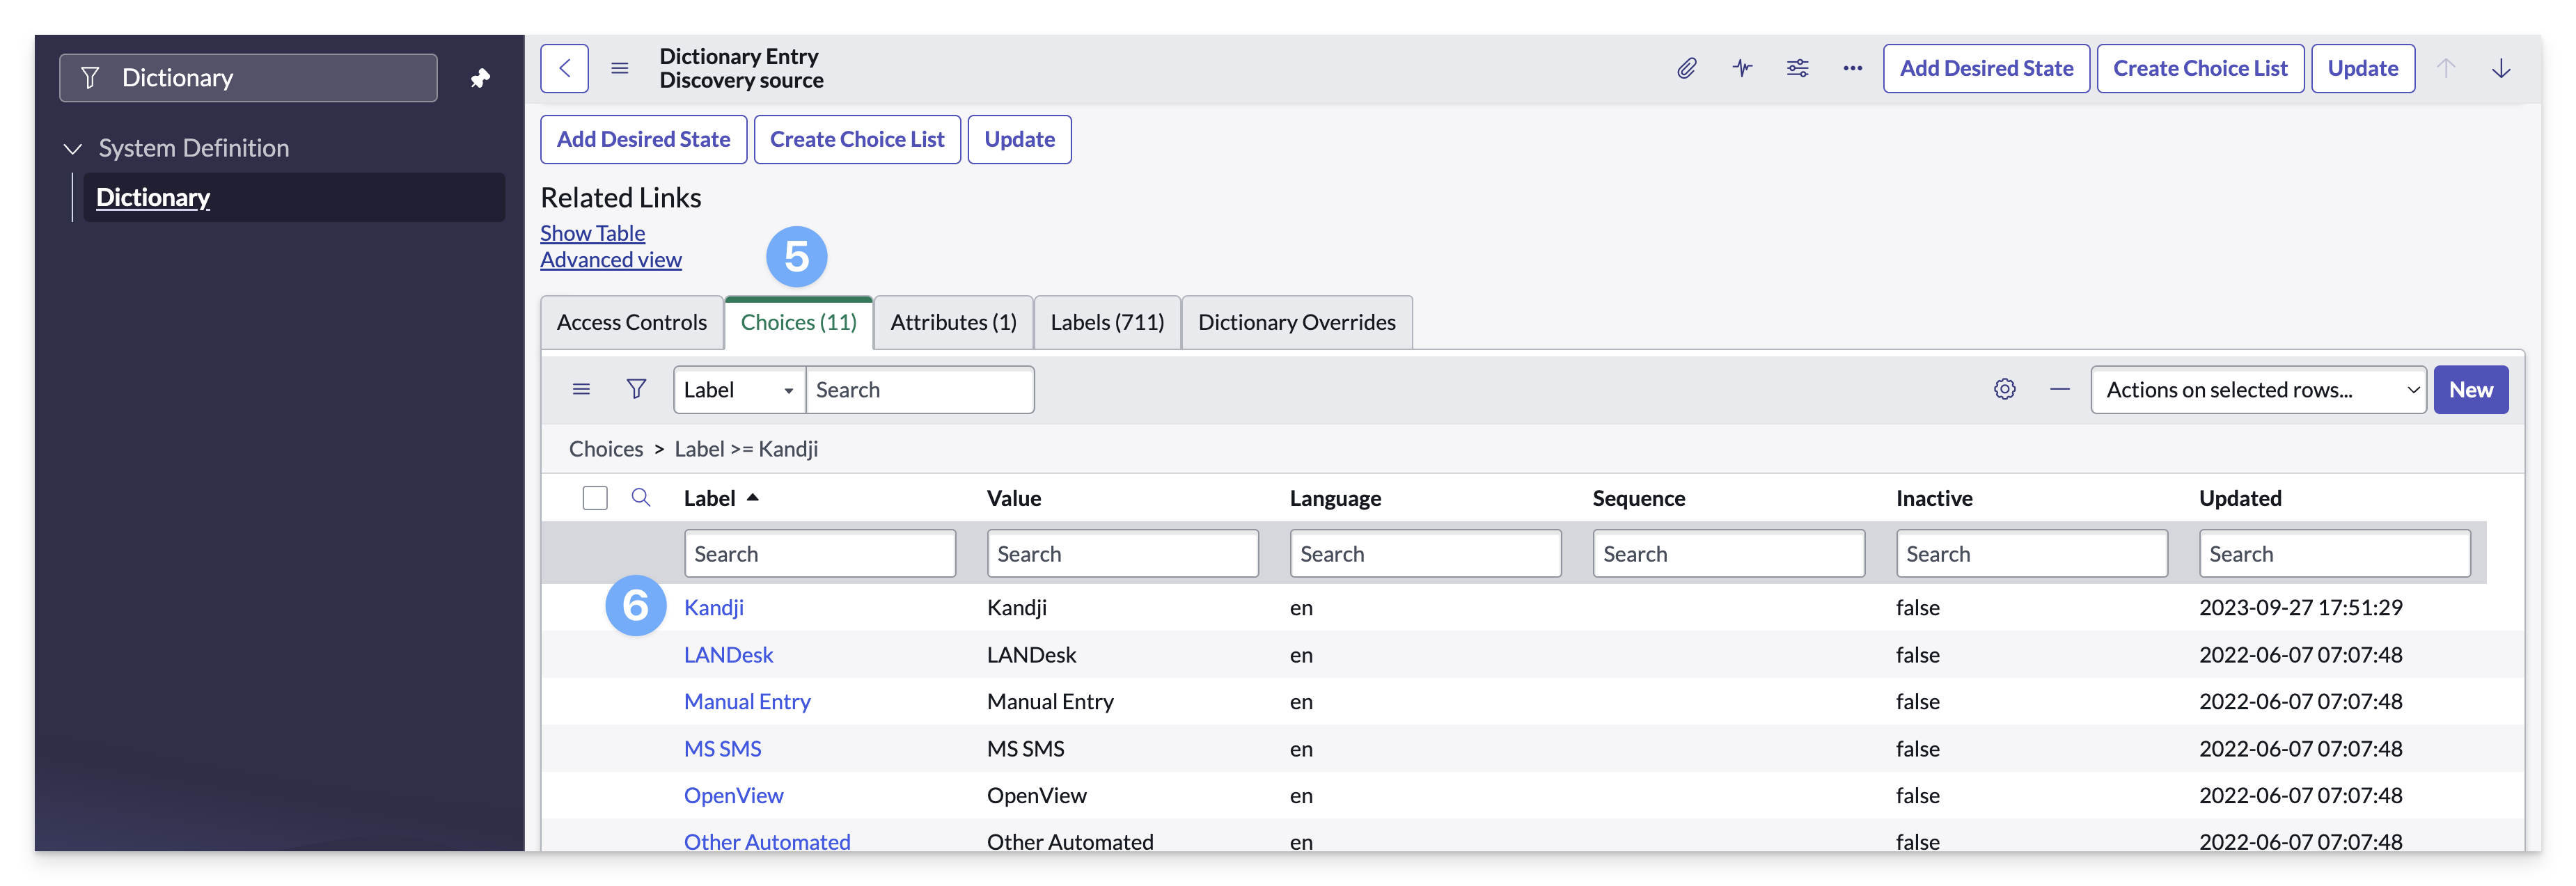
Scroll down and select the Choices tab.
Make sure that Kandji is listed. If you do not see Kandji right away you can search for the Label Kandji.
If Kandji does not show up as a Discovery Source
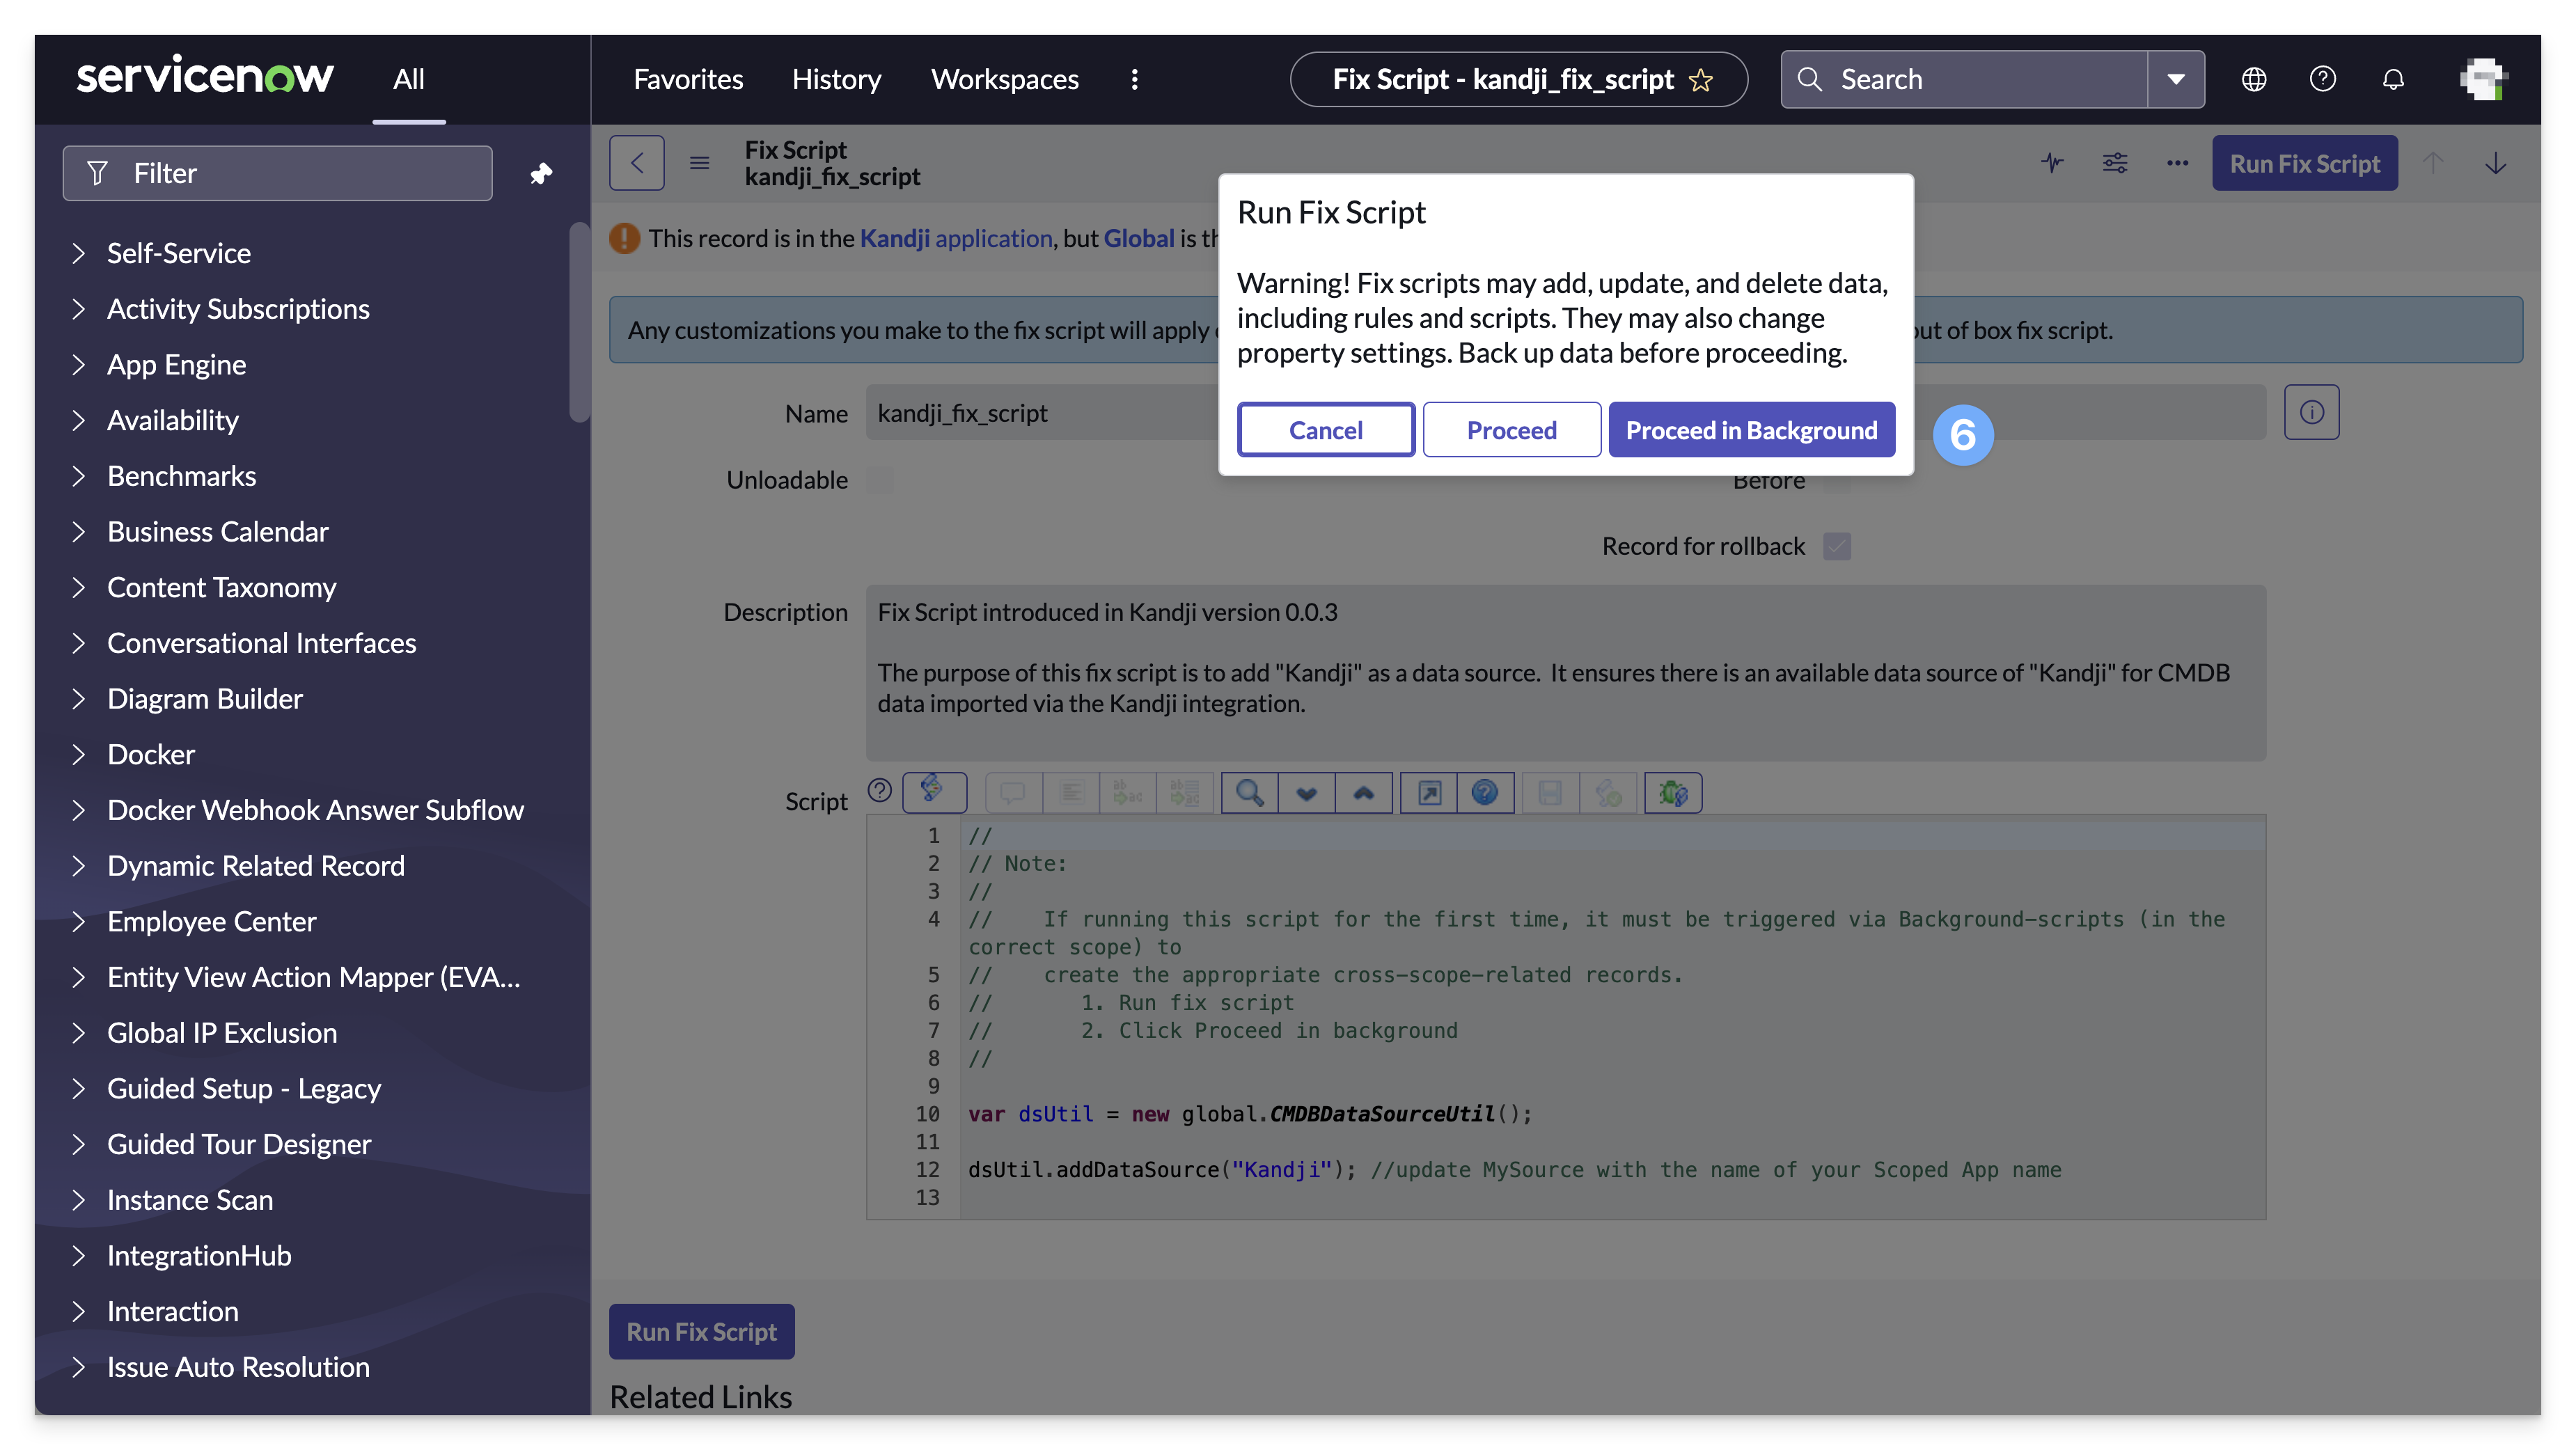
This section describes how to run the kandji_fix_script manually in the event that Kandji does not automatically show up as a Discovery Source after installation of the Kandji Integration Hub application.
In ServiceNow, enter Fix Script in the Filter navigator.
Under System Definition, click Fix Scripts.
In the Fix Scripts search ensure that Name is selected and then enter the fix script name kandji_fix_script.
Click on the kandji_fix_script table.

Click Run Fix Script.
In the Run Fix Script modal, click Proceed in Background.
Now Kandji should be listed as a Discovery source choice in ServiceNow.
Up next
Kandji Configuration for the Kandji ServiceNow integration.