This article covers adding the ServiceNow integration in Kandji.
Before you Begin
Follow the ServiceNow integration: ServiceNow Configuration guide to ensure the Kandji Service Integration Hub app is installed in your ServiceNow tenant.
Setup the ServiceNow integration in Kandji
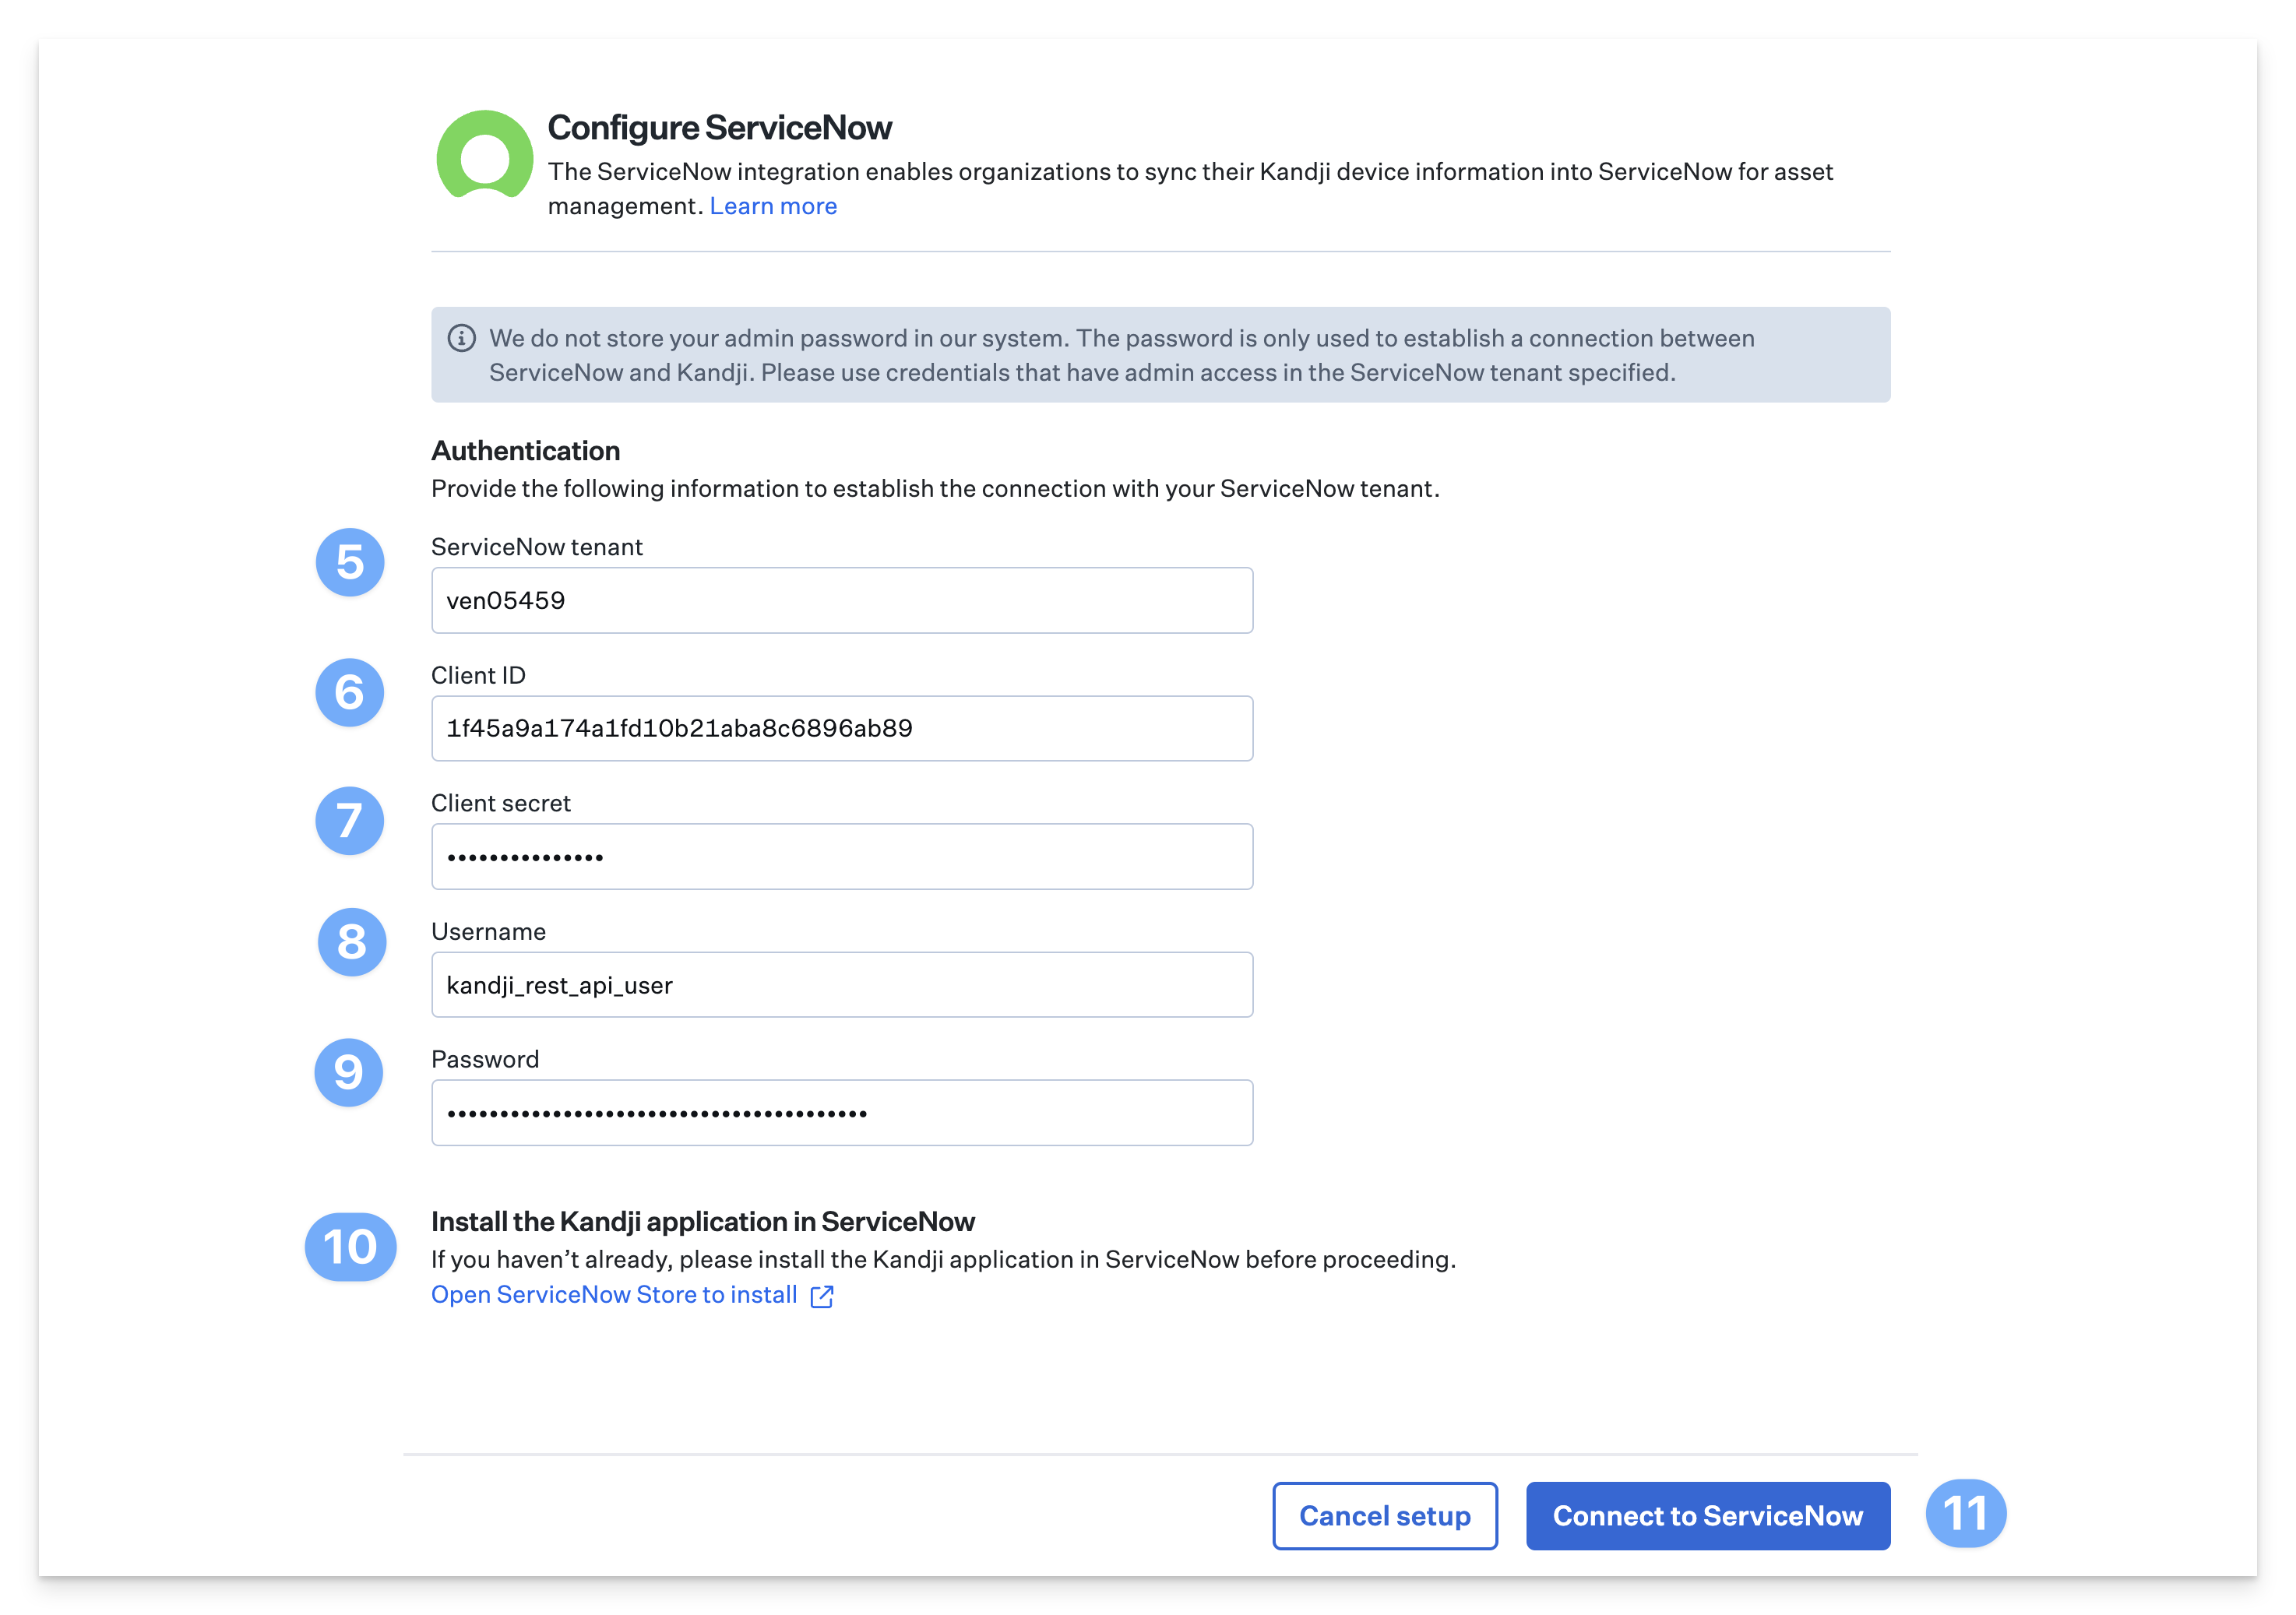
Be sure to install the Kandji app in the ServiceNow store prior to clicking Connect to ServiceNow in Kandji.
Login to Kandji.
Navigate to Integrations.
Select Discover integrations.
In the Asset Management section, find ServiceNow, click Add and configure.
Enter your ServiceNow tenant.
Enter the Client ID from the ServiceNow OAuth app that you created earlier.
Enter the Client Secret from the ServiceNow OAuth app that you created earlier.
Enter the Service account Username you created earlier.
Enter the service account Password you created earlier.
If not already, install the Kandji app in the ServiceNow integration hub and follow the ServiceNow configuration steps before completing the configuration for the ServiceNow integration Kandji.
Click Connect to ServiceNow.
Once the integration setup is complete, Kandji will begin syncing Apple device data into ServiceNow.
Managing the integration
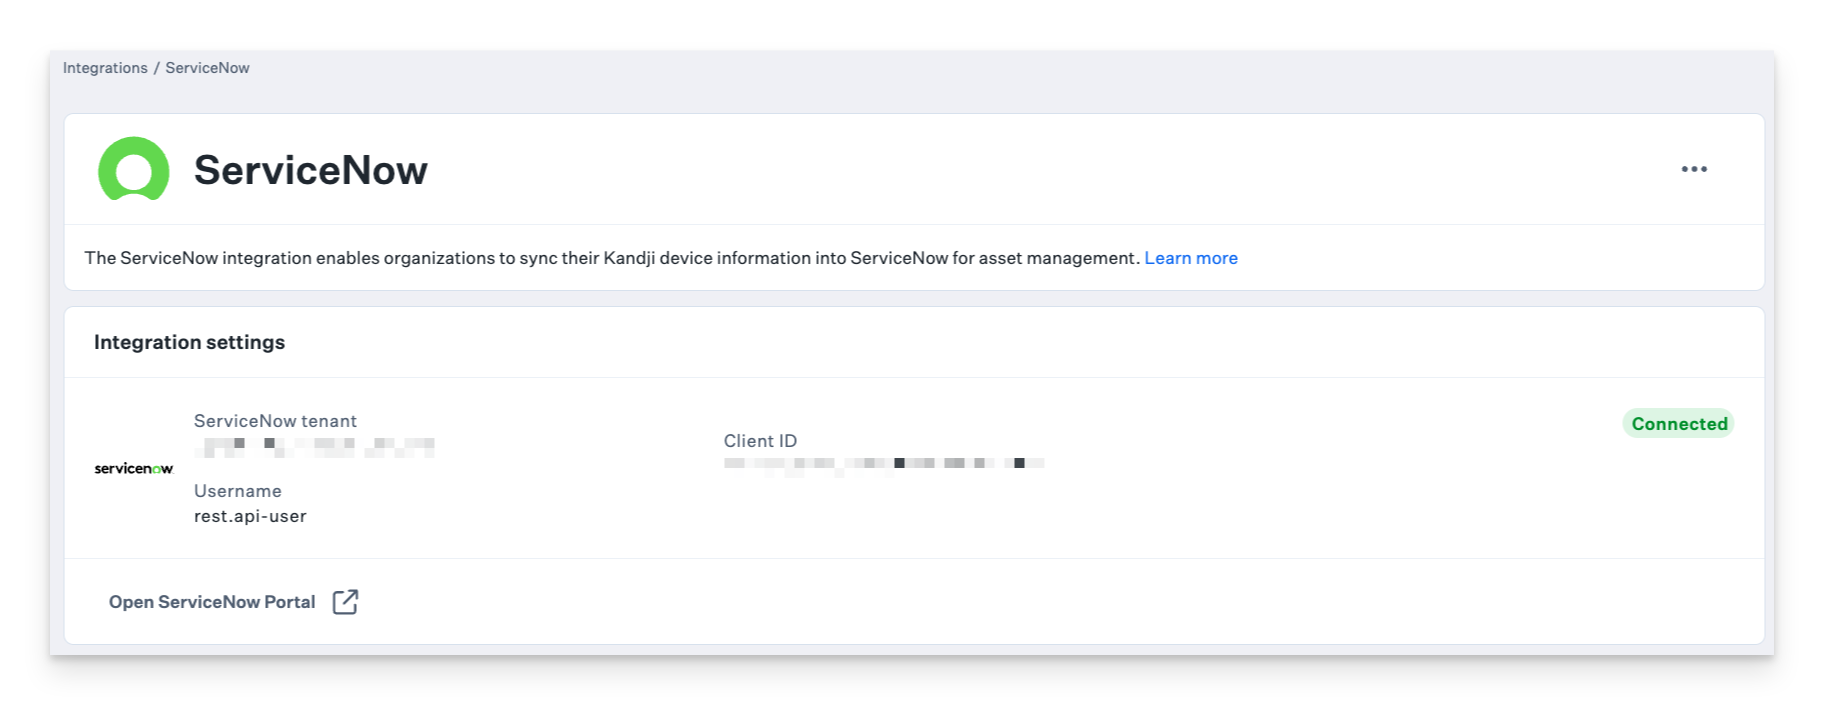
Once the integration with ServiceNow is complete, you can manage the integration from the integration overview details page in Kandji. Once on the Details overview page, you can see information about the integration with ServiceNow like the connection status, information about the ServiceNow tenant, and information about the OAuth app used.
Reauthentication
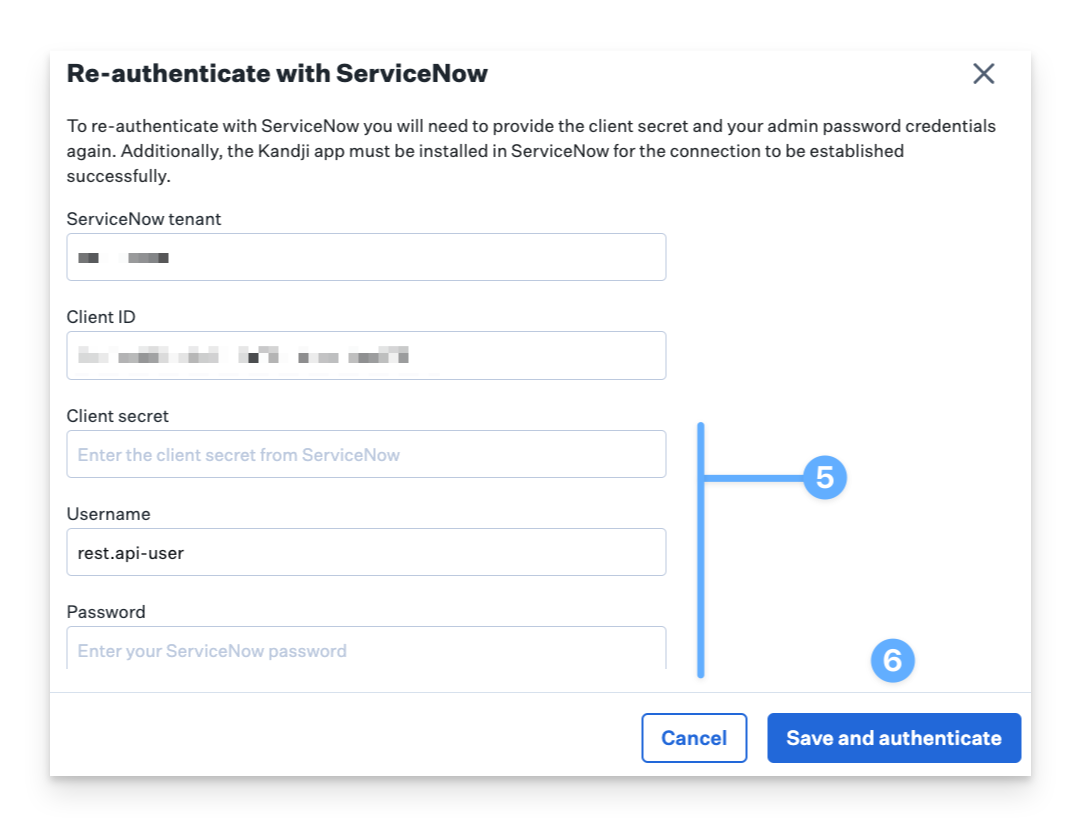
If the ServiceNow credentials used to configure the integration need to be updated, you can do so from the Integration details page in Kandji.
In Kandji, navigate to Integrations.
In the Asset Management section, click on ServiceNow.
In the top-right corner, click on the ellipses.
Click on Re-authenticate
Verify that the ServiceNow tenant domain and client ID are still accurate and enter the new account credentials.
Click Connect to ServiceNow.
If the credentials are accepted, you will be returned to the integration details page for ServiceNow.
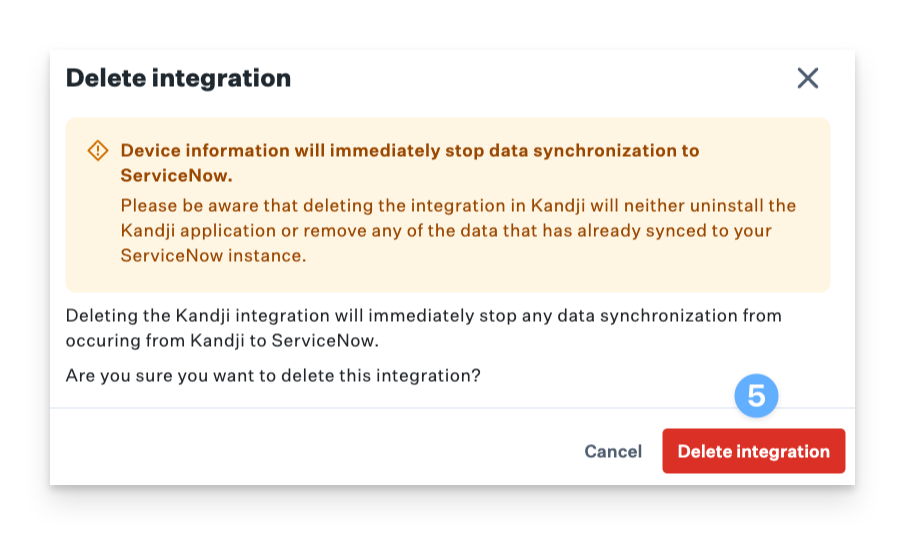
Deleting the integration
Use the following steps to remove the ServiceNow integration in Kandji.
This is a destructive action and cannot be undone. Device asset information with stop syncing to ServiceNow immediately upon deletion.
In Kandji, navigate to Integrations.
In the Asset Management section, click on ServiceNow.
In the top-right corner, click on the ellipses.
Click on Delete Integration.
Be sure to read the modal carefully before clicking Delete Integration.