What is a Sysdiagnose?
A sysdiagnose in macOS is a powerful tool designed to help troubleshoot and debug complex system issues. It collects a wide range of diagnostic data from your Mac, making it invaluable for identifying performance problems, crashes, and other system anomalies. Sysdiagnoses can be generated using a few different methods, each of which may apply for different levels of user access.
What sysdiagnose Collects
When you run sysdiagnose, it gathers an extensive array of information, including:
System-wide performance profiles - Captures the state of running processes
Filesystem activity logs - Reports on system calls and page faults related to filesystem usage
Process information - Provides detailed data on running processes and memory usage
Kernel memory usage - Includes data on kernel zones and loaded kernel extensions
System and crash logs - Collects all relevant logs to help diagnose issues
Hardware and software configuration - Similar to the System Information app, but more detailed
Network and power management data - Details on current network status and power settings
Generating a Sysdiagnose Using a Keyboard Shortcut
Click the Finder icon in the Dock to ensure that Finder is in the foreground.
All at once, press Command + Option + Shift + Control + Period (.) on the keyboard.
After a few moments, a Finder window should appear with a tar.gz file shown.
If the sysdiagnose was requested by Kandji Support, please zip it and provide the entire bundle.
Generating a Sysdiagnose Using the Command Line
This method requires administrator privileges.
Launch Terminal.app and enter the following command:
sudo sysdiagnose -f ~/Desktop/Wait a few moments for a file ending in .tar.gz to appear on the logged-in user's Desktop. If you logged into Terminal with a different user than is logged into the Mac, the file will be on the Terminal user's Desktop.
If the sysdiagnose was requested by Kandji Support, please zip it and provide the entire bundle.
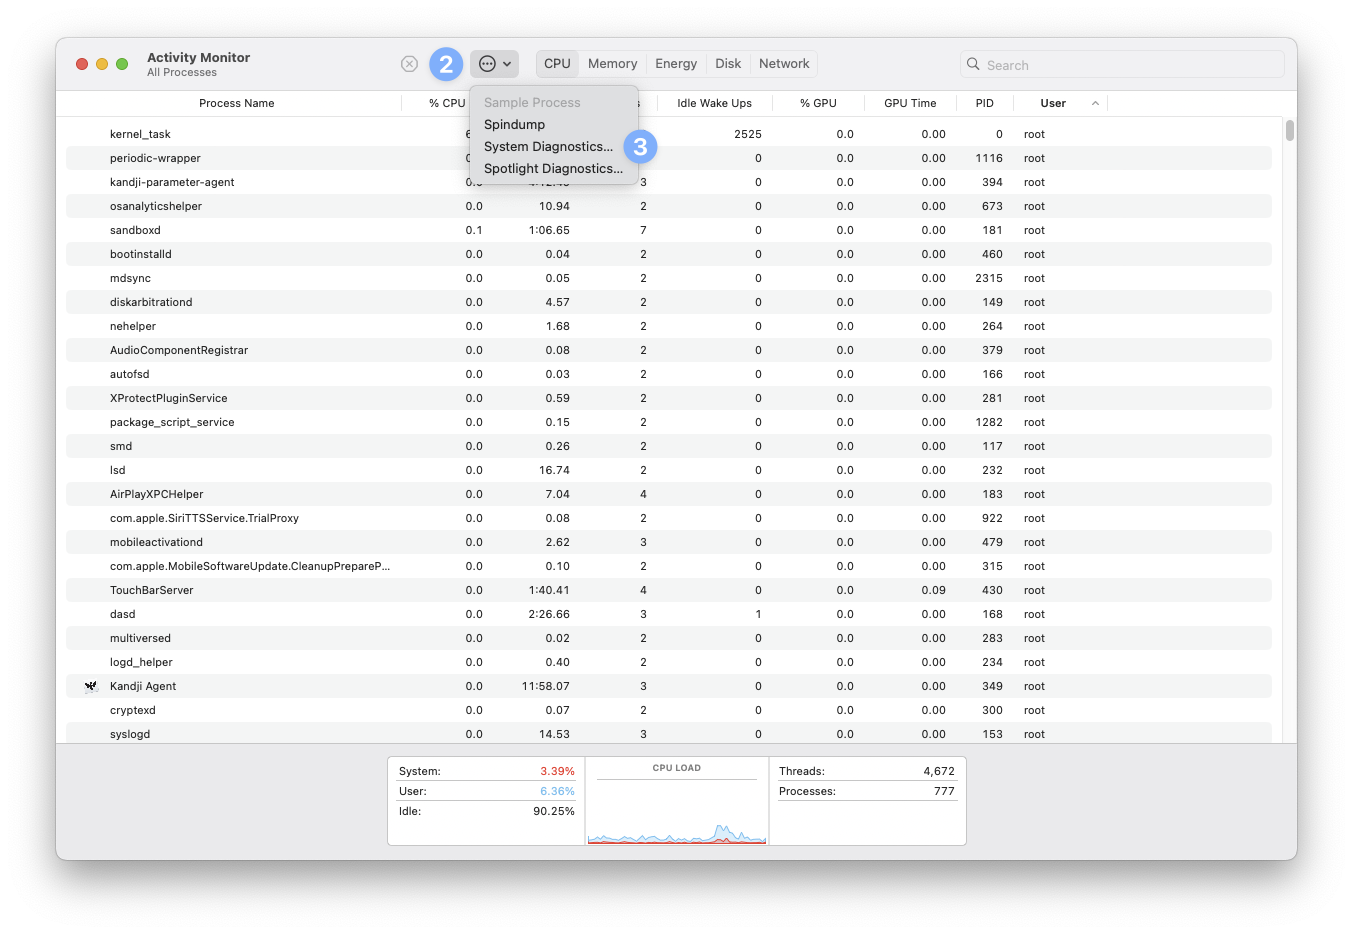
Generating a Sysdiagnose Using Activity Monitor
This method requires administrator privileges.
Open the Activity Monitor app on your Mac.
Click the ellipses at the top of the Activity Monitor window.
Select System Diagnostics...
Read through and accept the privacy agreement.
Wait for the progress bar to complete. Once done, a Finder window should appear with a tar.gz file shown.
If the sysdiagnose was requested by Kandji Support, please zip it and provide the entire bundle.