Note: Microsoft Entra ID is the new name for Azure AD (Azure Active Directory)
Create a SAML Connection
In Kandji, navigate to the Settings page.
Click the Access tab.
Find the Authentication section and click the Add button at the bottom left of the authentication section.
.png)
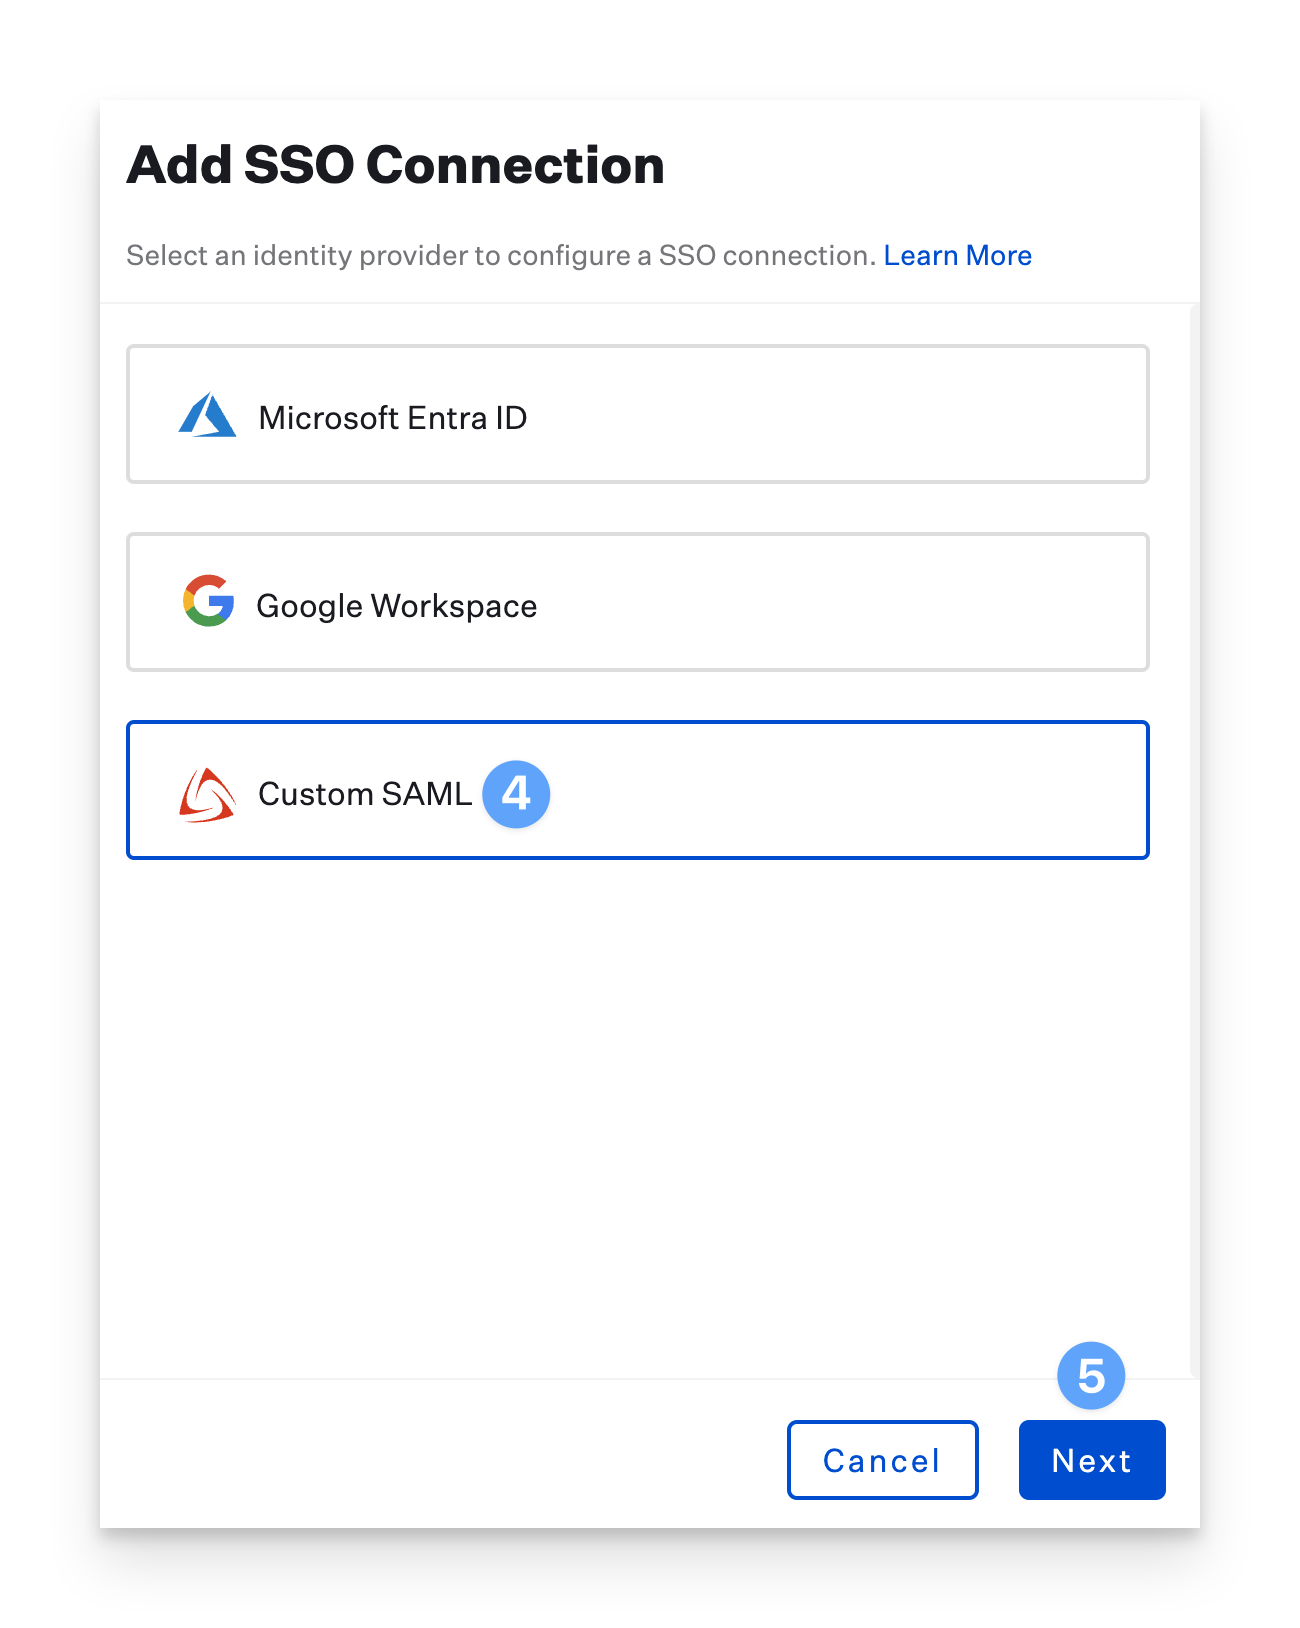
In the Add SSO Connection pane, select the Custom SAML option.
Click Next.
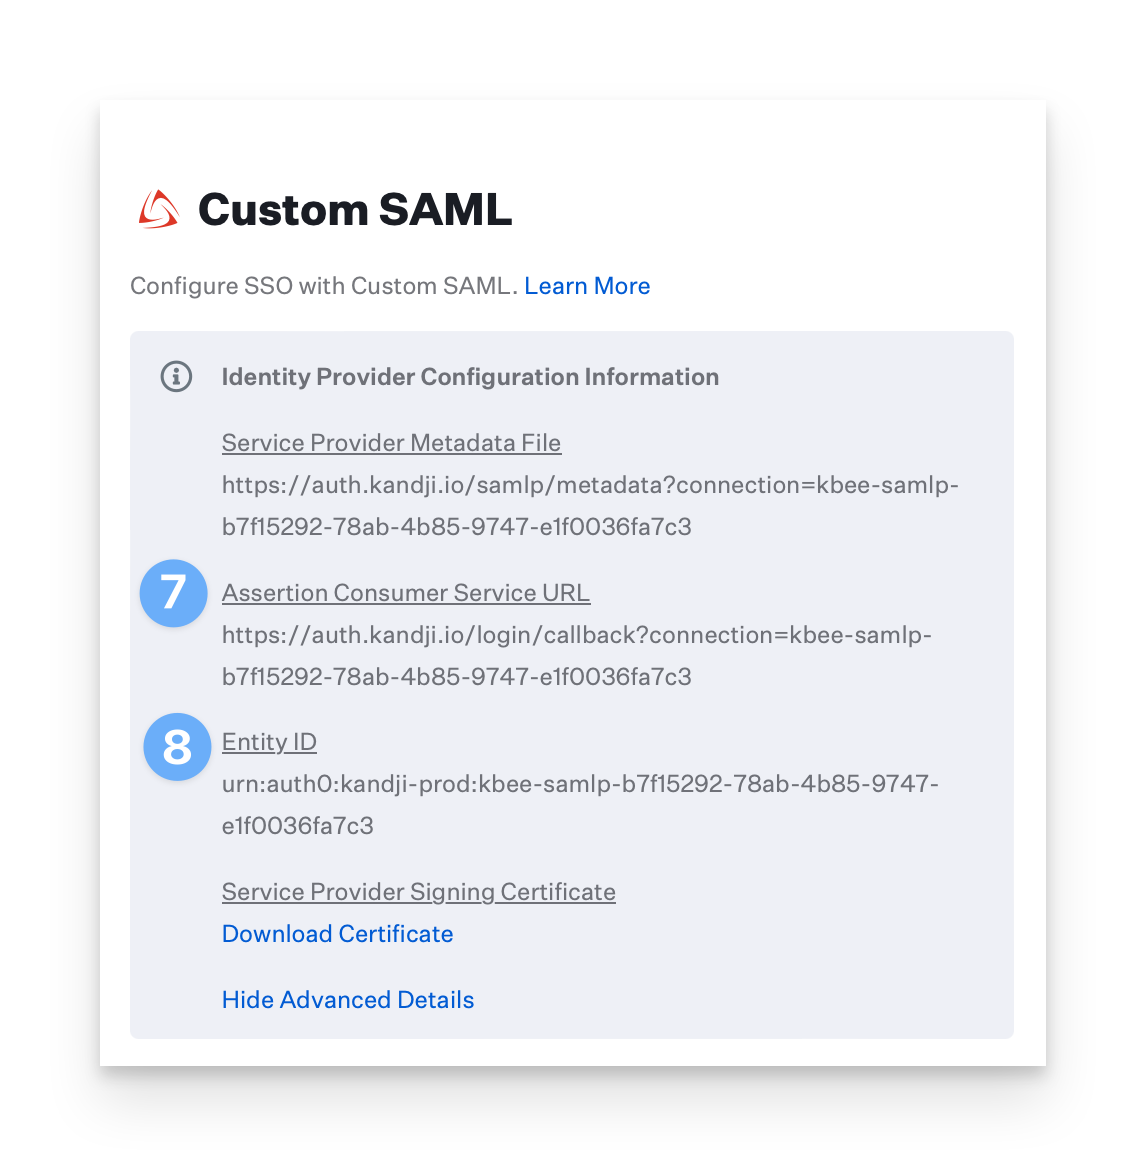
Select Show Advanced Details.
Copy the Assertion Consumer Service URL and save it in a text document for later use.
Copy the Entity ID and save it, too.
Leave this browser tab open as you proceed with the instructions below.
Add the Kandji Application to Microsoft Entra ID
Sign in to the Microsoft Entra admin center.
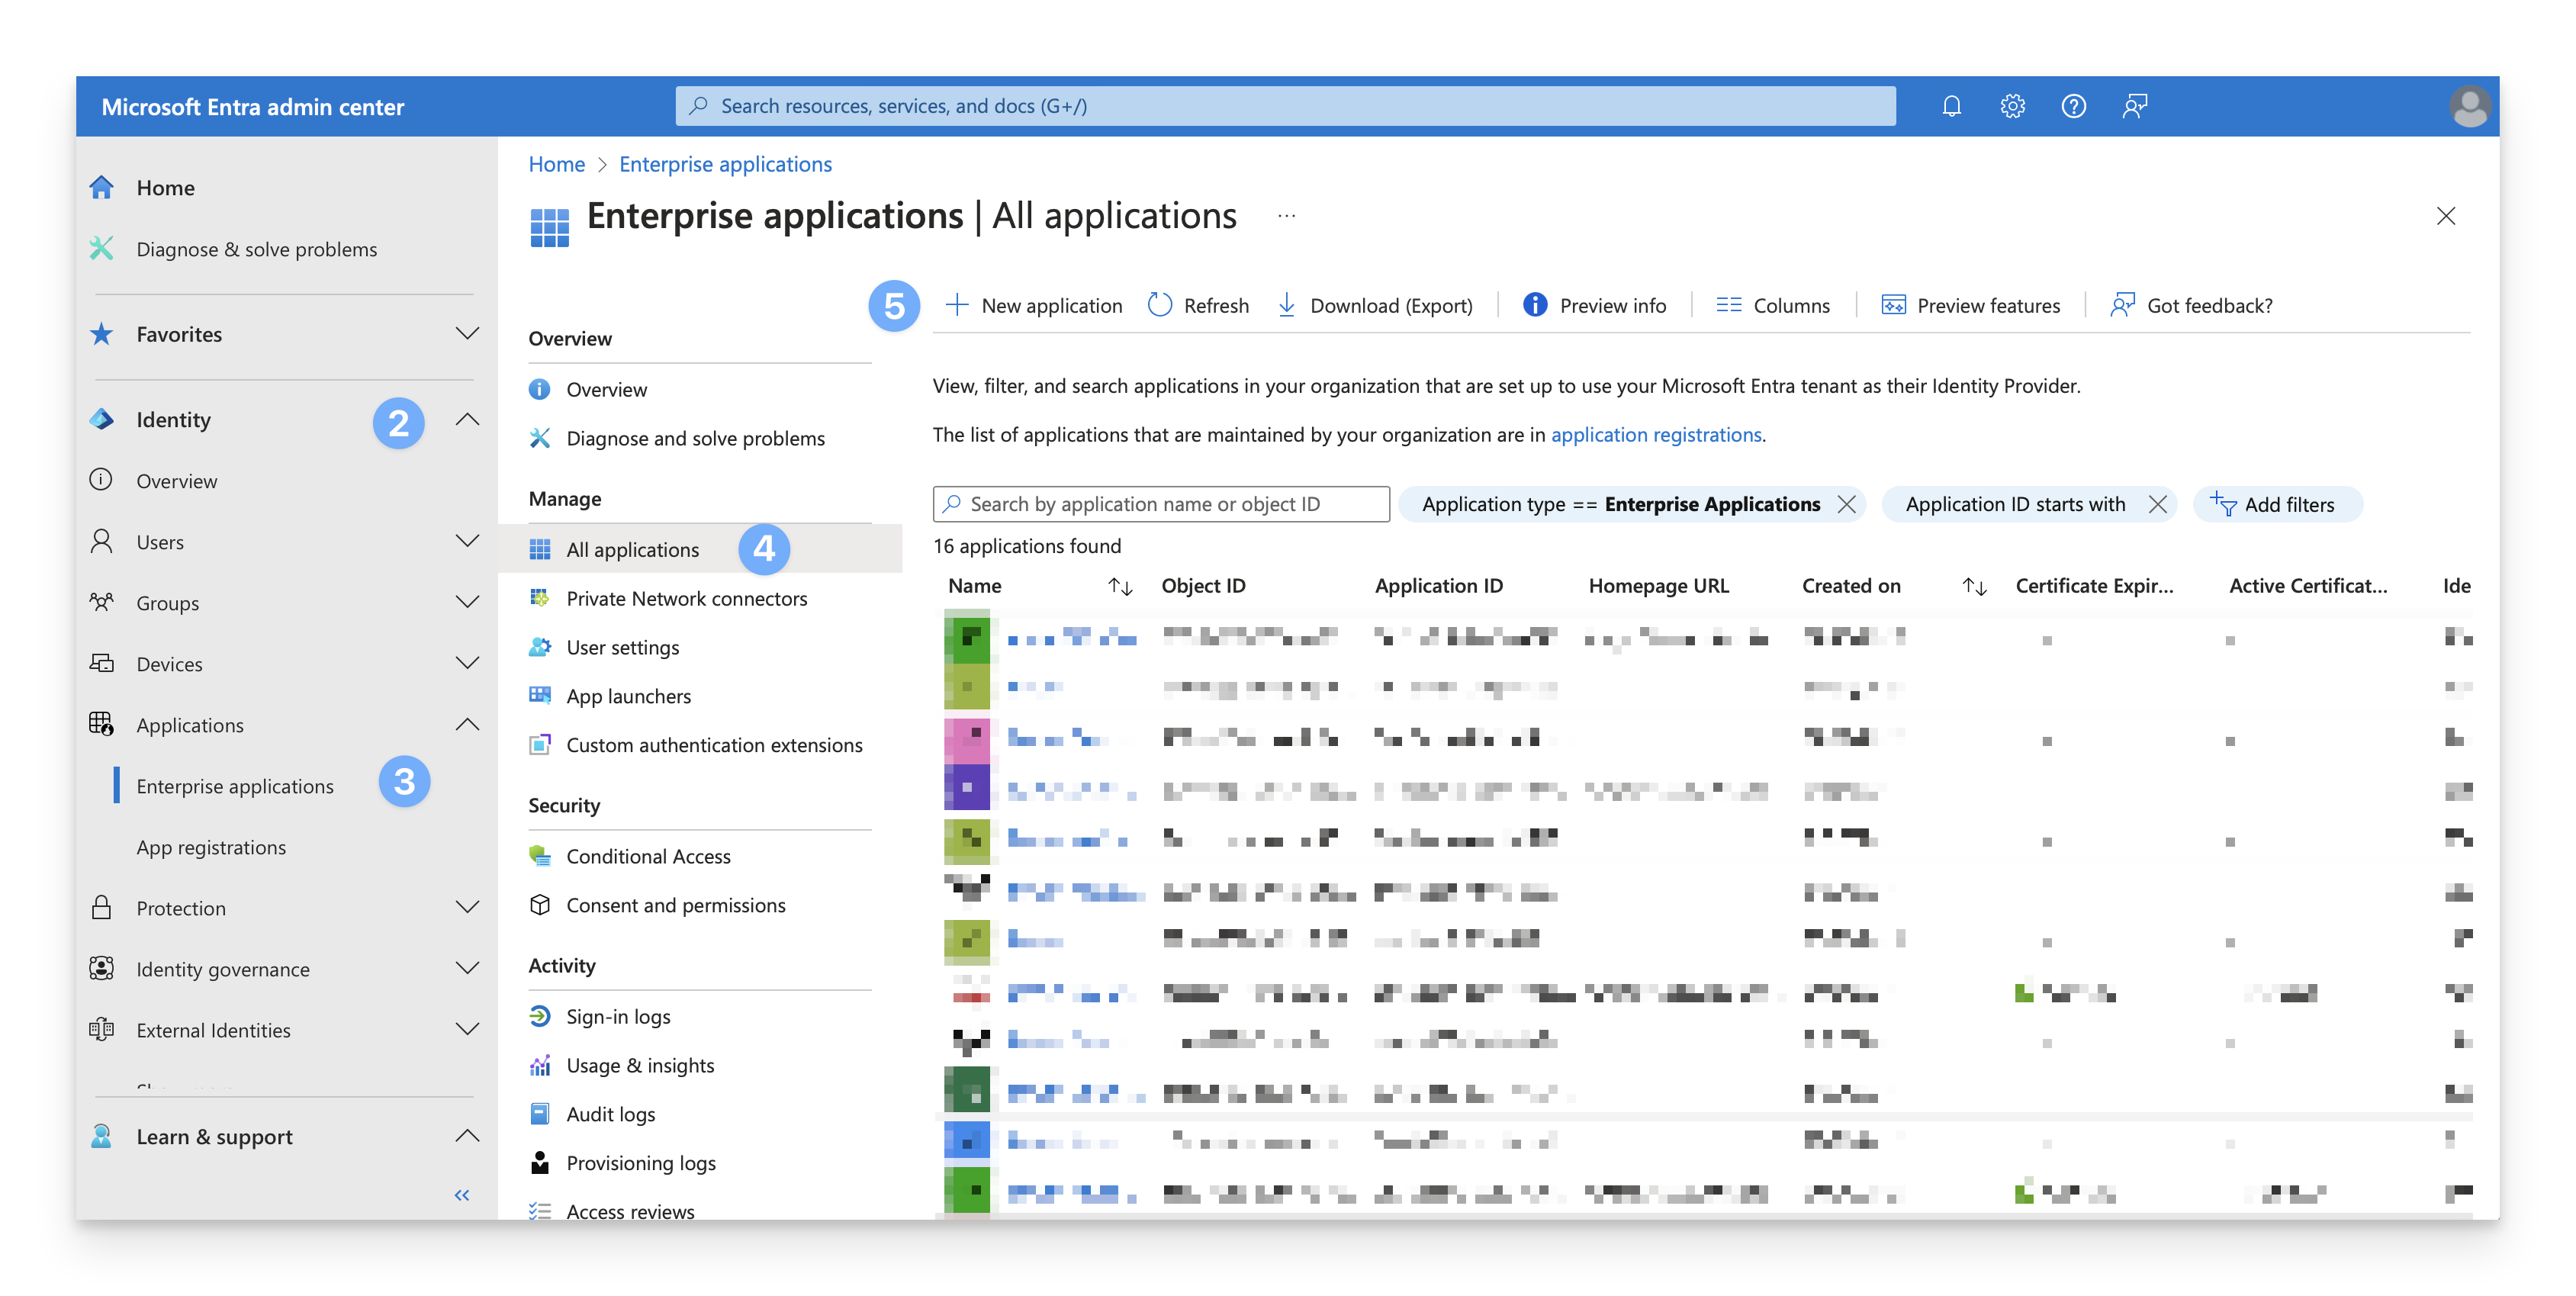
Open the portal menu and then select Identity.
On the Identity menu, under Applications, select Enterprise Applications.
In the Manage section, select All applications.
Select New Application.
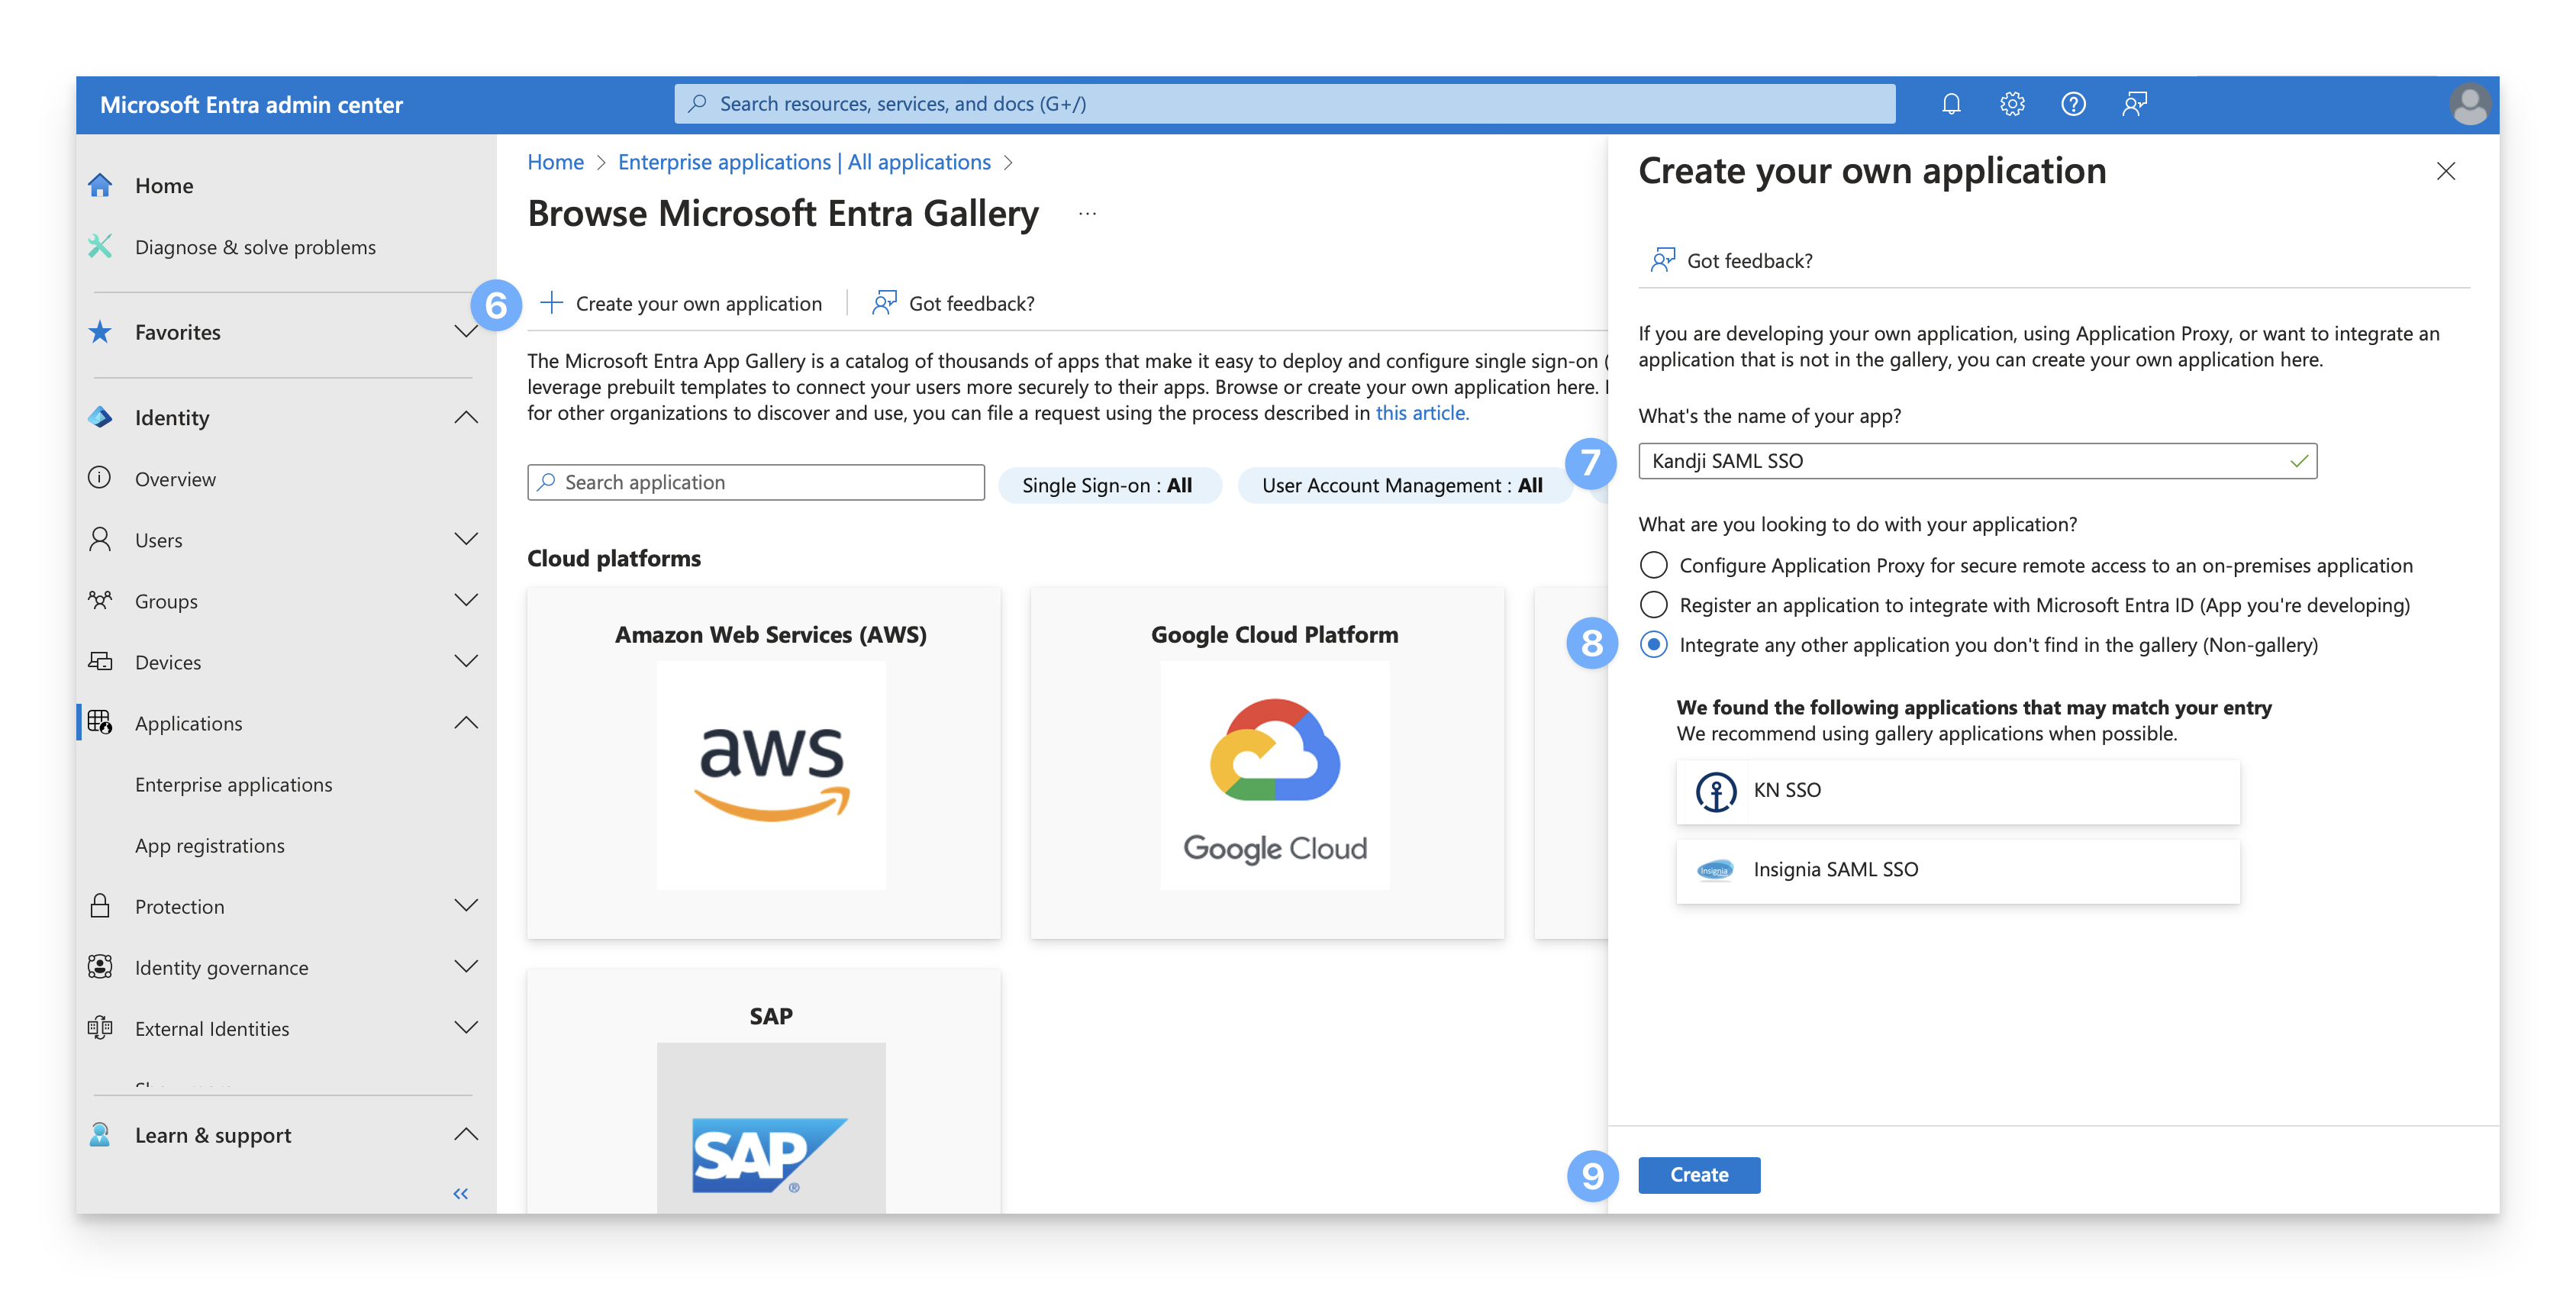
Select Create your own application.
Give the application a name.
Select Integrate any other application you don't find in the gallery (Non-gallery).
Click Create.
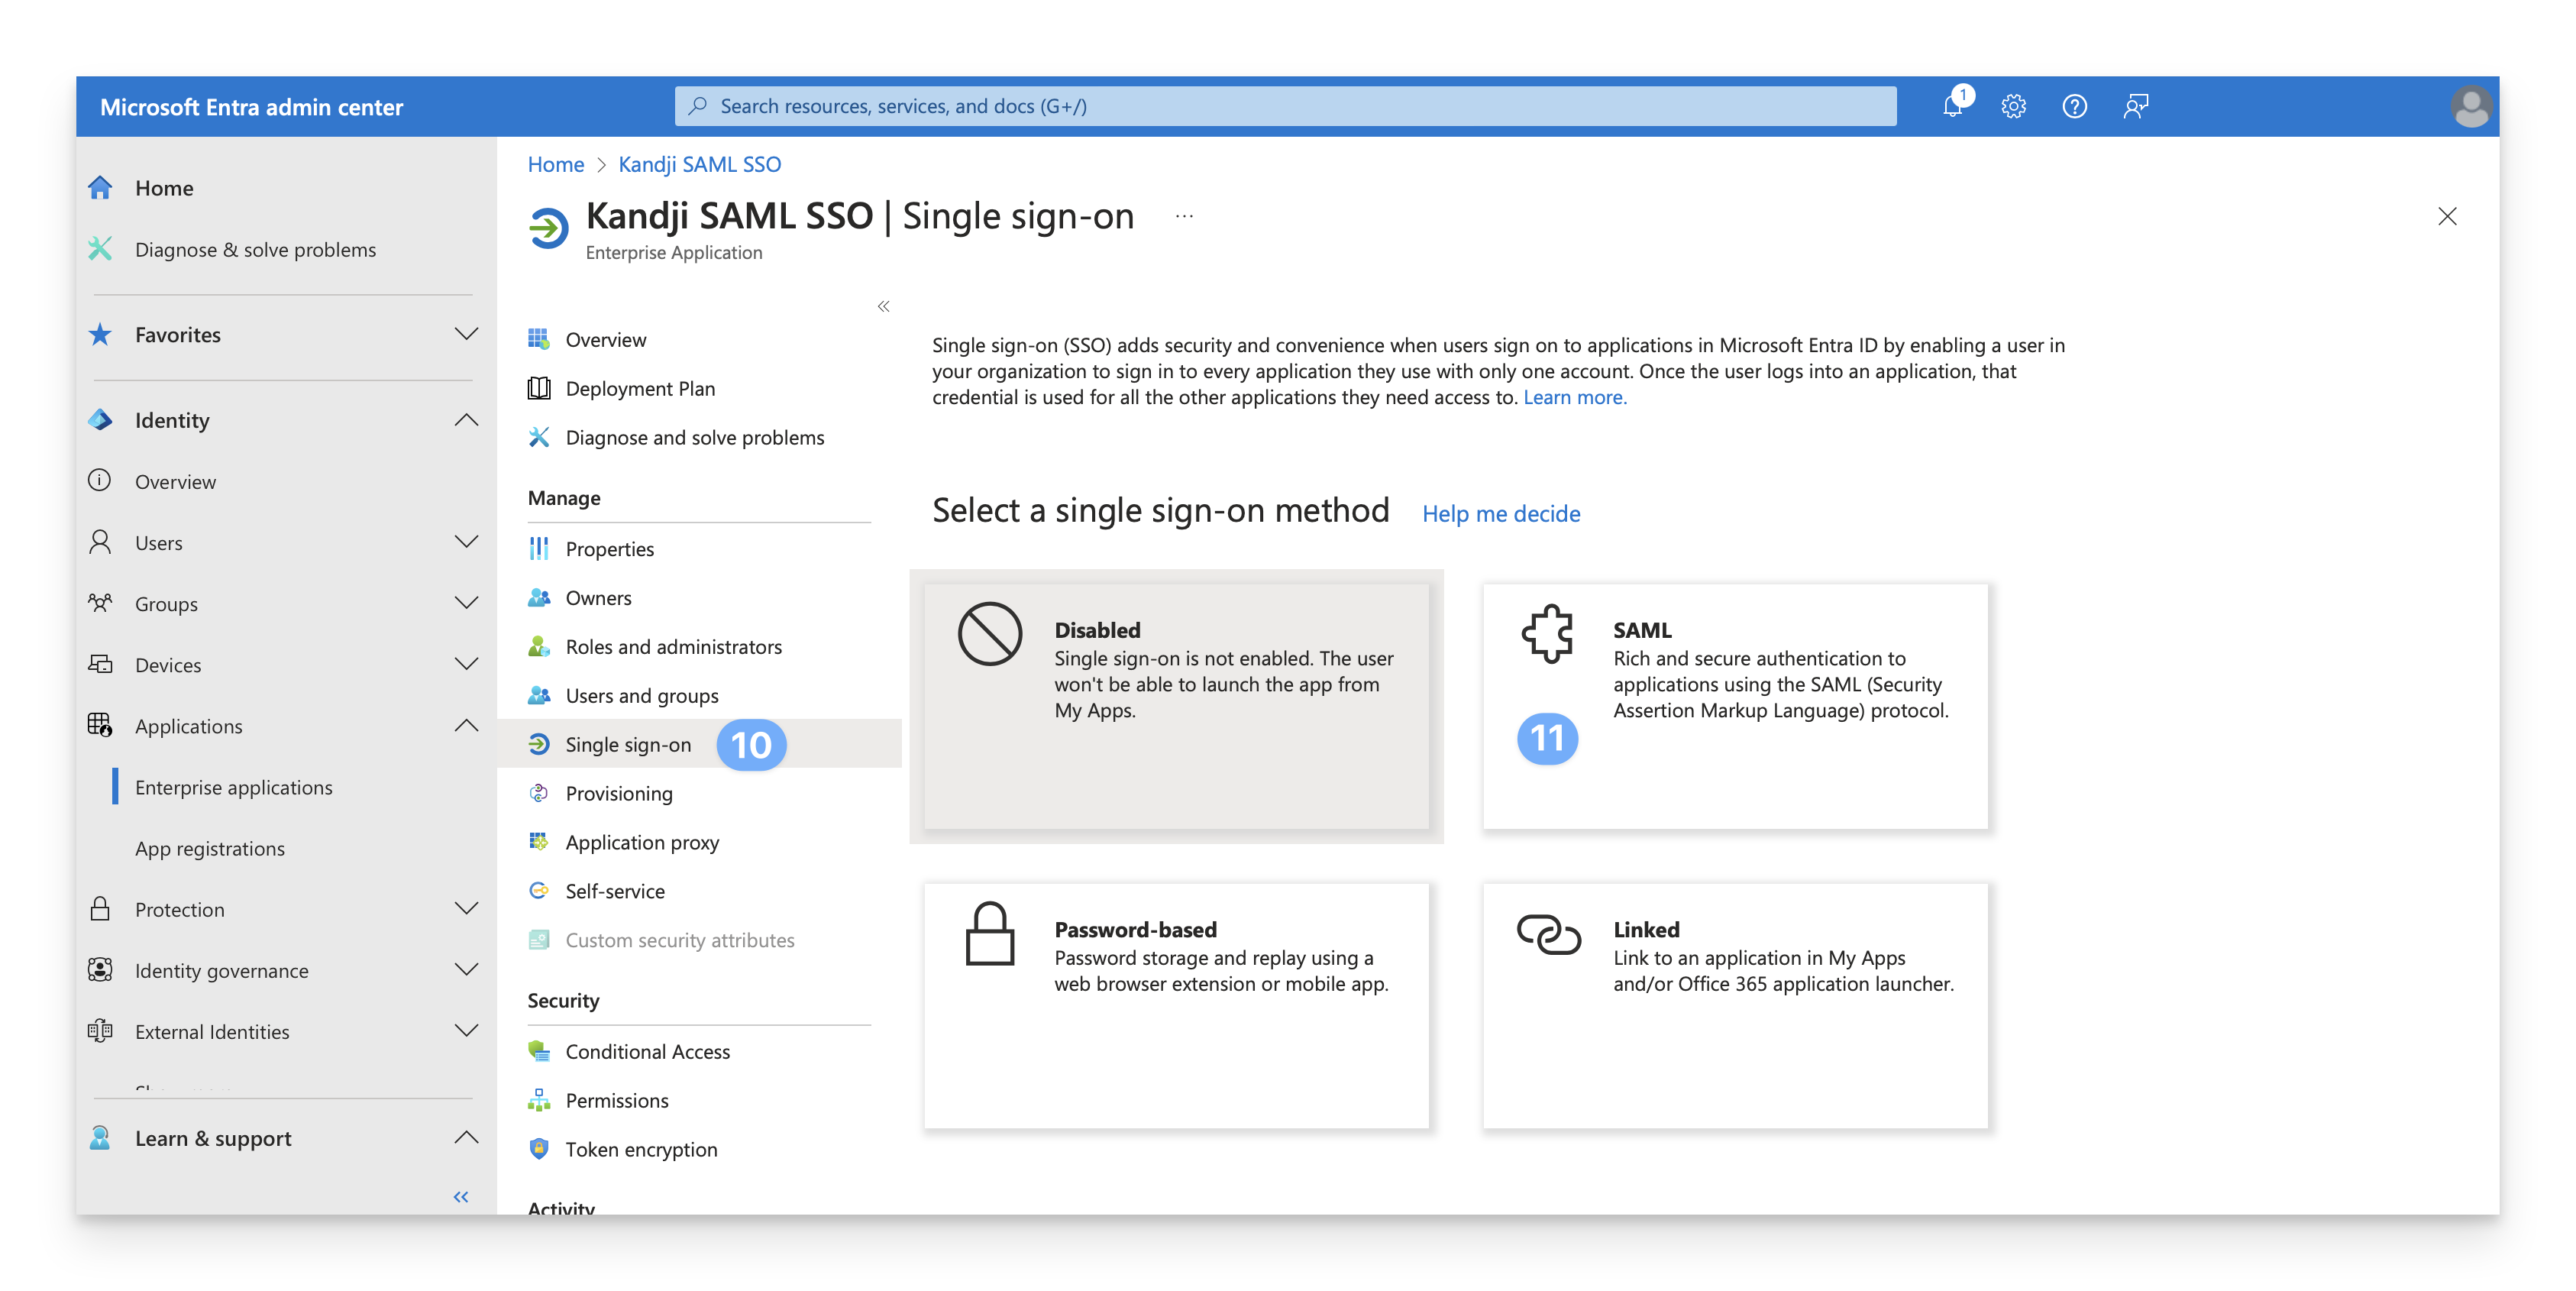
Under Manage, select Single sign-on.
Click SAML.
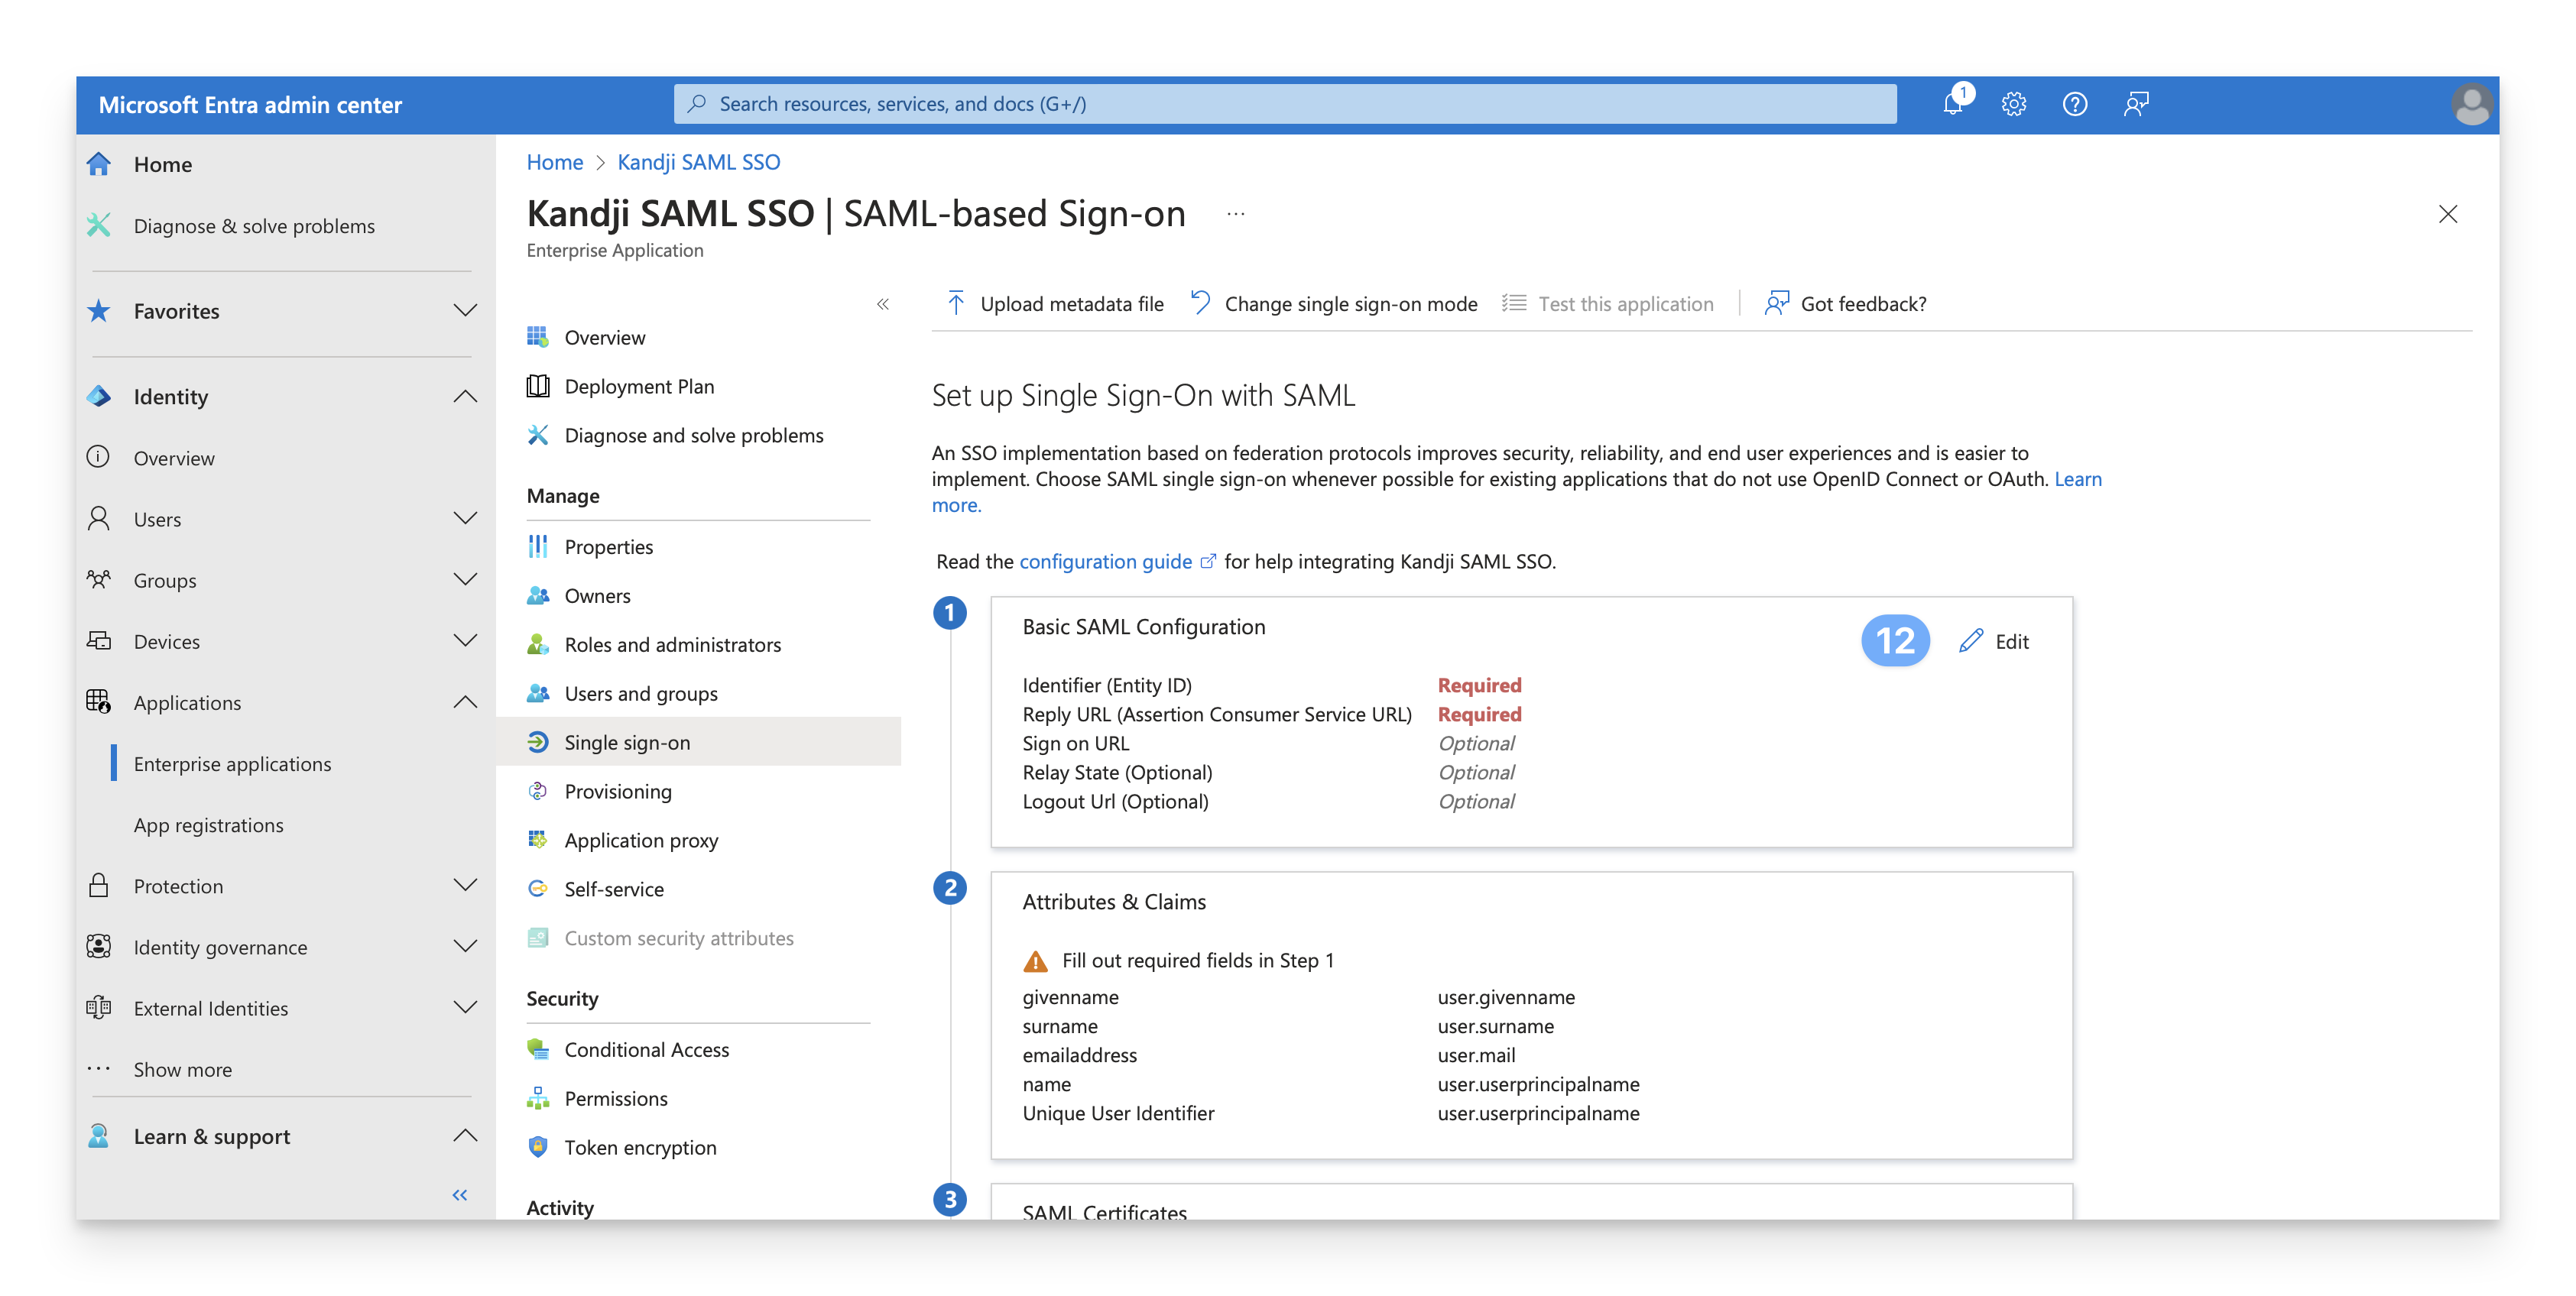
Click the Edit pencil in the Basic SAML configuration box.
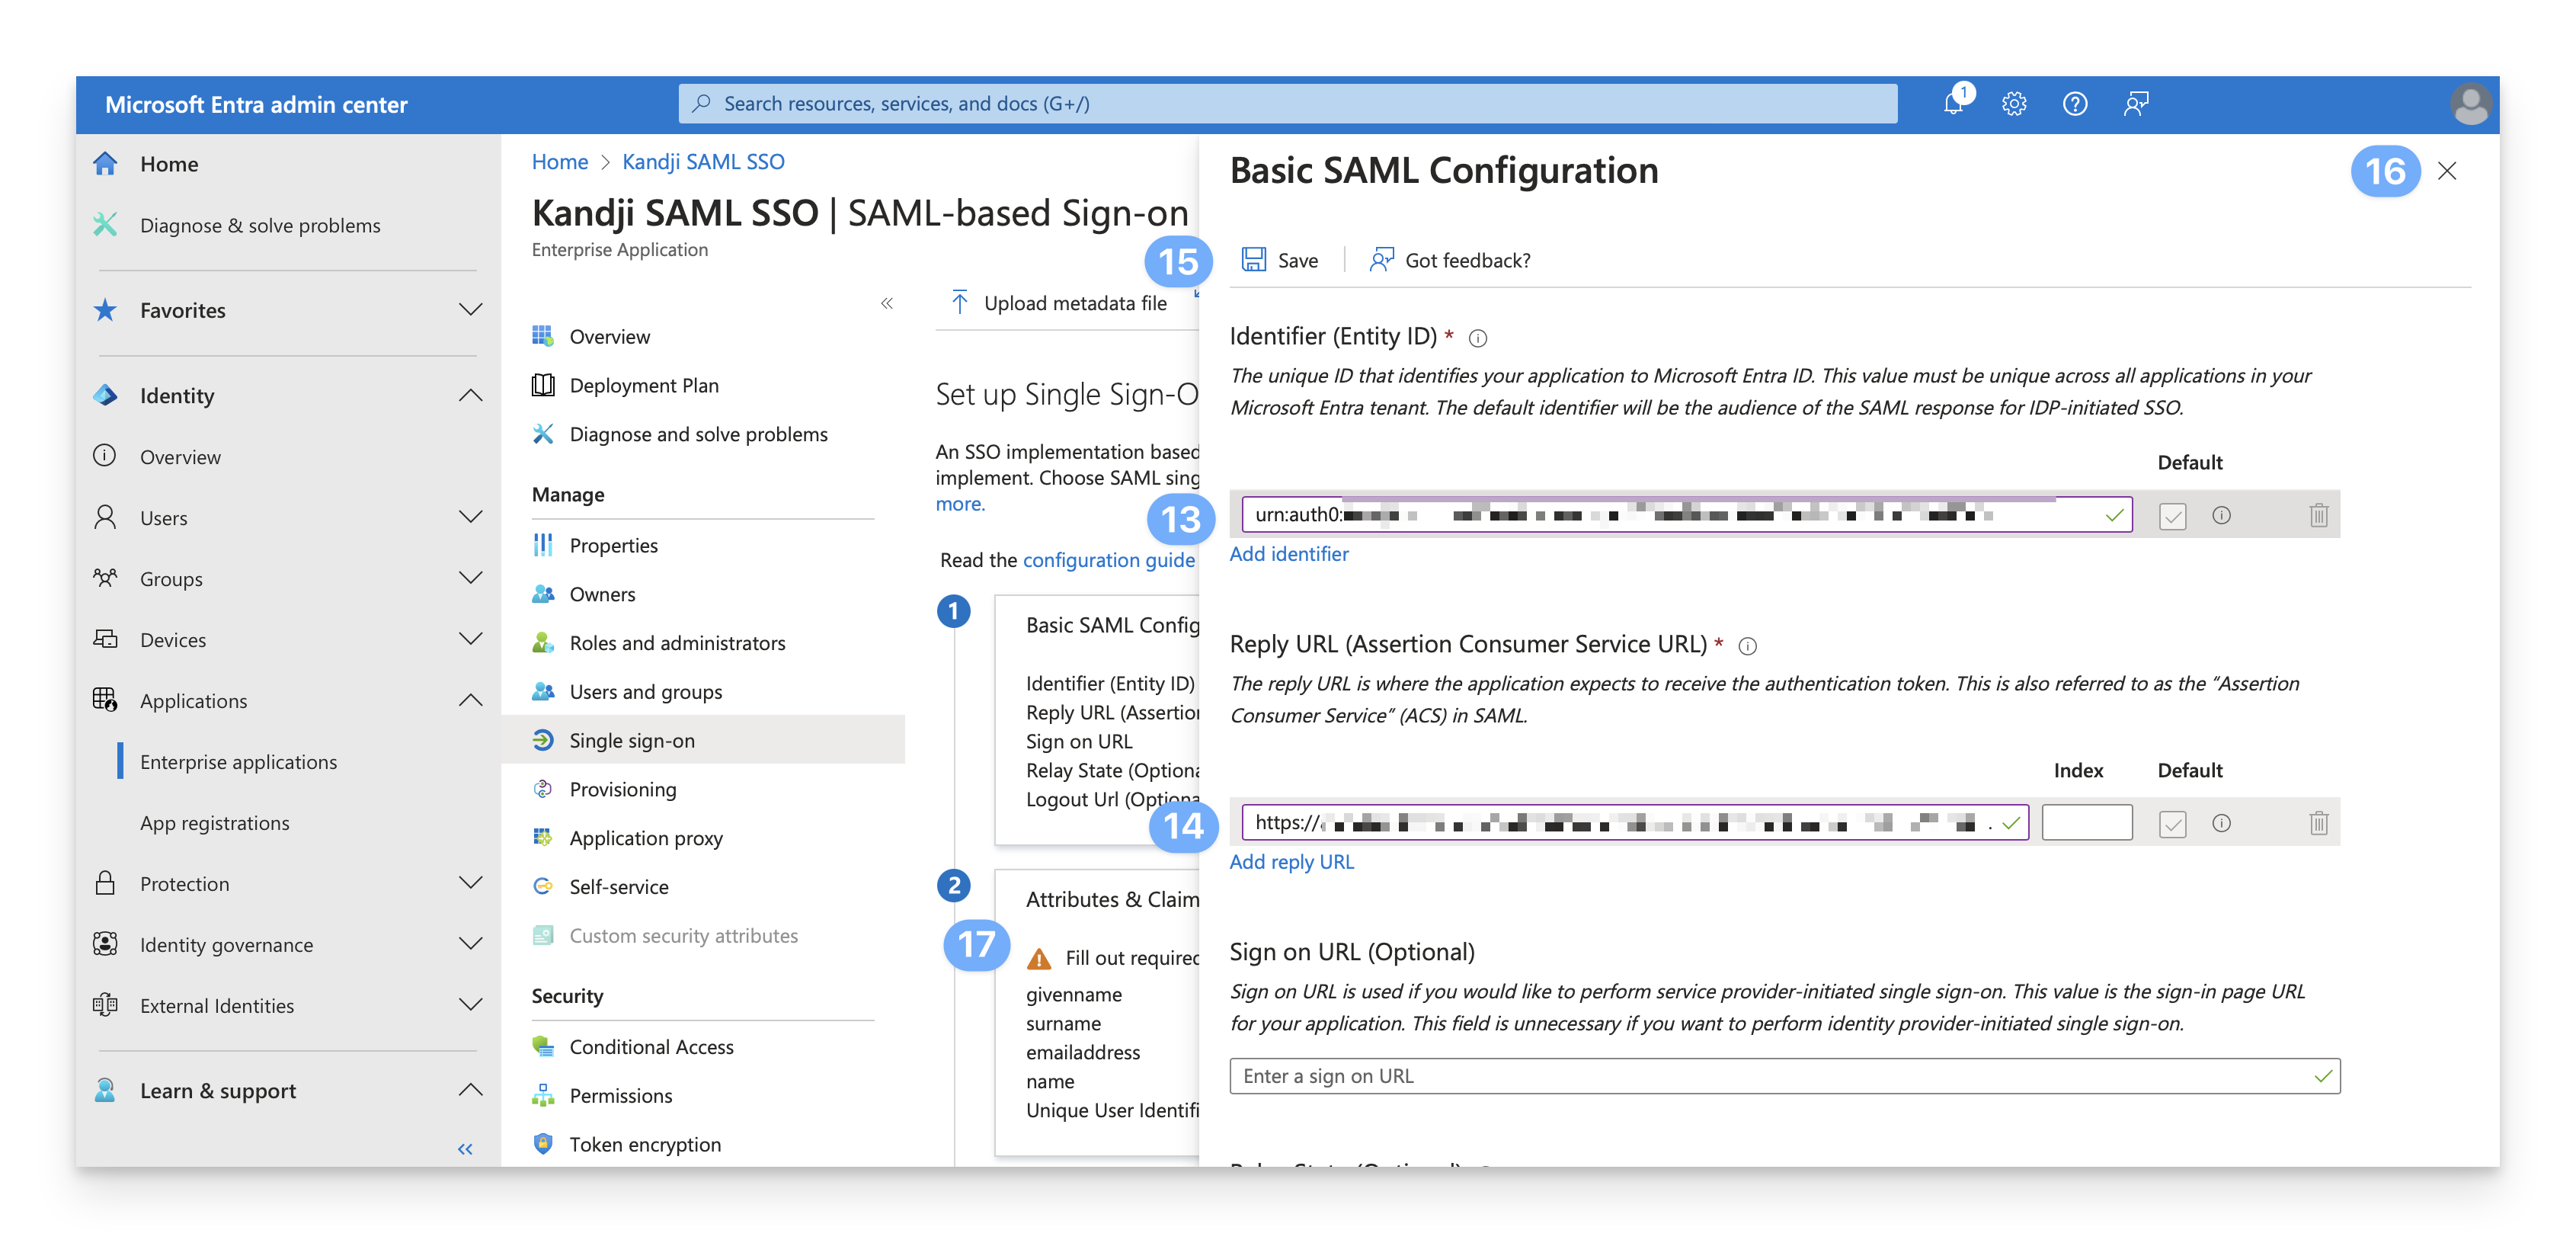
Click the Add Identifier link in the Identifier (Entity ID) section. Paste the Entity ID that you copied earlier into the Identifier (Entity ID) field.
In the Reply URL (Assertion Consumer Service URL) section, paste the Assertion Consumer Services URL that you copied earlier.
Click Save.
Click the X at the top right of the pane to close it.
Leave the settings in the Attributes & Claims section set to their default.
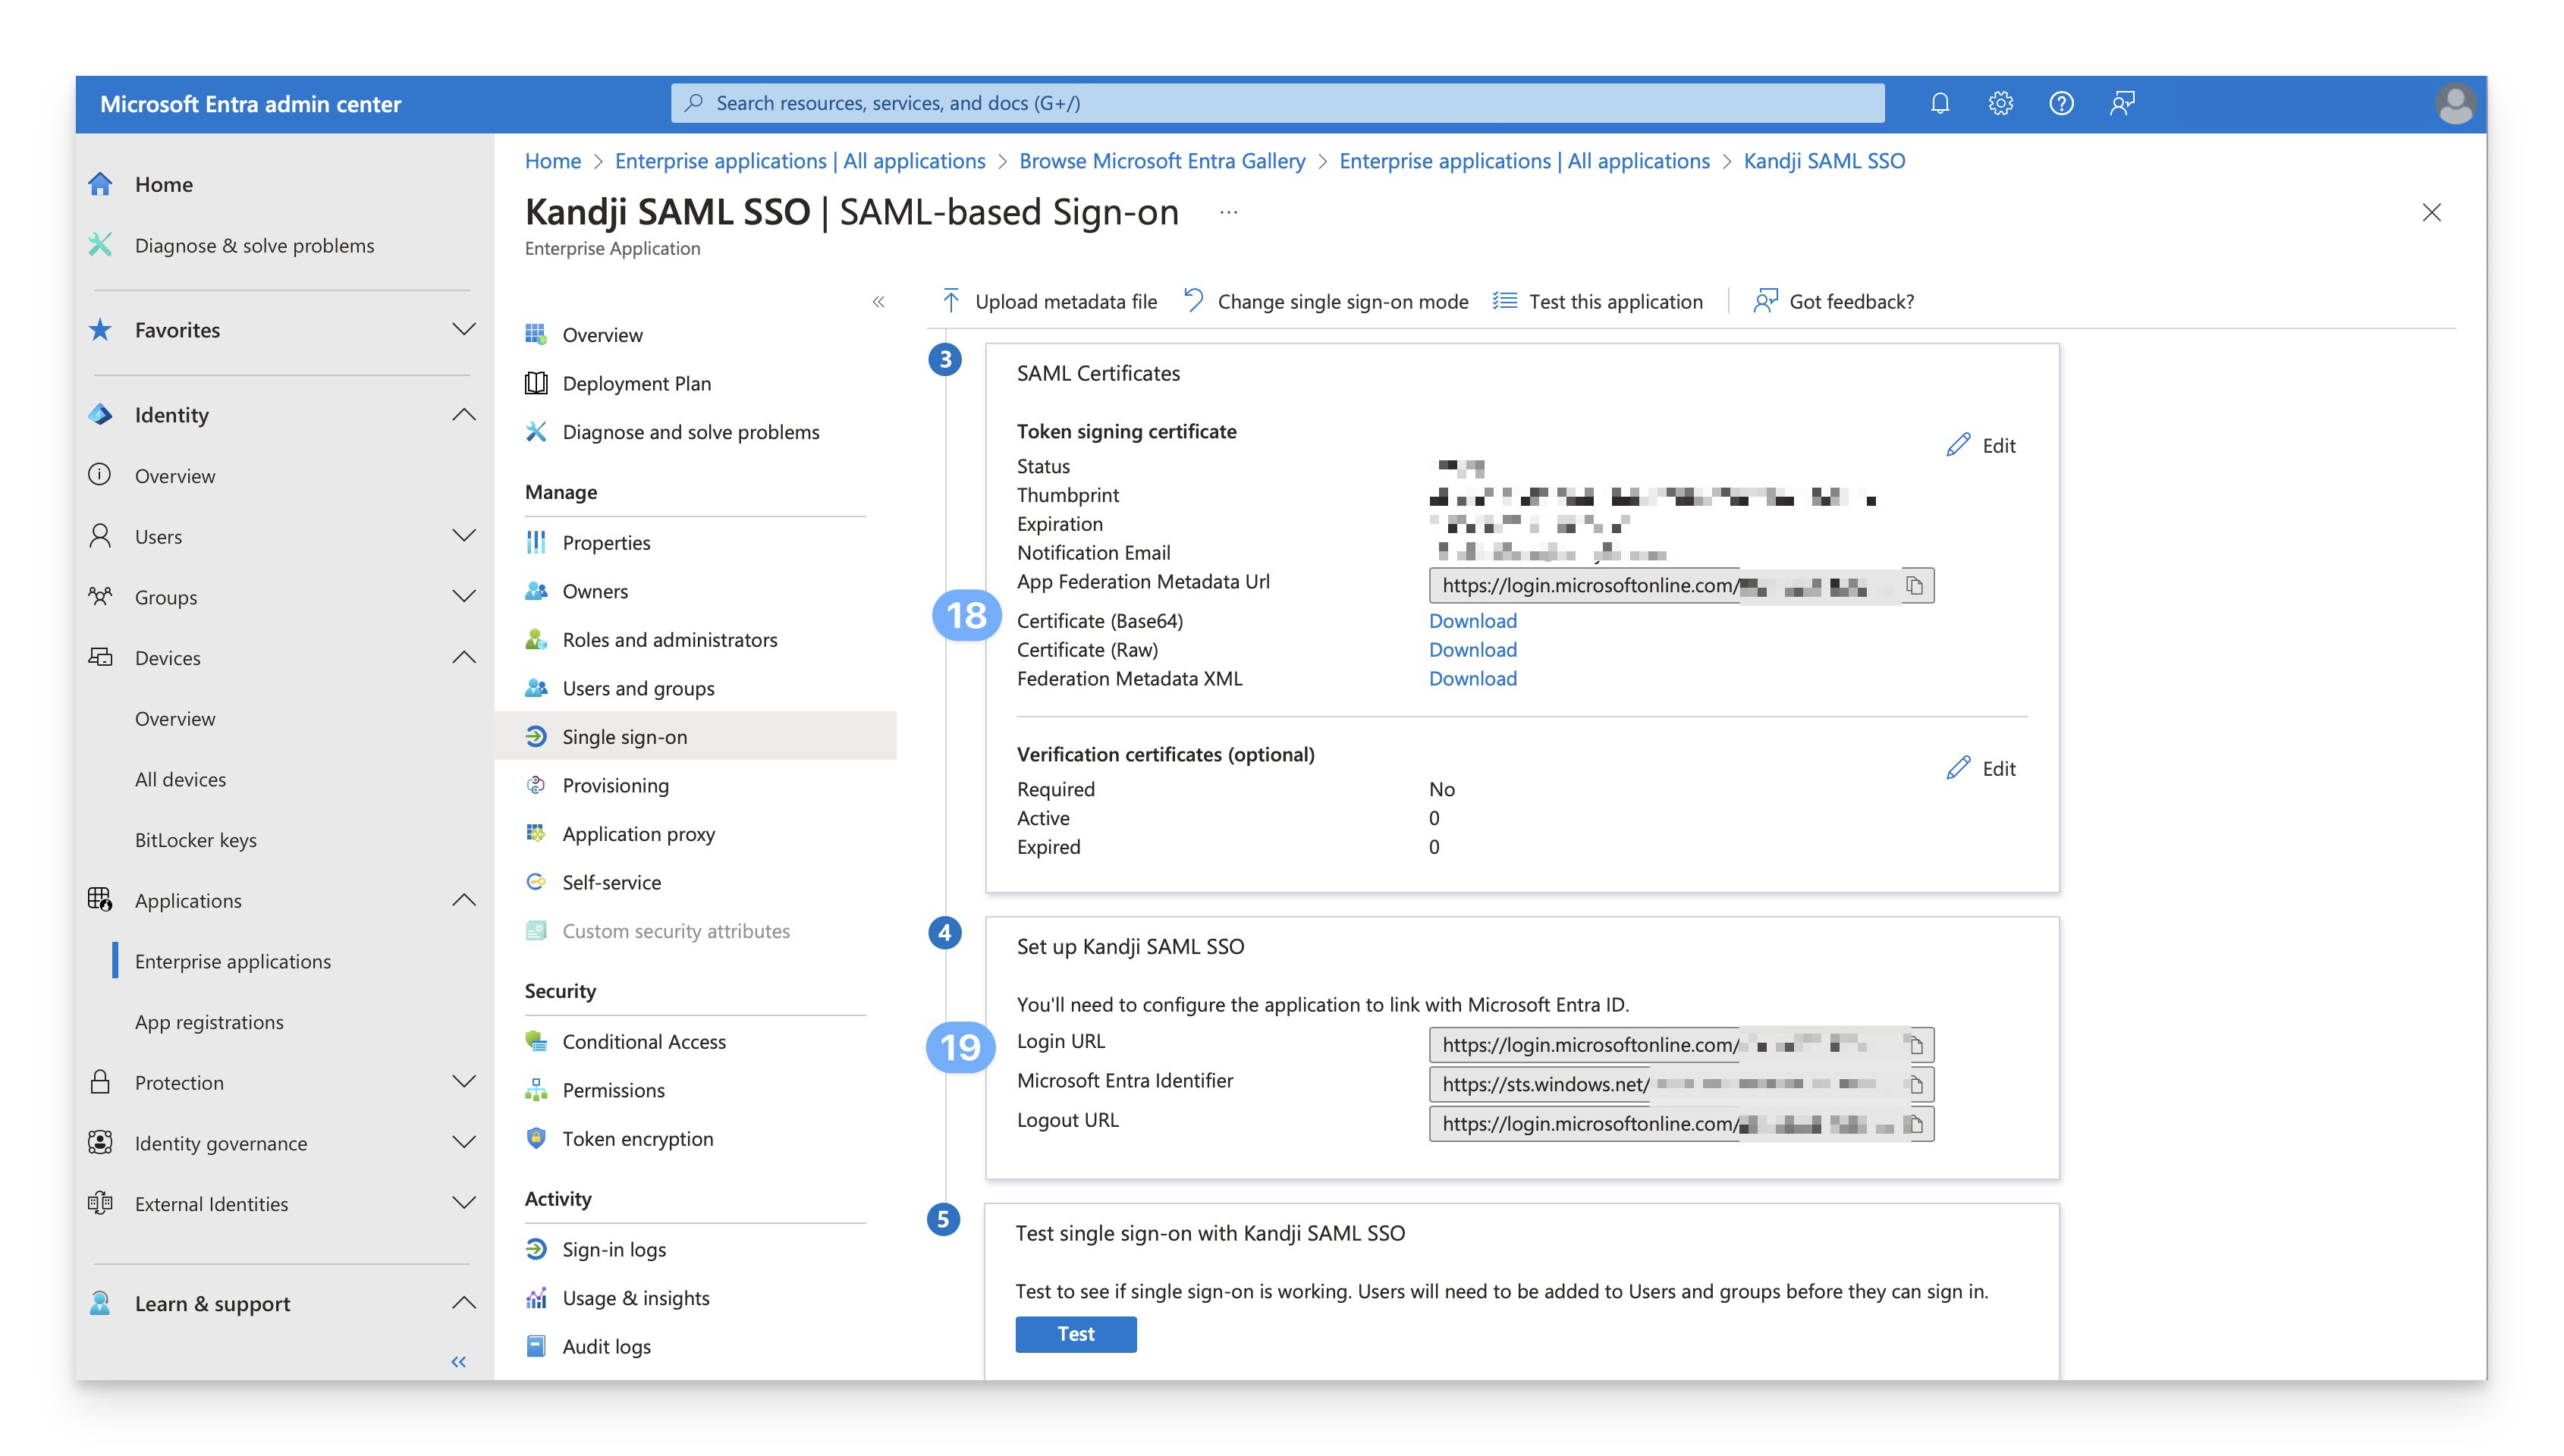
Click Download to download the Base 64 certificate in the SAML Certificates section. This certificate will be used in the Custom SAML configuration in Kandji.
In the Setup [App Name] section, copy the Login URL and Logout URL and paste them into a secure text document for later use.
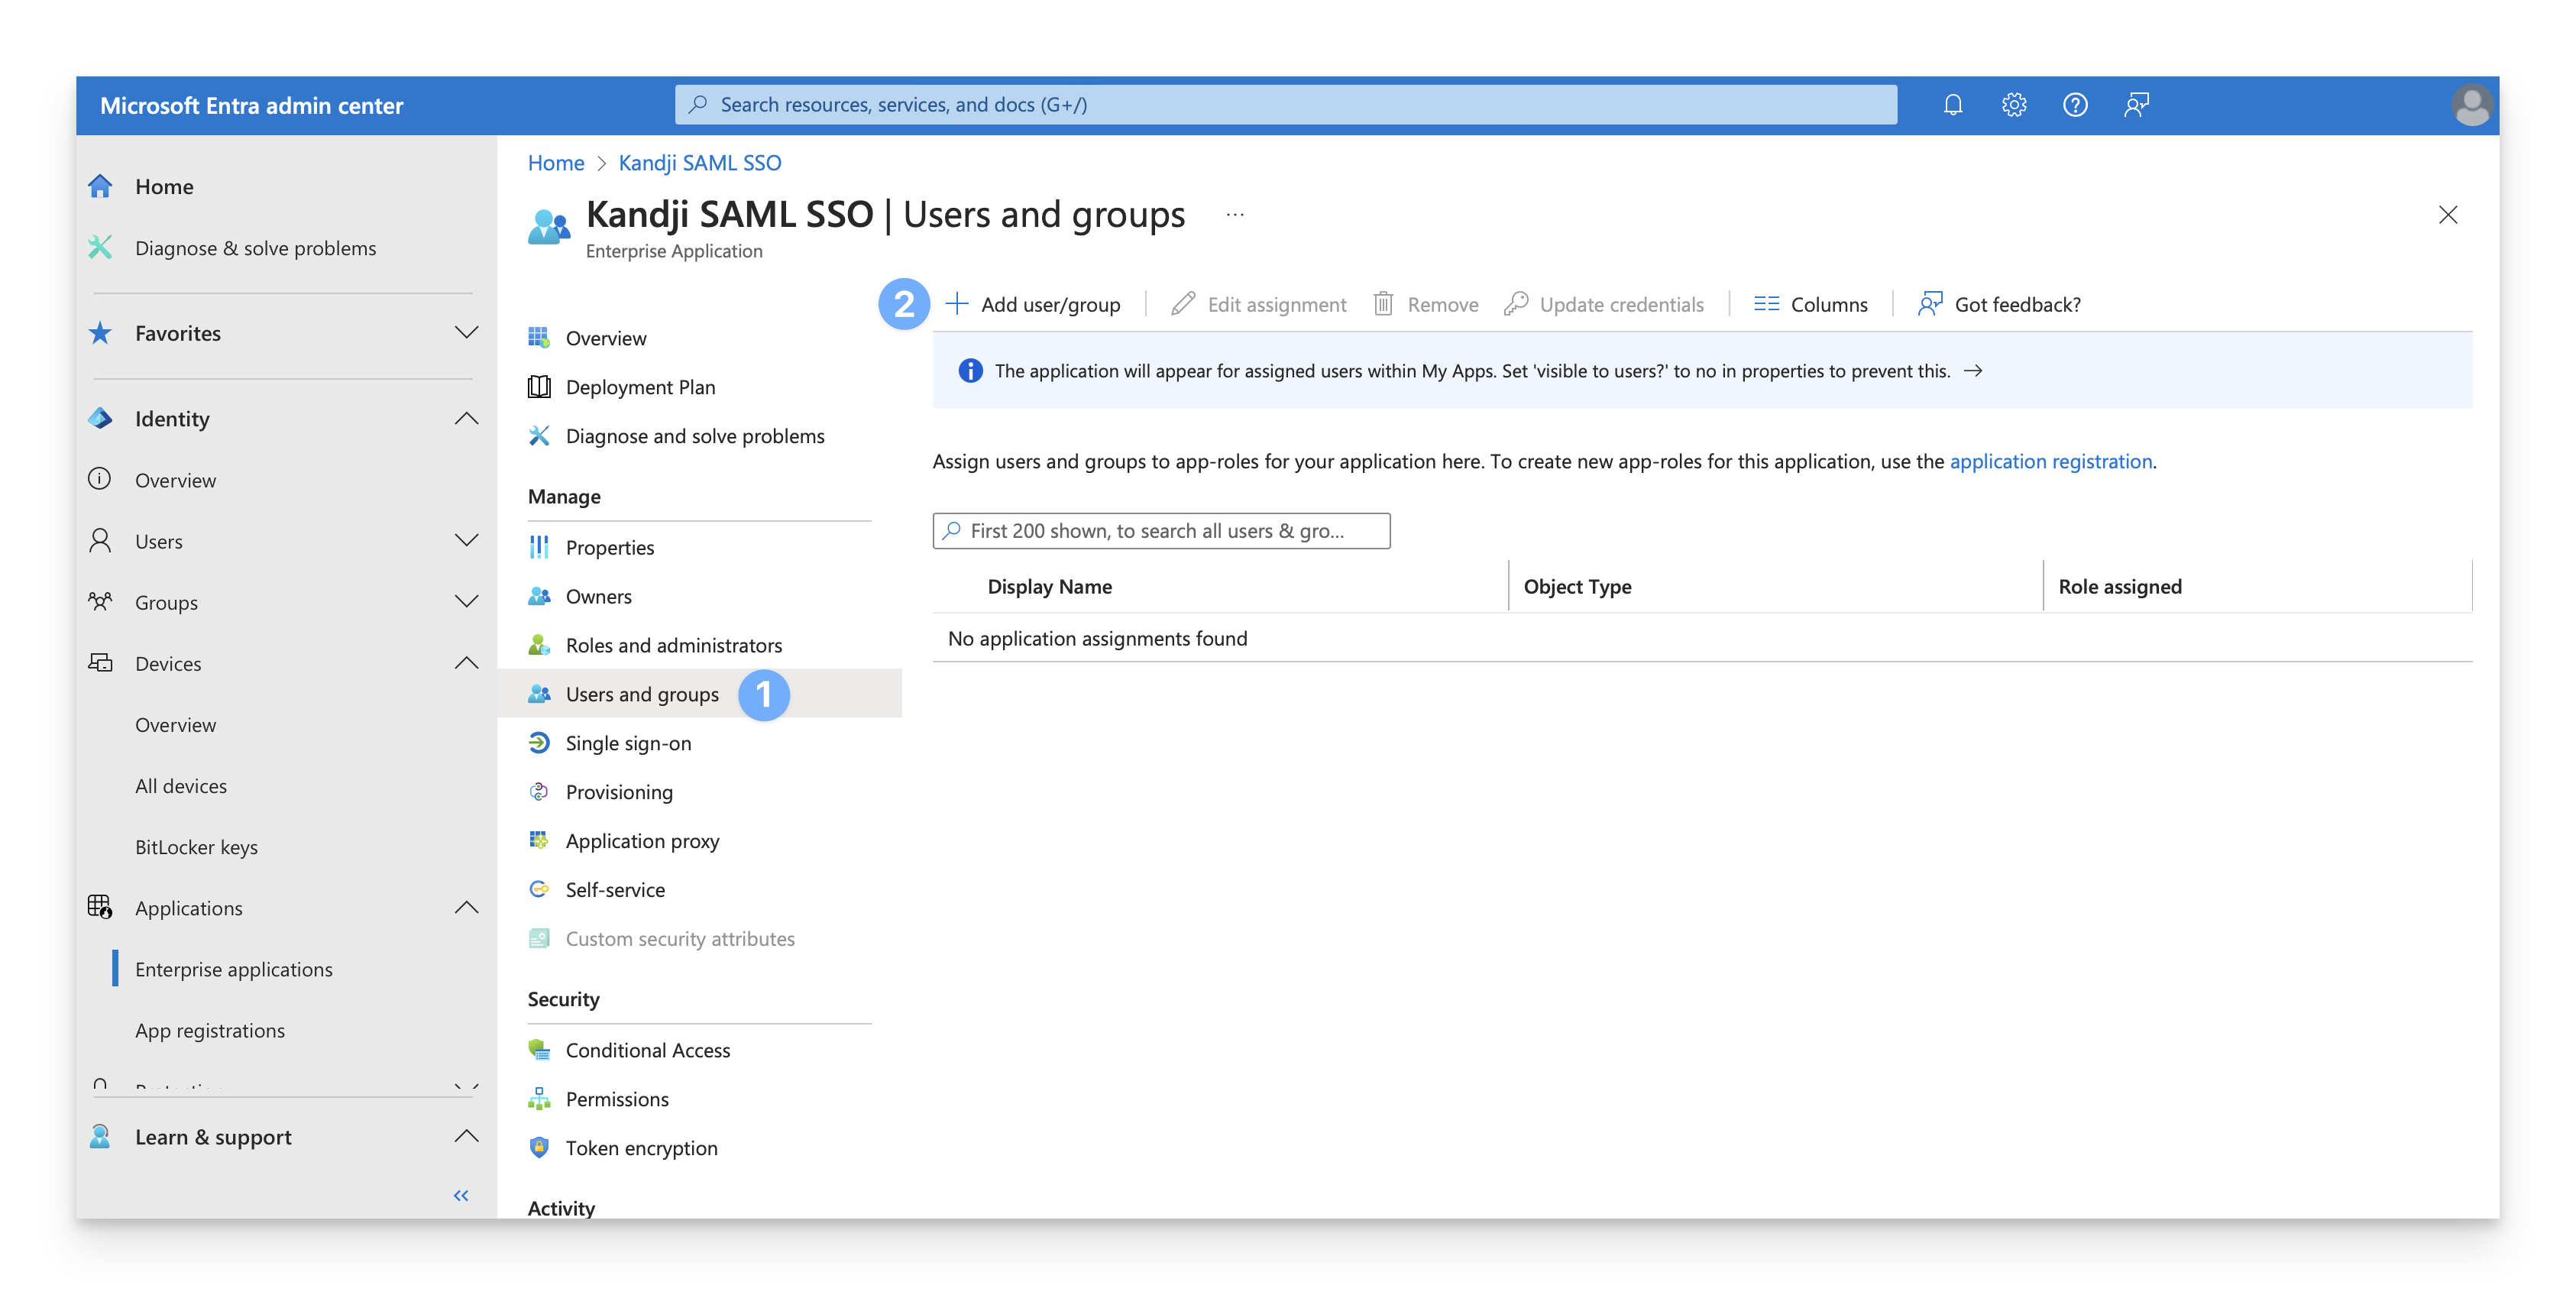
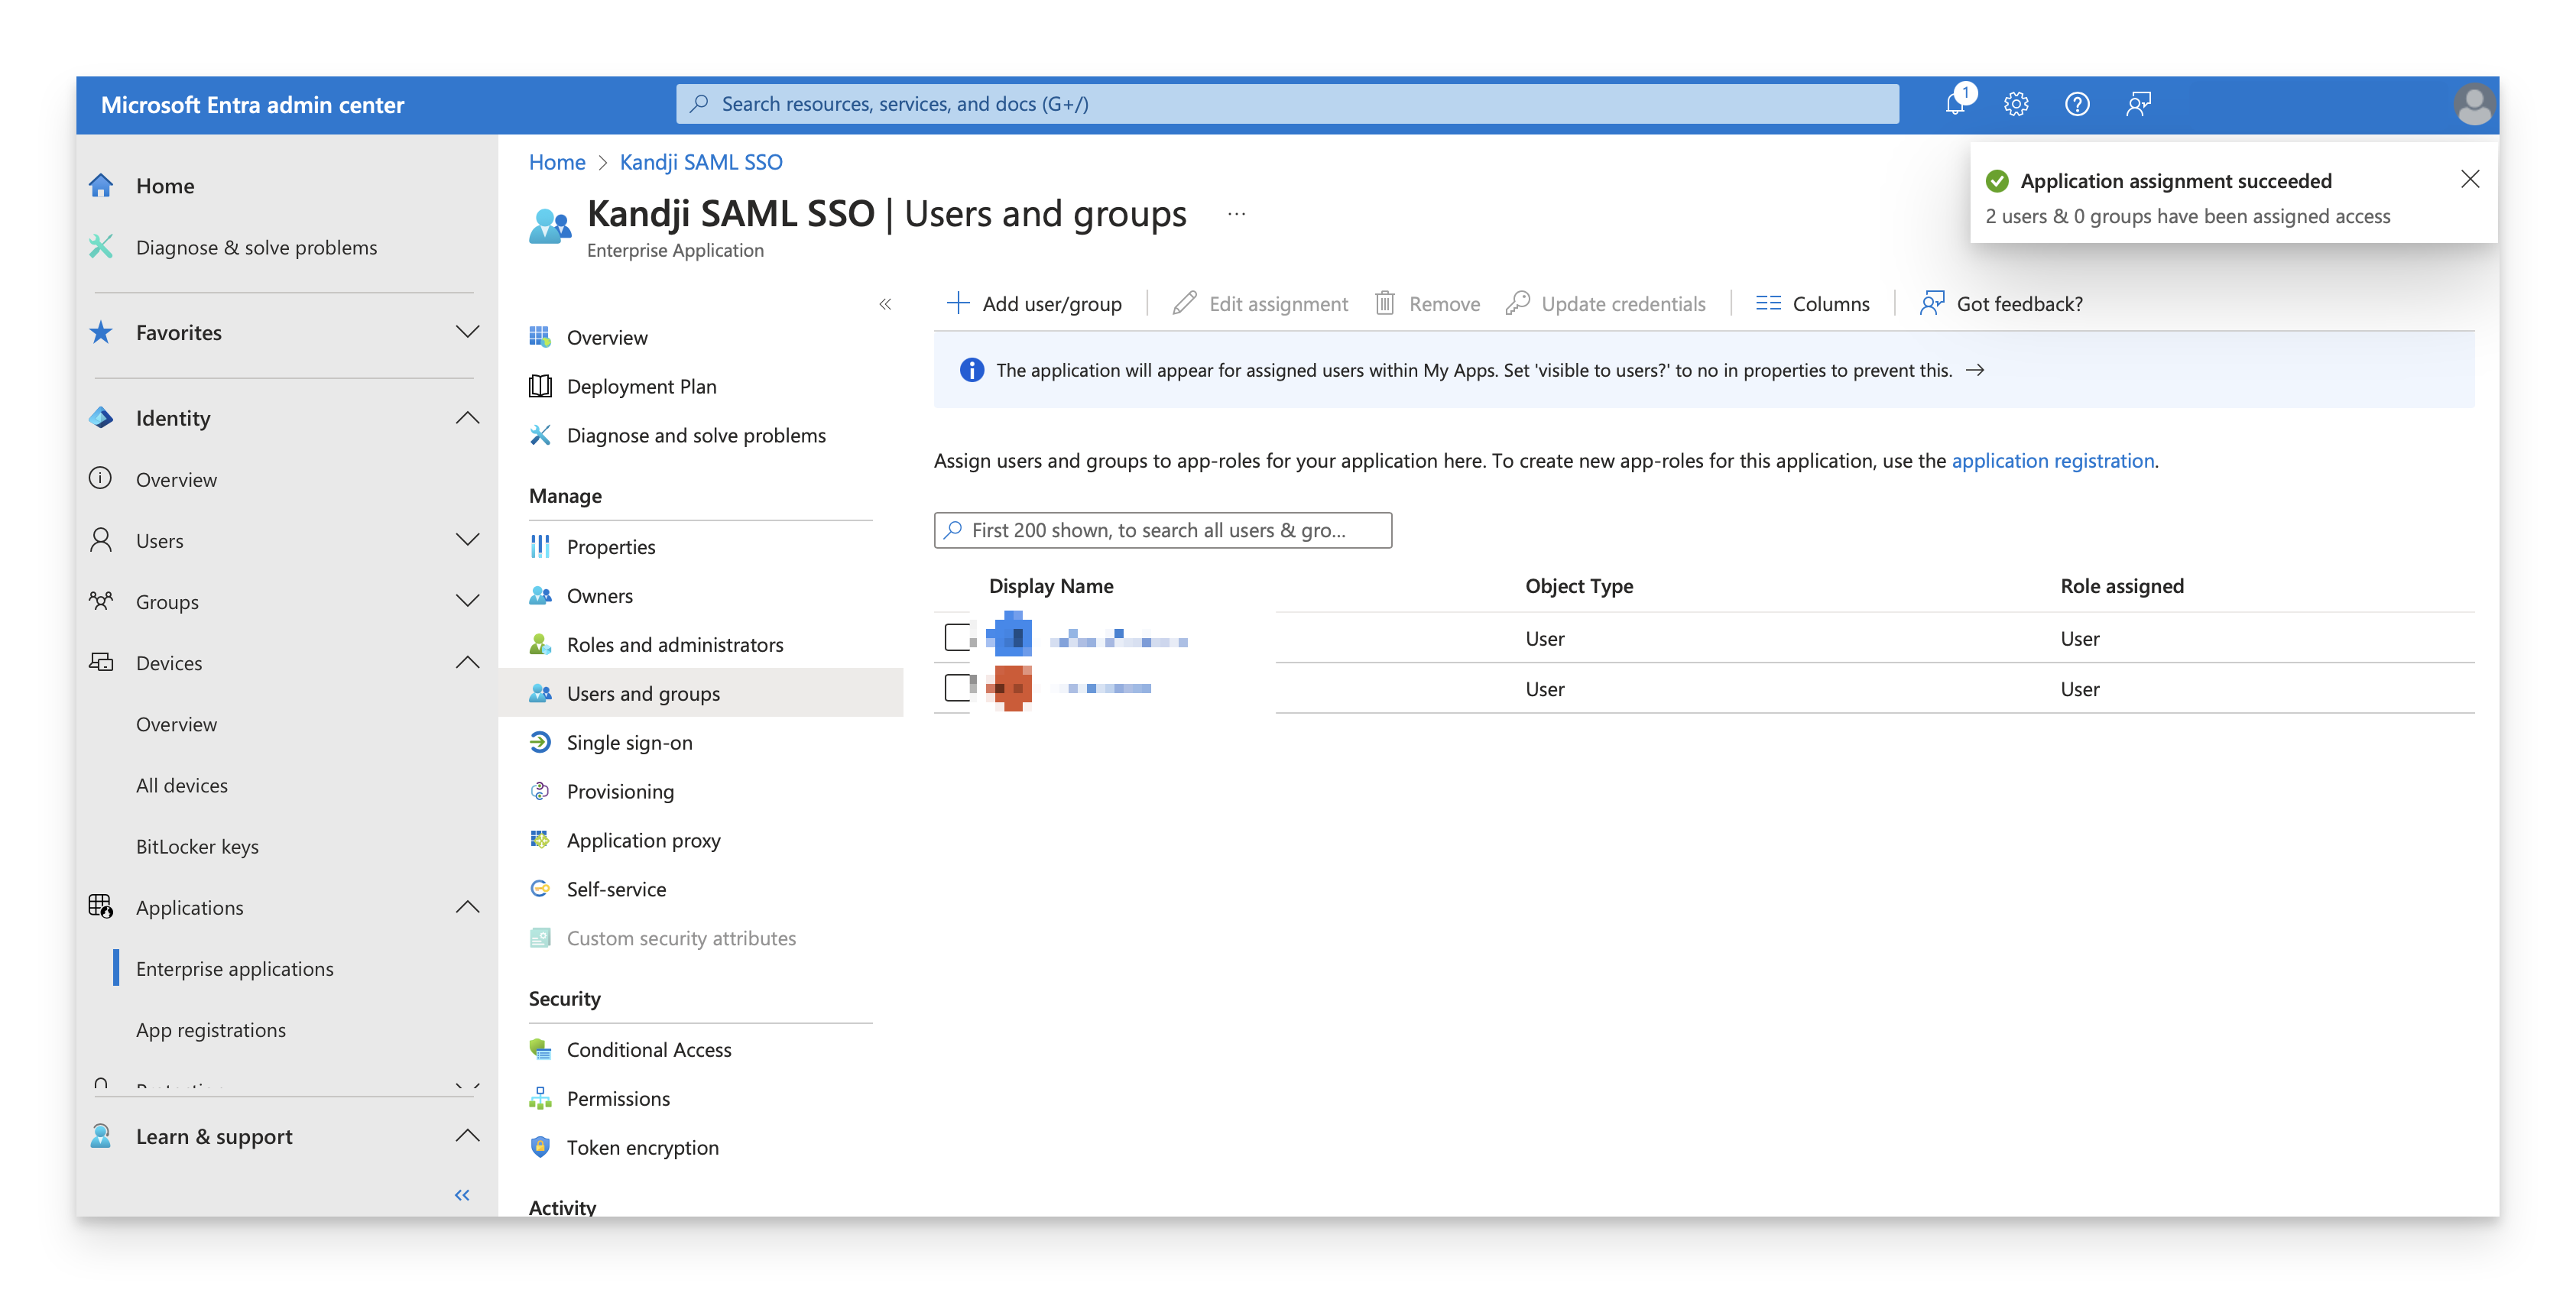
Assign Users and Groups
Under Manage, select Users and Groups.
On the menu, select Add user/group.
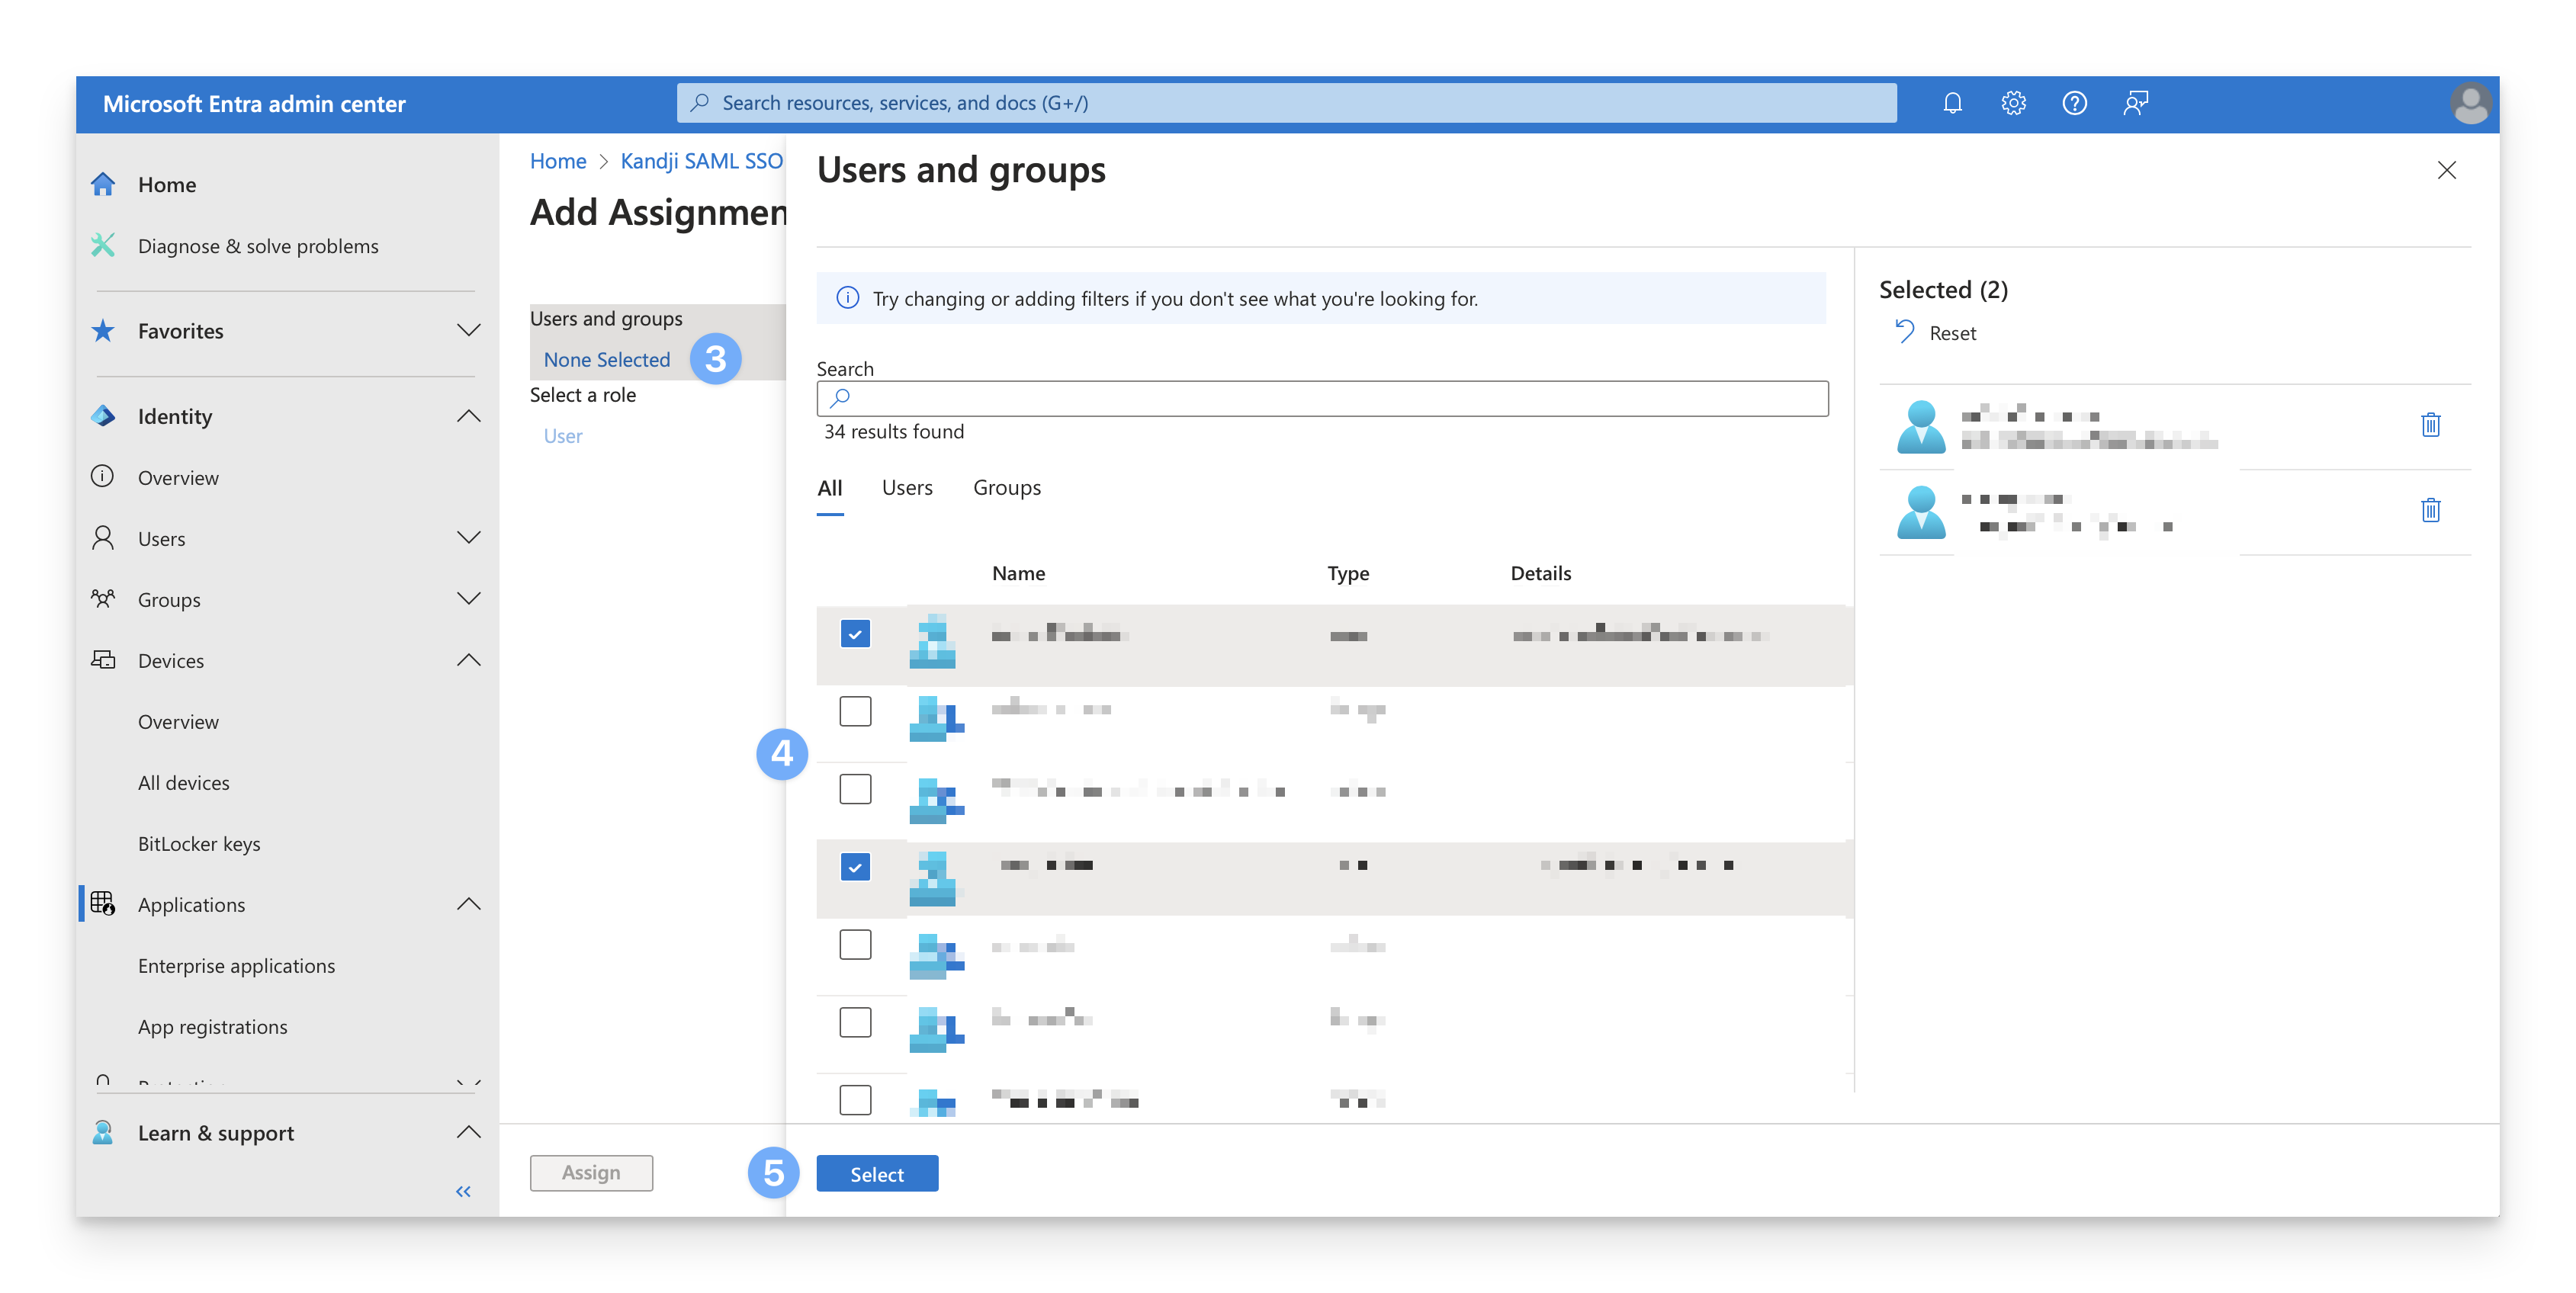
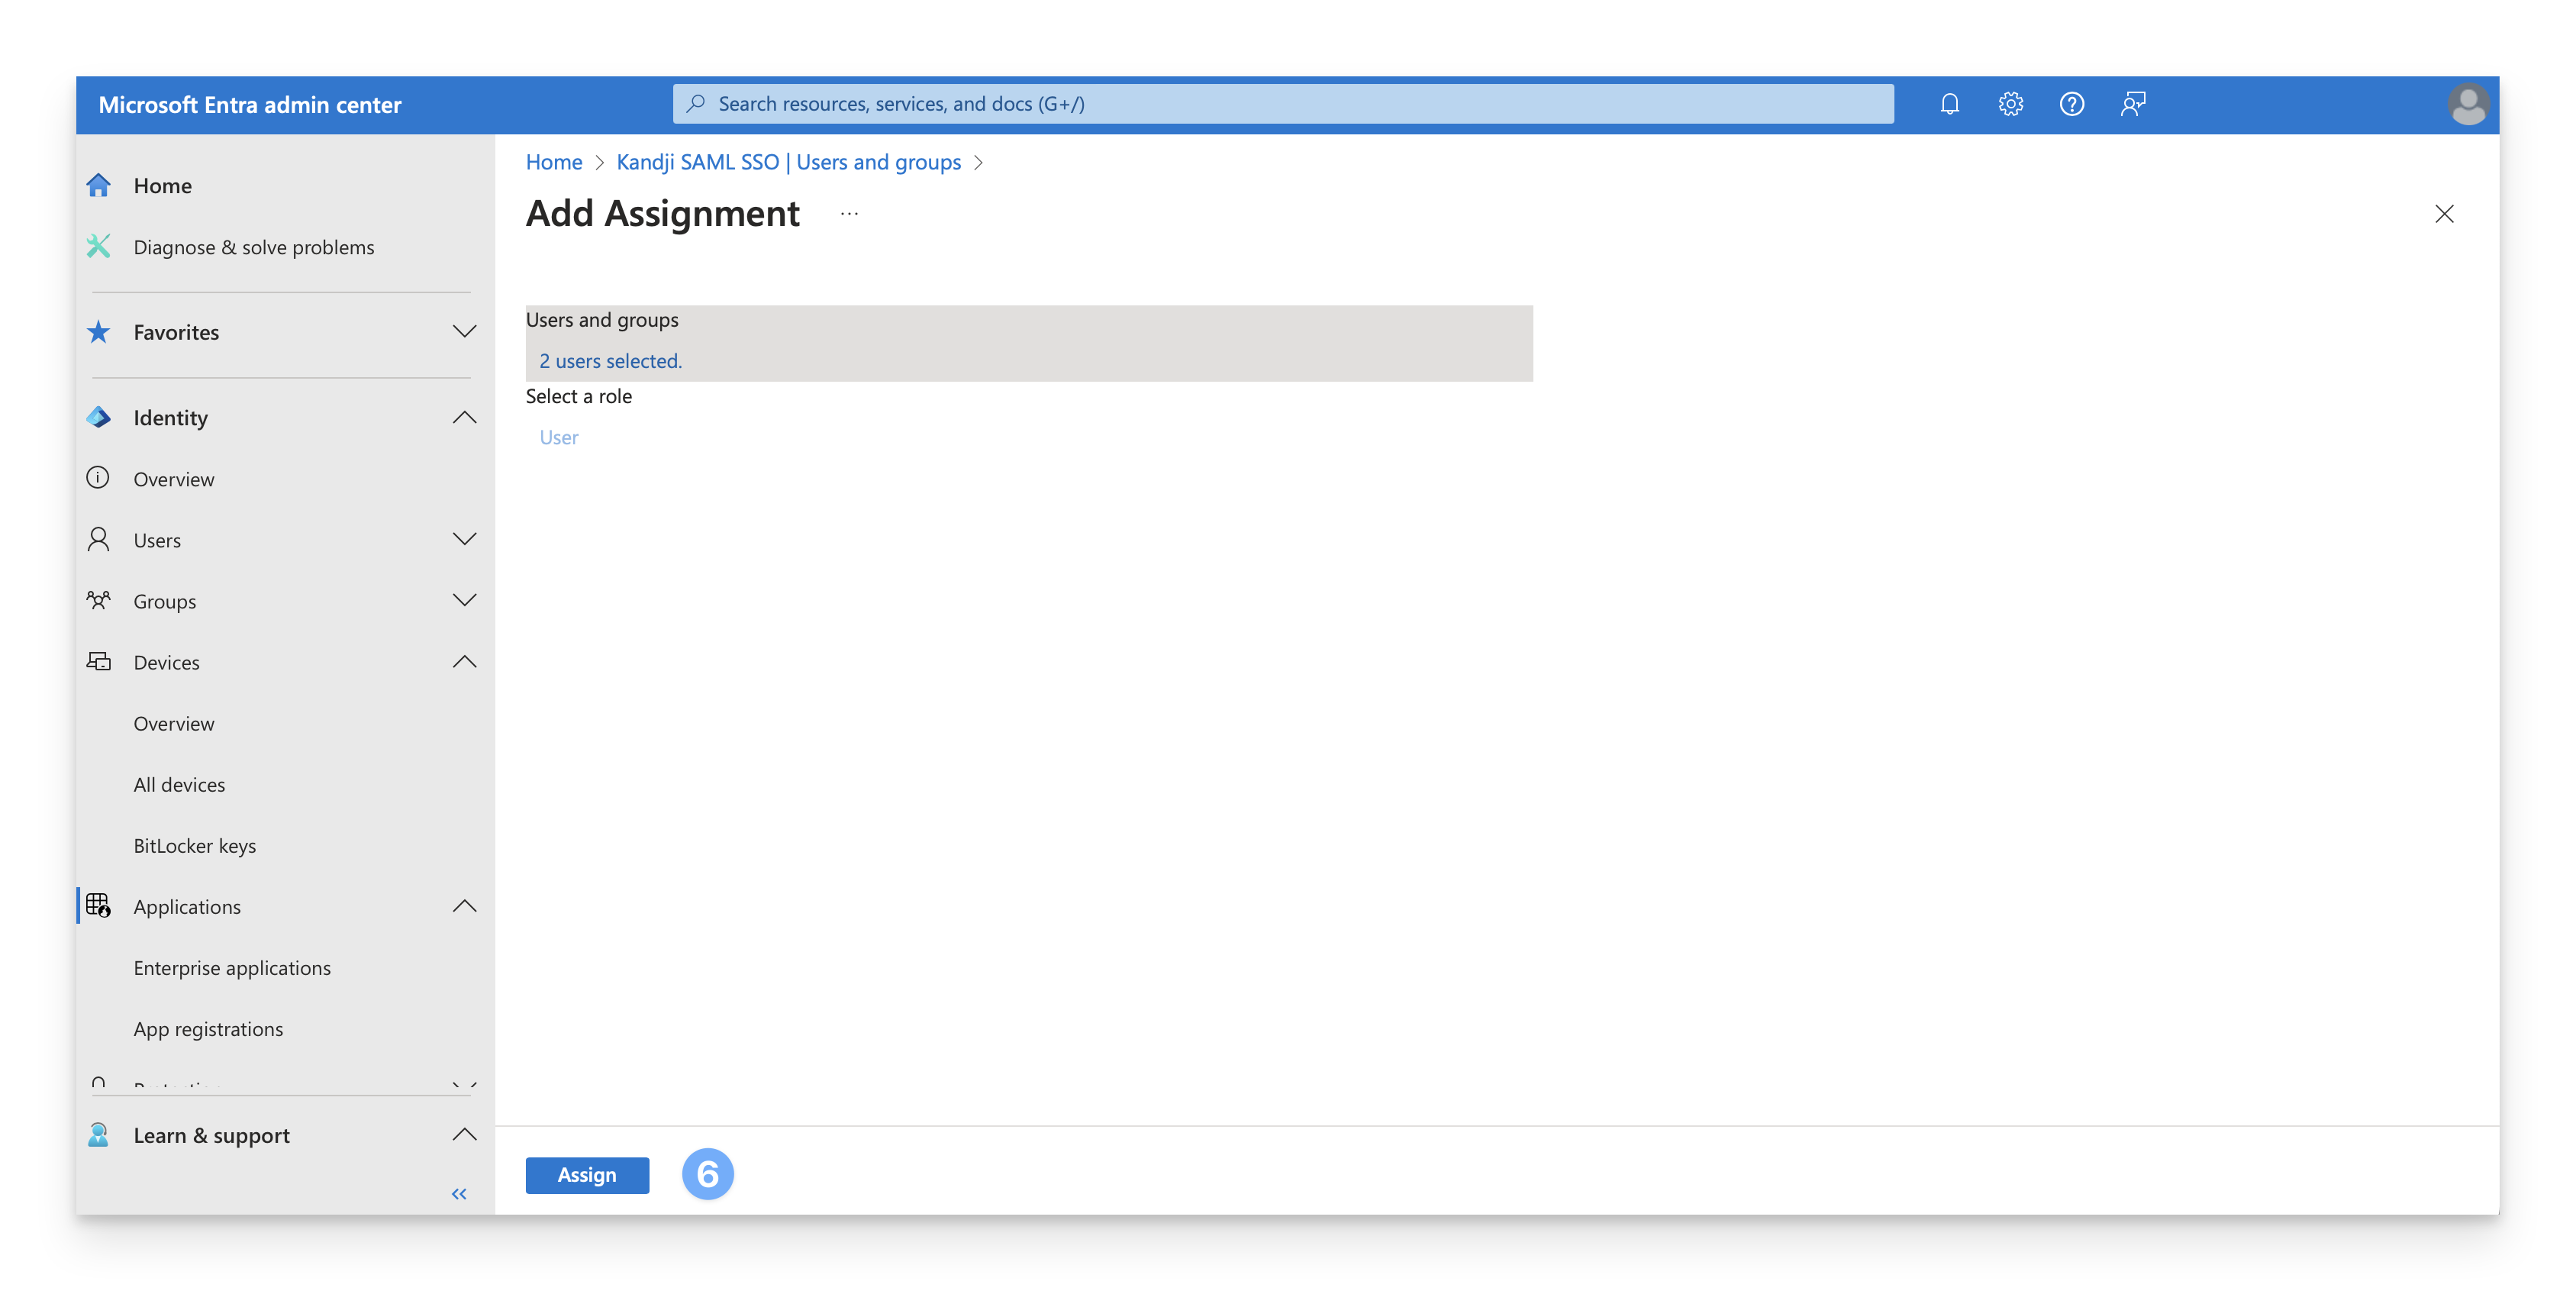
On the Add Assignment dialog, select the link under Users and groups.
A list of users and security groups is displayed. You can search for a certain user or group, as well as select multiple users and groups that appear in the list.
After you have selected your users and groups, select Select.
 If you see the message below, it means that a free tier is being used. The Single Sign-On Enterprise App allows you to add users (not groups) only.
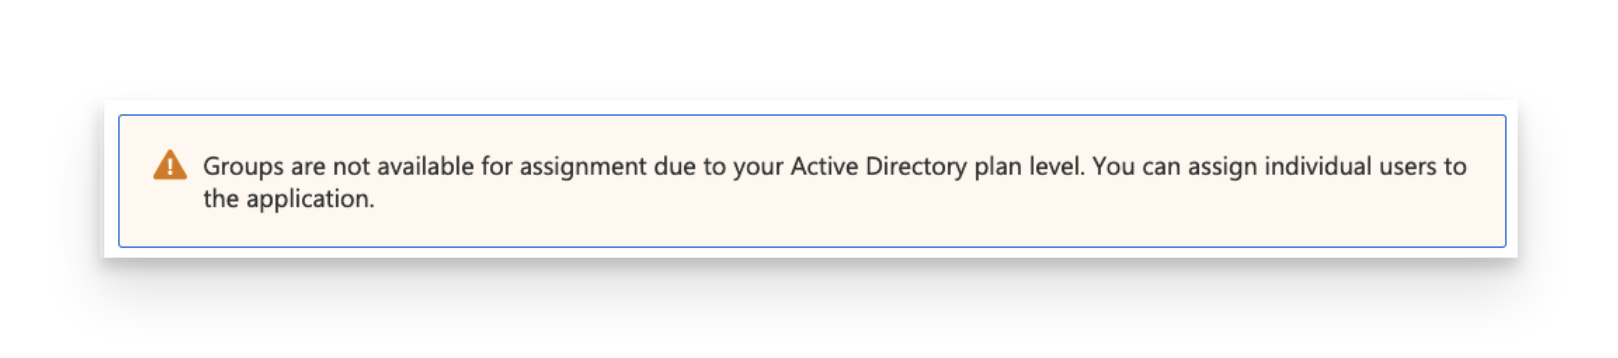
Select Assign to finish assigning users and groups to the app.
Confirm that the users and groups you added appear in the Users and groups list.
Configure the SAML Connection in Kandji
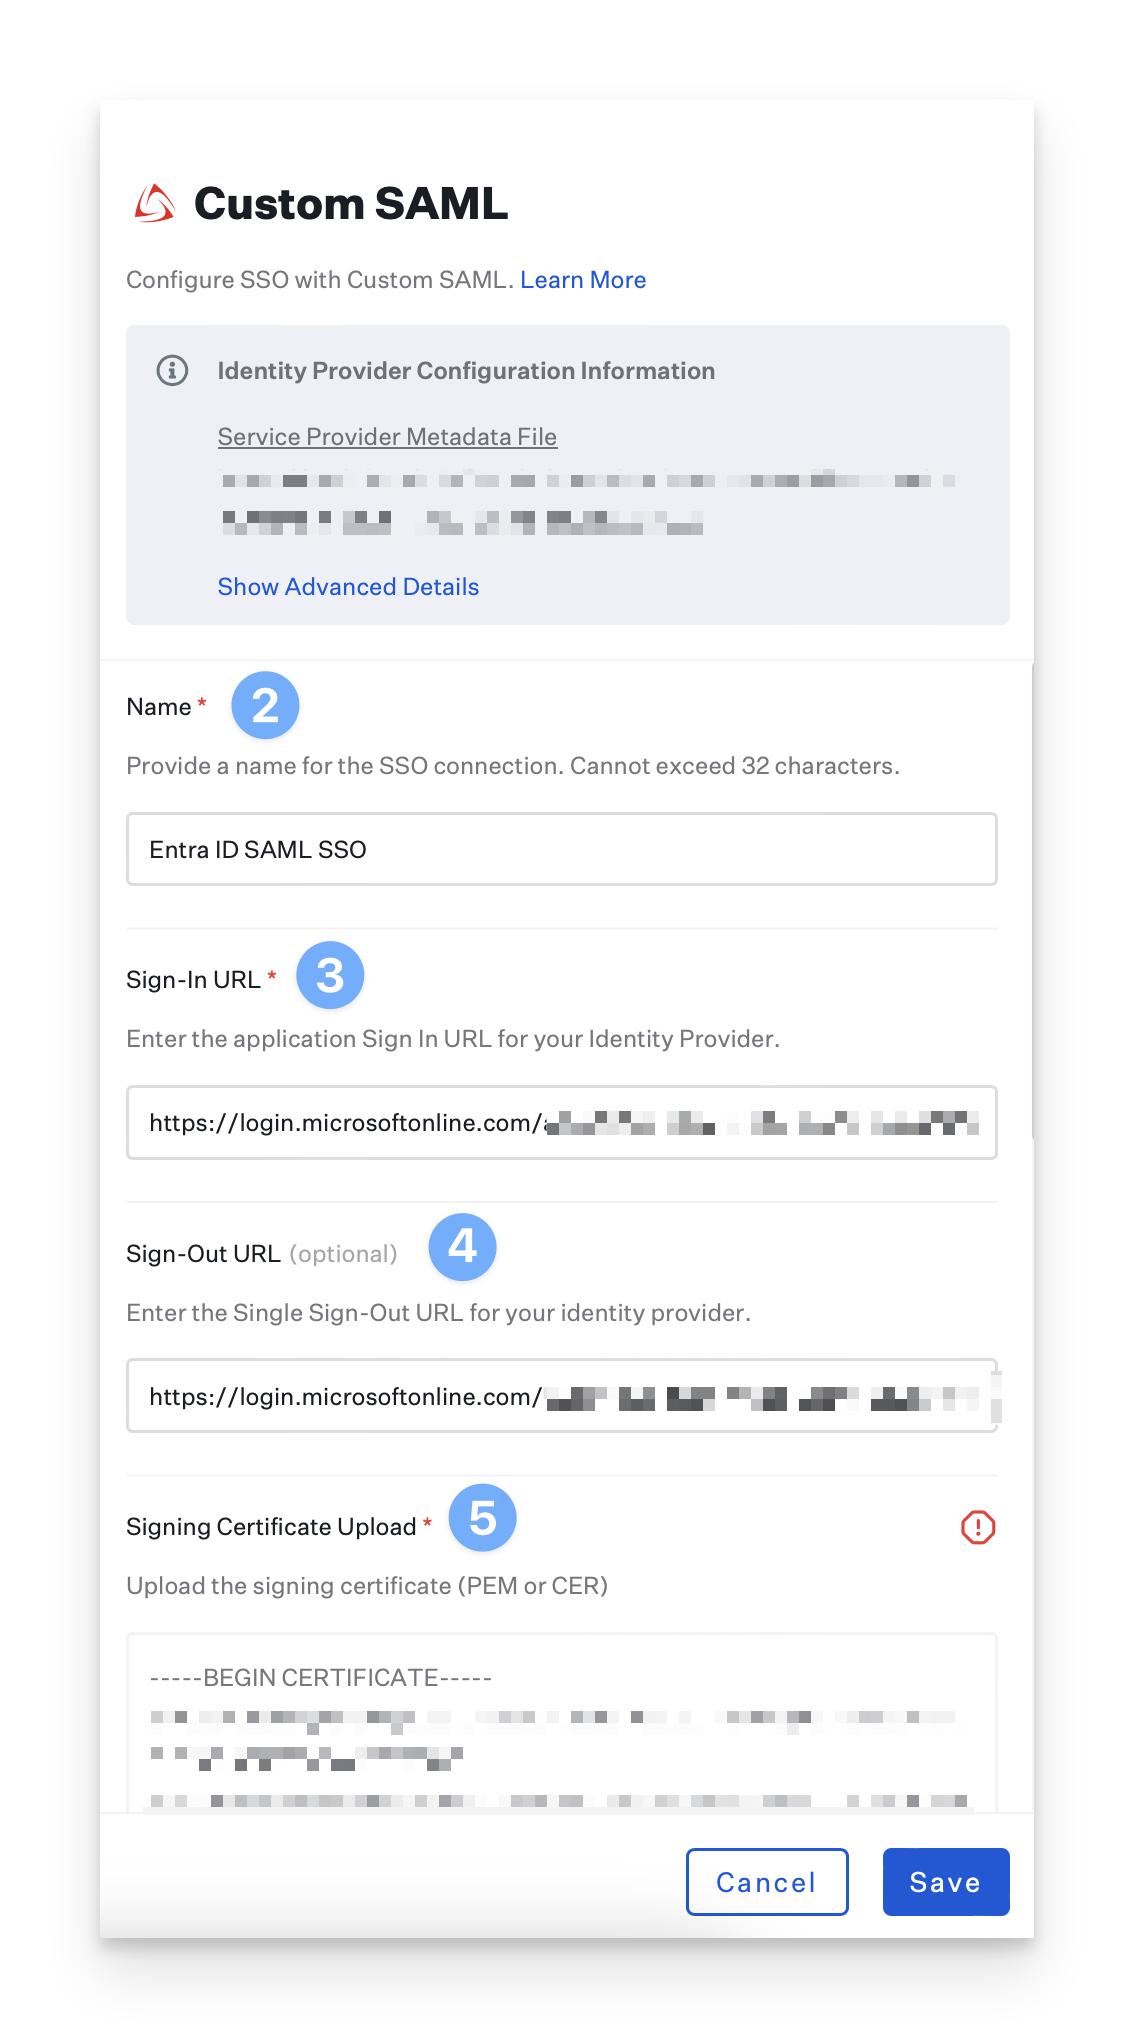
Go back to the Custom SAML modal in Kandji.
Give the connection a Name.
Paste in the Sign In URL you copied from Entra ID.
Paste in the Sign Out URL you copied from Entra ID.
Upload the certificate you downloaded from Entra ID.
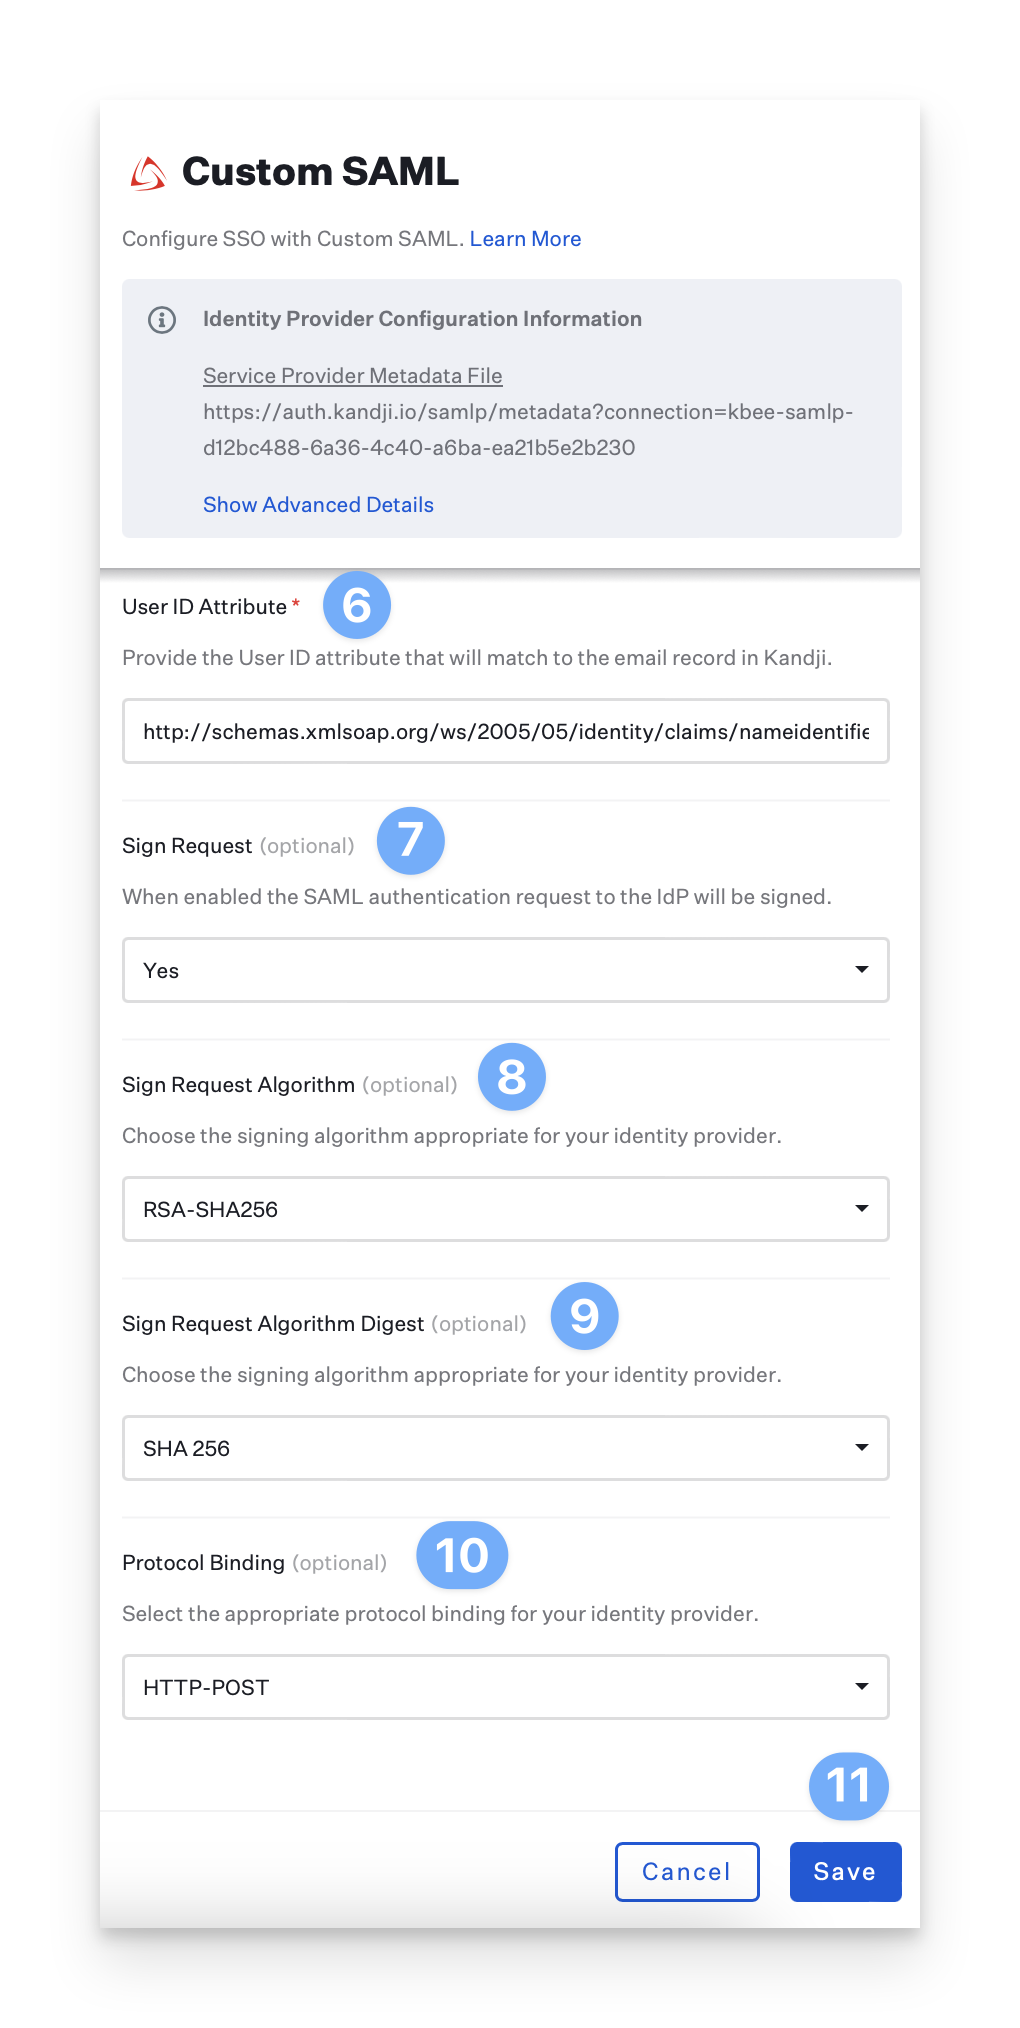
Ensure that the User ID Attribute is set to the default value of:
http://schemas.xmlsoap.org/ws/2005/05/identity/claims/nameidentifierEnsure that Sign Request is set to Yes.
Ensure that the Request Algorithm is set to RSA-SHA256.
Ensure that Sign Request Algorithm Digest is set to SHA 256.
Set the Protocol Binding to HTTP-POST.
Click Save and then click Cancel to exit the configuration.
Enable the SAML Connection
Once you have configured the SAML connection in Kandji and your identity provider, you can enable it. For step-by-step instructions, please refer to the Enable and Manage a Connection section in our Single Sign-On support article.
Enforcing Single Sign-On
Once you have configured at least one single sign-on connection, you can disable the standard authentication connection. Doing so will remove the ability for Kandji administrators in your tenant to authenticate via email/password, Google Sign in, or Office 365 Sign in.
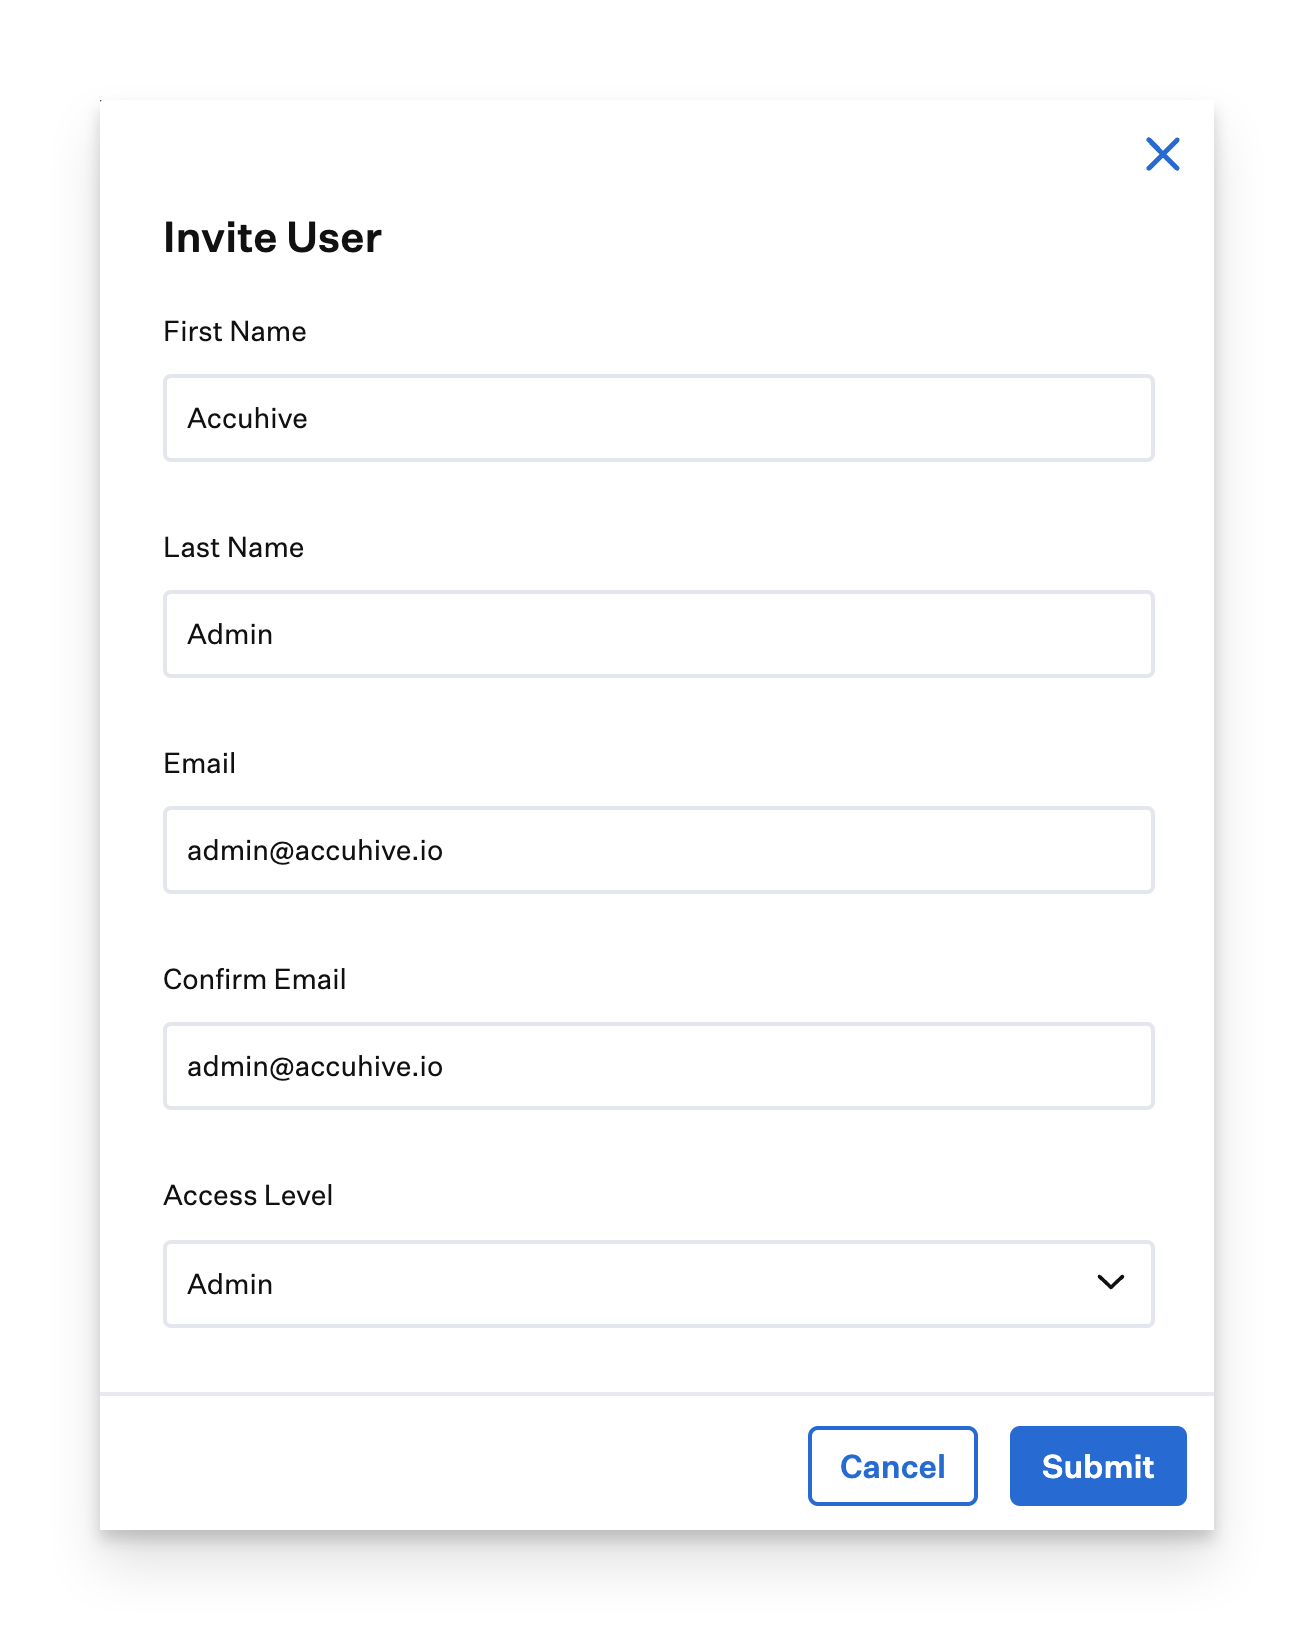
Add a User to Kandji
Add a user to the Admin Team in Kandji by clicking New User.
Fill in all of the corresponding user information. This user must exist in Microsoft Entra ID and must be assigned to the Kandji SSO app in your Microsoft Entra ID tenant.
Click Submit.
Once the invite is submitted, close the Invite User window.
Refresh the Access page in Kandji. You should see the user you just added.
Check the user’s email to accept the invitation and log into Kandji with the new SAML SSO connection.