You can use Kandji to enroll the Google Chrome browser into Chrome Browser Cloud Management on macOS. This will allow you to set bookmarks, allow extensions, and manage other settings in Google Chrome.
Chrome Browser Cloud Management
You can manage the browser on a computer using Google's Chrome Browser Cloud Management by delivering a configuration profile that contains a cloud management enrollment token from Google. This token will direct Google Chrome to allow management by the associated organization.
Set Up Cloud Management
Begin setup by following the instructions in the Chrome Browser Cloud Management support guide.
Generate a new cloud management enrollment token
Once you have completed the setup in Google Admin, you will need to generate an enrollment token in Google. This token is used in the Custom Profile uploaded to Kandji.
Modify the configuration profile template with your enrollment token
Download the configuration profile template.
Open the template in a text editor of your choice.
Replace XXXXXXXX-XXXX-XXXX-XXXX-XXXXXXXXXXXX in line 25 with your Cloud Management Enrollment Token generated above.
Save the file locally.
Create a custom profile in Kandji
In the Kandji admin console (e.g. https://subdomain..io) navigate to the Library module and follow these steps.
To add this Library Item to your Kandji Library, follow the steps outlined in the Library Overview article.
Give your profile a name.
Set the device family to Mac.
Assign the profile to your desired Blueprints.
.png)
Upload your .mobileconfig file.
.png)
Click Save.
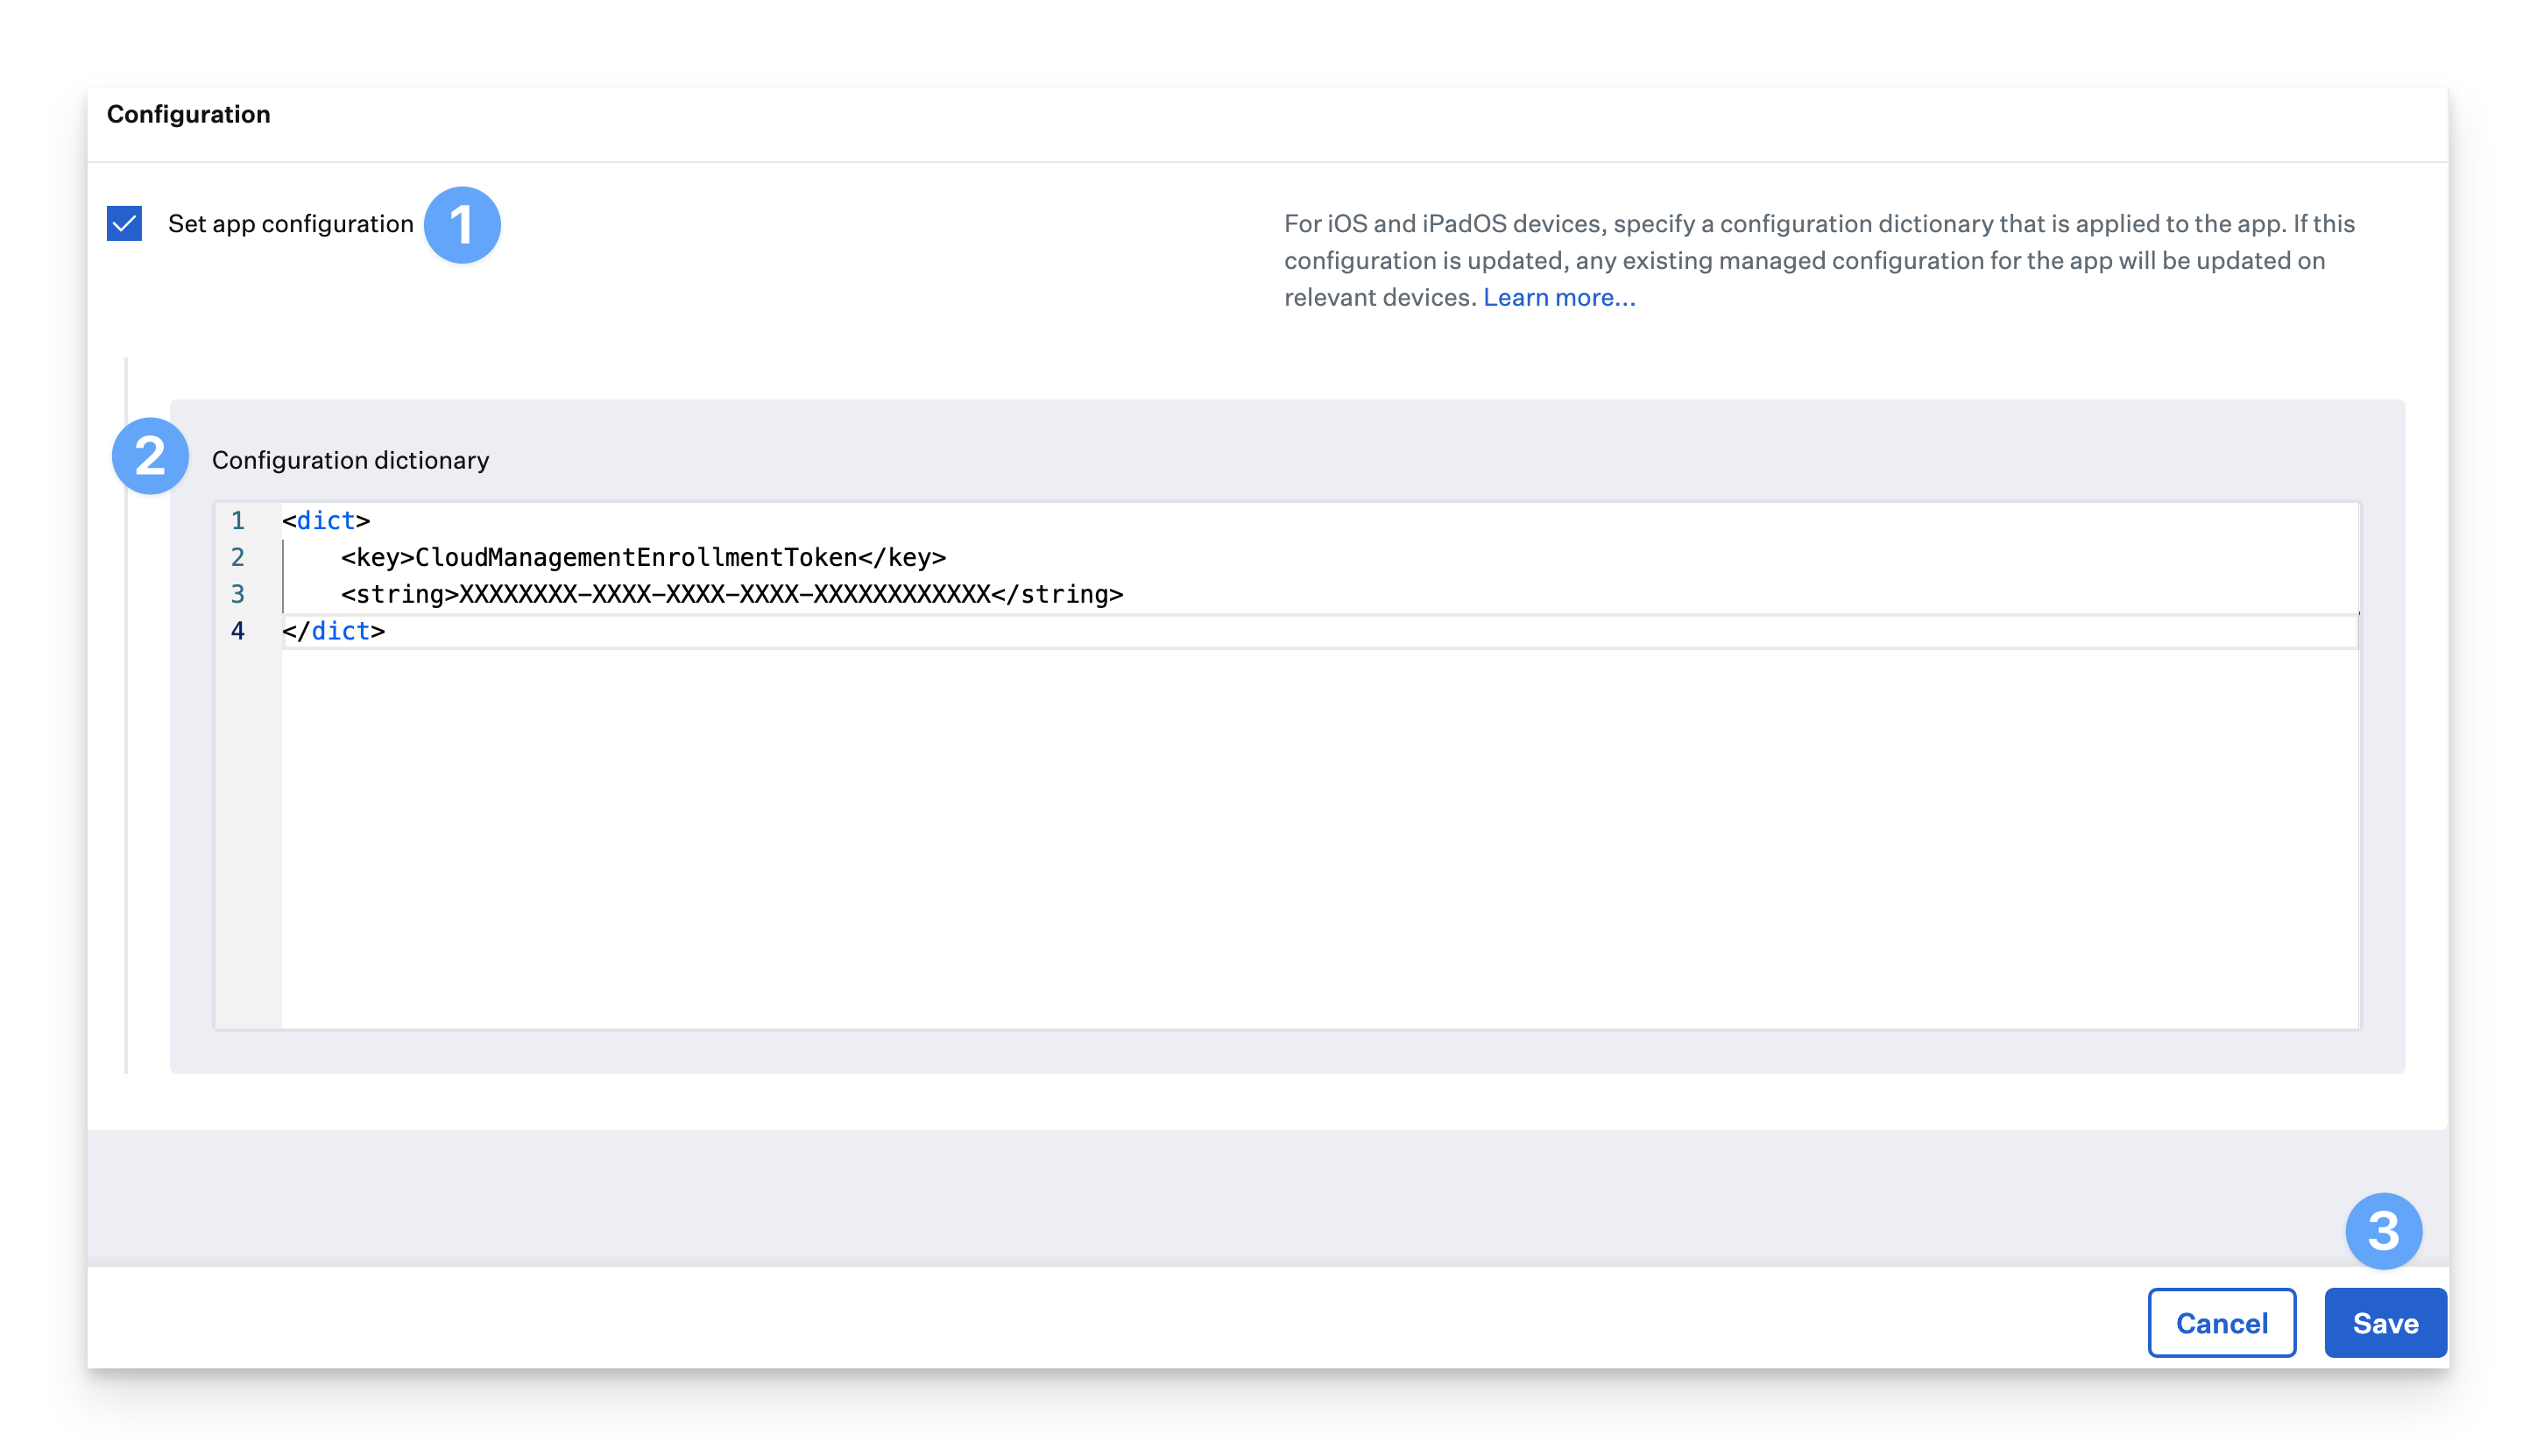
Using iOS AppConfig
iOS and iPadOS devices can use AppConfig for Google Chrome and customize it for your organization.
<dict>
<key>CloudManagementEnrollmentToken</key>
<string>XXXXXXXX-XXXX-XXXX-XXXX-XXXXXXXXXXXX</string>
</dict>
Enable the Set app configuration option in the Google Chrome App Store App Library Item by clicking the checkbox.
Paste the contents from the template into the Configuration dictionary section and edit the values as needed for your organization.
Click Save when completed.
Removing Chrome Browser Cloud Management
To unenroll a Chrome Browser, please reference the Unenroll a Device section of Google's Chrome Browser Cloud Management Documentation.