SAP Privileges 2 includes native support for much of the functionality provided by Kandji's Privileges Checker. For detailed guidance on managing SAP Privileges 2, visit SAP's wiki. A sample .mobileconfig containing all available settings for SAP Privileges 2 can be found in their GitHub repo.
What is SAP Privileges?
SAP Privileges is an open-source tool for macOS that allows users to temporarily elevate their user accounts from standard to administrative when needed. This is particularly useful in environments where security best practices suggest that users should operate with the least privileges necessary for daily tasks but occasionally need administrative rights for specific actions.
How does SAP Privileges work?
The SAP Privileges app for macOS allows users to elevate their privileges to perform administrative tasks temporarily. The built-in functionality of SAP Privileges supports time-based rights expiration, but only if the privileges are first granted by right-clicking the Dock icon and selecting the "Toggle Privileges" option. This means that the app will revert the user to standard privileges after a set period if they use this specific method to elevate their rights.
However, users can also launch the full SAP Privileges app to elevate their privileges, which bypasses the Dock icon method. To address this, we have released companion code that enforces the timeout even when privileges are escalated through other methods, such as launching the full app.
Configuring SAP Privileges in Kandji
Requirements
Privileges Checker audit script (GitHub Link)
Privileges Checker remediation script (GitHub Link)
A tool for custom profile creation, such as iMazing Profile Editor
The SAP Privileges Auto App, Custom Script, and Custom Profile must all be added to the same Blueprint(s)
The Demote user accounts to standard Parameter must be disabled on any Assignment Maps or Classic Blueprints where Privileges is assigned
Adding the SAP Privileges Auto App
This Auto App deploys a configuration profile allowing background items for SAP Privileges and Privileges Checker. This is to ensure core functionality for the add-on, and has no impact if Privileges Checker is not present.
To add this Library Item to your Kandji Library, follow the steps outlined in the Library Overview article.
Assign the Auto App to a test Blueprint.
Select desired installation method and hit Save.
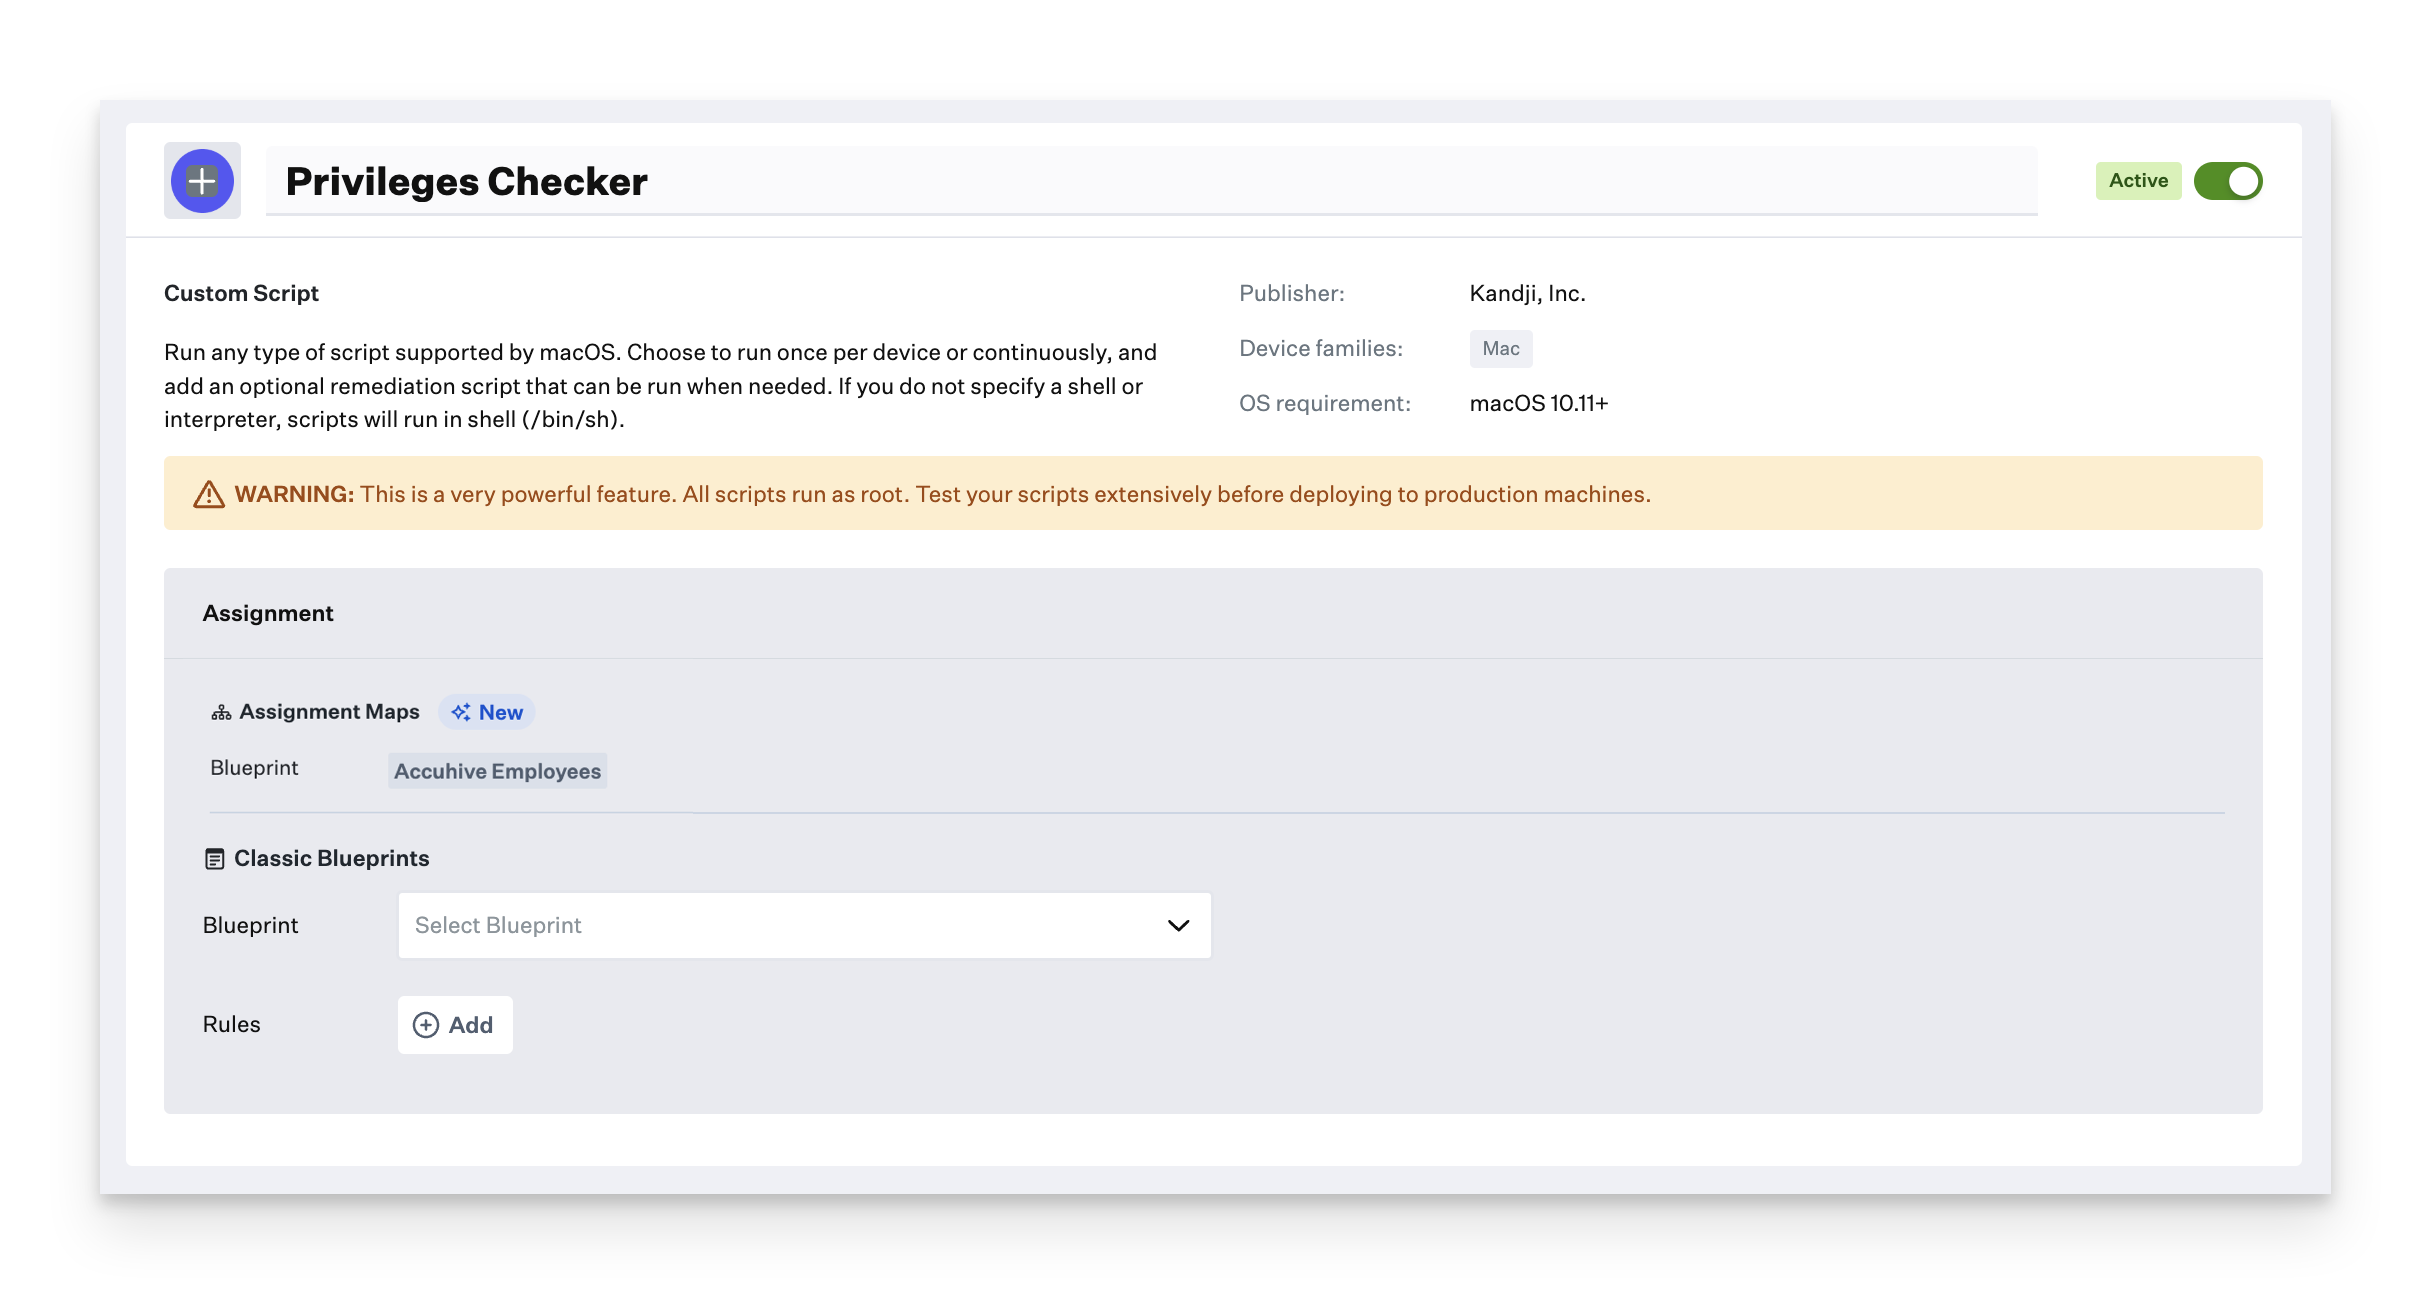
Adding and Configuring the Privileges Checker Script
Once this script is deployed, Privileges Checker will revoke rights for the logged-in user after the set timeout has expired.
Add a Custom Script Library Item
To add this Library Item to your Kandji Library, follow the steps outlined in the Library Overview article.
Give the new Accessory & Storage Access Library Item a Name.
Assign to your desired Assignment Maps or Classic Blueprints.
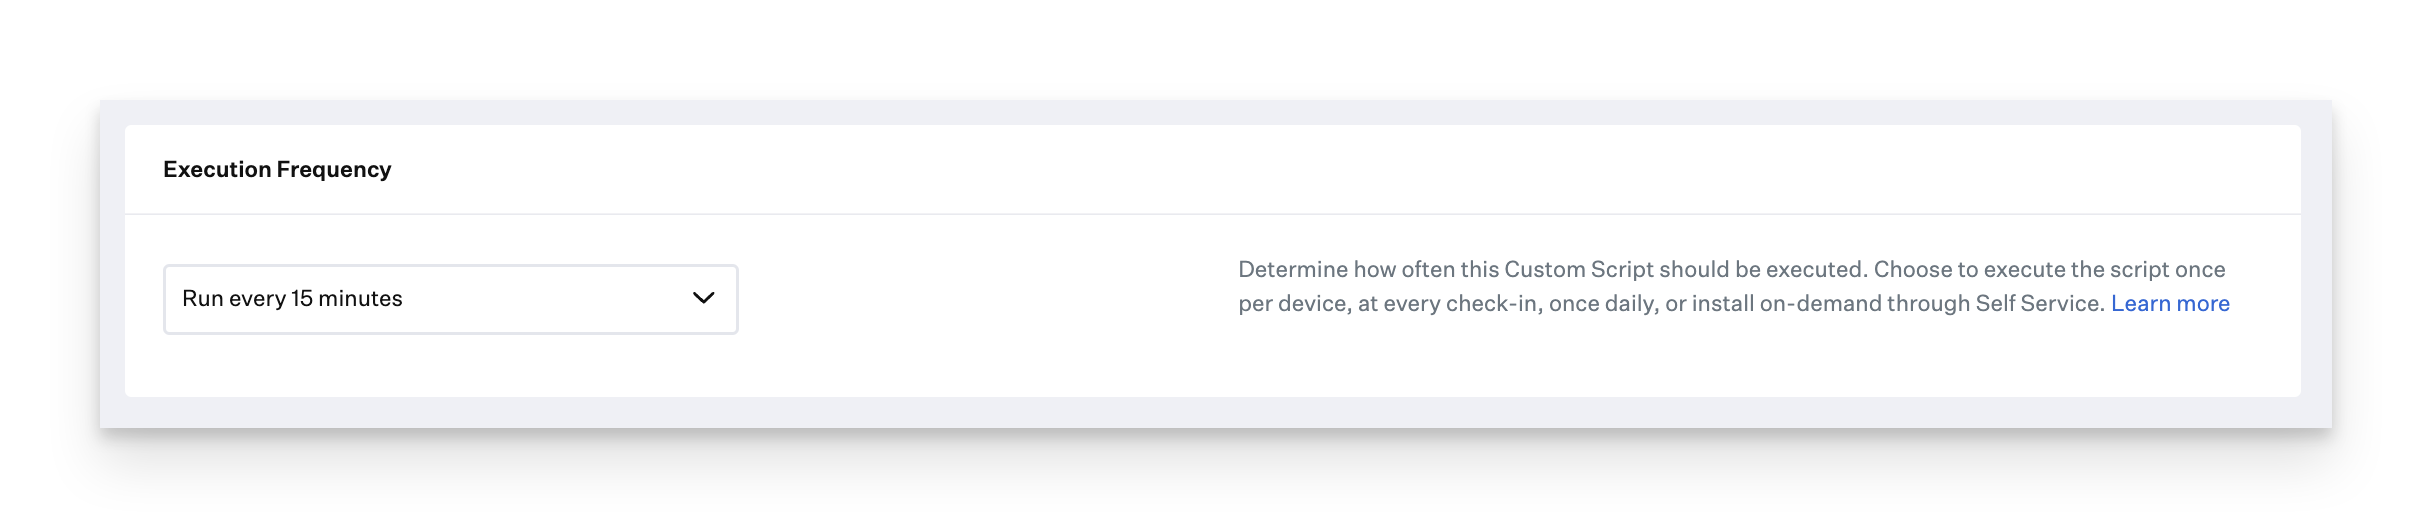
Select Run every 15 minutes as the Execution Frequency.
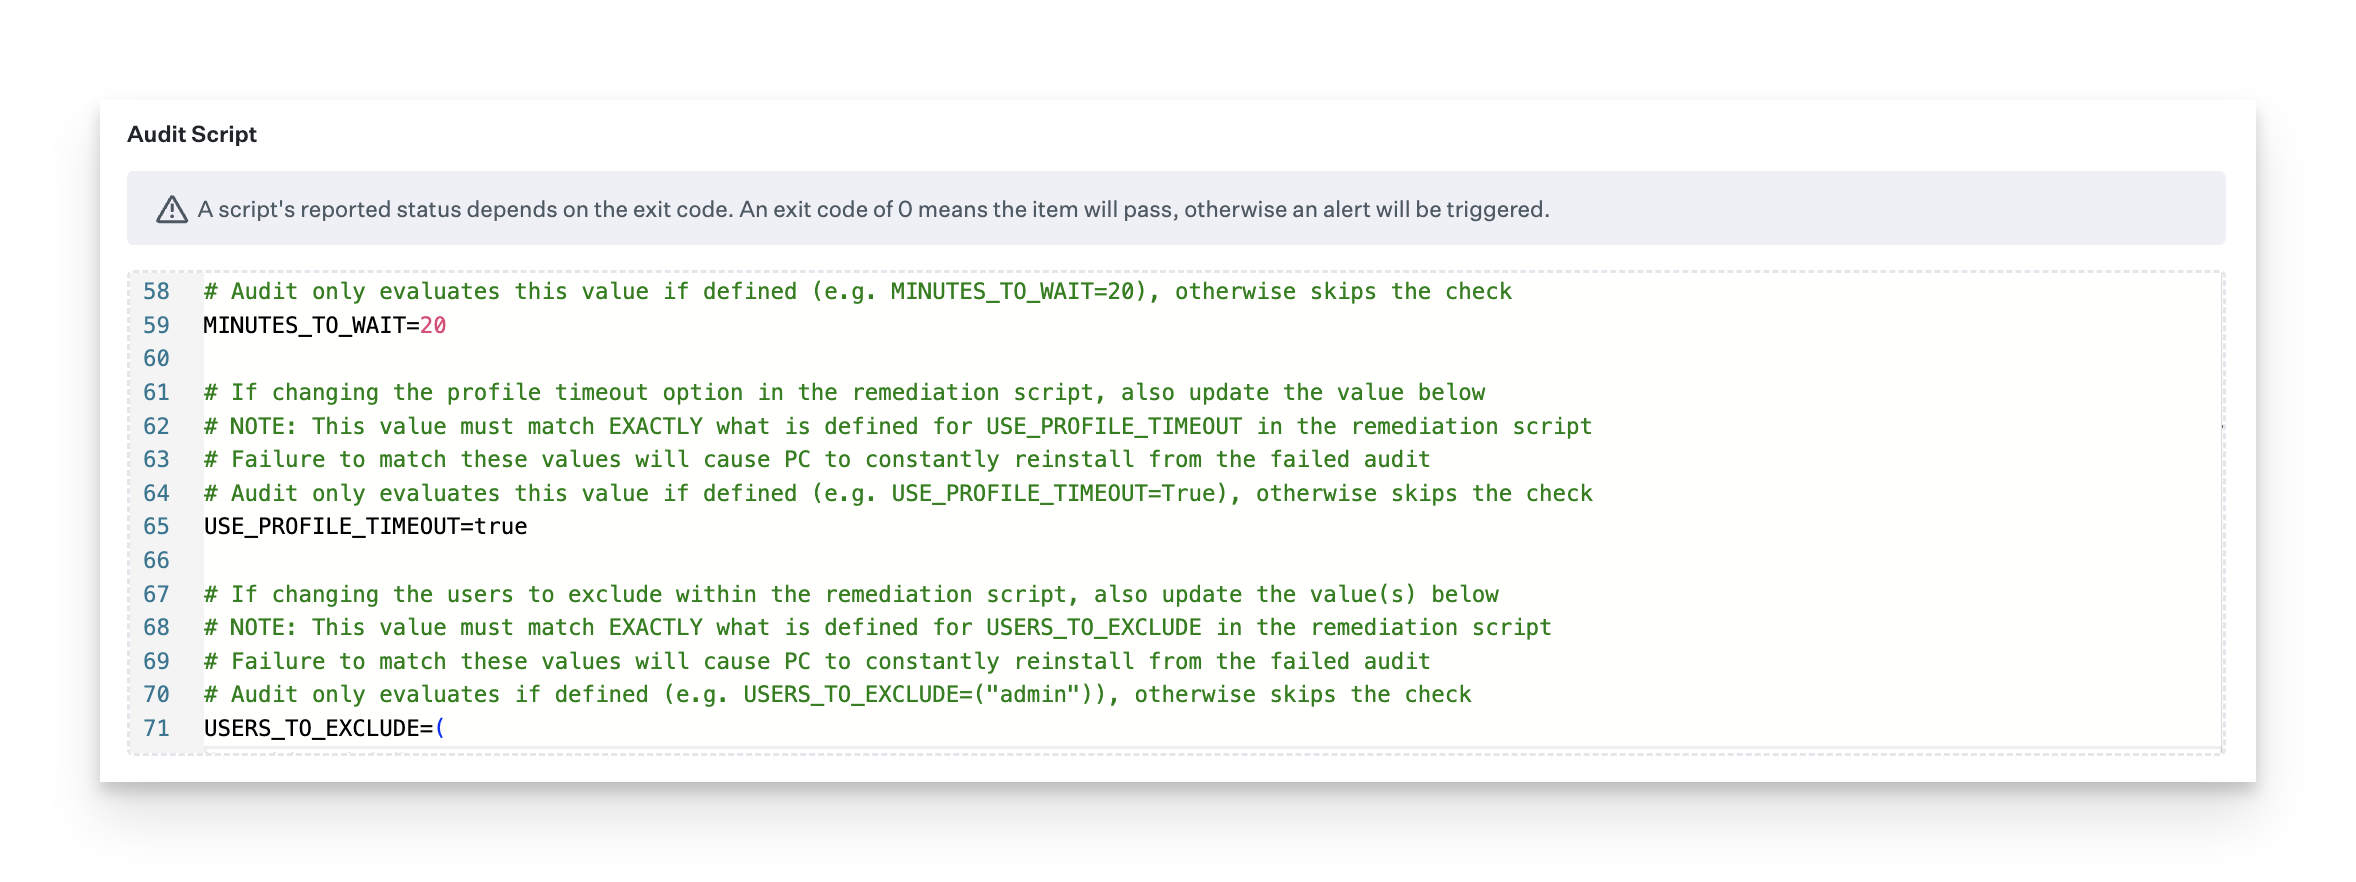
Paste the audit script you downloaded earlier into the Audit Script text field. Edit the script on line 65 to set a Boolean value for USE_PROFILE_TIMEOUT, and a string value for USERS_TO_EXCLUDE.
For USE_PROFILE_TIMEOUT:
Set to either True or False: Enforces a timeout in minutes from DockToggleTimeout key set in the Privileges configuration profile (see below).
If the value is marked True but no profile is installed, or if the DockToggleTimeout key is not defined, the timeout will default to MINUTES_TO_WAIT. Otherwise, the configuration profile will override the locally set value MINUTES_TO_WAIT.
For USERS_TO_EXCLUDE:
If no admin is defined, all admins will get demoted.
Admin names must be placed inside the double quotes.
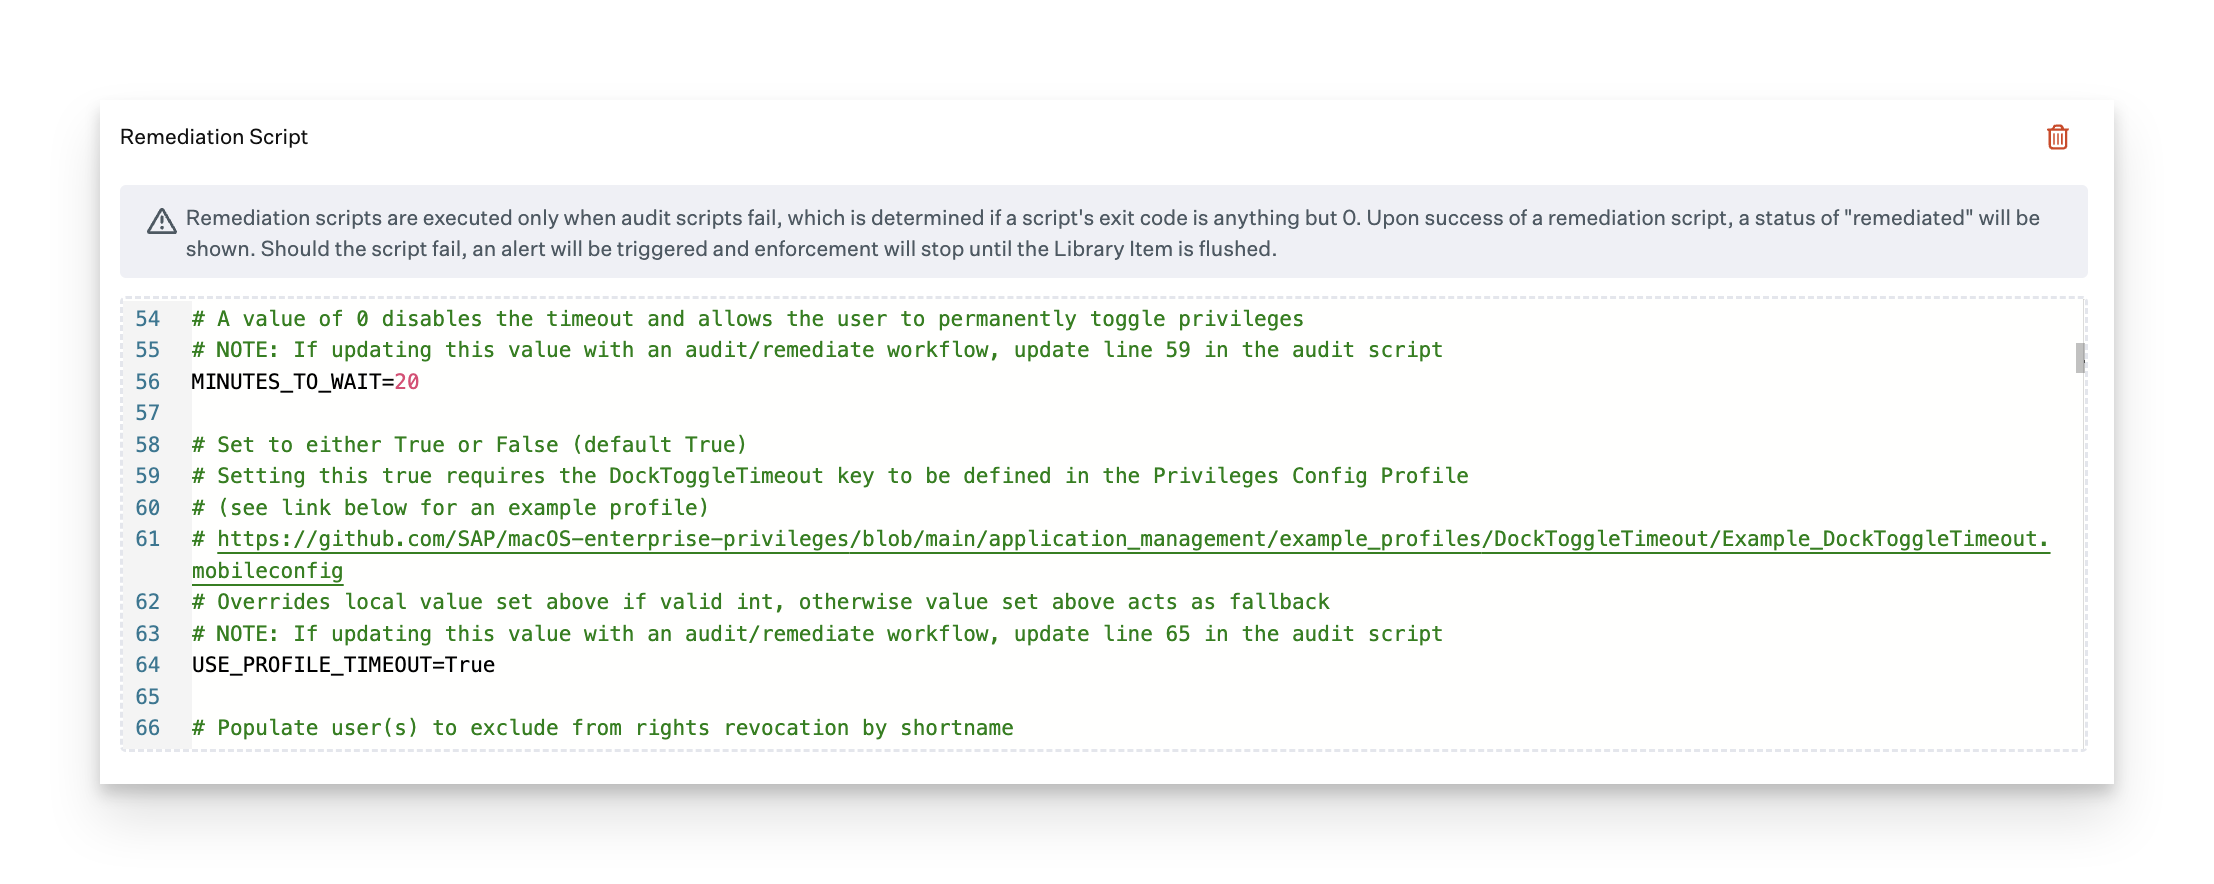
Paste the remediation script you downloaded earlier into the Remediation Script text field. Edit the script on line 56 to set an integer value for MINUTES_TO_WAIT. This is the number of minutes an end user should be allowed admin rights once granted.
Edit the script on line 64 to set a Boolean value for USE_PROFILE_TIMEOUT.
Set to either True or False: Enforces a timeout in minutes from DockToggleTimeout key set in the Privileges configuration profile (see below).
If the value is marked True but no profile is installed, or if the DockToggleTimeout key is not defined, the timeout will default to MINUTES_TO_WAIT. Otherwise, the configuration profile will override the locally set value MINUTES_TO_WAIT.
Edit the script on line 72 to set a string value for USERS_TO_EXCLUDE.
Admin names must be placed inside the double quotes.
Click Save.
Create a Custom Profile
Profile creation steps are optional if you are setting the rights timeout via script. You can also review additional profile options that SAP Privileges supports on their GitHub page.
If the EnforcePrivileges key in the Custom Profile is set with any value, it will disable the PrivilegesCLI used in the Privileges Checker and override its ability to demote users.
Open iMazing Profile Editor
On the left side, locate and click SAP Privileges under Available System Domains.
Click Add Configuration Payload.
Enter a value for Dock Toggle Timeout.
If Privileges is configured with the DockToggleTimeout payload, but Privileges Checker is not deployed, timed rights revocation will only occur if a user right-clicks the Privileges Dock icon and selects Toggle privileges.
Optionally, configure any additional settings for SAP Privileges as desired.
Click the General section; populate the required values for Name and Identifier.
Hit Command+S to save your profile.

Add and Configure the Custom Profile
To add this Library Item to your Kandji Library, follow the steps outlined in the Library Overview article.
Give the profile a Name.
Assign your custom profile to a test Blueprint.
Set the Device Families to Mac.
Upload the .mobileconfig you customized and saved above.
Save your custom profile.
Technical details about Privileges Checker can be found in our Kandji Support GitHub repo.