While this method of enforcing conditional access remains effective, using Microsoft Device Compliance (MSDC) is now the recommended approach for ensuring device compliance. Please see our MSDC configuration support articles for more information.
Prerequisites
Microsoft Entra ID (formerly Azure AD) (P1 or P2) subscription plan with Conditional Access included. See here for Microsoft Entra ID licensing information.
Licensing for Microsoft Defender for Cloud Apps (formerly Microsoft Cloud App Security). See here for Microsoft Defender for Cloud Apps licensing information.
For the configuration of Microsoft Entra ID and Microsoft Defender for Cloud Apps, an account with the Global Administrator role or Security Administrator role will be needed.
Trusted Root and Intermediate certificates (PEM file).
Managed PKI solution.
When using HTTP or DNS filtering, Microsoft's IP addresses will need to be added to the allow list. The IP addresses can be obtained from this Microsoft article.
Configure SCEP
The SCEP Library Item can be used with a Managed PKI solution such as Symantec Managed PKI, GlobalSign Managed PKI, Microsoft Entra application proxy with NDES, or SecureW2 for certificate distribution.
Configure and deploy a SCEP profile using the SCEP Library Item. For instructions, please refer to the SCEP Profile support article.
Deploy Root and Intermediate Certificates
Deploy the Root and Intermediate certificates that will be issuing the device certificates. For instructions, please refer to the Certificate Profile support article.
Create a Conditional Access Policy
Click here to go to the Conditional Access blade (you will be prompted to sign in if not already signed in) in Microsoft Entra ID (formerly Azure AD).
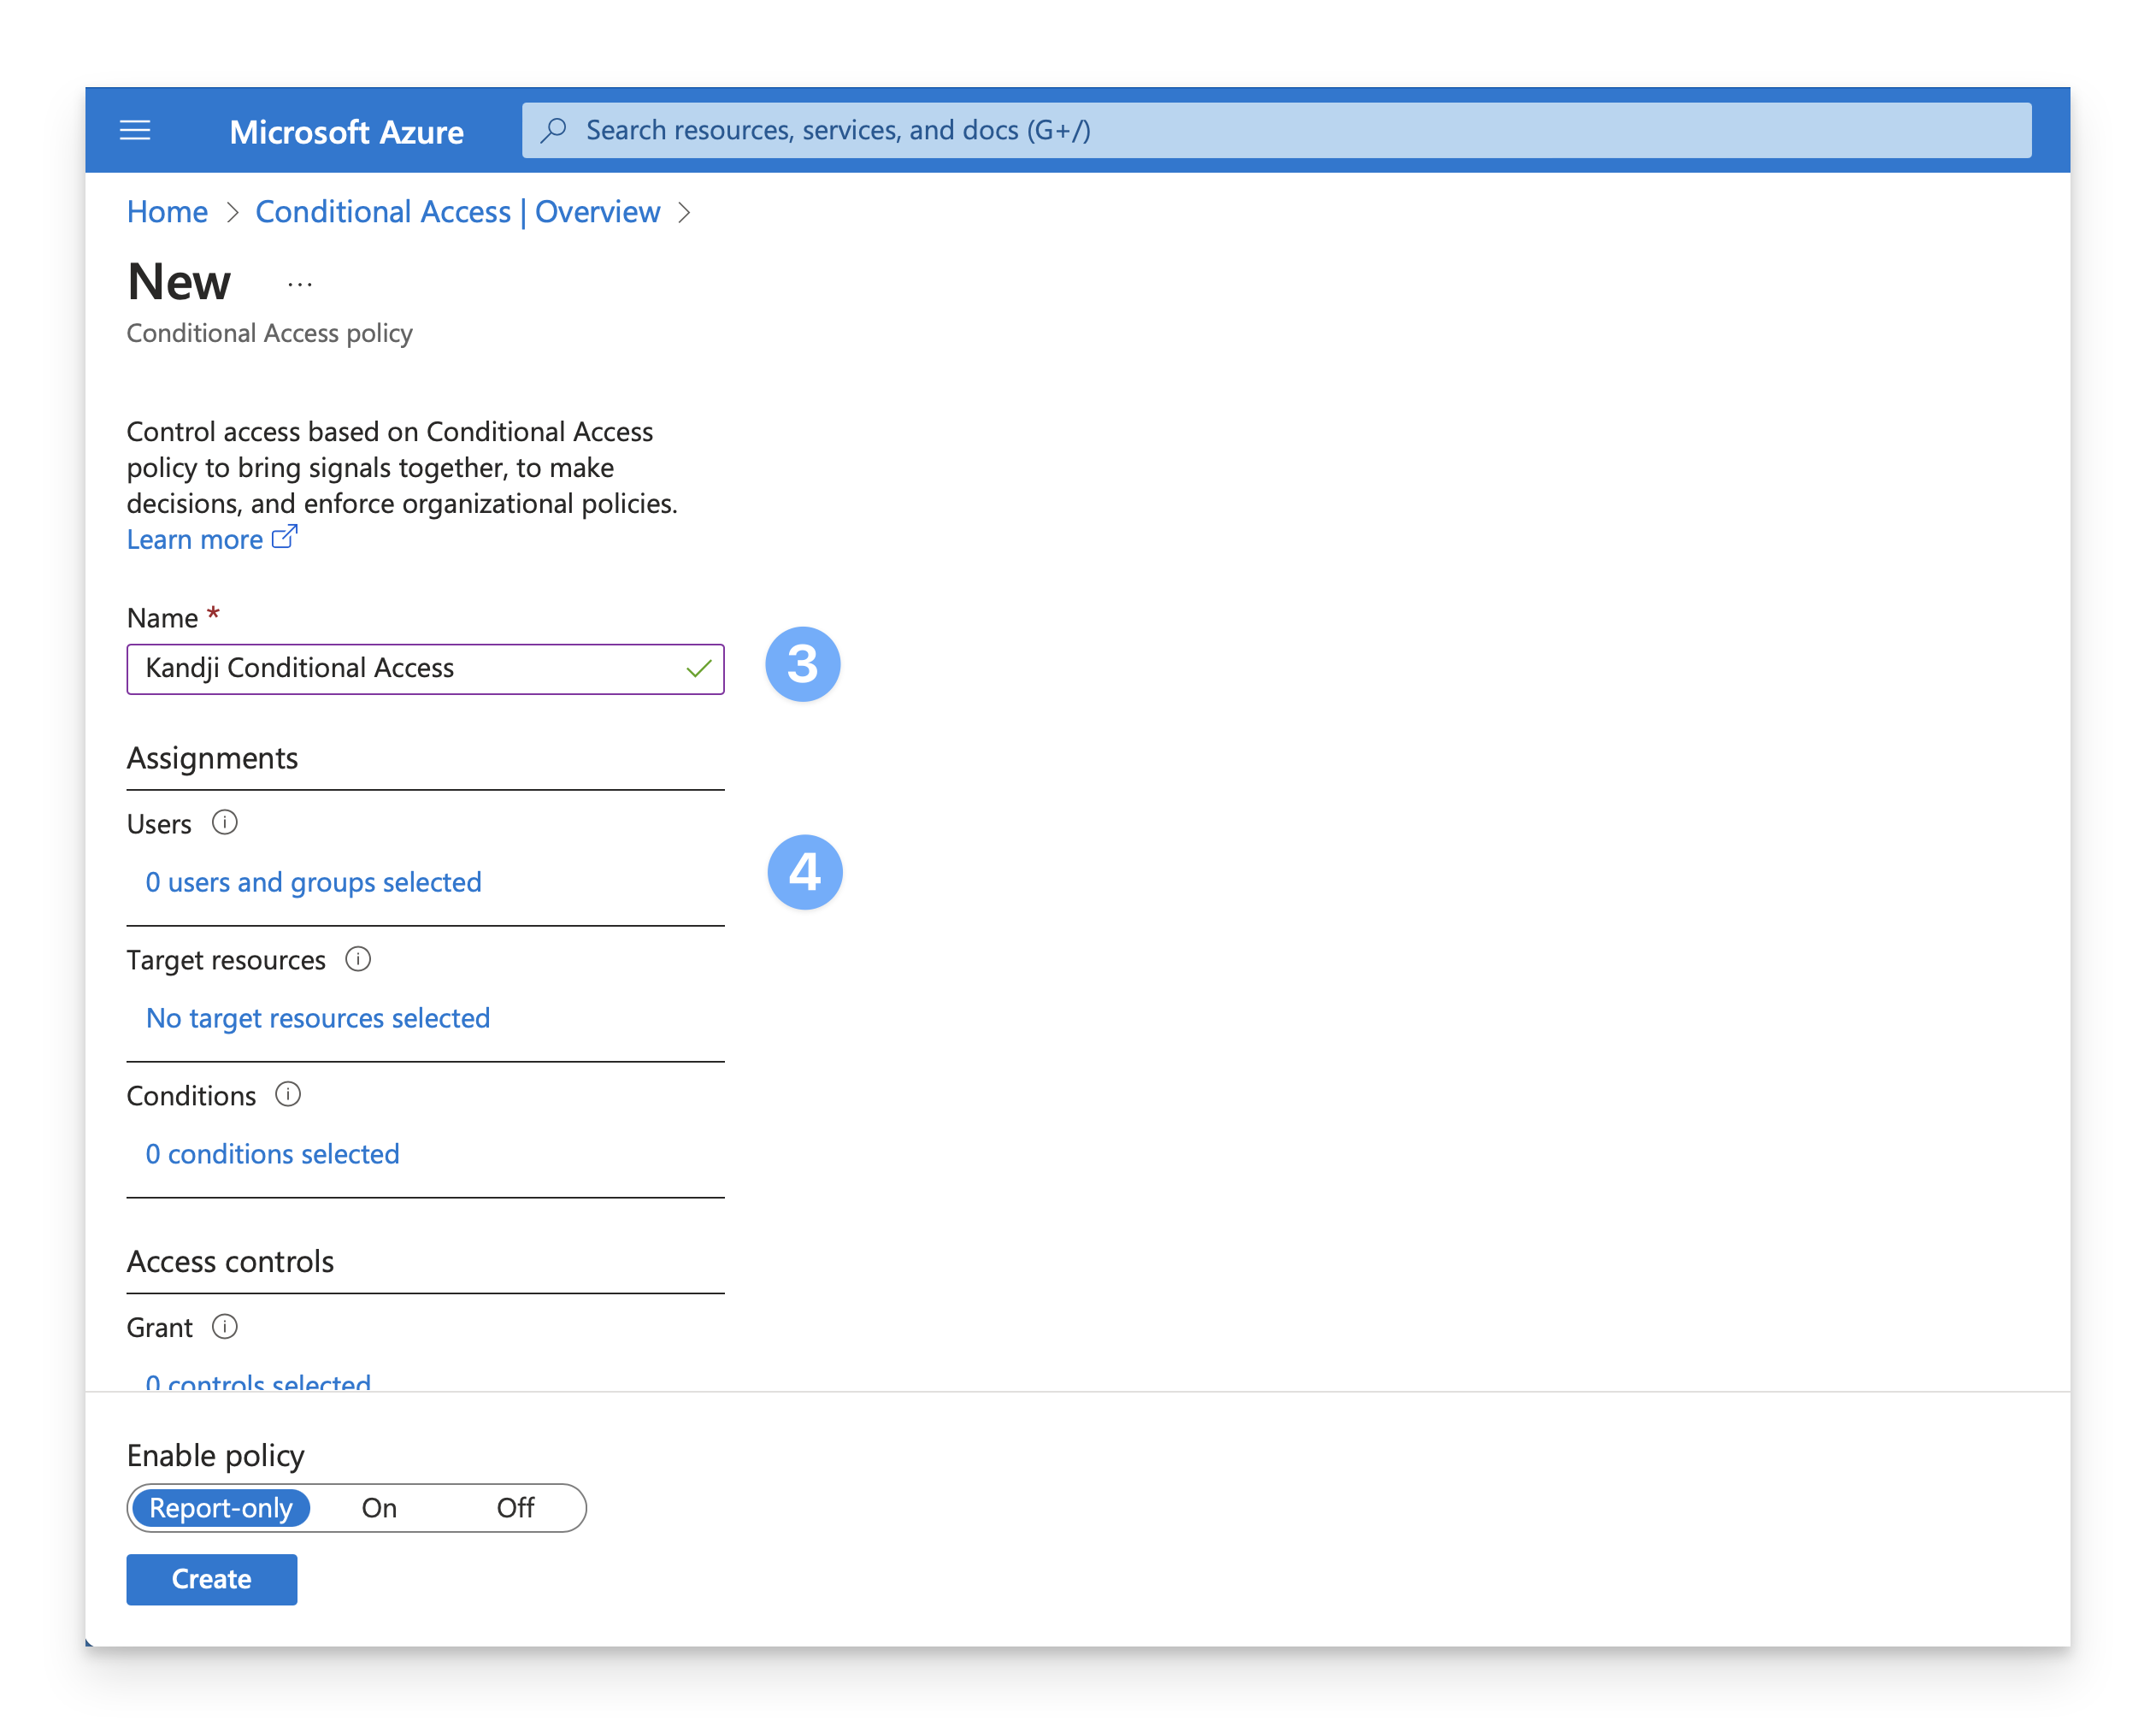
At the top of the Conditional Access blade, click + Create new policy.

In the Name field, enter a name for the Conditional Access policy, such as Kandji Conditional Access.
In the Assignments section, under Users, click on 0 users and groups selected.
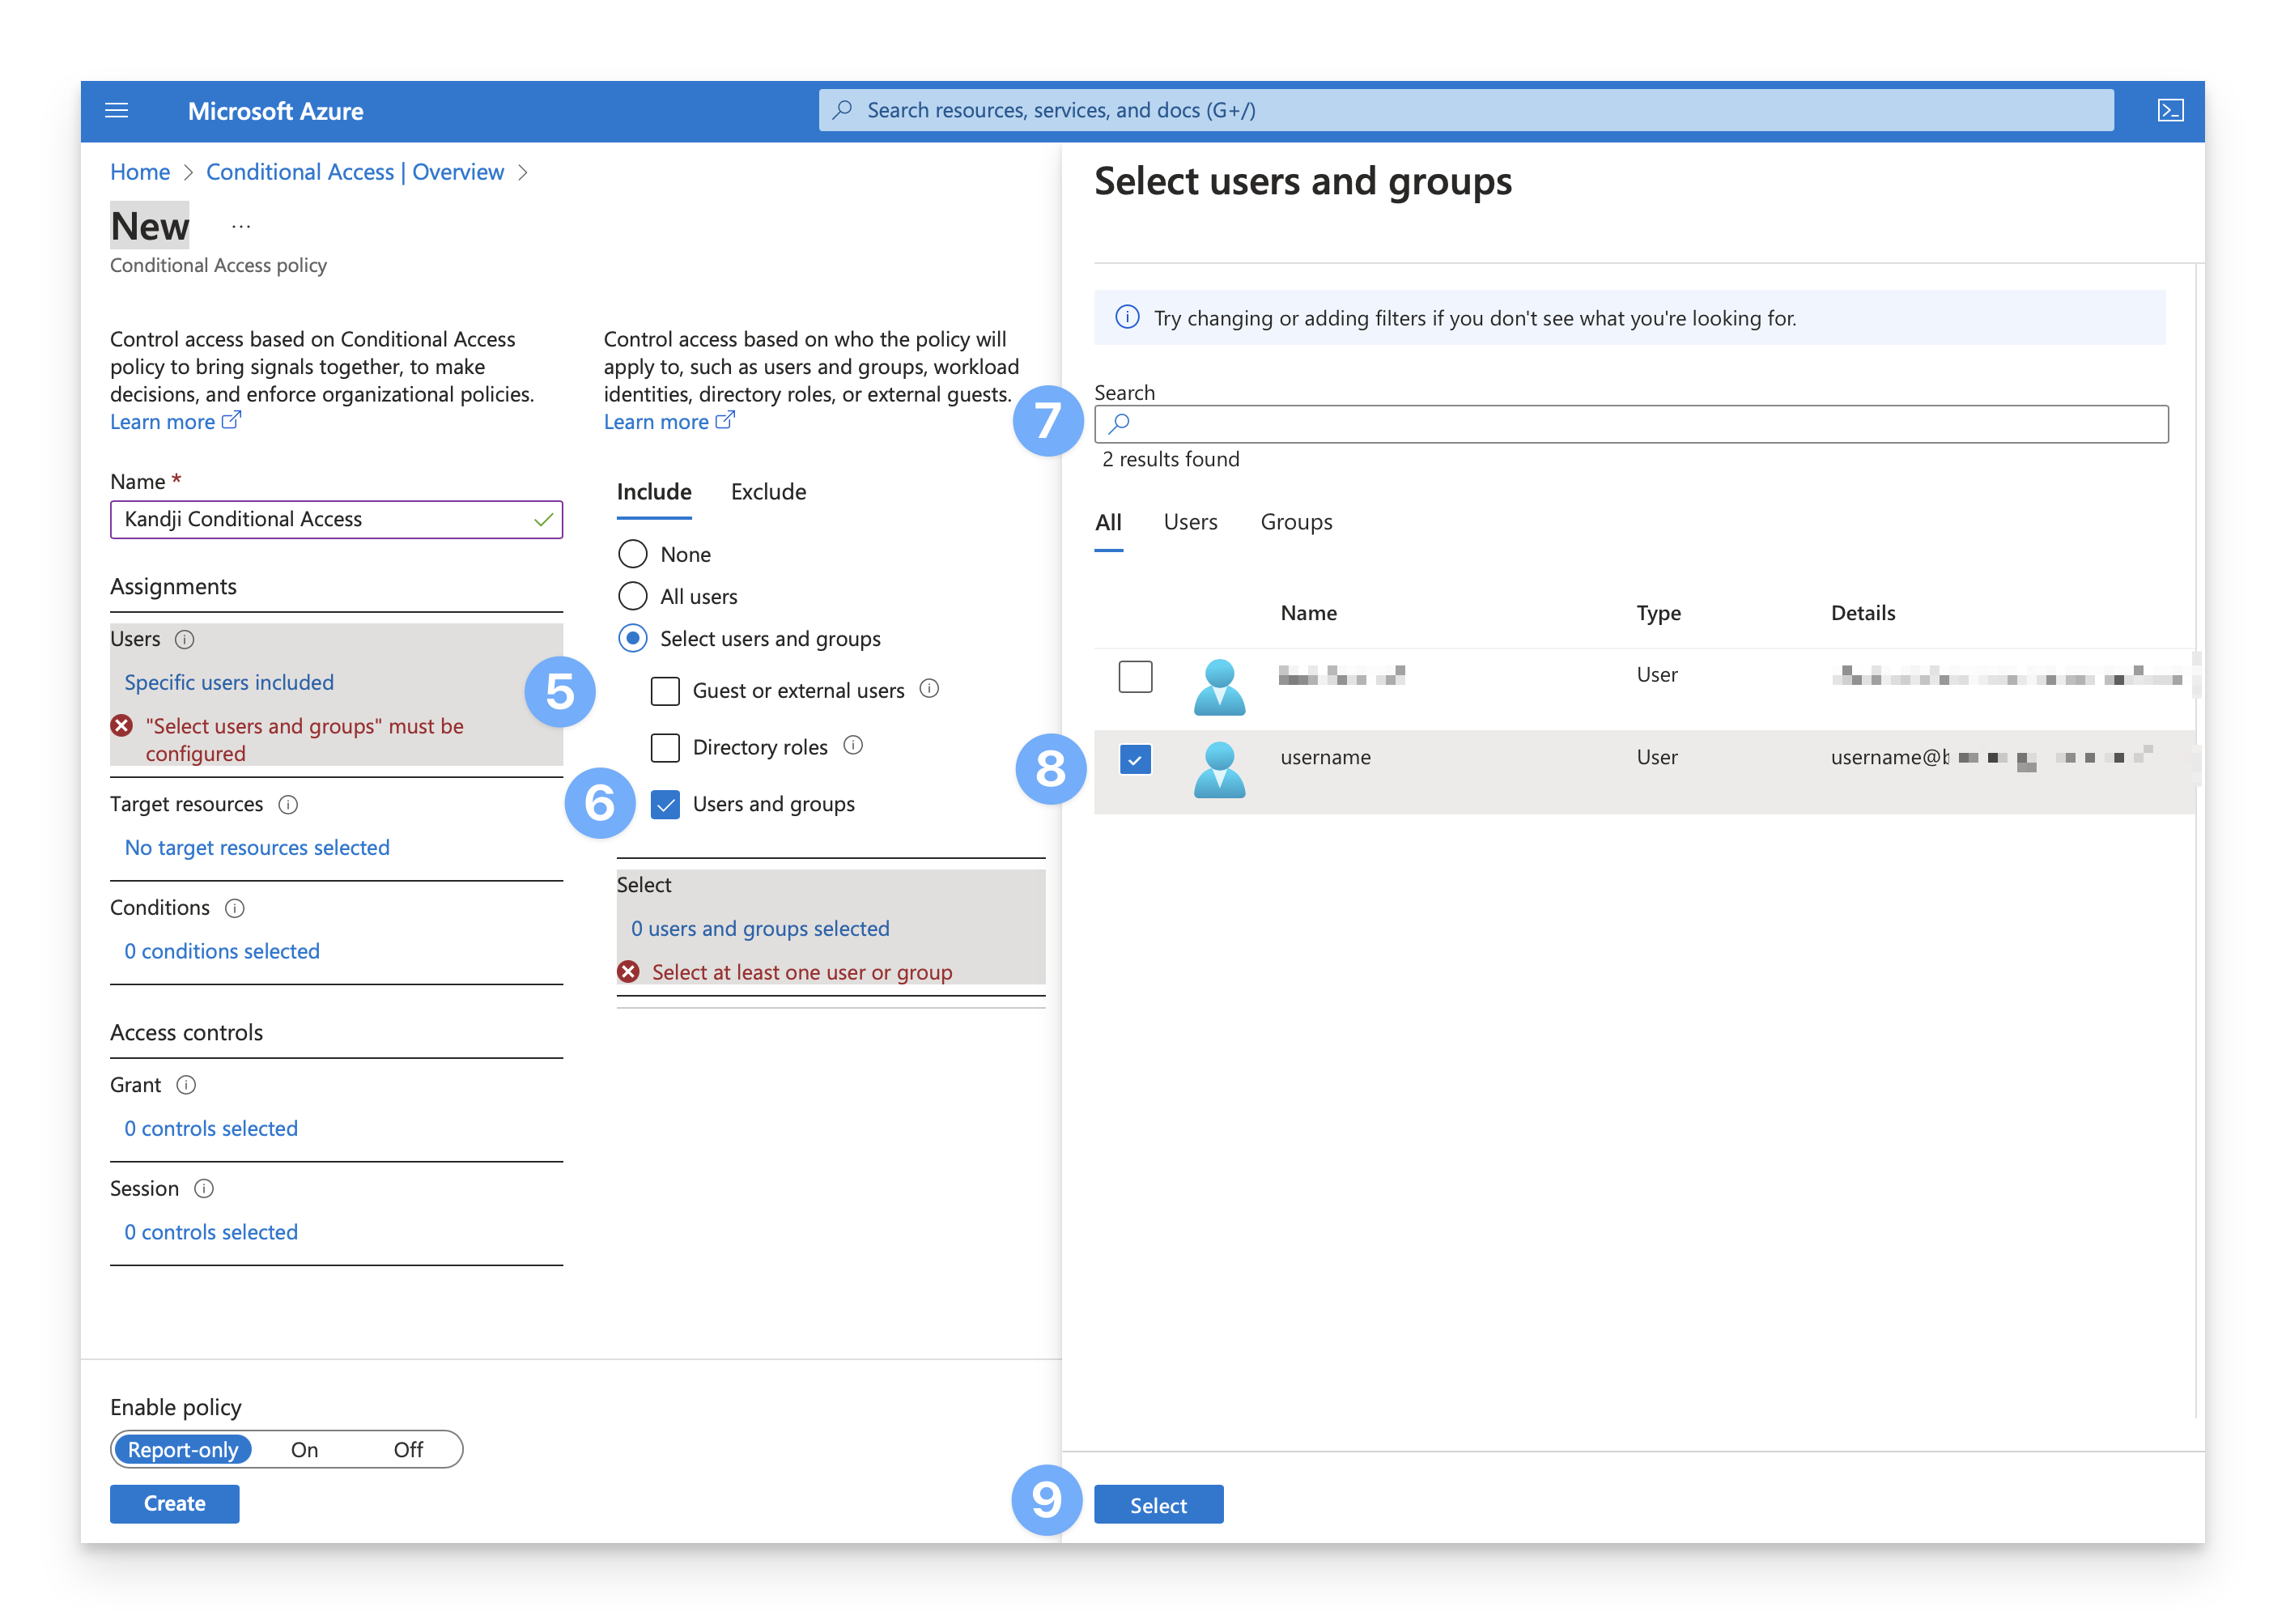
While testing and validating configurations and workflows, it is recommended to assign this policy to test user accounts before assigning it to production users. To do so, select the Select users and groups radio button.
Select the Users and groups checkbox.
Navigate to the upper right corner of the screen and search for the user accounts or groups to which you want to apply the policy.
Select the identified user accounts or groups.
To save the configuration, click on Select.
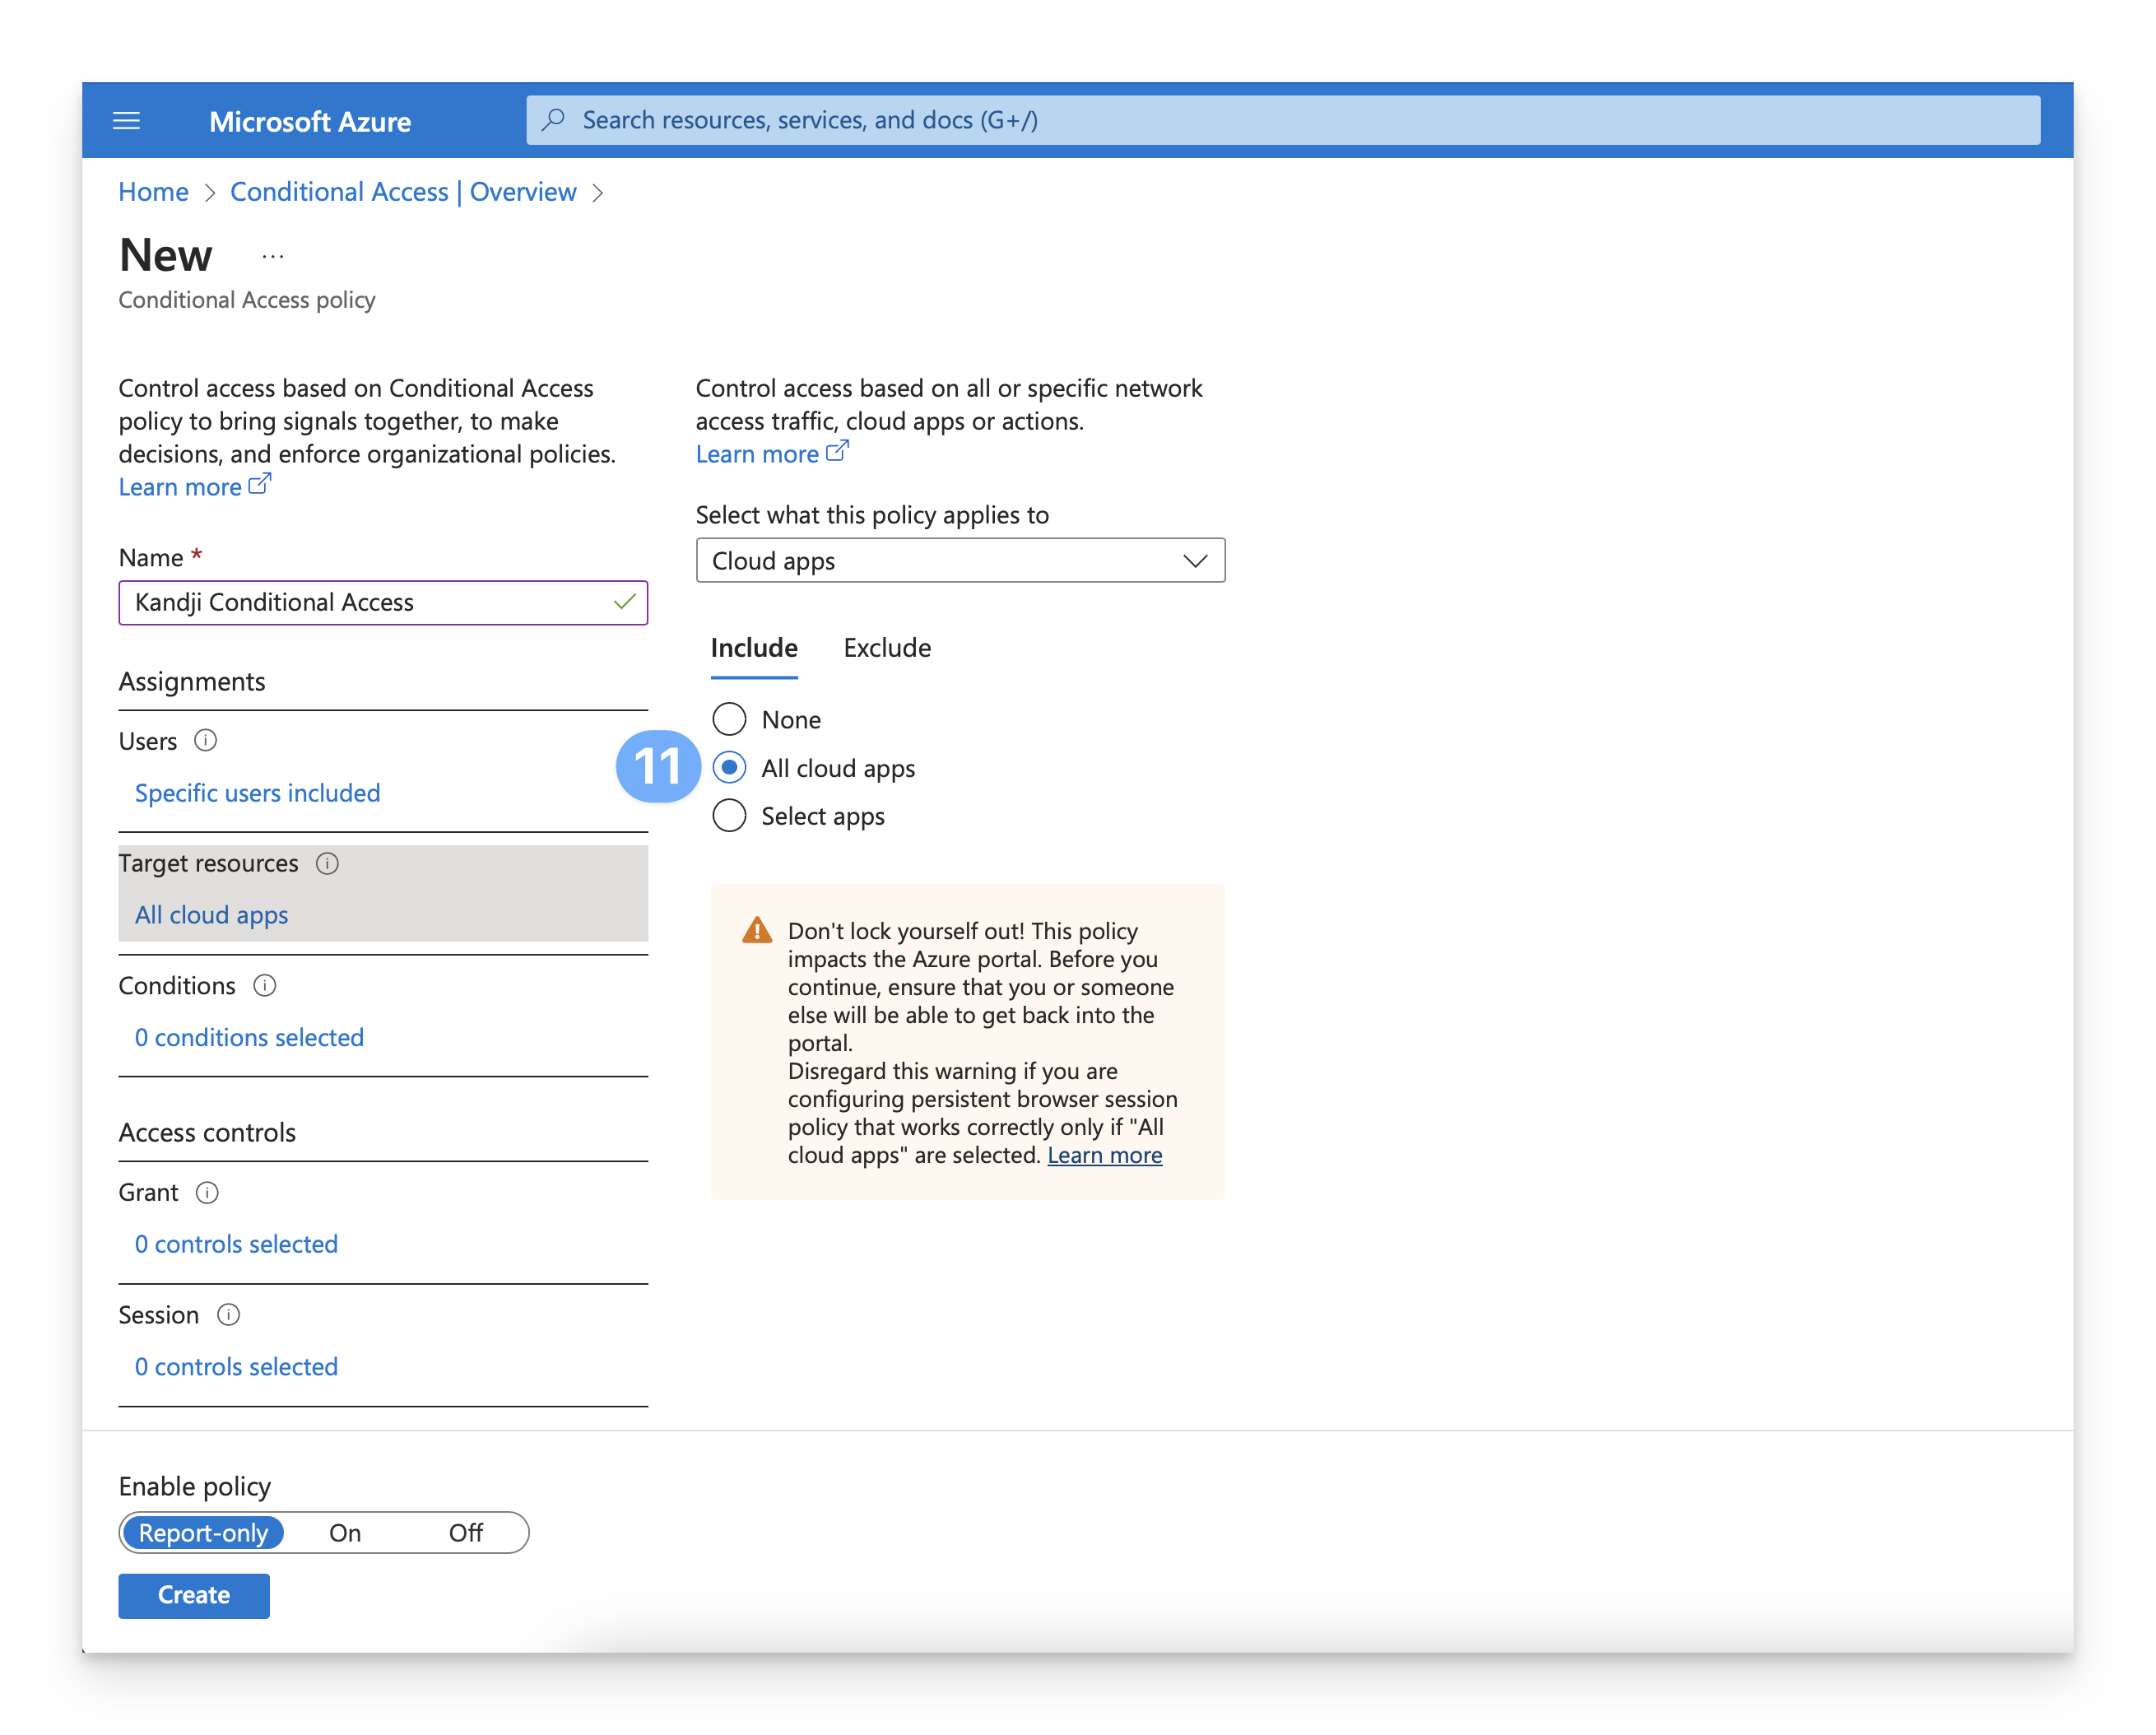
In the Assignments section, under Target resources, click on the No target resources selected link.
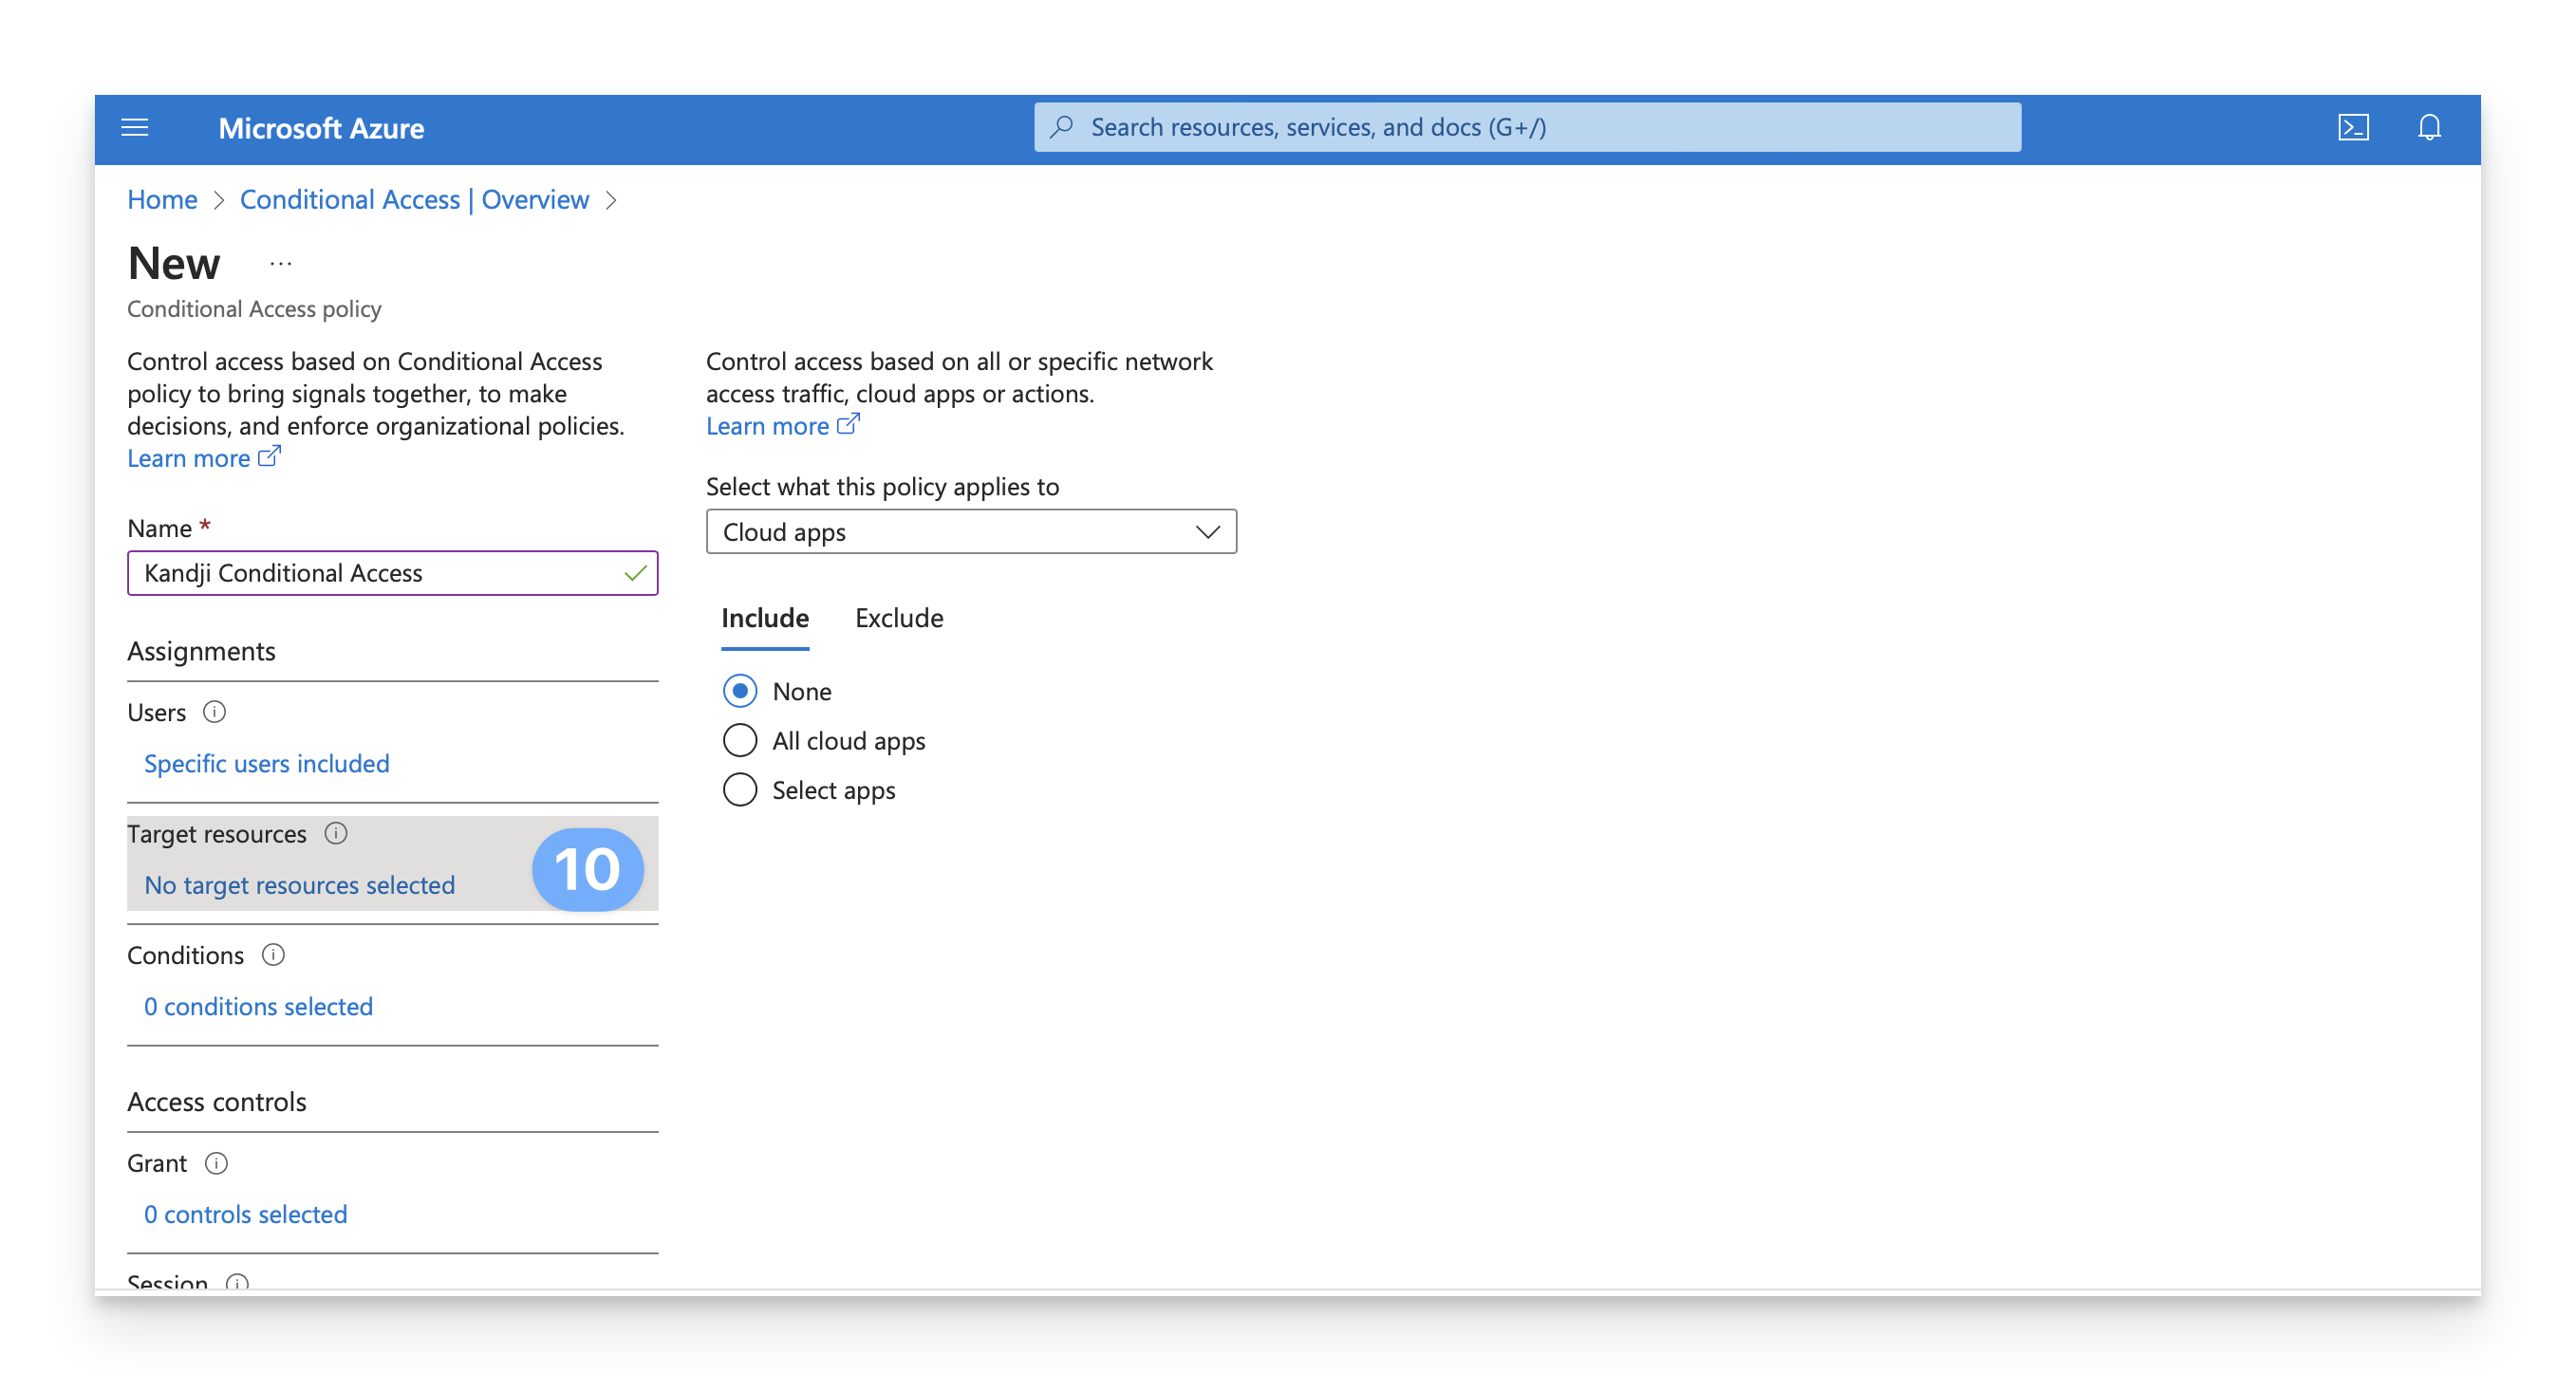
Select the All cloud apps radio button. Alternatively, you can select the Select apps radio button to narrow the scope to specific apps.
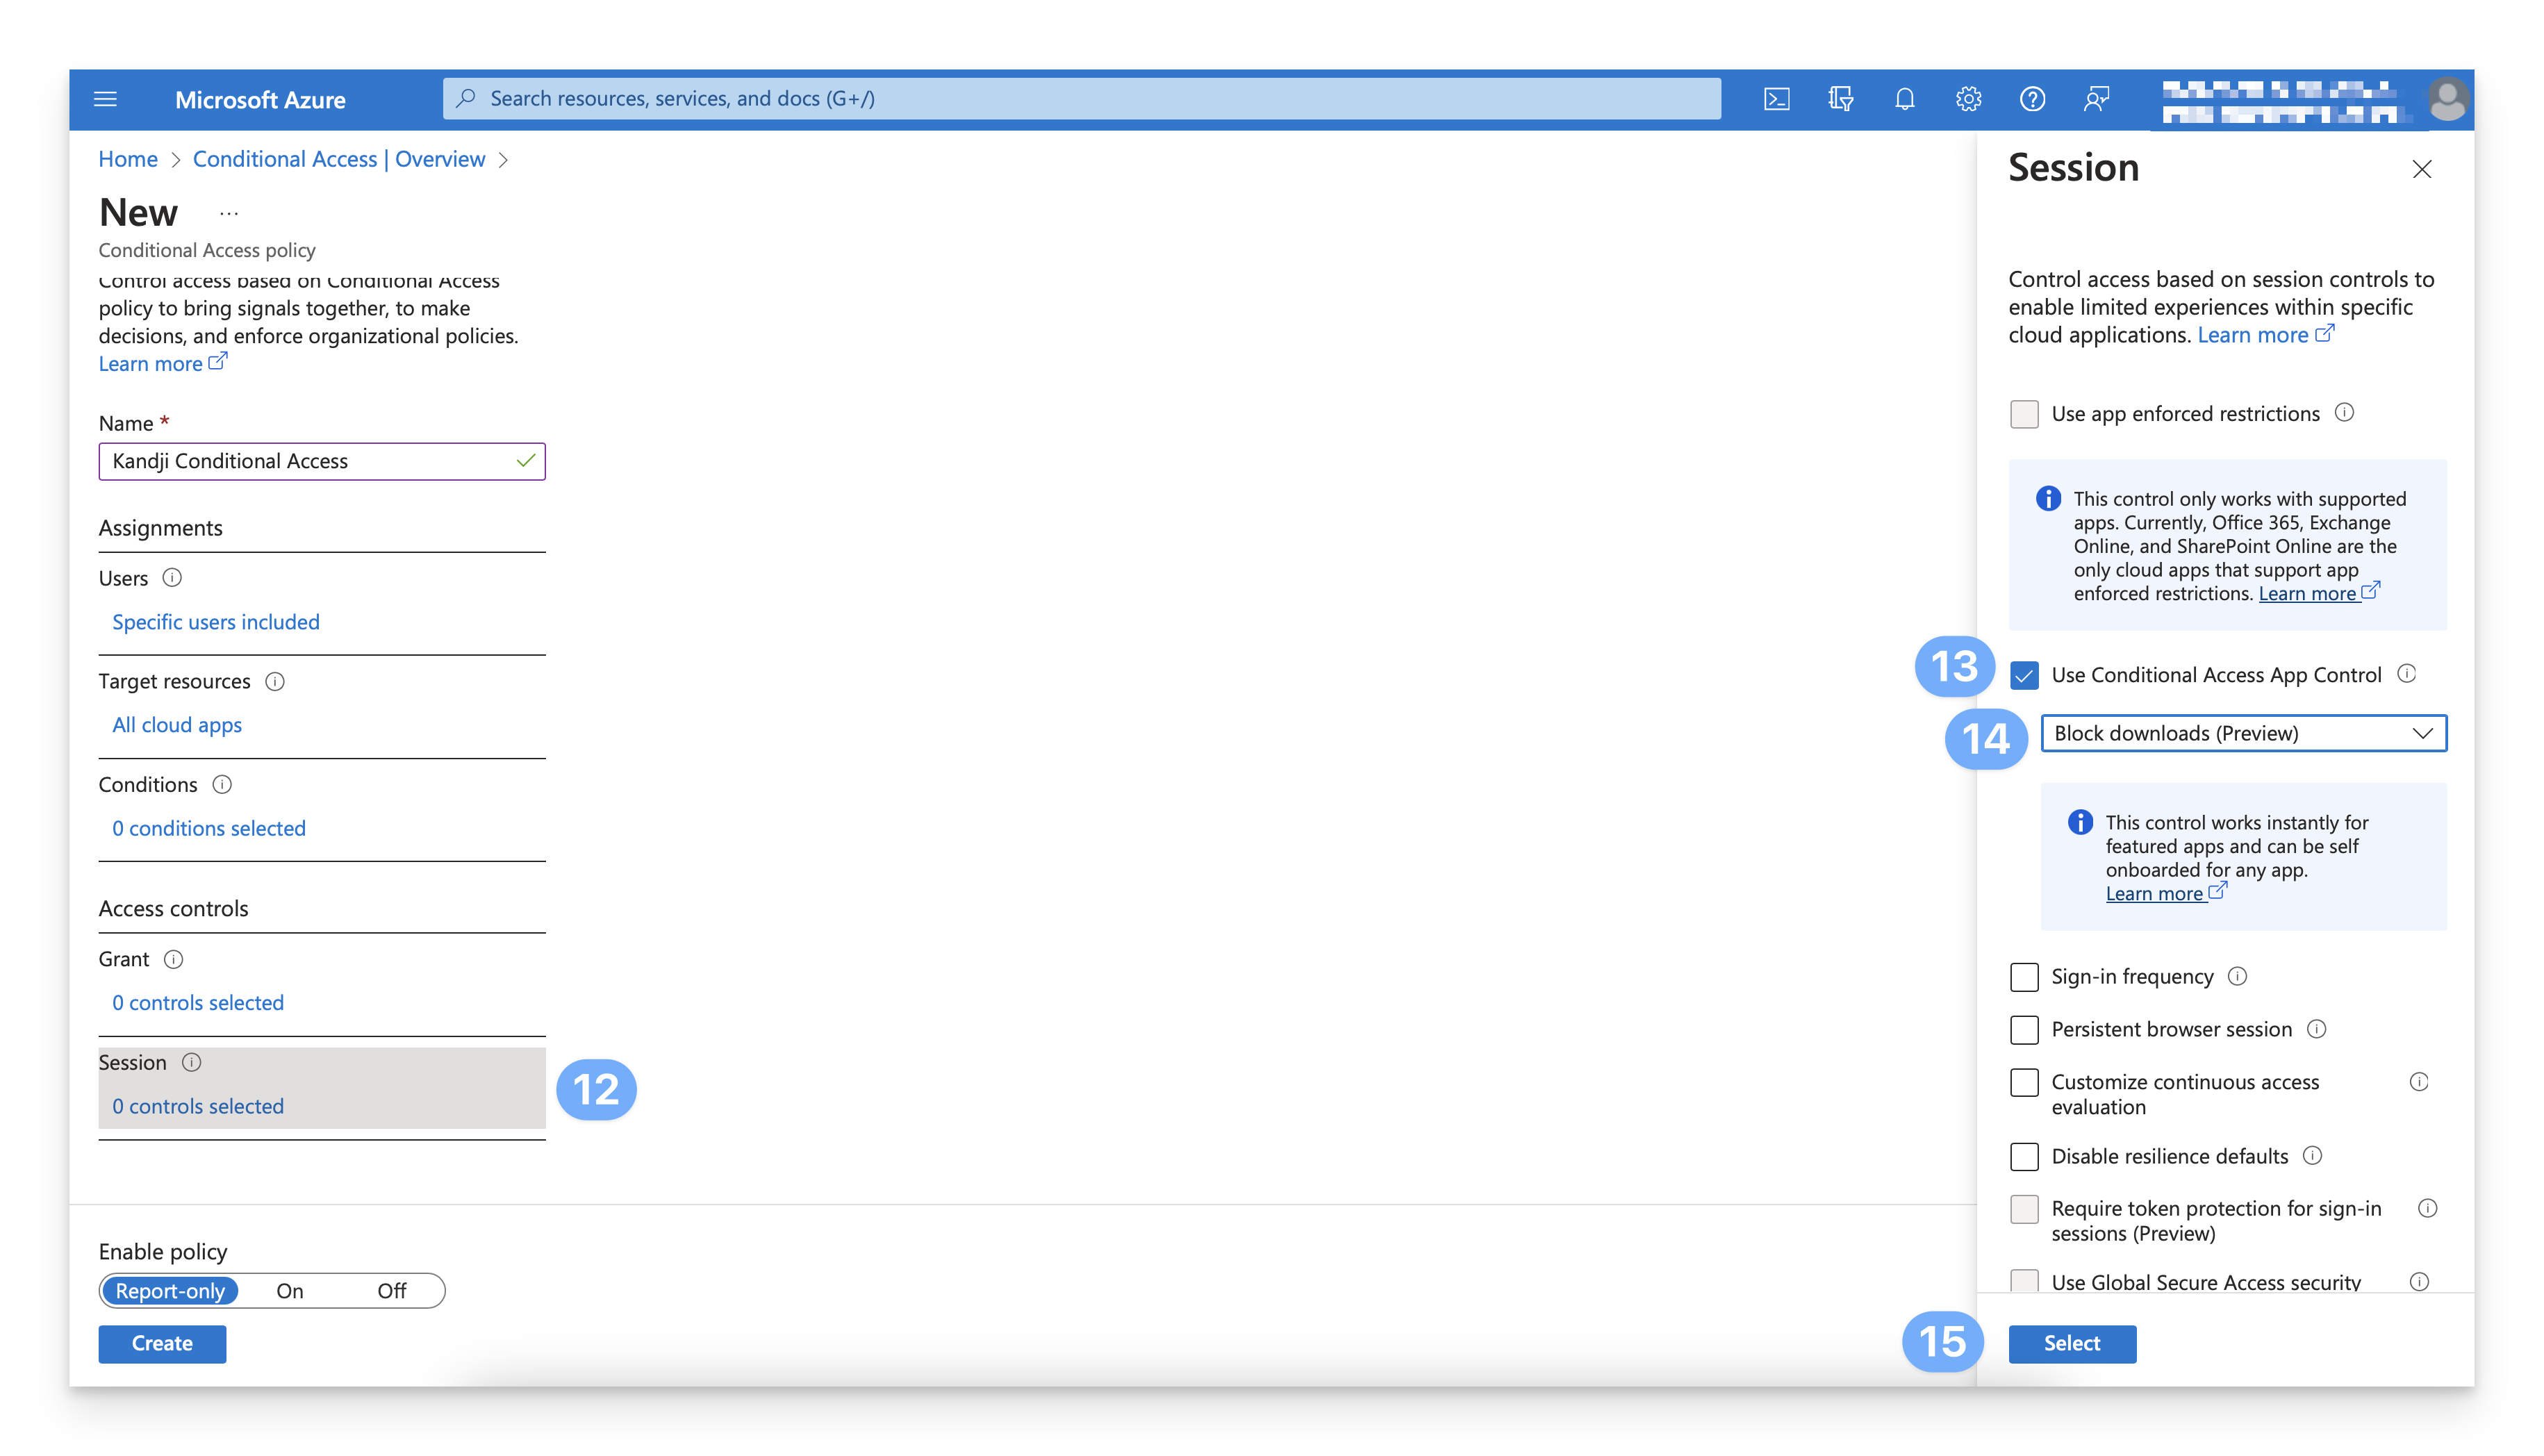
In the Access controls section, under Session, click on 0 controls selected.
Select Use Conditional Access App Control.
Under the Use Conditional Access App Control section, select Block downloads (Preview) from the dropdown menu. We will return to this setting later; the Block downloads (Preview) option is required initially to onboard and add the scoped apps in the Microsoft Defender portal.
To save the configuration, click Select.
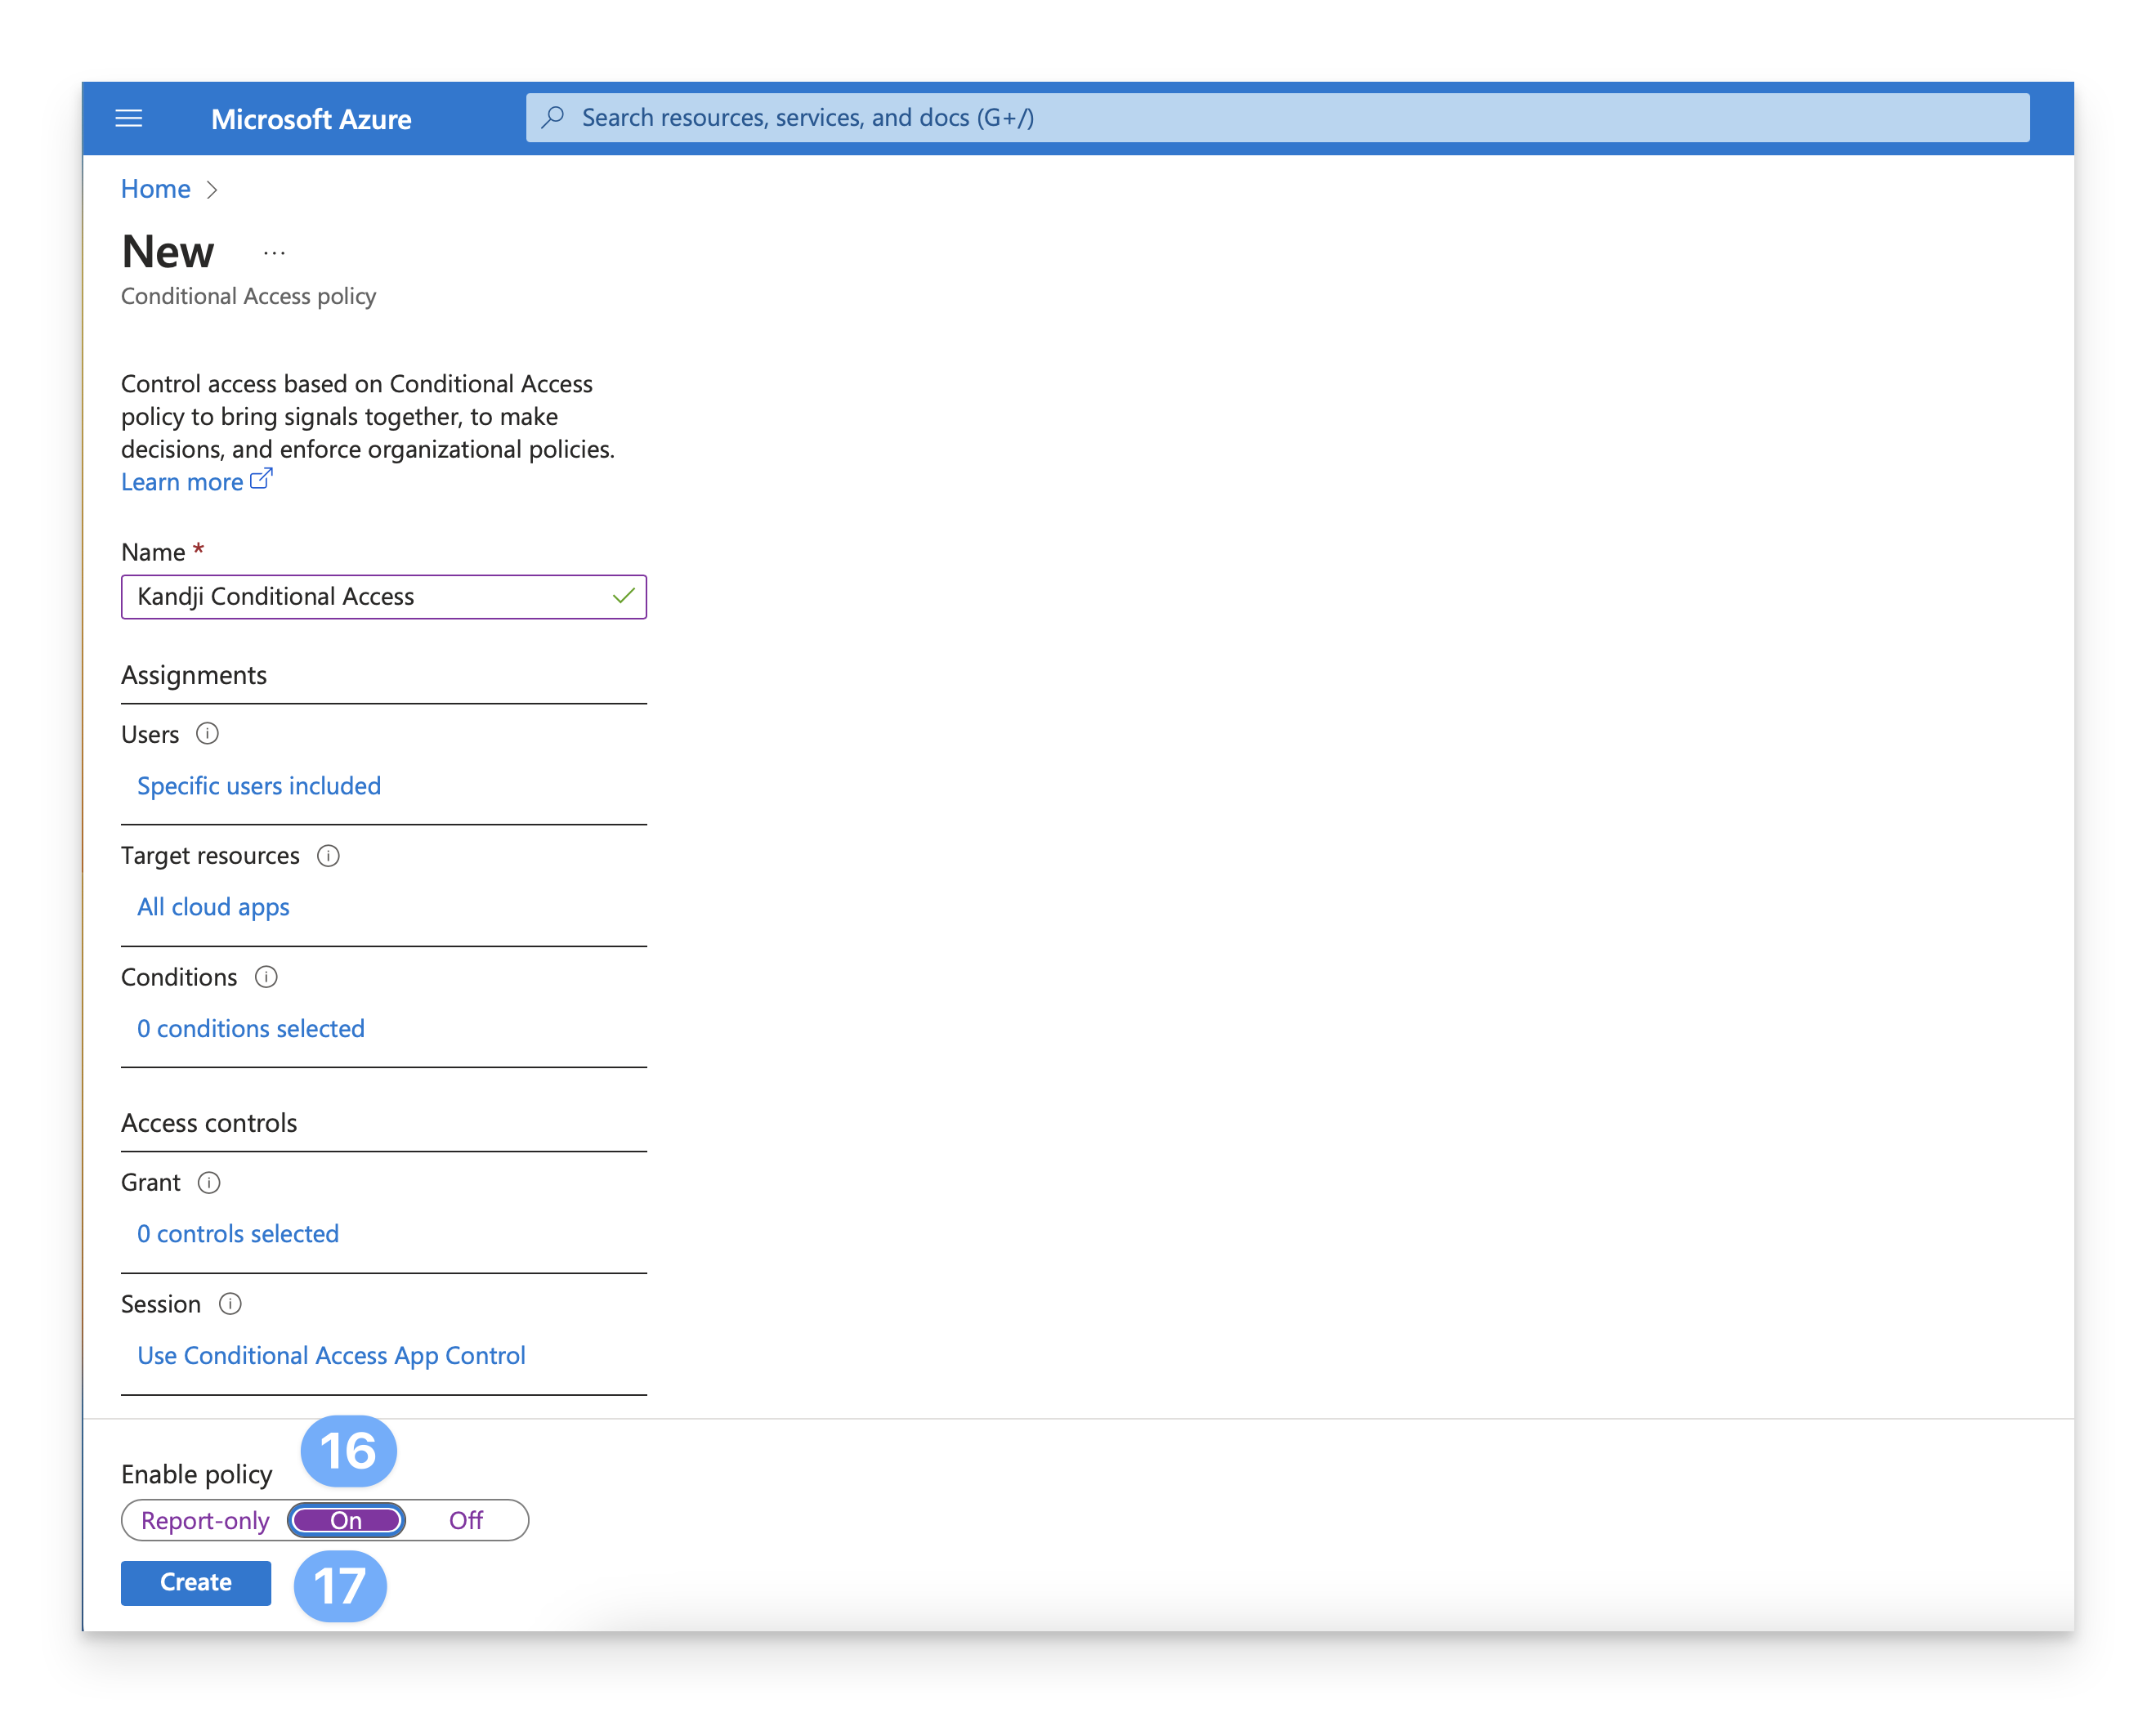
Under the Enable policy section, switch the policy to On. If prompted, go through the steps to disable Microsoft security defaults.
Click Create to save the policy.
Add the Scoped Cloud Apps to MDCA
Microsoft Defender for Cloud Apps (MDCA) uses Session Control, so to add the scoped apps to the Microsoft Defender portal, you will need to access each scoped cloud app with a test user account at least once, preferably in a private window session (⇧-⌘-N) if using Safari. We will be adding the Office 365 app in the following steps. The same process can be used to add additional apps to the Microsoft Defender portal.
On another device or in a private window, navigate to portal.office.com and sign in with a scoped test user account.
To confirm the cloud app was added to MDCA, navigate to security.microsoft.com and sign in with an administrative account or an account with the Security role assigned to it.
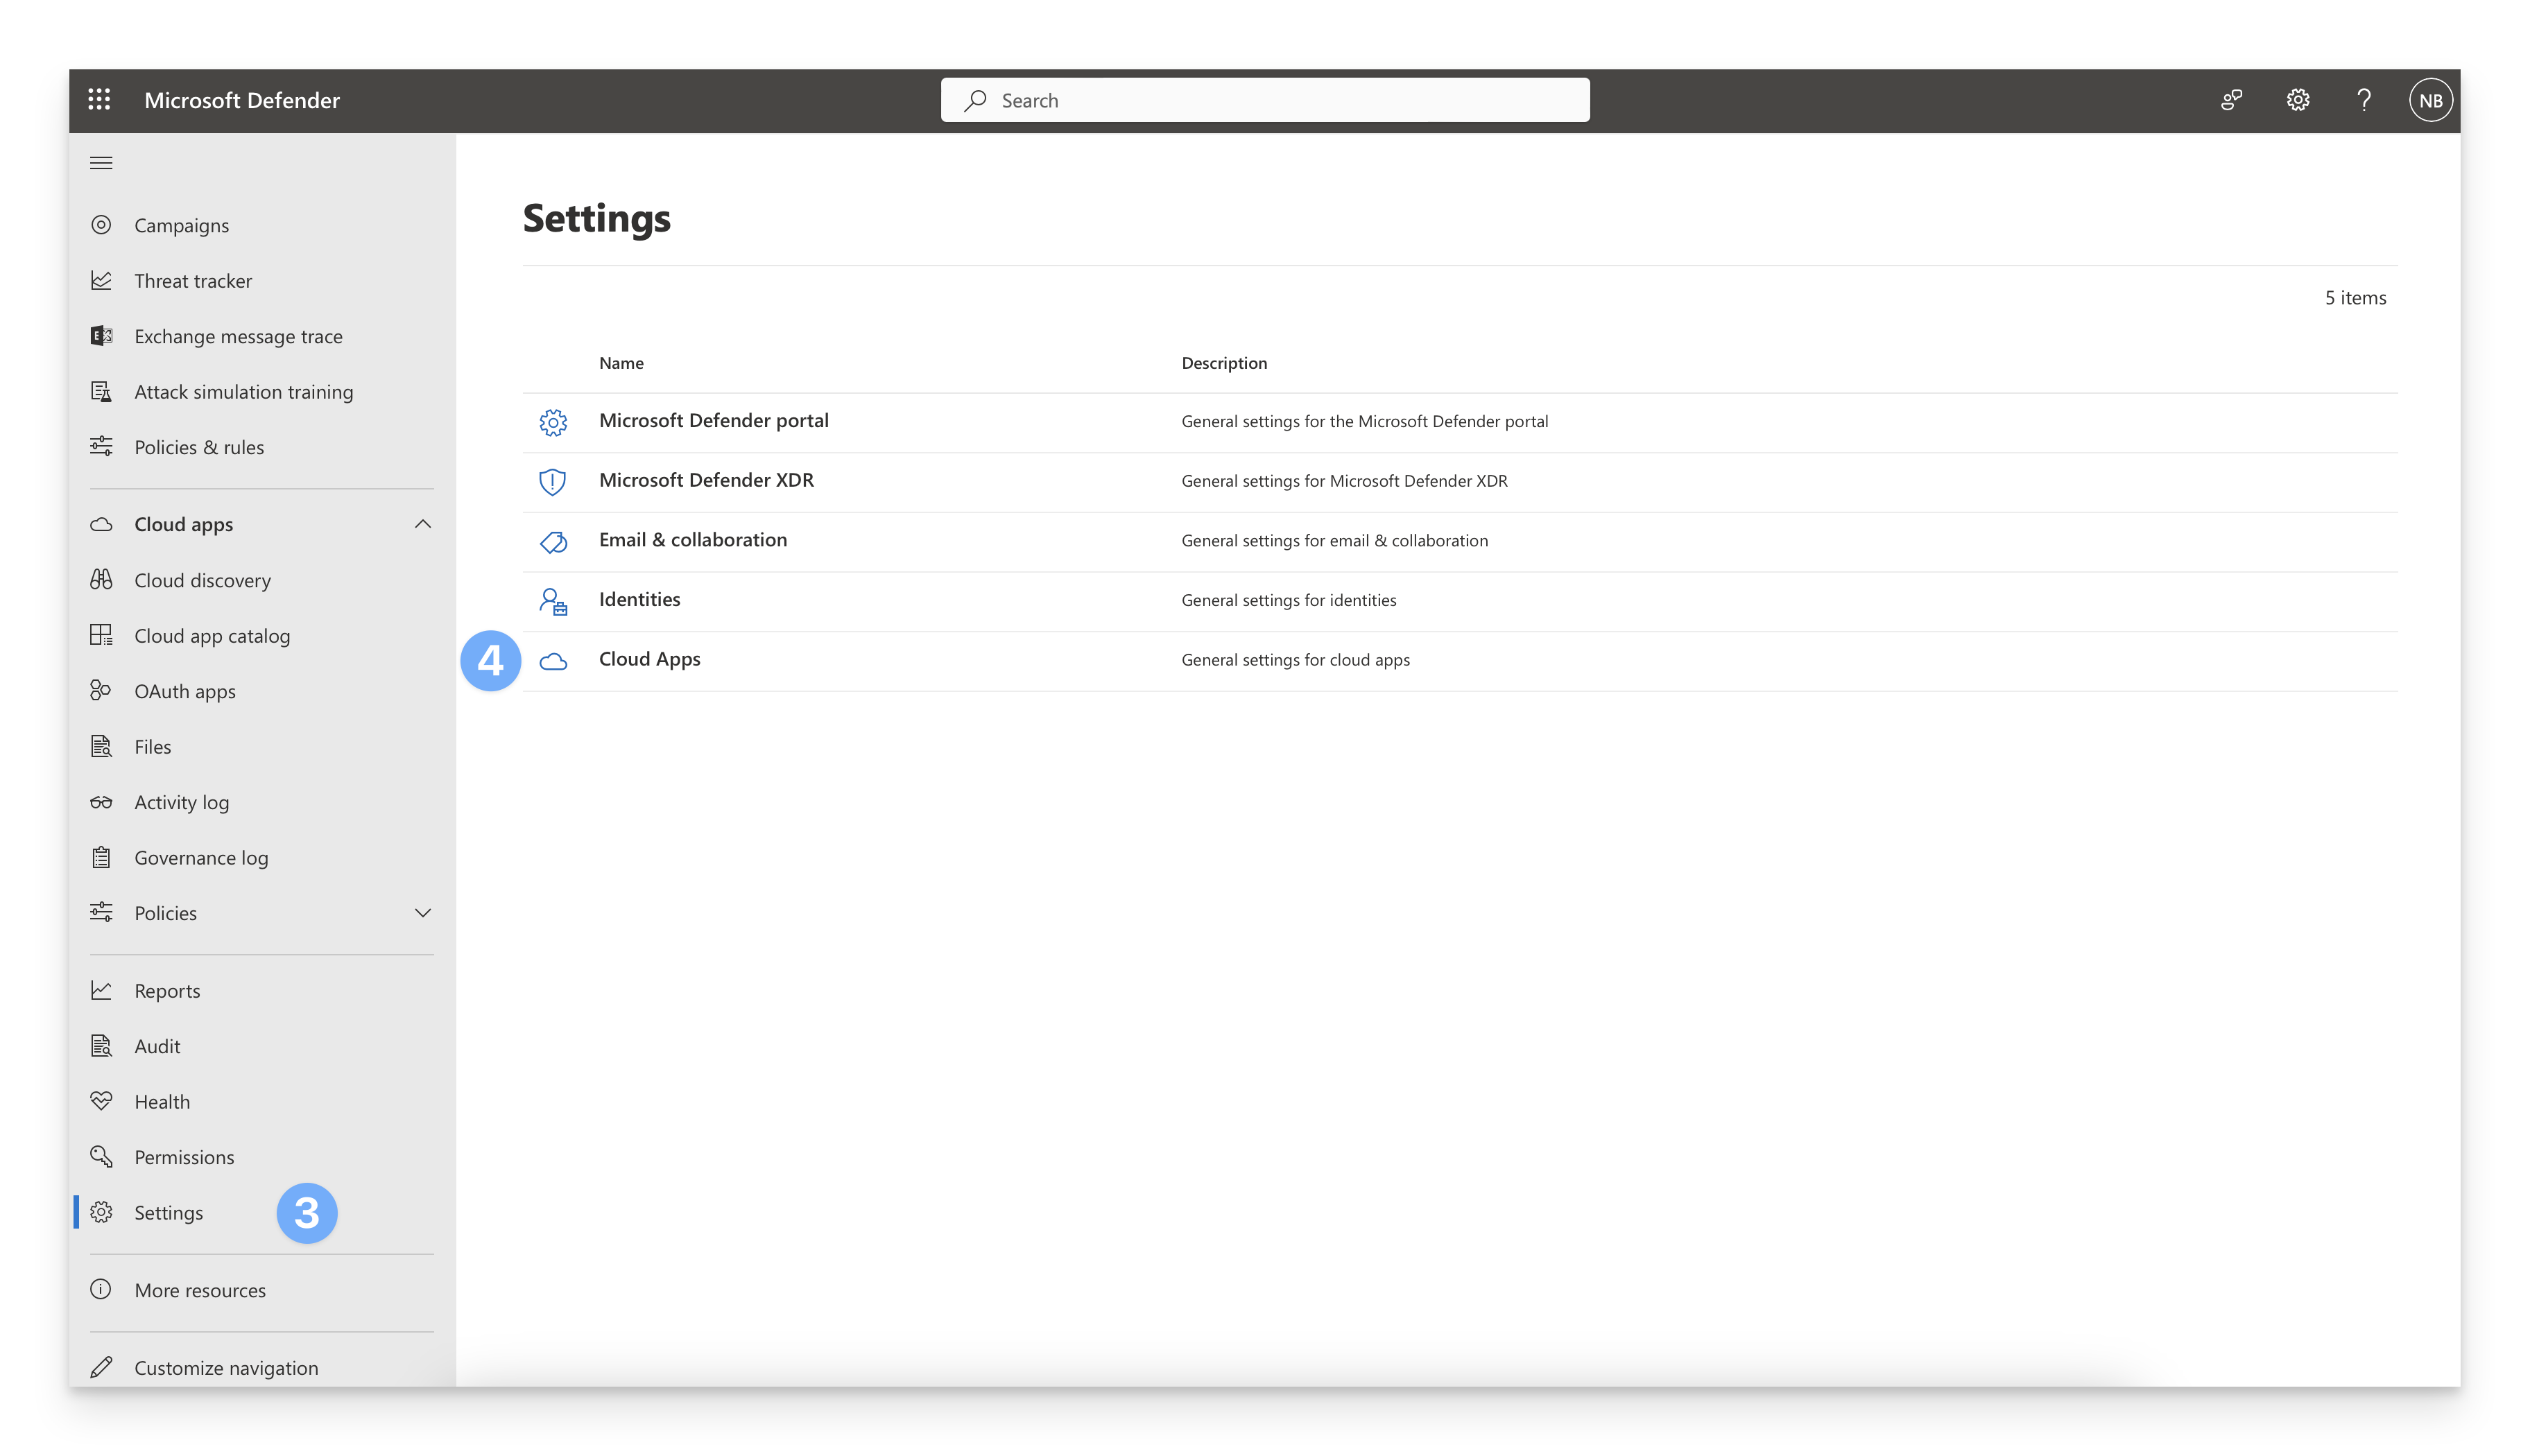
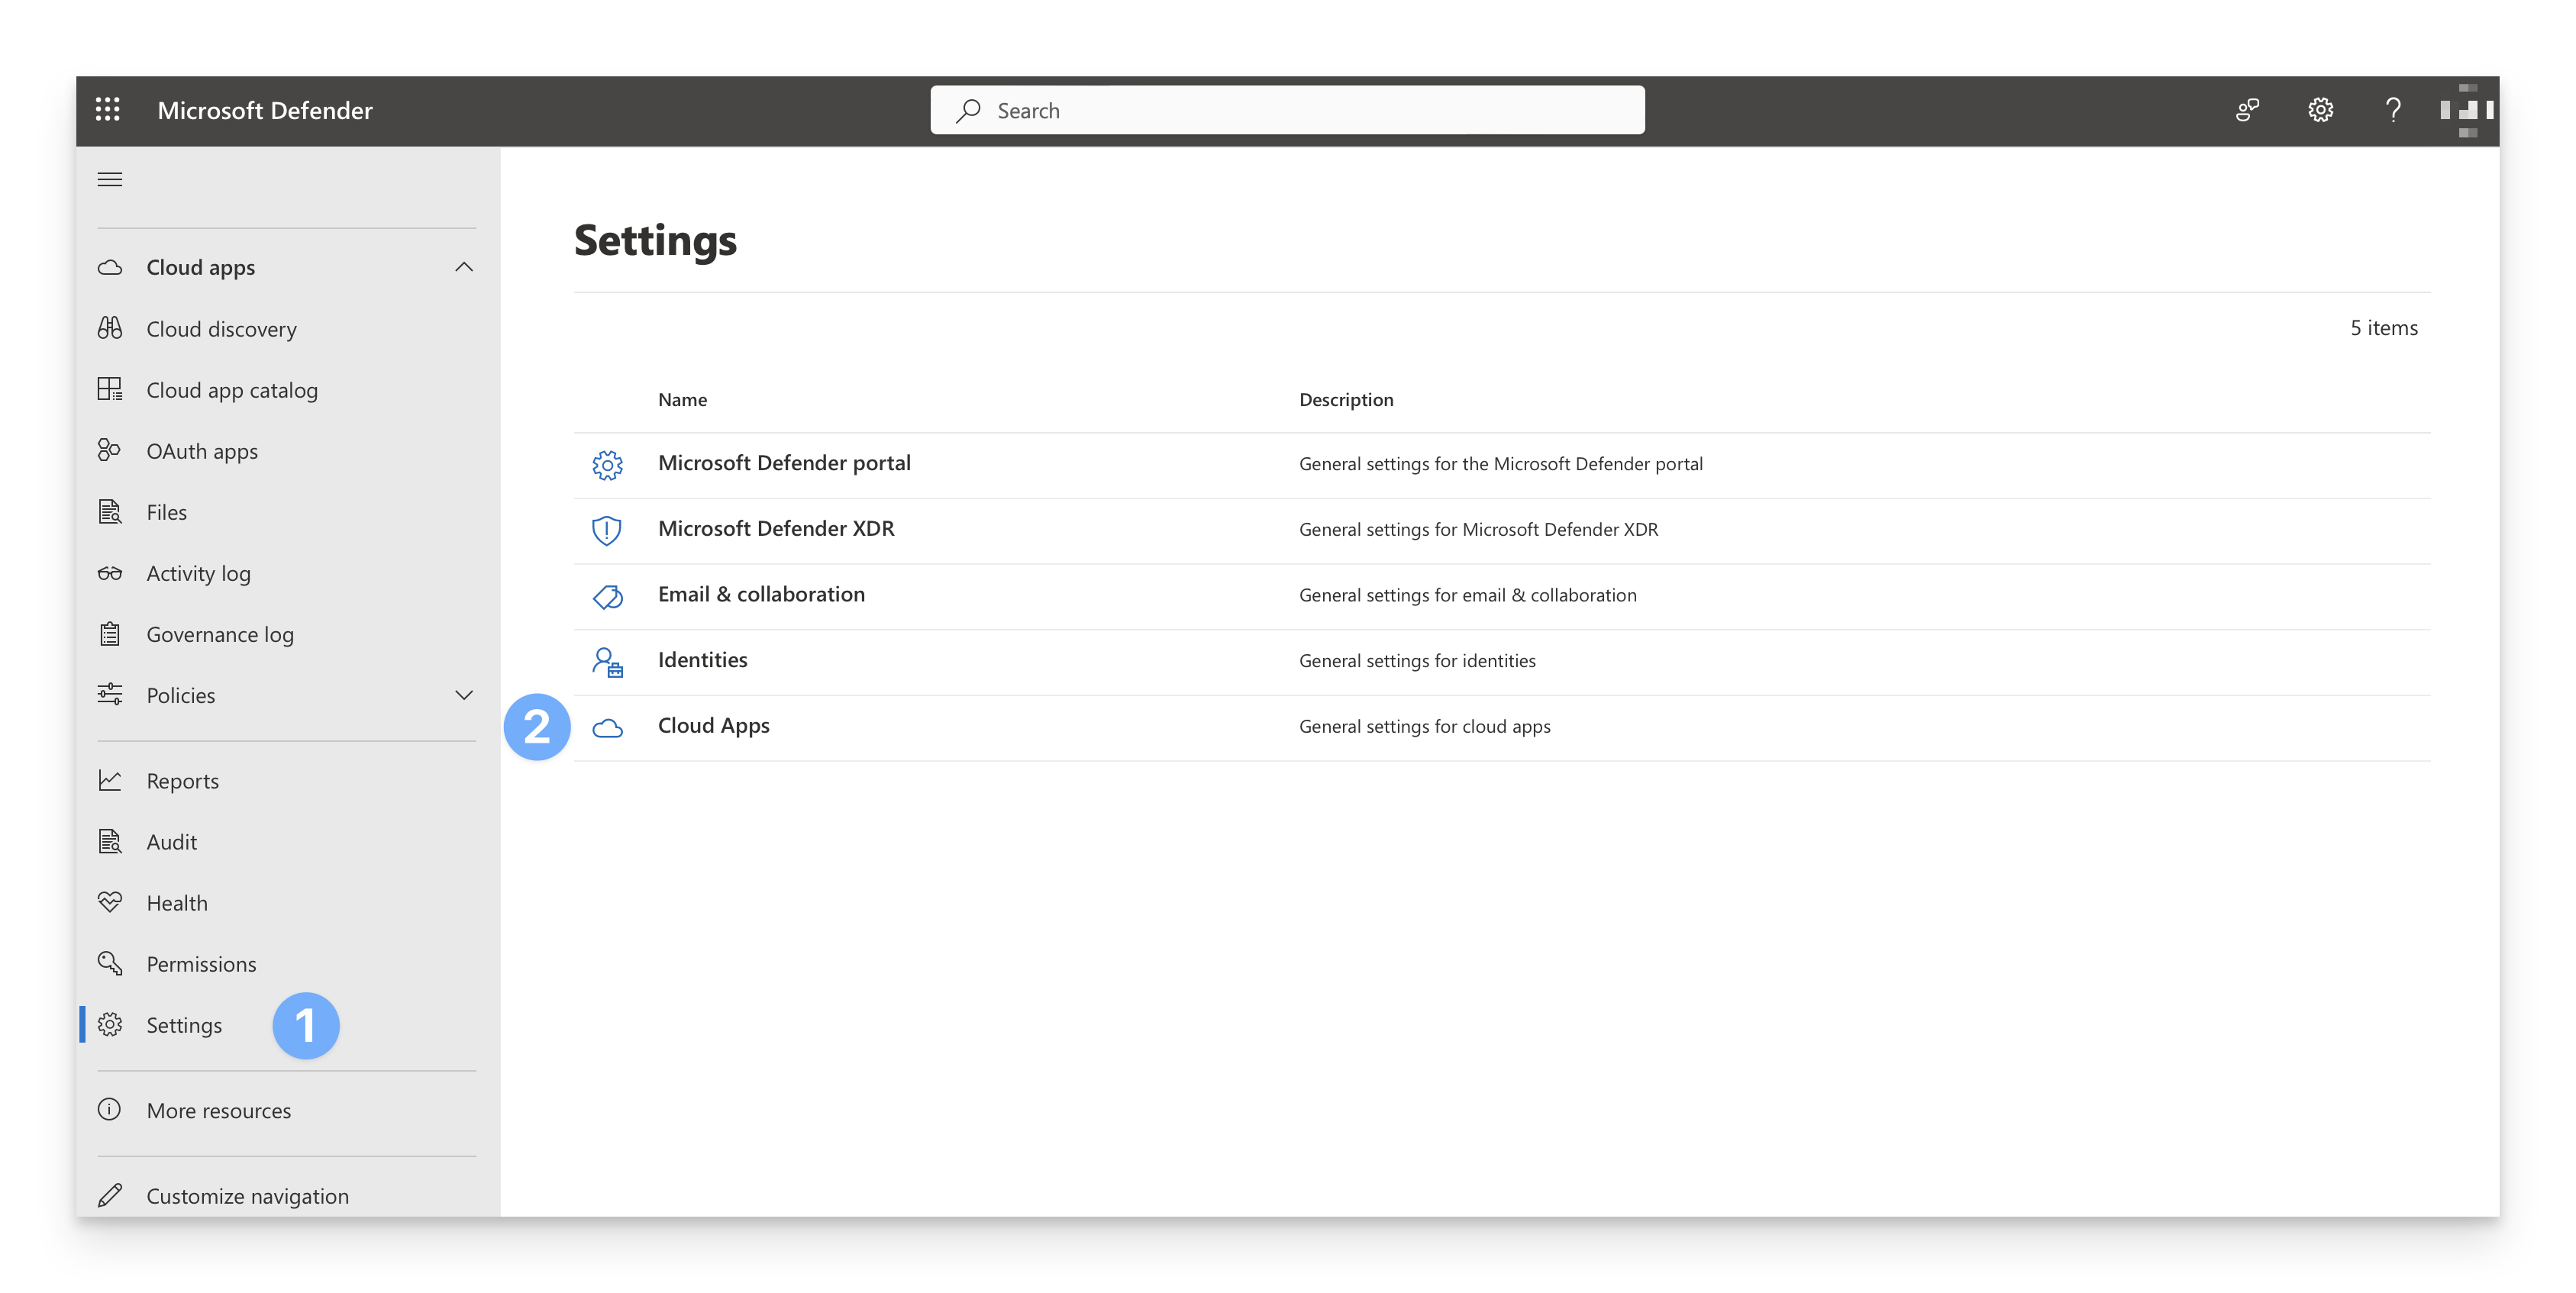
In the bottom left corner of the page, click the Settings gear icon.
On the settings page, click Cloud Apps.
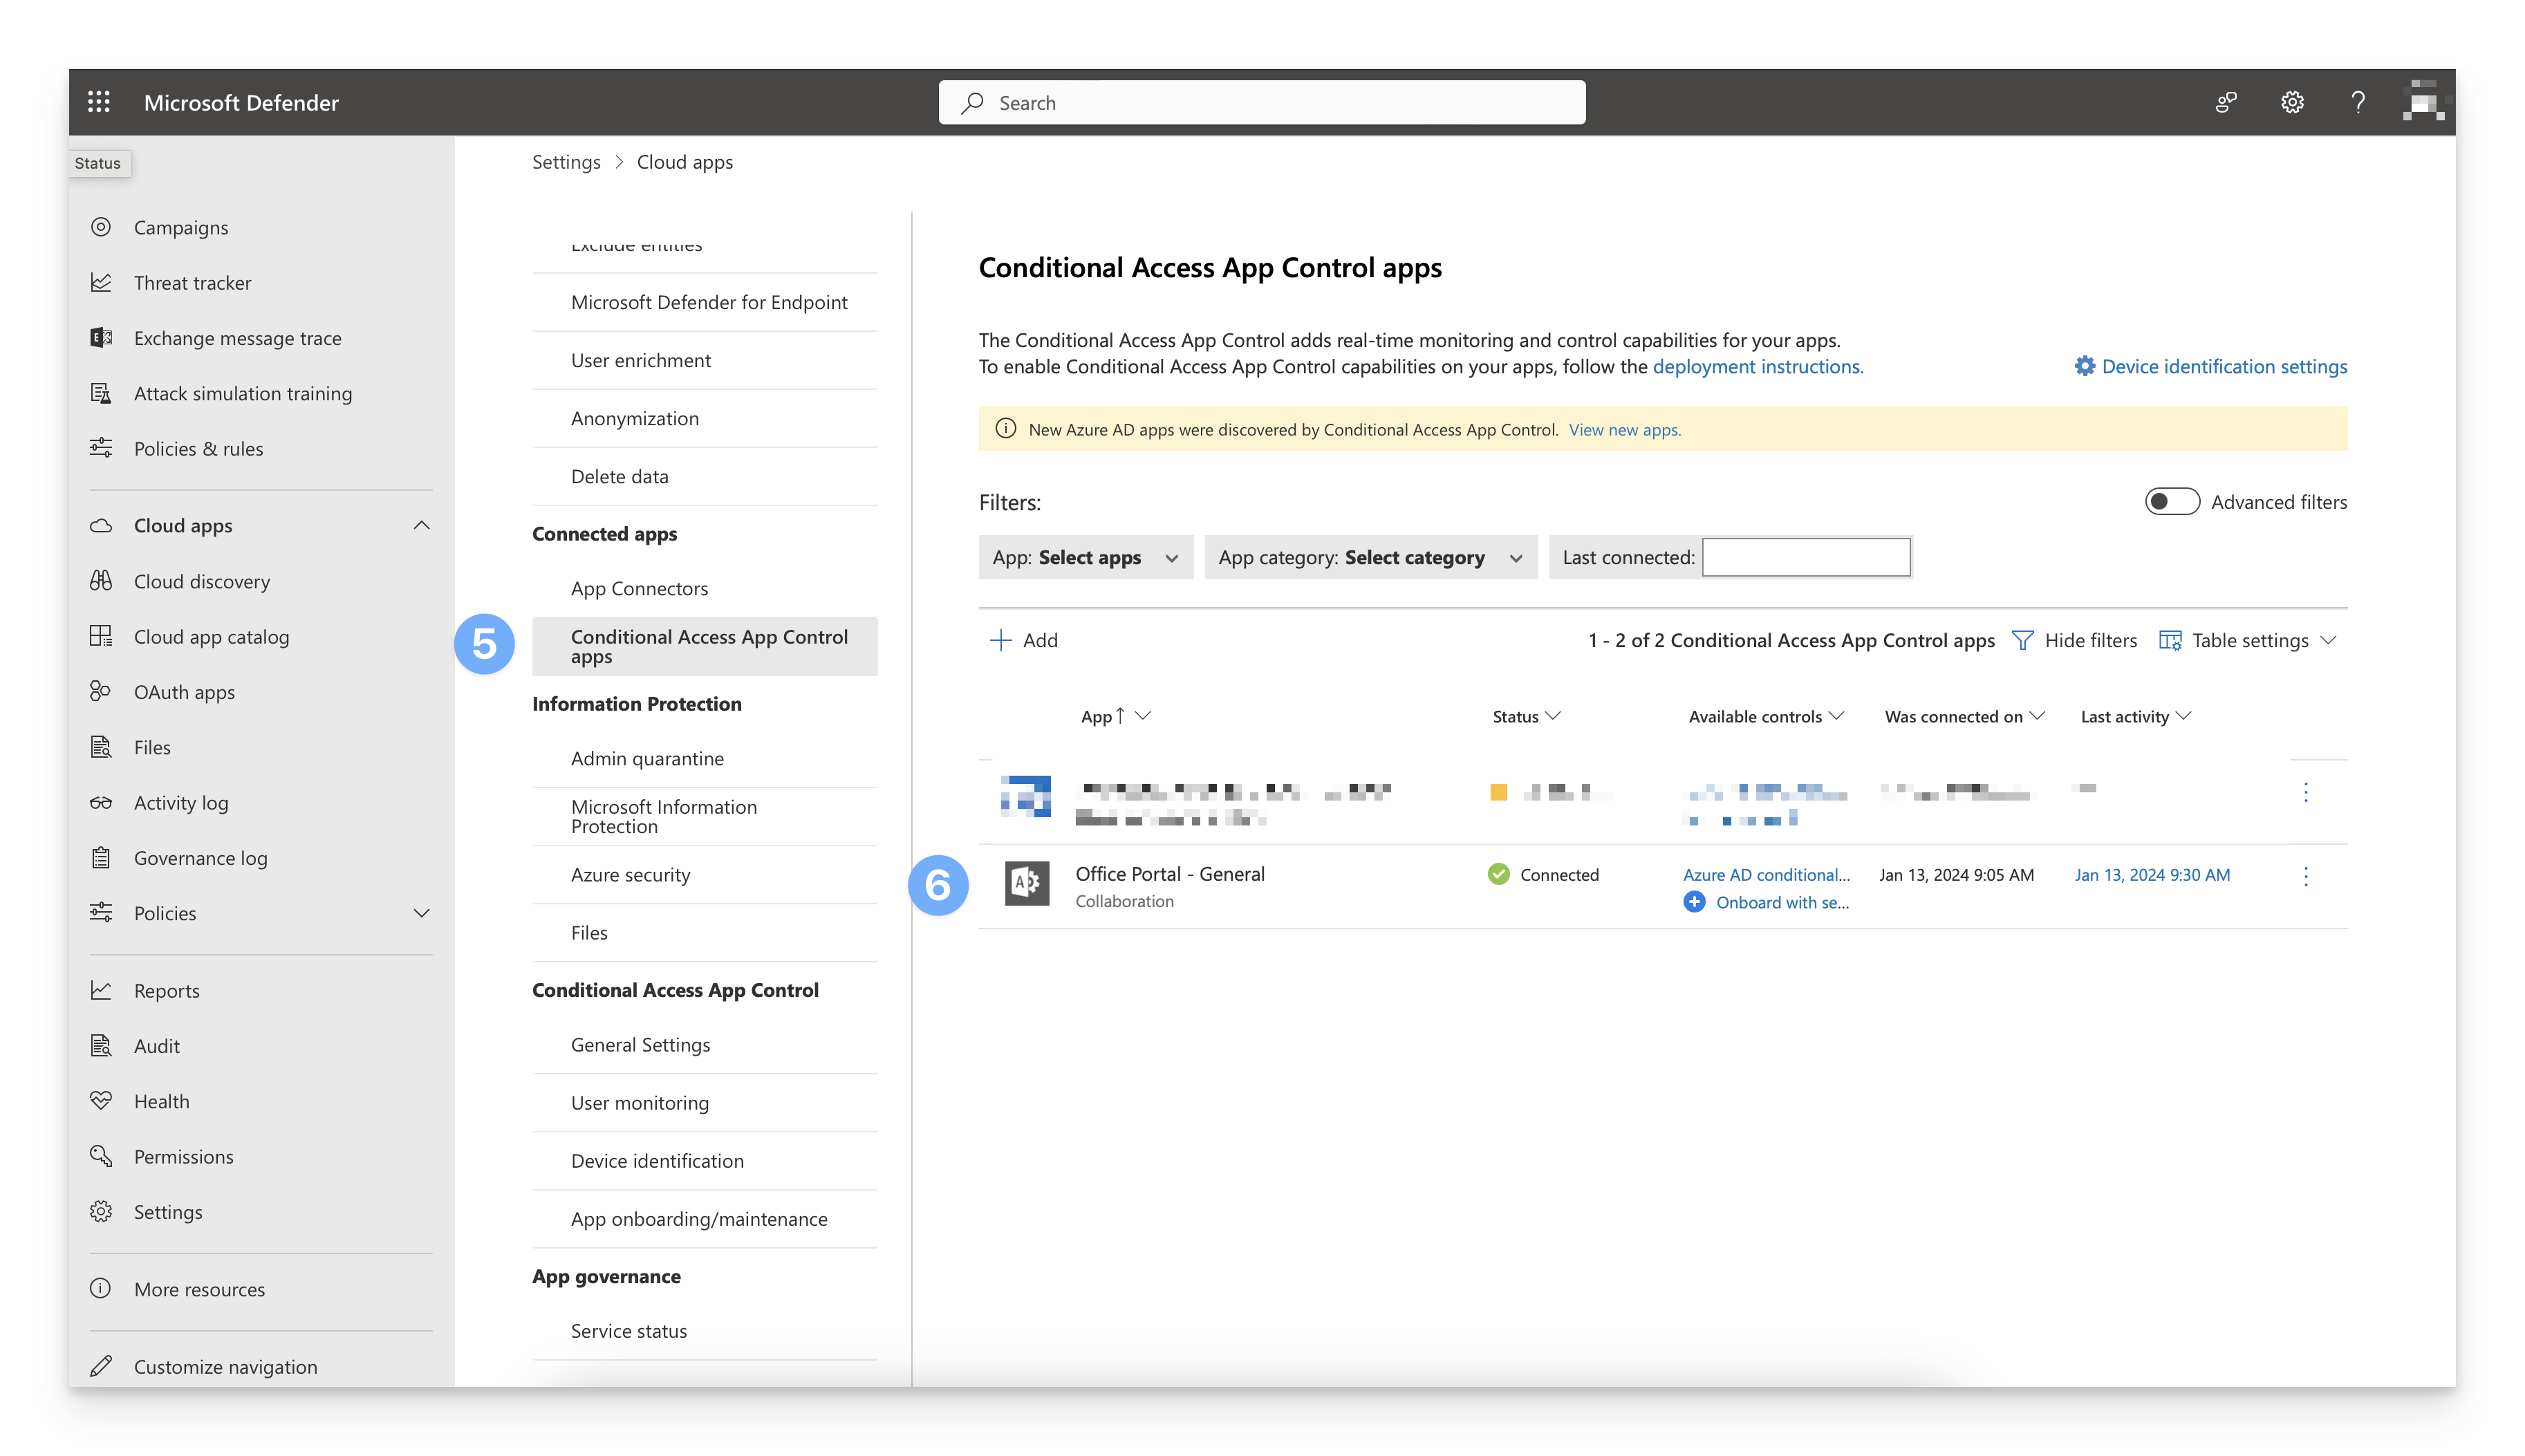
Under Connected apps > Click Conditional Access App Control apps
You should see Office Portal - General listed as a Connected app. If it is not, review your steps in the previous section. It may take a bit for the Office Portal to show a connected status. Check back later to see if the status gets updated.
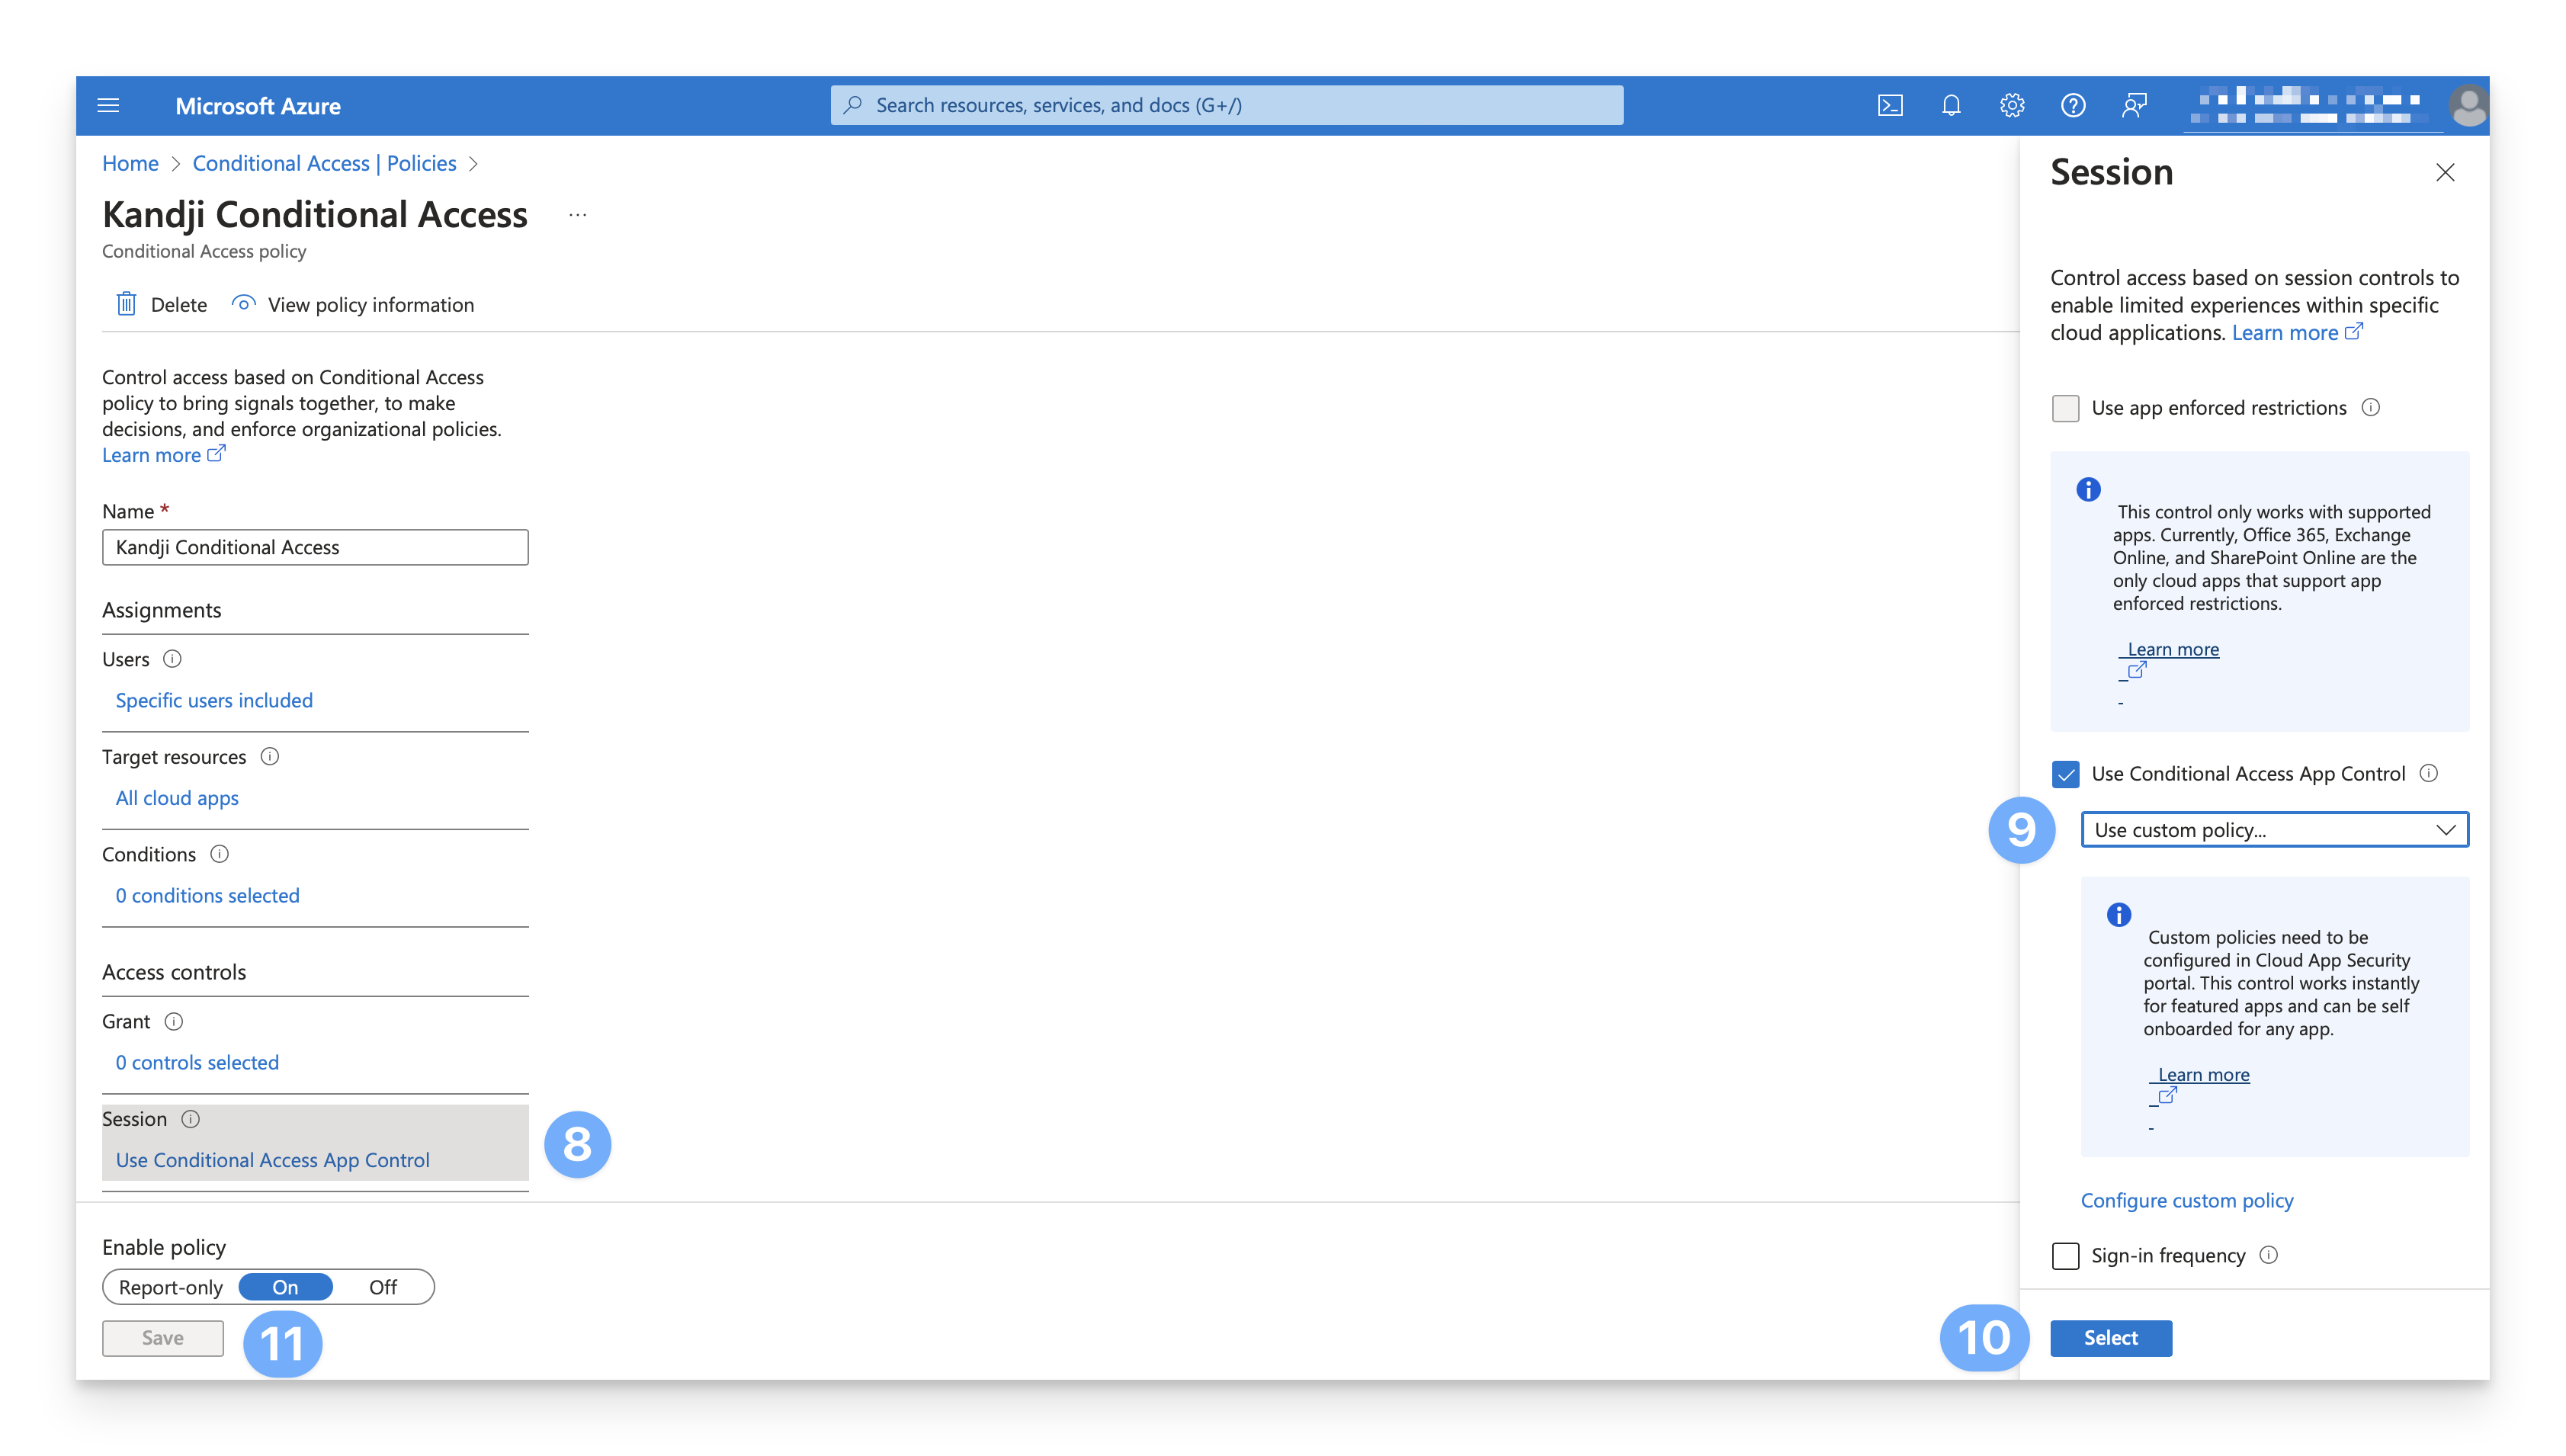
Click here to navigate back to the Conditional Access blade and select the Conditional Access policy created earlier.
Under Access controls > Session, click Use Conditional Access App Control.
Change the Conditional Access App Control setting from Block downloads (Preview) to Use Custom Policy.
Click Select.
Click Save.
Add your Root and Intermediate Certificates to MDCA
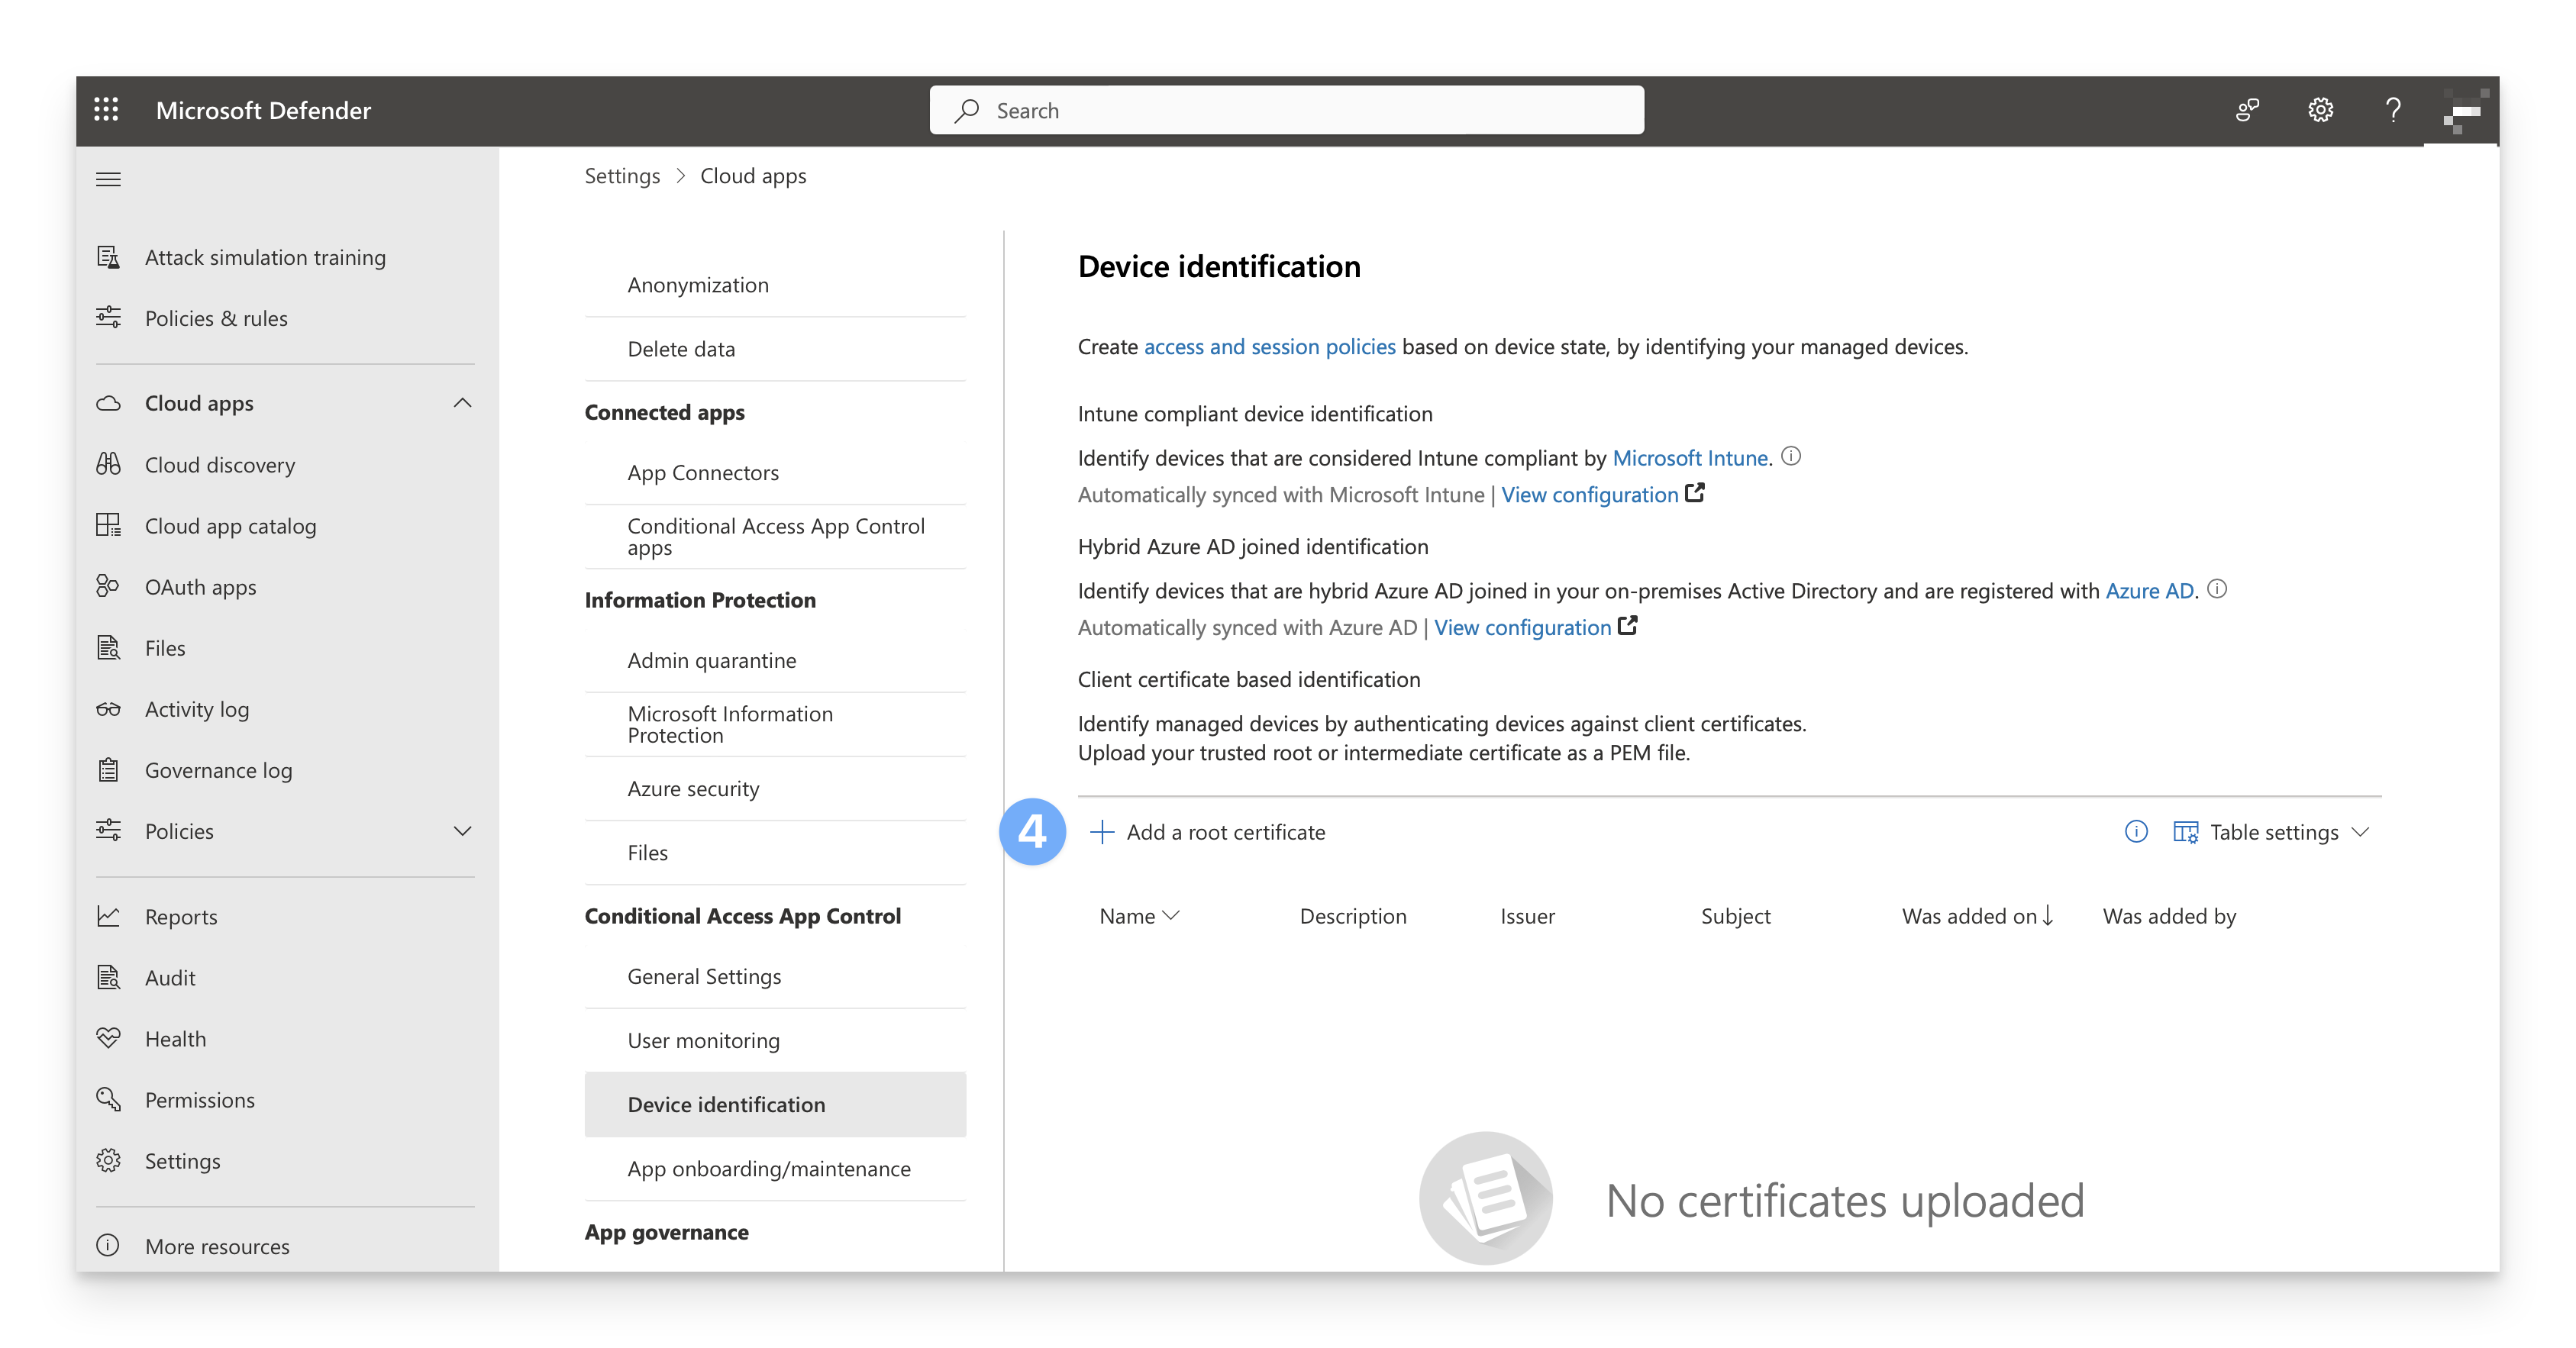
Navigate back to security.microsoft.com, and in the bottom left corner of the page, click the Settings gear icon.
On the settings page, click Cloud Apps.
Scroll to the bottom of the page. Under the Conditional Access App Control section, click Device identification.
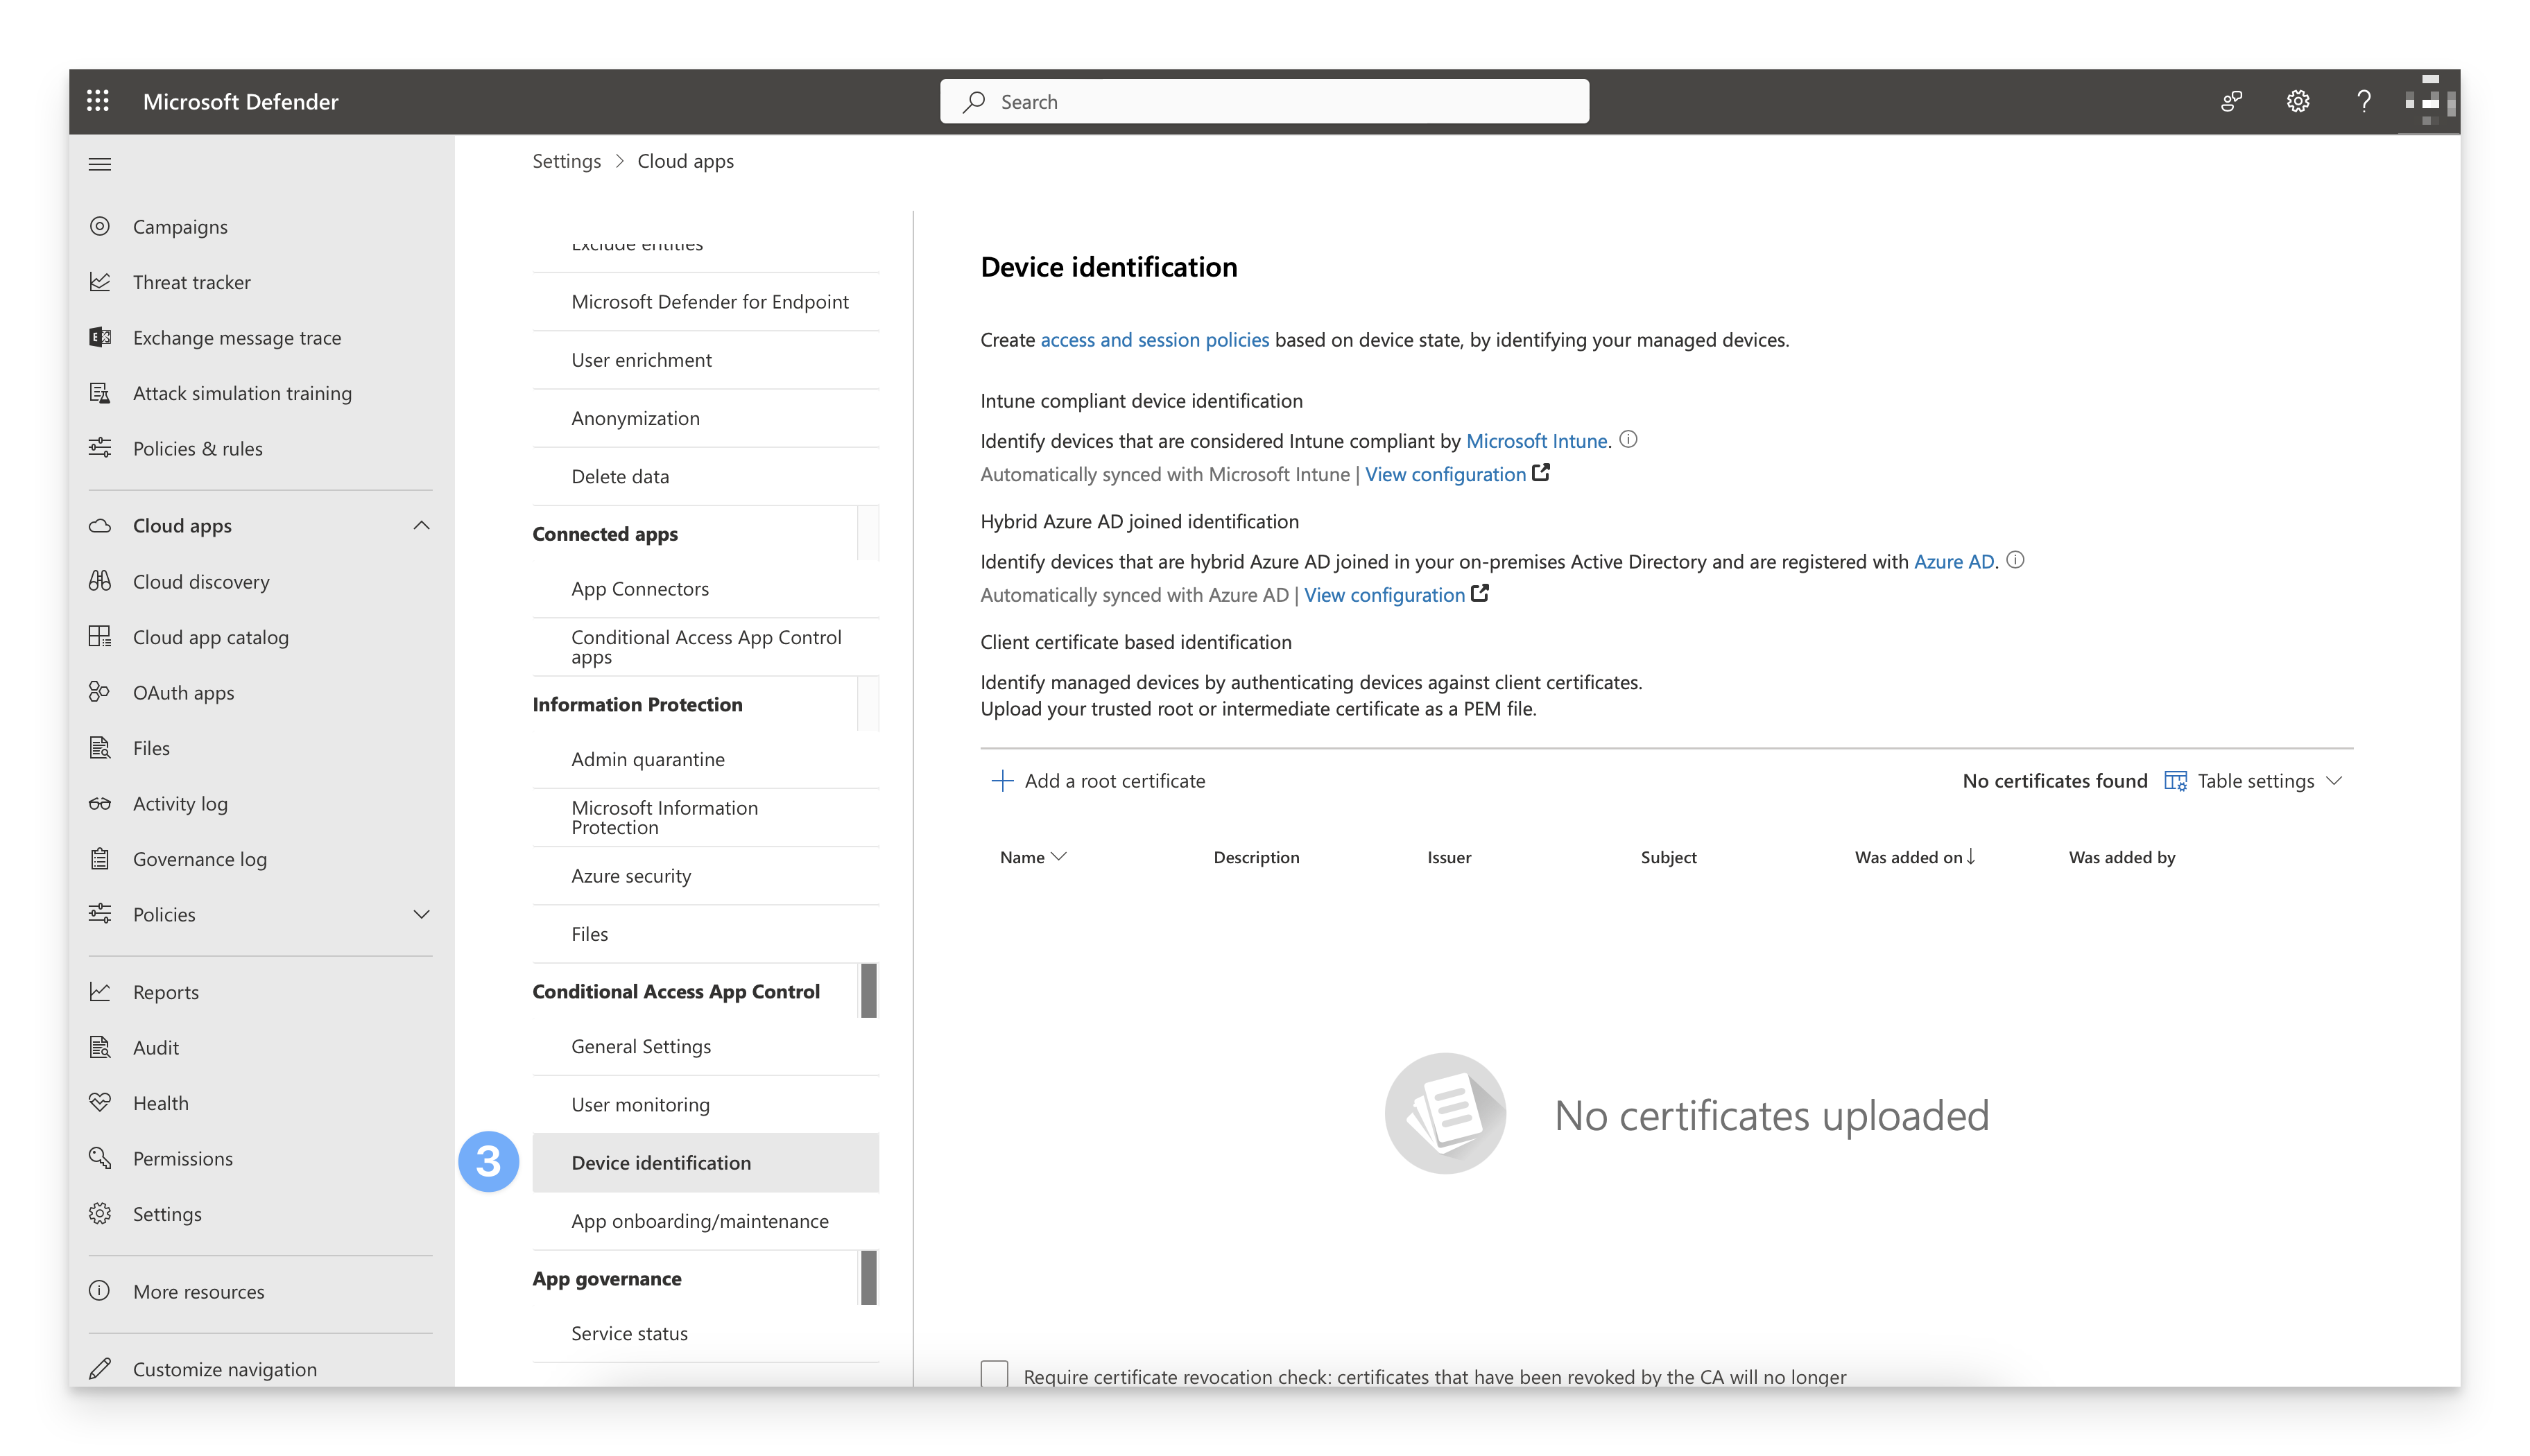
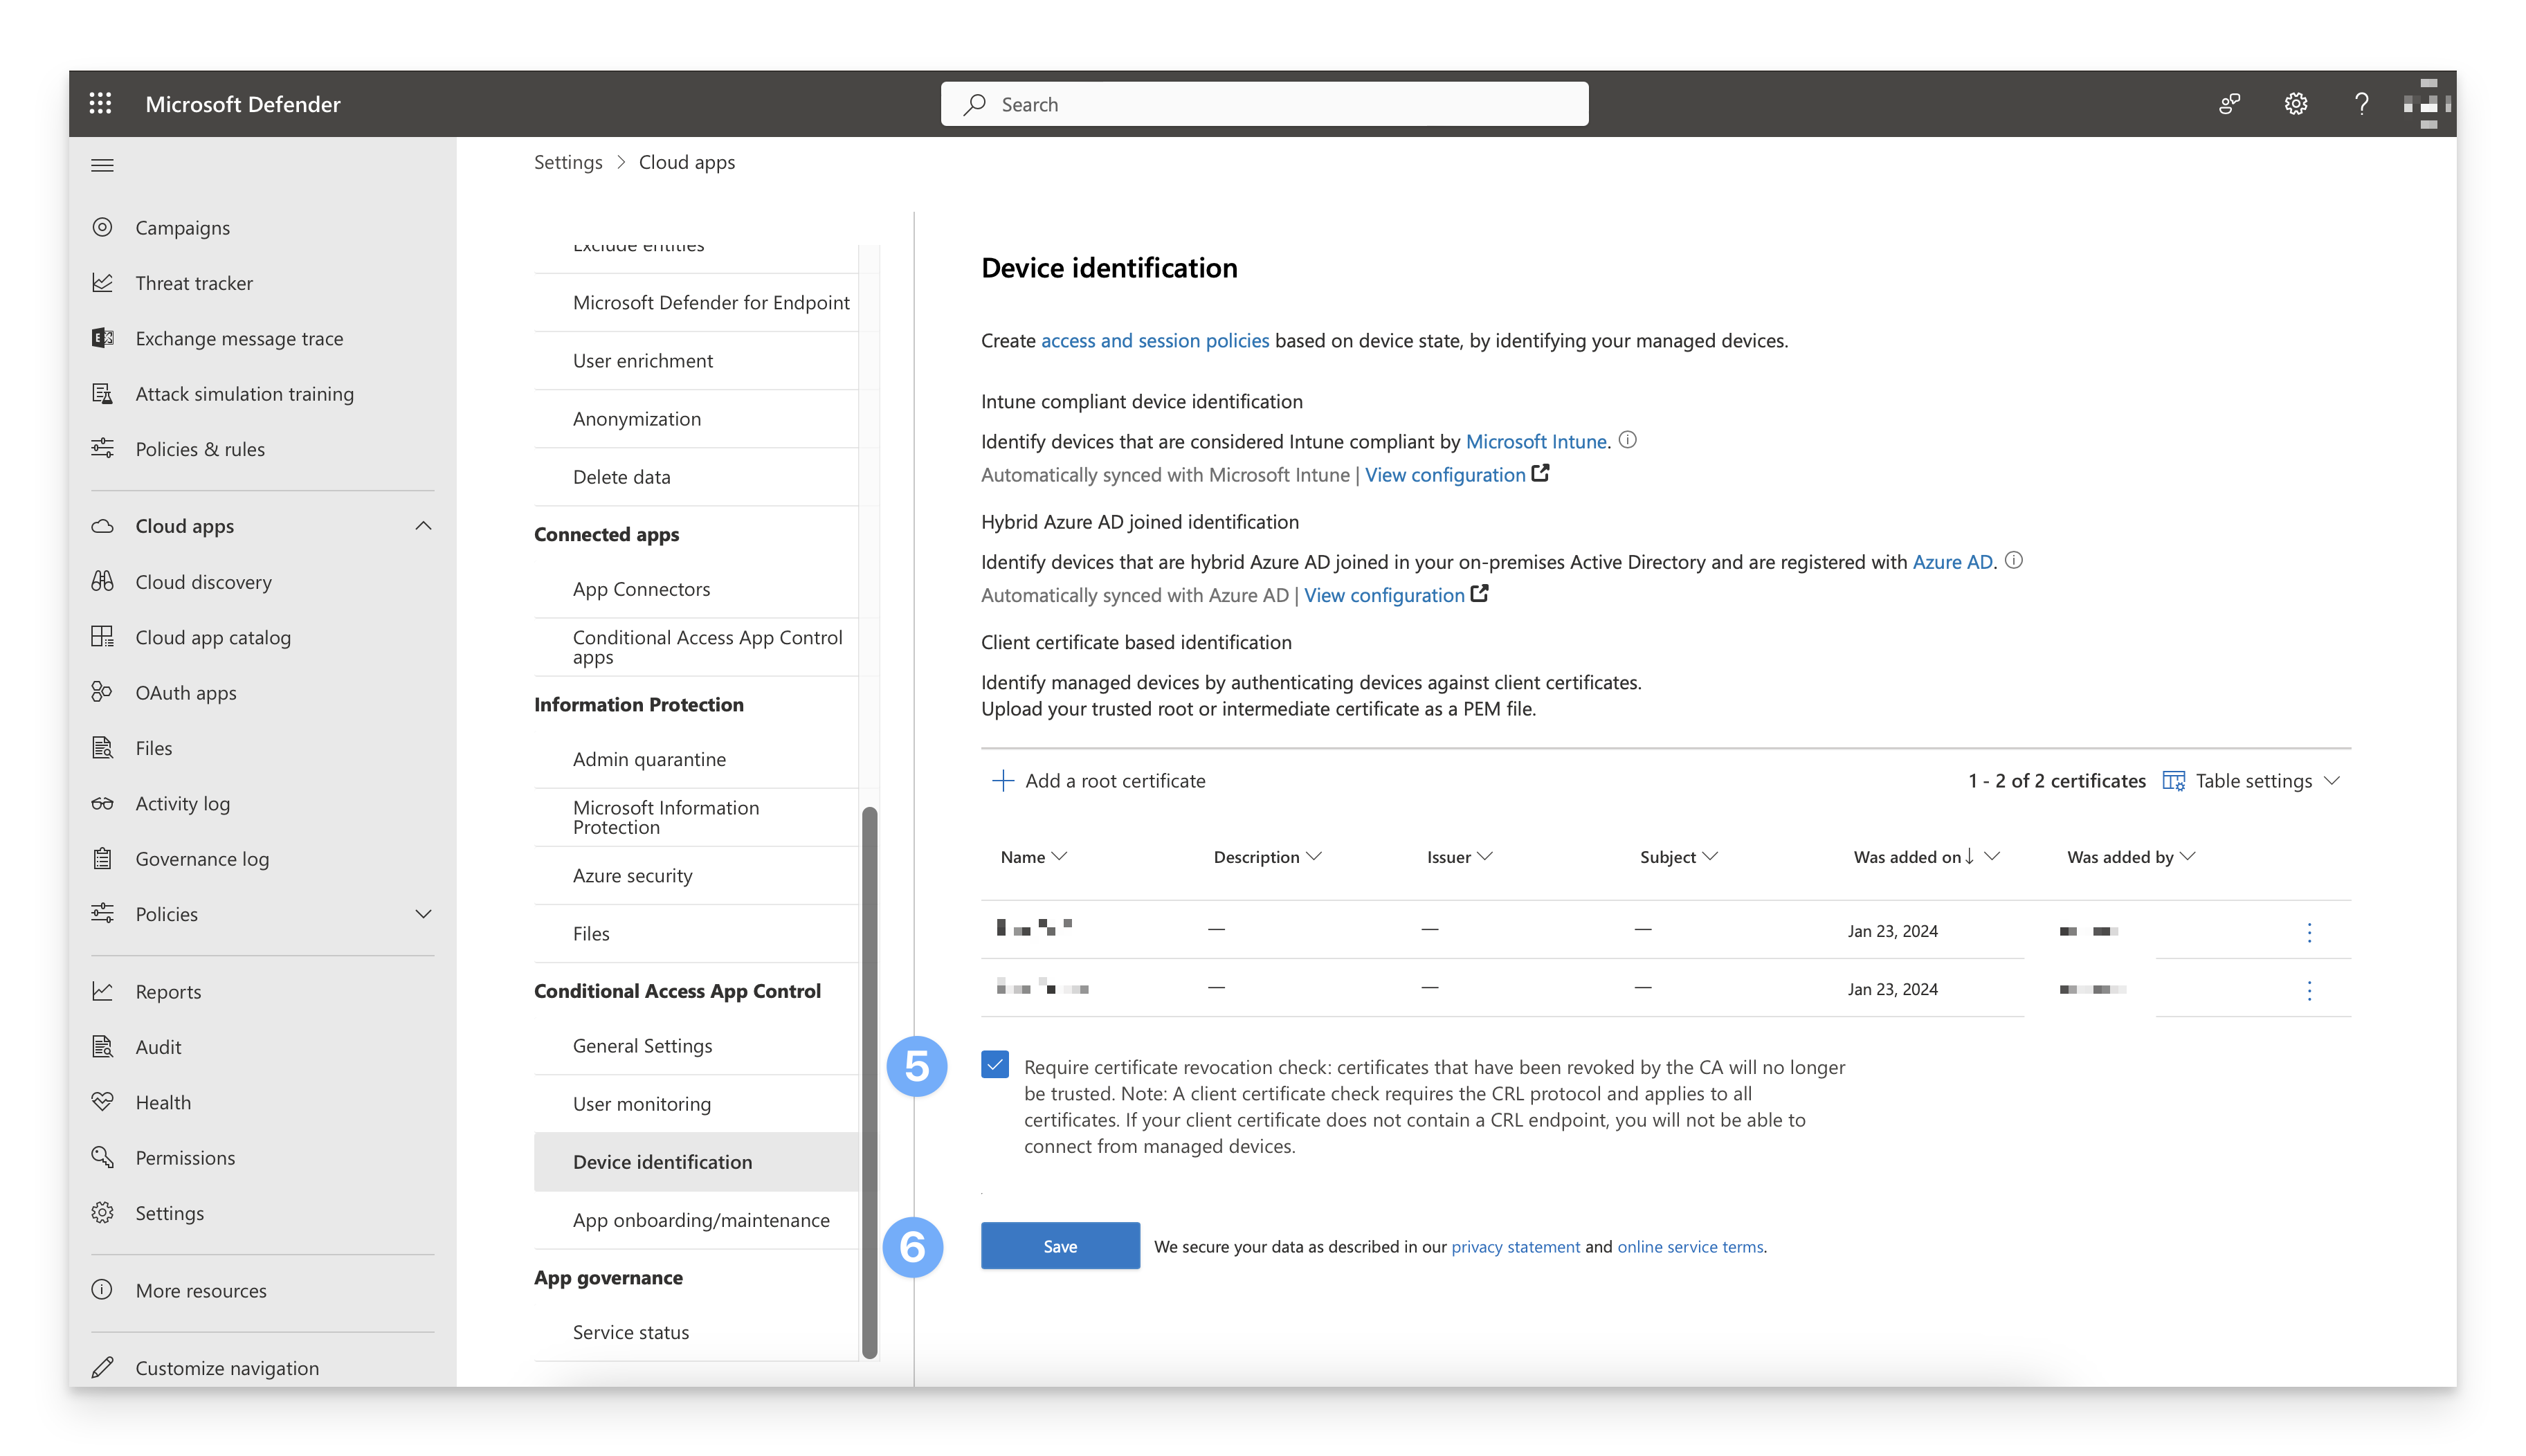
Under the Client certificate based identification section, click + Add a root certificate and follow the prompts to add your Root certificate. Repeat this process to add your Intermediate certificate.
Select the Require certificate revocation check checkbox.
Click Save.
To convert a CER to PEM use the following command in Terminal as an example:
openssl x509 -in certificate.cer -outform pem -out certificate.pemCreate an Access Policy in MDCA
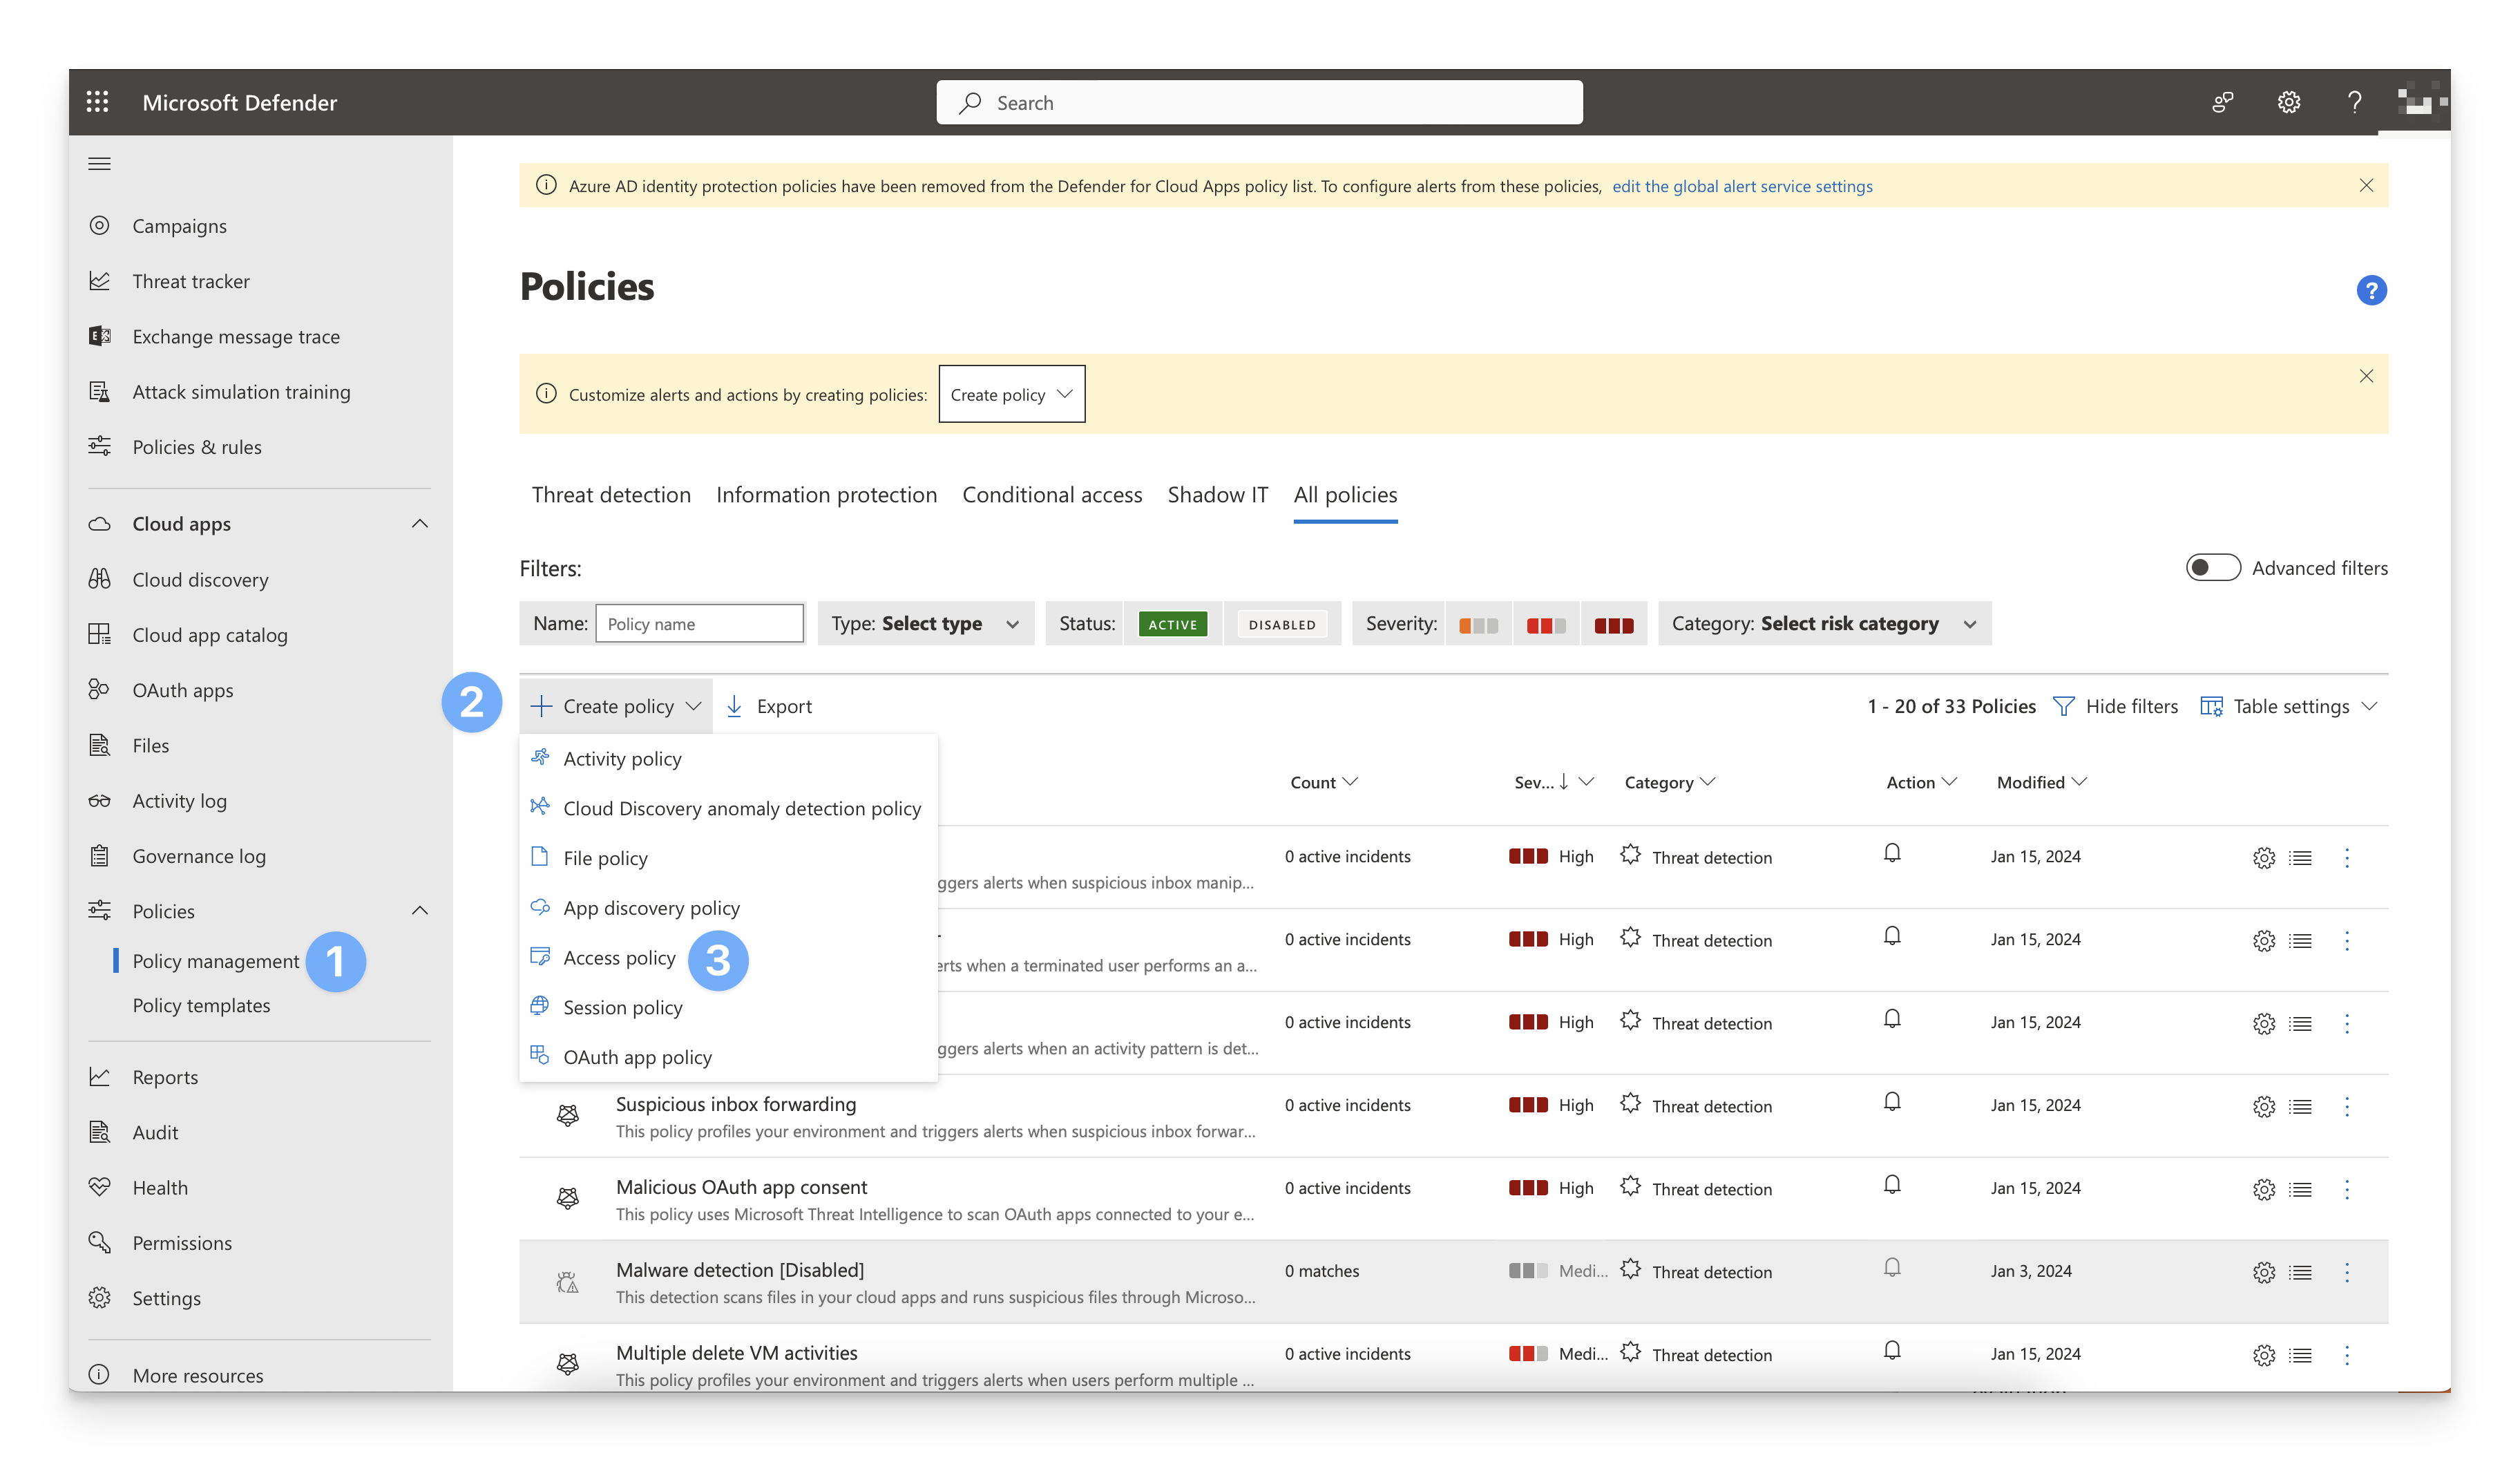
In the Microsoft Defender portal, in the Cloud apps section on the left-hand side navigation bar, click Policies > Policy Management.
Click + Create policy.
Click Access policy.
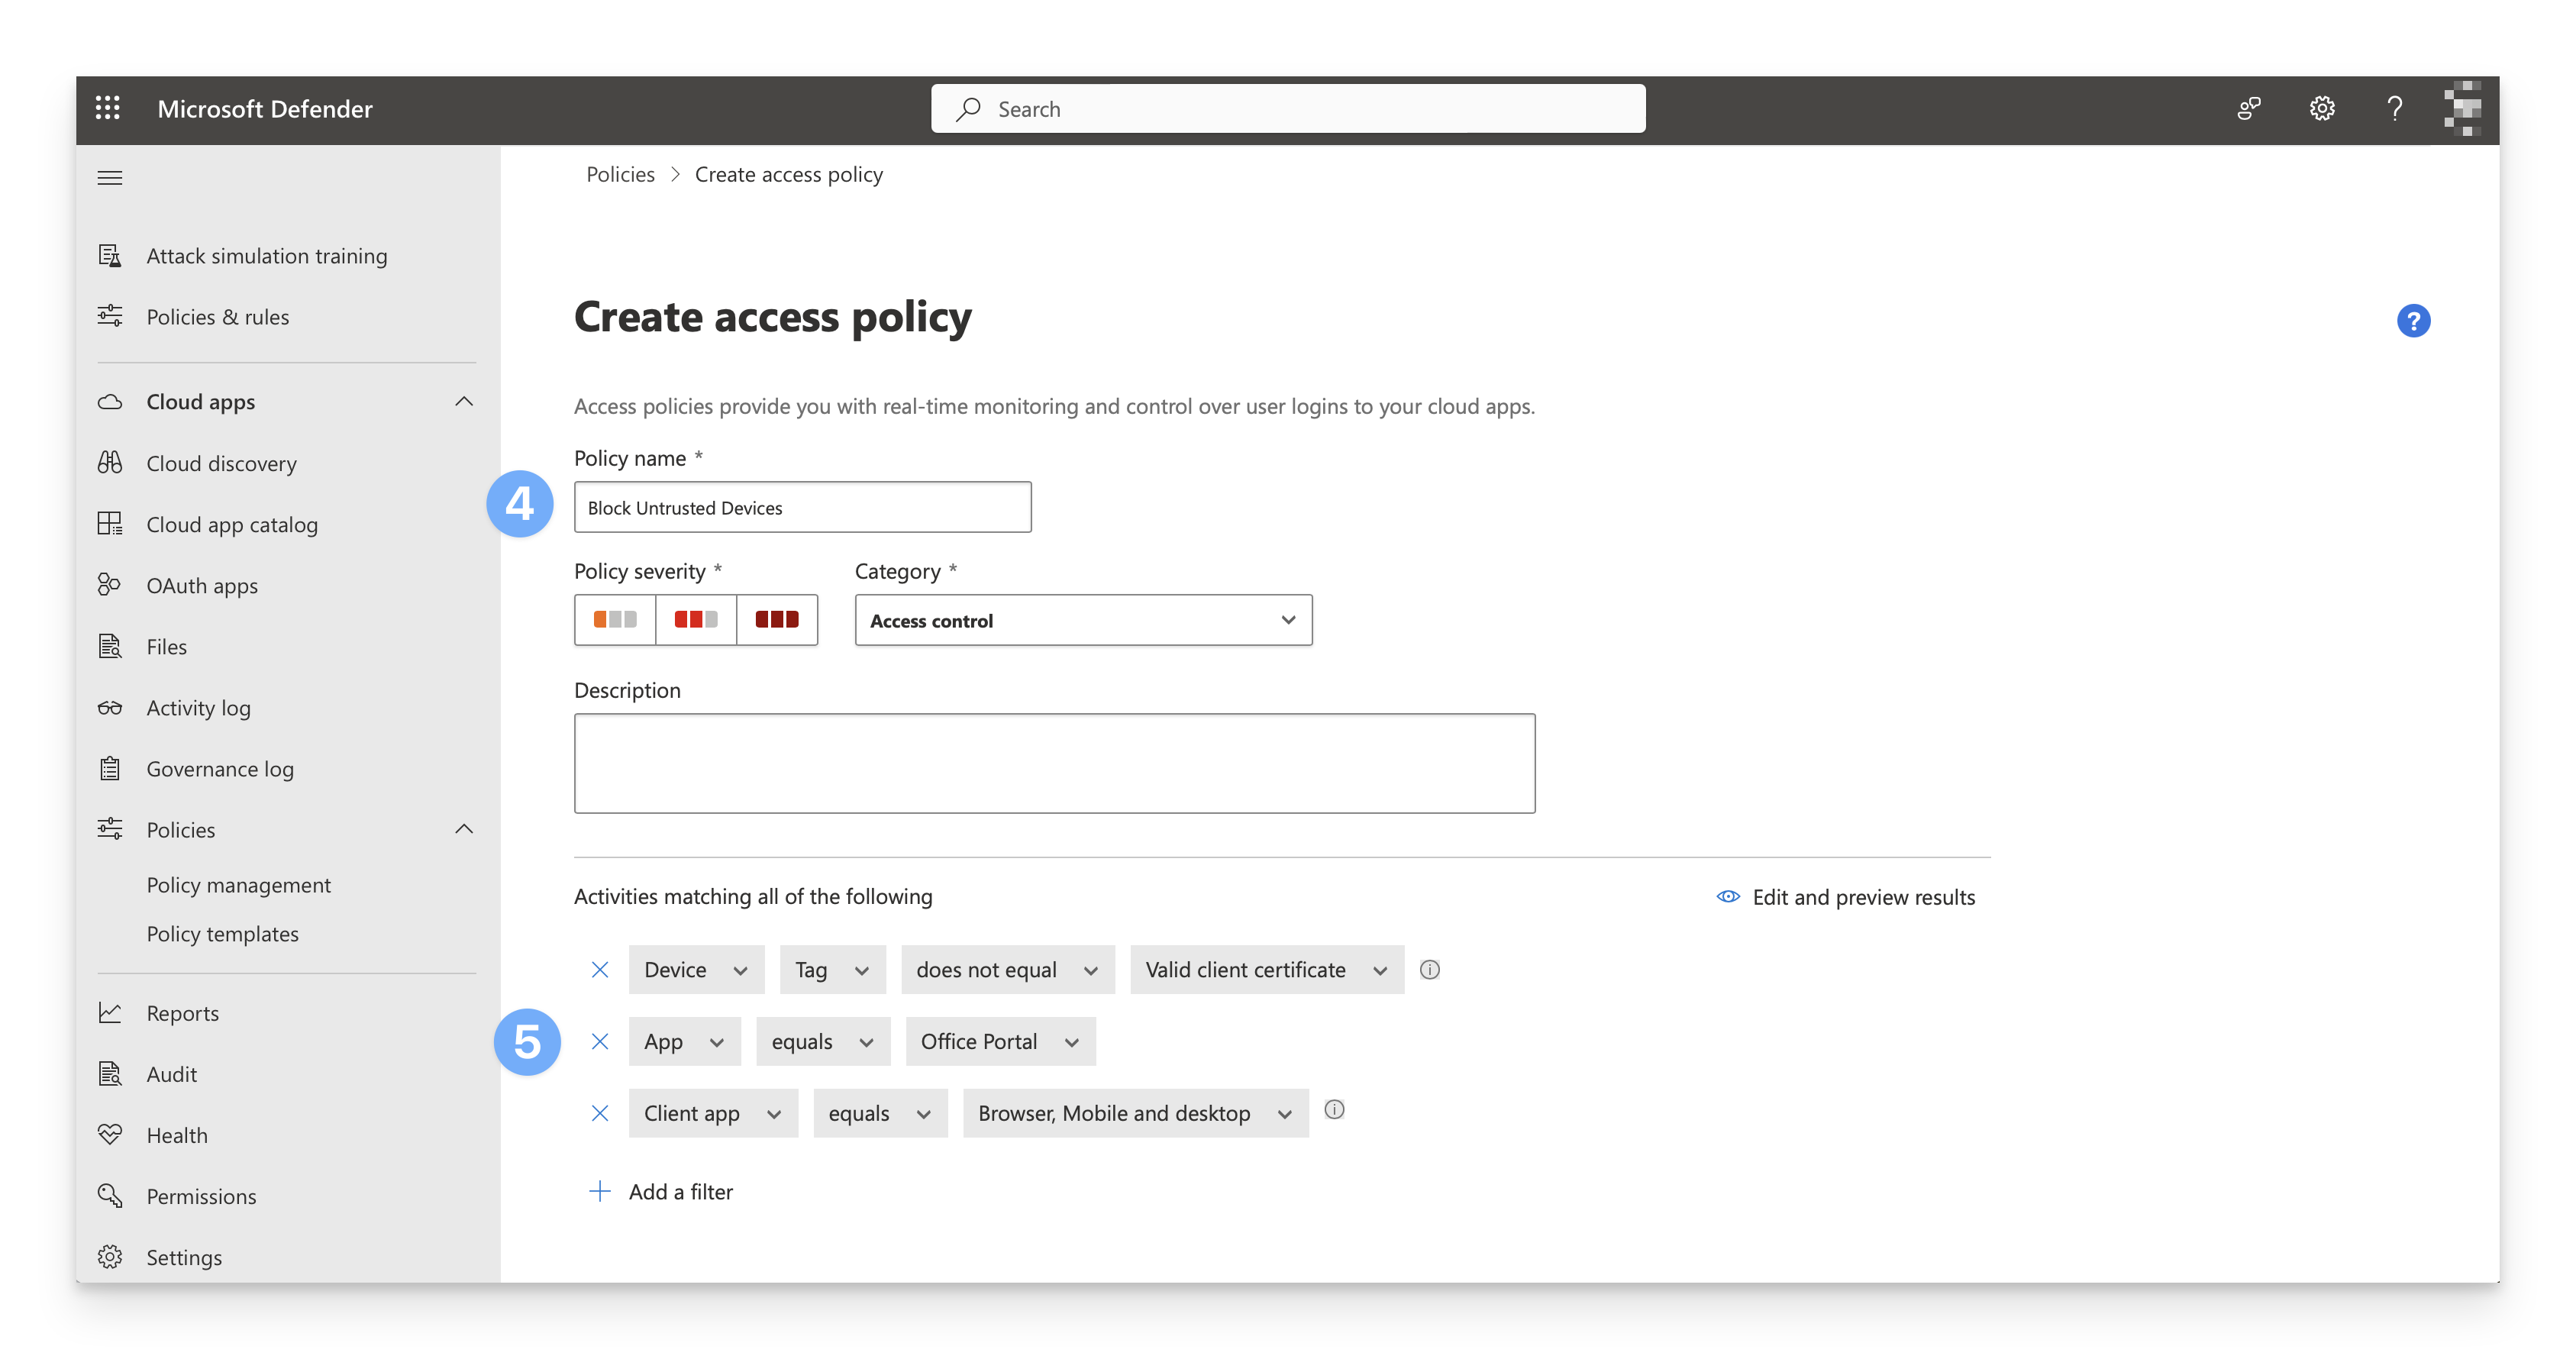
In the name field, enter a name for the Access policy, such as Block untrusted devices.
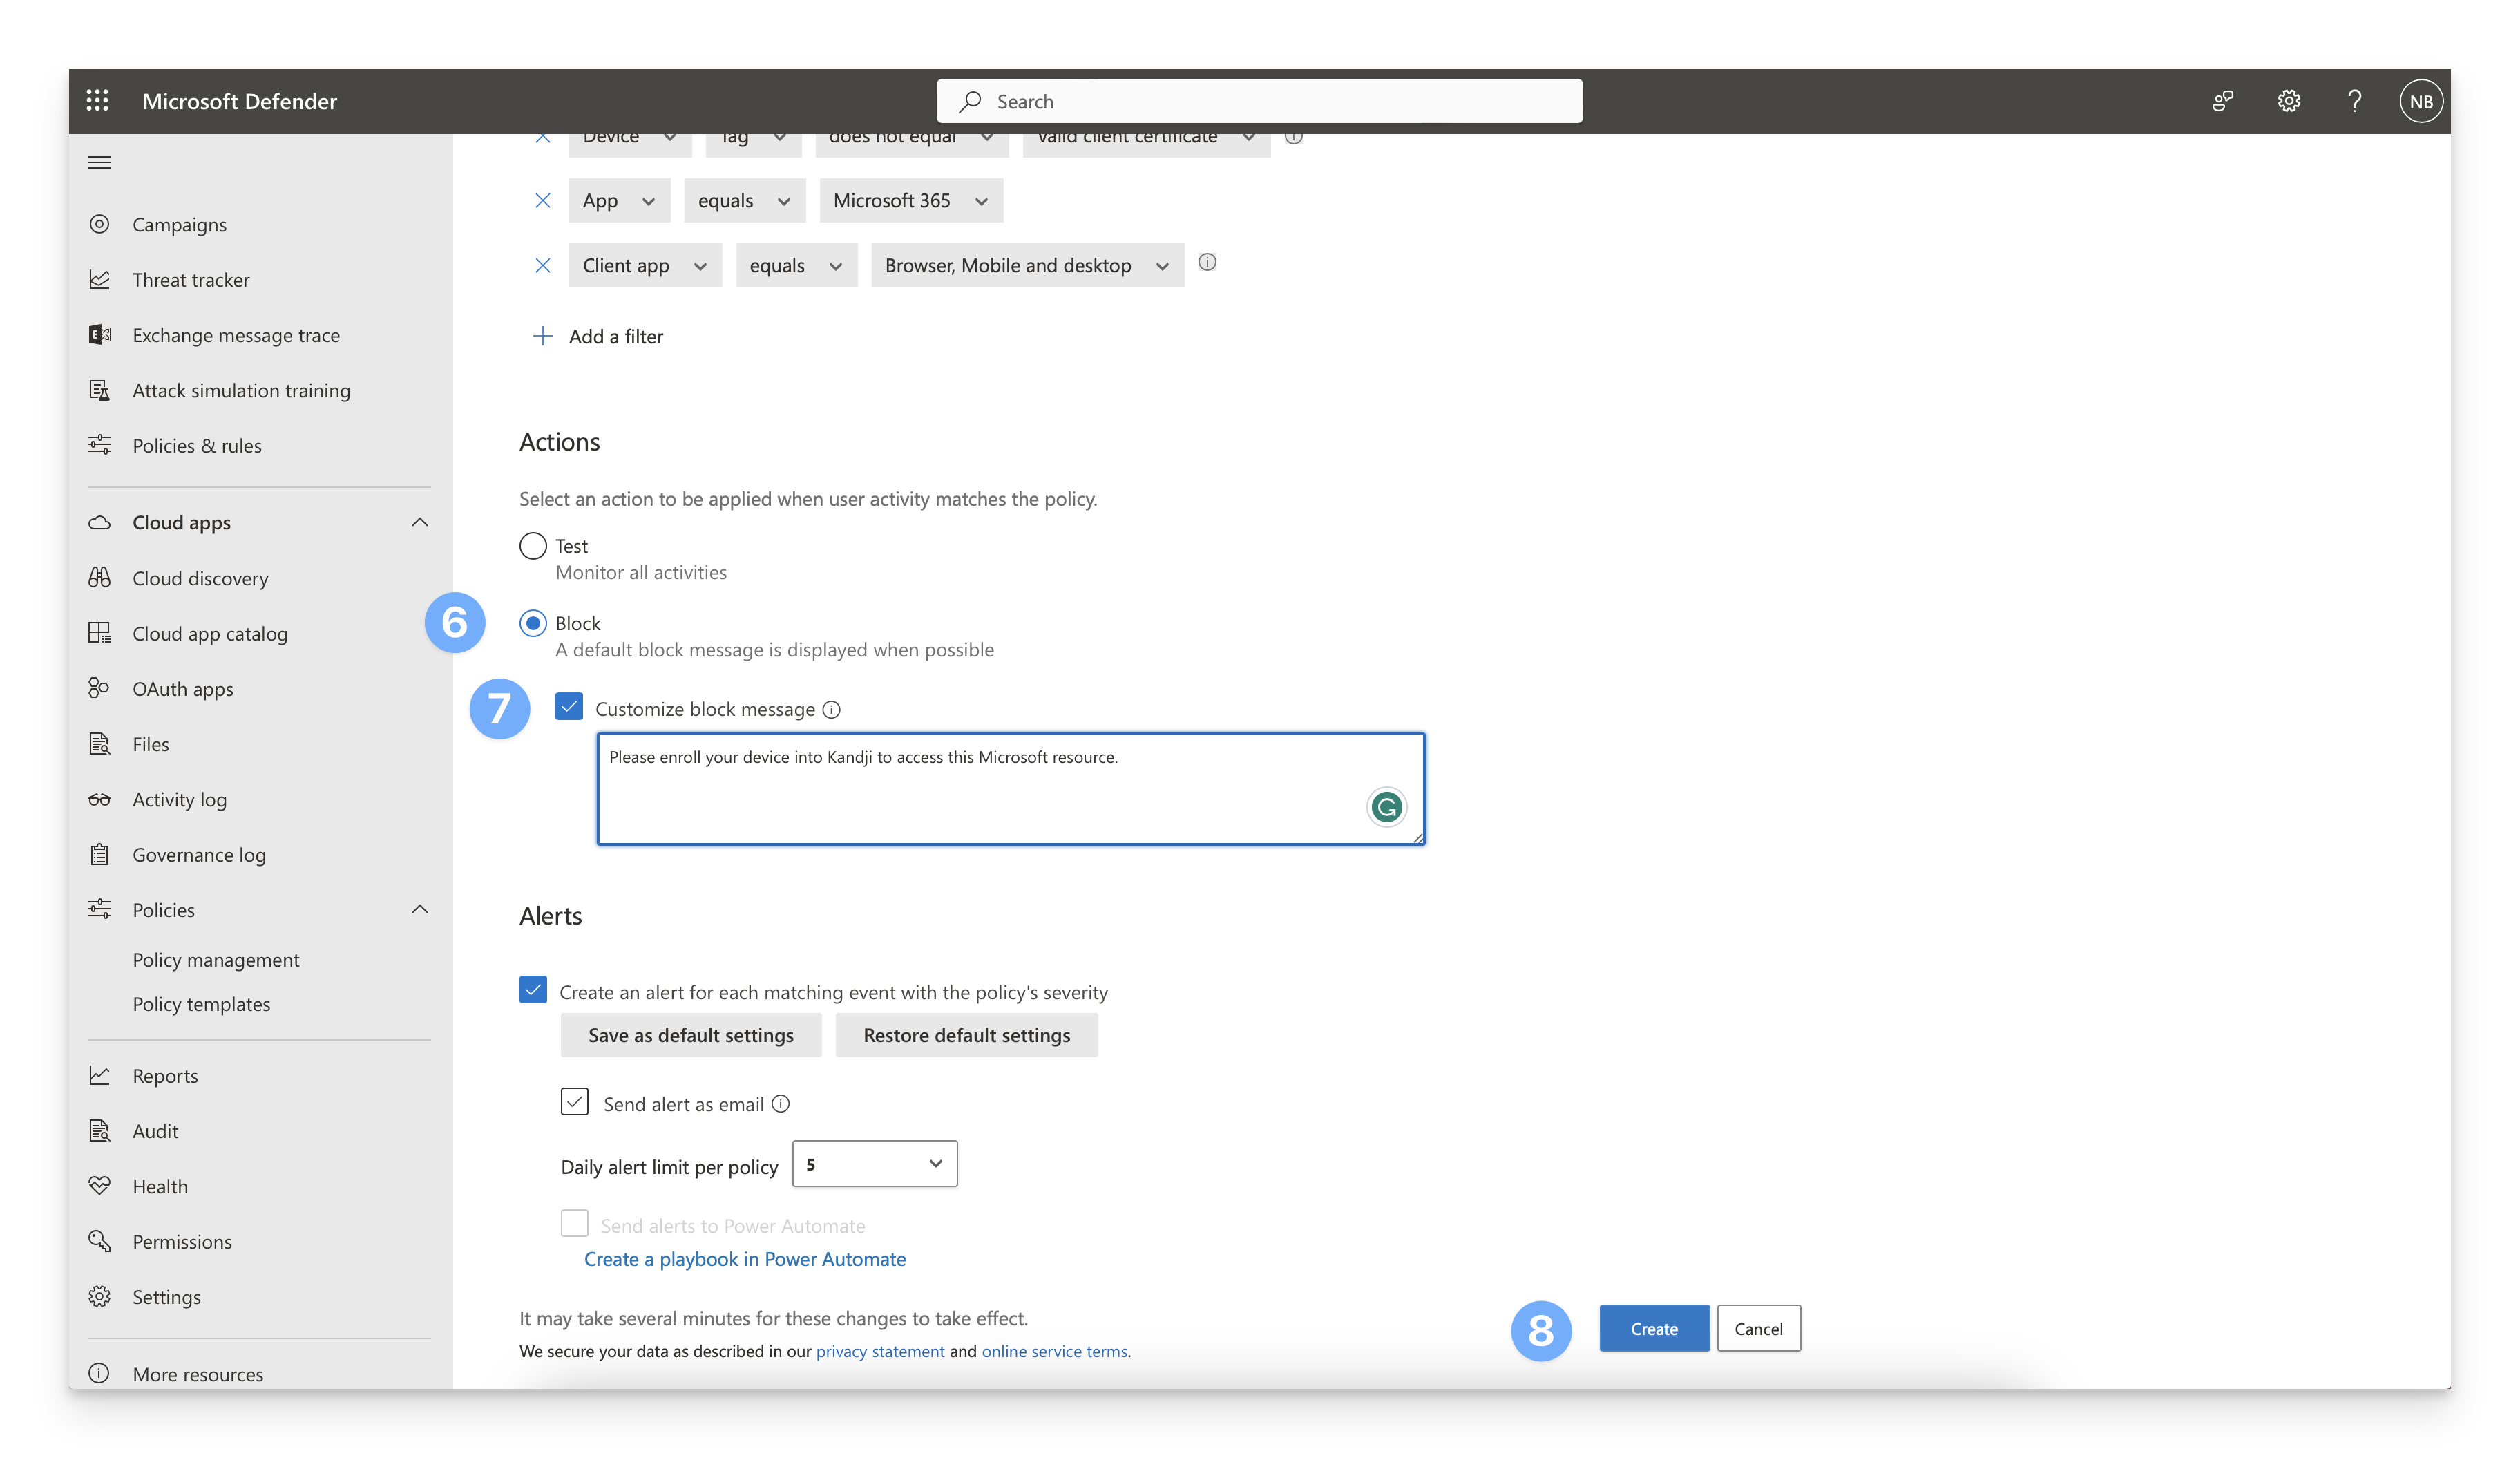
Under the Activities matching all of the following section, add the following filters to block untrusted devices from accessing O365 via browsers and mobile/desktop apps:
Device Tag does not equal Valid client certificate
App equals Office Portal (or other scoped app)
Client app equals Browser, Mobile and Desktop
Under the Actions section, select the Block radio button.
Select the Customize block message checkbox to enter a customized message that should be displayed to end users trying to access Microsoft 365 from untrusted devices.
Click Create to save the Access policy.
End User Experience
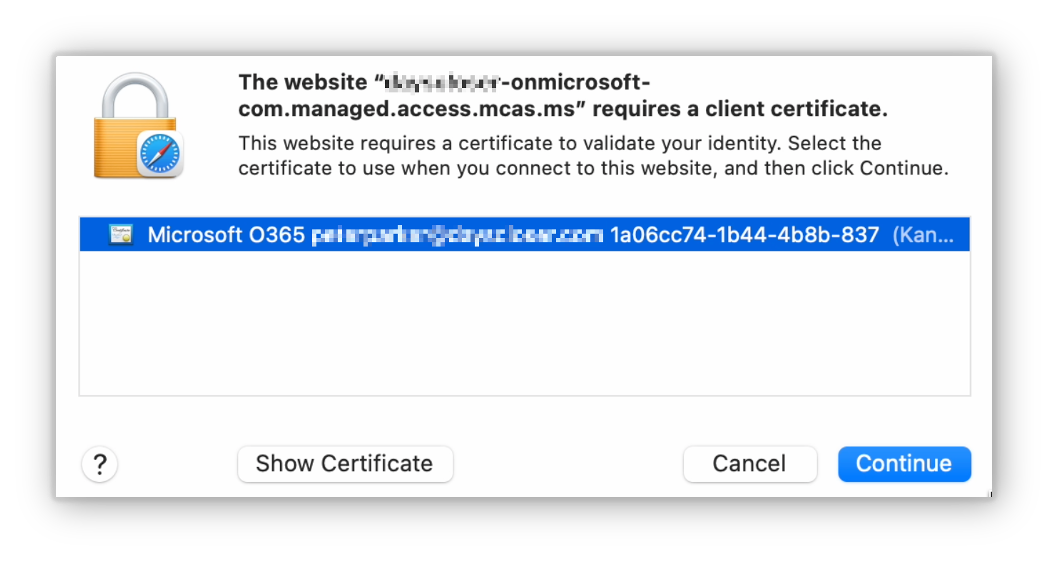
Trusted Devices
End users accessing Microsoft resources on a trusted device will be prompted to select the certificate to present to Microsoft. Sample prompt when using Safari:
Untrusted Devices
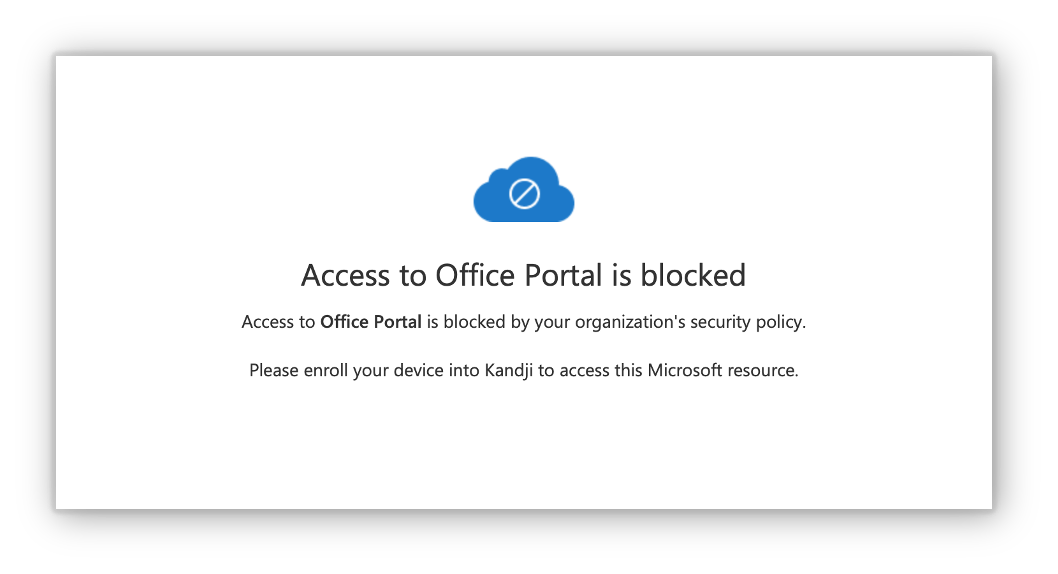
End users trying to access Microsoft resources on untrusted devices will receive the following block message.