What is SAML?
SAML, or Security Assertion Markup Language, is a standard that helps different systems communicate about user authentication and authorization. It’s mainly used for Single Sign-On (SSO), which means you can log in once and access multiple applications without entering your credentials again. In Kandji, you can use SAML for Kandji Web App access and Require Authentication with Automated Device Enrollment.
How SAML Works
There are three components that make up a SAML configuration:
Identity Provider (IdP) - This system that verifies your identity. It checks your credentials and shares this information with the service you want to use.
Service Provider (SP) - This is the application or service you're trying to access. It trusts the IdP to confirm your identity and lets you in based on that information.
SAML Assertions - These are messages that carry information about your identity and access rights from the IdP to the SP. There are three types:
Authentication Assertion - Confirms your identity and how you were authenticated.
Attribute Assertion - Shares extra details about you.
Authorization Decision Assertion - States whether you can access the service.
The SAML authentication process generally works like this:
User Requests Access - The user attempts to access a service provider, in this case, Kandji.
SAML Request Generation - Kandji generates a SAML authentication request and redirects the user to the IdP.
User Authentication - The IdP authenticates the user, usually by prompting them to log in if they aren’t already authenticated.
SAML Response Creation and Transmission - Once the user is authenticated, the IdP generates a SAML response, which includes a SAML assertion. This assertion contains information about the user, such as their identity and any attributes or roles they have. The SAML response is sent back to Kandji via the user’s browser.
Assertion Validation - Kandji receives the SAML response and validates the SAML assertion. This involves checking the digital signature to ensure it comes from a trusted IdP.
Access Granted - If the assertion is valid, Kandji grants the user access to log into the Kandji Web App, or enroll during Automated Device Enrollment.
Create a SAML Connection
These instructions cover how to create a generic Custom SAML SSO connection. For more information on creating IdP-specific Custom SAML connections, please see the following support articles:
In Kandji, navigate to the Settings page.
Click the Access tab.
Find the Authentication section and click the Add button at the bottom left of the authentication section.
.png)
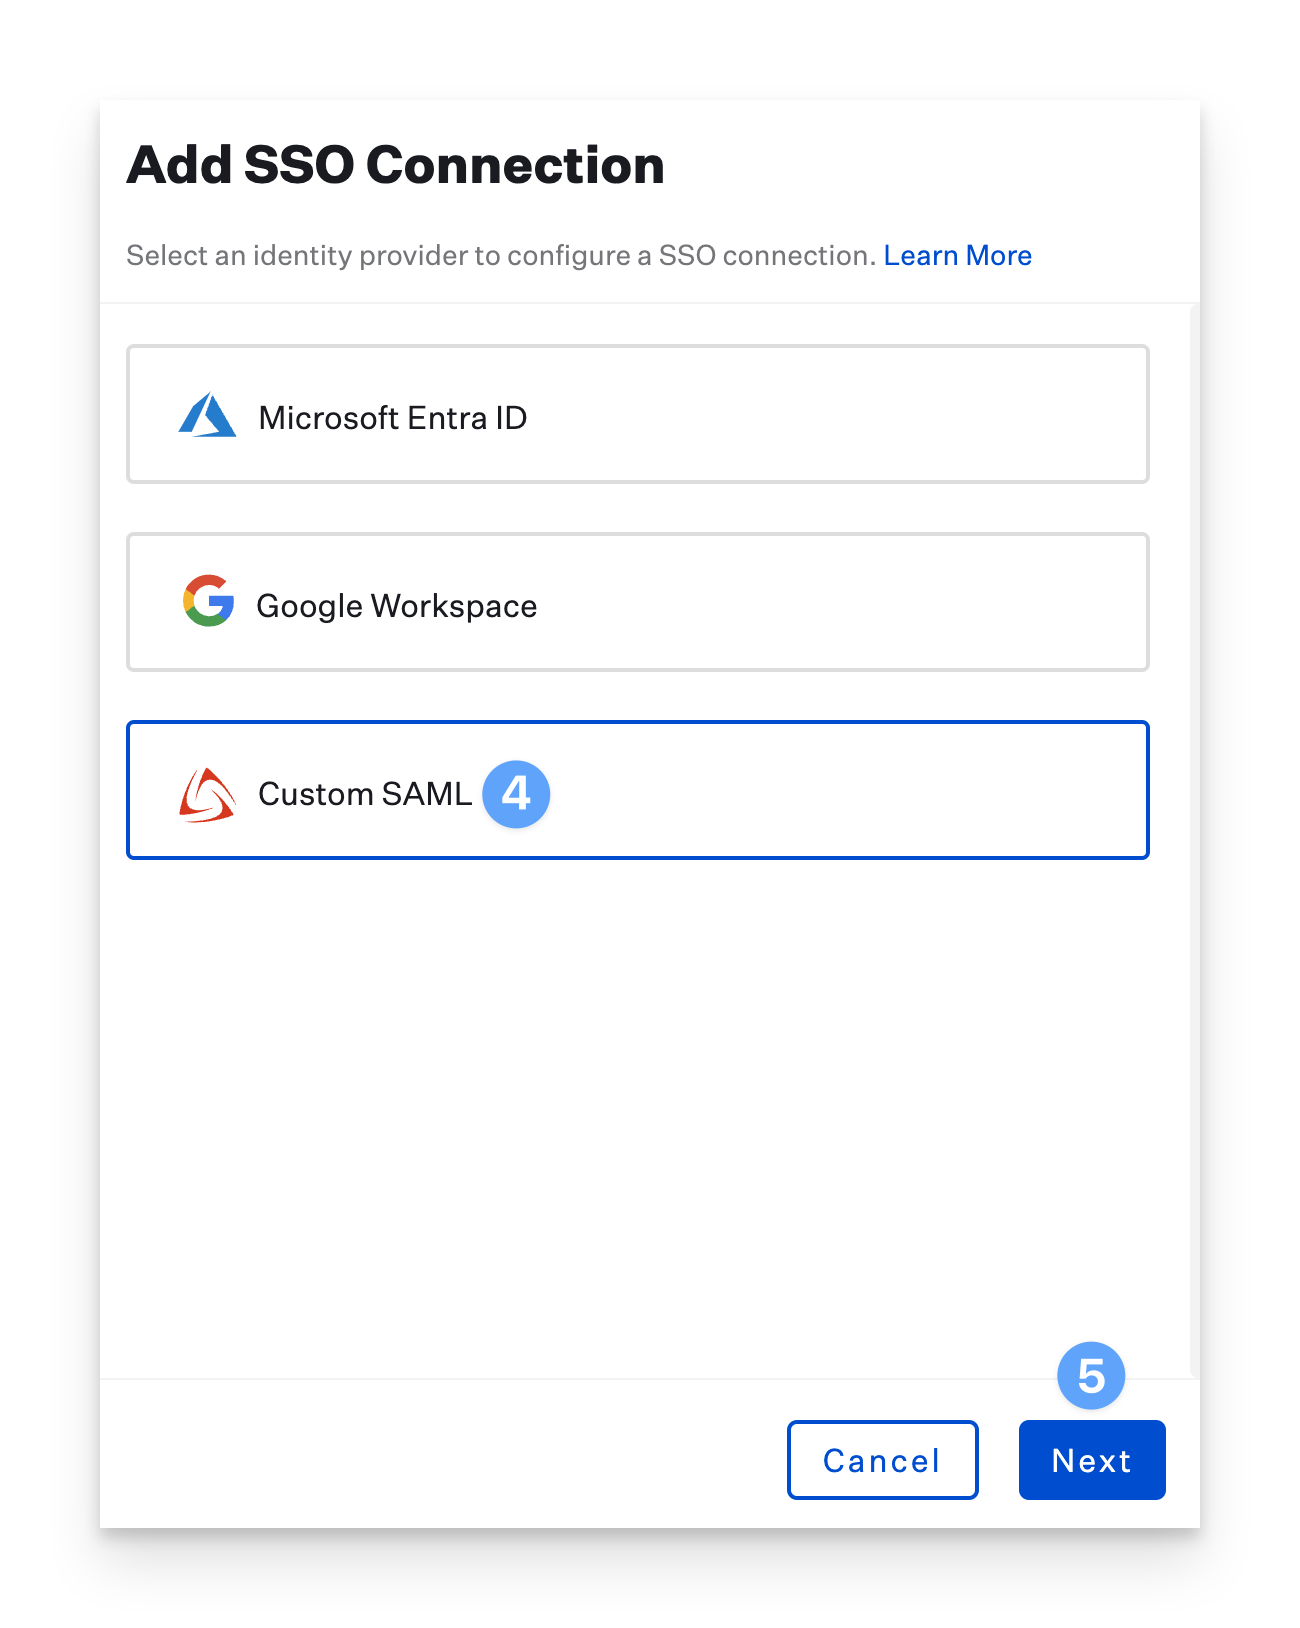
In the Add SSO Connection pane, select the Custom SAML option.
Click Next.

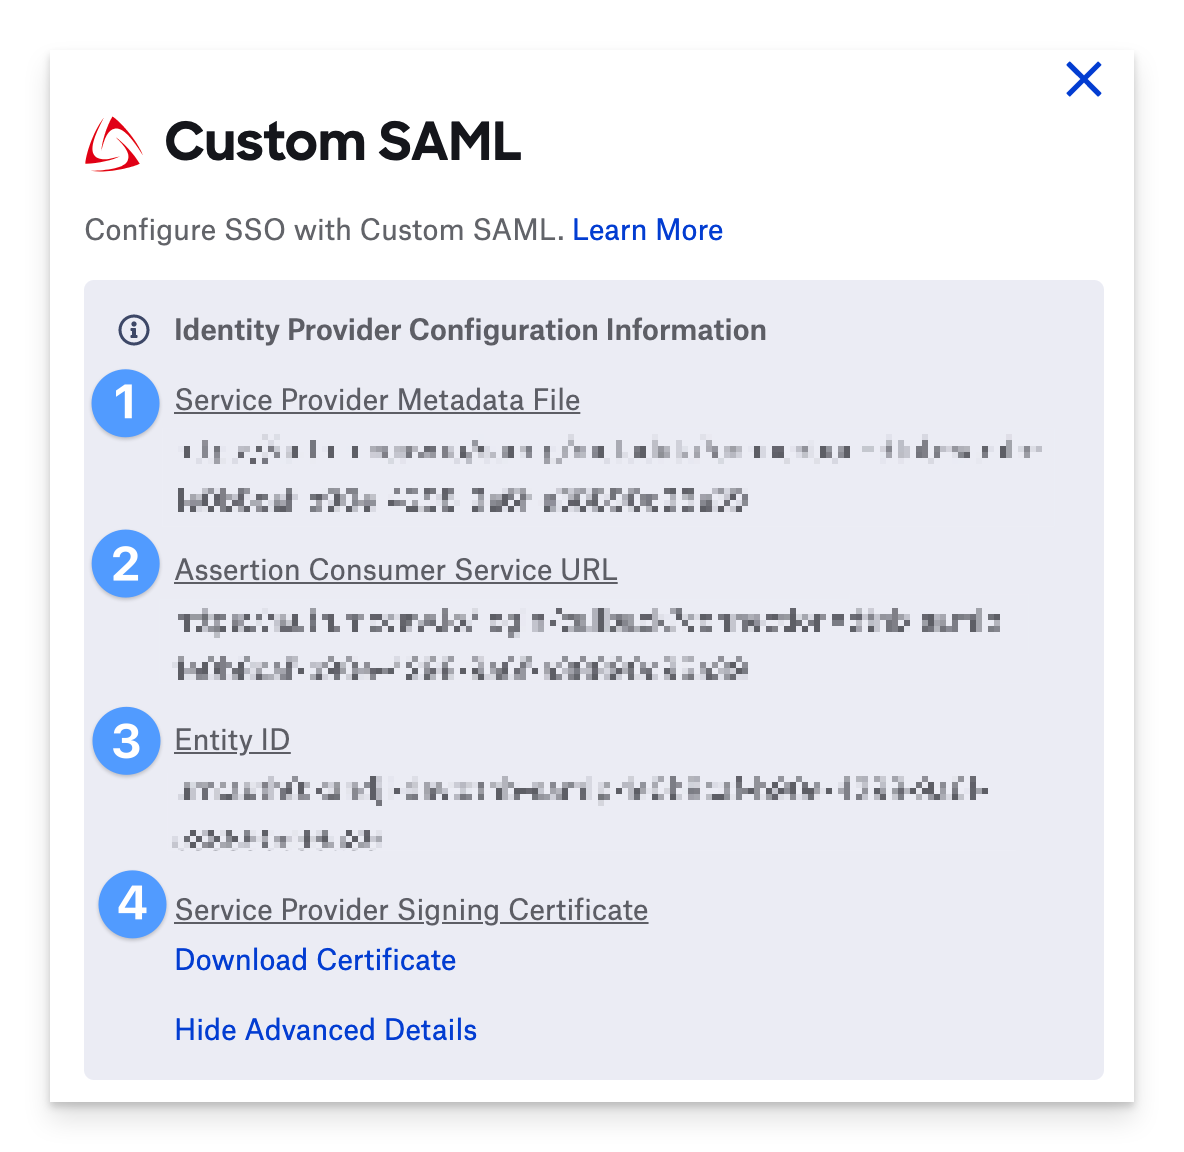
Select Show Advanced Details.
Copy the Assertion Consumer Service URL and save it in a text document for later use.
Copy the Entity ID and save it, too.
.png)
Leave this browser tab open as you proceed with the instructions below.
Configure SAML Connection
Once you have created the connection, you will see the following configuration options displayed in the modal.
Metadata File
This is the URL to the metadata file for the service provider details. Provide this metadata file to your identity provider if it supports metadata files. Note that this link will not be live until you save the connection page (Step 13).
Advanced Details
If your identity provider does not support metadata files, click Show Advanced Details. The advanced details section, which is covered later in this article, contains information from within the metadata file.
Name
Provide a display name for the connection. This will be shown on the login page.
Sign-In URL
This is the application sign-in URL provided by your identity provider.
Optional Sign-Out URL
This is the SLO URL (Single Logout URL) for your identity provider. SLO allows Kandji to automatically sign users out of your identity provider when they sign out of Kandji. Ensure you only fill in this URL if your identity provider supports SLO and it is configured to support SLO specifically with Kandji.
Signing Certificate
Paste the contents of the signing certificate in X.509 PEM format from your identity provider. This certificate is used to evaluate the validity of an incoming SAML claim. Paste the full contents of the certificate, including the BEGIN CERTIFICATE and END CERTIFICATE header/footer.
User ID Attribute
Specify the attribute within the SAML claim that should attempt to match against an existing administrator. Typically this will be the NAME ID URI (example below) as long as your identity provider is configured to send the user's email for the NAME ID value. Otherwise, match against any additional custom attribute that you intend on sending within the claim.
http://schemas.xmlsoap.org/ws/2005/05/identity/claims/nameidentifier
Sign Request
Choose if the request from the Service Provider (Kandji) to the Identity Provider, be signed.
Sign Request Algorithm
Select the signing algorithm required by your identity provider.
Sign Request Algorithm Digest
Select the signing algorithm digest required by your identity provider.
Protocol Binding
How should the Service Provider (Kandji) direct requests to the identity provider (typically HTTP-Redirect).
Save
Saves your SAML configuration.
Required Claim Attributes
The following attributes are required in your SAML claim. NameID is technically optional within Kandji so long as another attribute is specified to match the email address.
If the surname and given name attributes are missing from your claim, the email address will be used for these values.
Attribute URI | Needed Value | Reasoning |
NameID | The email of the user matching the email of a team member in your Kandji tenant. | Needed to match the user authenticating to Kandji. |
| The last name of the user. | Needed to update the users last name. |
| The first name of the user. | Needed to update the users first name. |
Encrypted SAML Assertions
Encrypted SAML Assertions are fully supported. While not required, we encourage you to encrypt the assertions from your identity provider whenever possible. Encrypting these assertions helps to prevent software (like browser extensions) from collecting private information from the SAML assertion.
Encryption Algorithm | AES256_CBCKey |
Transport Algorithm | RSA_OAEP |
Encryption Certificate | This is the same public key as used for single logout, it can be downloaded in the advanced details section or from here. |
Single Logout
The URL used for Single Logout operations is shown below. HTTP-POST or HTTP-REDIRECT bindings are both supported. The SP Issuer ID is the same as the Entity ID. The public key can be downloaded in the advanced details section or from here.
SLO URL: https://auth.kandji.io/logoutAdvanced Details
If your identity provider does not support configuring a service provider application via a metadata file, you will manually fill in this information.
Service Provider Metadata File: This is the URL to the metadata file for the service provider details. Provide this metadata file to your identity provider if it supports metadata files.
ACS URL: The URL that a SAML assertion should be sent to.
Entity ID: The entity ID of the service provider (this is also the SP Issuer ID used for SLO requests).
Service Provider Signing Certificate: This certificate is used to sign requests from the Service Provider to the Identity Provider. This same certificate should also be used if the identity provider is configured to encrypt SAML assertions sent to the service provider.

Enable the SAML Connection
Once you have configured the SAML connection in Kandji and your identity provider, you can enable it. For step-by-step instructions, please refer to the Enable and Manage a Connection section in our Single Sign-on support article.
Enforce Single Sign-on
You can disable the standard authentication connection once you have configured at least one Single Sign-on connection. Disabling Kandji standard authentication will disable the ability for Kandji administrators in your tenant to authenticate via email/password, Google Sign-in, or Office 365 Sign-in. Please refer to our Single Sign-on support article for step-by-step instructions.