Prerequisites
Intel-based Mac computers require the KEXT version of the Crowdstrike settings profile when using Crowdstrike's Firmware Analysis feature. If you are not using Firmware Analysis, we recommend using the non-KEXT versions of the custom settings below.
CrowdStrike installer from the vendor (Hosts > Sensor Downloads)
Crowdstrike Custom Settings
All Mac Architectures
macOS 15 (Sequoia) (GitHub Link)
Apple Silicon
All macOS Versions (GitHub Link)
Intel with KEXT
All macOS Versions (GitHub Link)
CrowdStrike Service Management Profile
macOS 13 (Ventura) - macOS 15 (Sequoia) (GitHub Link)
CrowdStrike Audit Script (GitHub Link)
CrowdStrike Postinstall script (GitHub Link)
Considerations
The CrowdStrike Settings Profiles are designed the facilitate the approval of CrowdStrike across all network content filters, kernel extensions, system extensions, PPPC, and web-filtering requirements. This profile is compatible with both the older Falcon agent using kernel extensions and the latest version utilizing system extensions.
You will need to deploy both the crowdstrike_settings_macOS15 and crowdstrike_settings profiles following the steps in the Deploying with Assignment Maps section to assign them correctly.
The CrowdStrike Service Management Profile handles essential login and background processes.
If you require it, the Legacy System Extension (KEXT) Settings Profile can be accessed via this GitHub link.
This profile supports both the Falcon agent with kernel extensions and the newer version with system extensions.
The KEXT payload is necessary only when using the CrowdStrike Firmware Analysis feature on Intel-based Mac computers.
Please note that depending on the specific CrowdStrike product and version you have installed, there may be variations in app paths, privacy access settings, and kernel or system extension requirements. As with any custom application, we strongly recommend thorough testing before deploying it to a production Mac.
Add and Configure the Custom Profiles
The service management profile for Crowdstrike Falcon is compatible with macOS 13 Ventura and later. For macOS Monterey 12 and earlier, an Assignment Map must be used for advanced scoping to prevent the service management profile from being assigned to those devices. To learn more about deploying Crowdstrike in Assignment Maps, follow the Deploying with Assignment Maps section.
To add this Library Item to your Kandji Library, follow the steps outlined in the Library Overview article.
Give your Custom Profile a Name.
For Install on, select Mac.
Assign to your desired Blueprints.
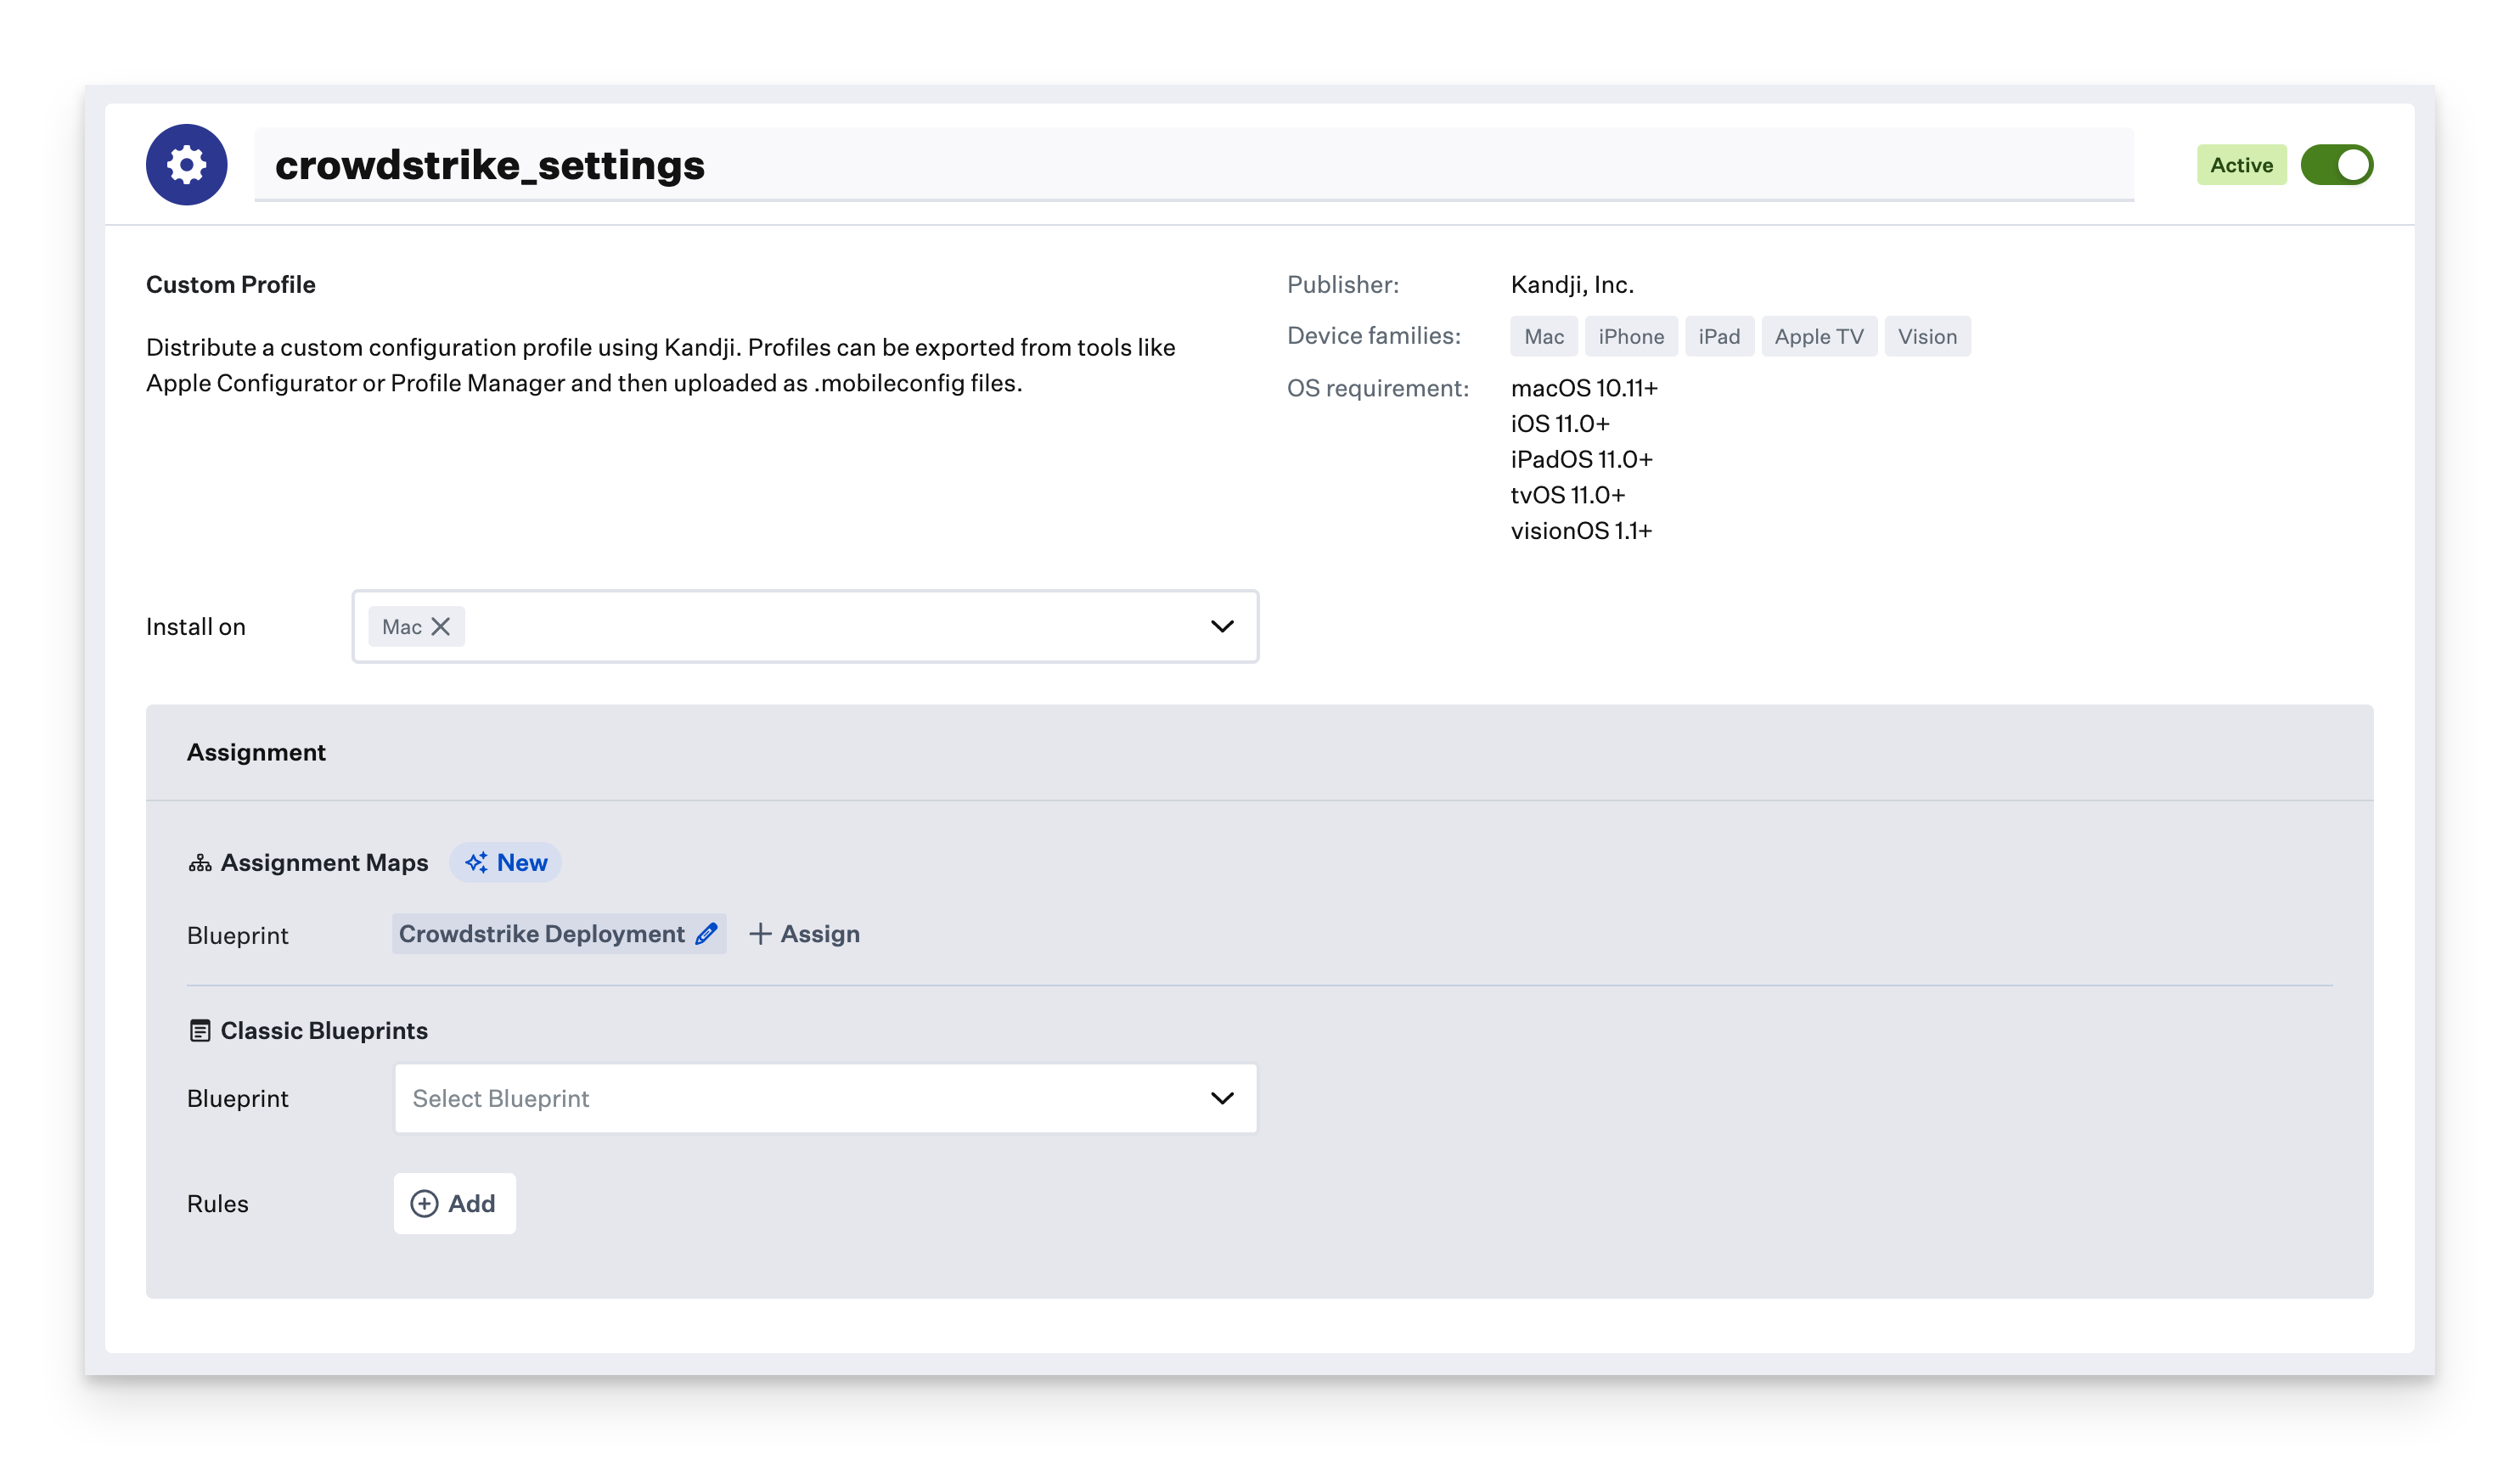
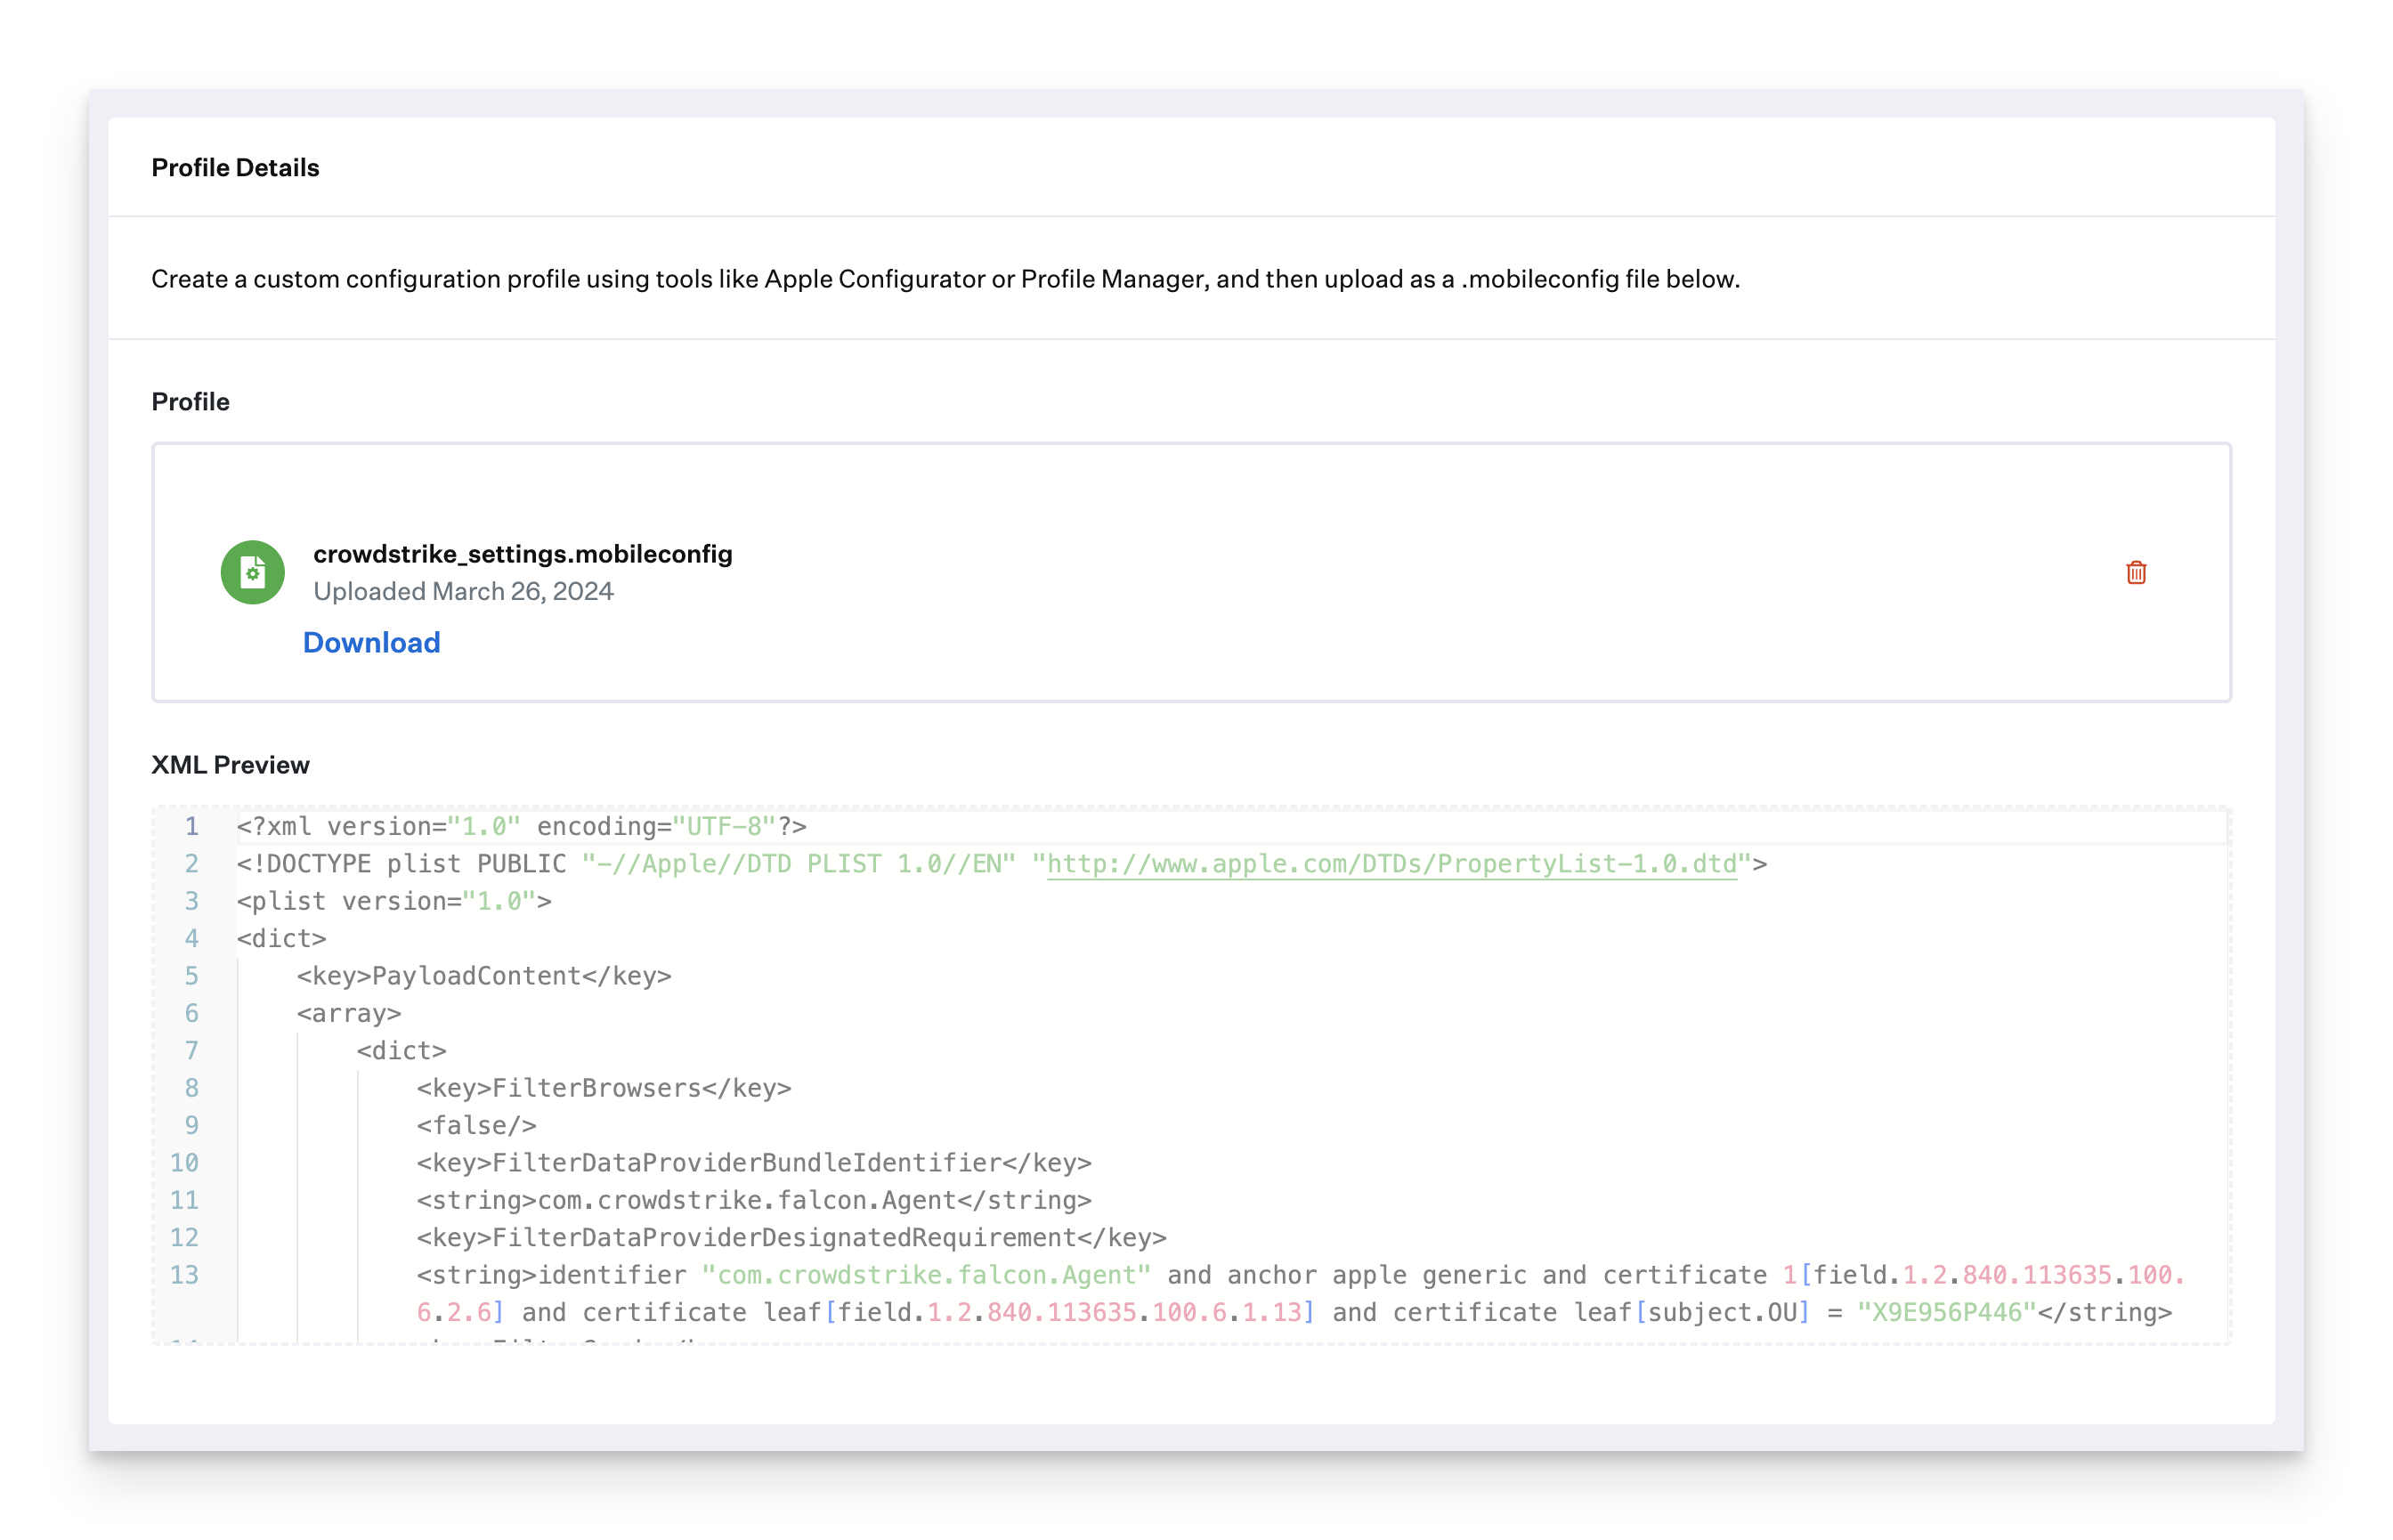
Upload the CrowdStrike Settings Profile (or Legacy System Extension (KEXT) settings profile).
Click Save.
Repeat the previous steps in this section for the crowdstrike_settings_macOS15 and crowdstrike_service_management profiles.
Add and Configure the Custom App
To add this Library Item to your Kandji Library, follow the steps outlined in the Library Overview article.
Give the Custom App a Name. Optionally, add a custom icon.
Assign to your desired Blueprints.

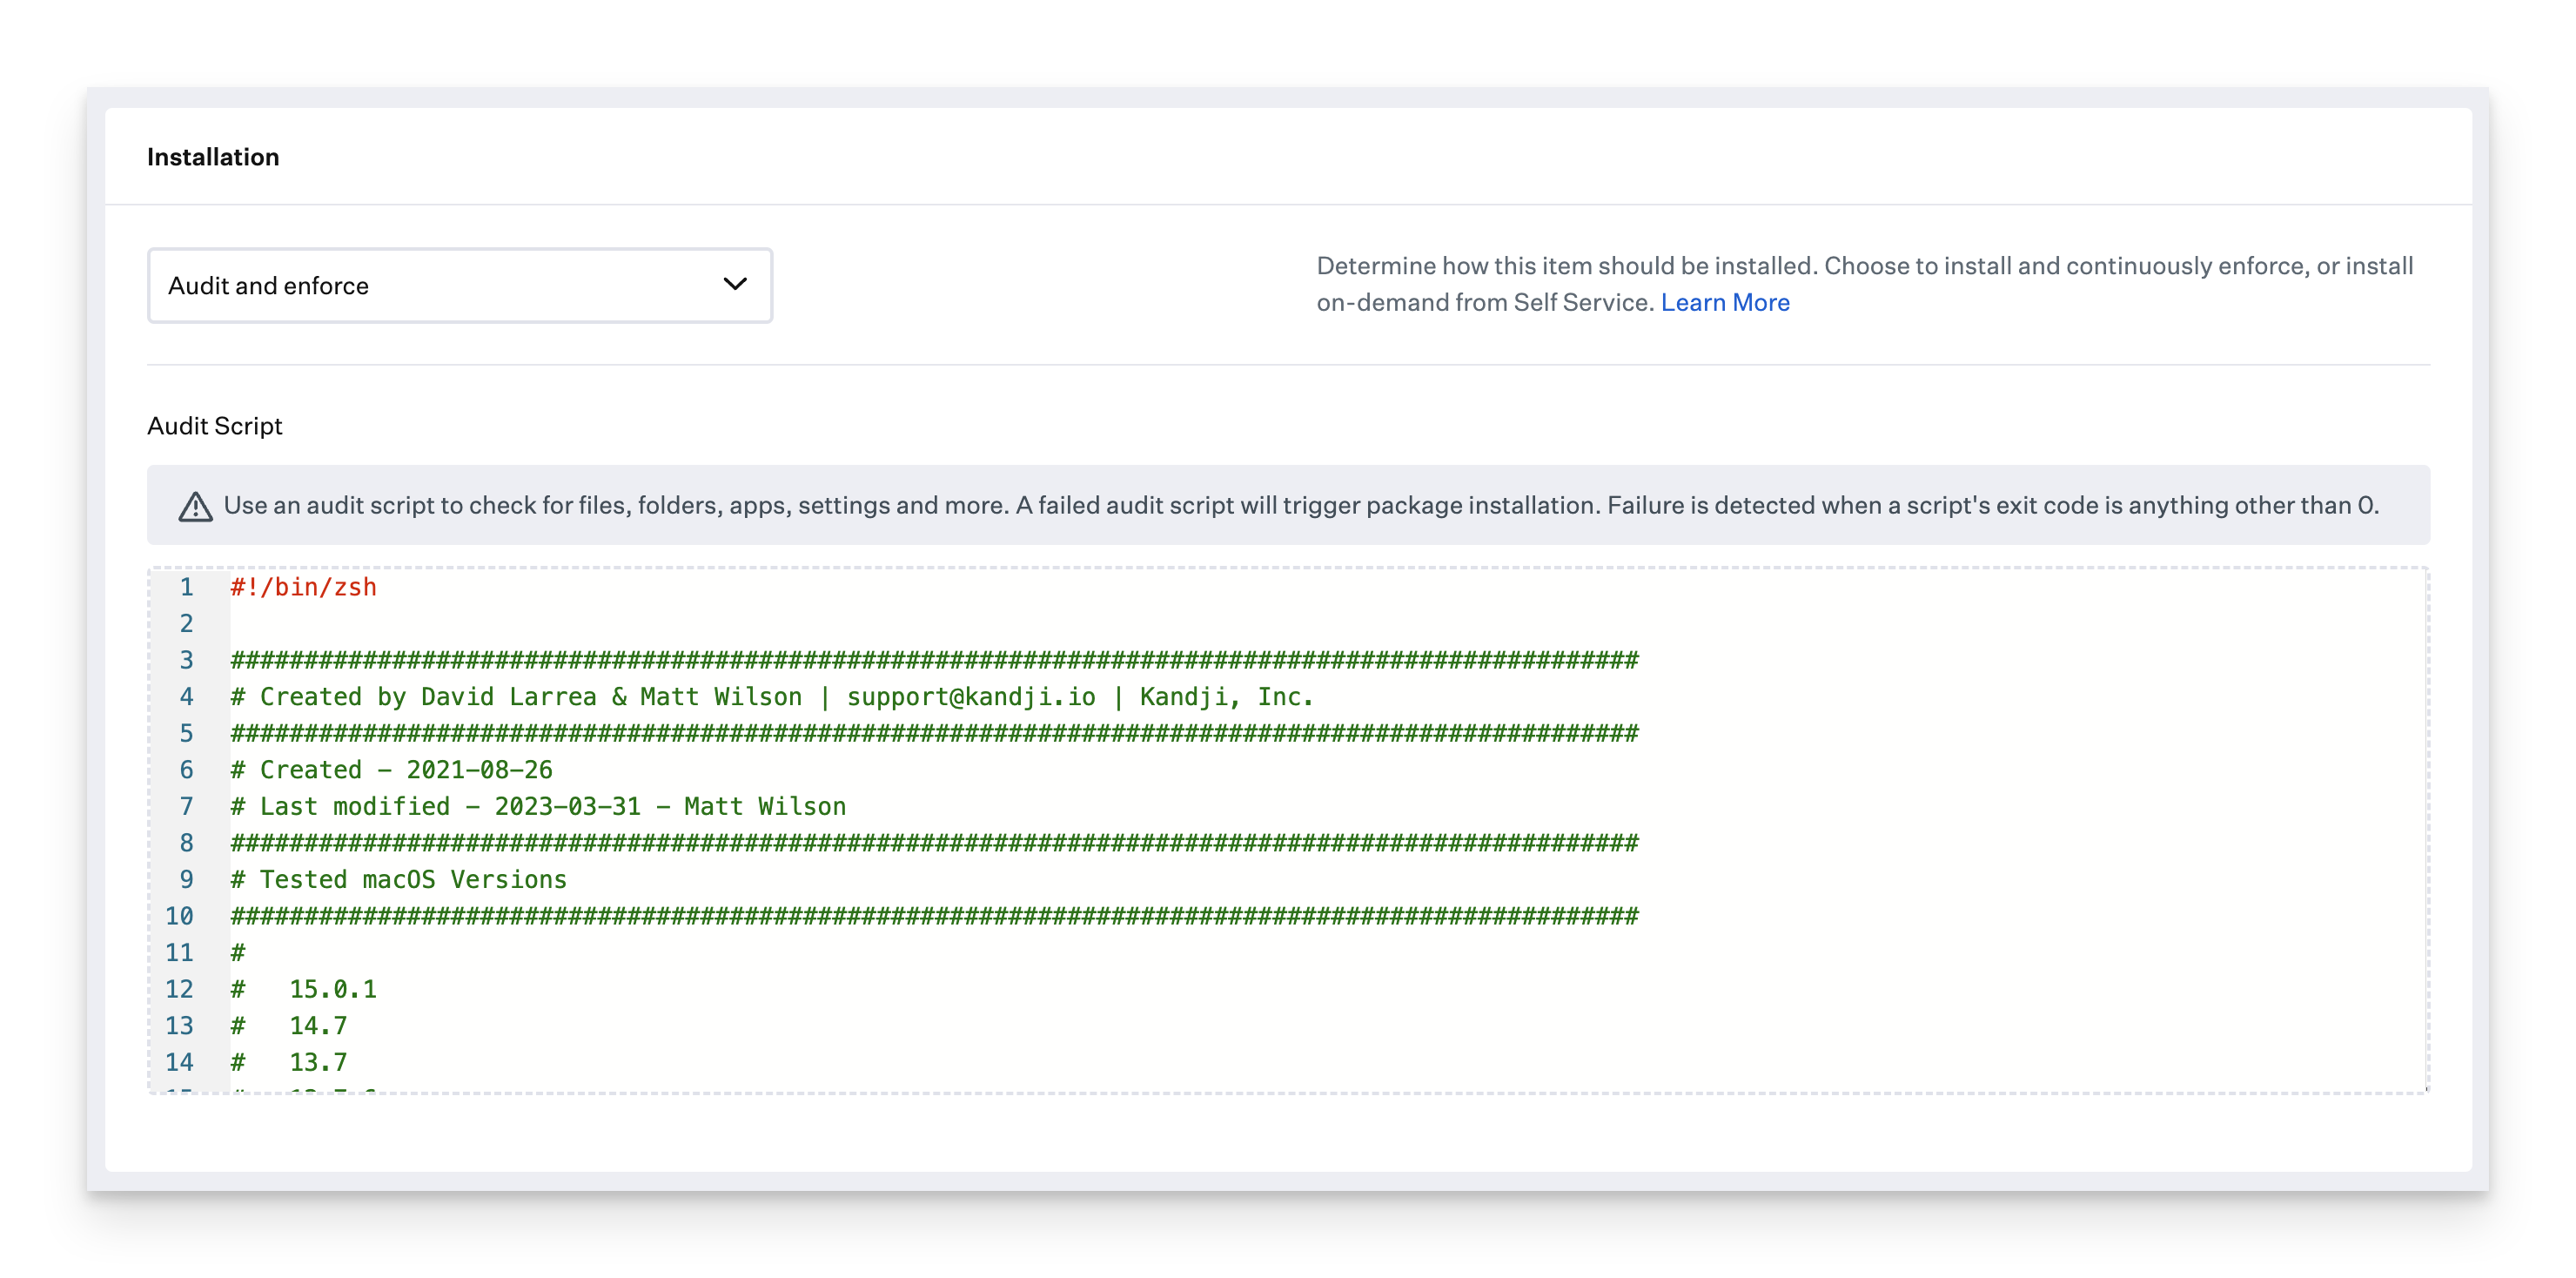
Change the Installation to Audit and Enforce.
Copy and paste the crowdstrike_ae_script.zsh script from the prerequisites into the Audit & Enforce text box. No modification is required.
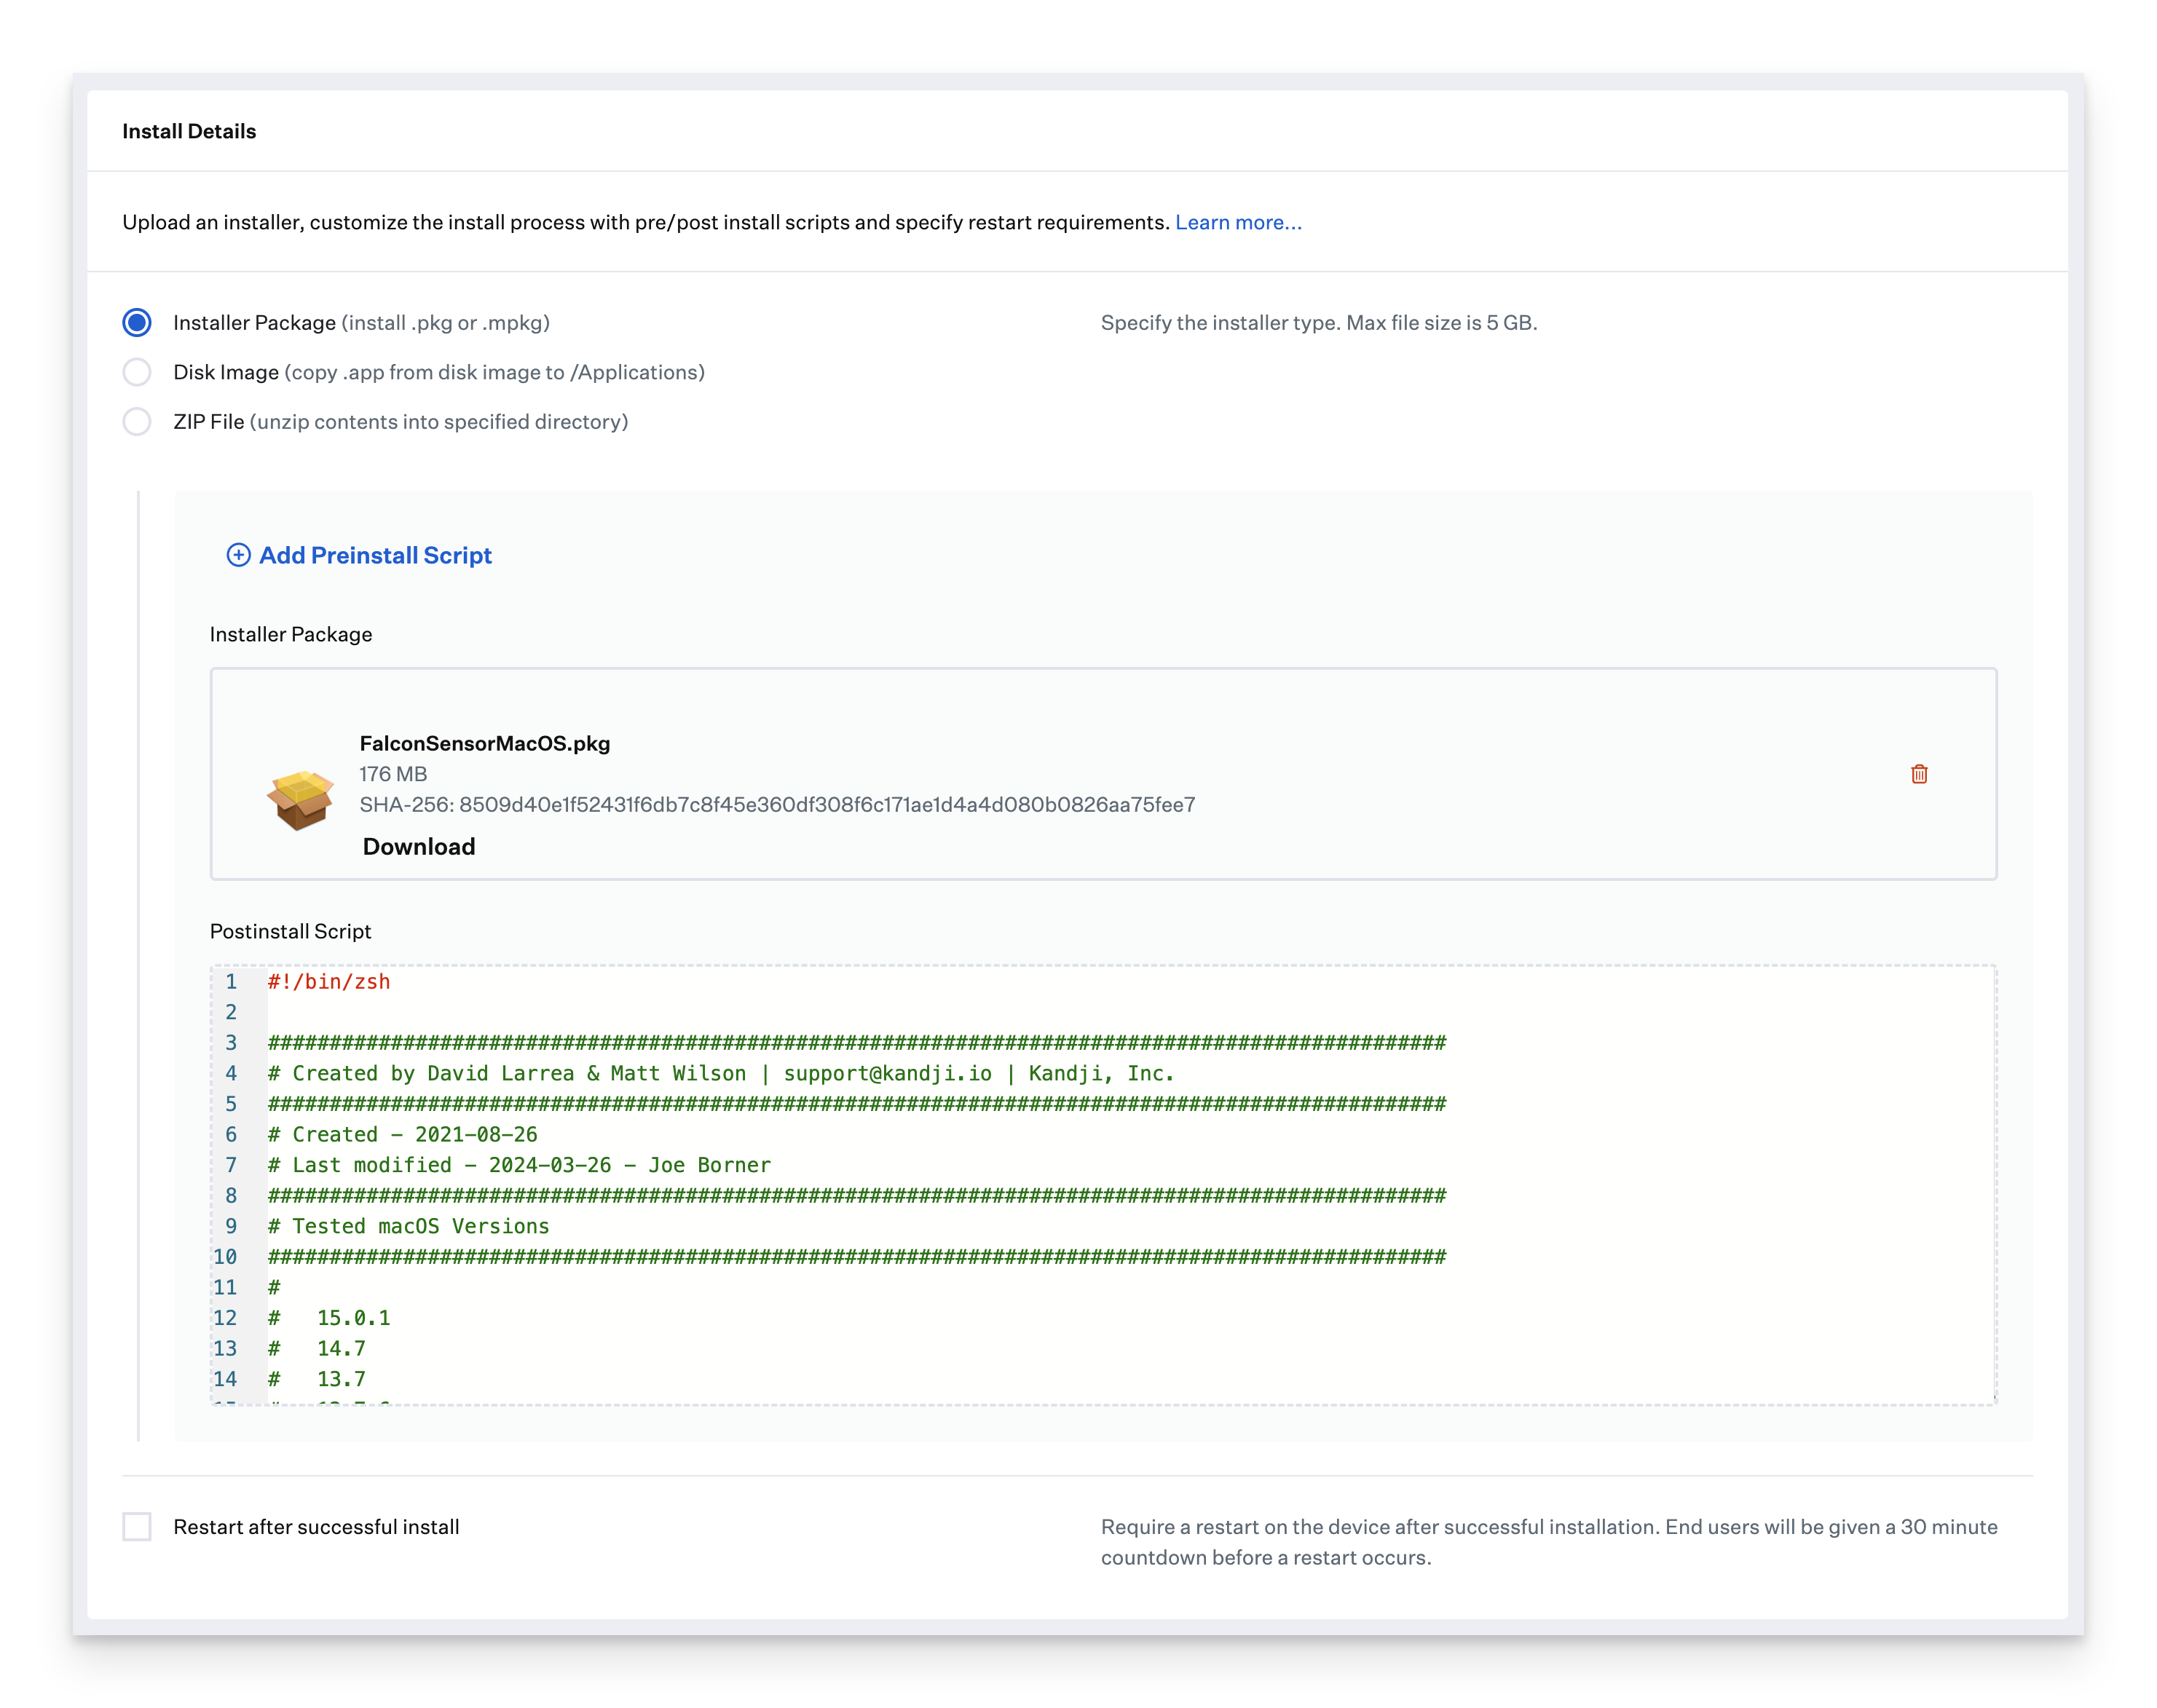
Select Installer Package (install .pkg or .mpkg) as the deployment type
Upload the installer package.
Paste the Postinstall Script referenced in the Prerequisites.
In the Post-Install script, update the customerIDChecksum variable on line 55 with your Customer ID
Optionally, paste your install token on line 59 inside the installToken variable; otherwise, leave it blank.
Click Save.
Deploying with Assignment Maps
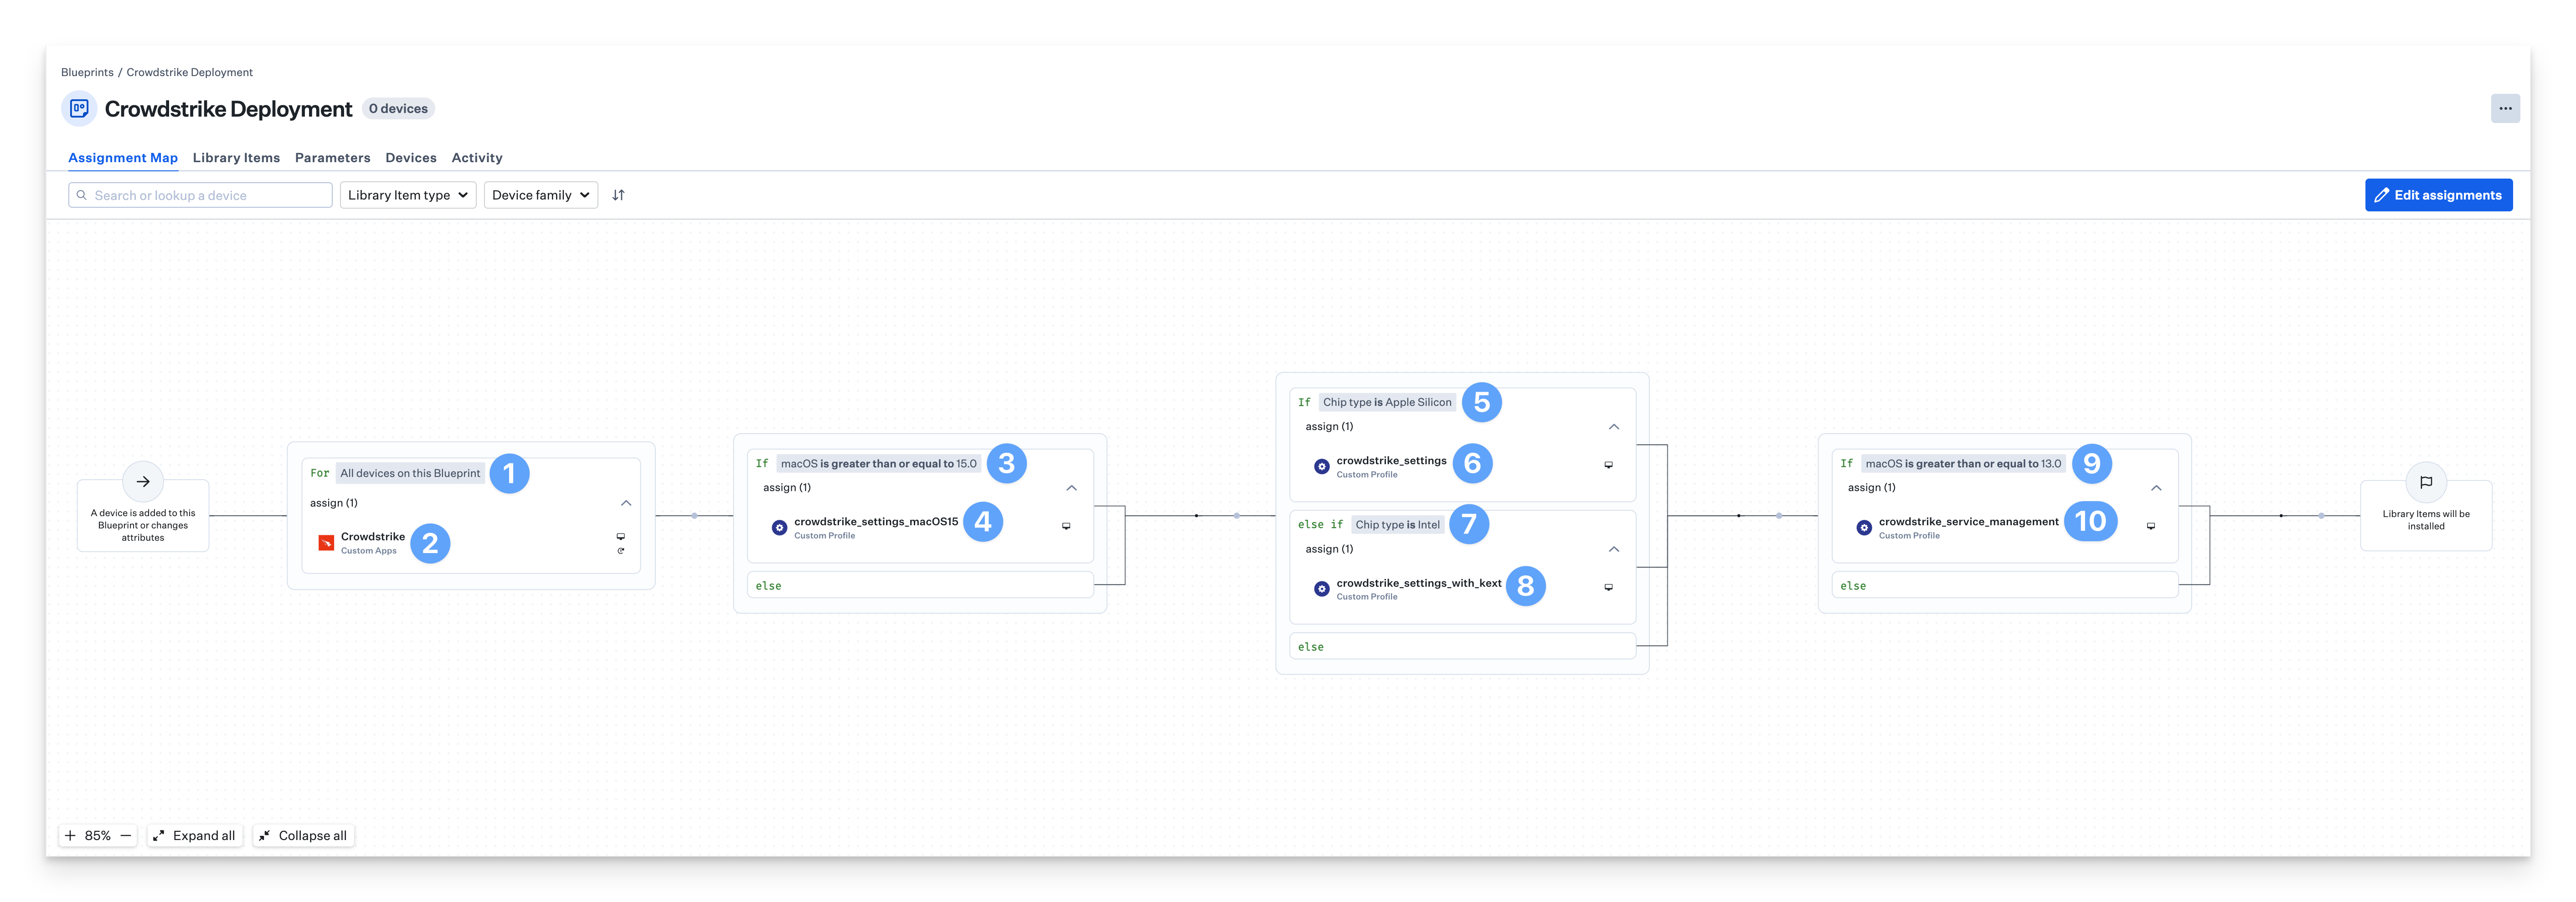
There are four Crowdstrike Custom Profiles that need conditional logic to ensure they are deployed to the correct devices. An Assignment Map provides an easy solution for all of your devices in one convenient view.
Please review our Creating a Blueprint and Using Conditional Logic in Assignment Maps articles.
Start with the For All devices on this Blueprint conditional block.
Assign the Crowdstrike Custom App to the block.
If multiple Custom Apps are needed, create a conditional block with conditions for the different versions of the installer.
Set the top of the conditional block to If macOS is greater than or equal to 15.0.
Assign the crowdstrike_settings_macOS15 Custom Profile to the conditional block.
Set the top of the conditional block to If Chip type is Apple Silicon.
Assign the crowdstrike_settings Custom Profile to the conditional block.
Set the bottom conditional block to else if Chip type is Intel.
Assign the crowdstrike_settings_with_kext Custom Profile to the conditional block.
Set the top of the conditional block to If macOS is greater than or equal to 13.0.
Assign the crowdstrike_service_management Custom Profile to the conditional block.