What is Platform SSO?
Platform SSO is a capability that allows users to sign in to their Mac devices using a hardware-bound key, smart card, or their IdP password. This feature enhances the Microsoft Enterprise SSO plug-in for Apple devices, providing single sign-on for Microsoft Entra ID accounts on macOS 14 and later.
Platform SSO with Microsoft Entra ID is currently in Preview. For more information, see Microsoft's macOS Platform Single Sign-on overview.
Add and Configure the Company Portal Auto App
To add this Library Item to your Kandji Library, follow the steps outlined in the Library Overview article.
Assign to your desired Blueprints.
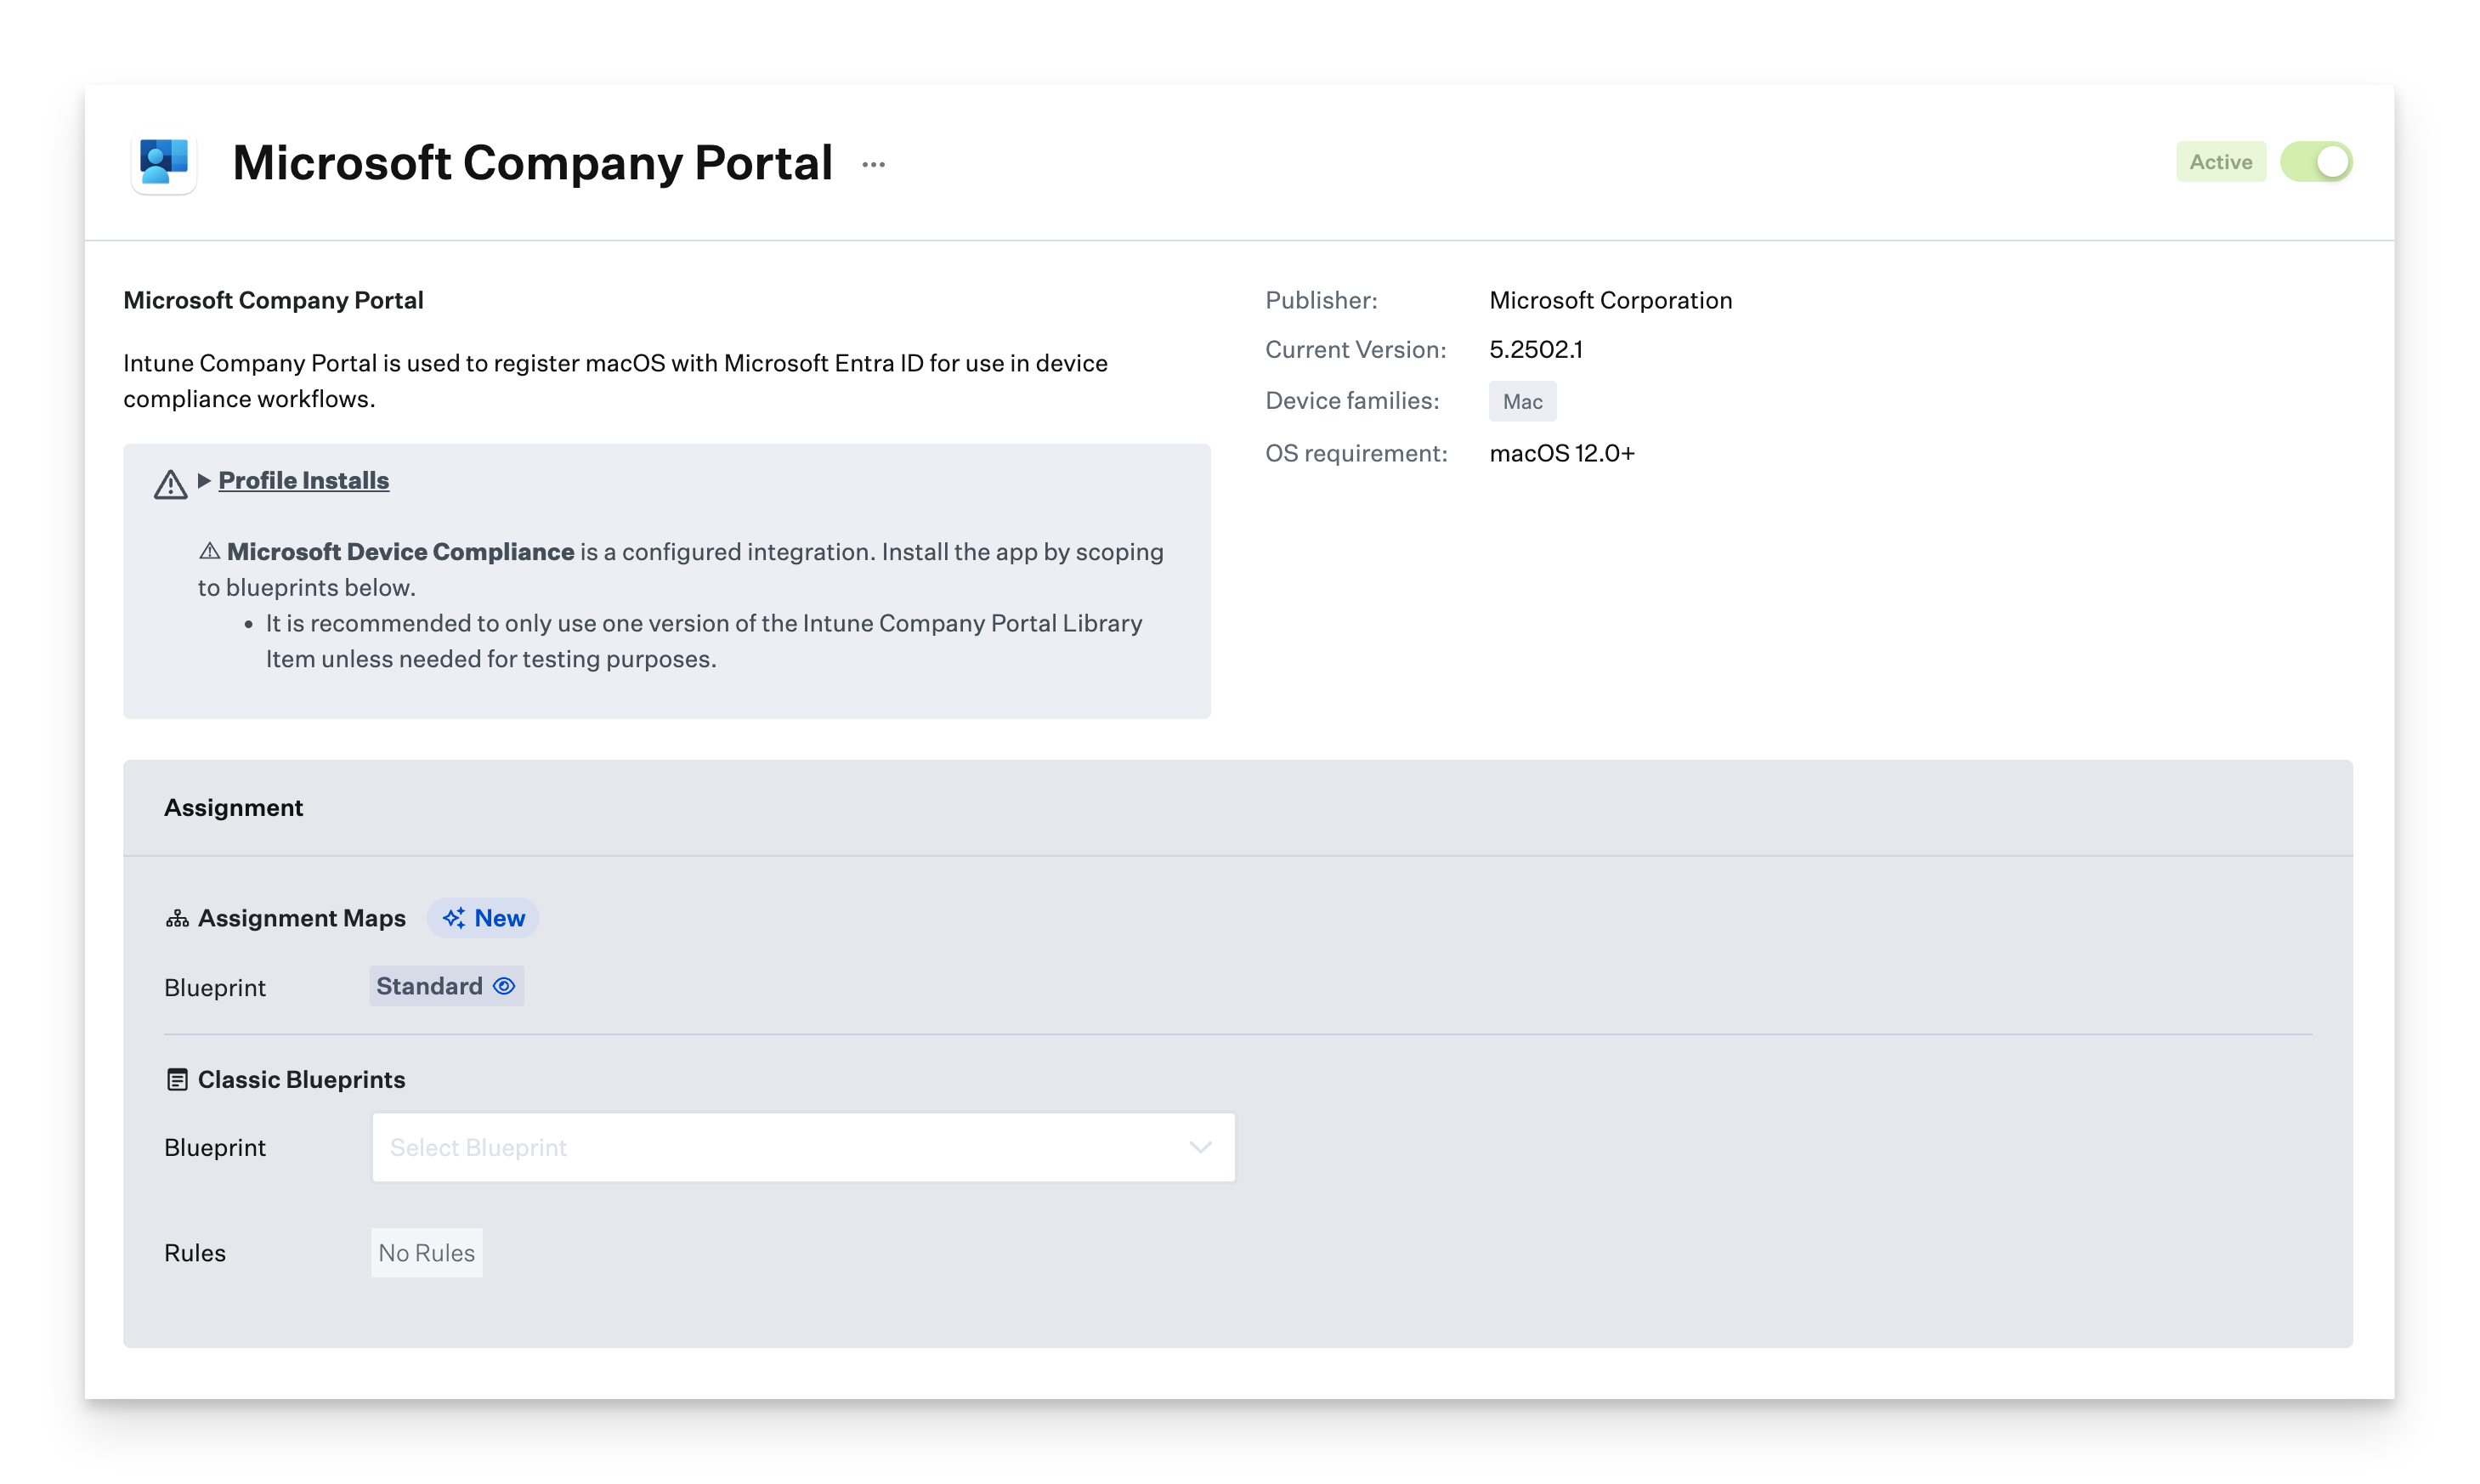
Set your Installation Method to Continuously Enforce.
Specify your Version Enforcement settings.
Save your Library Item.
Add and Configure a Login Window Library Item
To add this Library Item to your Kandji Library, follow the steps outlined in the Library Overview article.
Give your Login Window Library Item a Name.
Assign to your desired Blueprints.
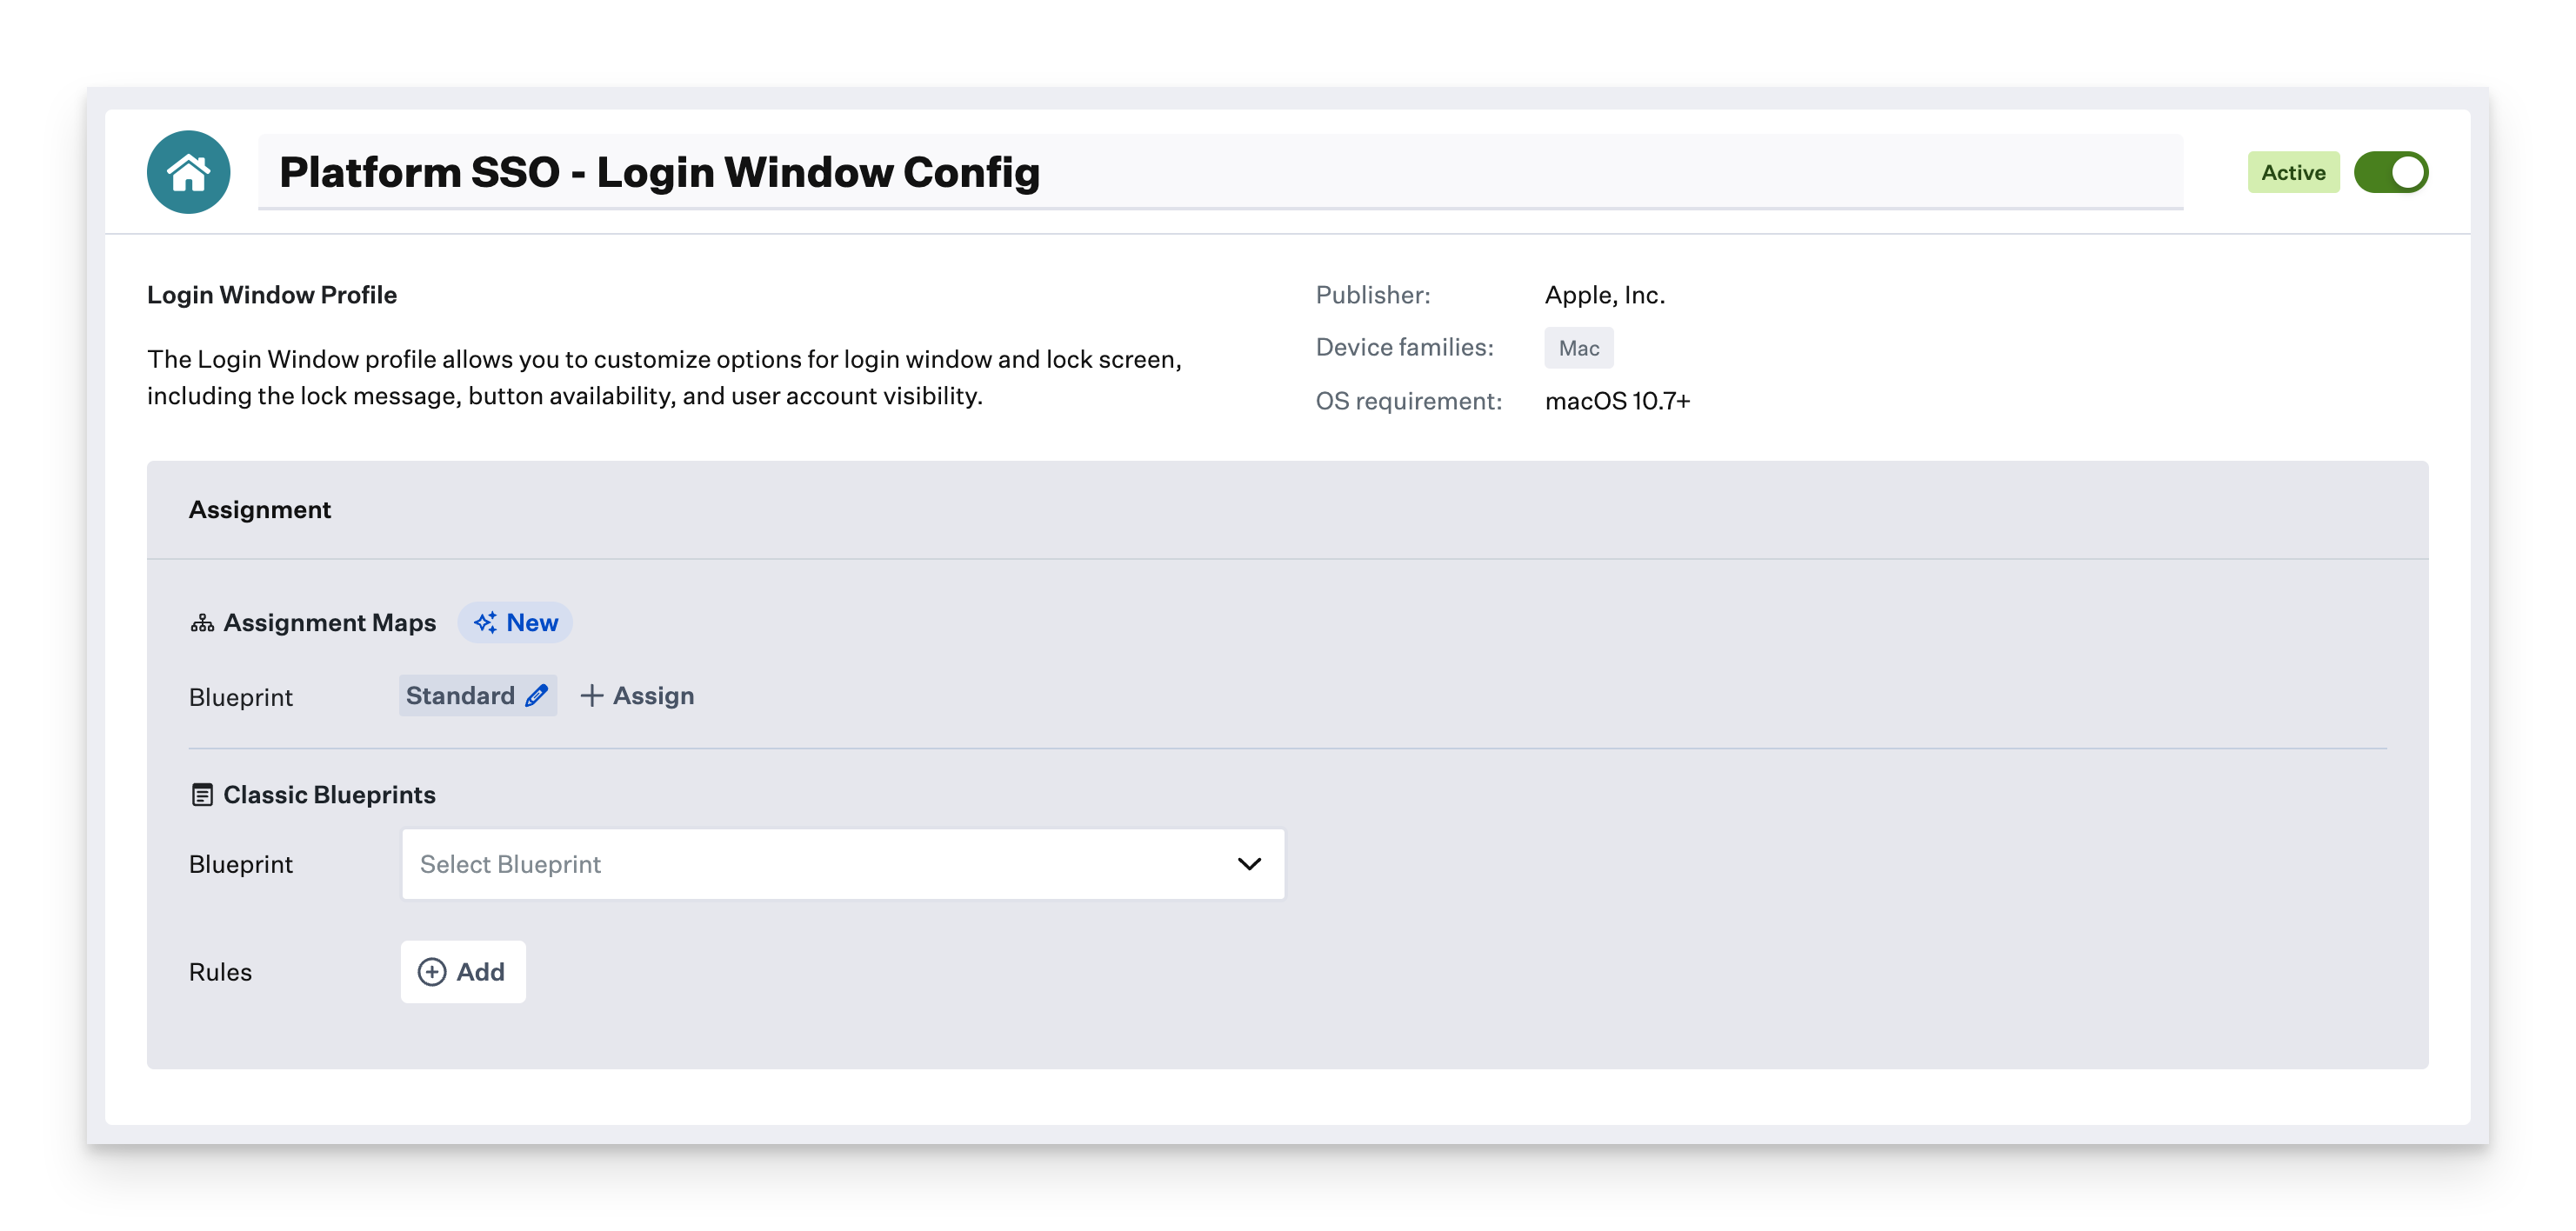
Under User Visibility, set the radio button for Display username and password fields.
Save your Library Item.

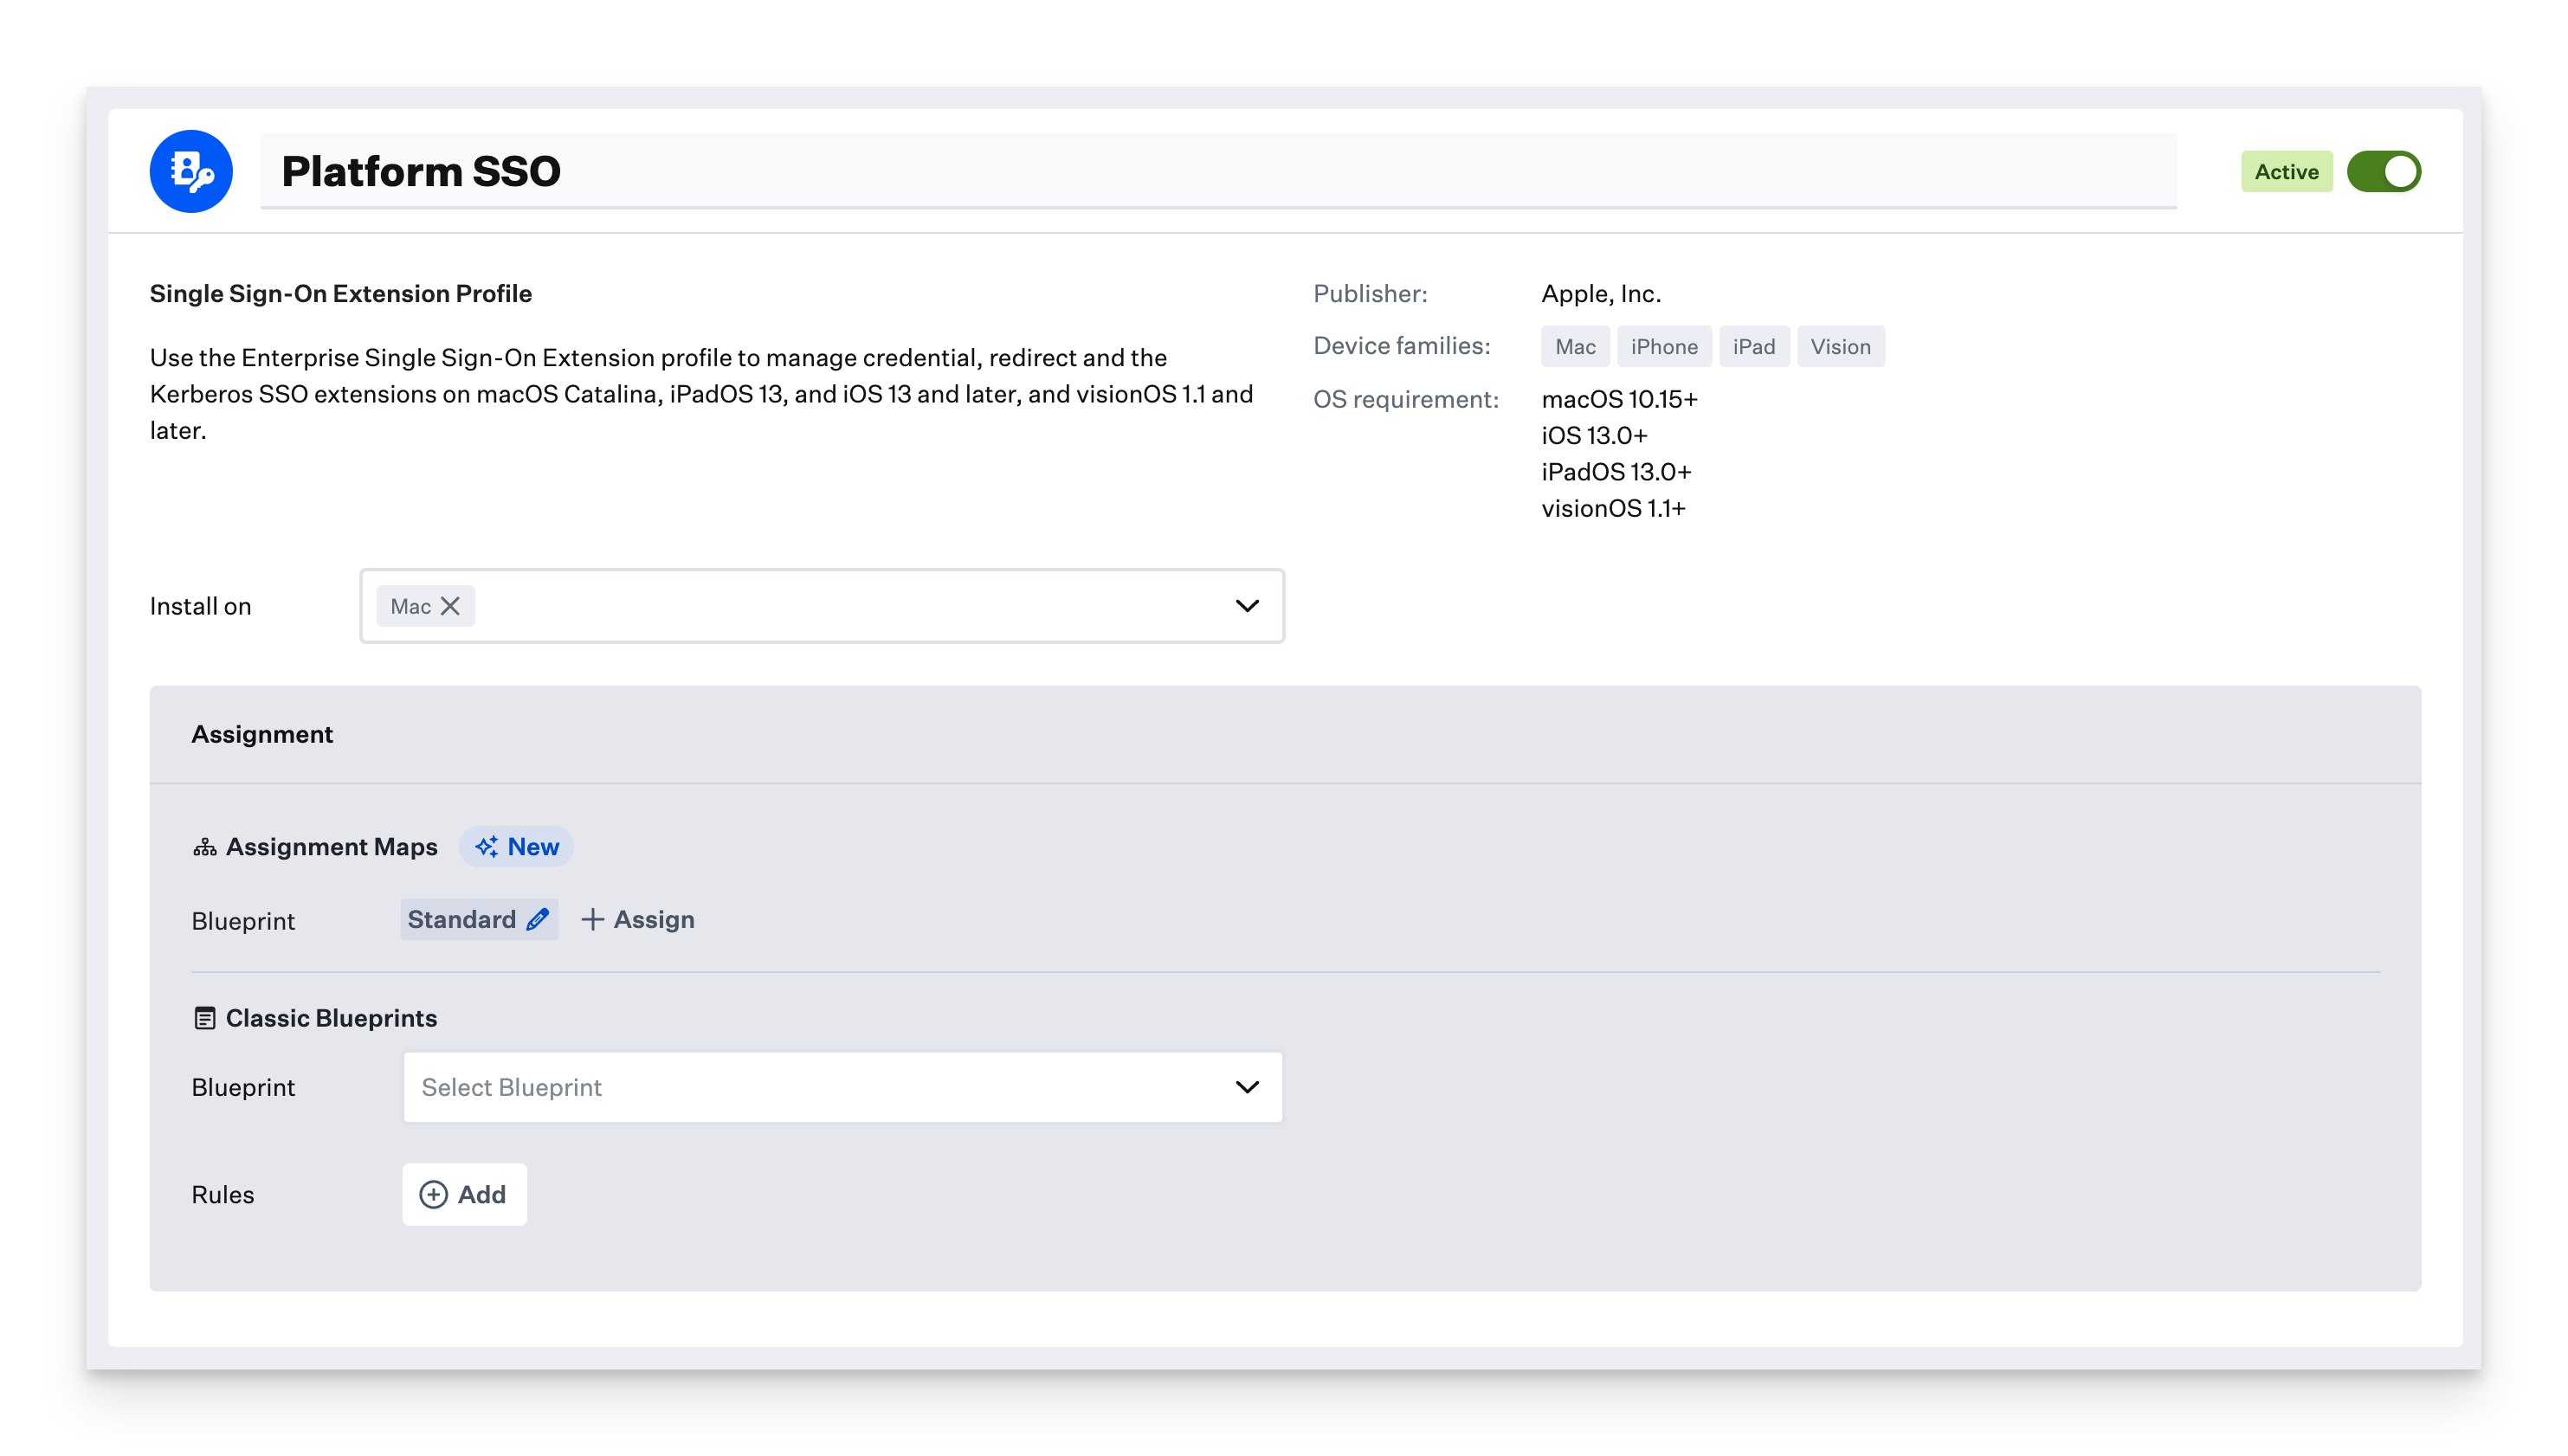
Add and Configure a Single Sign-on Extension Library Item
To add this Library Item to your Kandji Library, follow the steps outlined in the Library Overview article.
Give the new Library Item a Name.
Select Mac as the Install on platform.
Assign to your desired Blueprints.
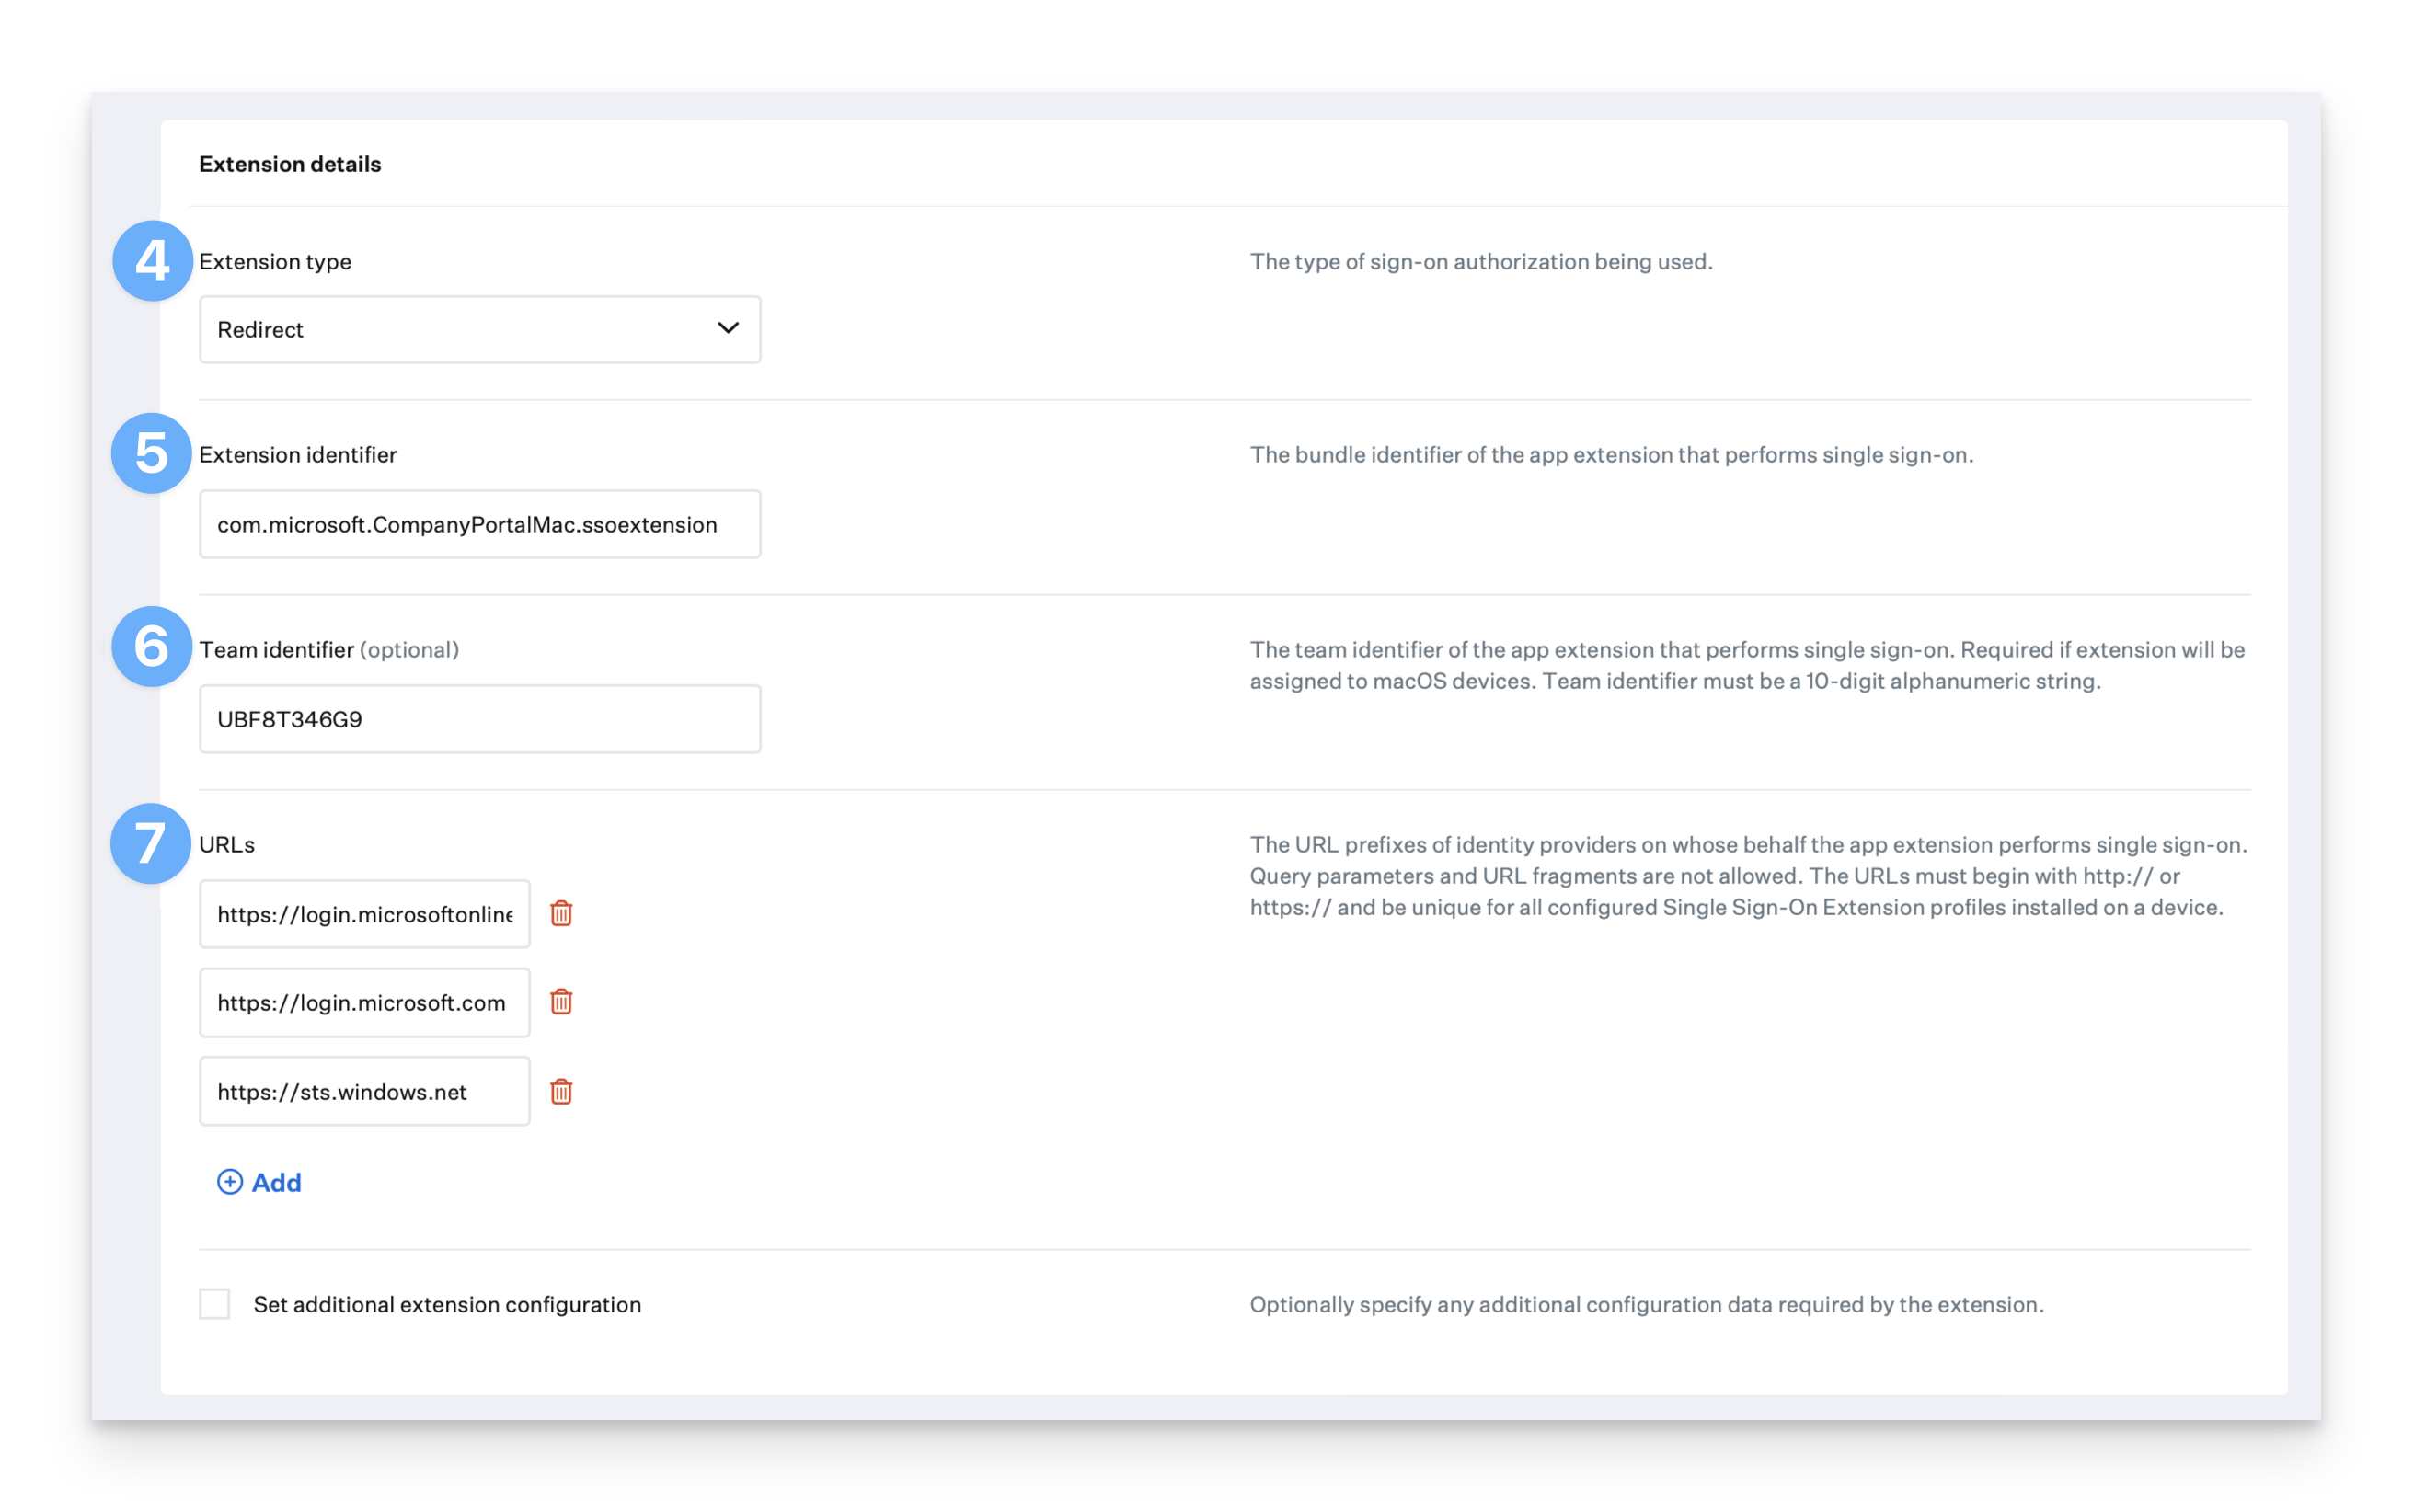
Under Extension type, select Redirect.
For the Extension identifier, enter com.microsoft.CompanyPortalMac.ssoextension
Paste UBF8T346G9 into the Team identifier text box.
Paste the following URLs into the URLs fields.
https://login.microsoftonline.com
https://login.microsoft.com
https://sts.windows.net
Optionally, if using sovereign cloud domains, you will need to include additional URLs.
https://login.partner.microsoftonline.cn
https://login.chinacloudapi.cn
https://login.microsoftonline.us
https://login-us.microsoftonline.com
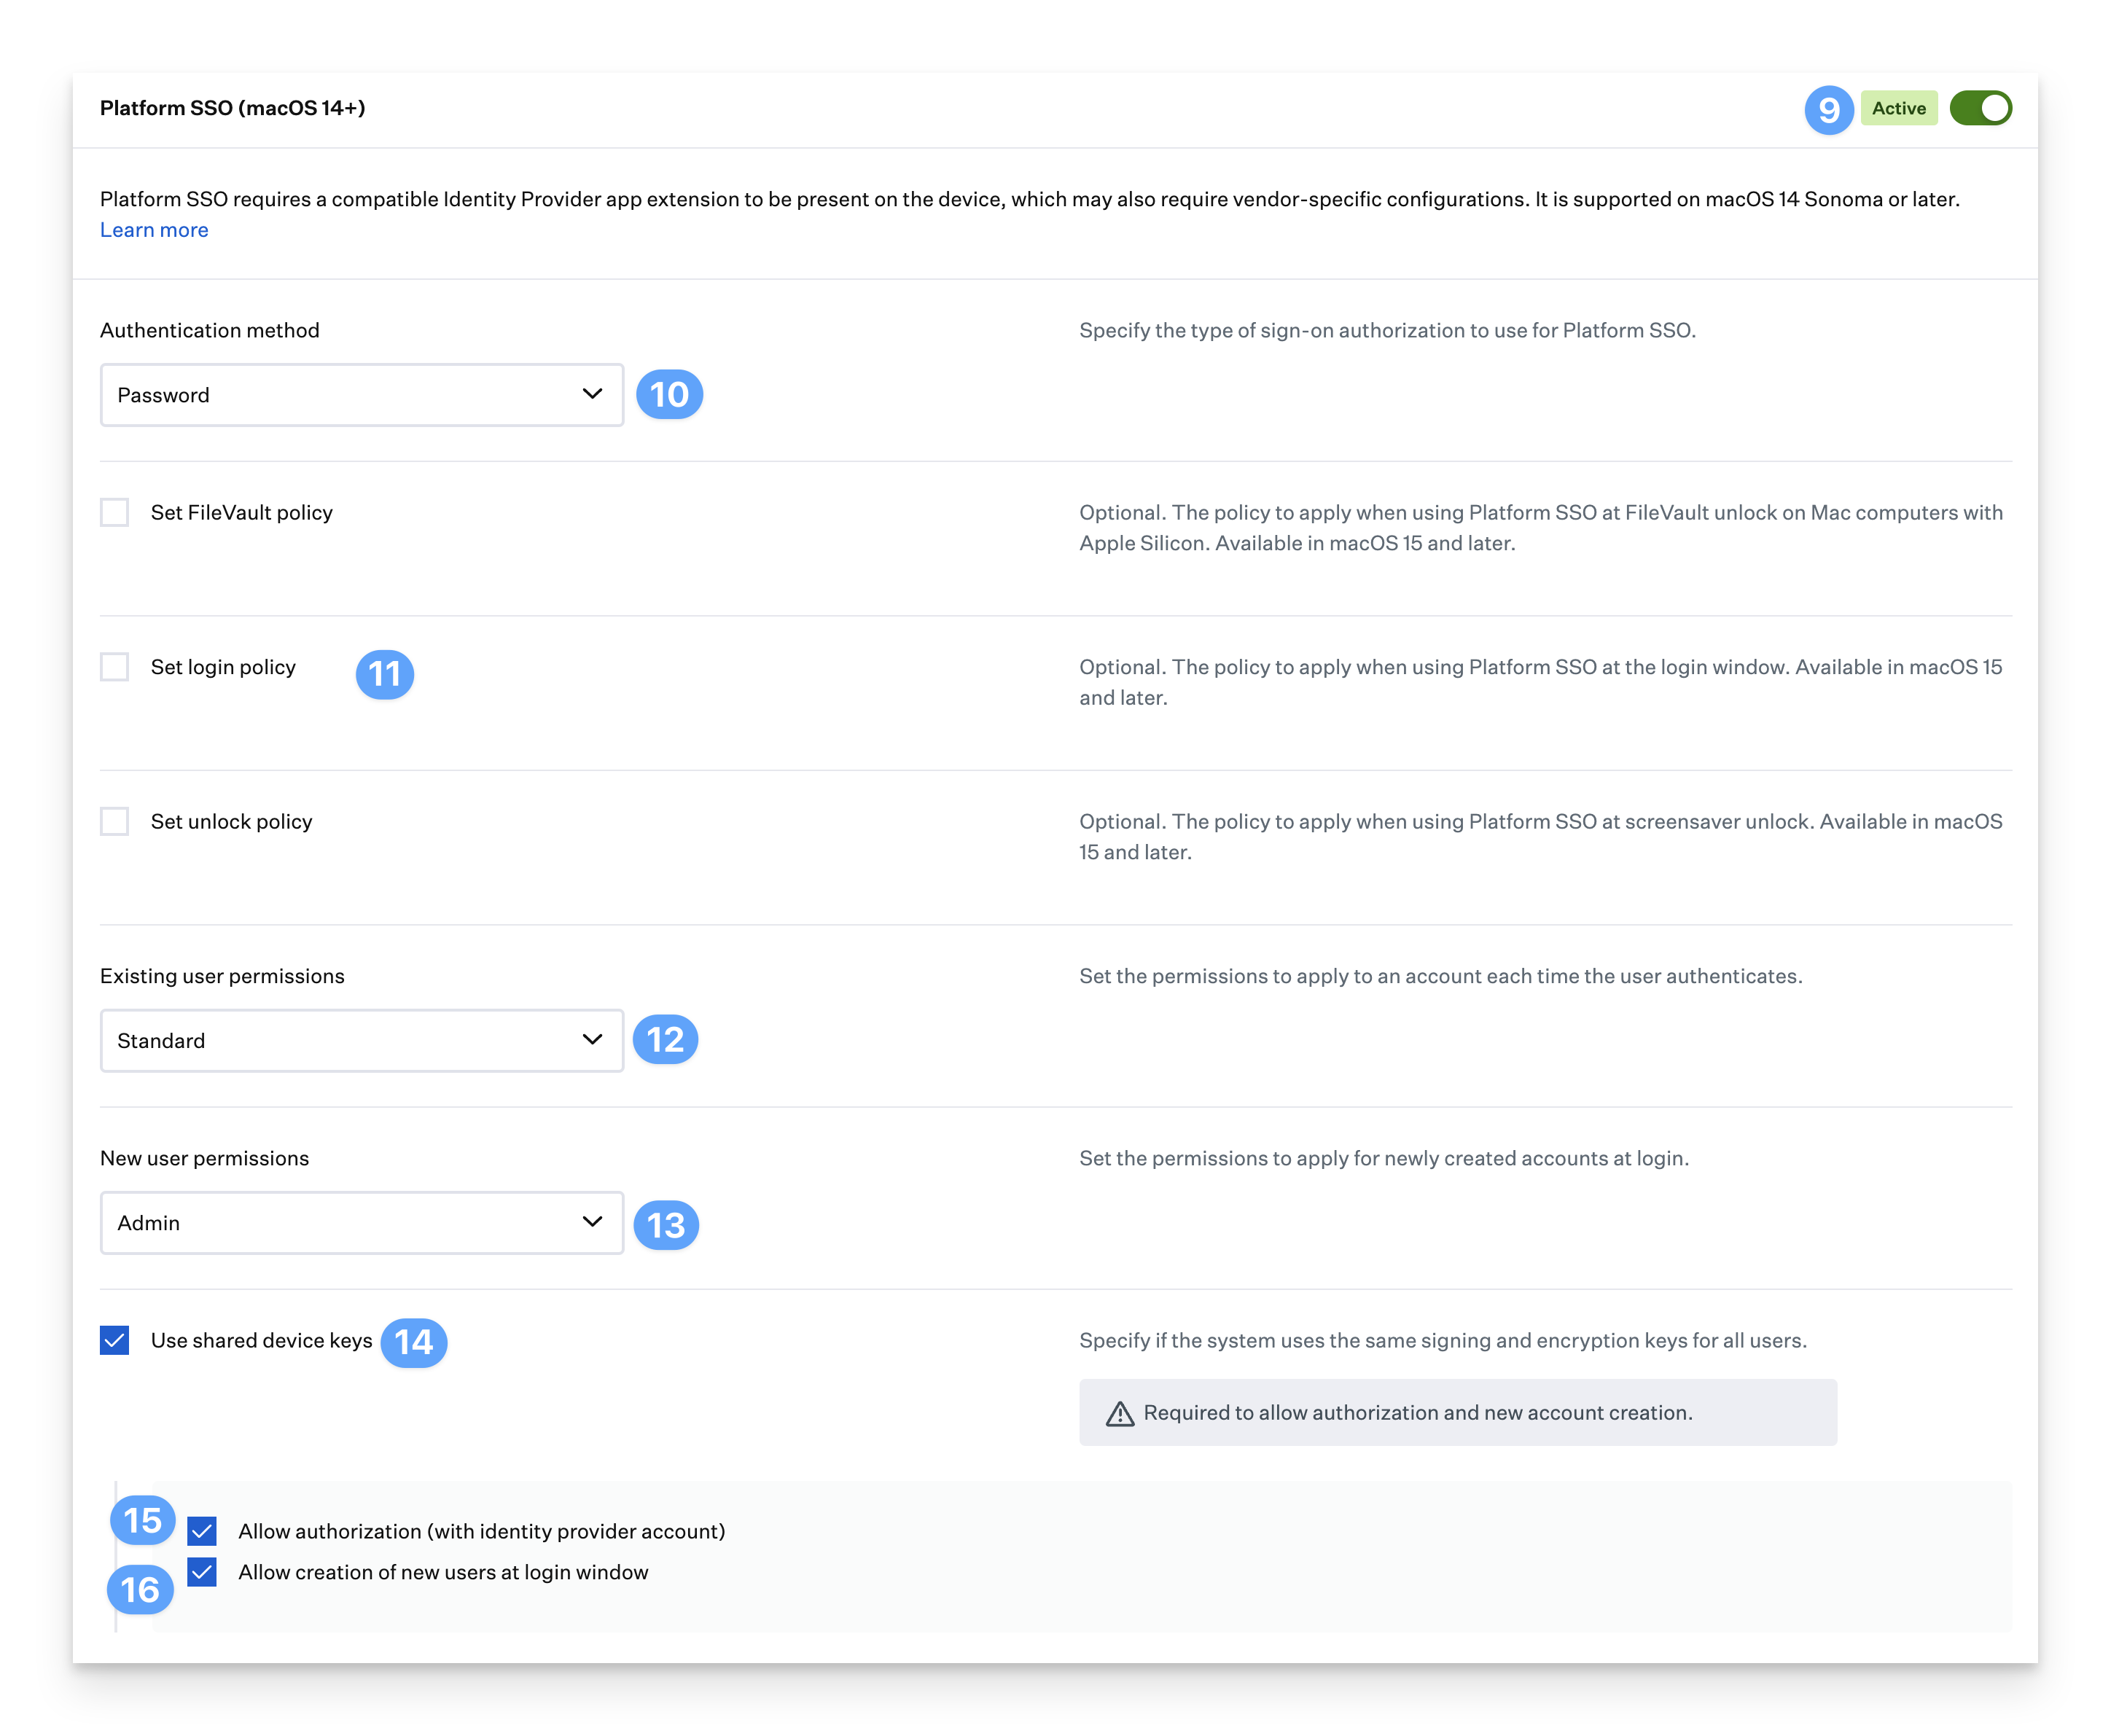
Toggle the switch for Platform SSO.
Select your Authentication Method. For information on which method to use for your organization, refer to Microsoft's support article.
Enable additional optional settings for macOS 15 and later as needed.
Set default permissions for Existing Users.
Set default permissions for New Users.
Check the box for Shared Device Keys.
Enable Allow authorization (with identity provider account). This will allow users to interact with system authorization prompts using their Microsoft Entra ID credentials.
If you want to automatically create local accounts for users, enable Allow creation of new users at login. To create a local account, the device must be connected to the internet at the login screen with FileVault unlocked, and Kandji must have a valid Bootstrap token for that device.
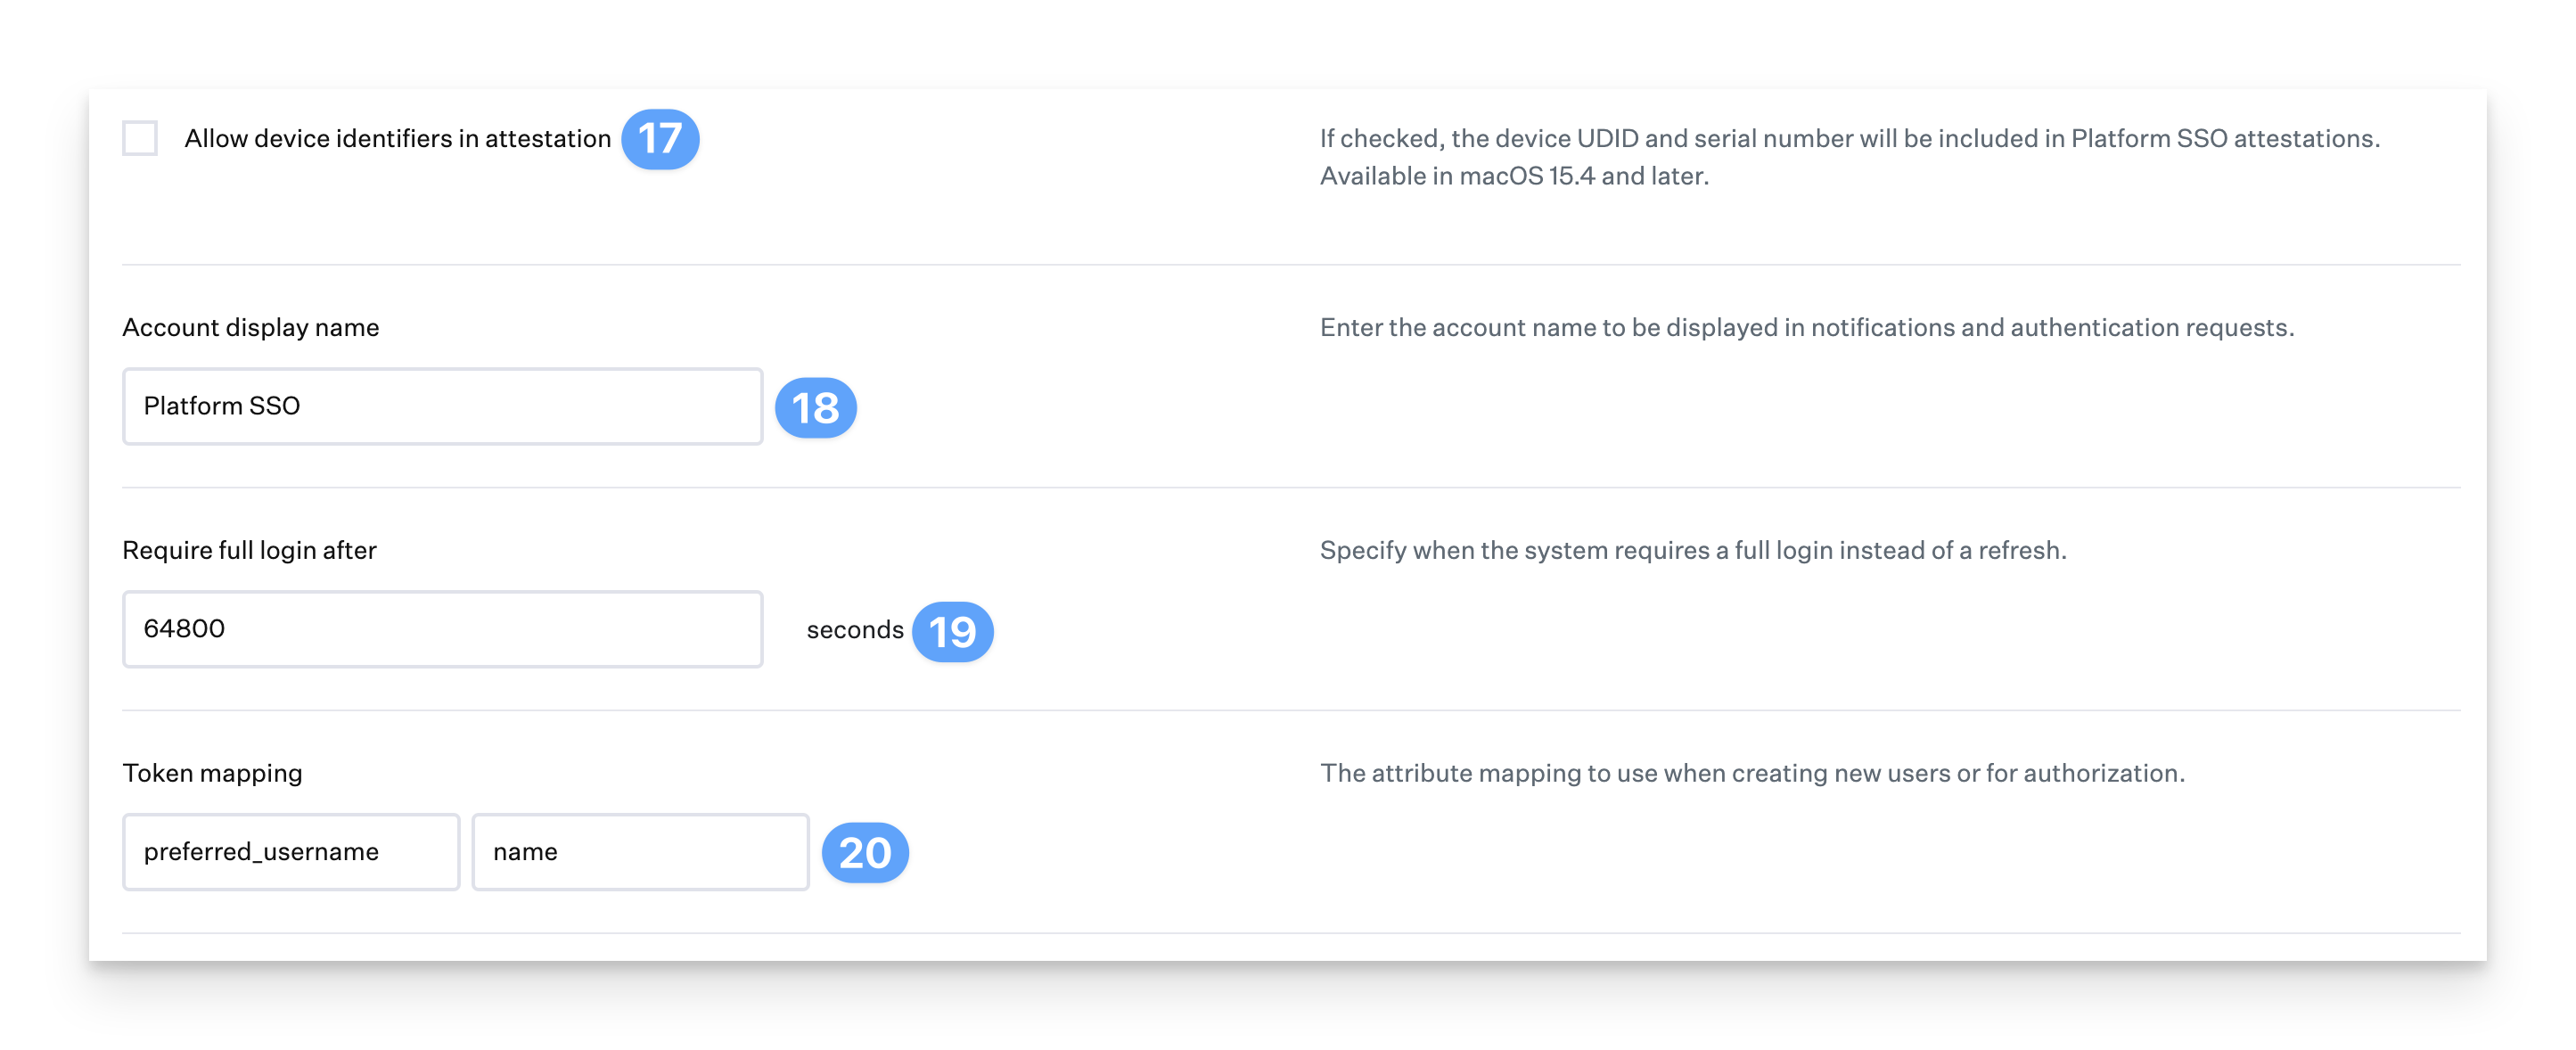
If checked, the device UDID and serial number will be included in Platform SSO attestations. Available in macOS 15.4 and later.
Enter an Account display name.
Specify the number of seconds after which to Require full login.
In the Token mapping fields, enter preferred_username for the AccountName, and name for the FullName.
If desired, configure Admin Groups, Additional Groups, and User Groups.
Microsoft currently only supports using static Standard and Admin values for new and existing users.
Admin groups are groups from Microsoft Entra ID that should have administrator access on the device. These groups are used to grant elevated permissions to specific users
Additional groups are custom groups you'd like to create in the device's local directory. These groups can be used to organize users and apply specific settings or permissions
User groups are particularly useful, allowing you to map specific macOS system rights to custom groups created in the local directory. For example, you can use user groups to grant 'sudo' access or manage printer permissions
Save your configuration