
If you need to add Automated Device Enrollment Tokens, please visit the Configure Multiple Automated Device Enrollment Tokens article.
If you do not feel confident in completing this process yourself, please reach out to {{ glossary.Kandji}}-support" target="_blank" rel="noopener noreferrer">Kandji Support for additional guidance.
Configure Kandji API Token
Prepare API Token and store it in a secure location. You can read more about this in our Kandji API article. You can skip this section if you already have an API Token prepared.
Create or modify an existing API Token.
In your Kandji tenant, navigate to Settings > Access > API Tokens.
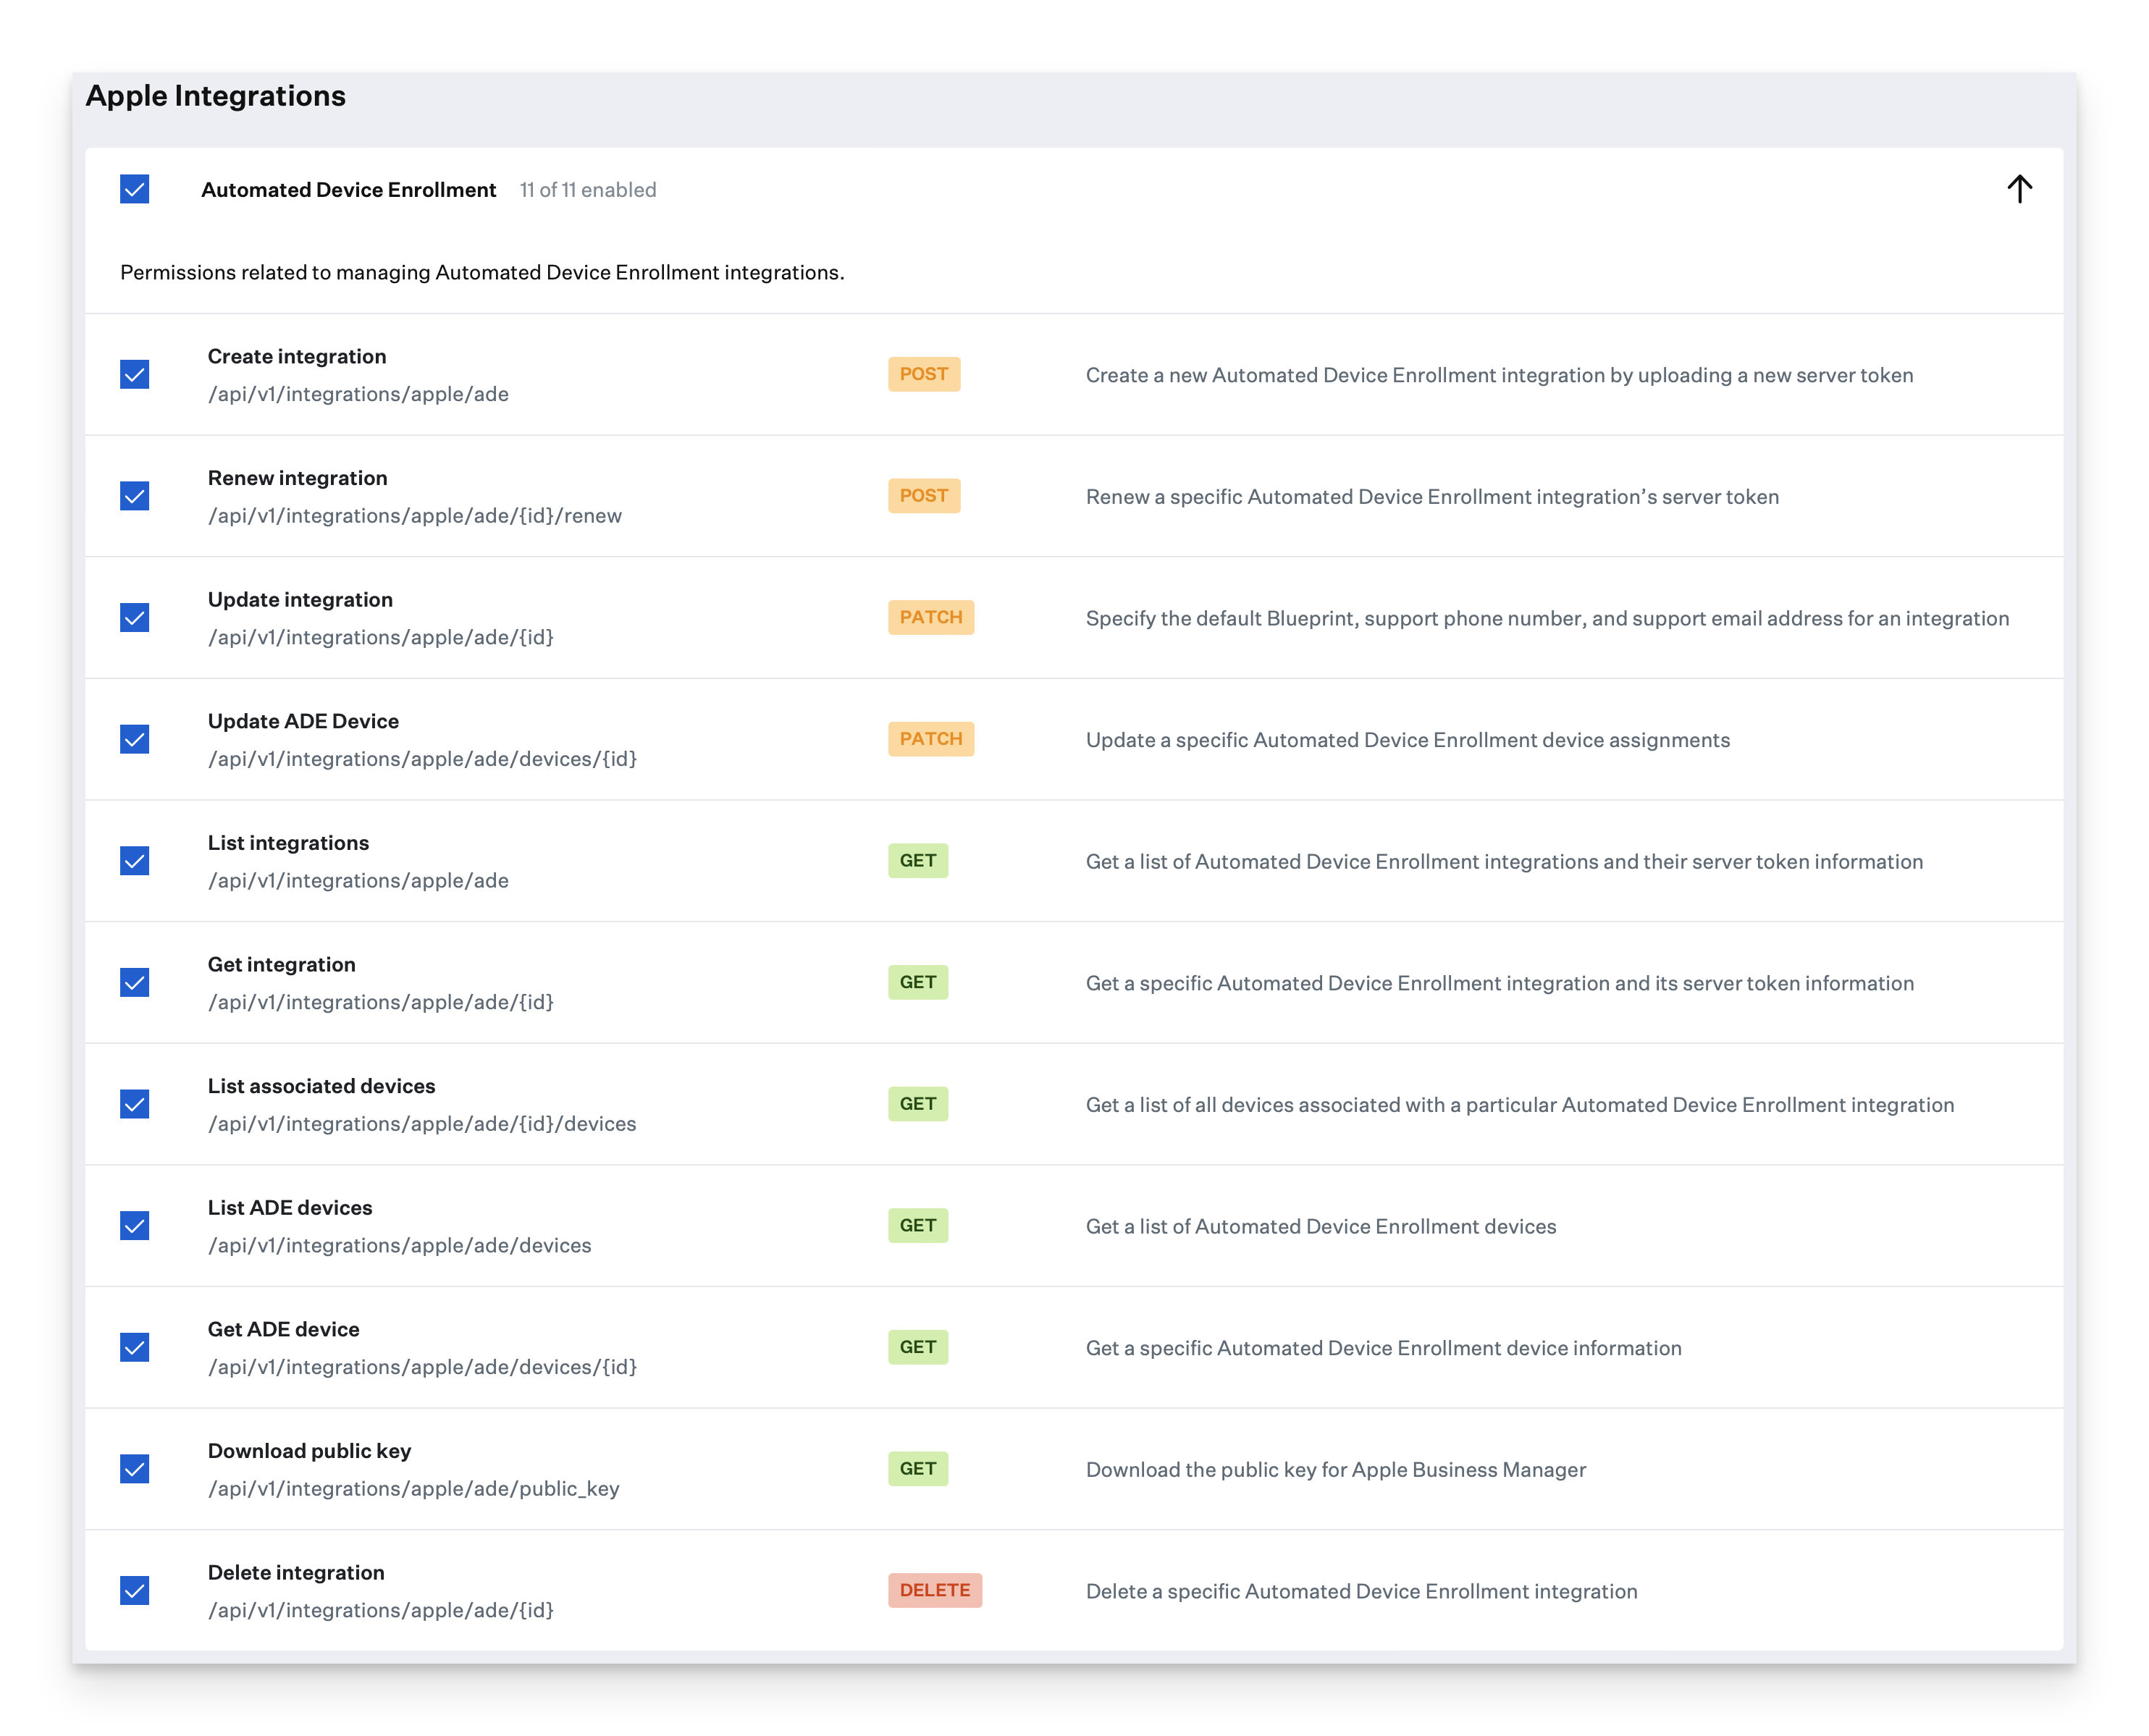
Create or modify the existing API Token to include all Automated Device Enrollment-related permissions.
Prepare Postman
For basic configuration, please follow our How to Set Up the Kandji API in Postman article. Most of the steps moving forward will be performed inside the Postman application on your device. You can skip this section if you already have Postman configured.
Check your Collection for the Automated Device Enrollment integrations folder.
If this folder is missing, go to api-docs.kandji.io, click the Run in Postman button, and follow the steps to import the new API version.
Define your API URL if undefined in the Kandji API folder at the top of the collection.
Define the API Token in your Environment variables following our How to Set Up the Kandji API in Postman article.
Configure Postman Environment Variables
Now that the basics of Postman have been configured, you will need to define some Environment Variables in Postman to keep track of the Automated Device Enrollment servers.
Follow the instructions in the Create Environment Variables section of our How to Set Up the Kandji API in Postman article.
If you already have environment variables configured, you can add the new items to the existing variables.
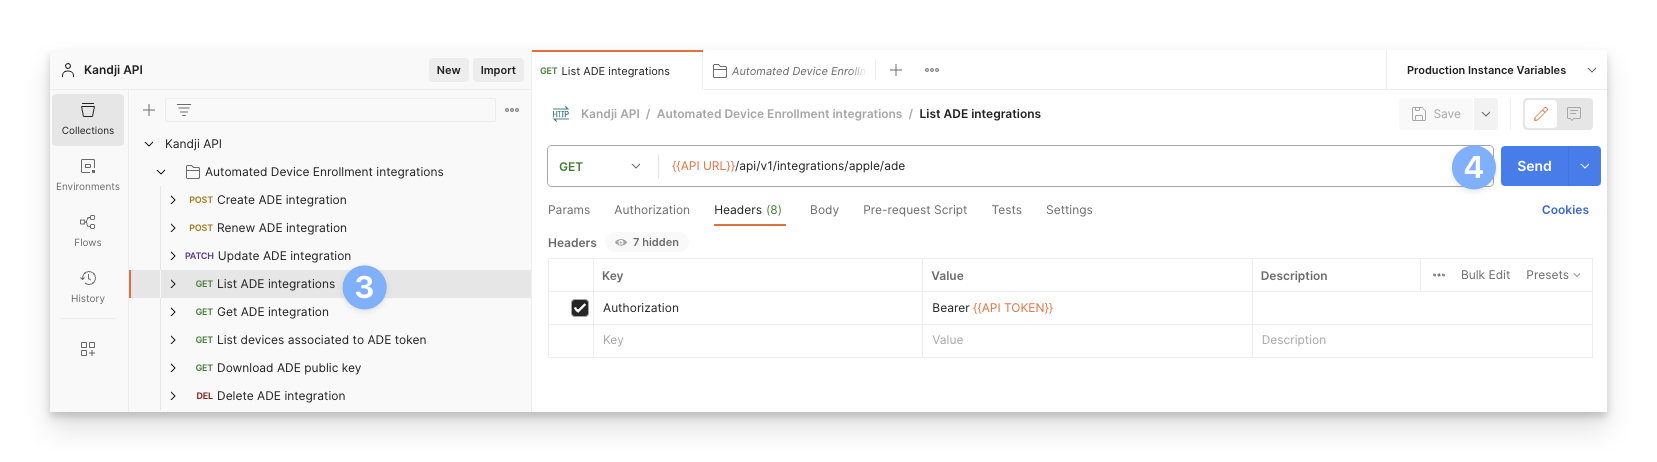
Select the Kandji API > Automated Device Enrollment Integrations > GET List ADE Integrations in the Collection.
Click the Send button.
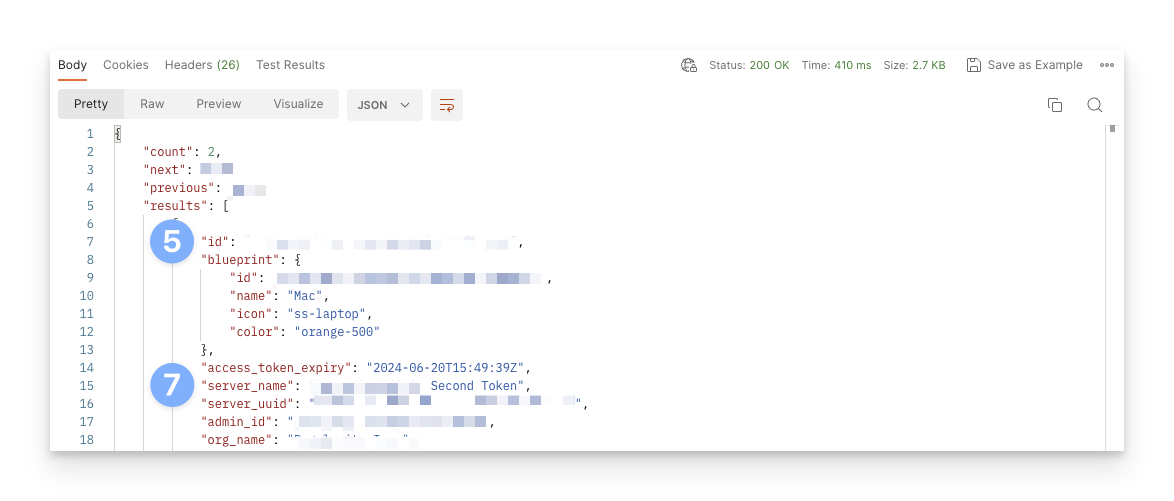
In the Body section of the Results, you will copy the top-level IDs of each Automated Device Enrollment token.
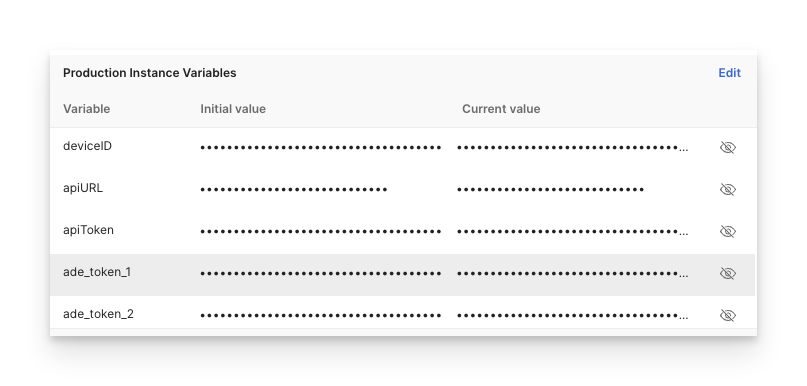
For each of these IDs, you will create an environment variable with a naming scheme such as "ade_token_1" and increment the number at the end for each token.
Make a note of the associated server_name for each token. You will need this information when downloading the tokens from Apple Business Manager.
Paste the ID value for each token into the value for the machine "ade_token_#" variable.
You can set the variable type to secret so that the value of the variable is not visible.
Download ADE Tokens
Log in to your Apple Business Manager account.
Click on your profile in the bottom left and choose Preferences.

Click on the first MDM server that matches the first ADE token from the list you made earlier.
Click Download MDM Server Token.
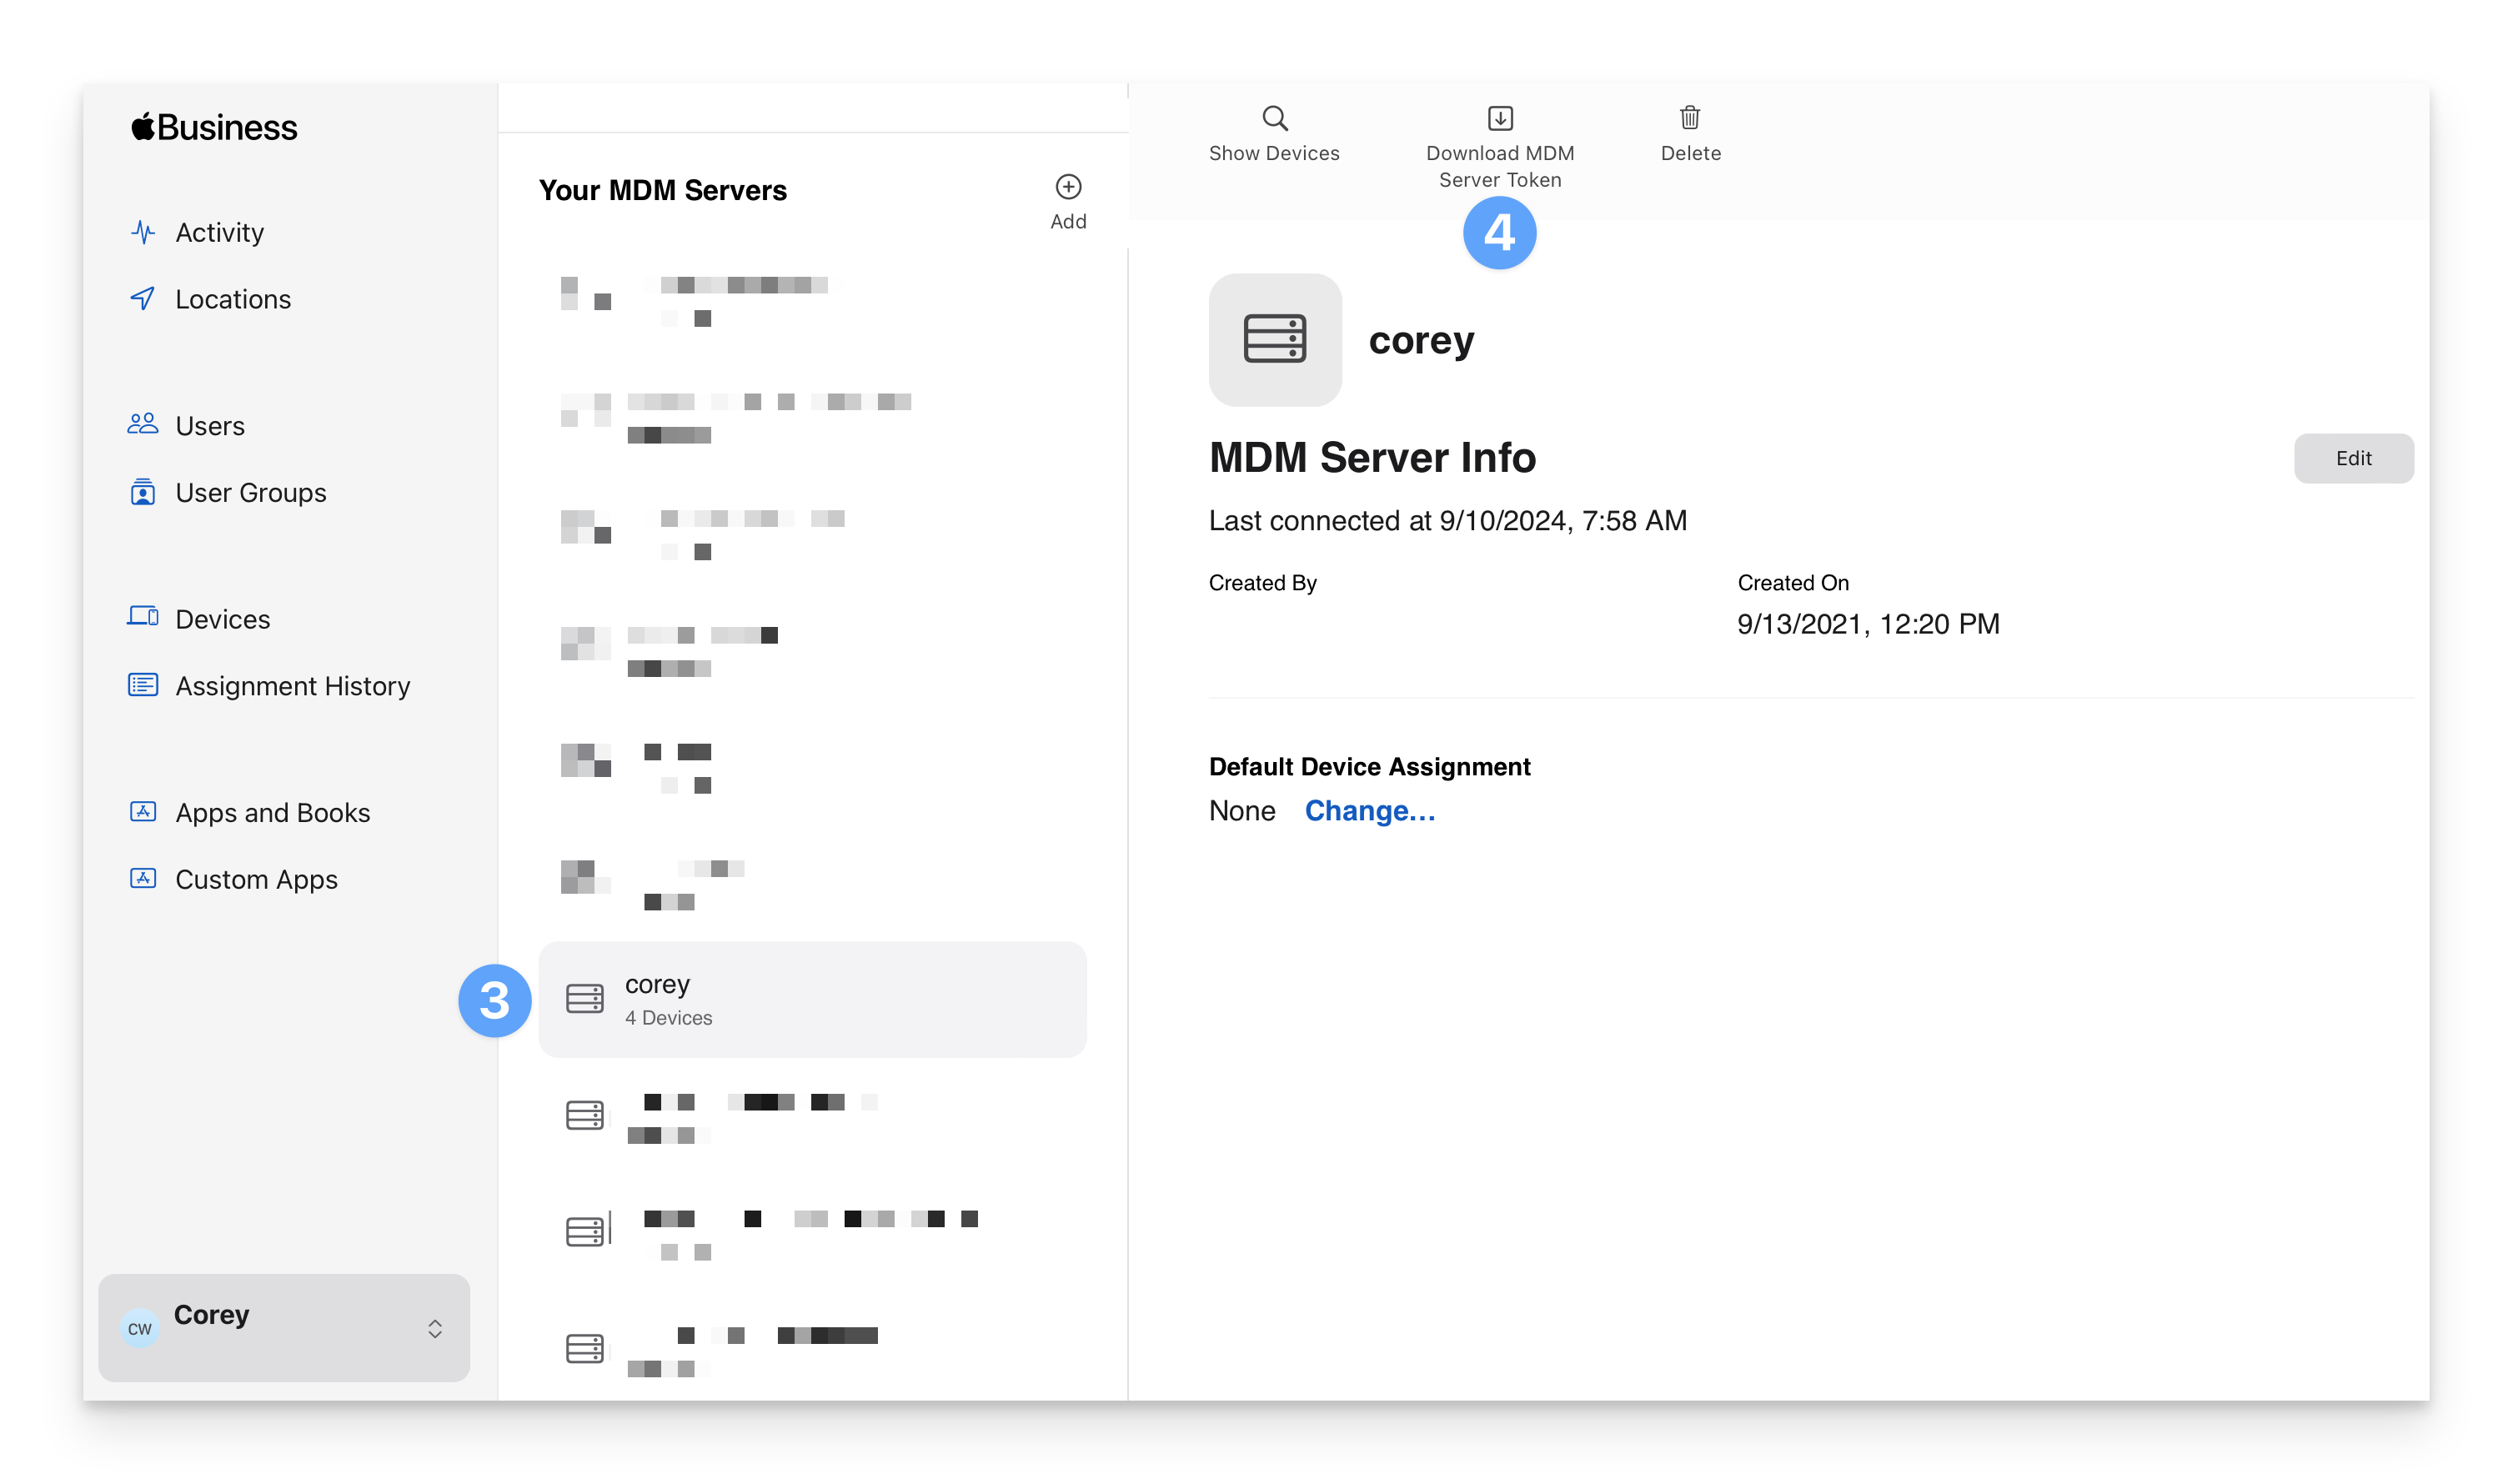
Repeat this process for each token that you will be renewing.
Create Postman Folder Template
Creating folders in Postman will make it easier to keep track of your Automated Device Enrollment tokens.
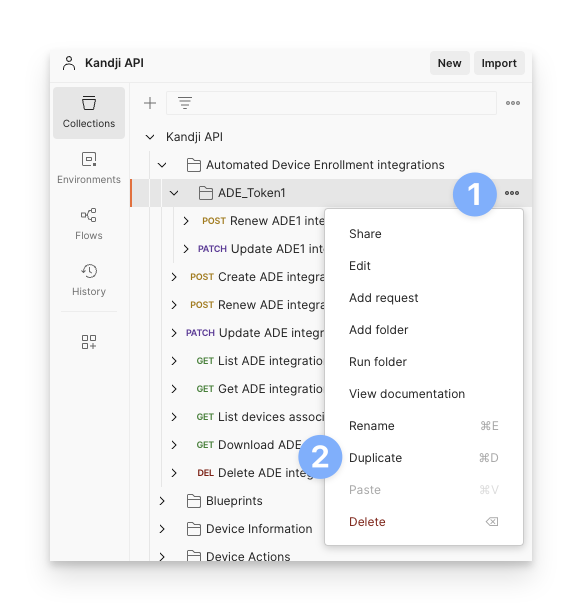
Click on the ellipse next to the Automated Device Enrollment Integrations folder.
Click Add folder.
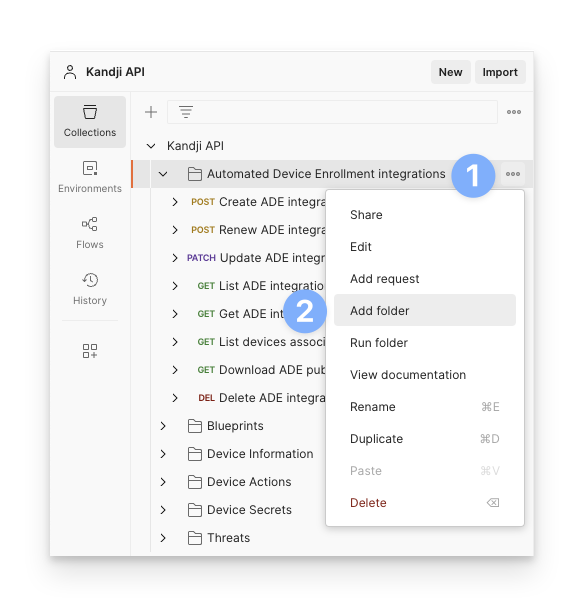
Name the folder ADE_Token1.
Select the Renew ADE Integration and Update ADE Integration items in the Automated Device Enrollment Integrations folder.
Right-click them and choose Copy.
Click on the ellipse next to the ADE_Token1 folder.
Click Paste.
Modify Renew Item
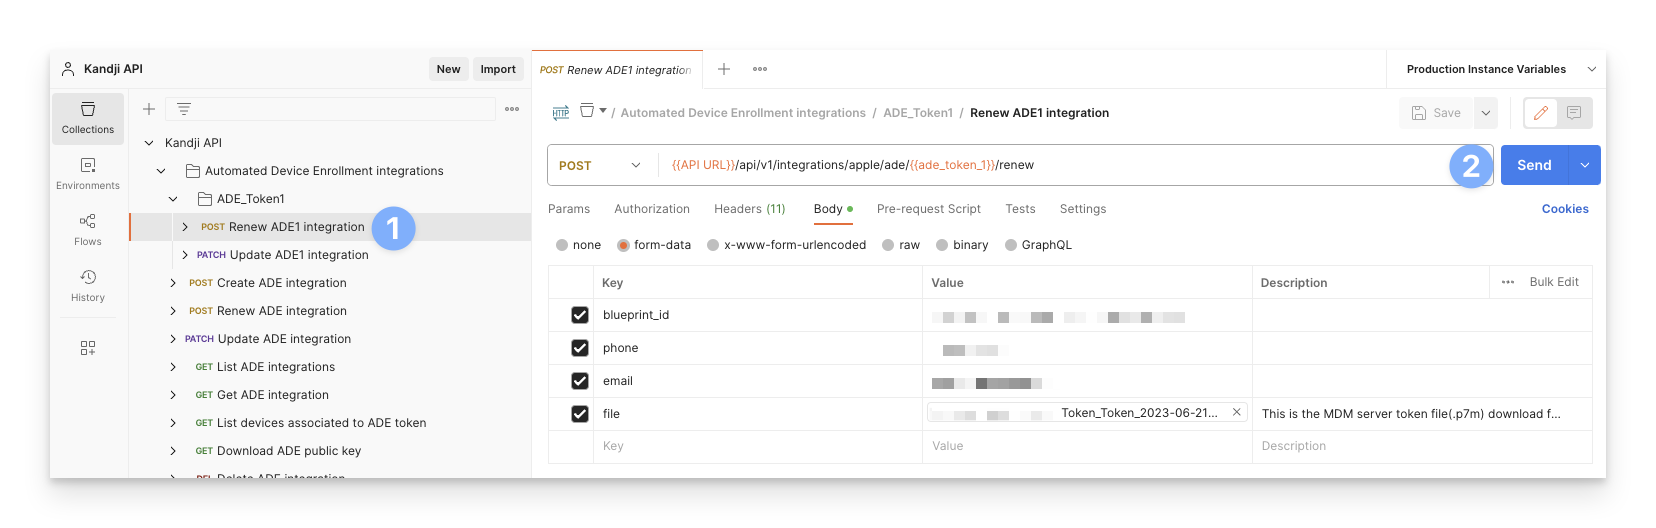
Select the Renew ADE Integration item.
Rename it to Renew ADE1 Integration.
In the section to the right, click on address bar to the left of the Send button.
Select the text inside the {{ade_token_ade}} and update it to {{ade_token_1}}.
Click on the Body tab below.
Enter the blueprint_id, phone, and email that should be associated with the token.
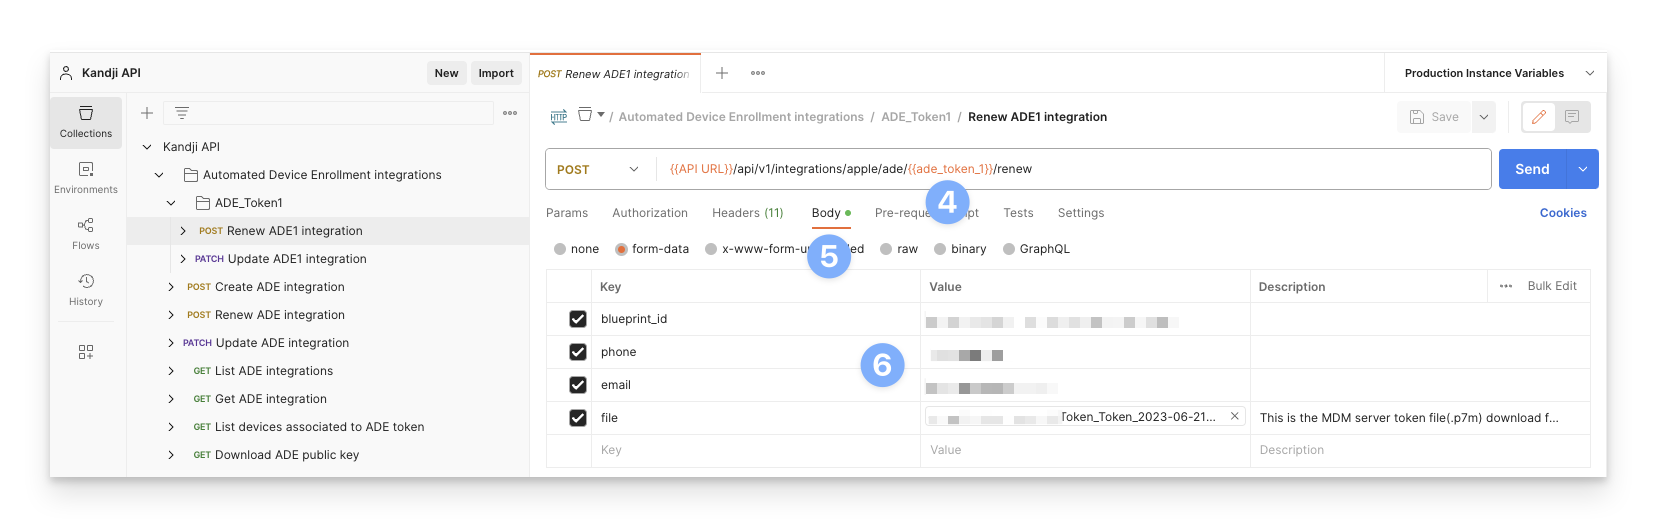
For the file, click x by any current files, and then click Select Files.
Choose the .p7m file that matches this ADE token.
Save the changes.
Modify Update Item
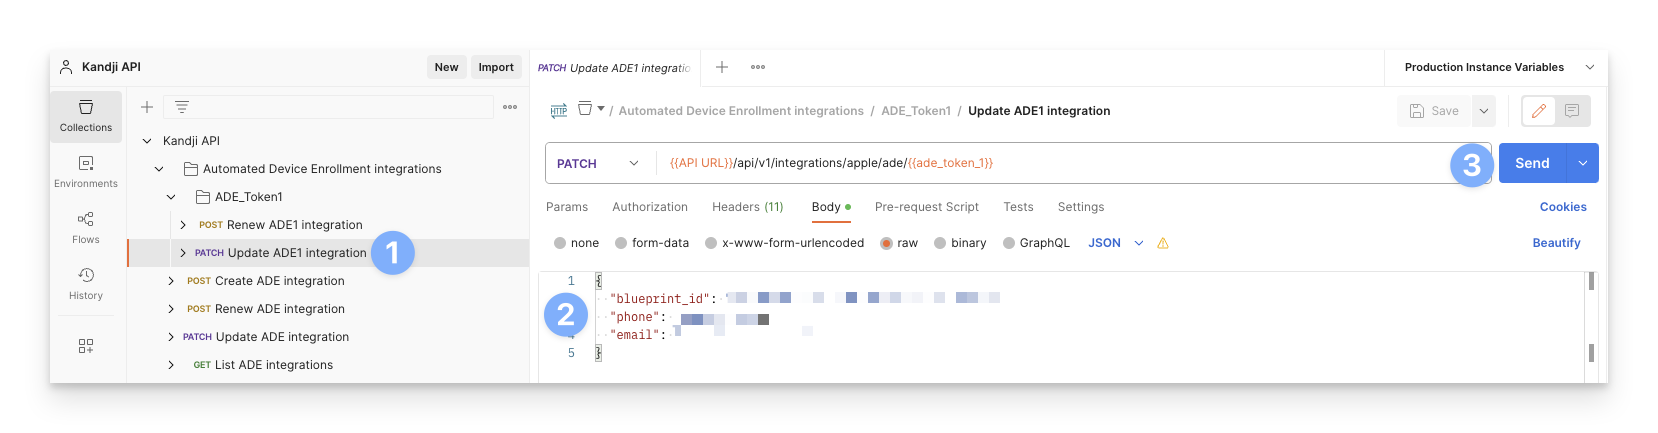
Select the Update ADE Integration item.
Rename it to Update ADE1 Integration.
In the section to the right, click on the address bar to the left of the Send button.
Select the text inside the {{ade_token_ade}} and update it to {{ade_token_1}}.
Click on the Body tab below.
This is where you can enter new blueprint_id, phone, and email information.
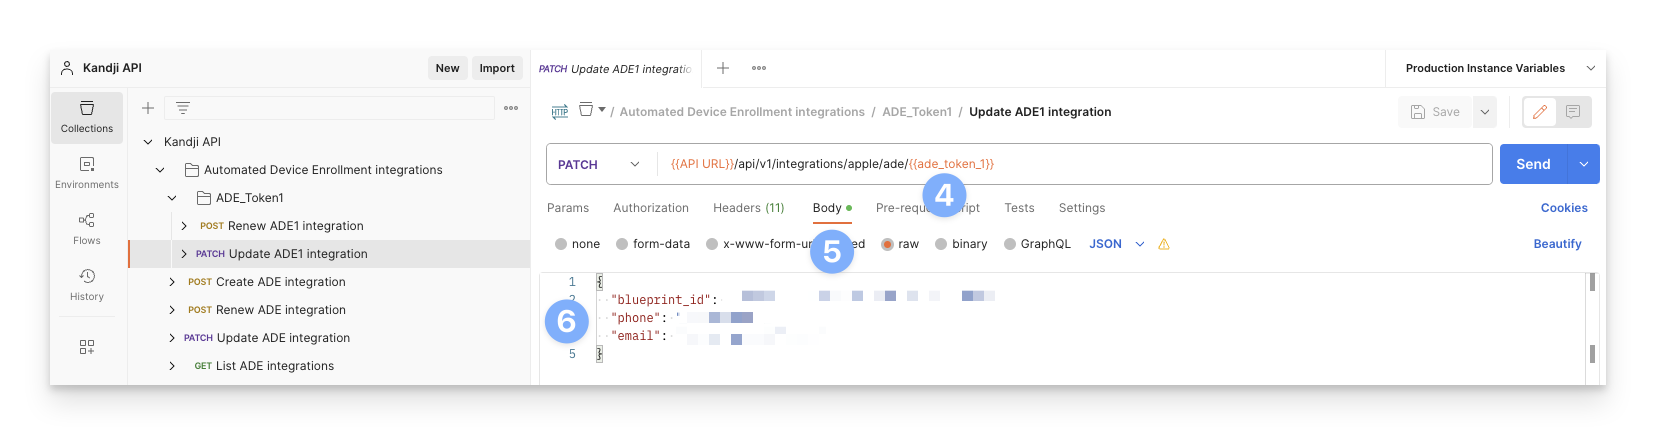
Save the changes.
Duplicate ADE_Token Folder
Click on the ellipse next to the ADE_Token1 folder.
Choose Duplicate.
Update the contents of the folder using the process above.
Make duplicates of the folder for each of your ADE tokens.
Renew ADE Integration
Now that everything is configured, you can send the Renew command.
Select the Kandji API > Automated Device Enrollment Integrations > ADE_Token# > Renew ADE# Integration
Click the Send button.
Update ADE Integration
Now that everything is configured, you can send the Renew command.
Select the Kandji API > Automated Device Enrollment Integrations > ADE_Token# > Update ADE# Integration.
Update the details in the Body section that need updating.
Click the Send button.
Check Current Integrations
Kandji API > Automated Device Enrollment Integrations > GET List ADE Integrations command will give us all current ADE integrations so that we can verify that the integration was Renewed or Updated successfully.
Select Kandji API > Automated Device Enrollment Integrations > GET List ADE Integrations in the Collection.
Click the Send button.
The days_left variable should be 364 if the Renew command was successful.
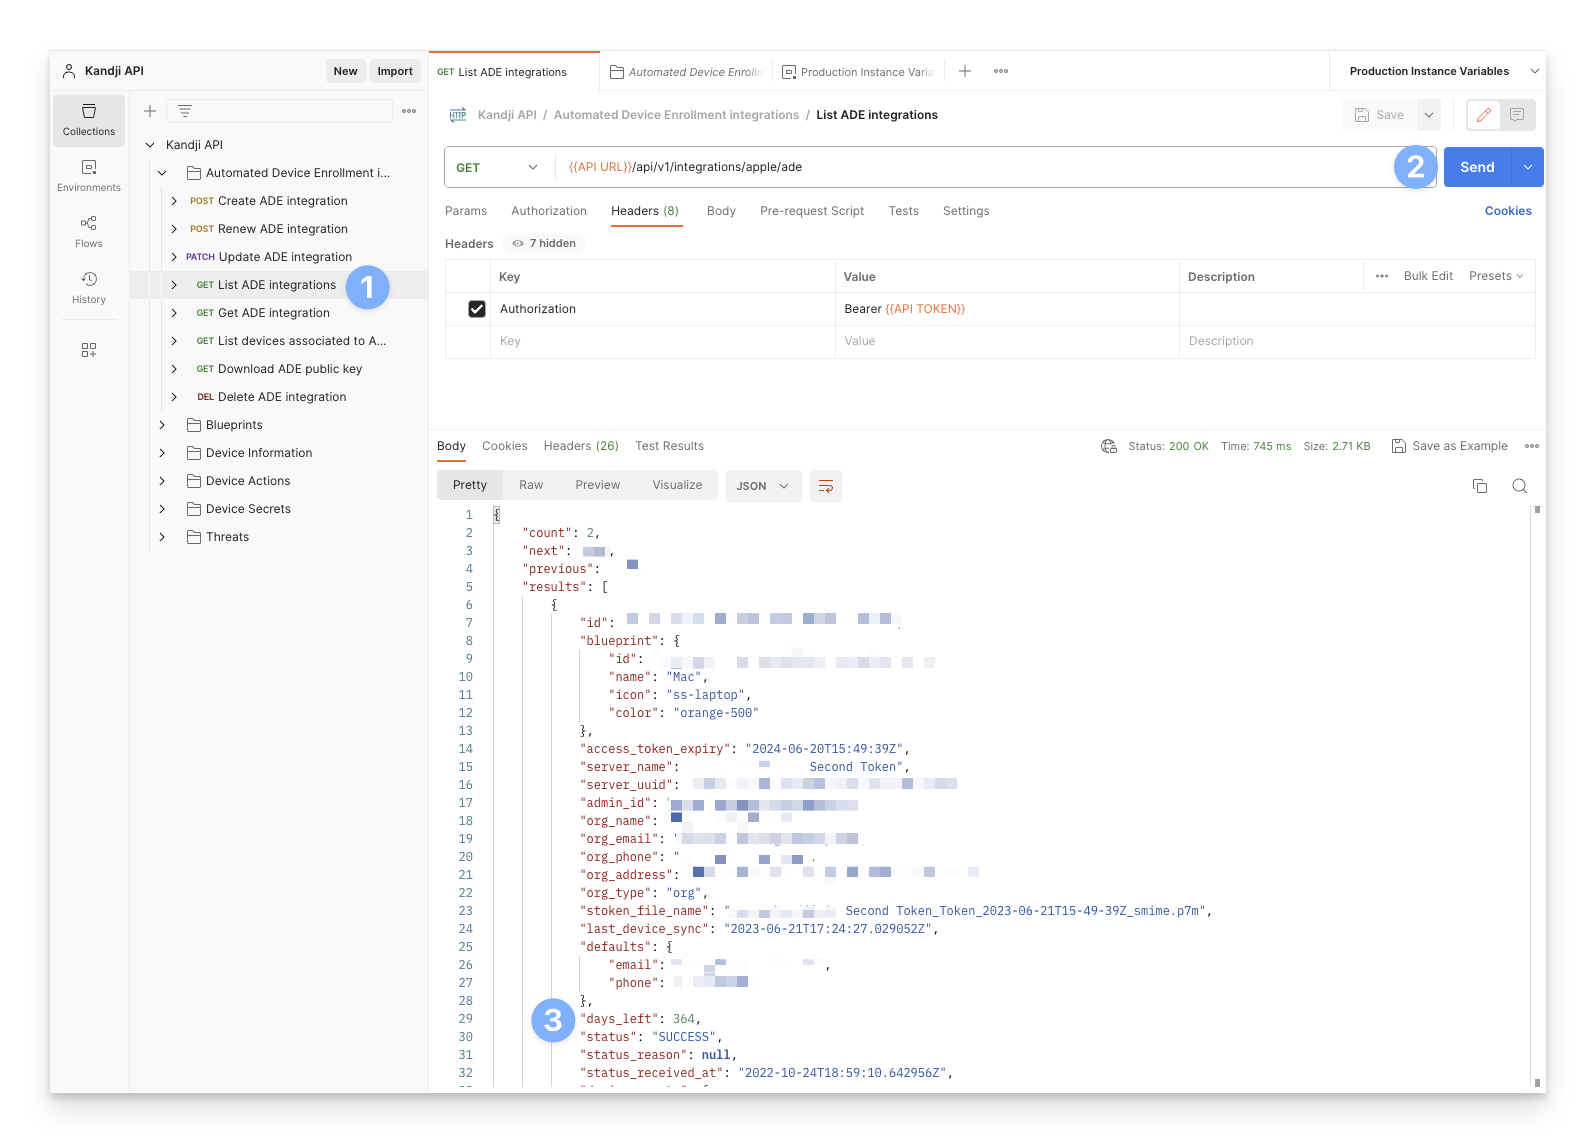
To verify an update, check the information associated with the ADE token to verify that it was updated.
Delete Integration
Kandji API > Automated Device Enrollment Integrations > DEL Delete ADE Integration command will delete the ADE integration associated with the supplied ADE Token ID.
Select Kandji API > Automated Device Enrollment Integrations > DEL Delete ADE Integration in the Collection.
Populate the ade_token_id variable with the ID of the ADE Token.
Click the Send button.
