The AD CS integration is configured from the Kandji Integrations marketplace in your Kandji web app. Once the setup is complete, you can manage Kandji AD CS Connector servers, add your AD CS certificate authority (CA) hosts, and create Library Items, all from the AD CS integration page.
The Kandji AD CS Connector (current version - 1.0.0.3) installation media is downloaded during the initial integration setup.
Before You Begin
Ensure you have a computer certificate template created in AD CS for use with Kandji.
Ensure you have access to the Windows Server designated as the AD CS Connector.
To save time, have the Windows server up and running so you're ready to install the AD CS Connector application once you have completed the initial AD CS integration setup.
Setup and Configuration Overview
Complete the initial setup of the AD CS integration.
Download the AD CS Connector installer.
Add a CA server to the AD CS integration.
Install the AD CS Connector on the designated Windows server.
Assign the CA server to the AD CS Connector in the Kandji web app.
Build out Library Items to deliver AD CS certificates to devices.
AD CS Integration Setup
If you do not see the AD CS integration in your Kandji web app, contact your Customer Success Manager or Account Executive for assistance.
Log in to Kandji.
In the left-hand navigation, go to Integrations.
Near the top-right, click Discover integrations.
Find the Active Directory Certificate Services integration and click Add and configure.
In the Welcome window, there are a few links that you can use to learn more about Installing the AD CS Connector on a Windows server and how to create Library Items to deploy AD CS certificates to devices. These support articles can also be found in the Kandji Support knowledge base. Click Get started to continue with the setup process.
In the Download window, click Download connector. You should see an indicator displaying the download progress. Once the download is done, the Kandji ADCS.exe installer file will be in your default downloads folder.
Once the download completes, click Next.
On the Connection pending… screen, you will see a few instructions that need to be performed on the Windows Server designated as the AD CS Connector.
To go back to the main Integrations page, click Close.

An AD CS integration card should be visible on the main Integrations page.
The status will show as Pending installation… until the AD CS Connector has been installed on the Windows server and you have signed in to the AD CS Connector with your Kandji credentials to create the WebSocket connection back to Kandji.
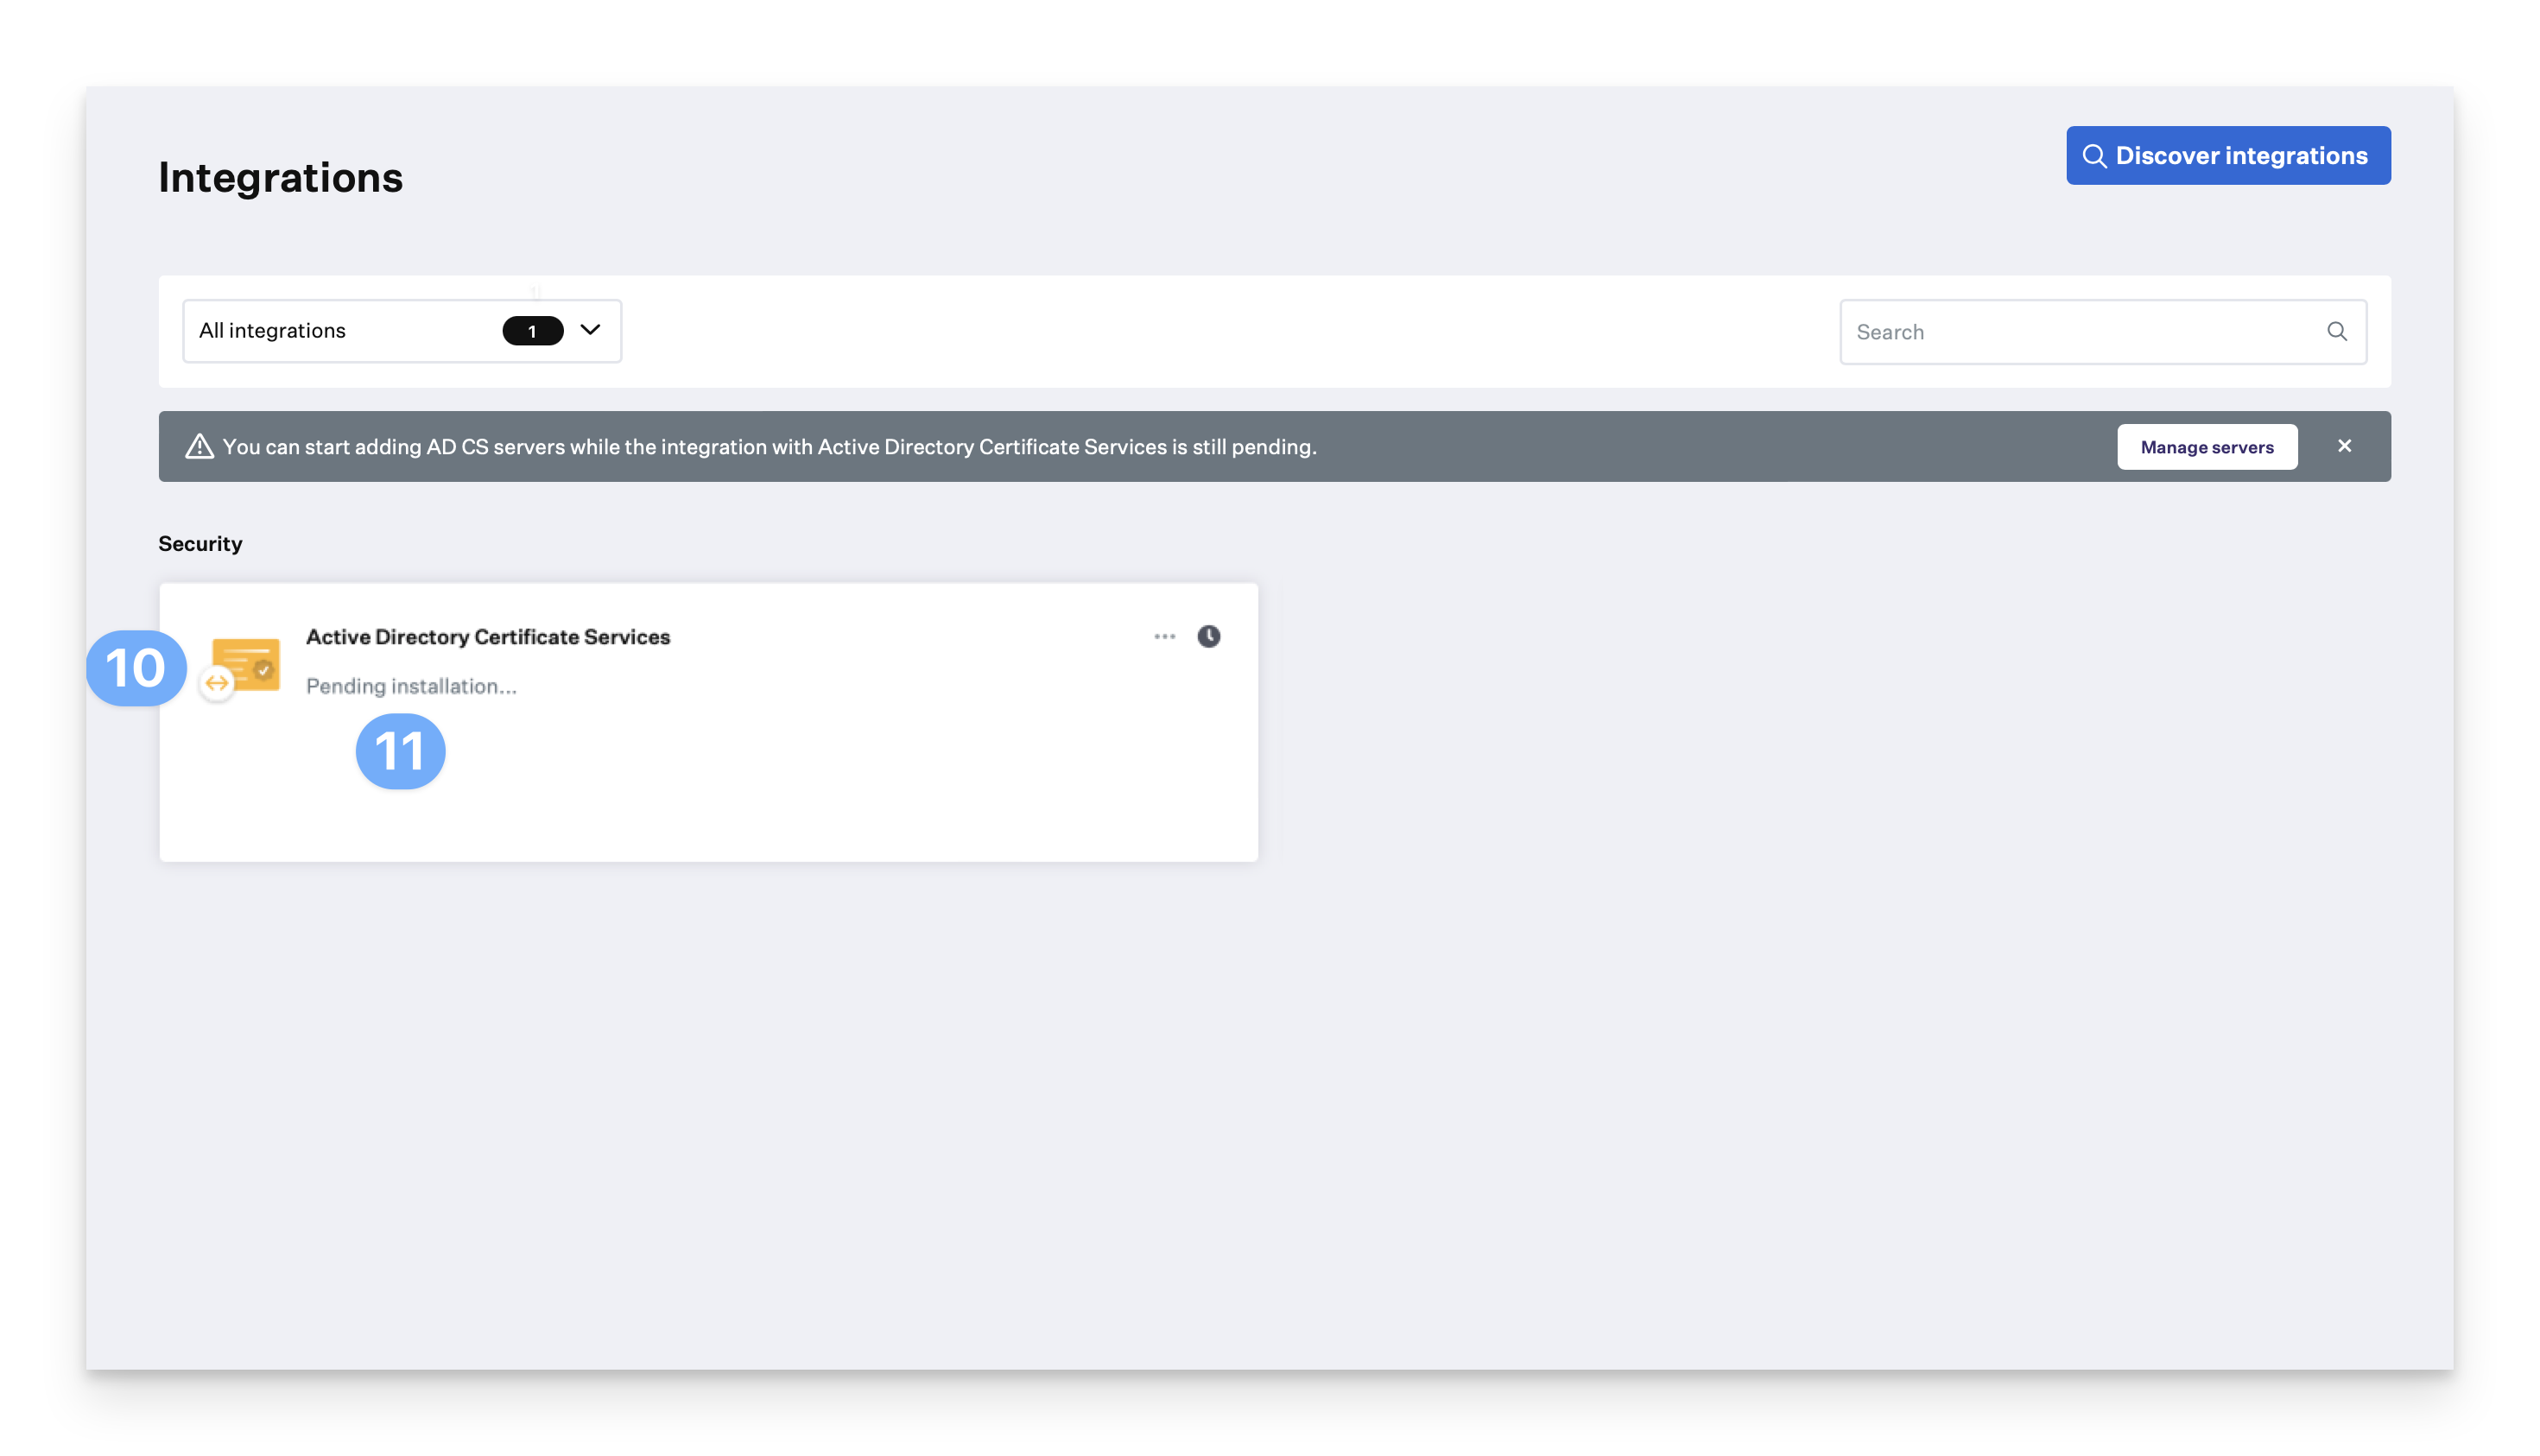
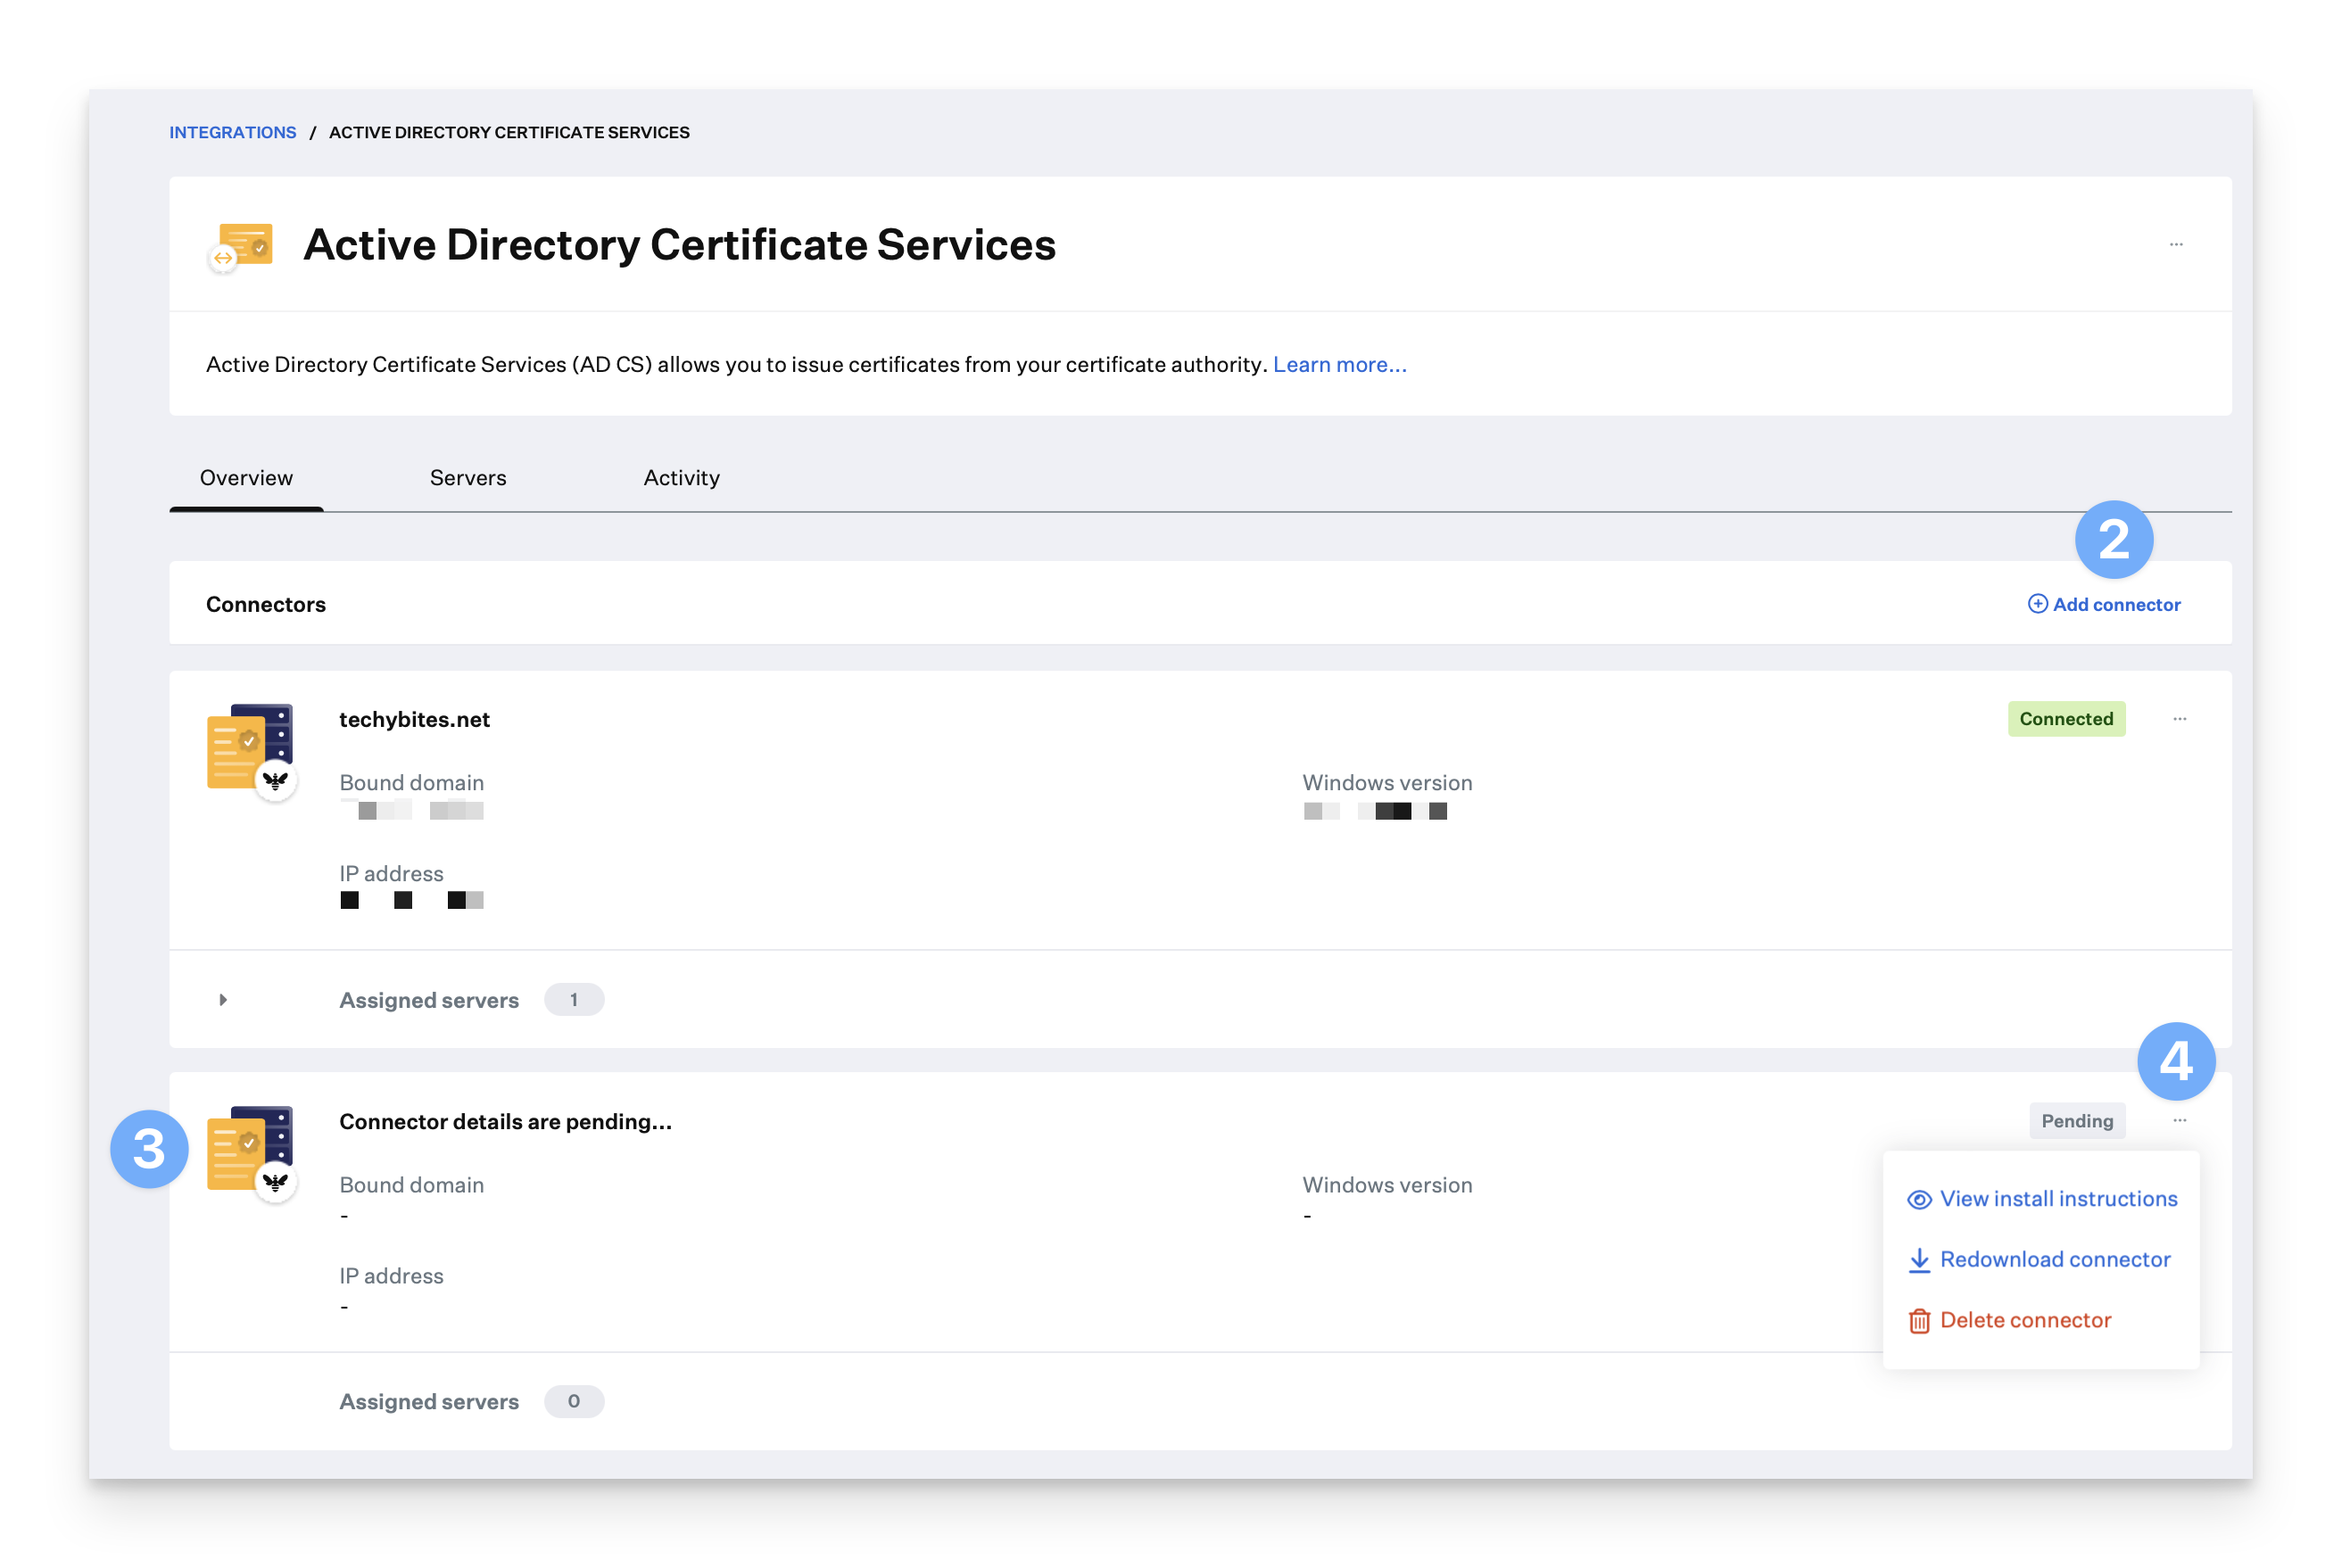
Click on the AD CS integration card to go to the Overview page.
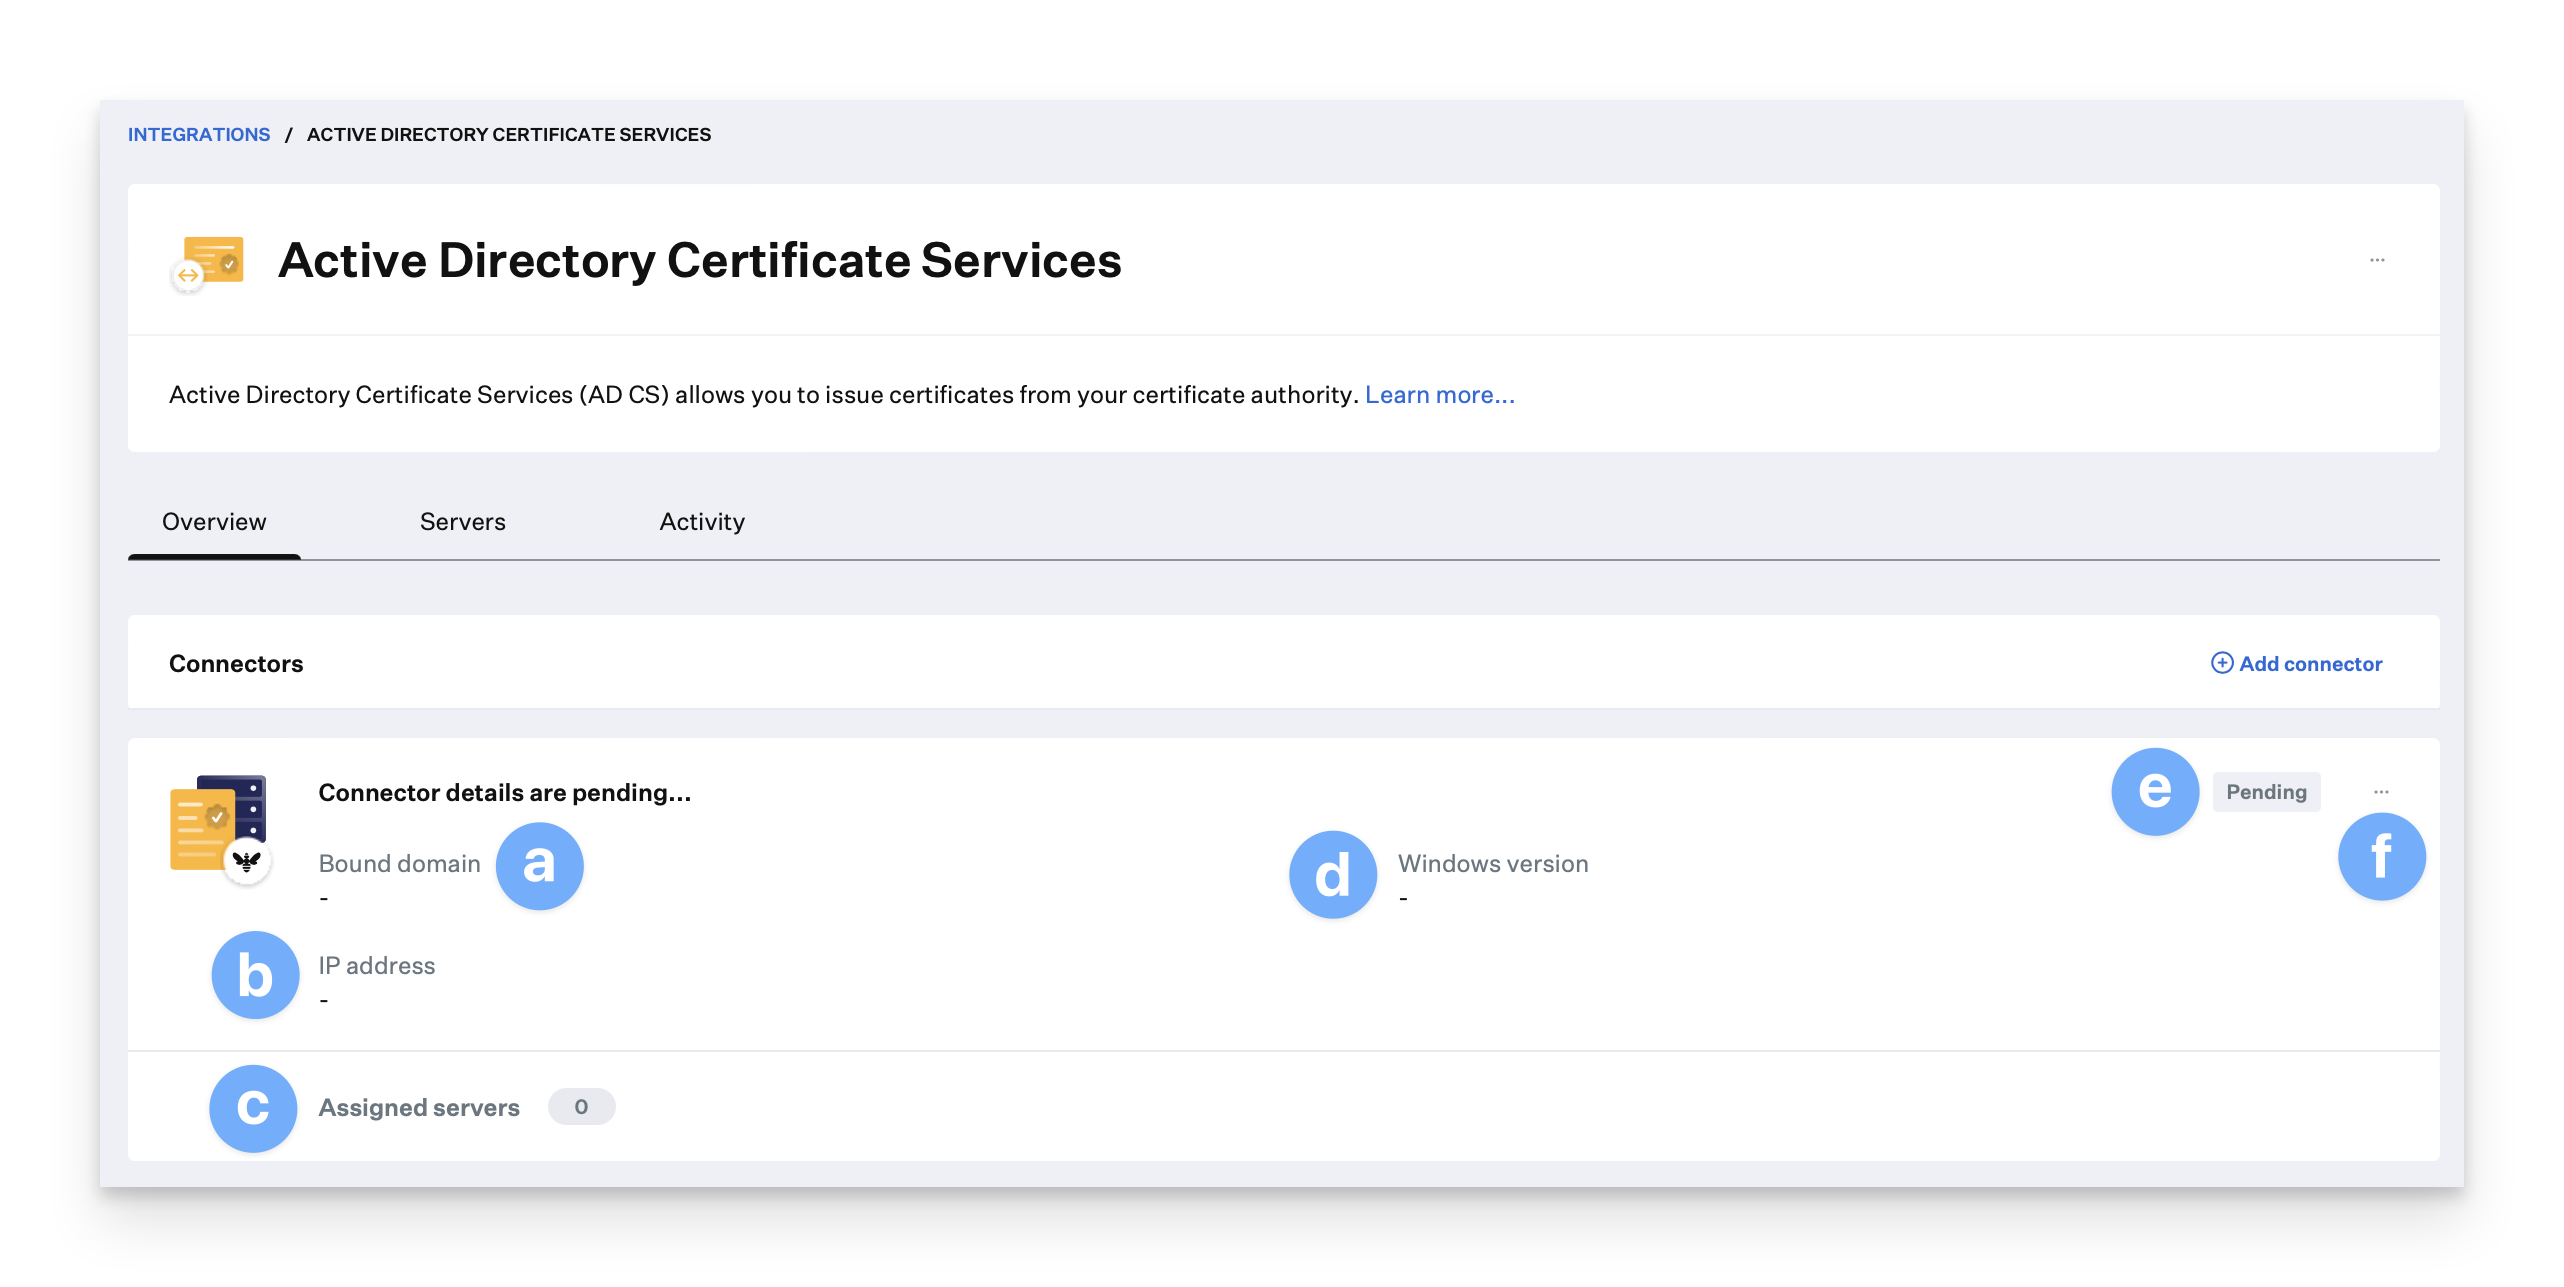
On the Overview page, you can see information about the AD CS Connector that was just added. Most of the details will not be populated until the AD CS Connector is installed on the Windows server and a connection is made back to Kandji.
The domain to which the AD CS Connector server is bound.
The Connector's IP address.
Assigned AD CS servers. Servers can be assigned once the AD CS Connector is connected back to Kandji.
The version of the Windows server where the AD CS Connector is installed.
Status on the connection between Kandji and Kandji AD CS Connector. The status will remain in a Pending state until the Connector is installed on the Windows server and a connection is made back to Kandji.
In the Connector action menu(...), you can view the installation instructions, redownload the connector installer, or delete the connector.
Adding AD CS Certificate Authority Servers
You must define the FQDN in the Server name field in the AD CS servers tray.
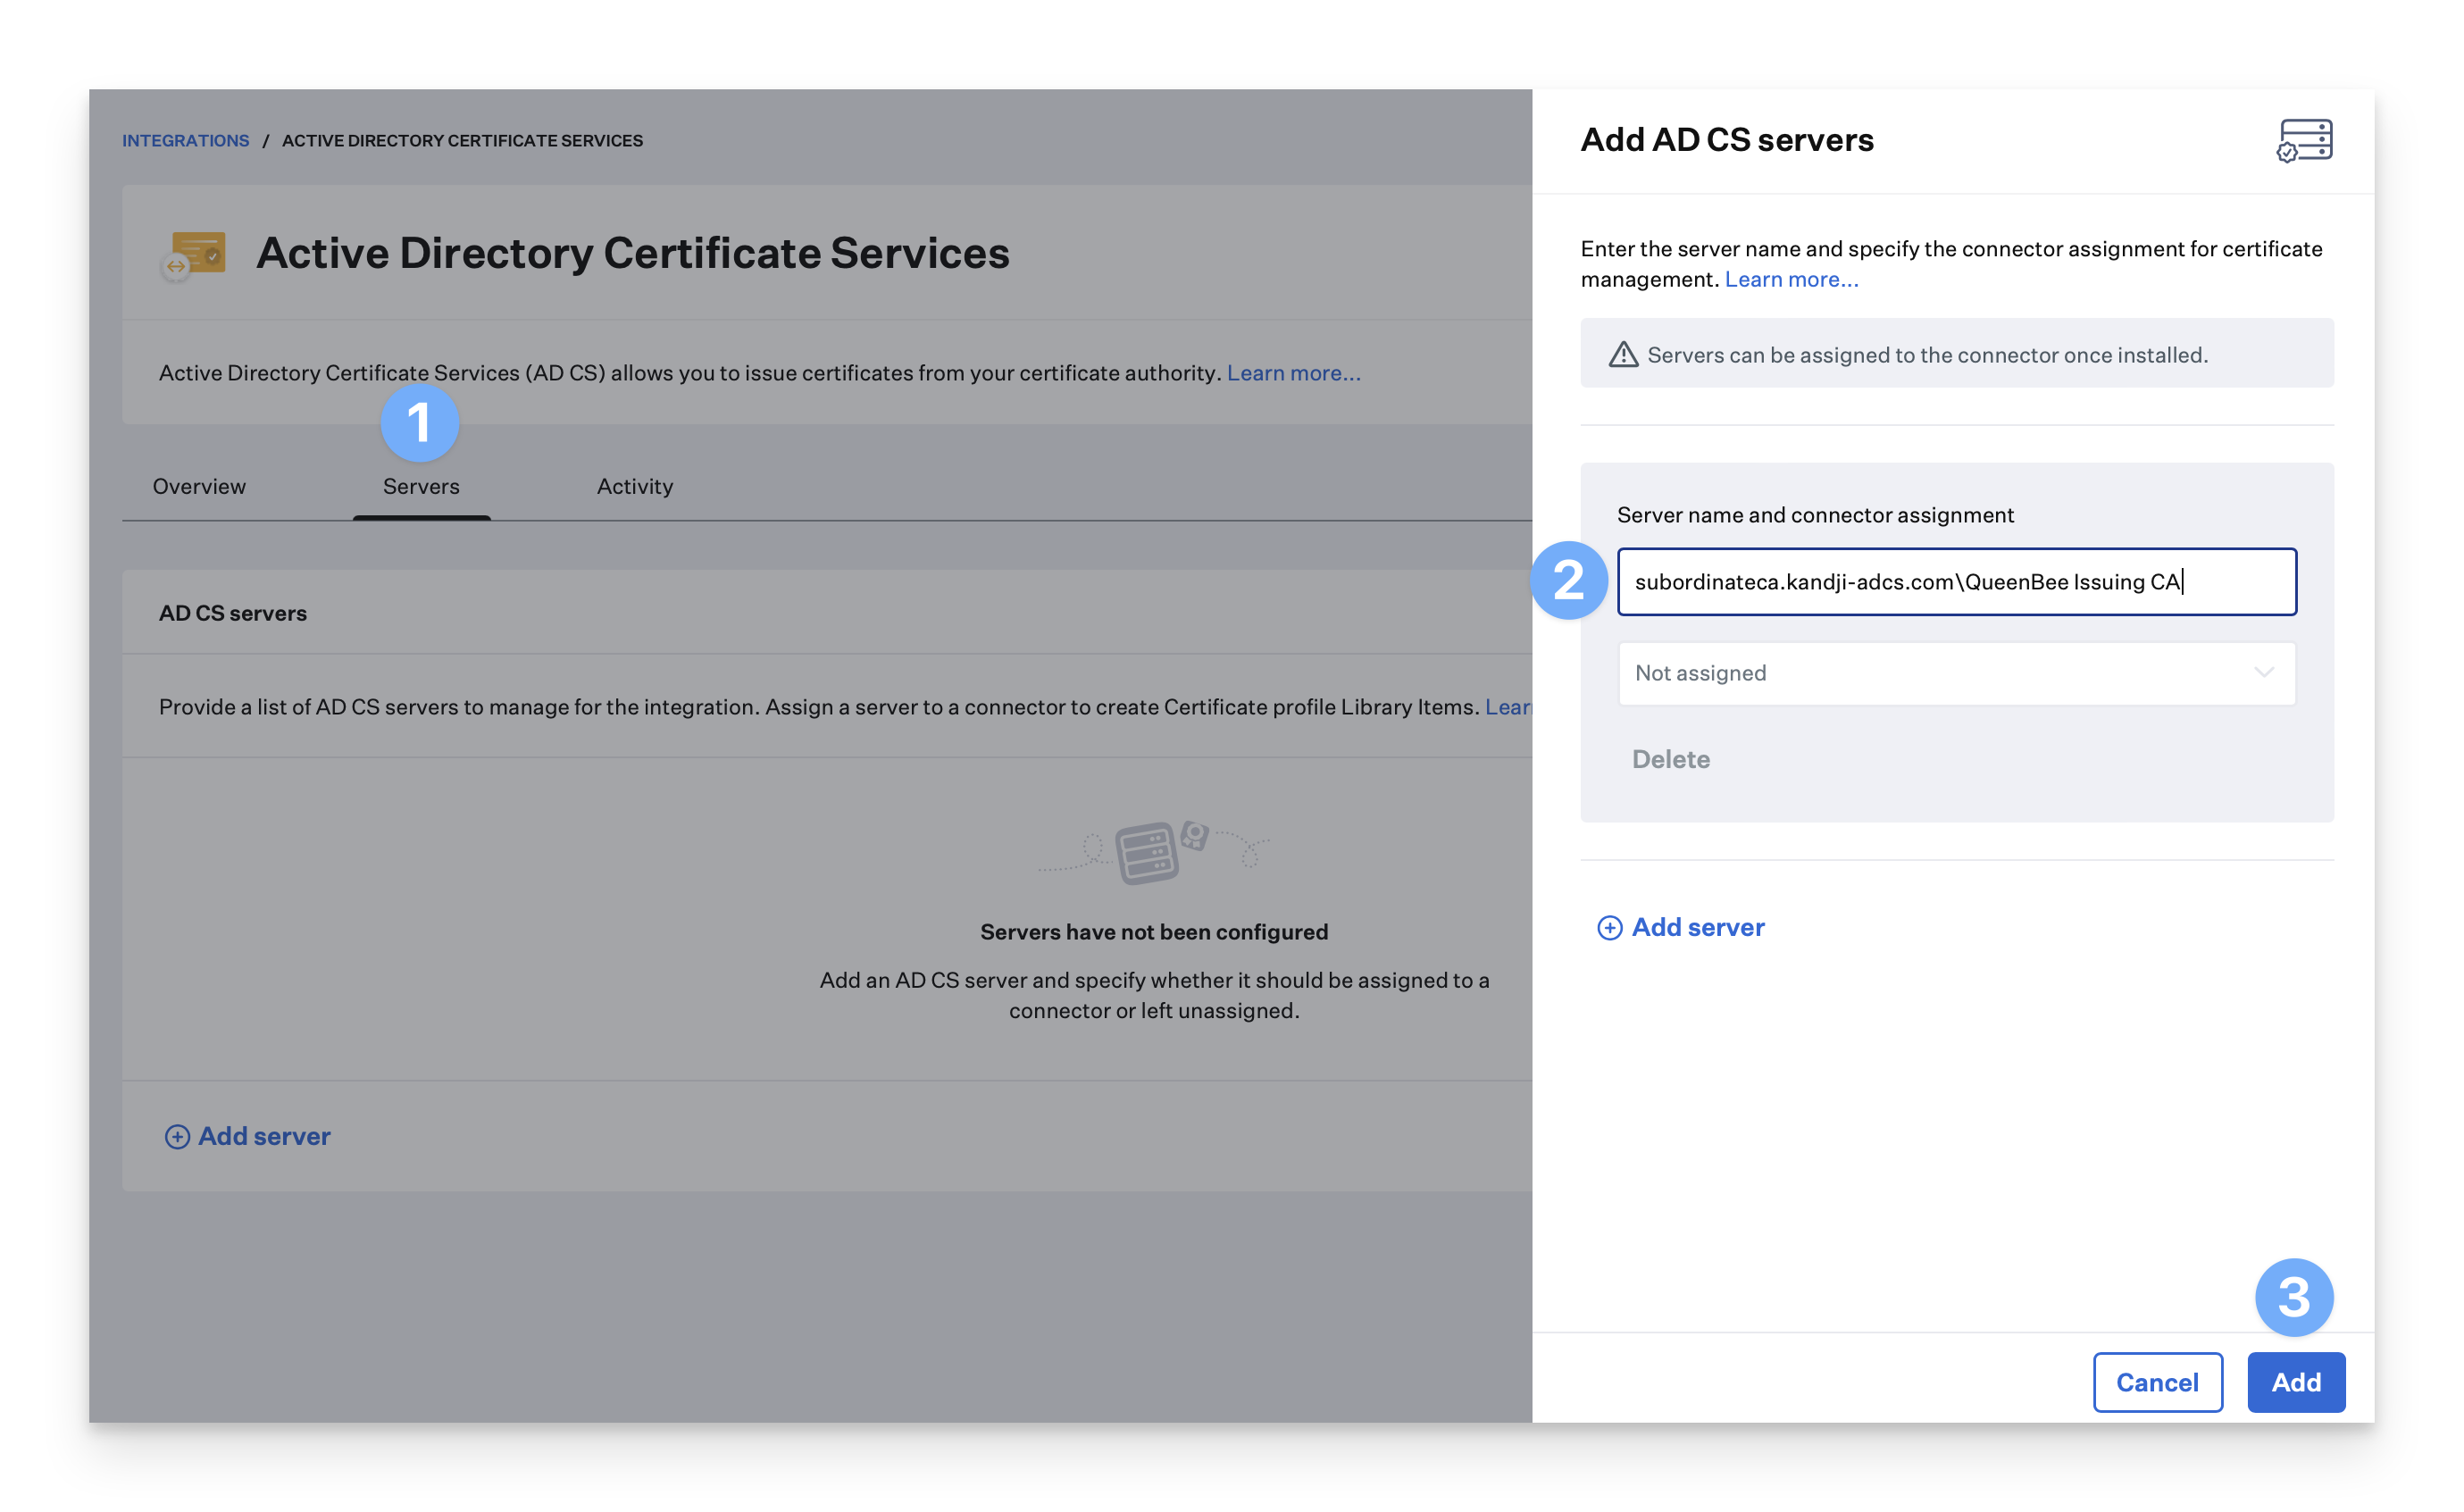
On the AD CS Integration page, click the Servers tab.
In the tray, add the AD CS server(s) that will be used for creating certificates using the format of: ca_server_fqdn\issuing_ca_name (Example: "subordinateca.kandji-adcs.com\QueenBee Issuing CA"). The issuing_ca_name is found in the Certificate Authority Snap-in on the issuing CA Windows server. You will be able to assign the server once the Connector shows a status of Connected.
Click Add.
The status for the AD CS server will show as Disconnected until assigned to an AD CS Connector. Once the AD CS Connector status shows Connected, you can assign the AD CS CA server(s) to the AD CS Connector. You can edit or delete the AD CS server from the action menu (…) on the AD CS server card.
At this point, you are ready to hop over to the Connector Installation support article to install the AD CS Connector on the Windows server and establish a connection back to Kandji.
Assigning an AD CS server to a Connector
Once the AD CS Connector status shows as Connected, you can assign an AD CS server to the Connector.
On the AD CS Integration Overview page, click the action menu(…)on the Connector card.
Click Assign servers.
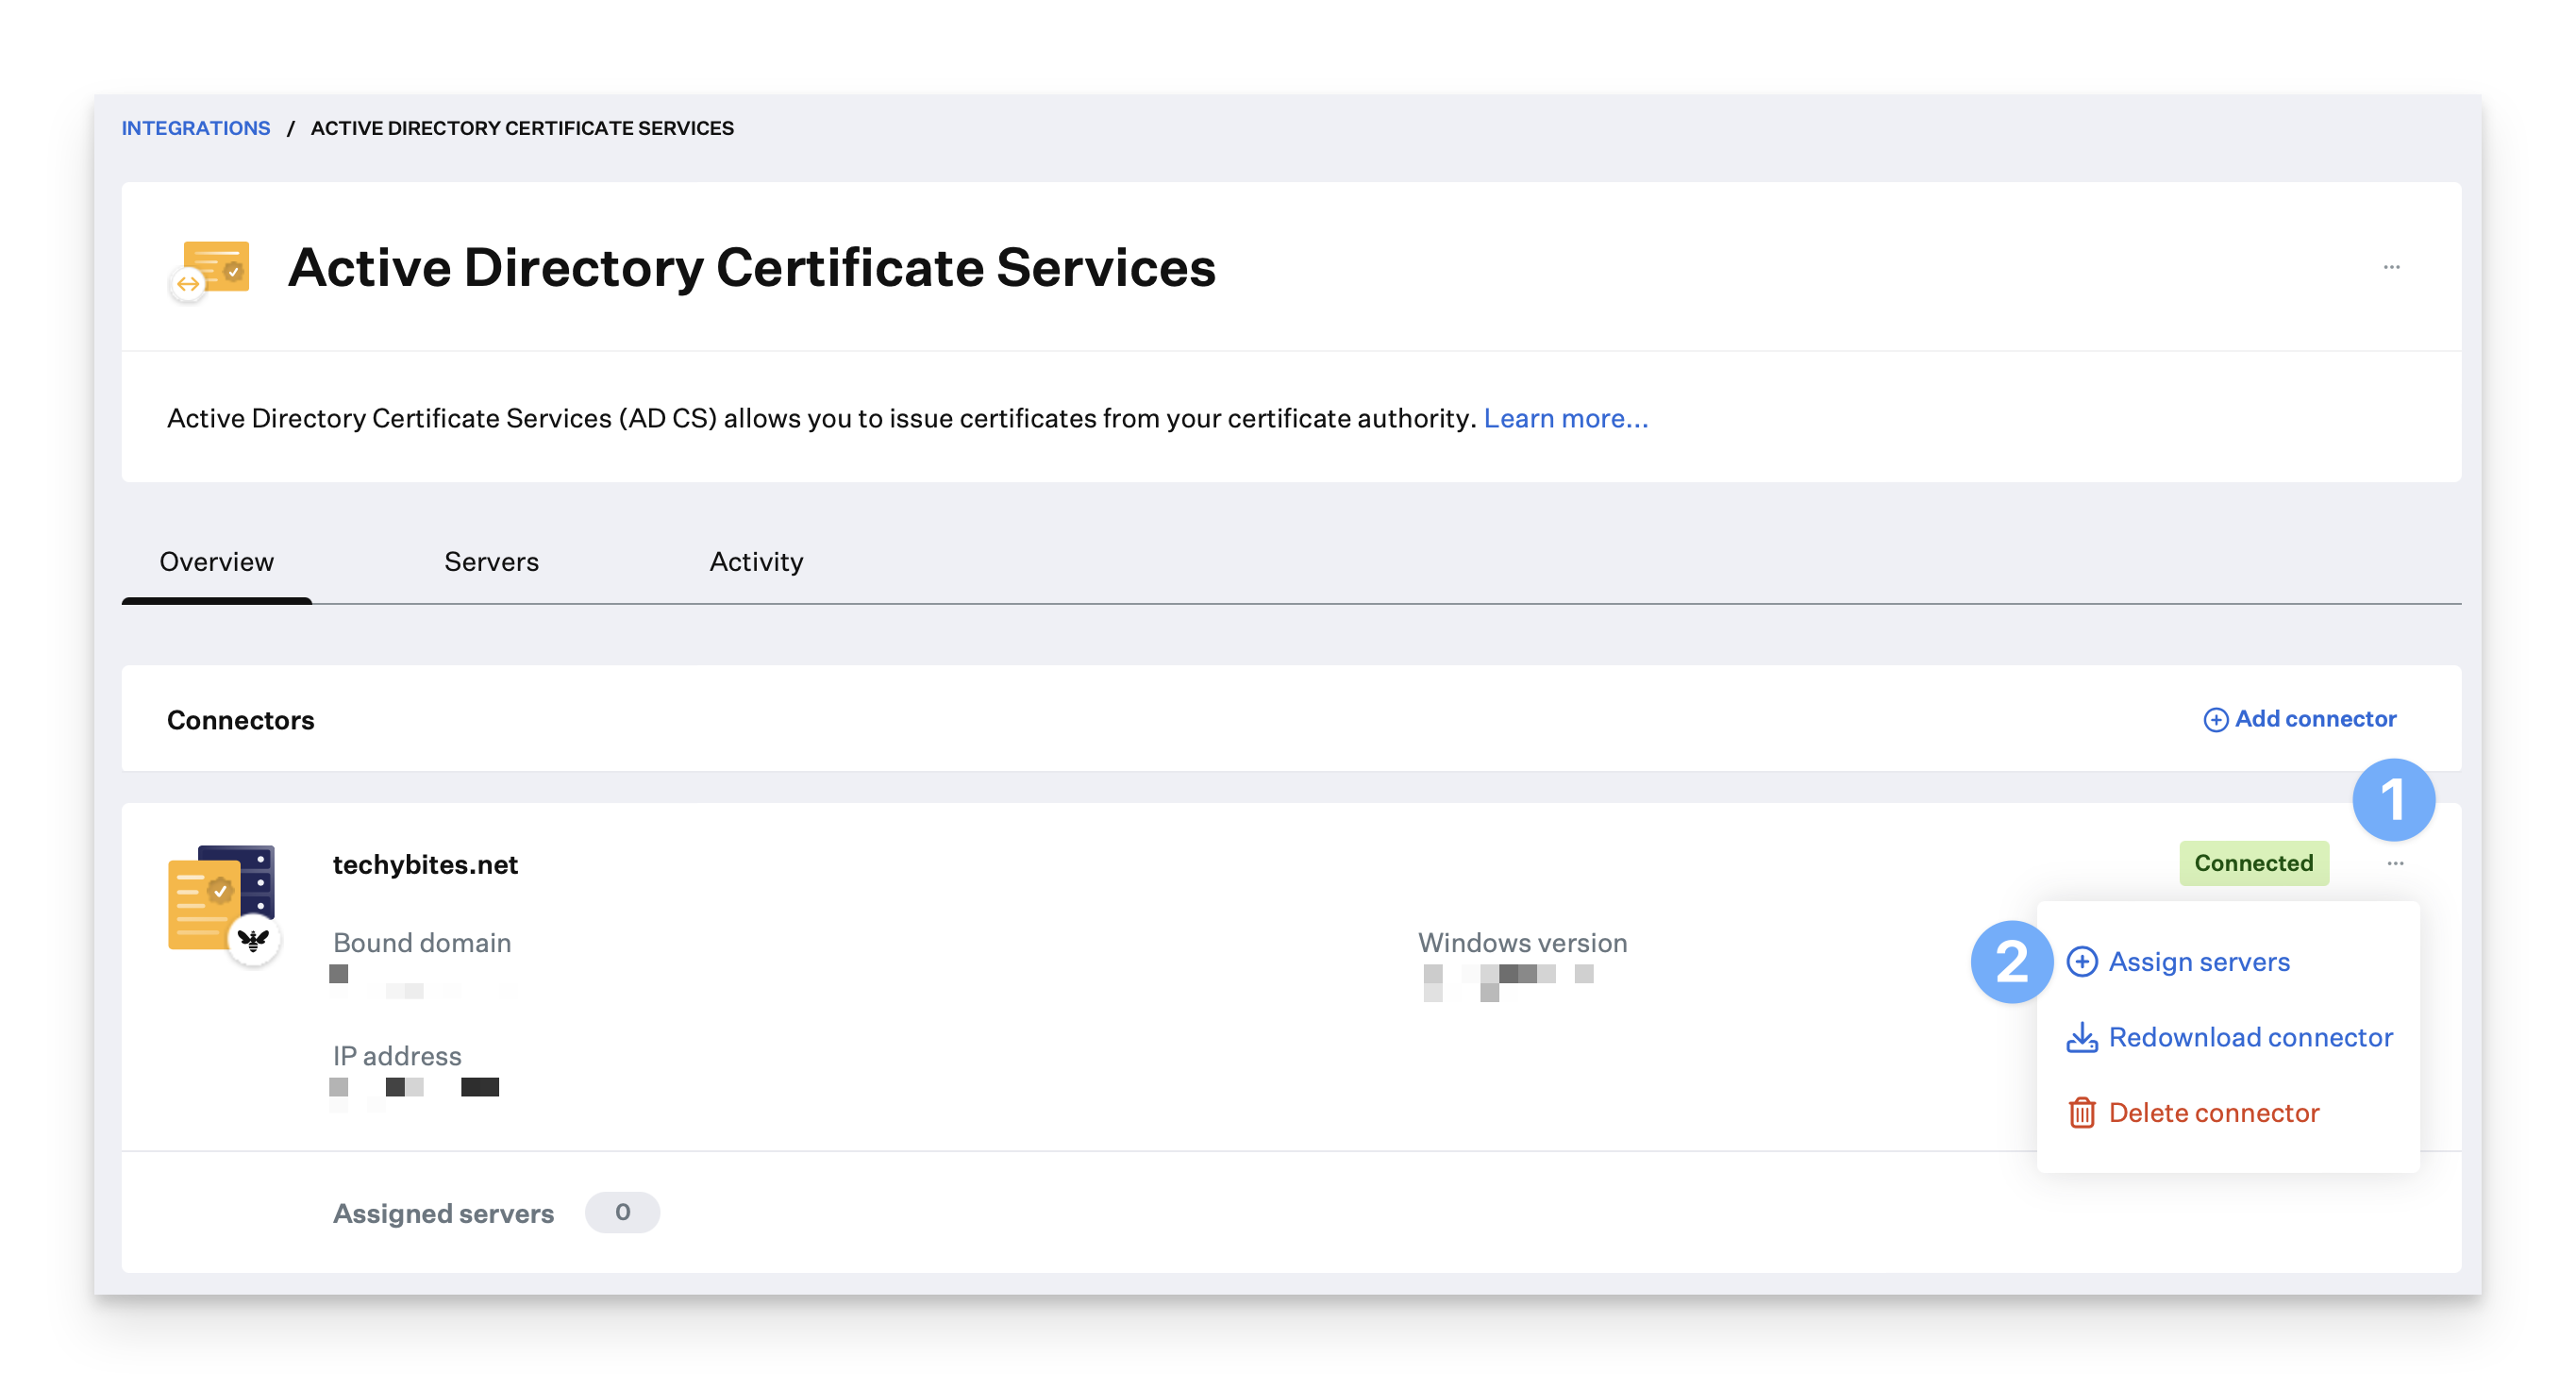
Select the AD CS server from the list.
Click Add.
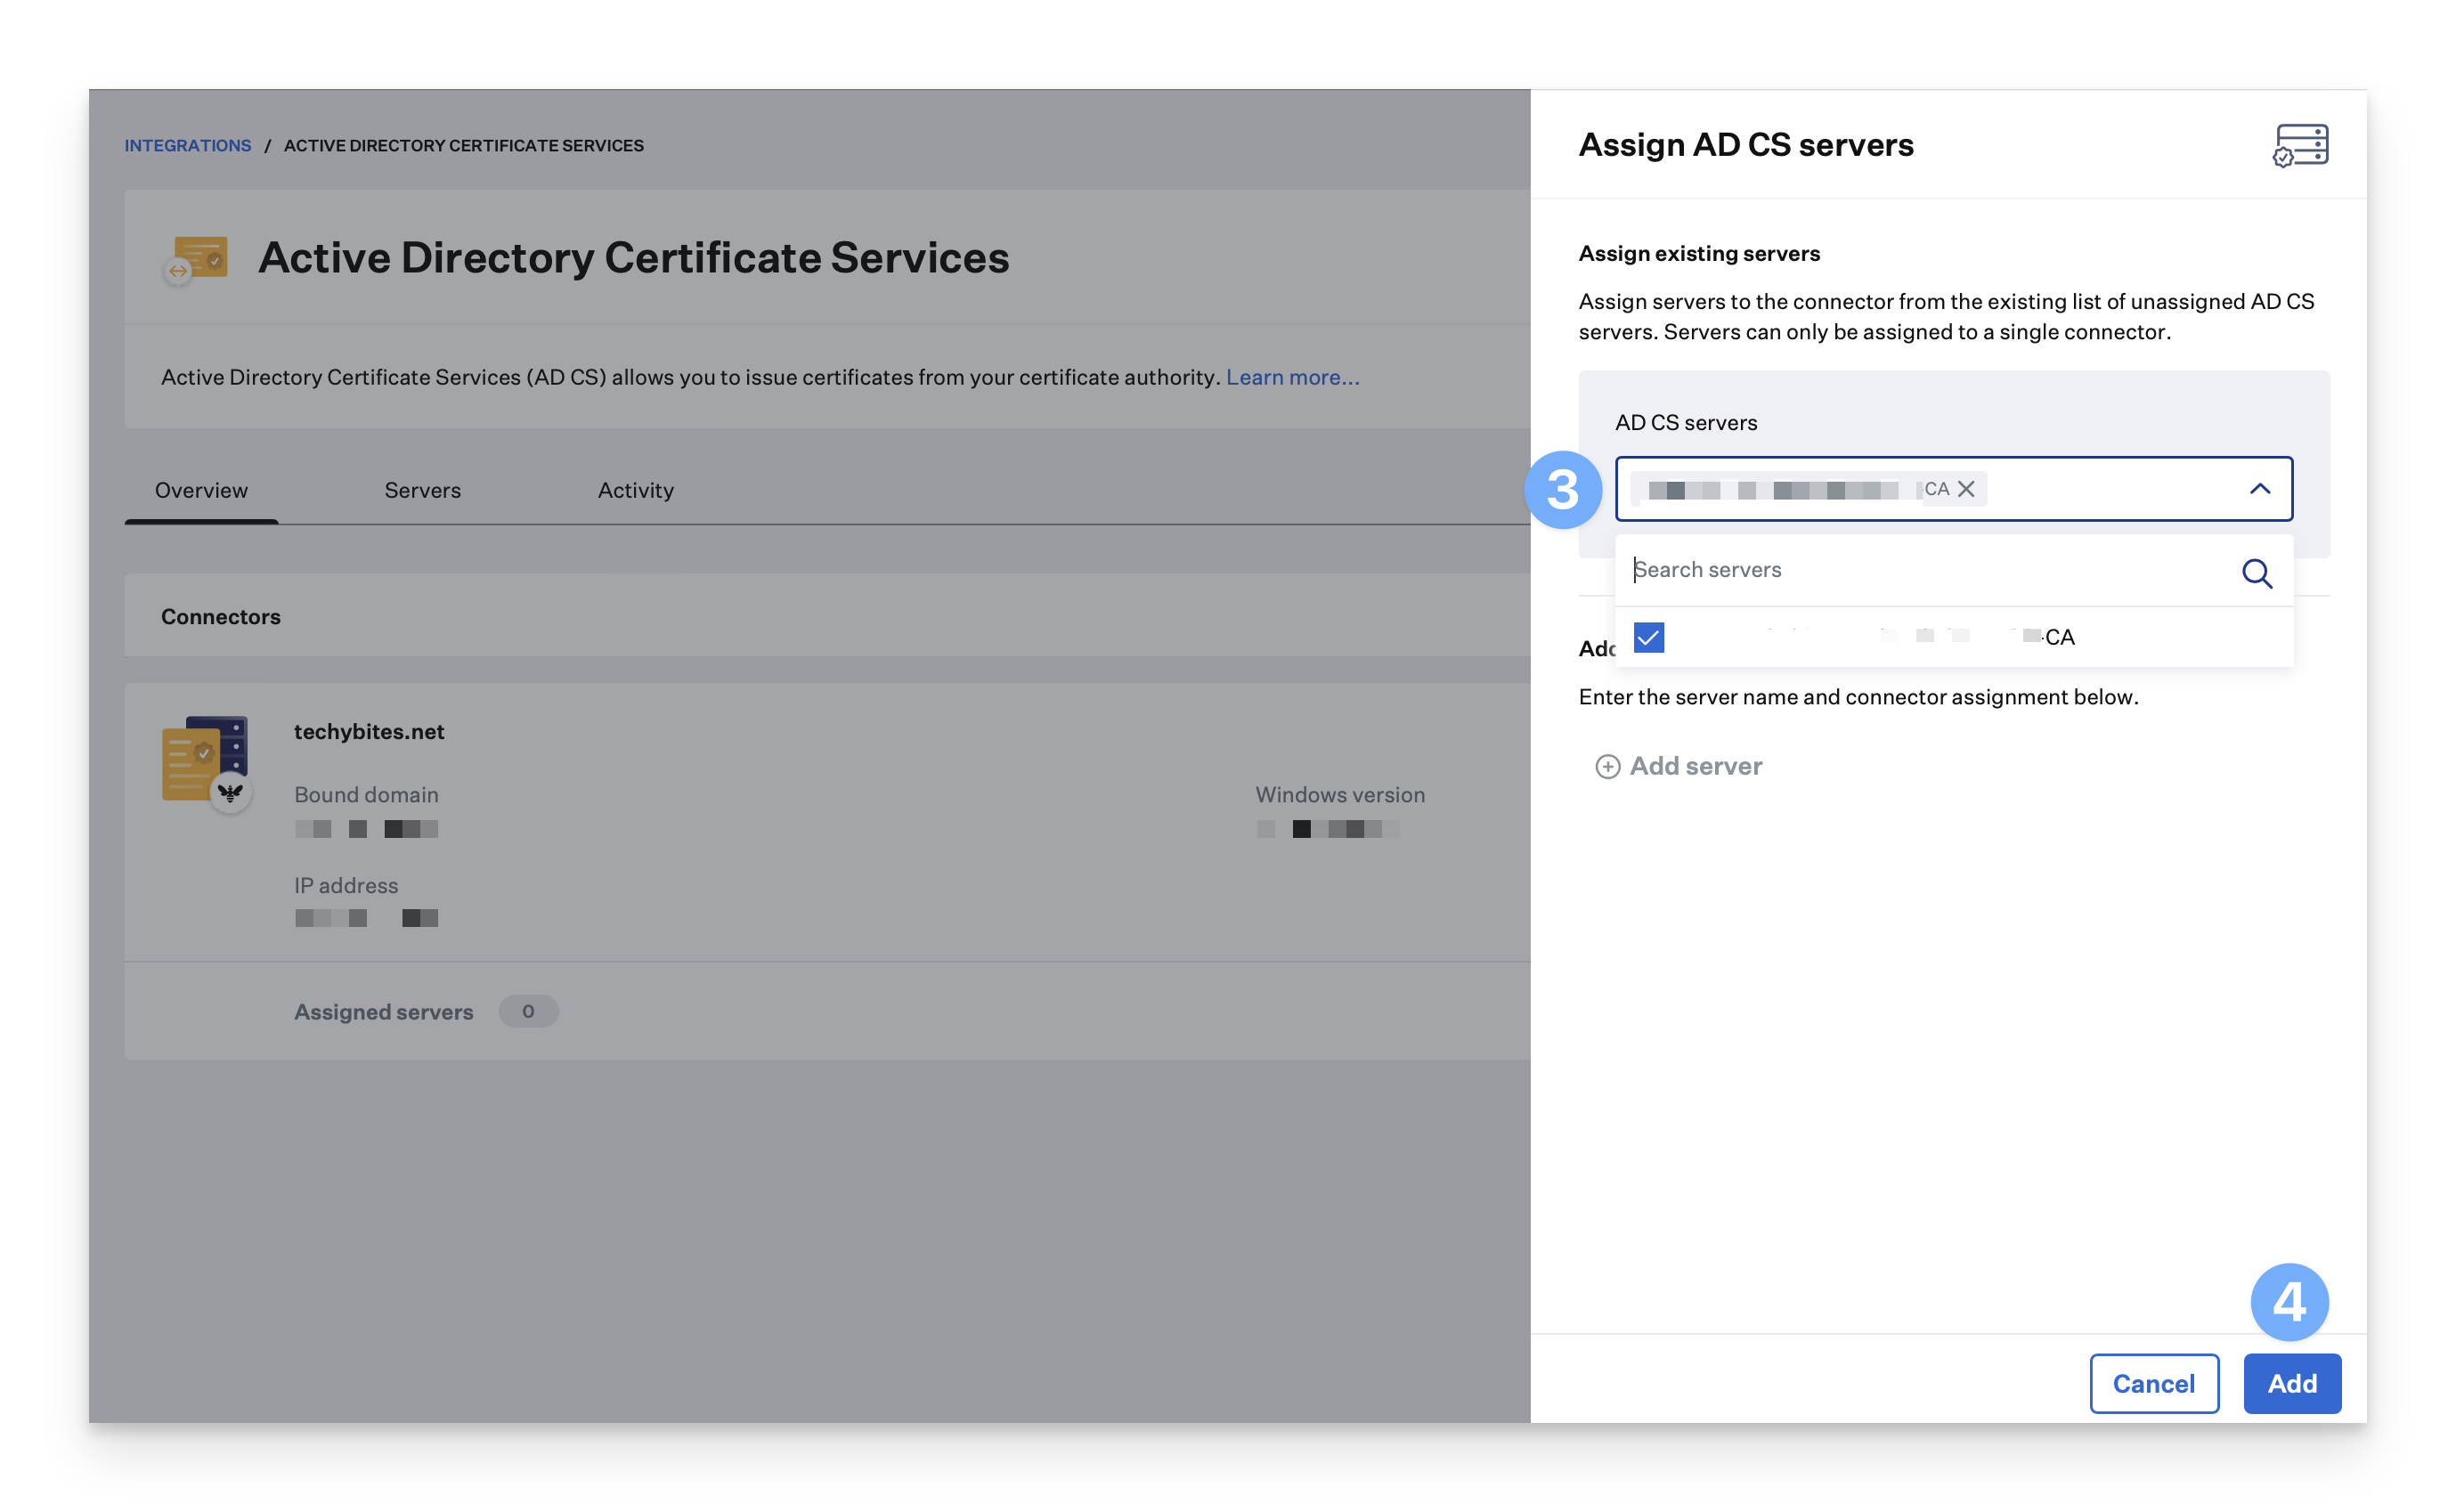
There should now be an AD CS server assigned to the Connector.
At this point, you are ready to start building out Library Items to deploy AD CS certificates to devices.
Adding Additional Connectors
If needed, additional AD CS Connectors can be added to the AD CS integration.
In Kandji, navigate to Integrations and select the AD CS Integration card.
Click Add connector.
A new connector will appear in a Pending state awaiting AD CS service assignment.
From the action menu (…), you can view install instructions, redownload the connector installer, or remove the connector entirely.
Removing the Integration
This integration is a requirement to issue AD CS certificates to your Apple fleet. Deleting this integration cannot be undone.
Use the steps below to remove an Active Directory Certificate Services Connector from your Kandji tenant.
In Kandji, navigate to Integrations.
Click on the Active Directory Certificate Services integration that you want to remove.
On the main Active Directory Certificate Services page, click the Action menu (…) and click Delete integration.

In the Delete AD CS Integration window, click the Delete integration button. Once the integration is removed, you will be taken back to the main Integration page.