Create a SAML Connection
Navigate to the Settings page.
Click the Access tab.
Find the Authentication section and click the Add button at the bottom left of the authentication section.
.png)
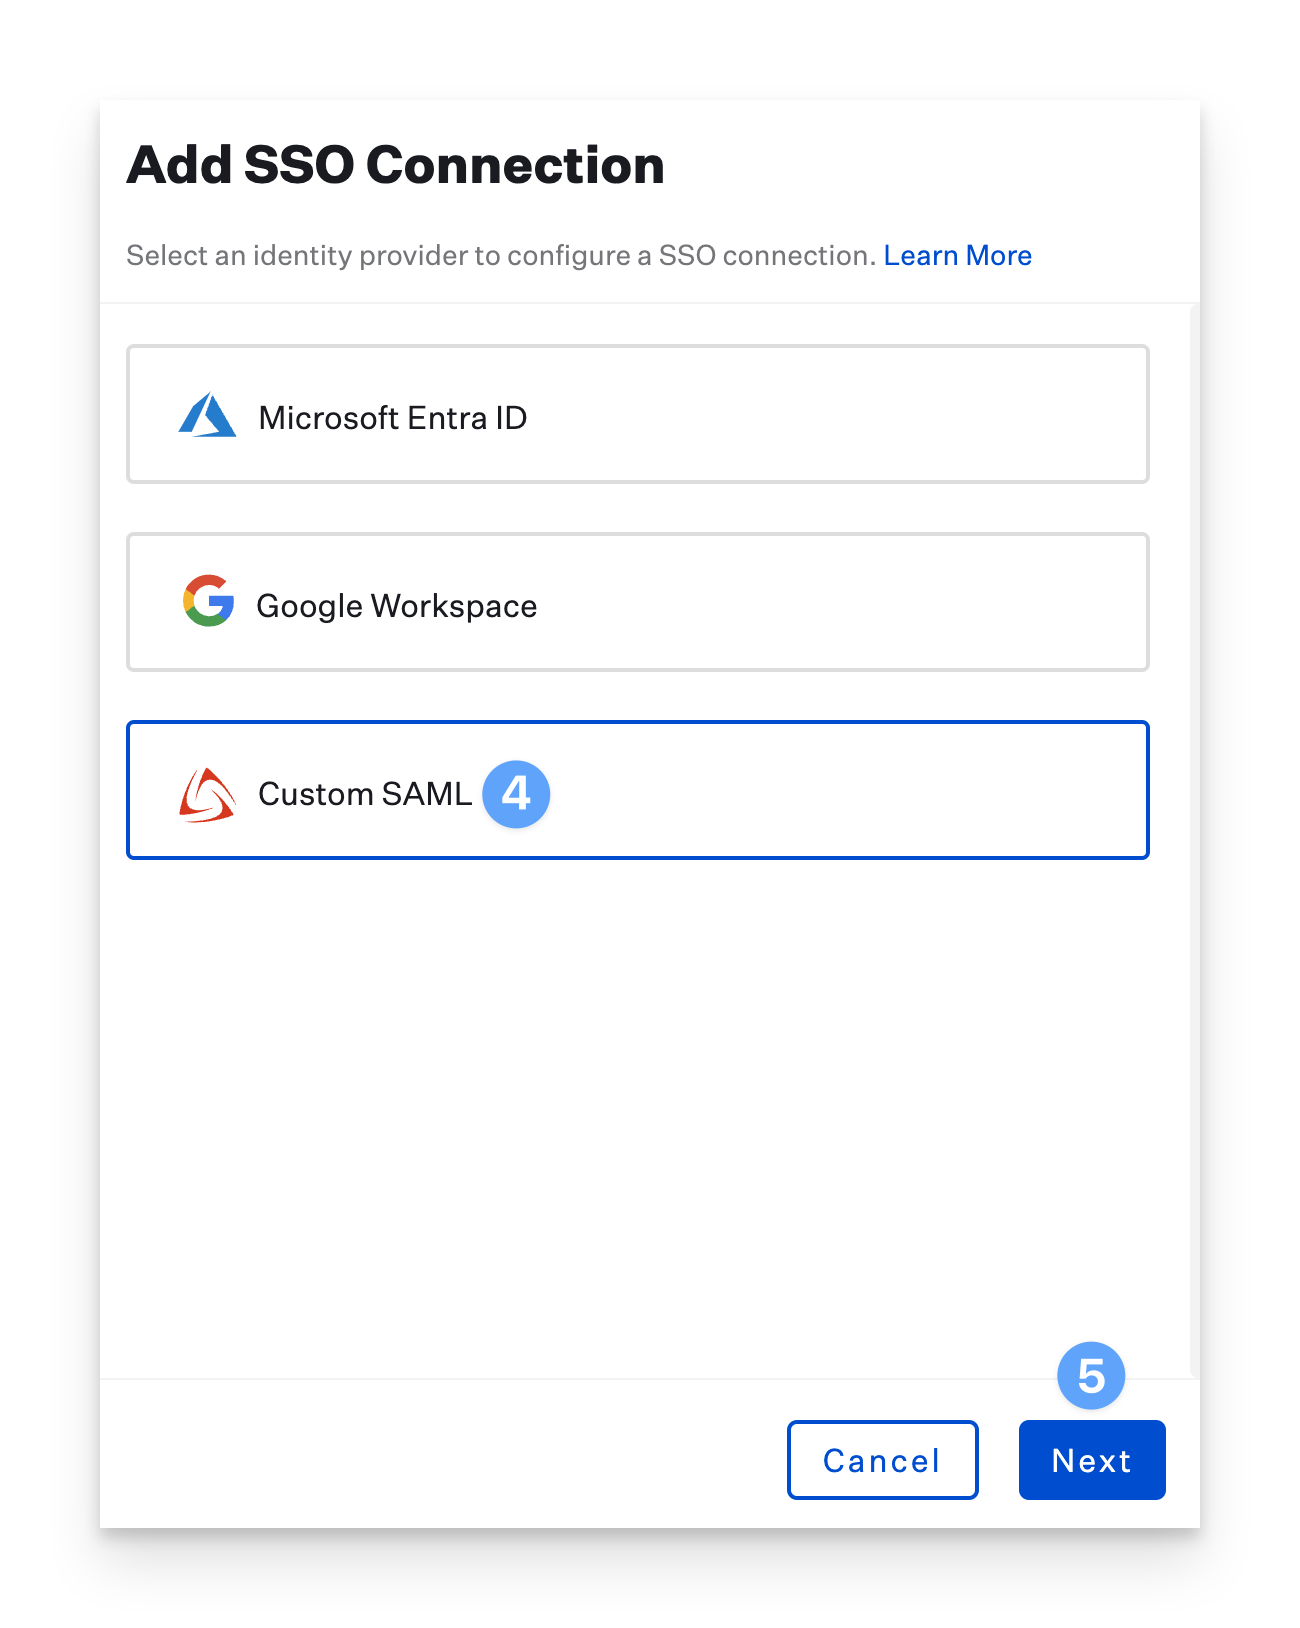
In the new blade, select the Custom SAML connection option.
Click Next.
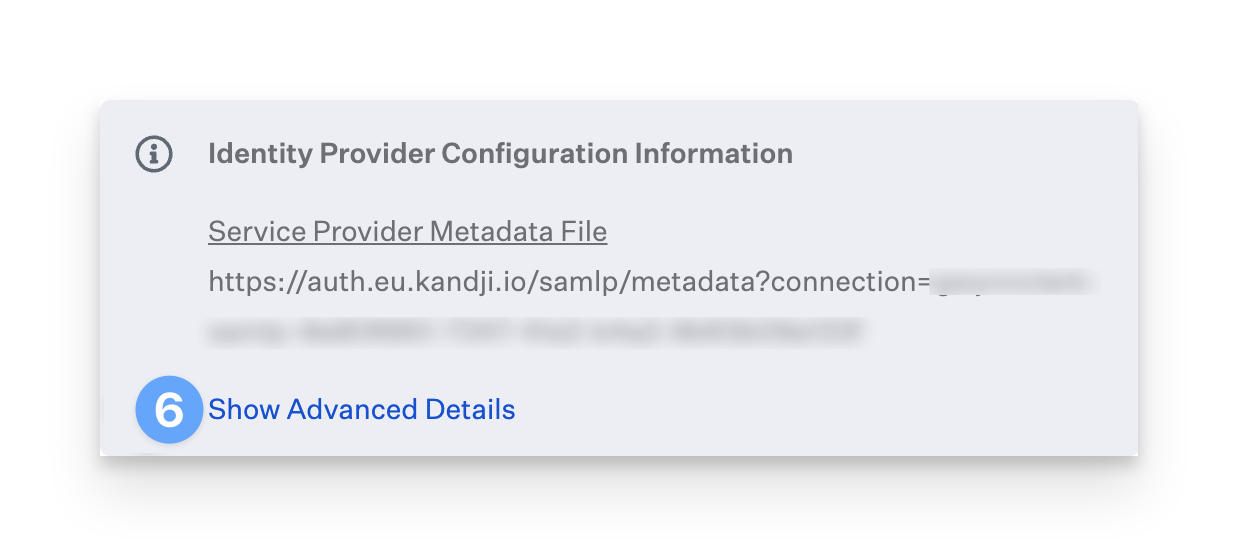
Click Show Advanced Details.
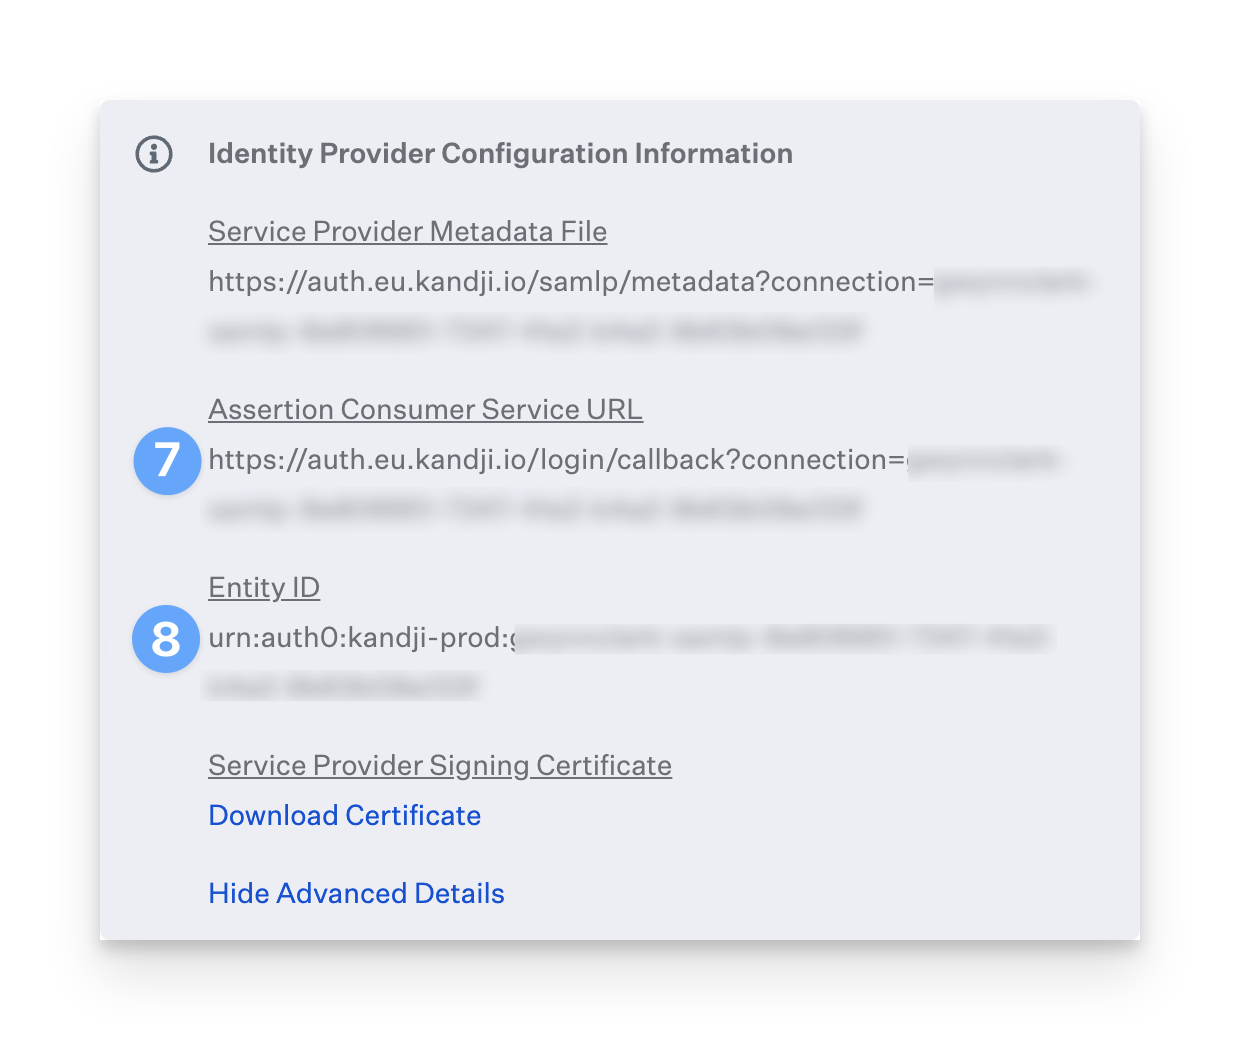
Copy the contents of the Assertion Consumer Service URL.
Copy the contents of the Entity ID after the urn:auth0:-prod: portion of the string.
Leave this tab open, and continue to the OneLogin instructions below.
Add the Kandji application to OneLogin
Navigate to the following OneLogin configuration page, or find the Kandji app in the catalog. http://{YourSubdomain}.onelogin.com/apps/new/159093
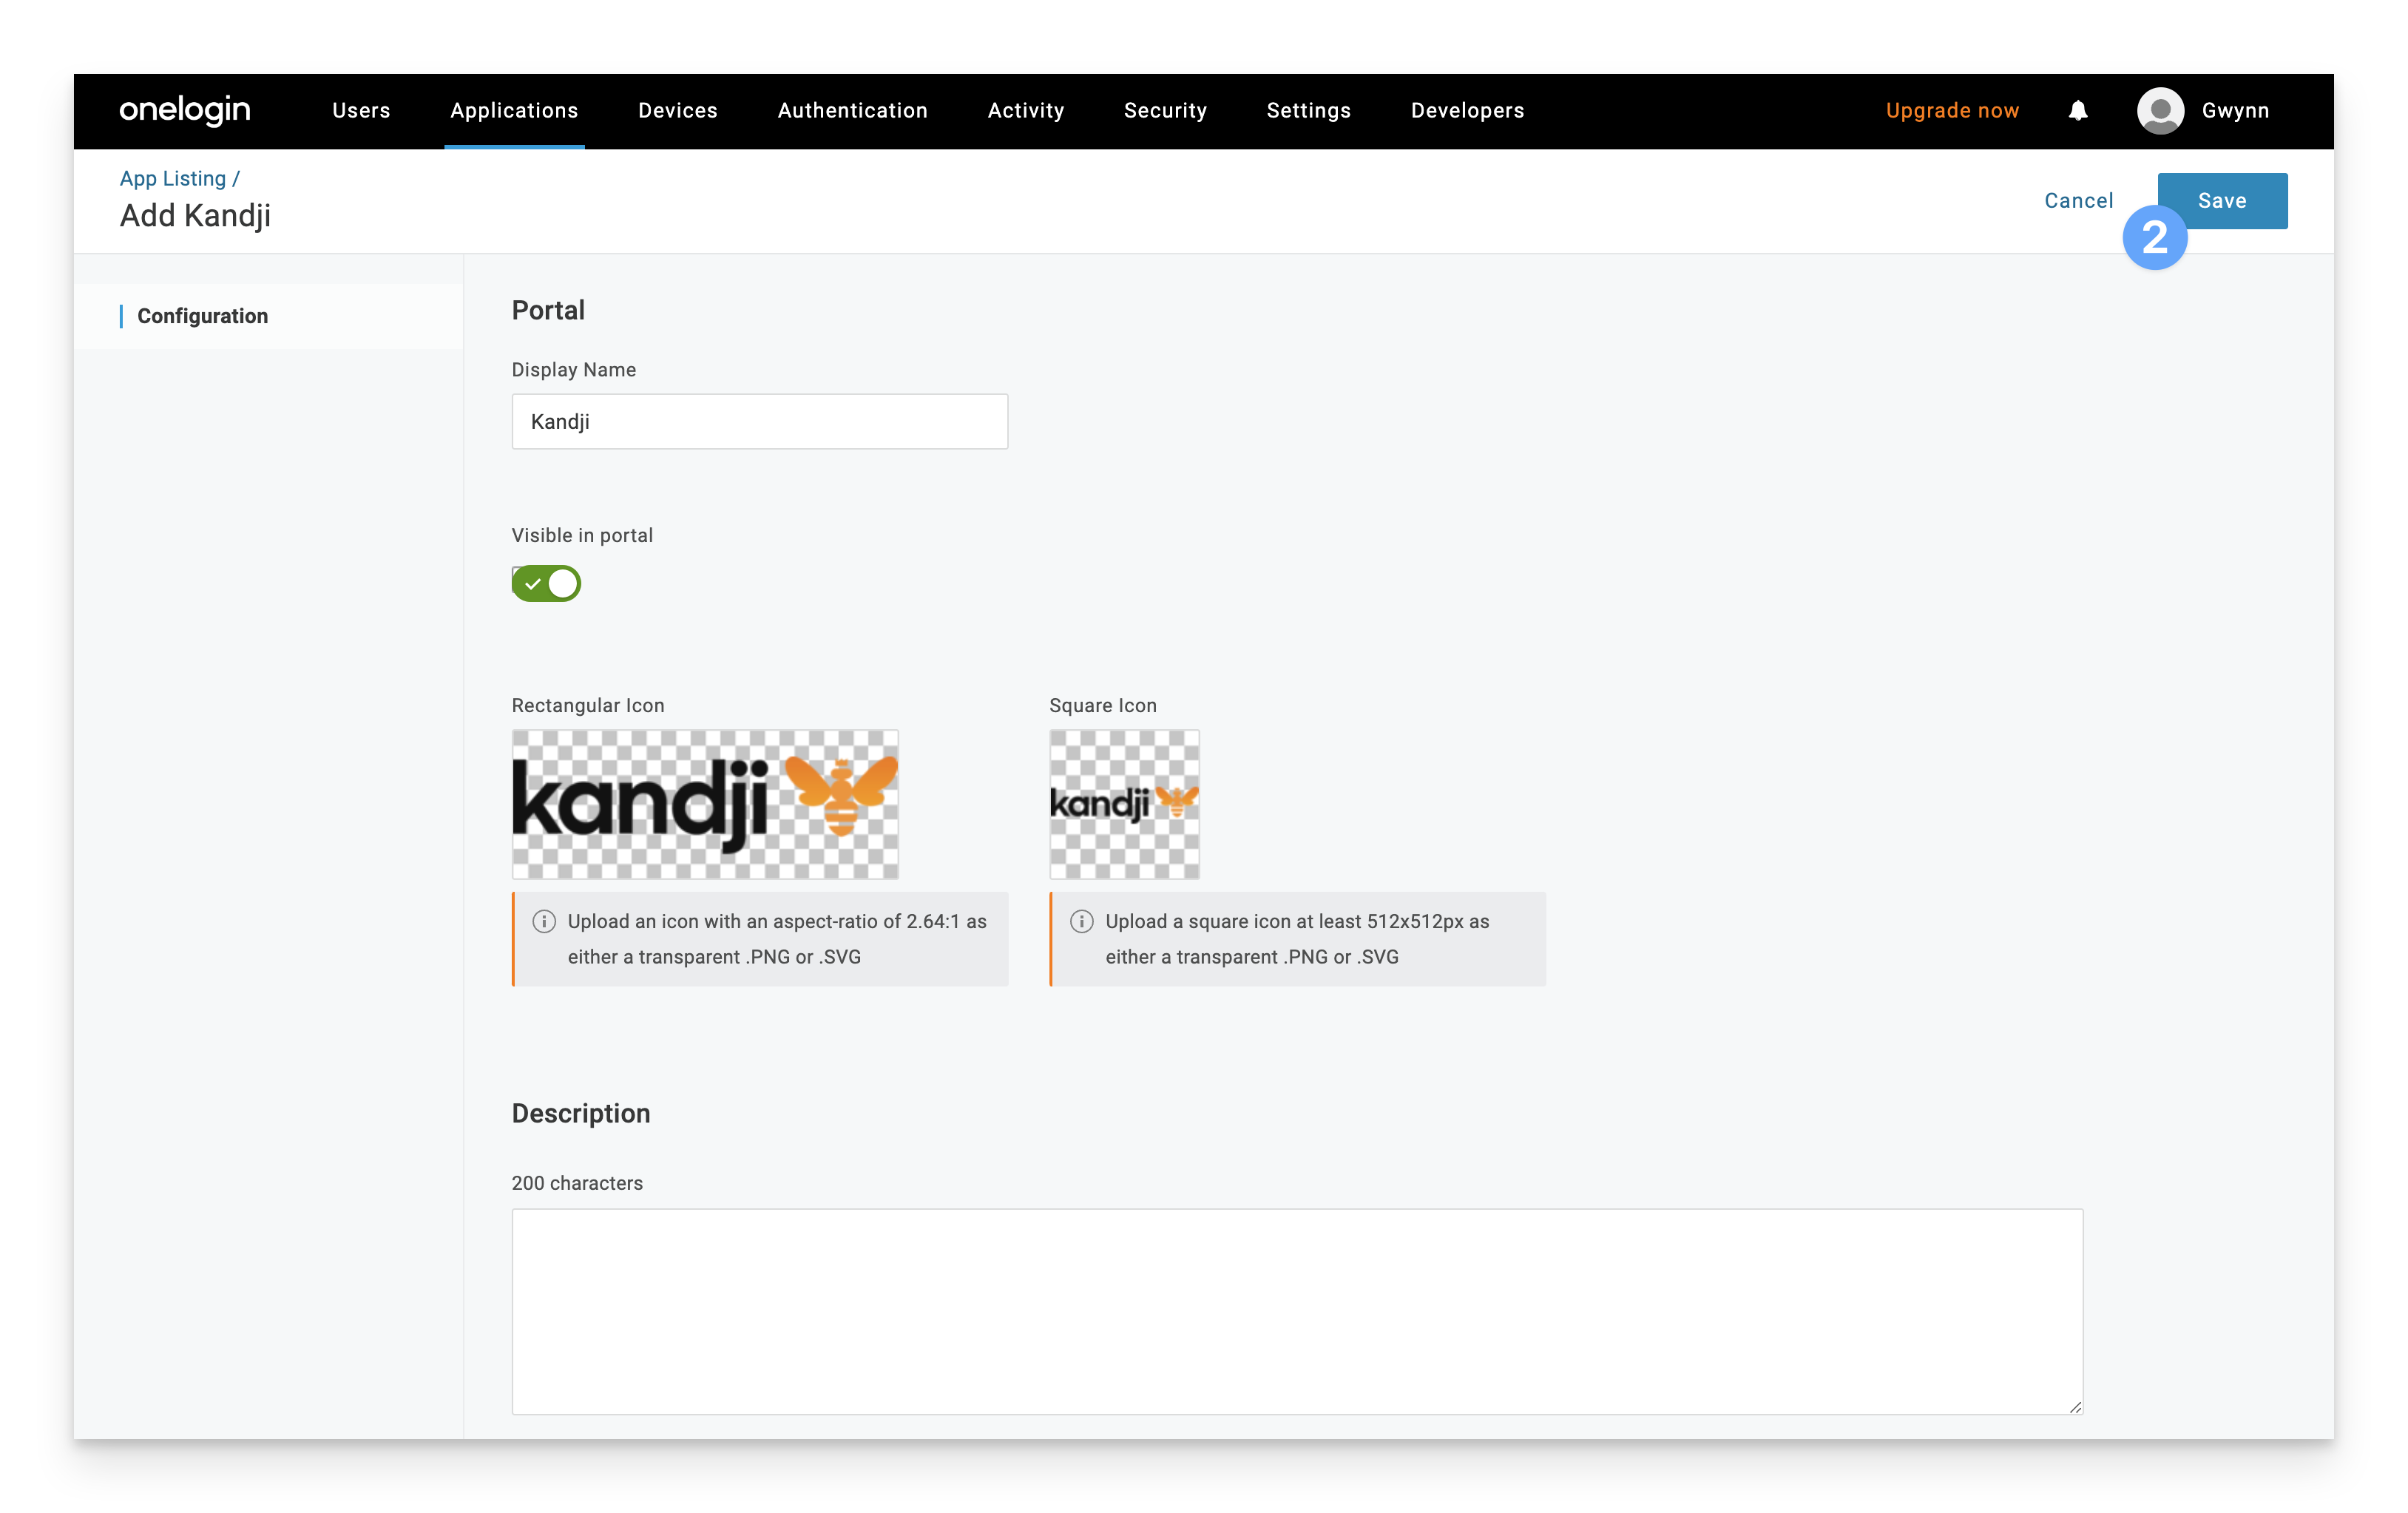
Click the Save button in the upper right hand corner.
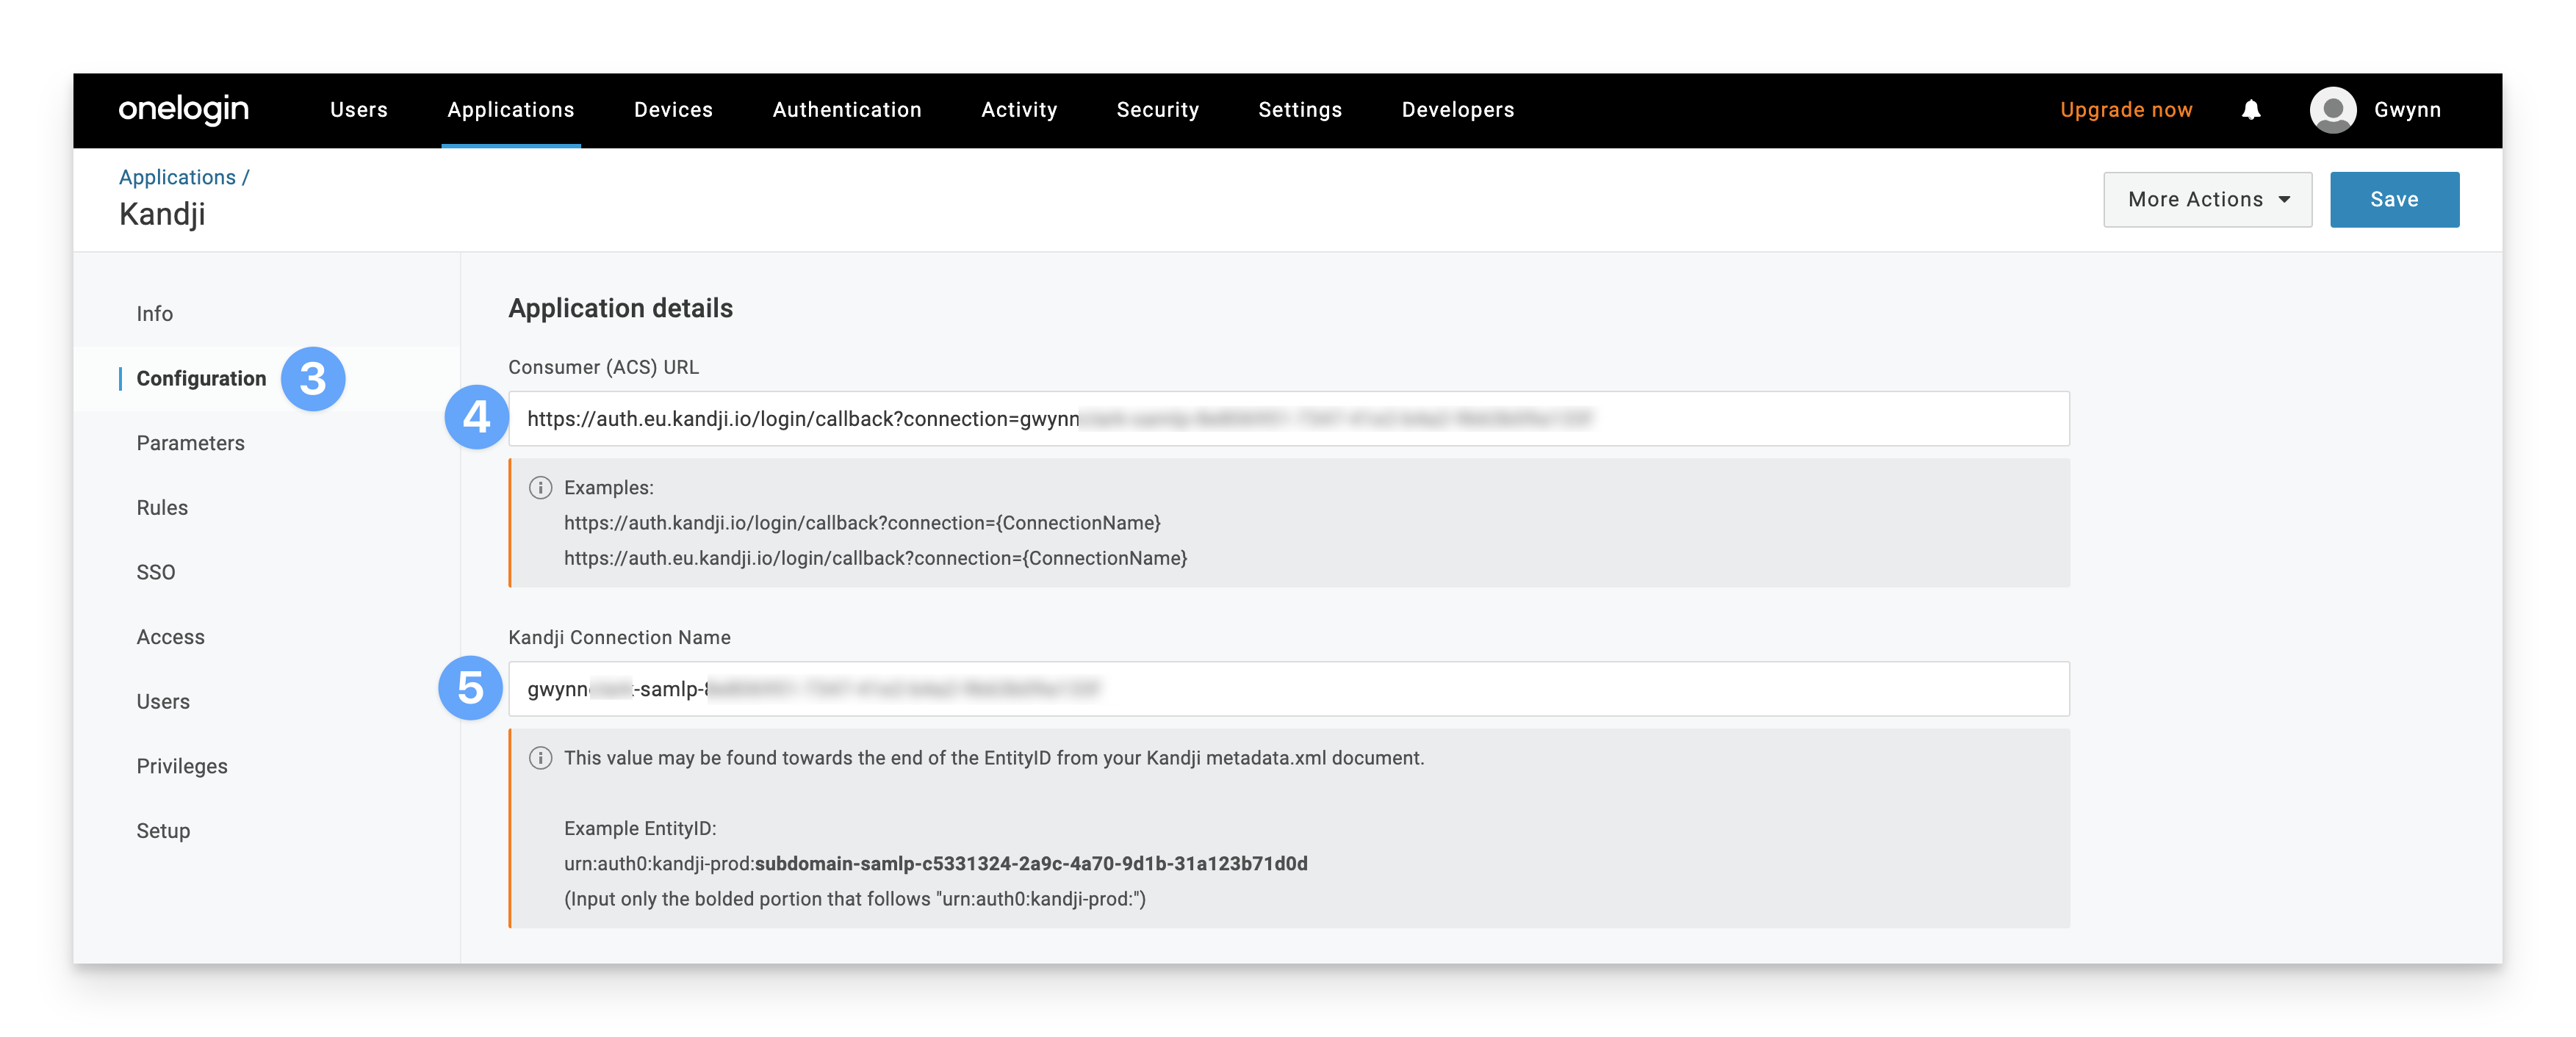
Click on the Configuration tab.
Paste in the Assertion Consumer Service URL you previously copied in the Consumer (ACS) URL field.
Paste in the ending of the Entity ID you previously copied in the Kandji Connection Name field. Note only enter the part after "urn:auth0:kandji-prod:"
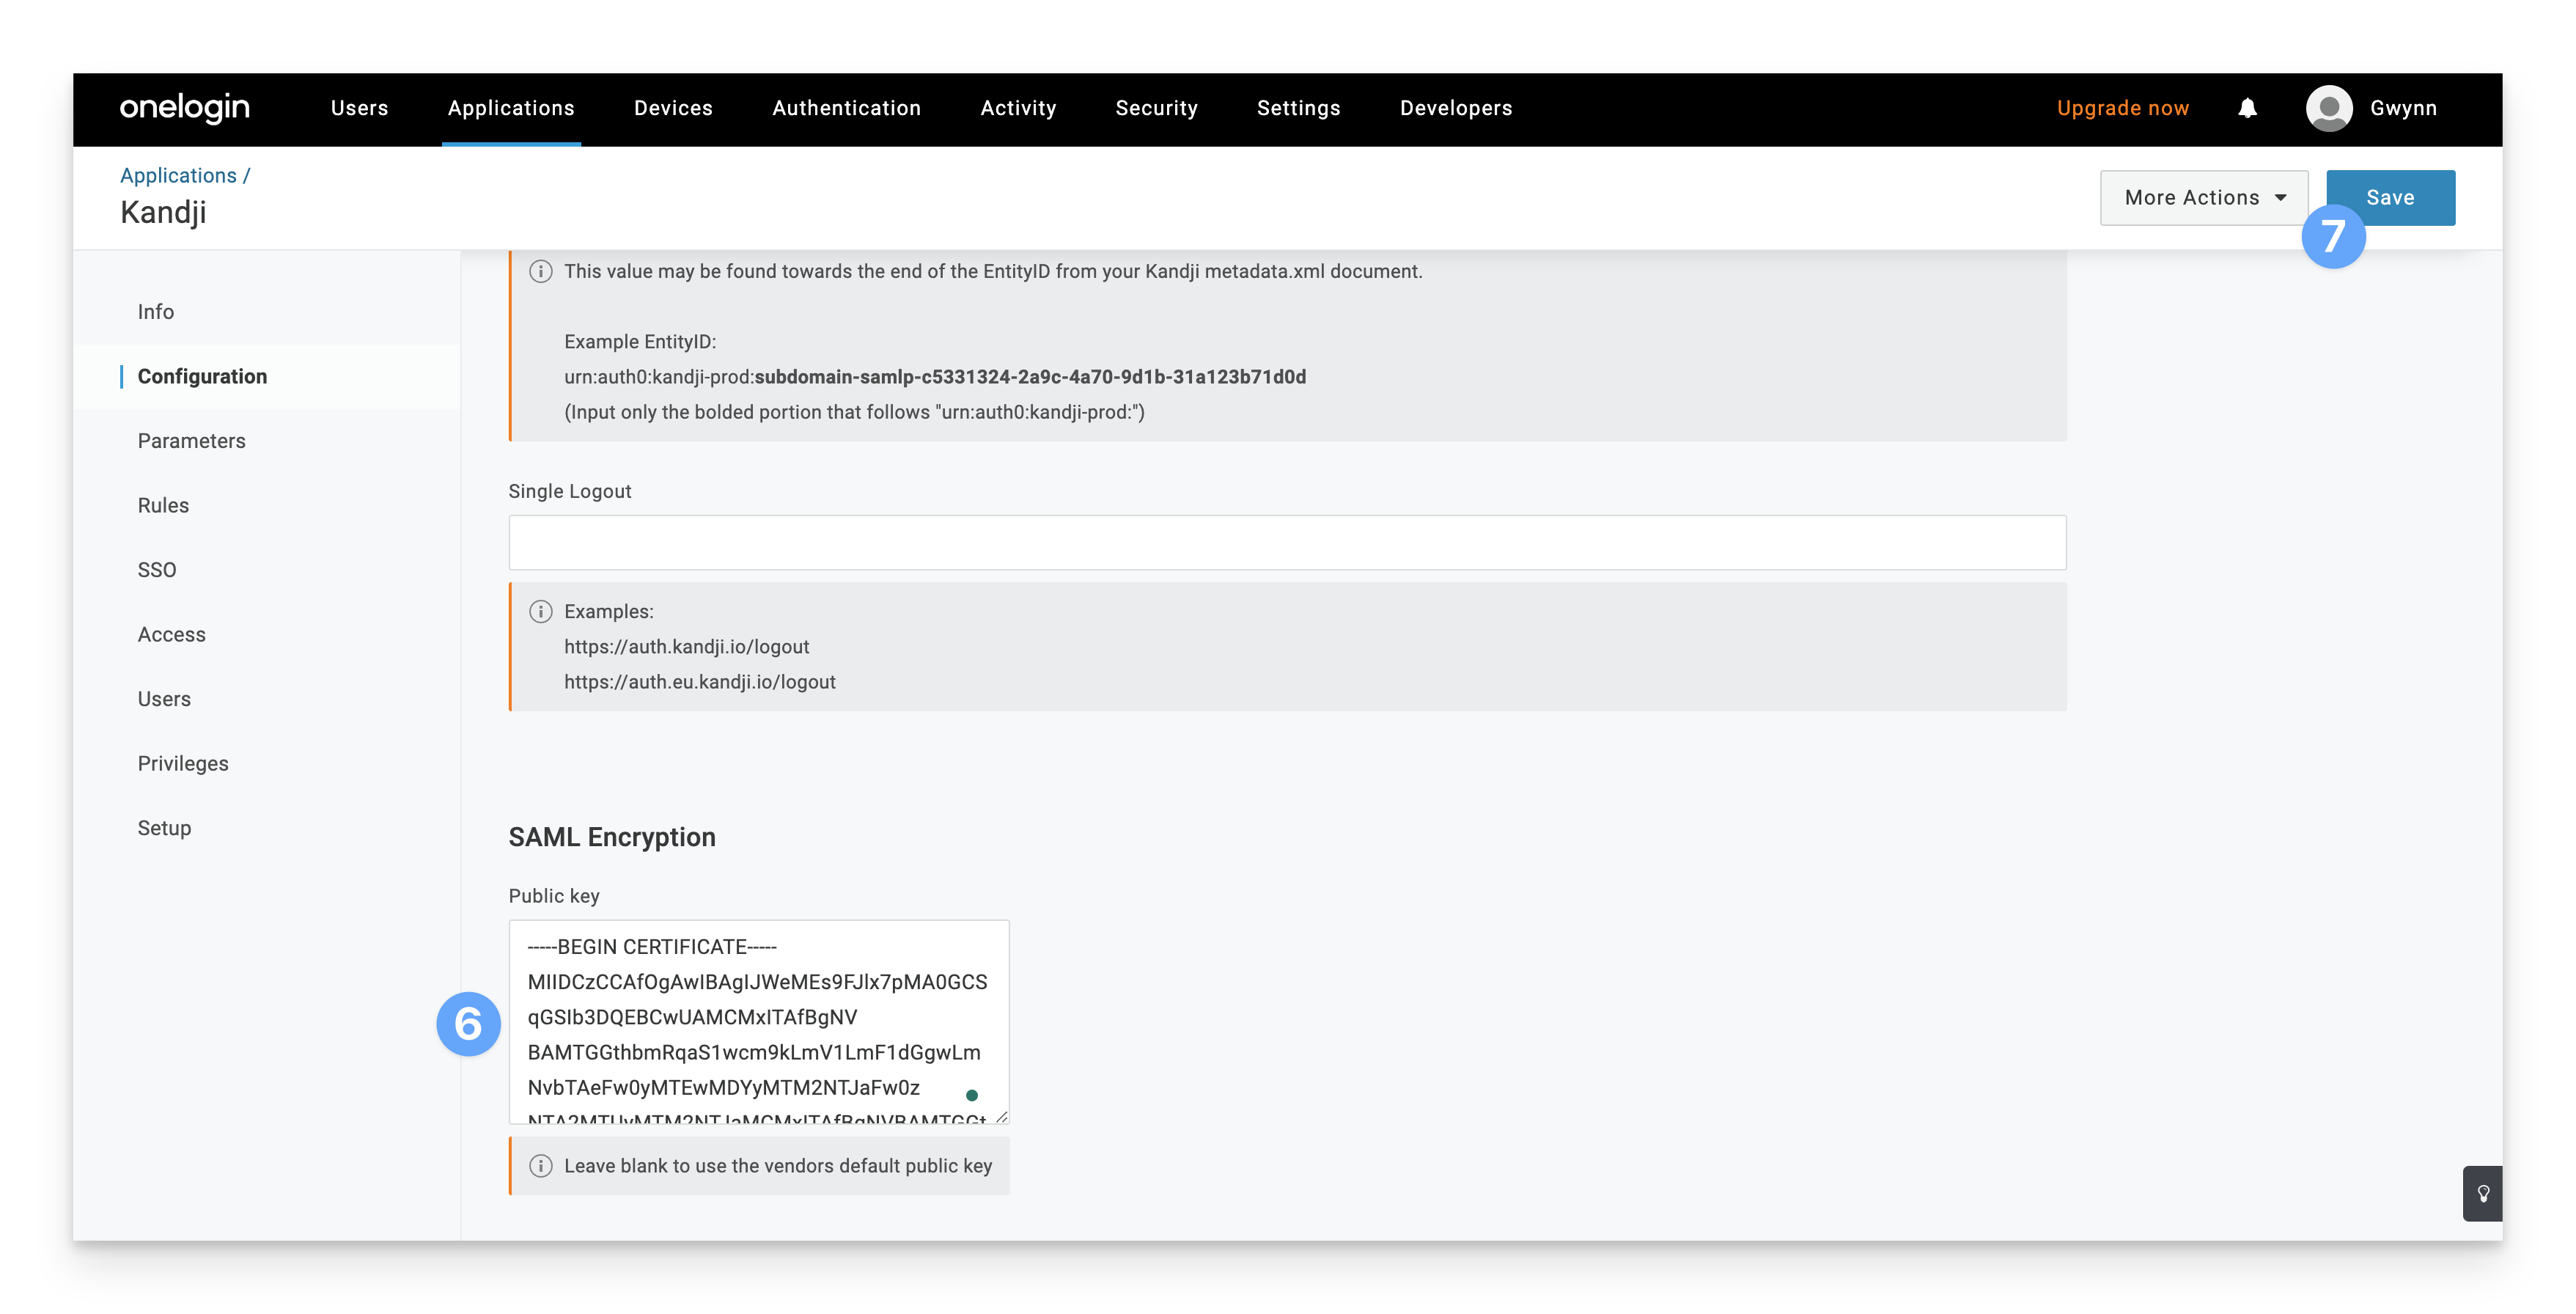
For EU tenants only: Copy the contents of the encryption certificate below and paste it into the Public Key box in the SAML Encryption section.
If you have a US tenant, you can skip this step and continue to step 7.
-----BEGIN CERTIFICATE-----

MIIDCzCCAfOgAwIBAgIJWeMEs9FJlx7pMA0GCSqGSIb3DQEBCwUAMCMxITAfBgNV
BAMTGGthbmRqaS1wcm9kLmV1LmF1dGgwLmNvbTAeFw0yMTEwMDYyMTM2NTJaFw0z
NTA2MTUyMTM2NTJaMCMxITAfBgNVBAMTGGthbmRqaS1wcm9kLmV1LmF1dGgwLmNv
bTCCASIwDQYJKoZIhvcNAQEBBQADggEPADCCAQoCggEBANcZbctdPHfmhFi1sAlO
qjbL+1xG456EYakTle+5kAckTj9BAC0hLTxrrnjMVpm4ESqFaYIN+xwL0CLfxWlw
HyfOm2fCGuEmcdeA3EGYDAcDHHG3nNDGgOU0iDL5UFJWewzrdSwEQJiczgw+vGod
AXP29tBww4zOyt4CC/JvQeCR85yTFNN+Dca8fdqTvjCtQ0IEvREECTSiM5mcCvqL
V3acqFAm78GsVG7S9Zw4lsvTtlmBZfMJ2XkMyvFcDT38FKWrR+PtW5h5+/G/l7+v
FayXL12RJTLOS+hSKZFyfZypUL8I4q1d0C5Qgl6/RtvfFTX1C7ghI9OhMlB27BjE
QX8CAwEAAaNCMEAwDwYDVR0TAQH/BAUwAwEB/zAdBgNVHQ4EFgQUhXf4eBrfVFai
K1DzoiwXFDmn6YEwDgYDVR0PAQH/BAQDAgKEMA0GCSqGSIb3DQEBCwUAA4IBAQCo
mHVUh6CYf8SXHs/GzbqPc2s82XY5FmHC/PrxHuESu8CQomRwFk4iyCbB0lLKUJ6P
a81F1jlrA5x0F745YCY9d5R5FUkzVn3oO9nGTf5PlYIQHGDbZZCKnq7c+5AbQNEa
fUrWpvyUJhgPGxeD0P6u8PnBKmevhdJQjzwImAtt+JfZWm+tjBAqzYCwjhQ5wxsn
h6cINHabdqyHG7frcfDbT165b1m2InAPre8u+/q8O9W+0HD7xpLZ5LDXzg9g/sIF
OrT8a6Nmy9UJrfGjwdflYGxQnR/jwFS+I3AfhhtQBXqdyaMcsPzYprEEt8ZUp6gz
EdQ5HLz8x/51w1JOZA9Q

-----END CERTIFICATE-----
Click Save.
Click on the SSO tab.
Change the signature algorithm to SHA-256.
Copy the Sign In URL, under SAML 2.0 Endpoint (HTTP)
Copy the Sign Out URL, under SLO Endpoint (HTTP).
Click Save in the upper right-hand corner.
Click View Details under the certificate section in the SSO tab.
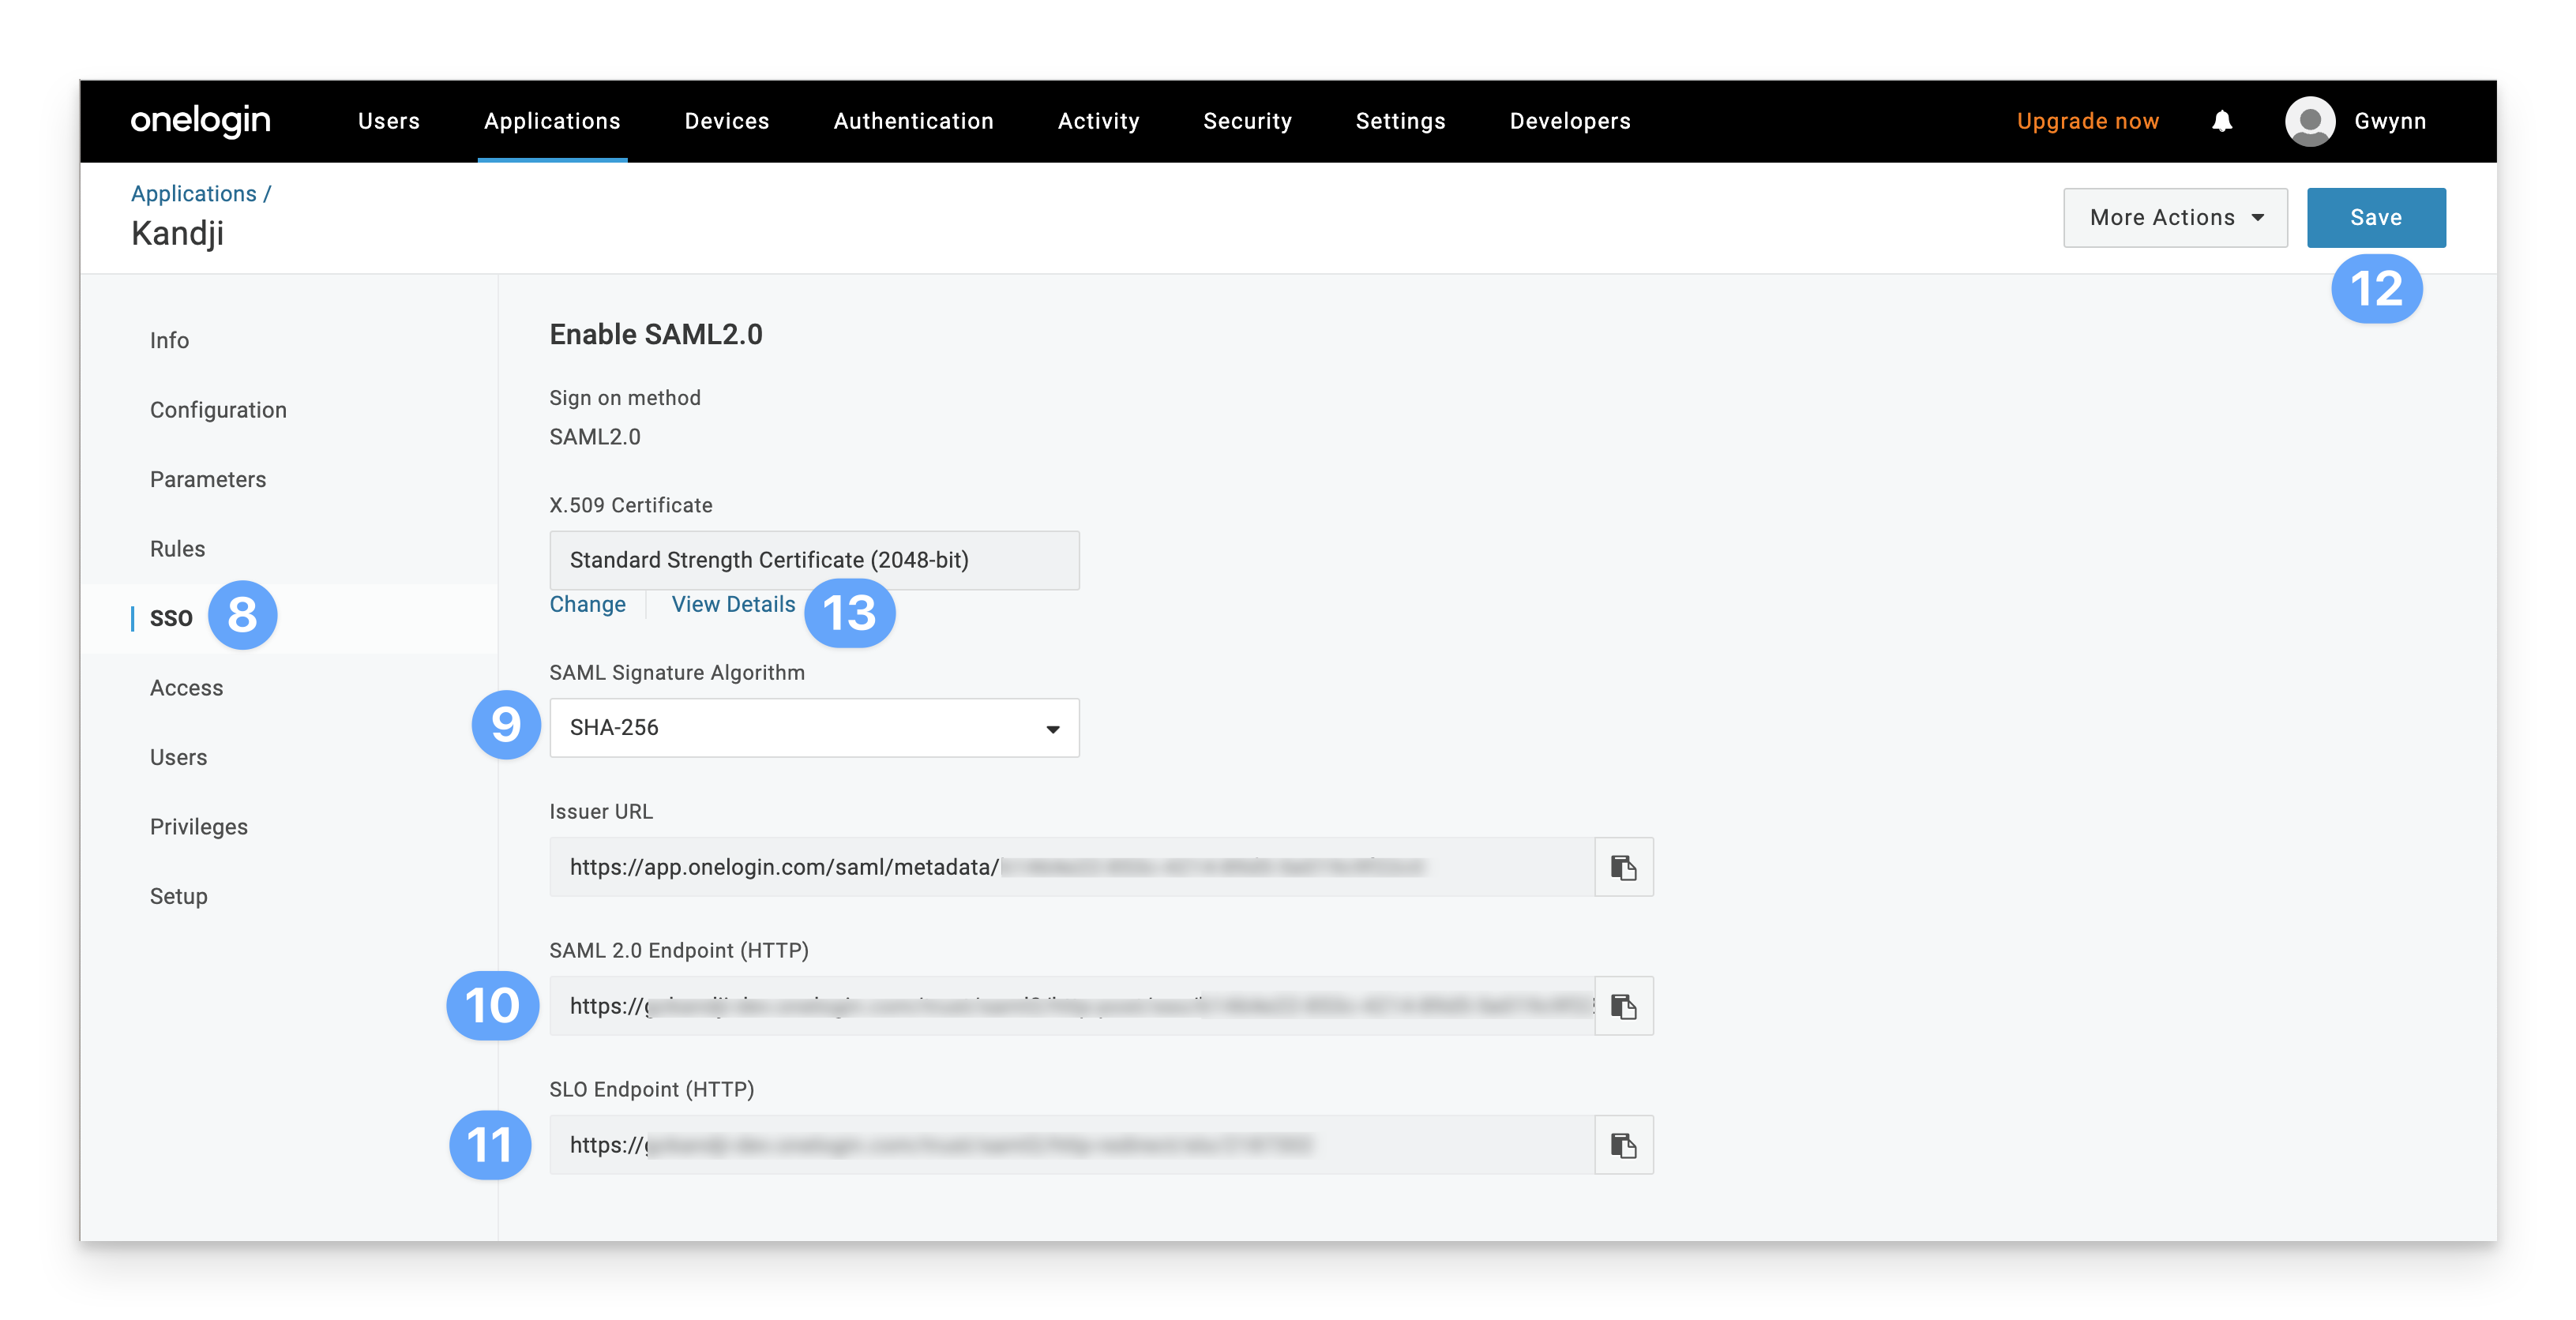
Download the certificate in a X.509 PEM format.
You may now assign users to this OneLogin application and close the tab.
Configure the SAML connection in Kandji
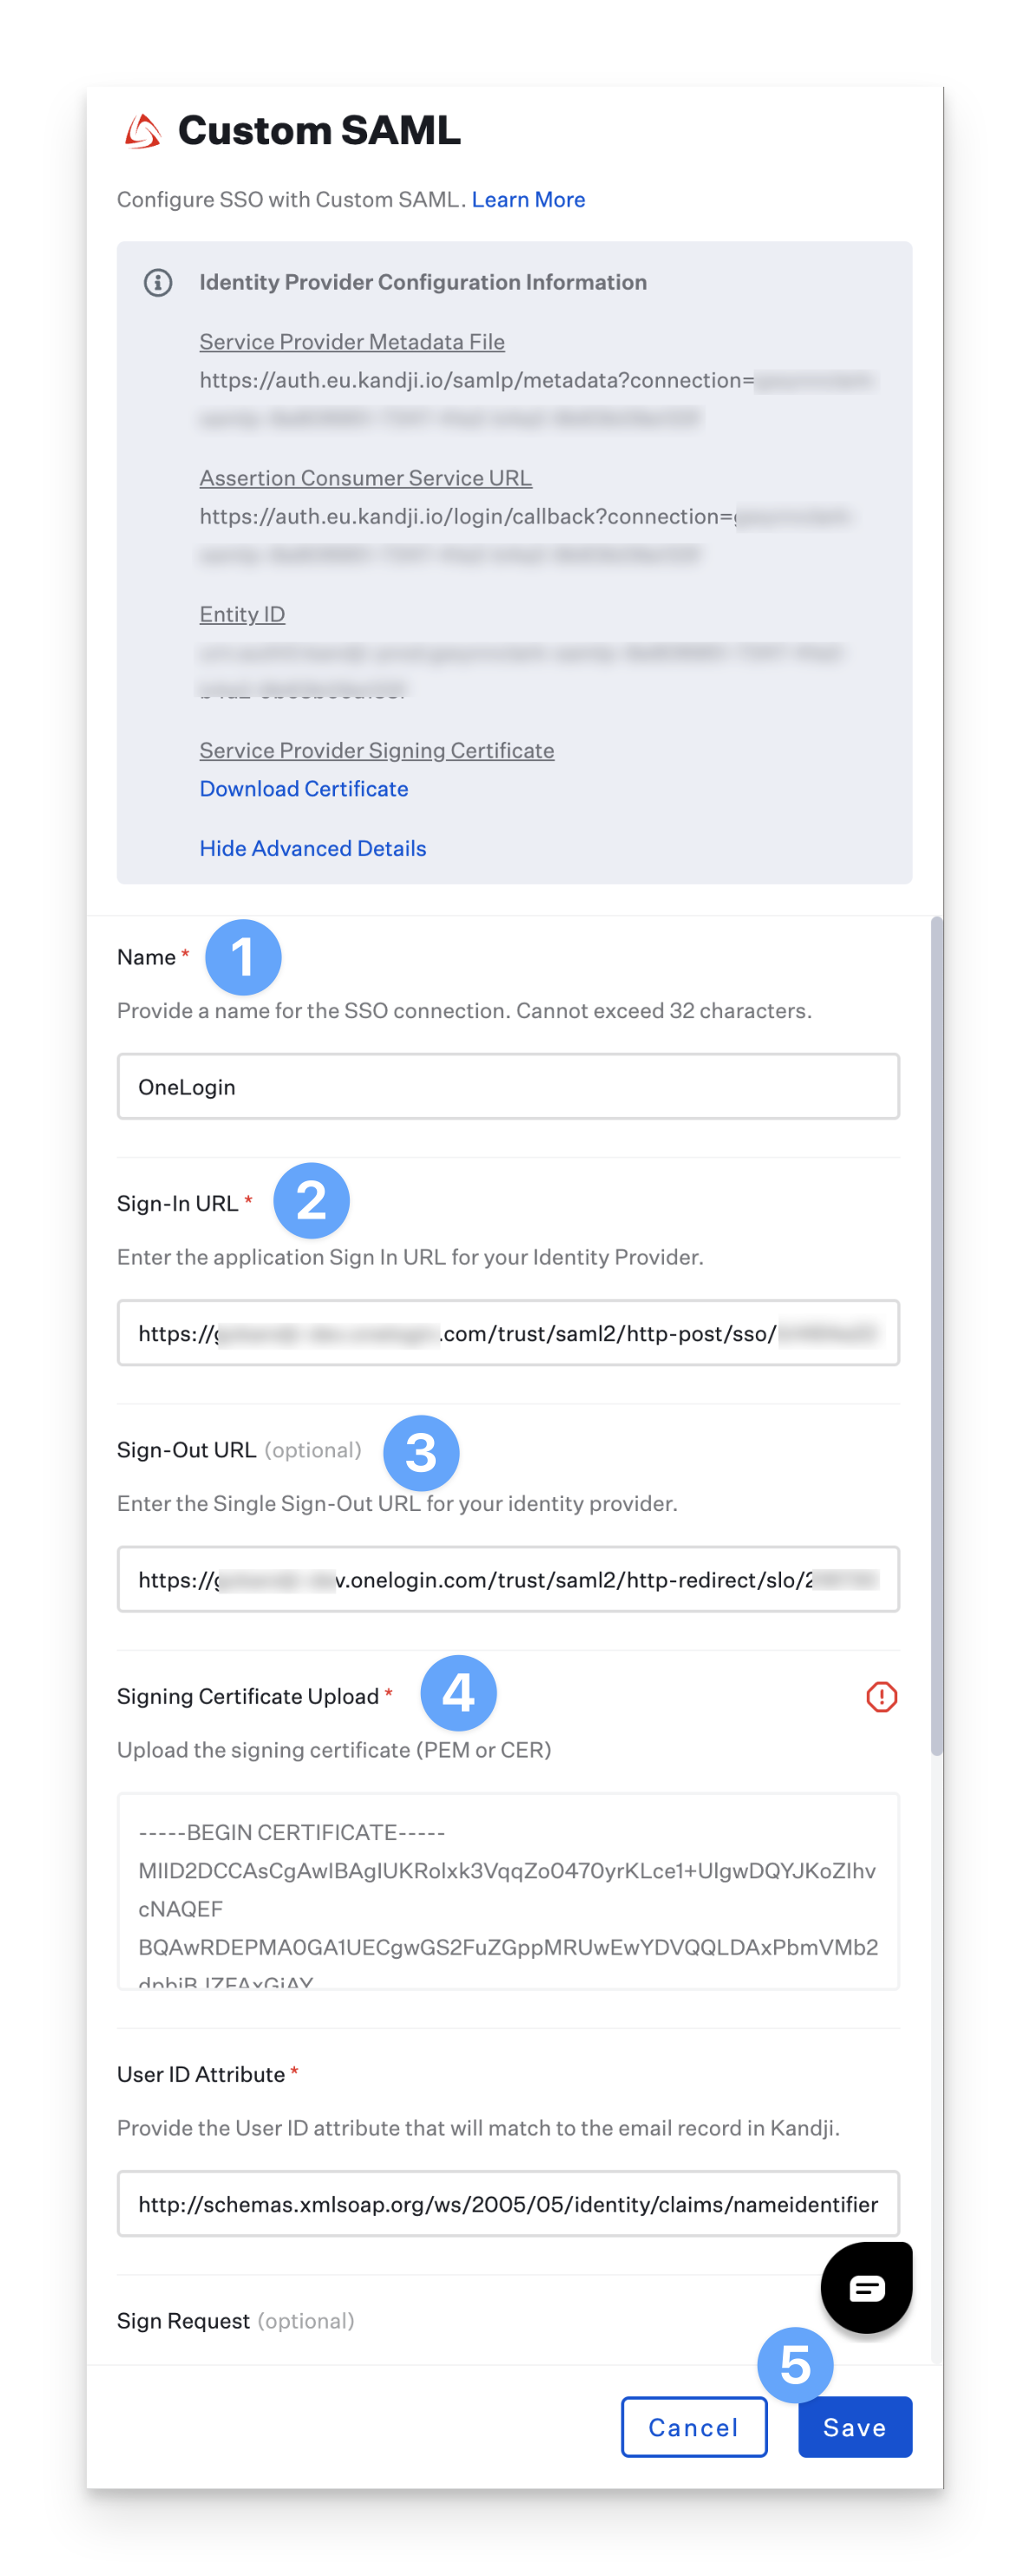
Set the Connection Name to OneLogin.
Paste in the Sign In URL you copied from OneLogin.
Paste in the Sign Out URL you copied from OneLogin.
Upload the Certificate you downloaded from OneLogin.
Save the connection (do not modify any other settings).
Enable the SAML Connection
Once you have configured the SAML connection in both Kandji and your identity provider, you can now enable the connection. Please refer to our Single Sign-On support article for step-by-step instructions.
Enforcing Single Sign-On
Once you have configured at least one Single Sign-On connection, you can disable the Standard Authentication connection. Disabling Kandji standard authentication will disable the ability for Kandji administrators in your tenant to authentication via Email/Password, Google Sign in, or Office 365 Sign in. Please refer to our Single Sign-On support article for step-by-step instructions
Add a Test User to Kandji
Add a test user to the Admin Team in Kandji by clicking New User.
Fill in all of the corresponding user information. This user must exist in OneLogin and must be assigned to the Kandji SSO app in your OneLogin tenant.
Click Submit.
Once the invite is submitted, close the Invite User window.
Refresh the Access page in Kandji. You should see the user you just added.
Go to the user’s email to accept the invite and log in with the new SAML SSO connection.