If you're requiring authentication with Automated Device Enrollment for iOS enrollments and using Google Workspace as your identity provider, the Single Sign-On entry must be created using Custom SAML. The built-in Google Workspace integration is not supported.
Create a Google Workspace Application
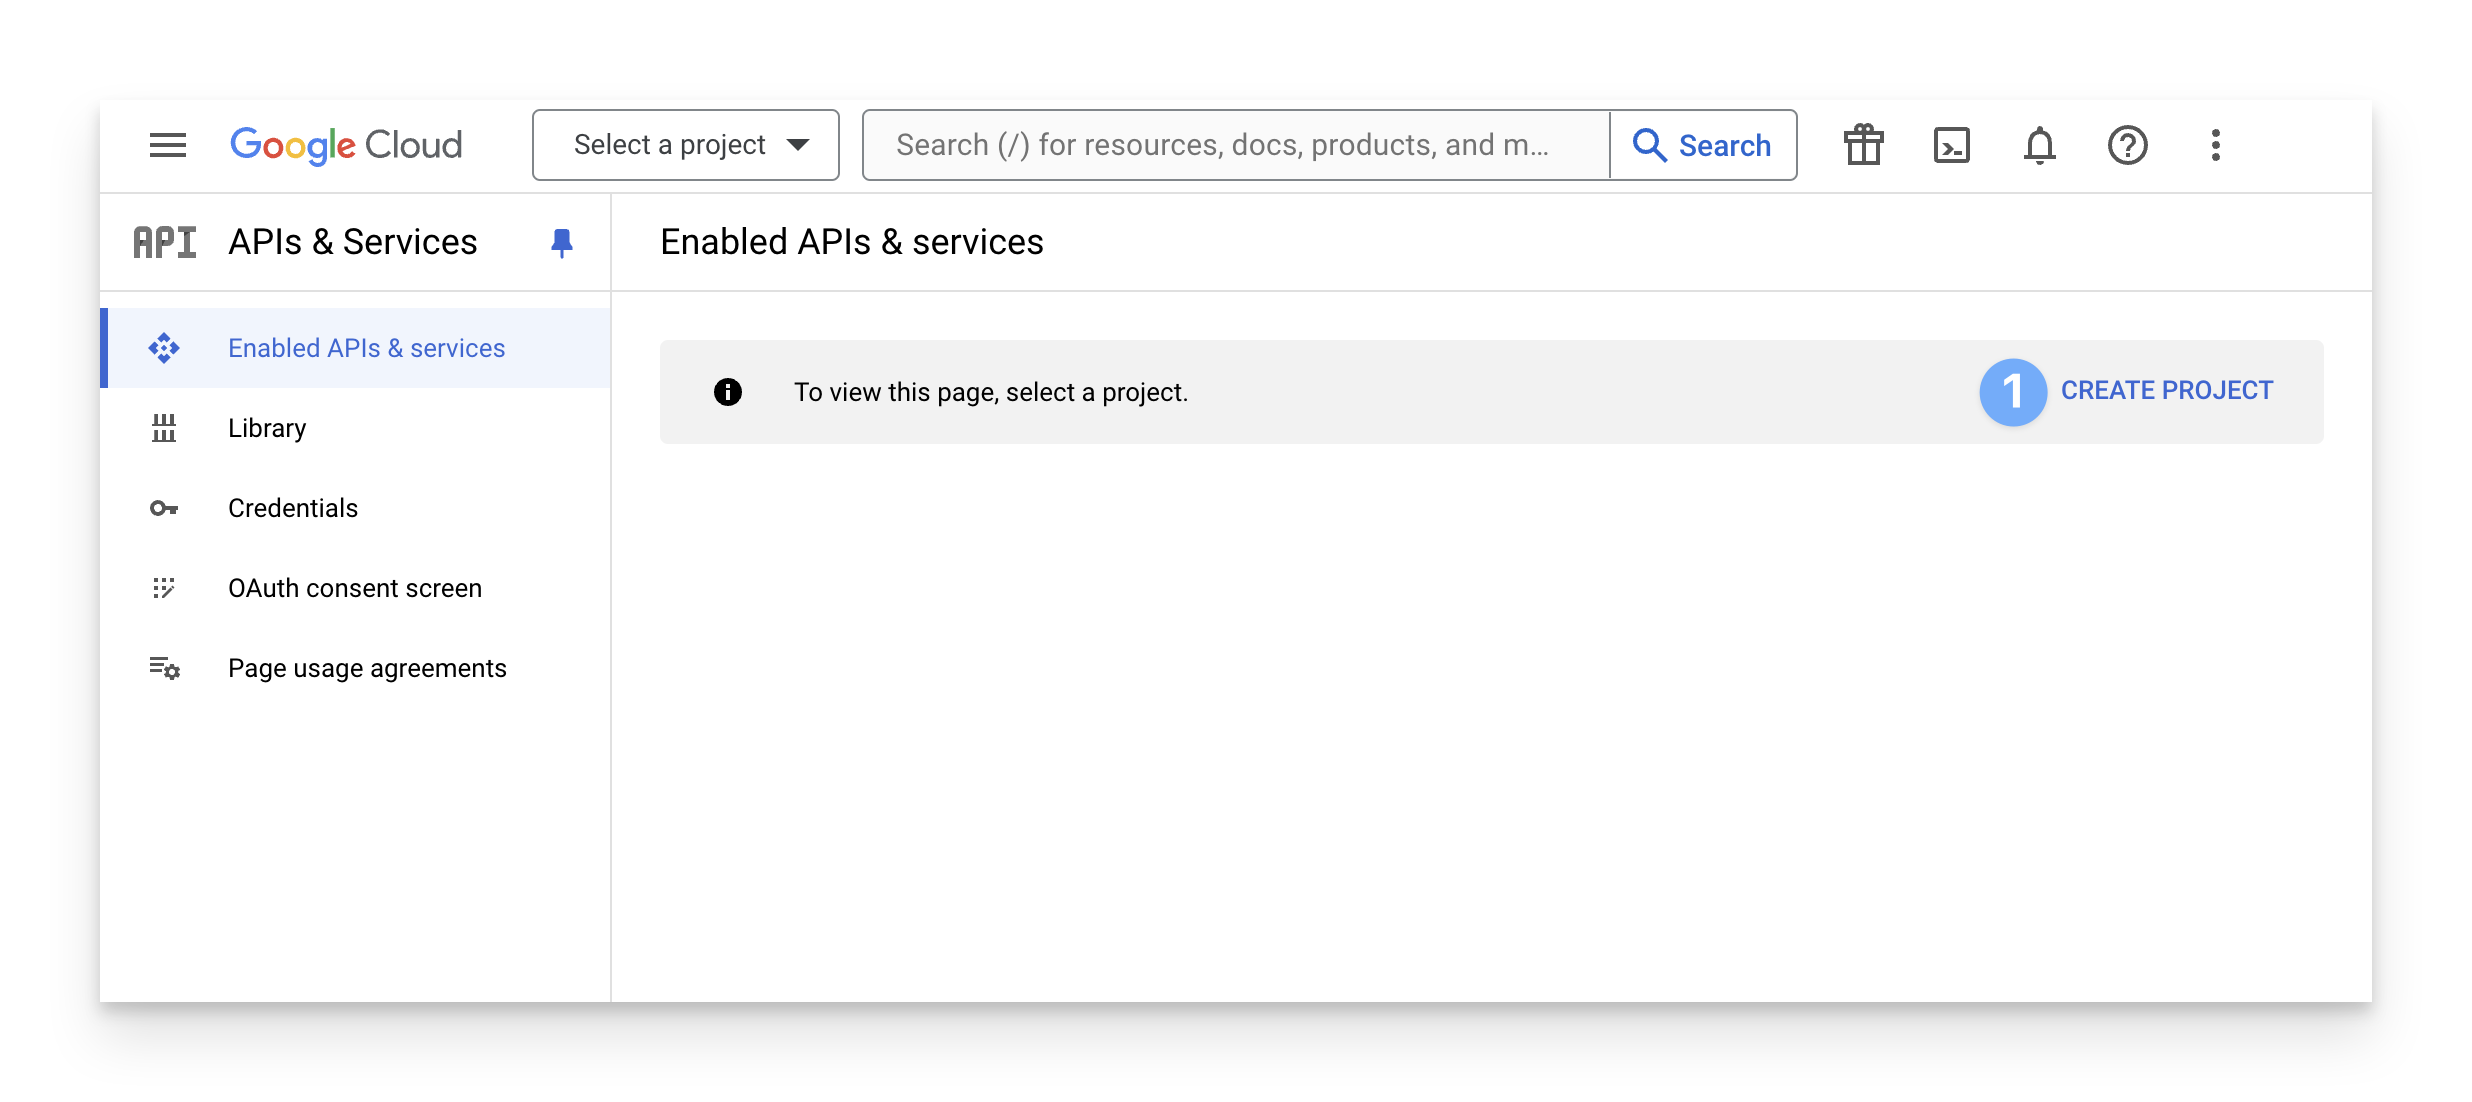
Log in to the Google Developer API Console. Then click CREATE PROJECT.
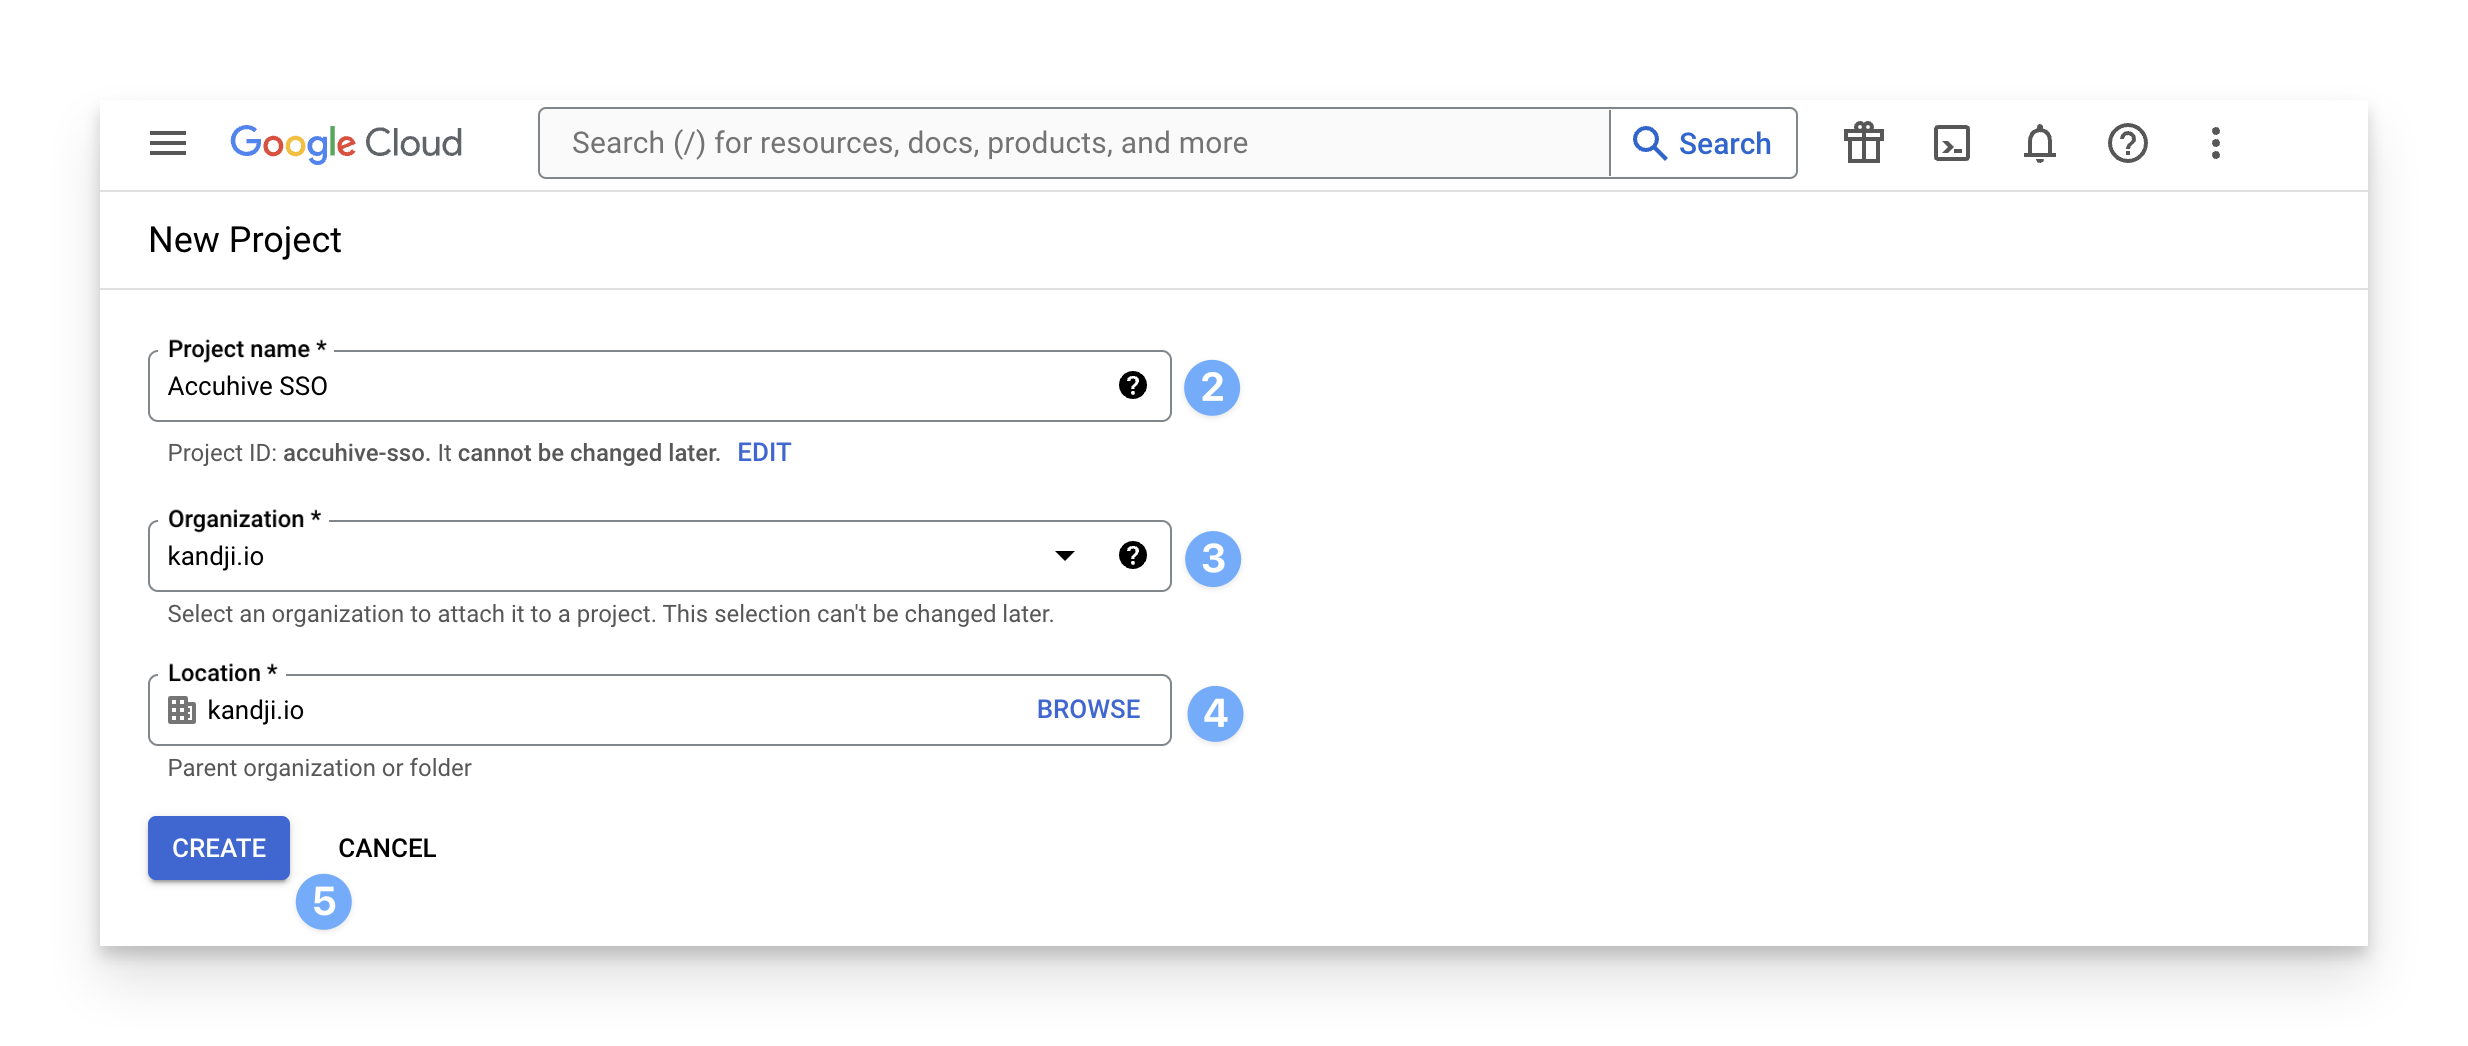
Enter a Project name.
Select your Organization.
Select your Location.
Click Create.
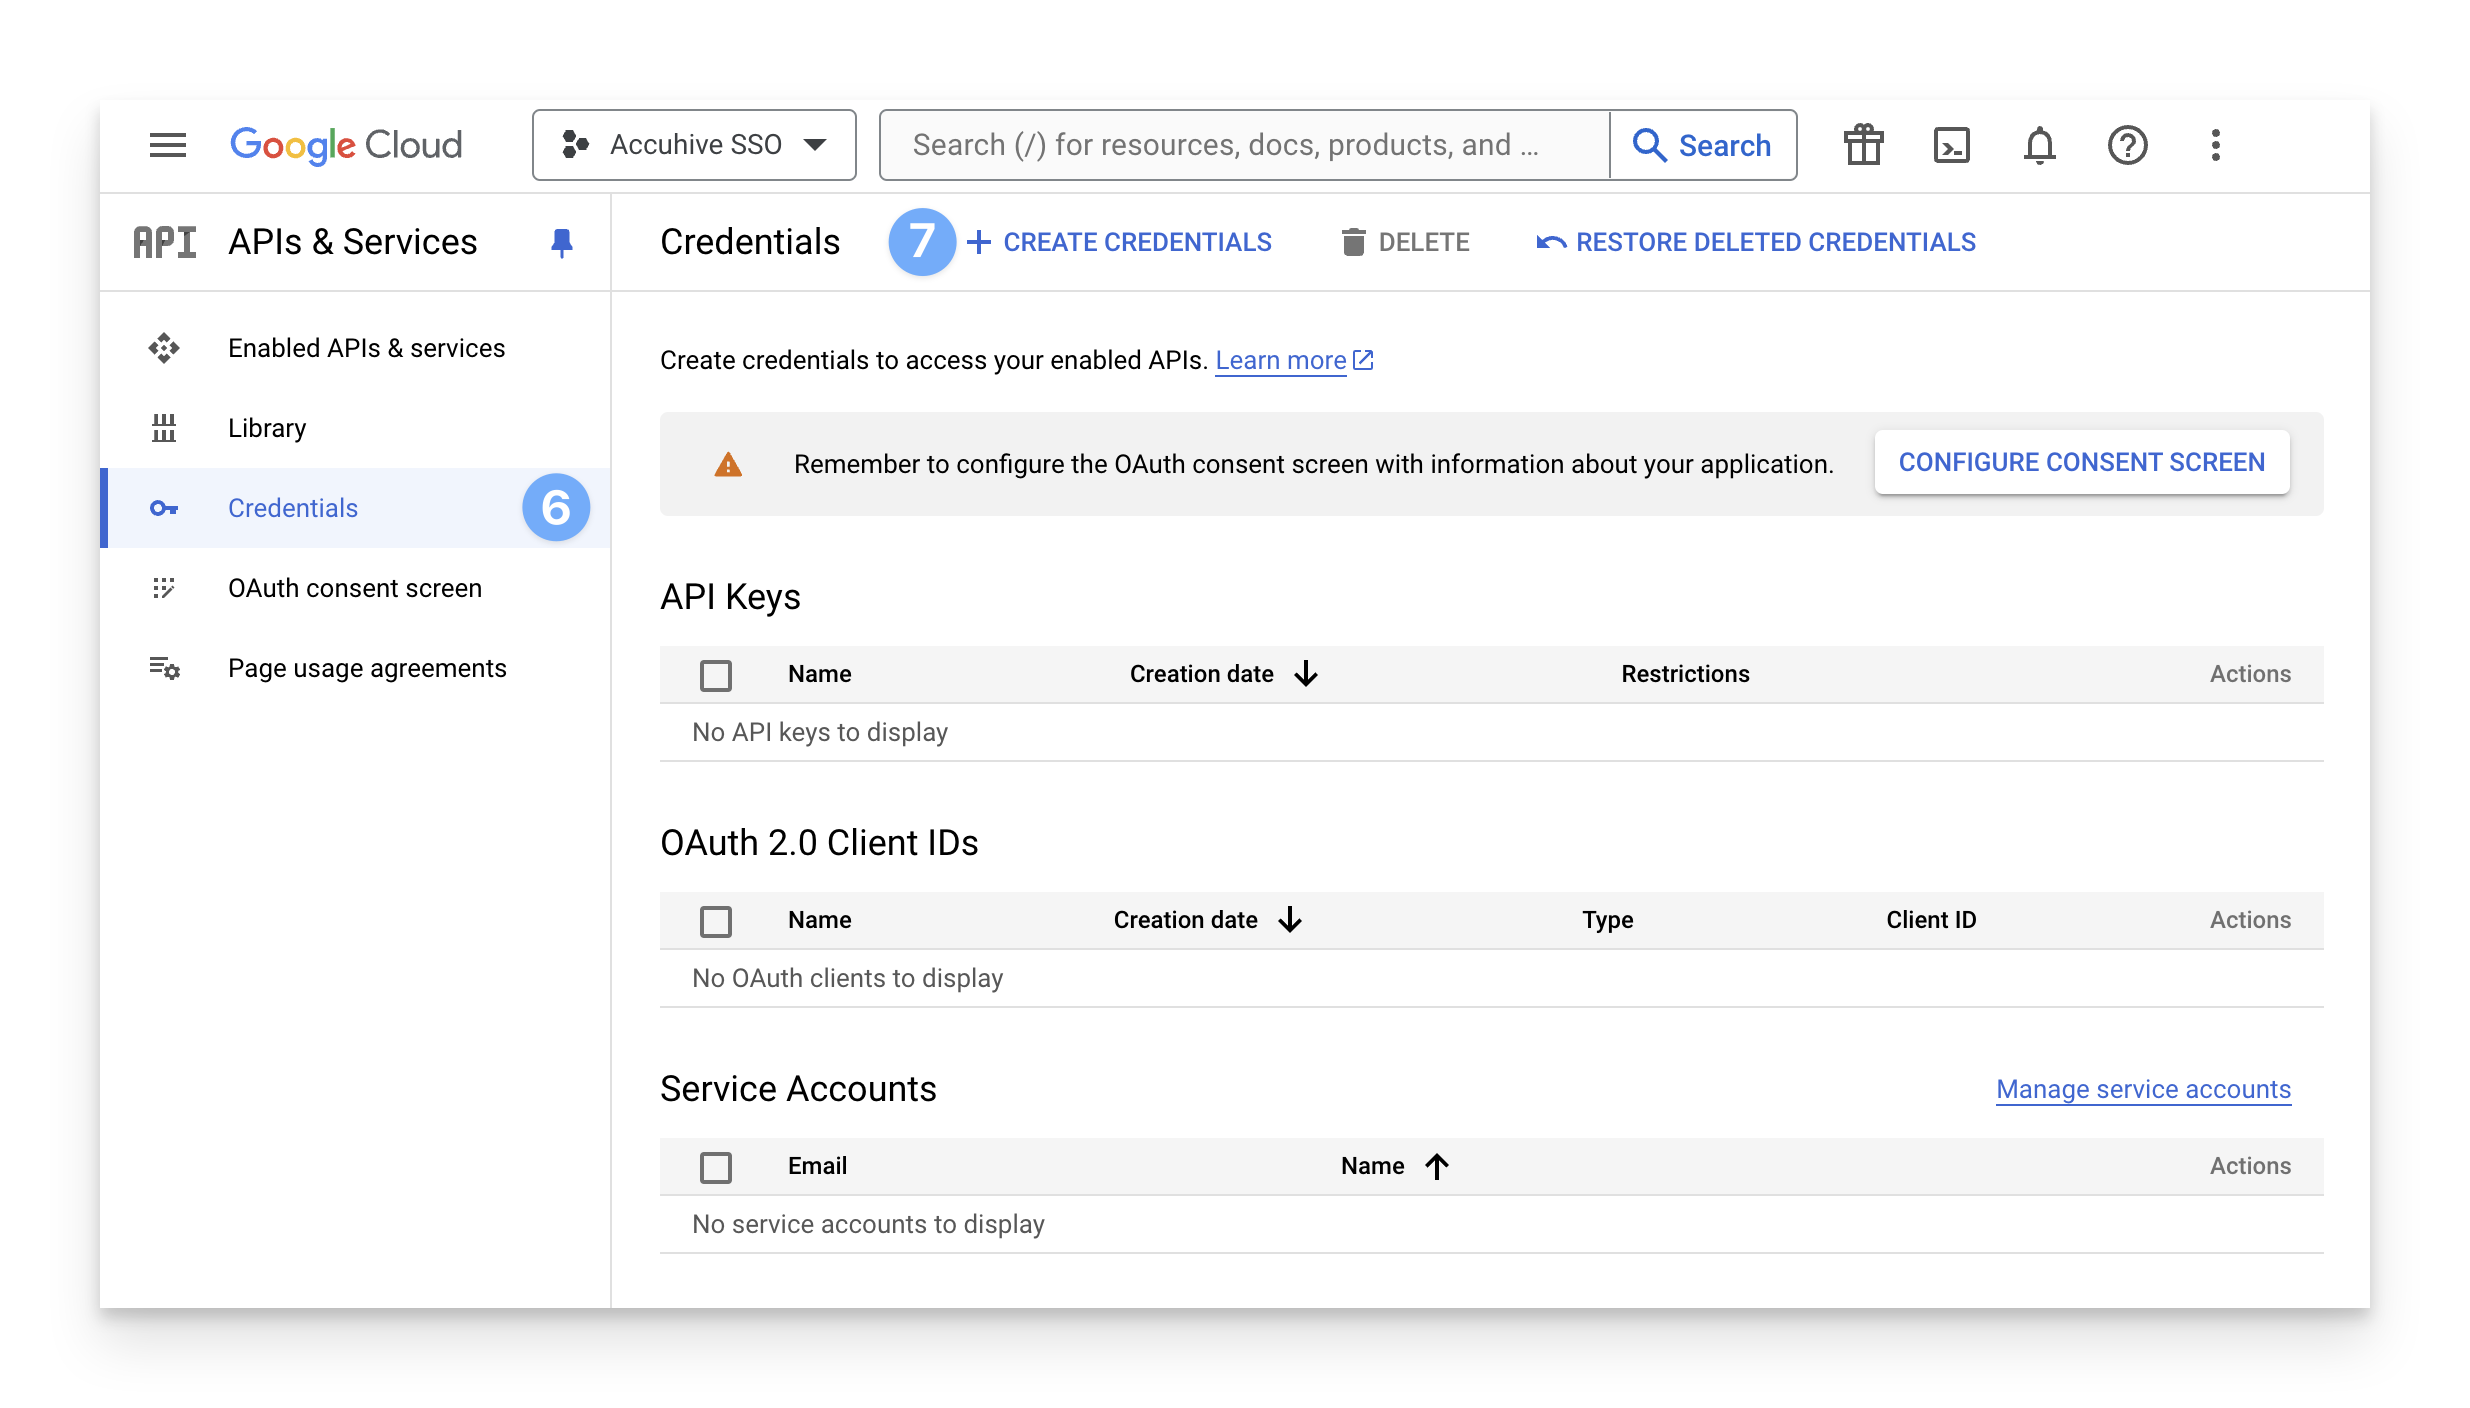
In the sidebar, click Credentials.
On the right side of the window, near the top, click Create Credentials. If this is your first time creating a client ID, you may also be prompted to configure your consent screen.
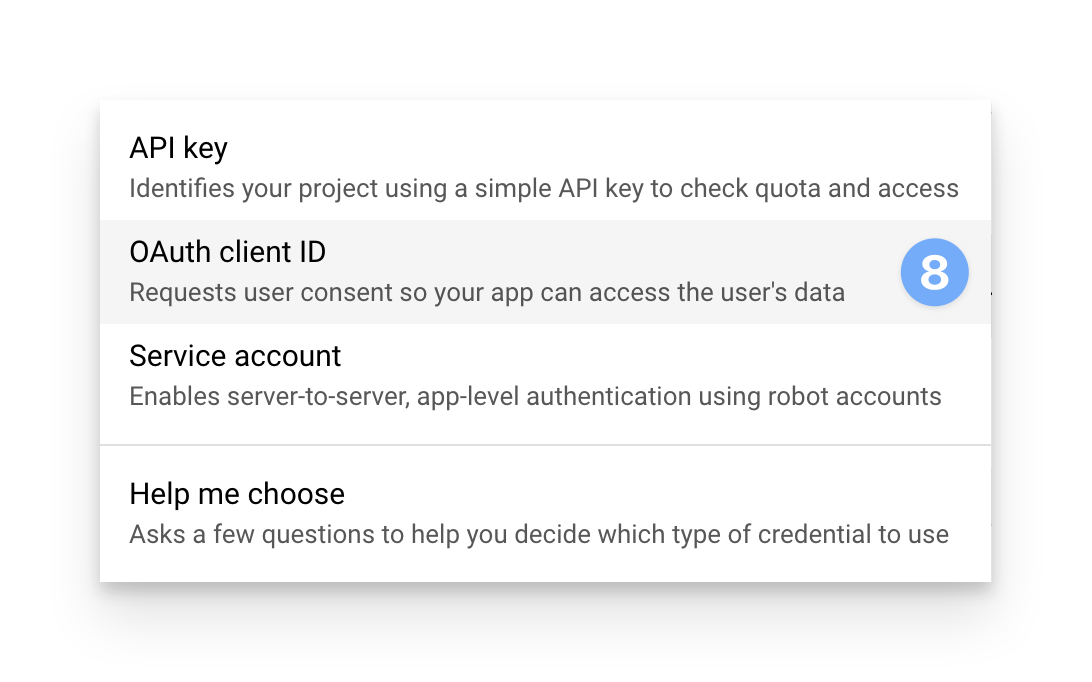
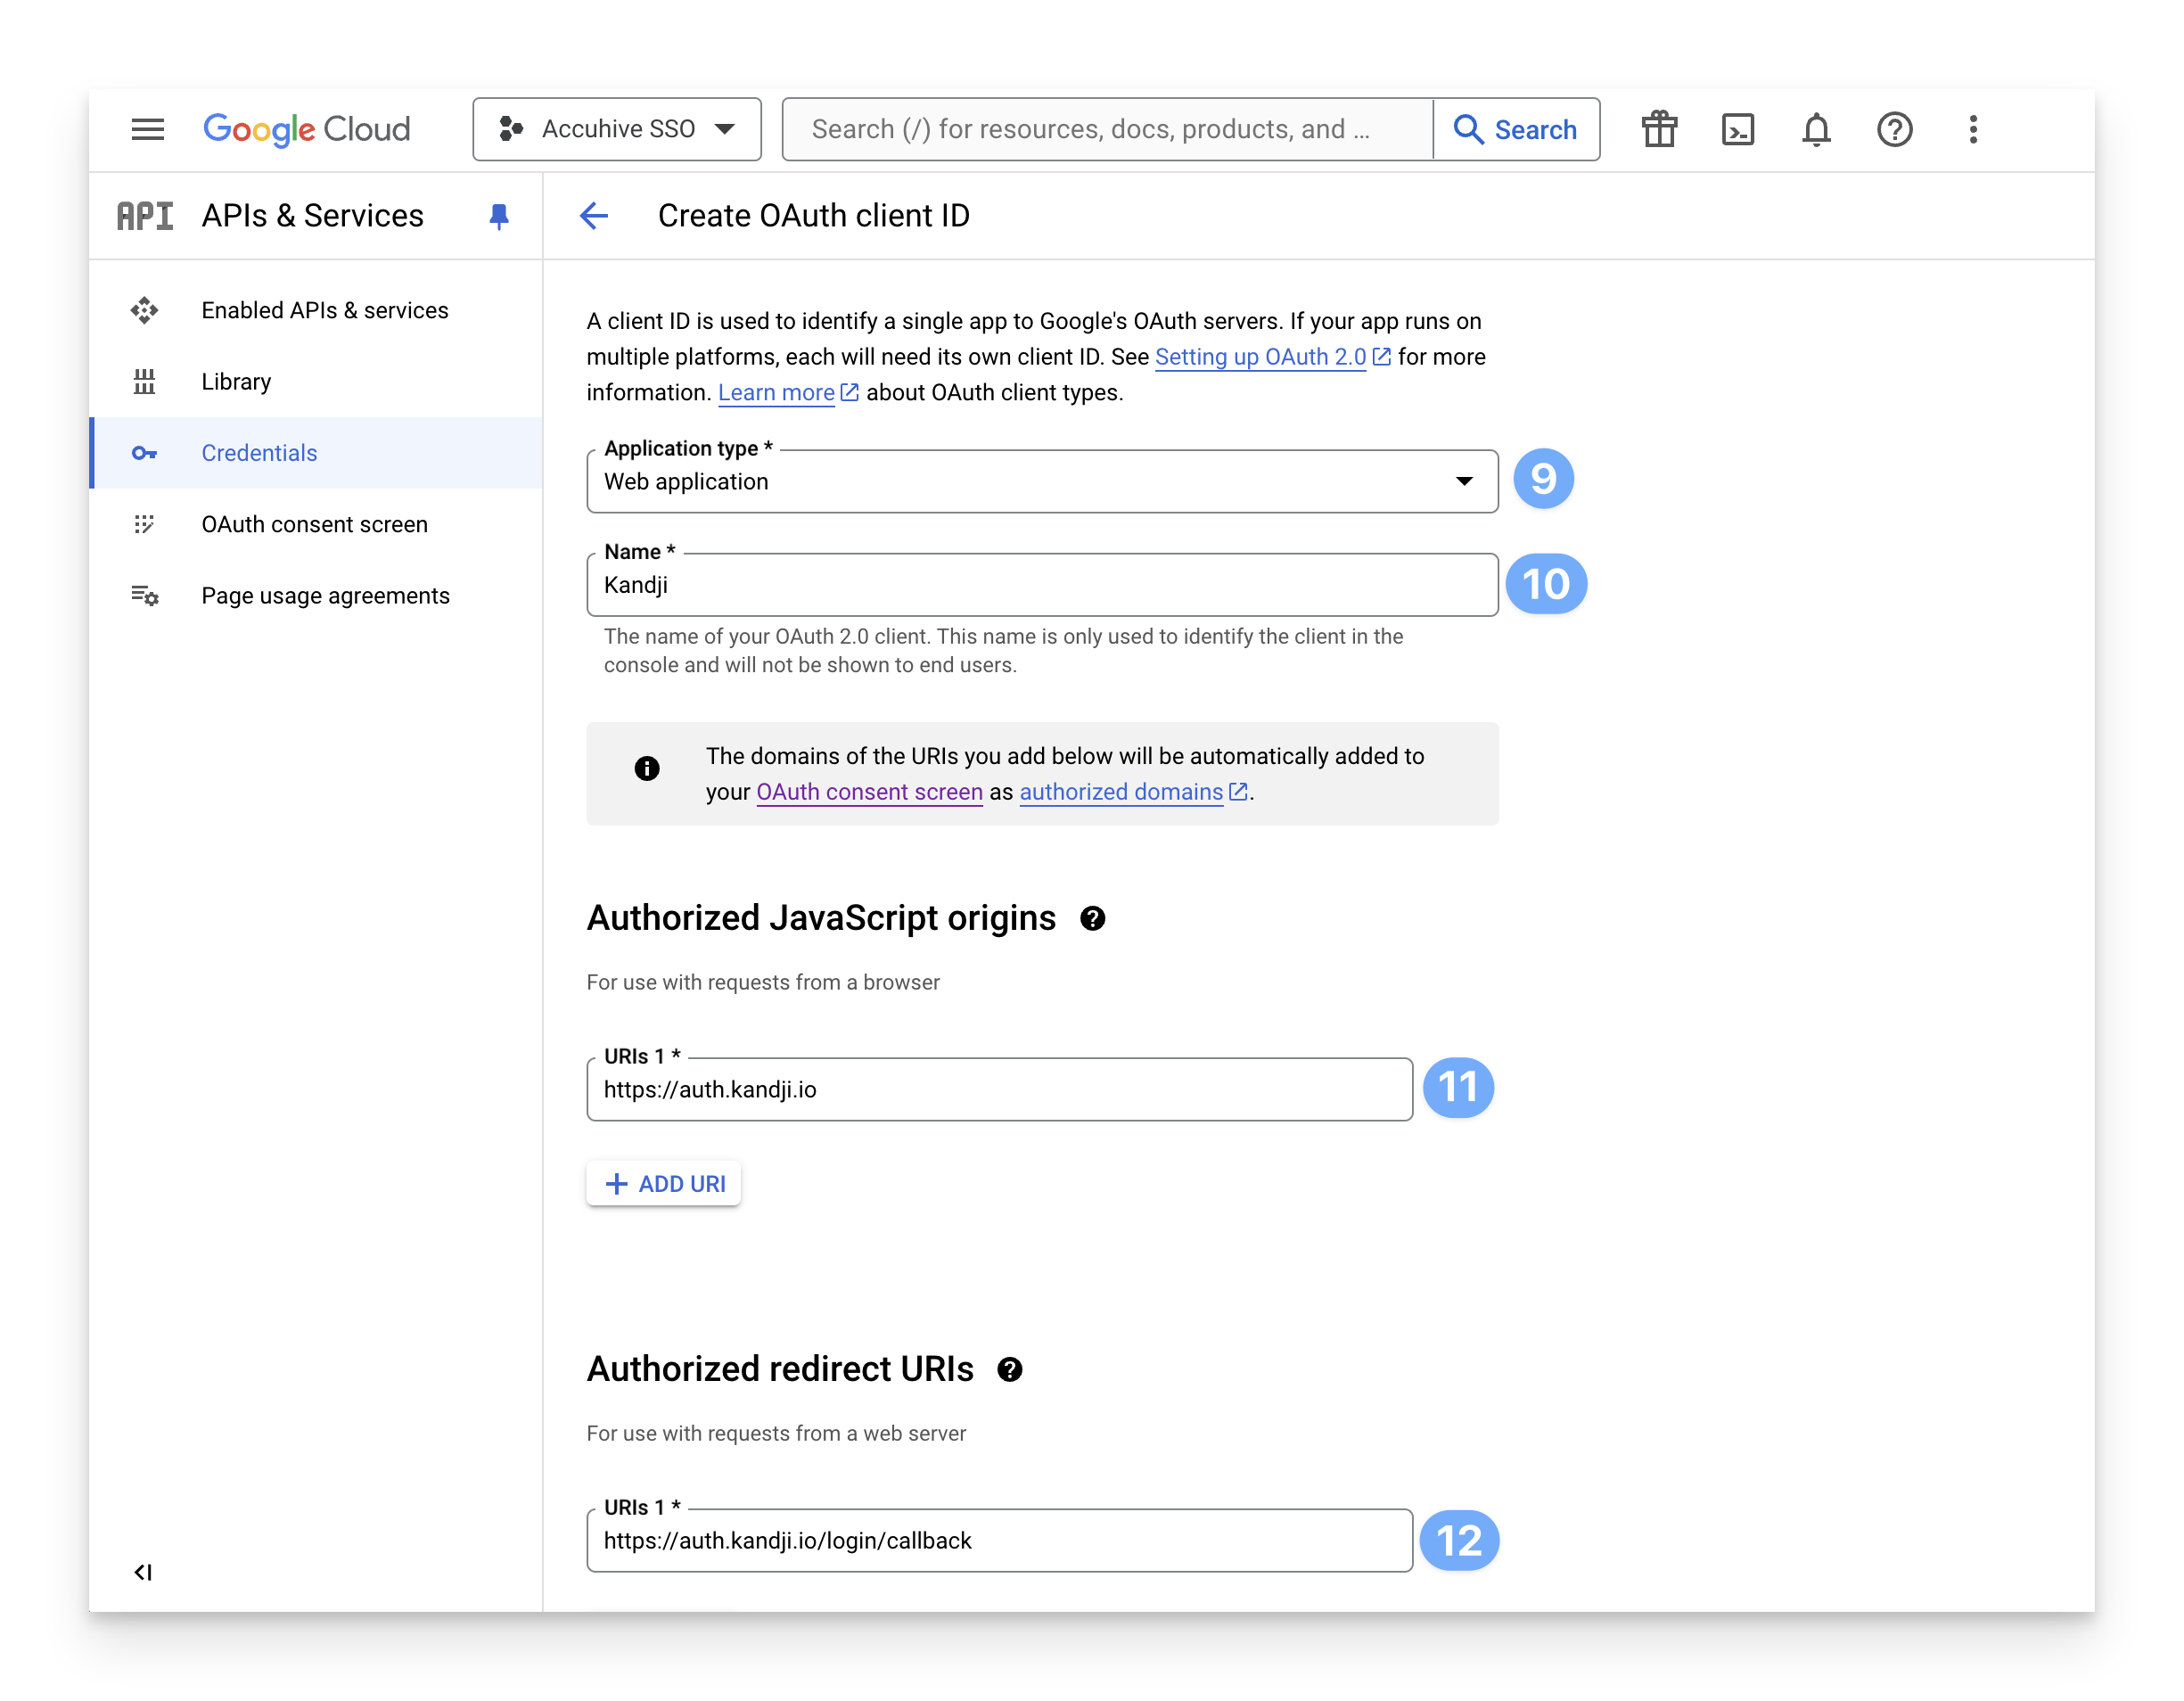
From the menu that appears, choose OAuth Client ID.
For "Application Type," click the menu and select "Web application".
In the Name field, enter a Name for your OAuth client.
In the Authorized JavaScript Origins section, in the URIs field, enter the following:For US tenants:
https://auth.kandji.ioFor EU tenants:
https://auth.eu.kandji.ioIn the Authorized redirect URIs section, in the URIs field, enter the following:For US tenants:
https://auth.kandji.io/login/callbackFor EU tenants:
https://auth.eu.kandji.io/login/callbackClick Create.
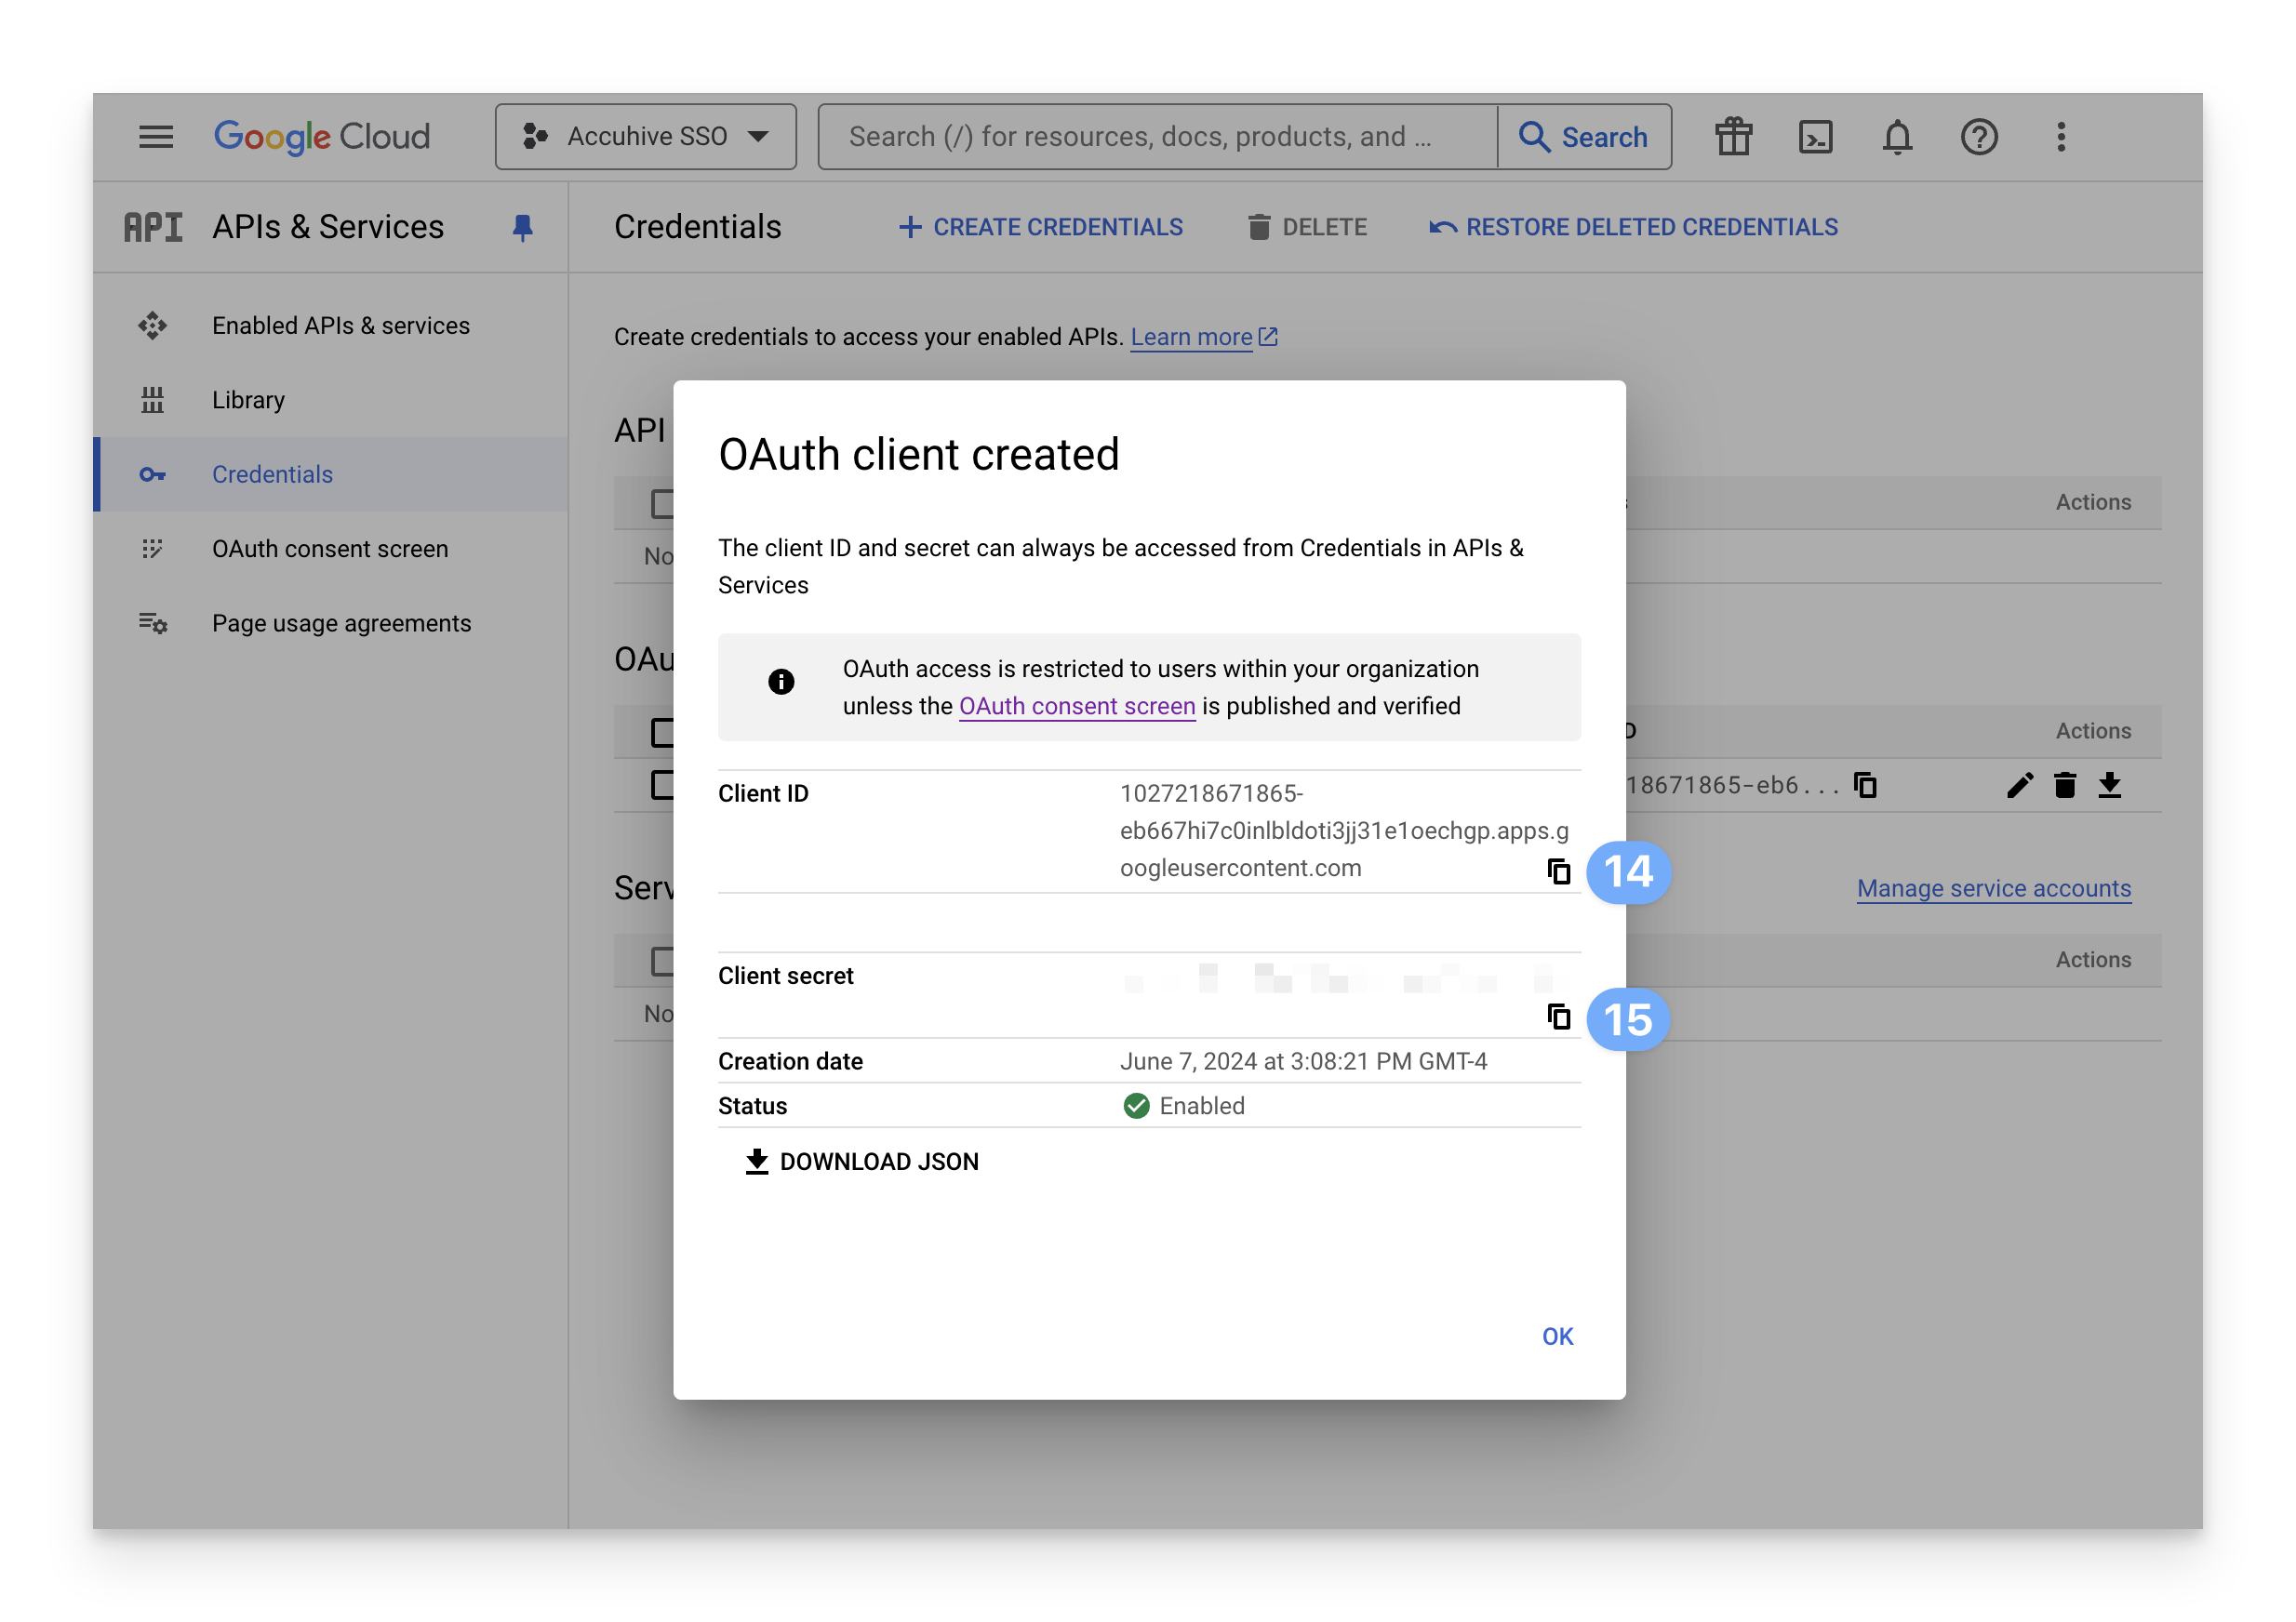
Copy the text from the Client ID field and save it for later use.
Copy the text from the Client Secret field and save it for later use.
Create a Google Workspace Connection
In Kandji, in the sidebar, click Settings.
Click the Access tab.
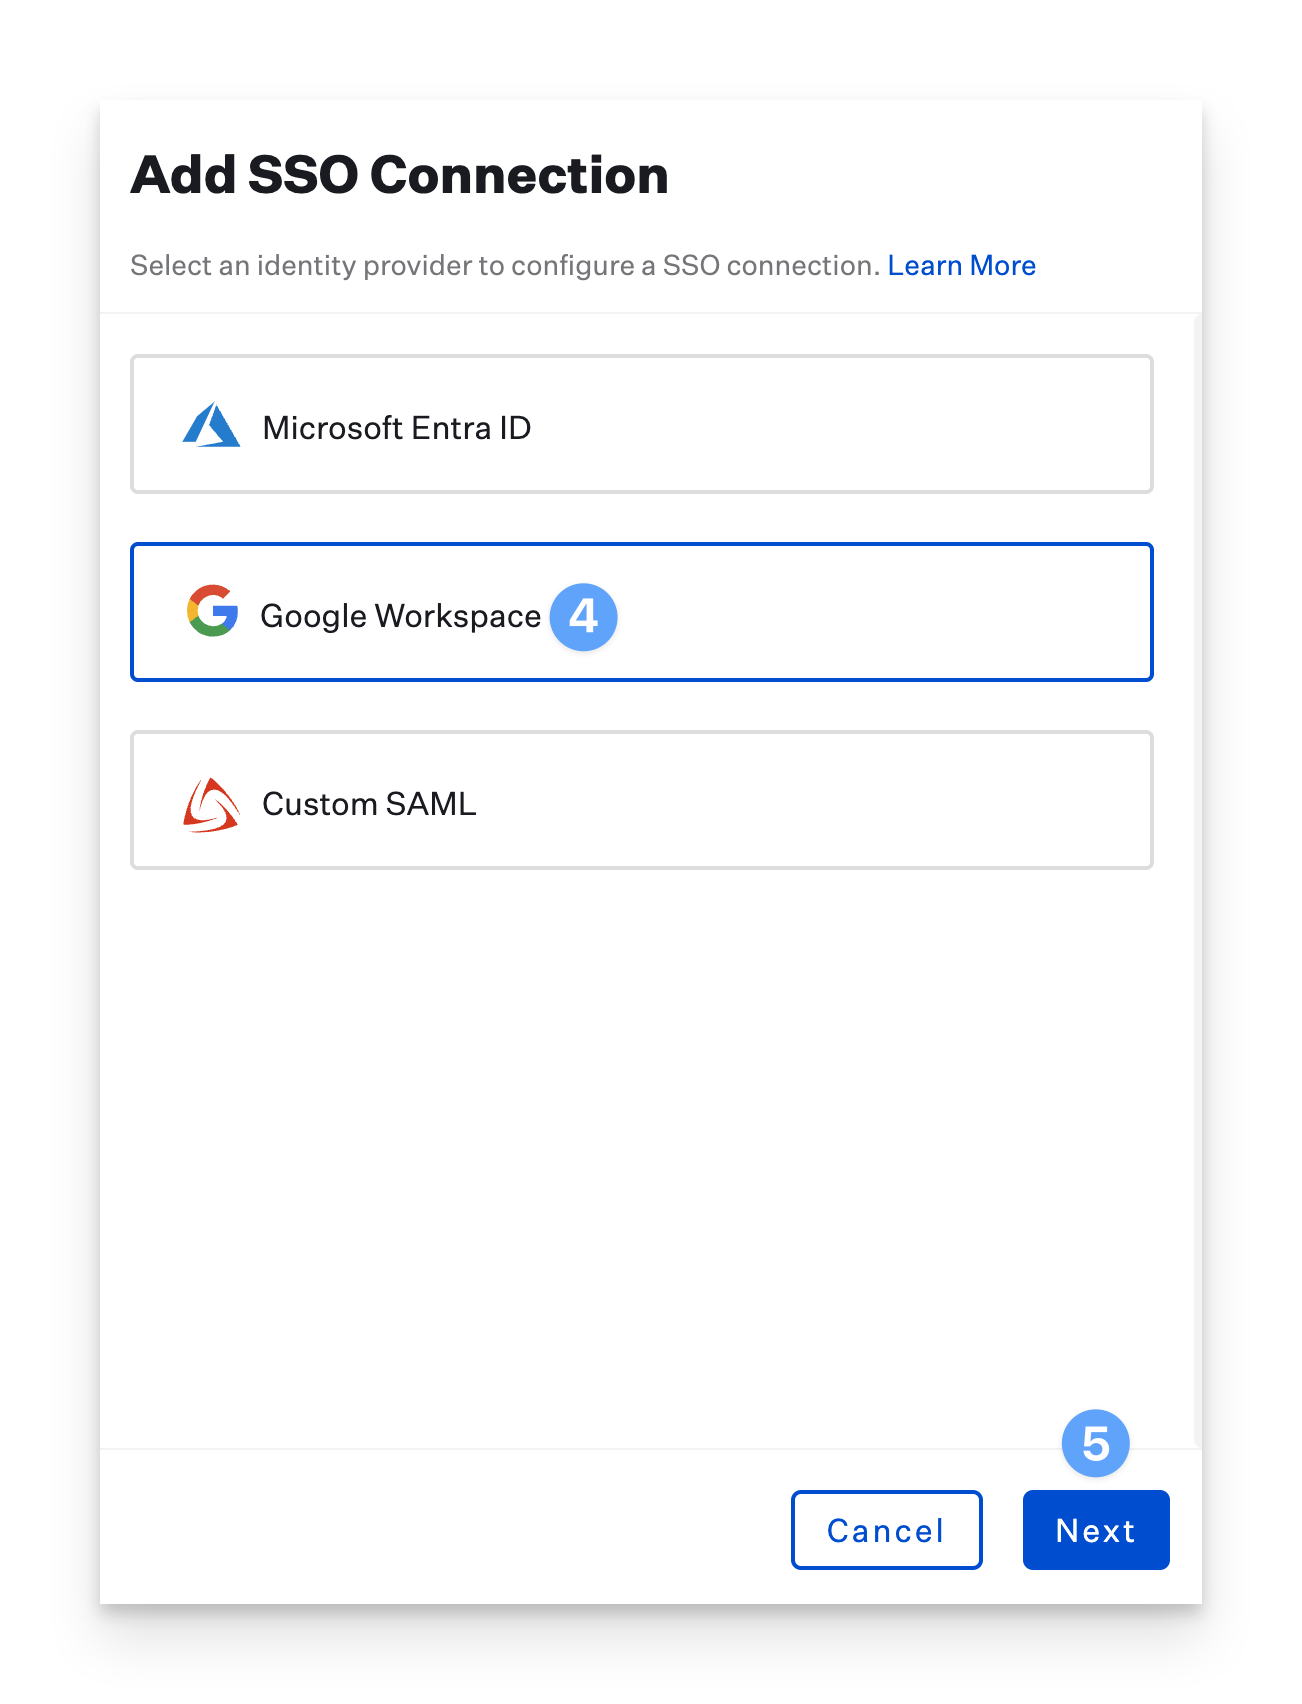
Find the Authentication section and click the Add button at the bottom left of the authentication section.
.png)
In the new blade, click Google Workspace.
Click Next.
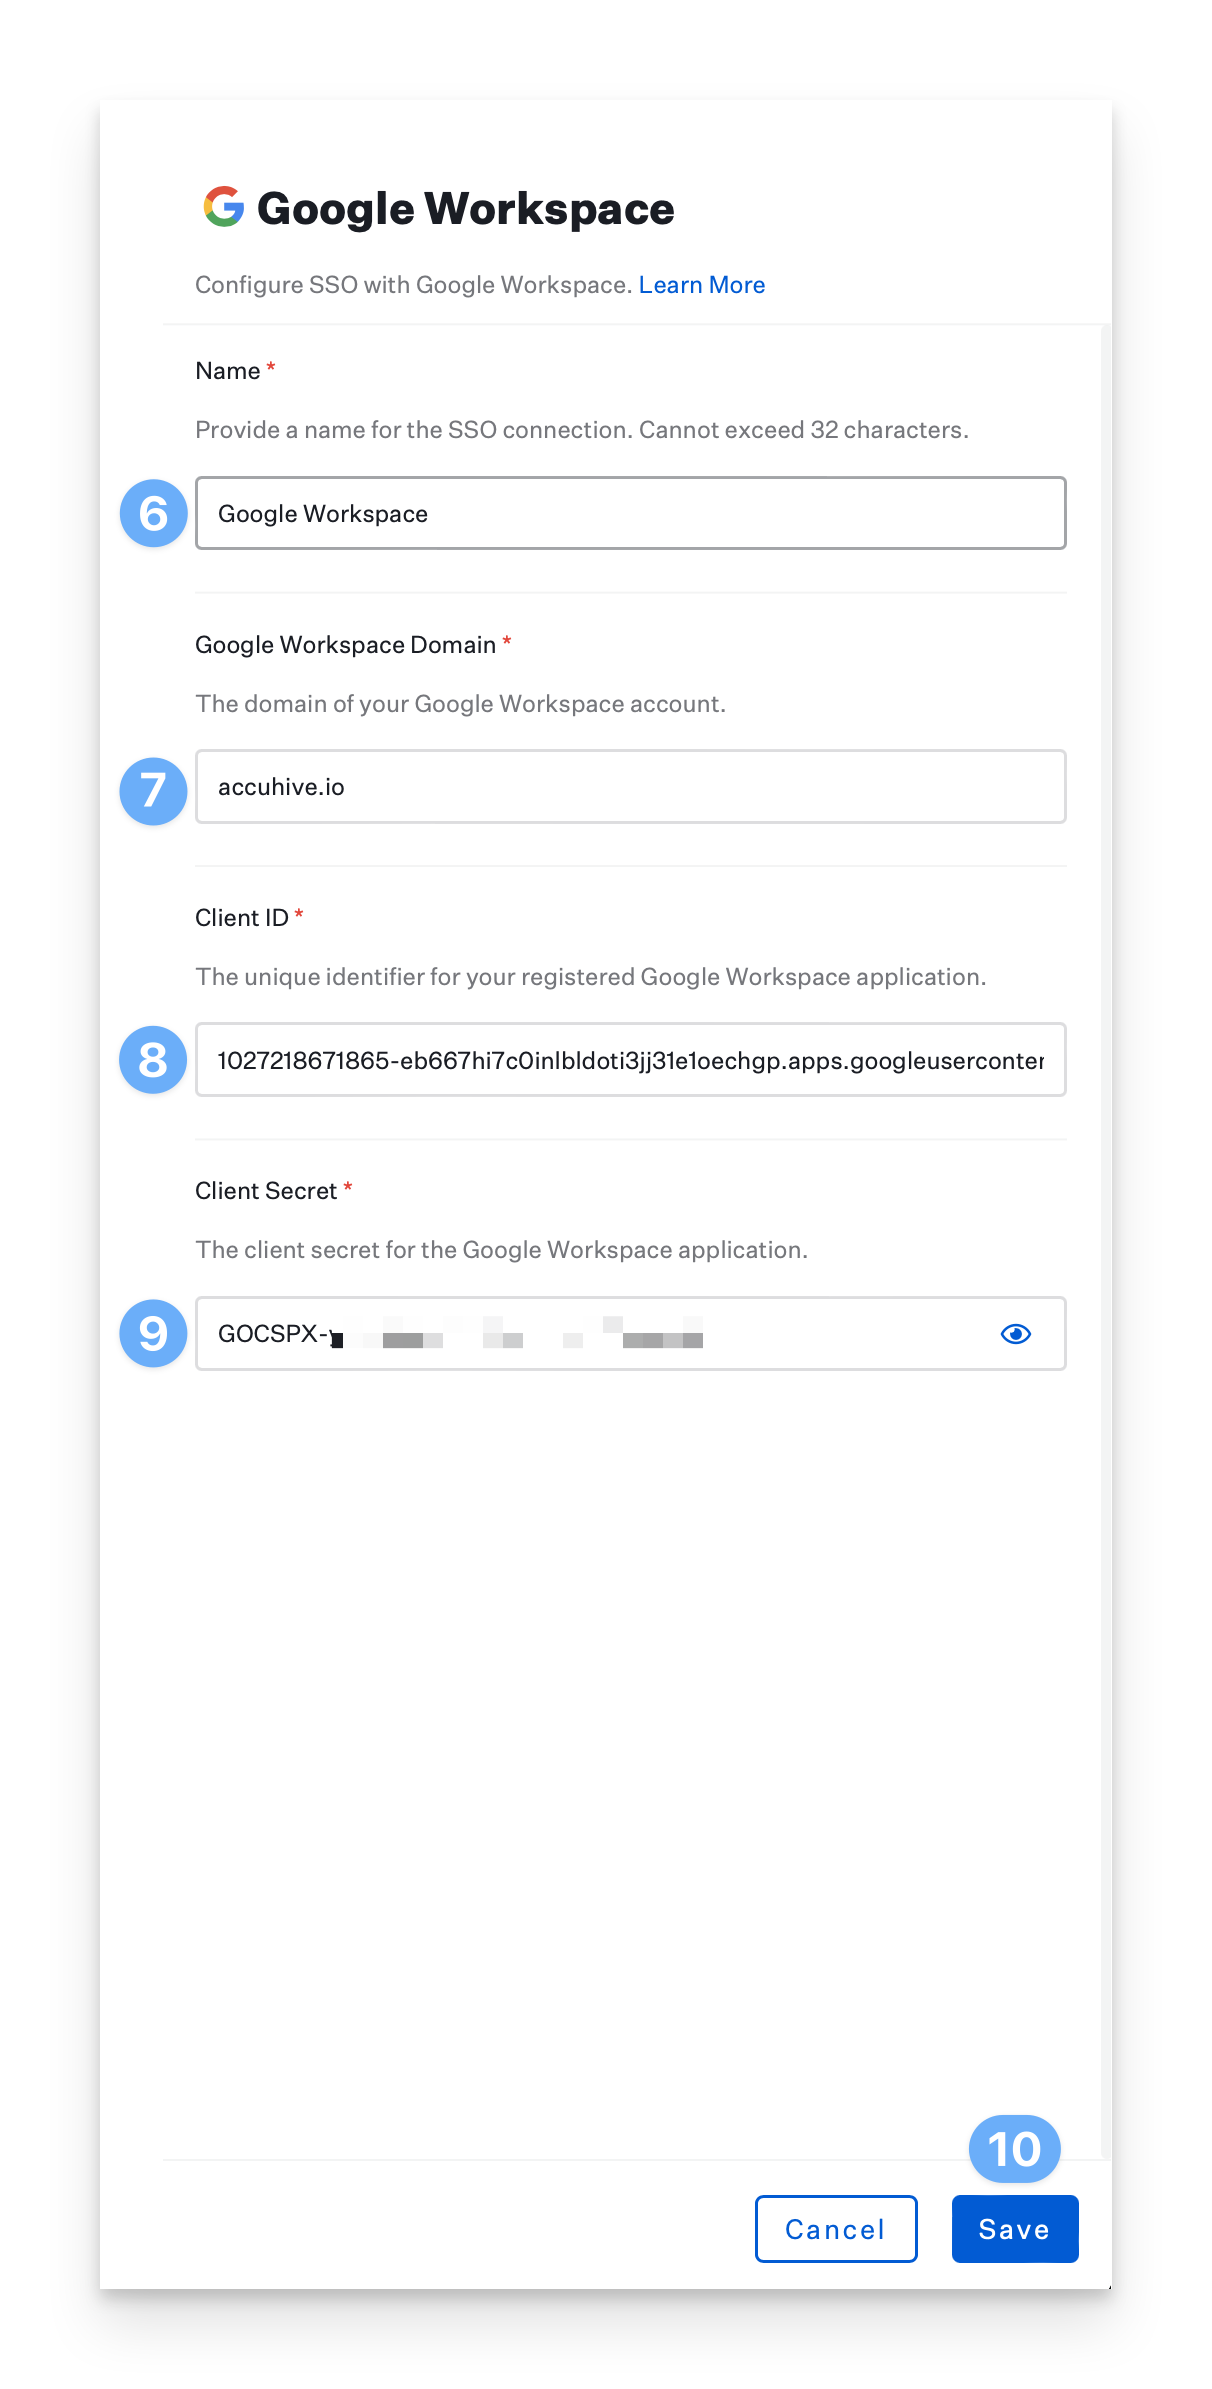
Customize or use the default Name for the Google Workspace connection (this will be shown on the login page).
Enter the Google Workspace Domain that the application is registered within.
If migrating to a new Google Workspace domain using the same connection, this value can be changed to match your new domain. Best practice, however, would be to create a new SSO connection using SAML.
Enter the Client ID you previously copied from Google Workspace.
Enter the Client Secret you previously copied from Google Workspace.
Click Save.
After saving, a new dialogue box will appear with a link to authorize your connection. A Google Workspace administrator for your domain must click the link and complete this process to authorize the application. This box will not go away after authorization is completed.
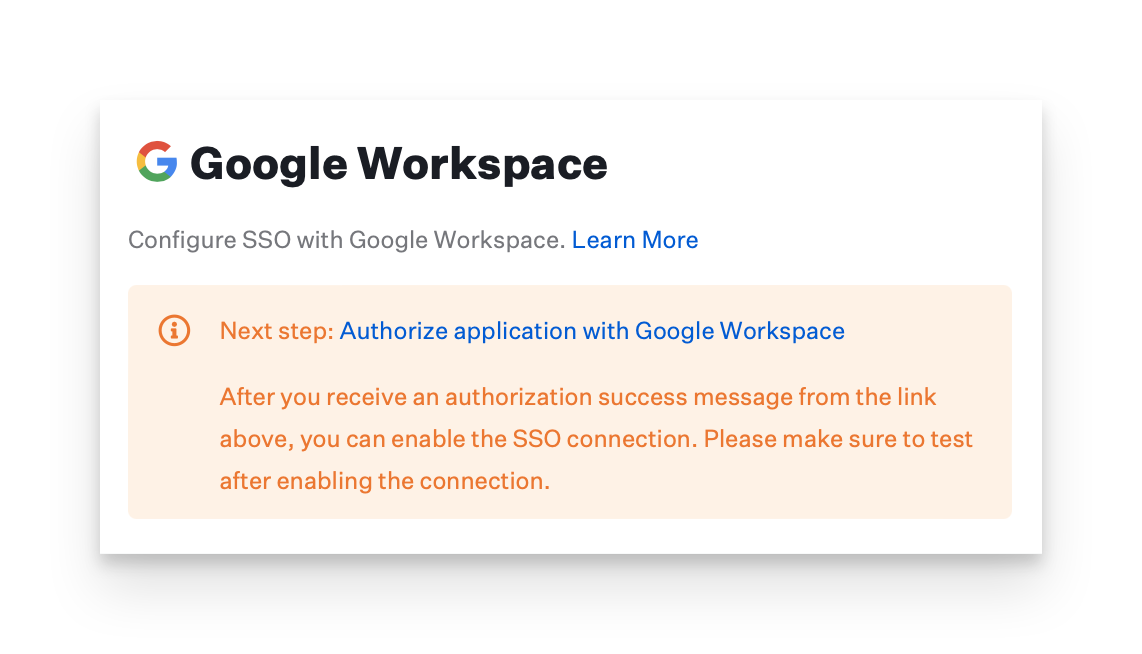
In the new window that launches, sign in and click Accept.
After clicking Accept, you will be brought to an authorization success page.
Your connection has now been successfully configured and may be enabled and tested.
Enable the SAML Connection
Once you have configured the SAML connection in Kandji and your identity provider, you can enable it. For step-by-step instructions, please refer to our Single Sign-On support article.
Enforce Single Sign-On
Once you have configured at least one Single Sign-On connection, you can disable the Standard Authentication connection. Disabling Kandji standard authentication will disable the ability for Kandji administrators in your tenant to log in via Email/Password, Google Sign-in, or Office 365 Sign-in. Please refer to our Single Sign-On support article for step-by-step instructions.