If you experience any issues with Passport & OneLogin, read through our Passport Troubleshooting with OneLogin article for more information.
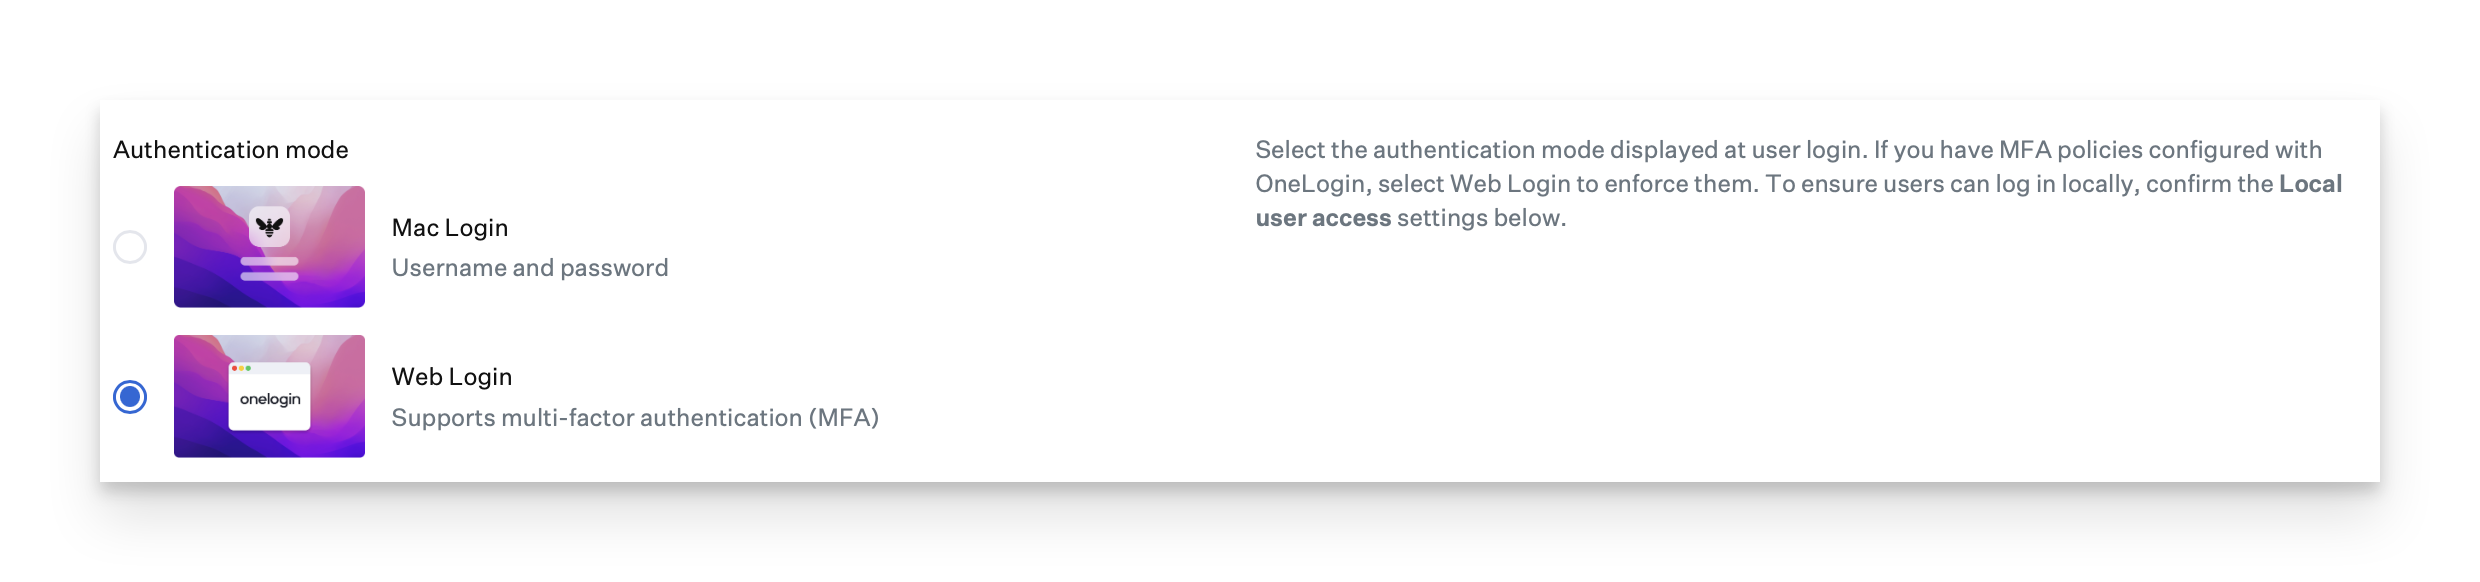
The number of OIDC apps you need to create in OneLogin depends on the authentication mode your Passport library item uses.
If you do not use multi-factor authentication (MFA) with OneLogin, you need to configure only one OIDC app (for password sync).
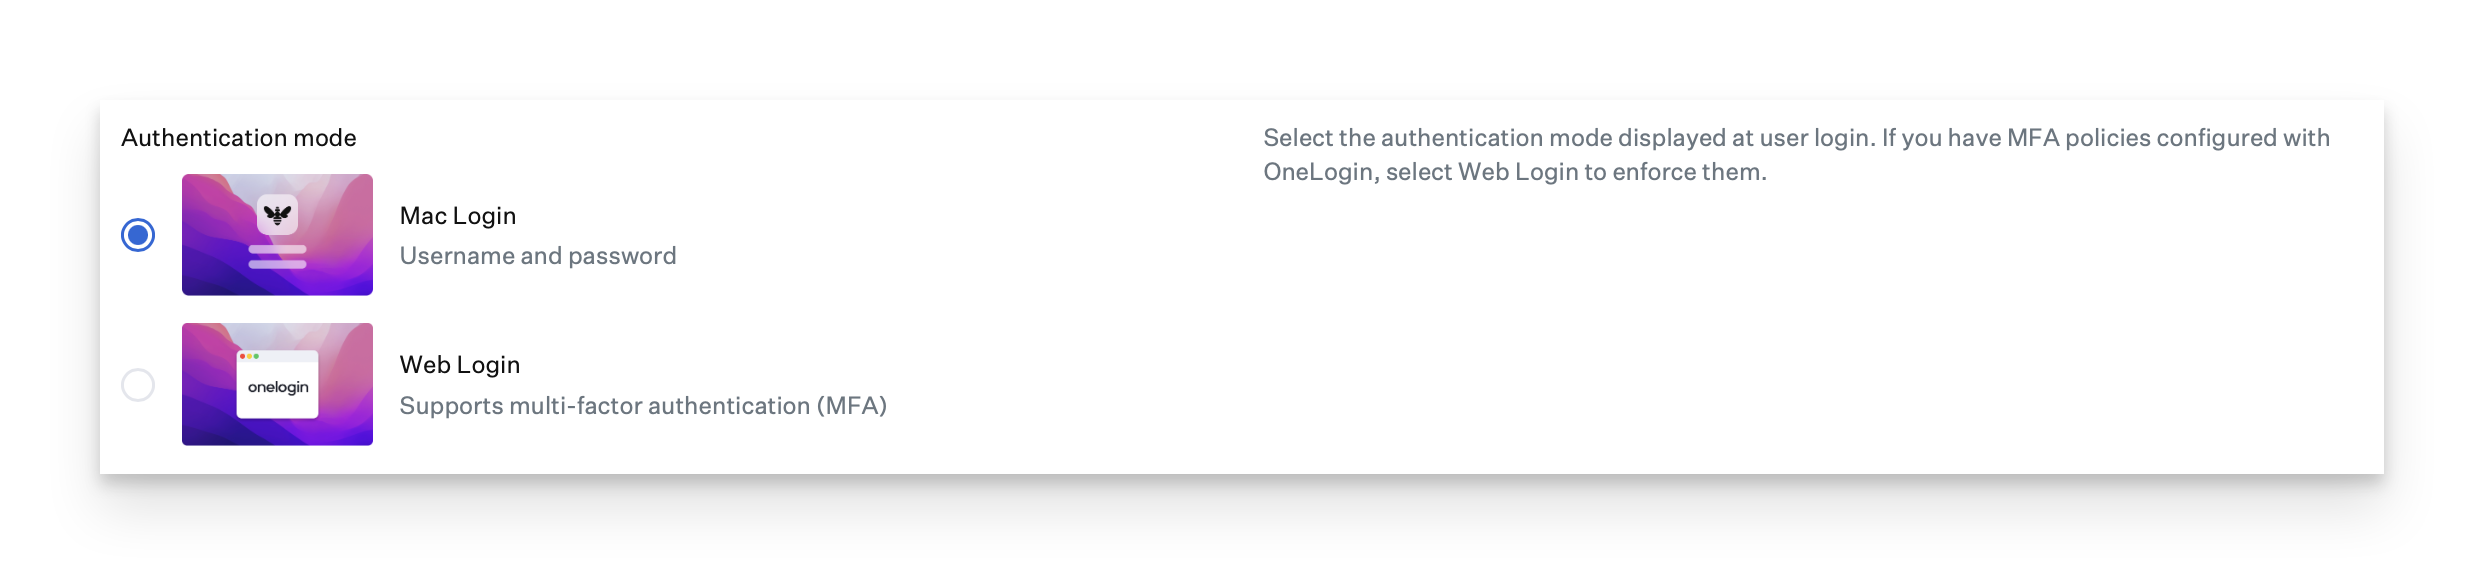
If you do use multi-factor authentication (MFA) with OneLogin, you need to create two apps: the app mentioned above, and an additional OIDC app for the Web Login authentication mode.
The number of OIDC apps you need to create in OneLogin depends on the authentication mode your Passport library item uses. Use these steps to configure the app that Passport will use to keep the Mac password in sync with the OneLogin password. This is required for both authentication modes (Mac Login and Web Login).
You can assign whatever names you like for the OIDC apps you create; our documentation uses the following names:
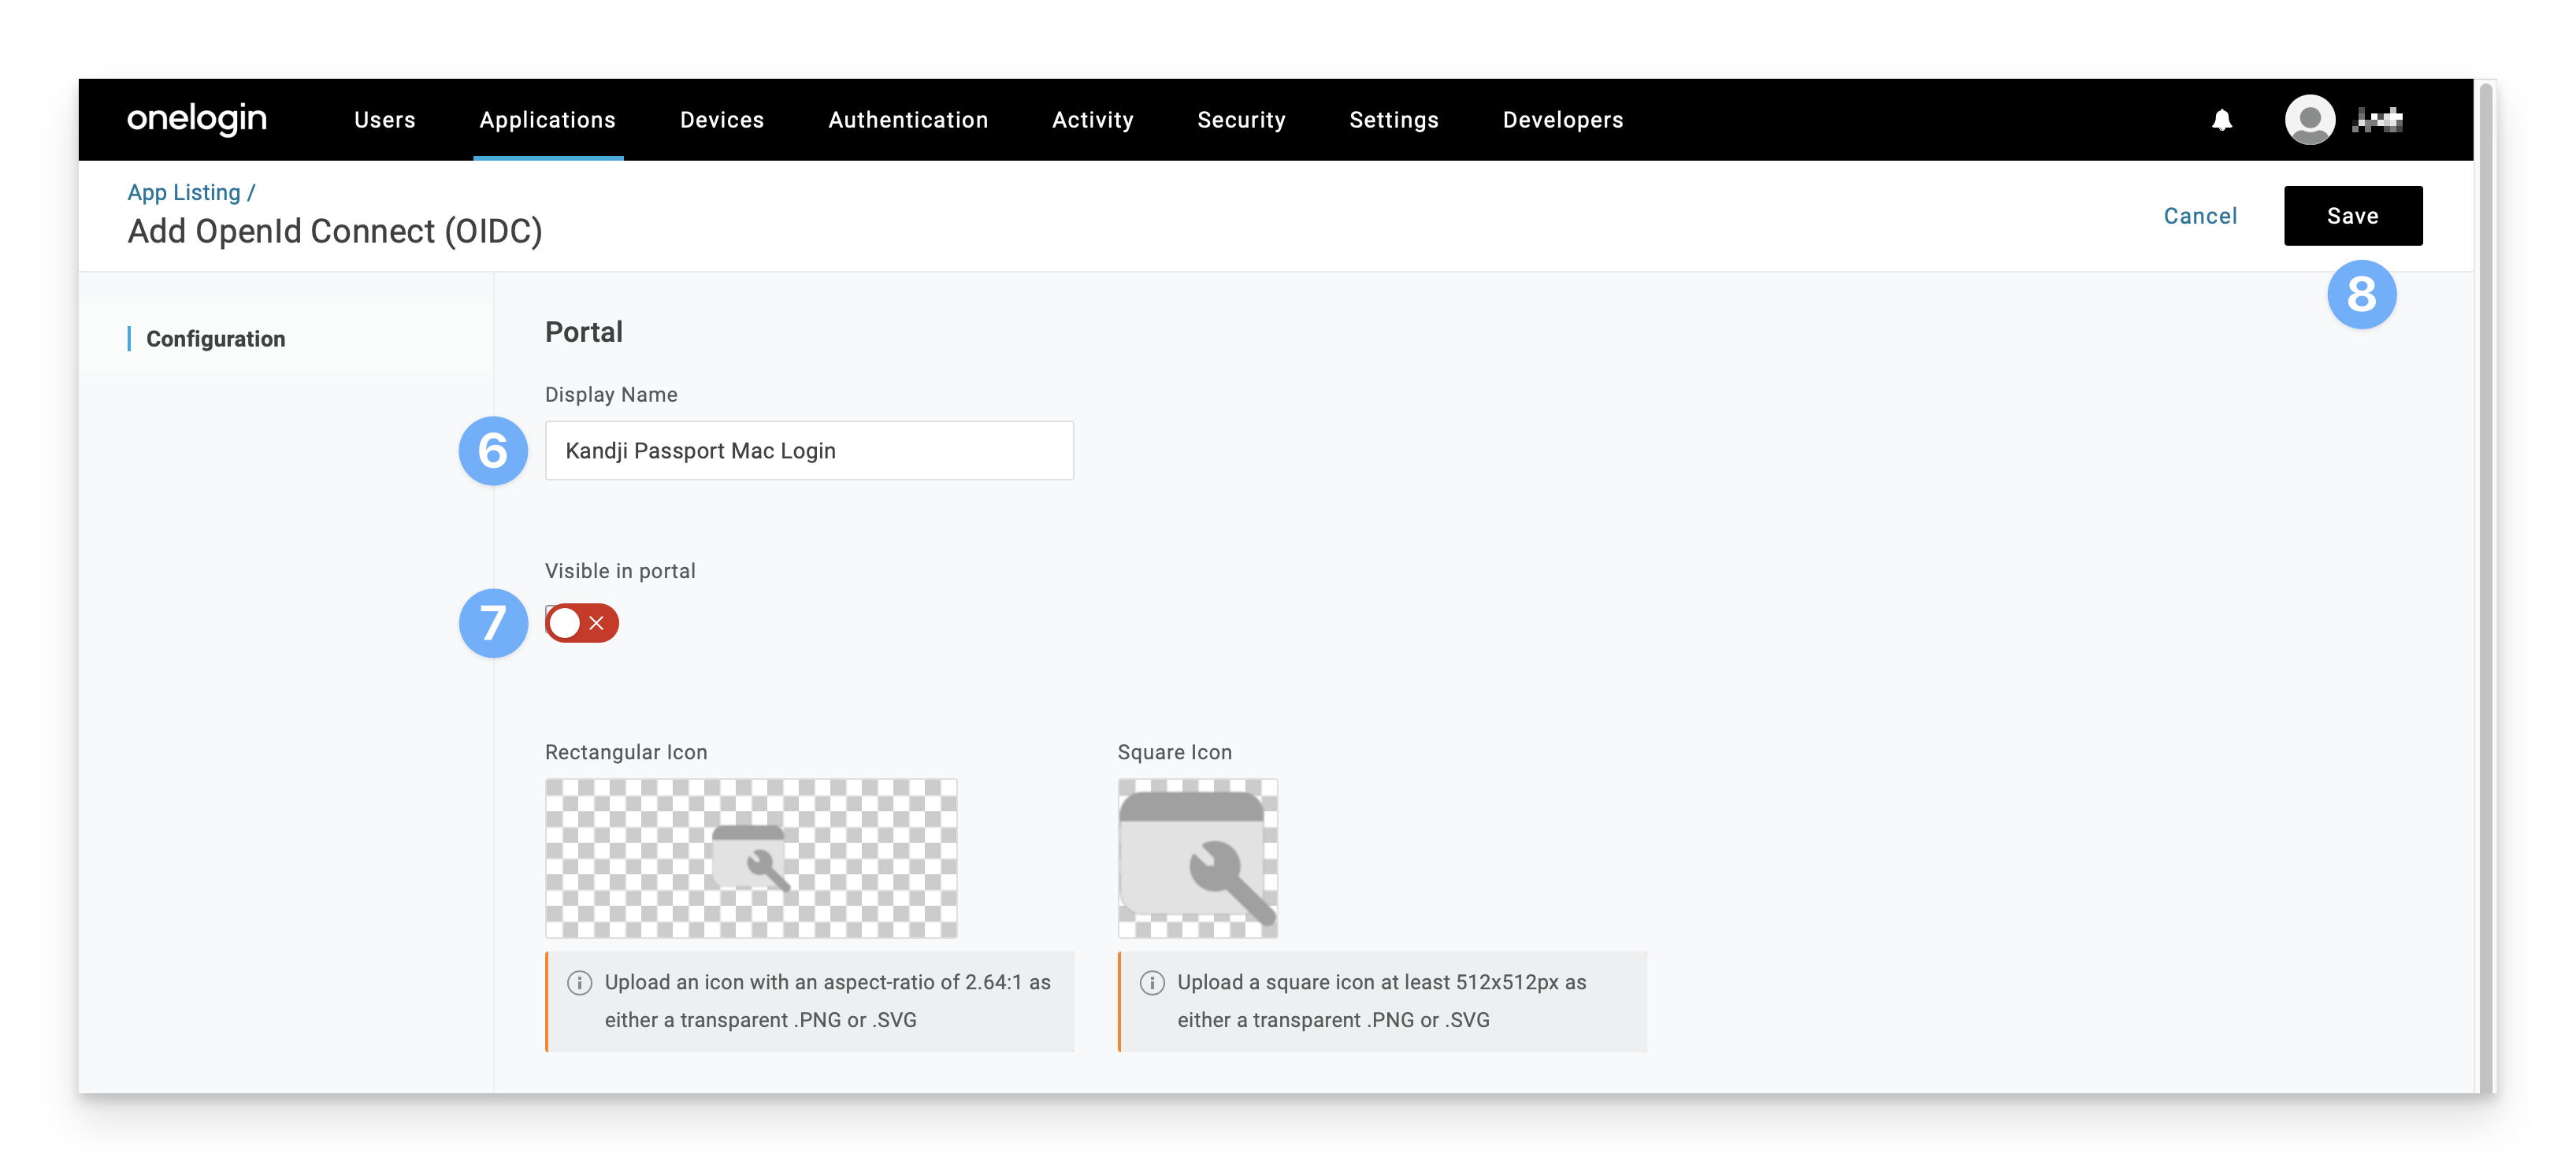
Kandji Passport Mac Login
Kandji Passport Web Login
According to the OneLogin support article Introduction to App Management, in order to add apps, you need to use a OneLogin account that is either a Super User or Account Owner.
If you already configured Passport for the first iteration of Kandji Passport, you can go directly to the section: Configure an OIDC app for Kandji Passport Web Login
Configure an OIDC App for Kandji Passport Mac Login
Use these steps to configure the app that Passport will use to keep the Mac password in sync with the OneLogin password. This is required for both authentication modes (Mac Login and Web Login).
Log in to OneLogin as an Account owner or Super user.
In your OneLogin admin console, navigate to the Applications page.
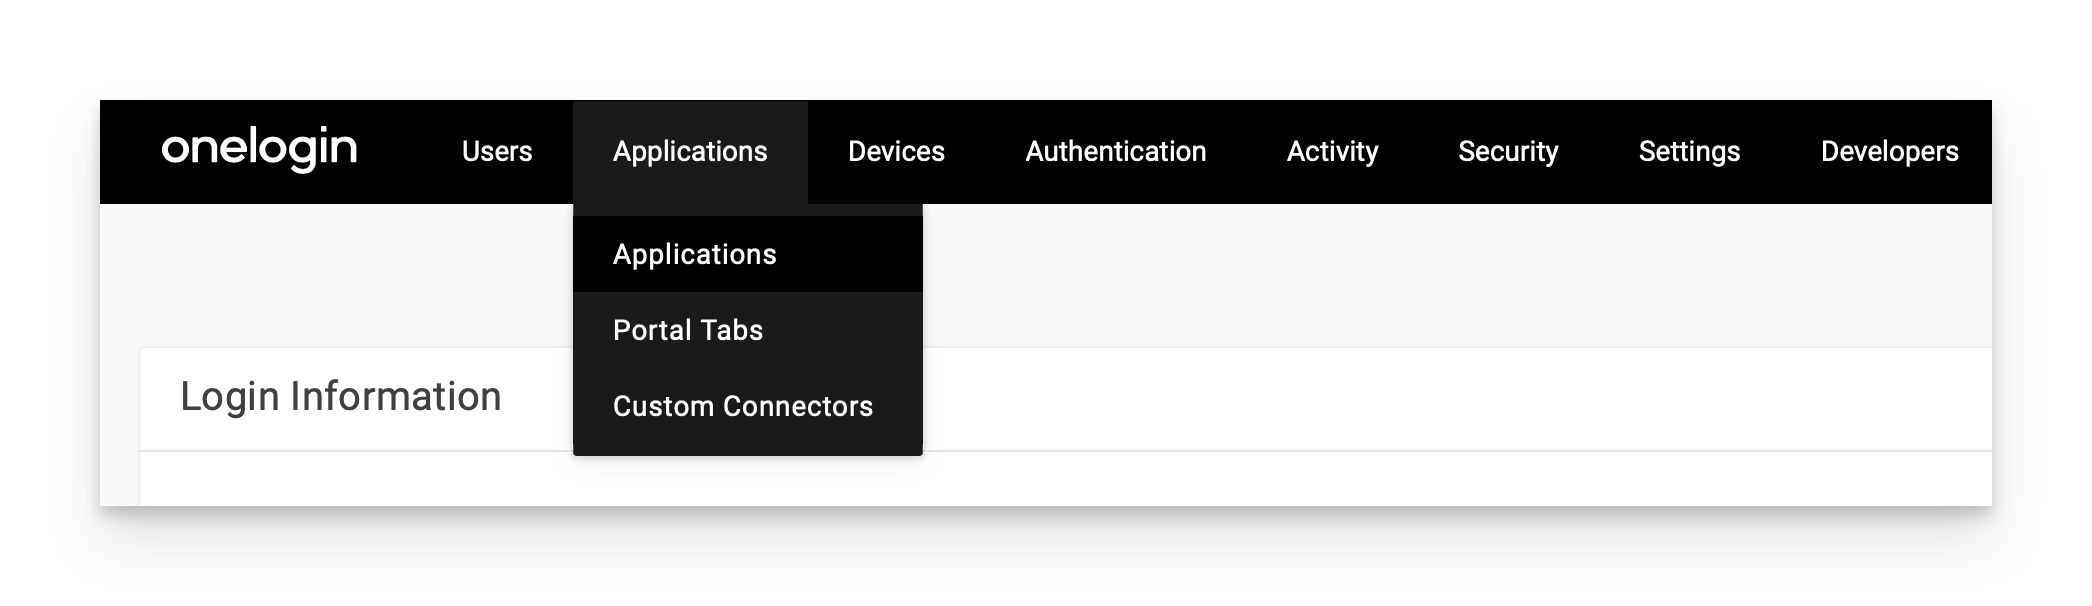
In the upper-right corner, click Add App.

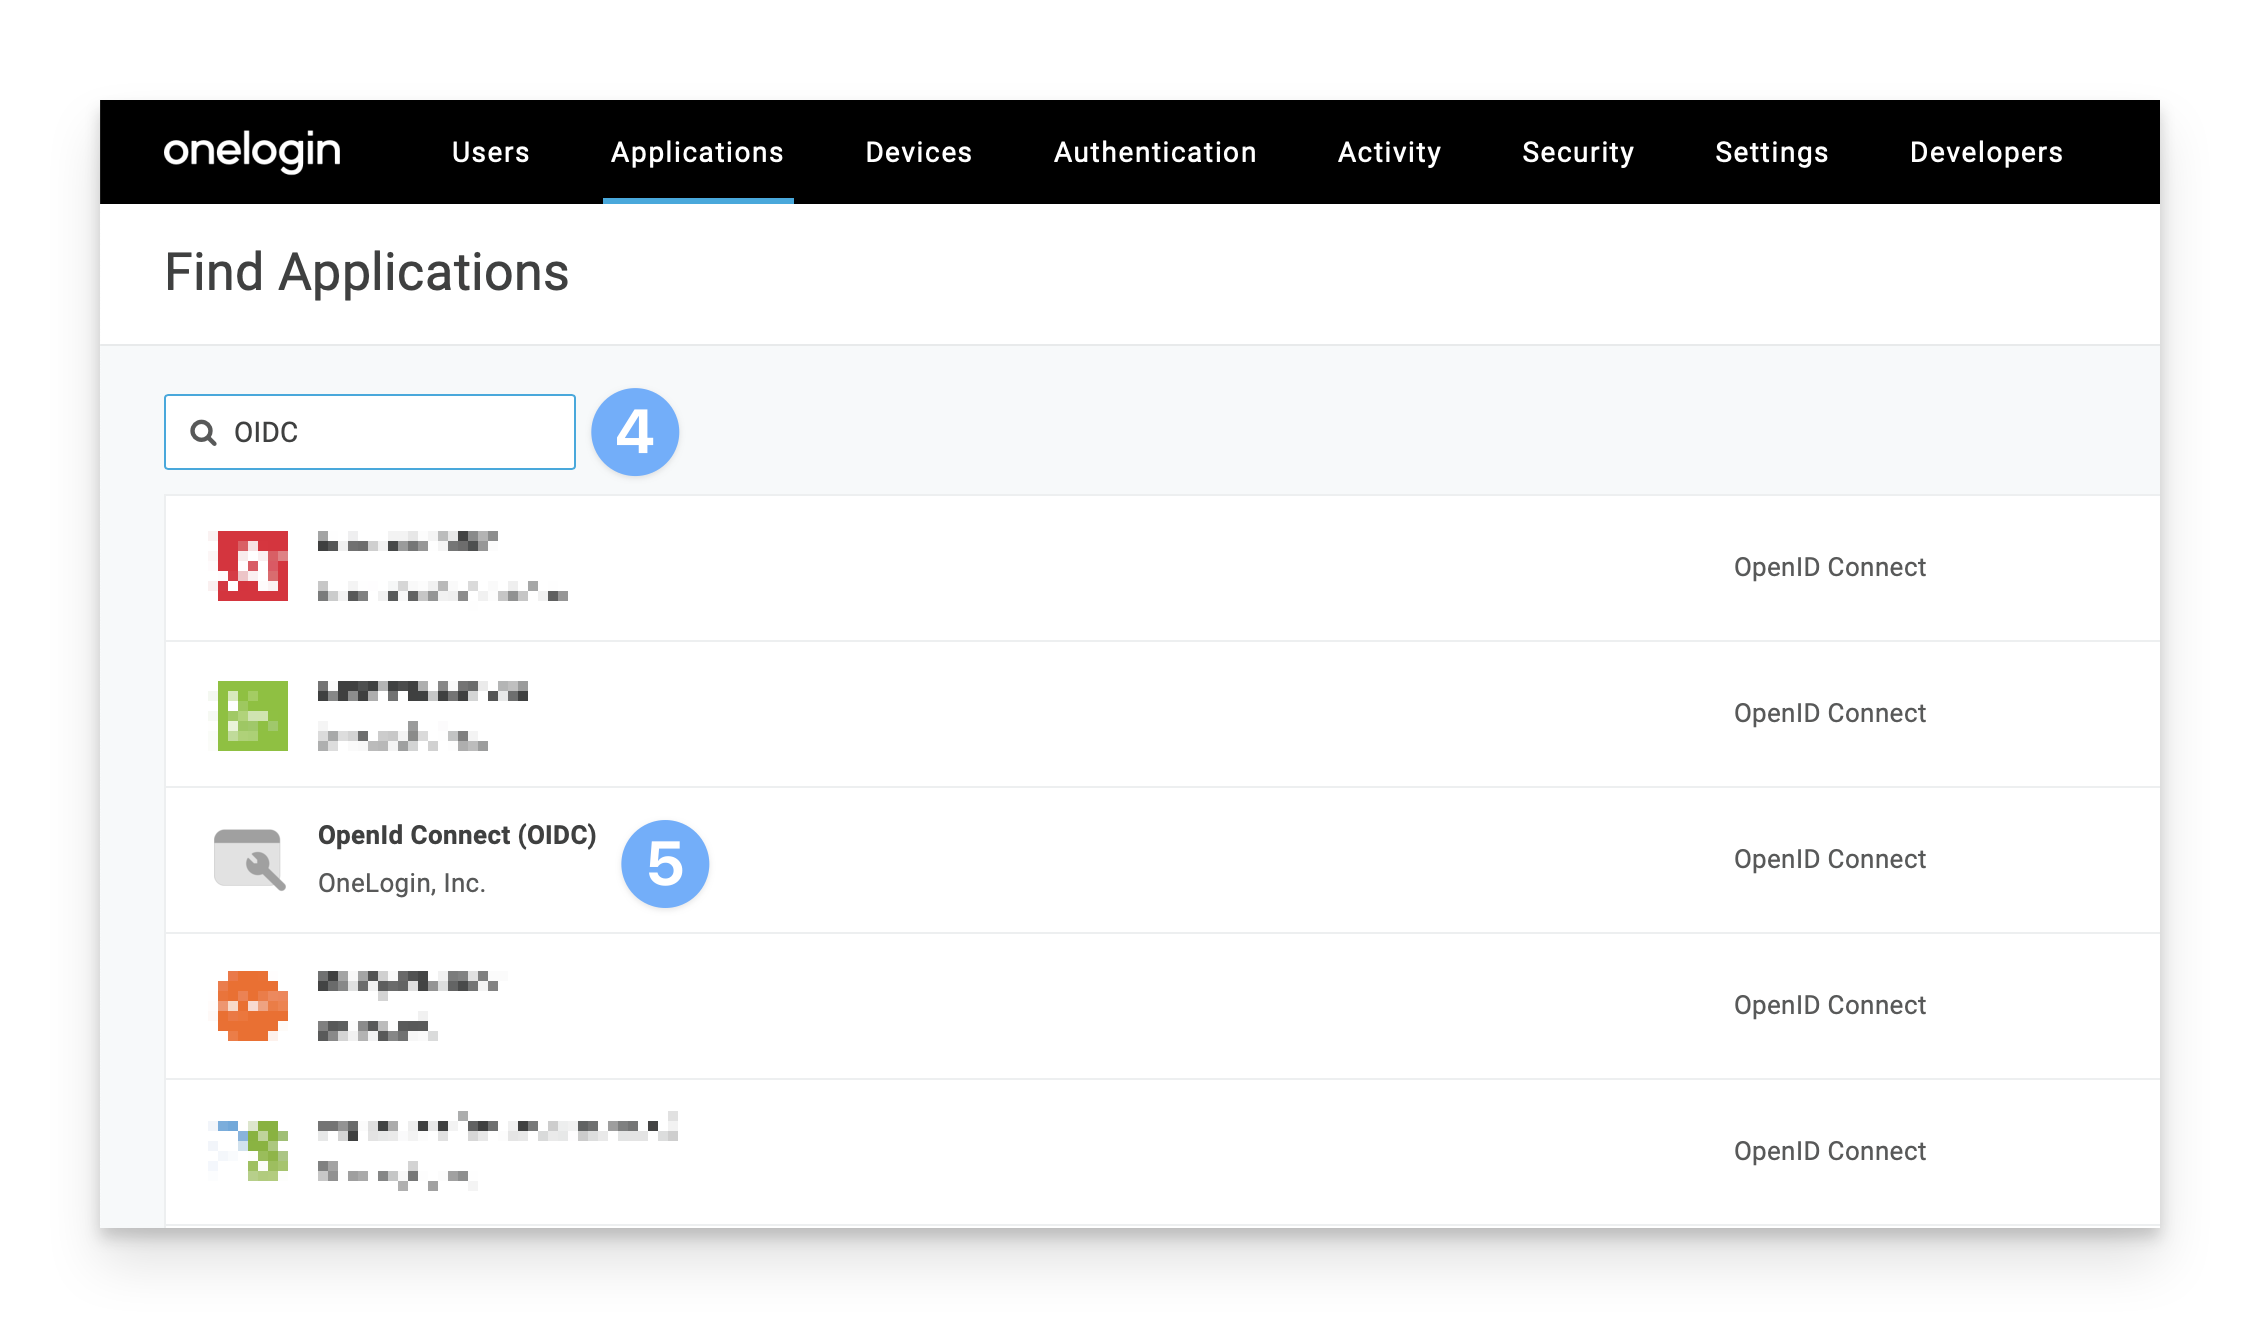
In the search field in the upper-left corner, enter OIDC.
Select OpenId Connect (OIDC).
In the Display Name field, enter a descriptive name such as Kandji Passport Mac Login.
Click the Visible in portal switch to the Off position; this app does not need to be visible in order for Passport to work, and it might be confusing for a user to see this app in their OneLogin portal.
Click Save.
In the left sidebar, click Configuration.

In the Redirect URI's field, enter the following:
https://localhost.redirect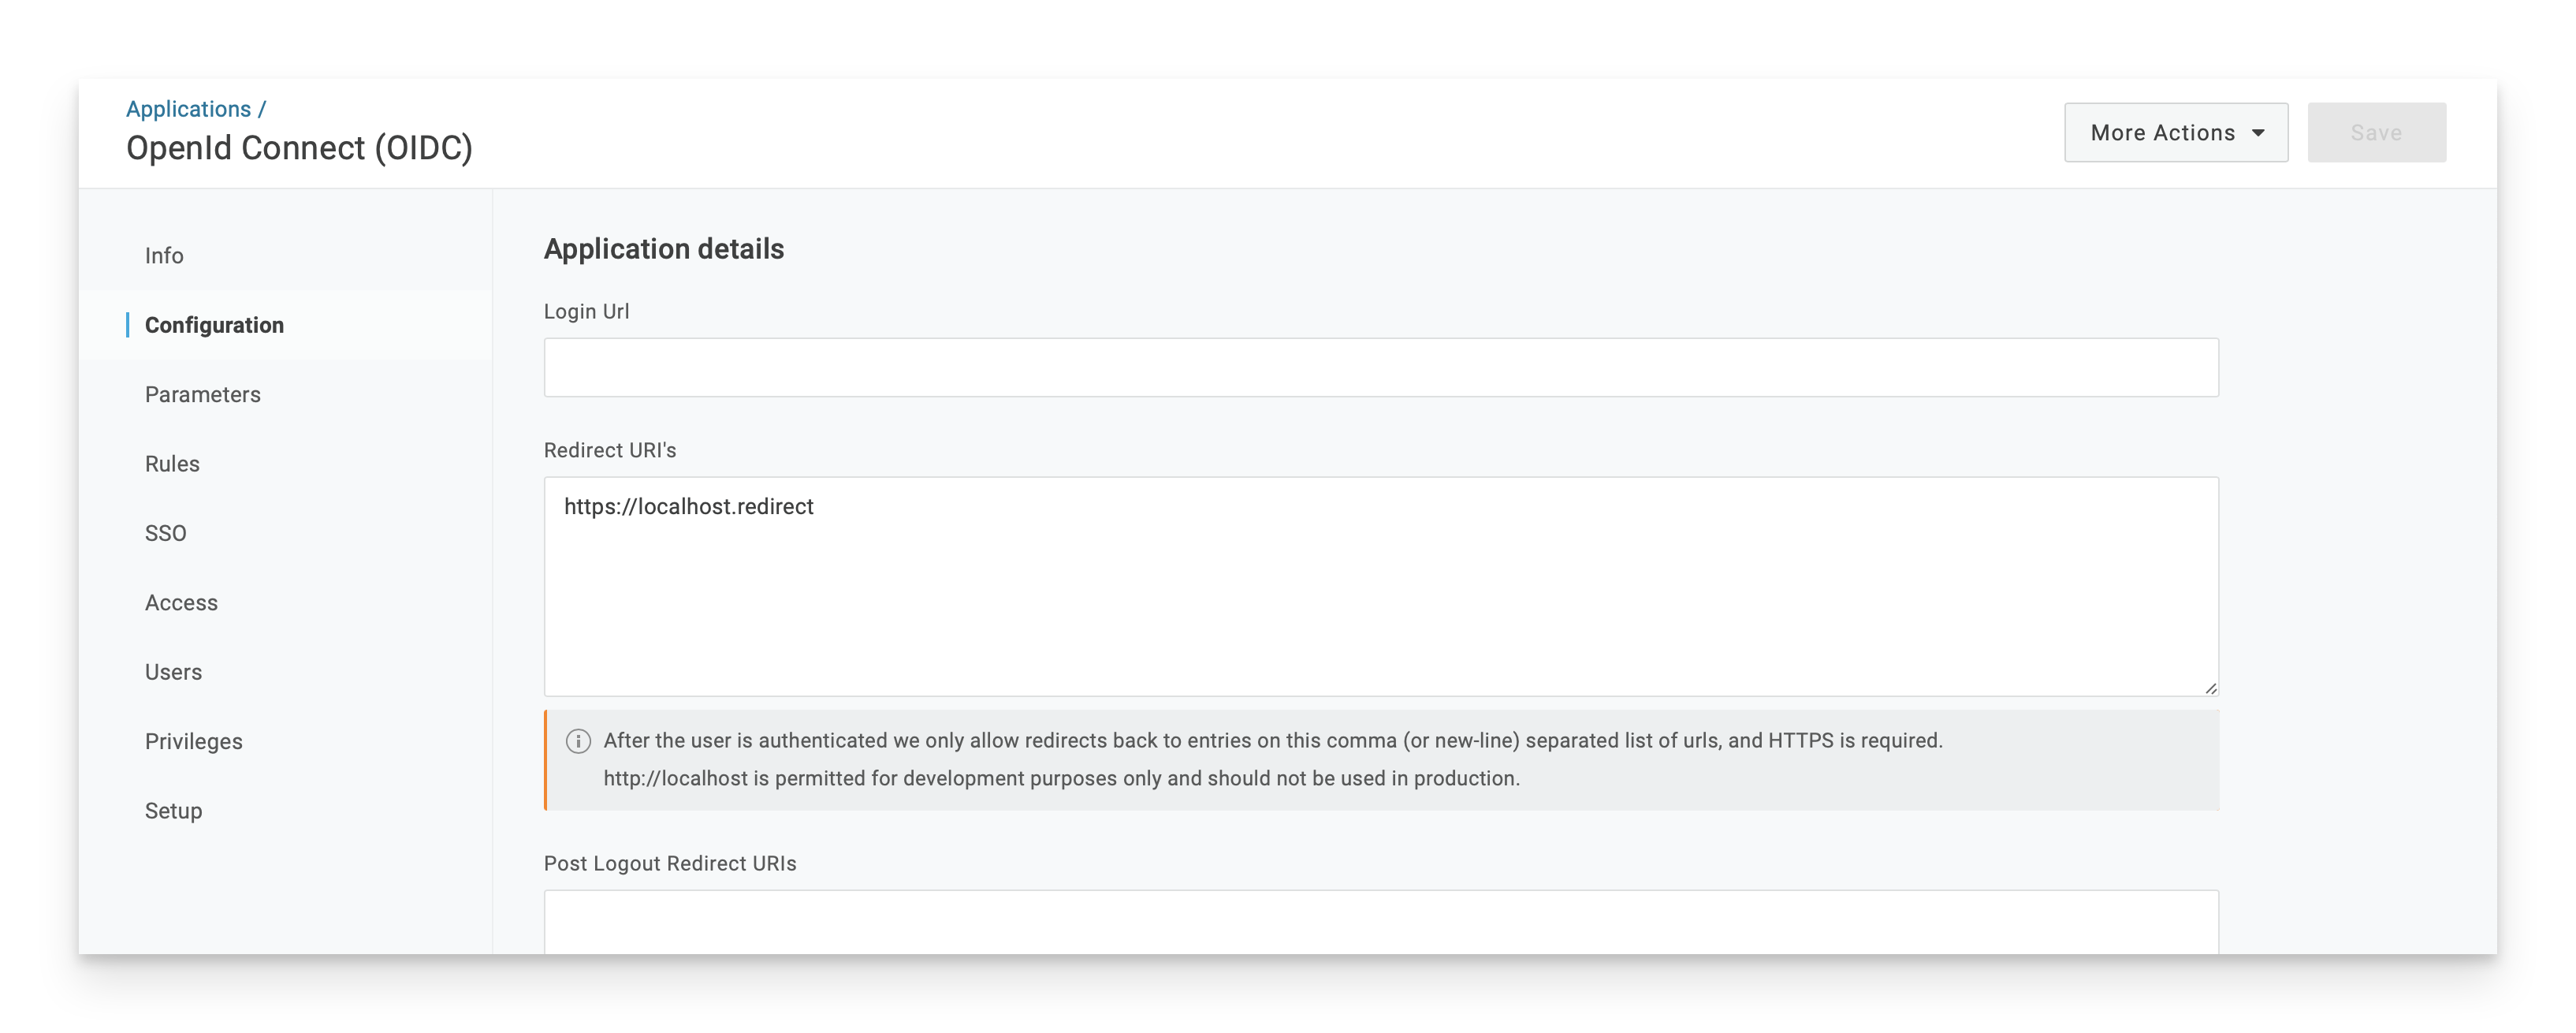
NOTE: Passport doesn't require this value, but you cannot save the app configuration without some value in the Redirect URI's field.
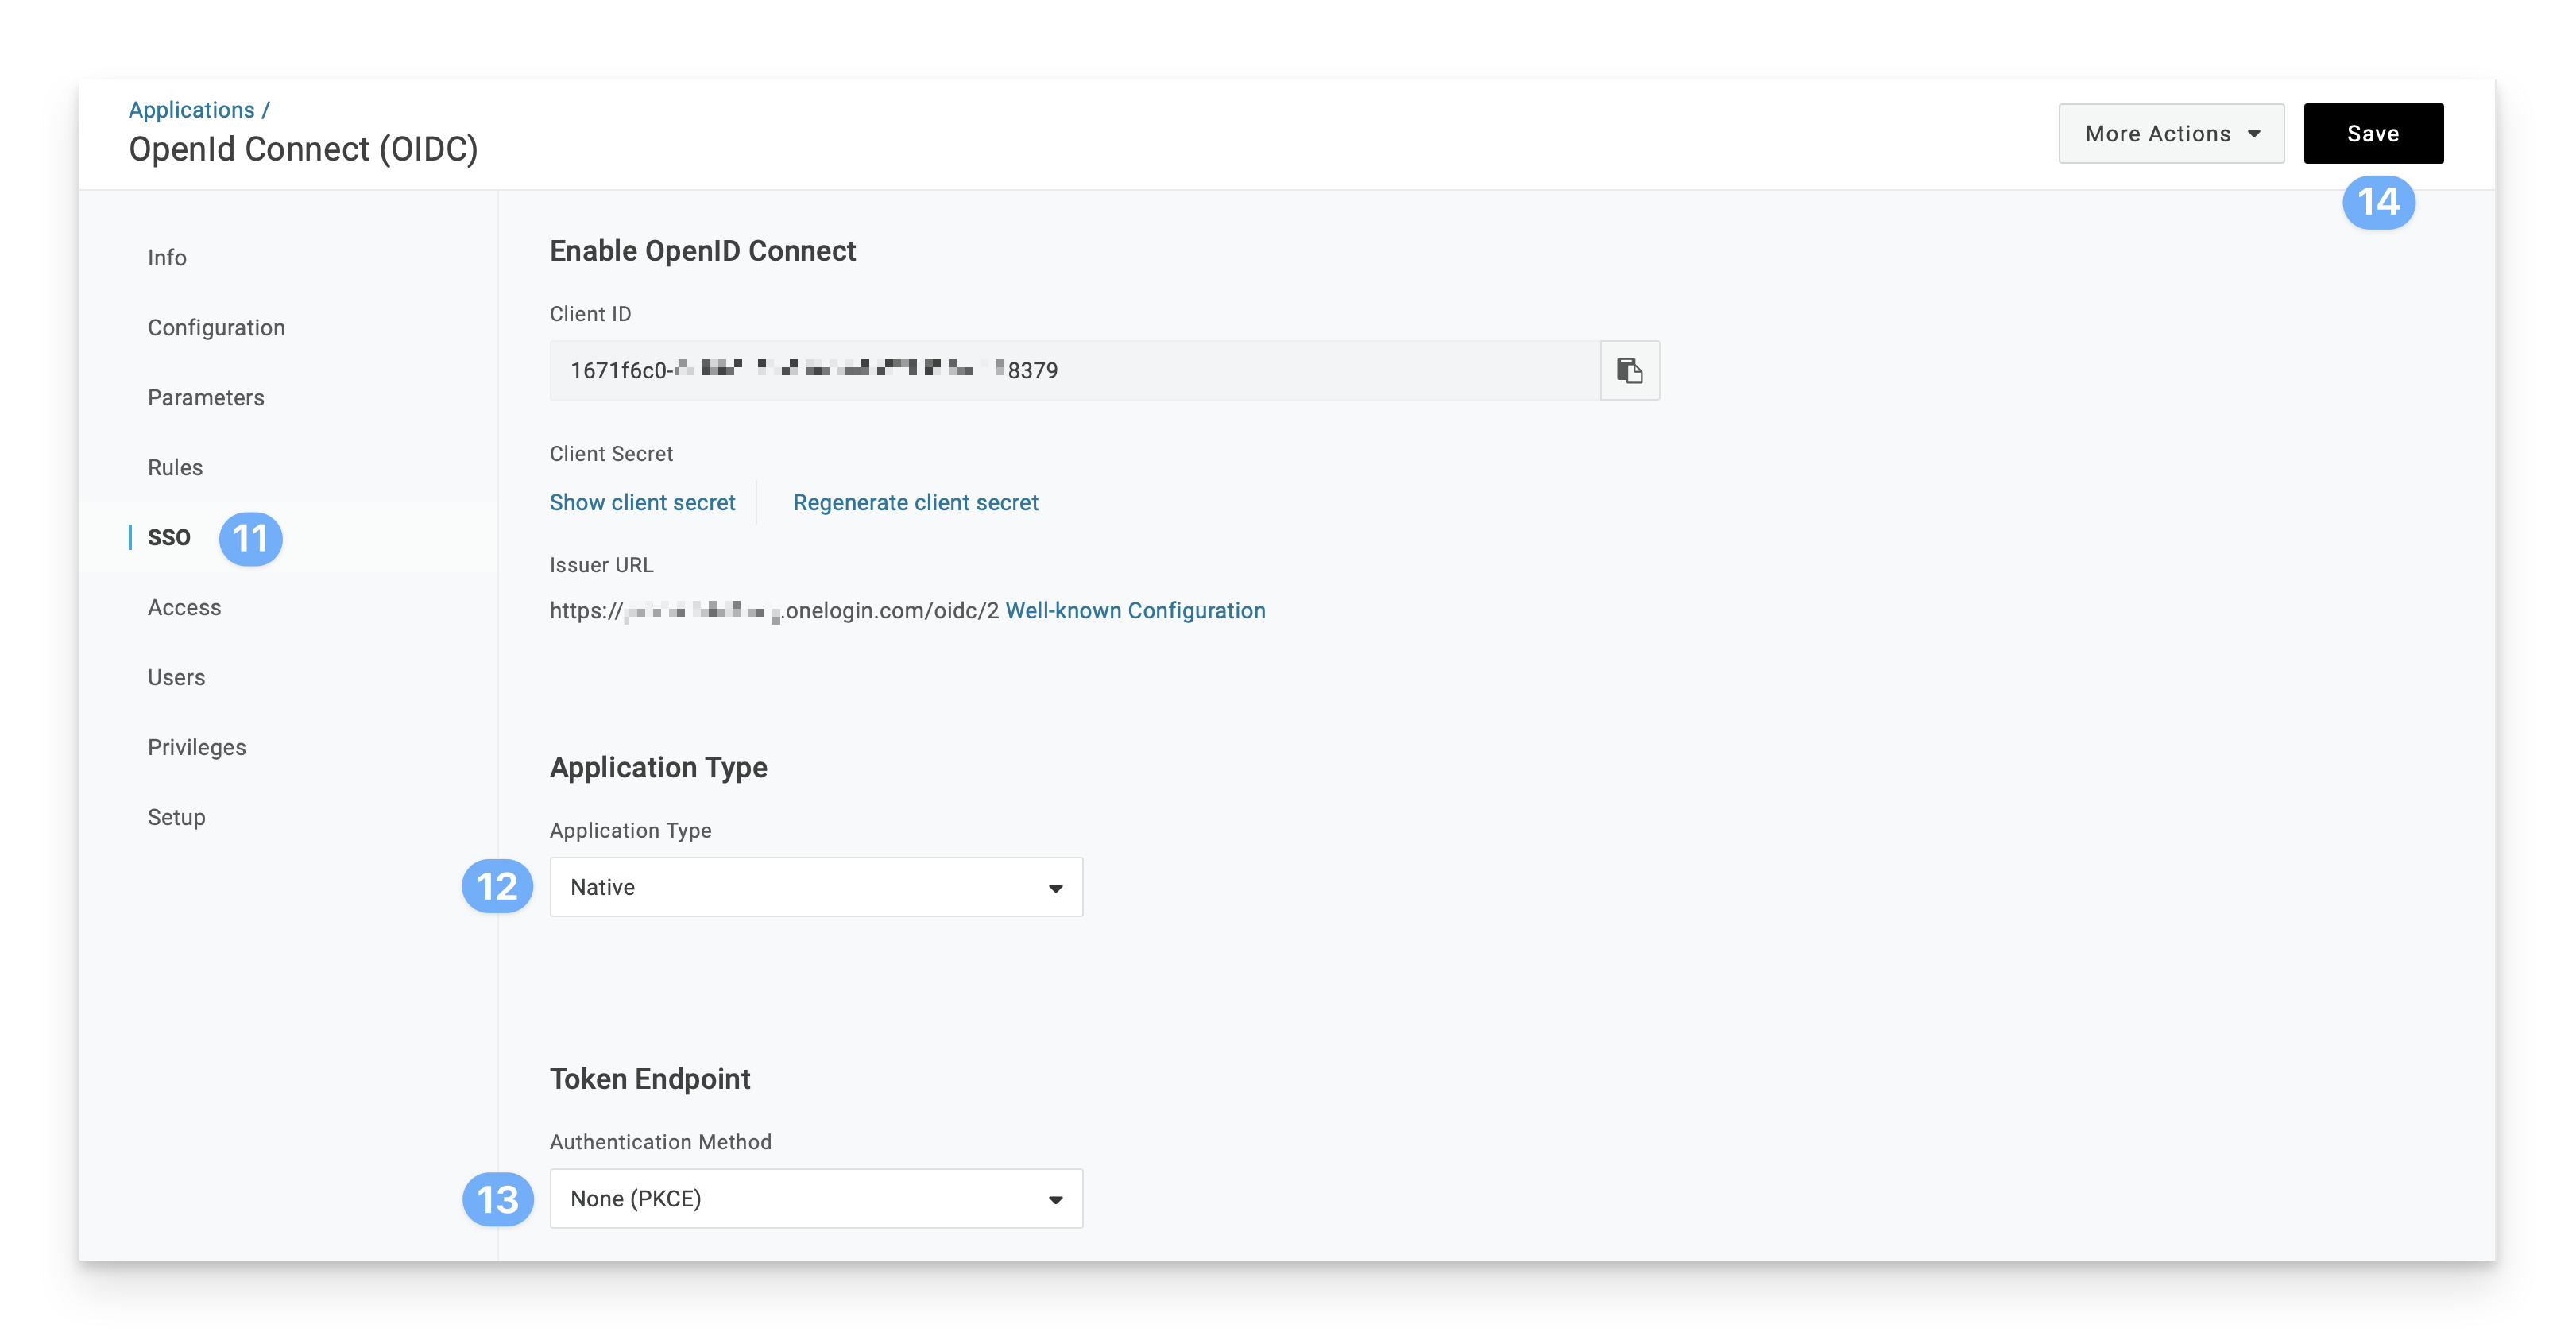
In the left sidebar, click SSO.
Click the Application Type menu and select Native.
Click the Token Endpoint menu and select None (PKCE).
Click Save.
Open a secure text document that you can use to store values for this OIDC app. You will need the Client ID and Issuer URL details when you configure the Passport library item (you don't need the client secret).
To the right of the Client ID field, click the Copy to Clipboard button (looks like a clipboard).
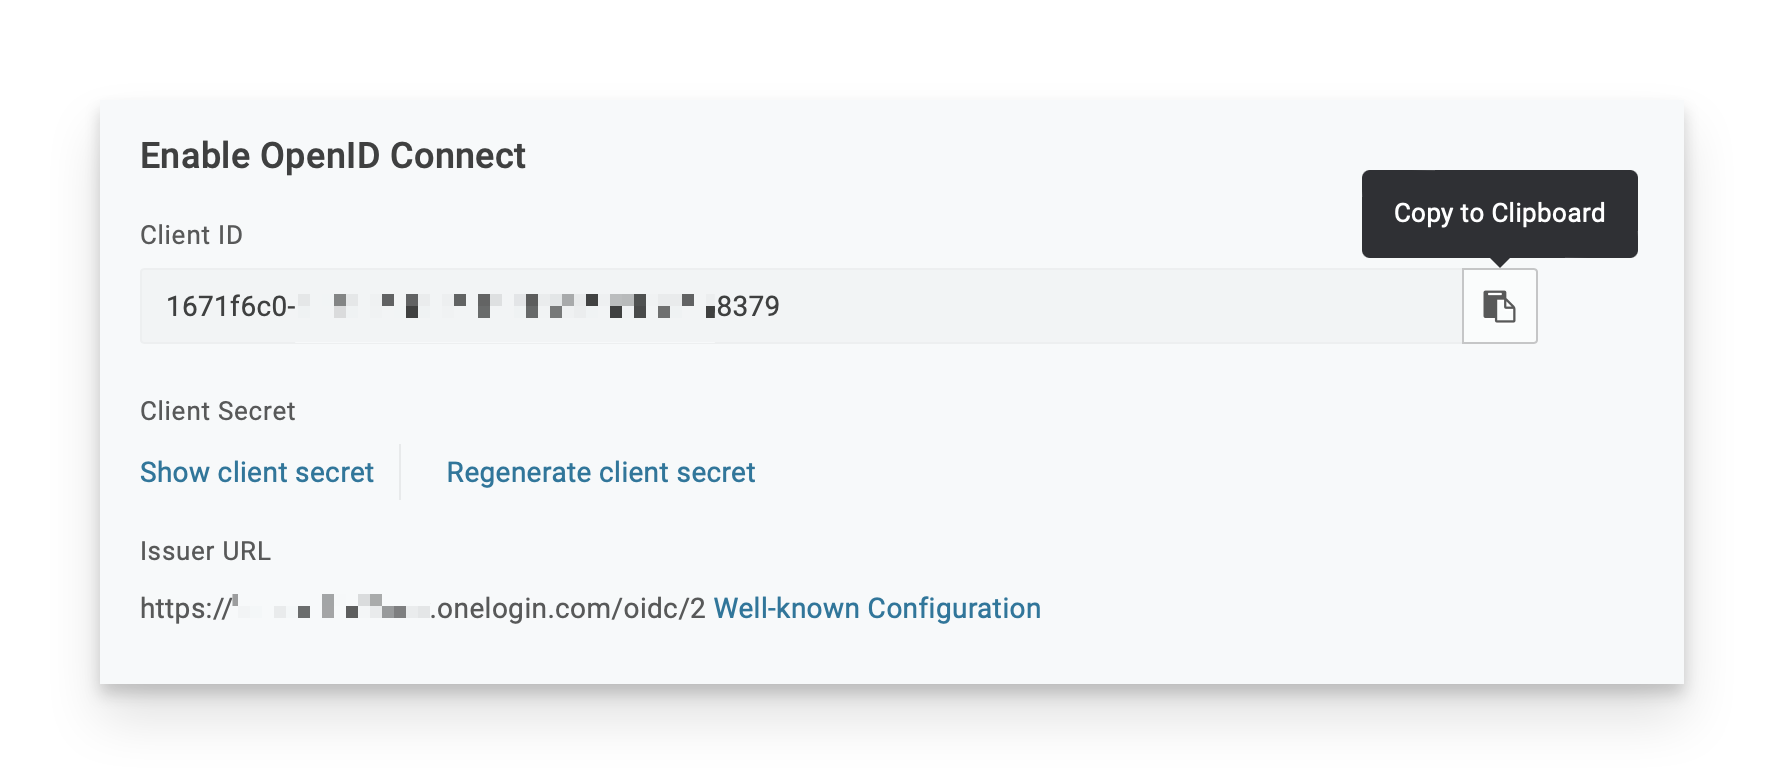
Paste the Client ID into the secure text document.
Right-click (or Control-click) the Well-known Configuration link and copy its value.
NOTE: The Issuer URL contains the start of the well-known configuration for this OIDC app, which uses the following pattern:
https://<subdomain>.onelogin.com/oidc/2/.well-known/openid-configurationPaste the Issuer URL into the secure text document.
Save the secure text document.
In OneLogin, assign the app to the users or groups who will be using Passport to log in to their Mac computers.
If you are using Kandji Passport Web Login, continue with the next section. Otherwise, if you're not using Kandji Passport Web Login, go to the Kandji web app to configure the Passport library item.
Configure an OIDC App for Kandji Passport Web Login
Configure the POST OIDC app that Passport uses to allow users to enter an additional factor of authentication when they log in to their Mac.
In your OneLogin admin console, navigate to the Applications page.
In the upper-right corner, click Add App.
NOTE: If the Add App button does not appear, it’s possible that you previously clicked See the new apps list. To make OneLogin display the Add App button, remove the string /admin2 from the URL. For example, instead of https://accuhive.onelogin.com/admin2/apps, use https://accuhive.onelogin.com/apps.
In the search field in the upper-left corner, enter OIDC.
Select OpenID Connect (OIDC).
In the Display Name field, enter a descriptive name such as Kandji Passport Web Login.
Click the Visible in portal switch to the Off position; this app does not need to be visible in order for Passport to work, and it might be confusing for a user to see this app in their OneLogin portal.
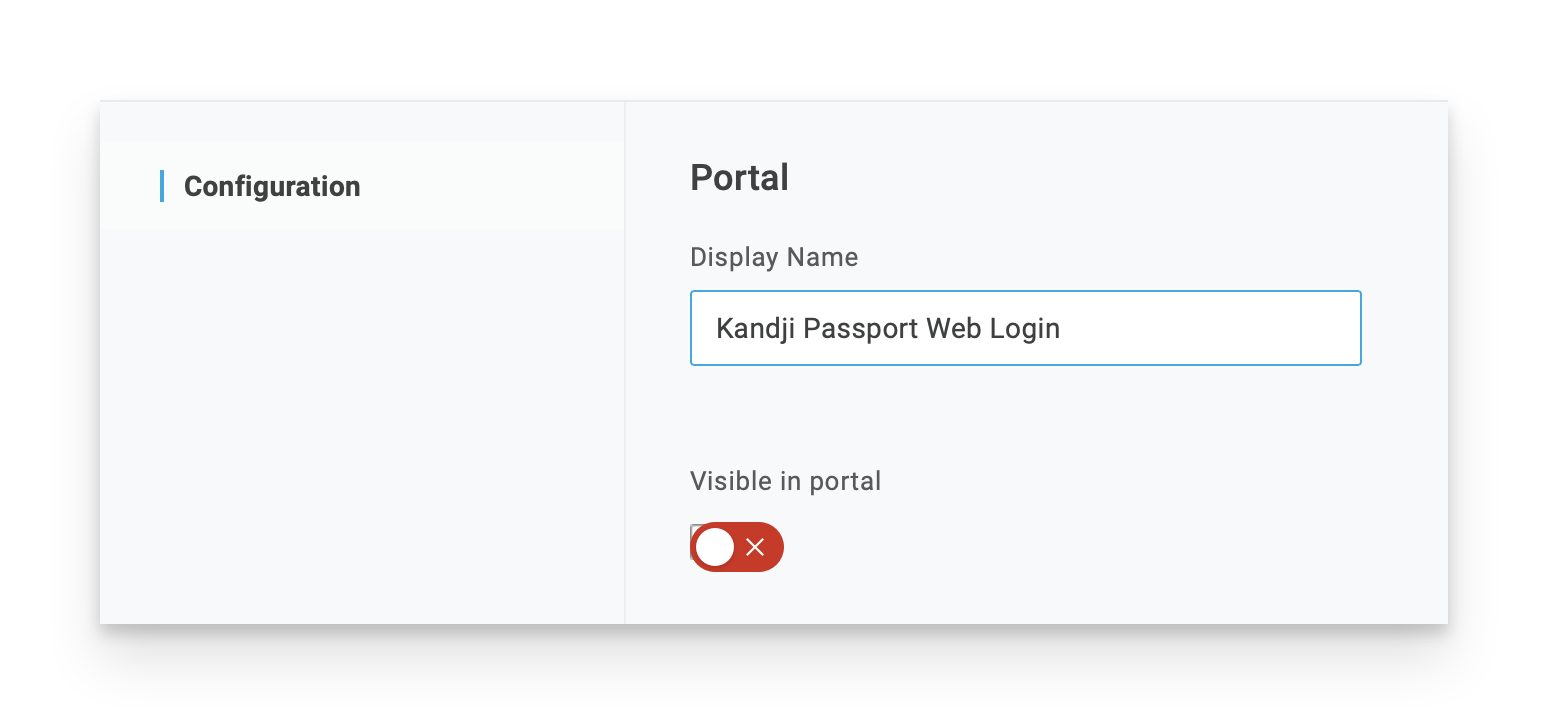
Click Save.
In the left sidebar, click Configuration.
In the Redirect URI's field, enter the following:
https://localhost.redirectIn the left sidebar, click SSO.
Click the Application Type menu and select Native.
In the Token Endpoint section, click the Authentication Method menu and select POST.
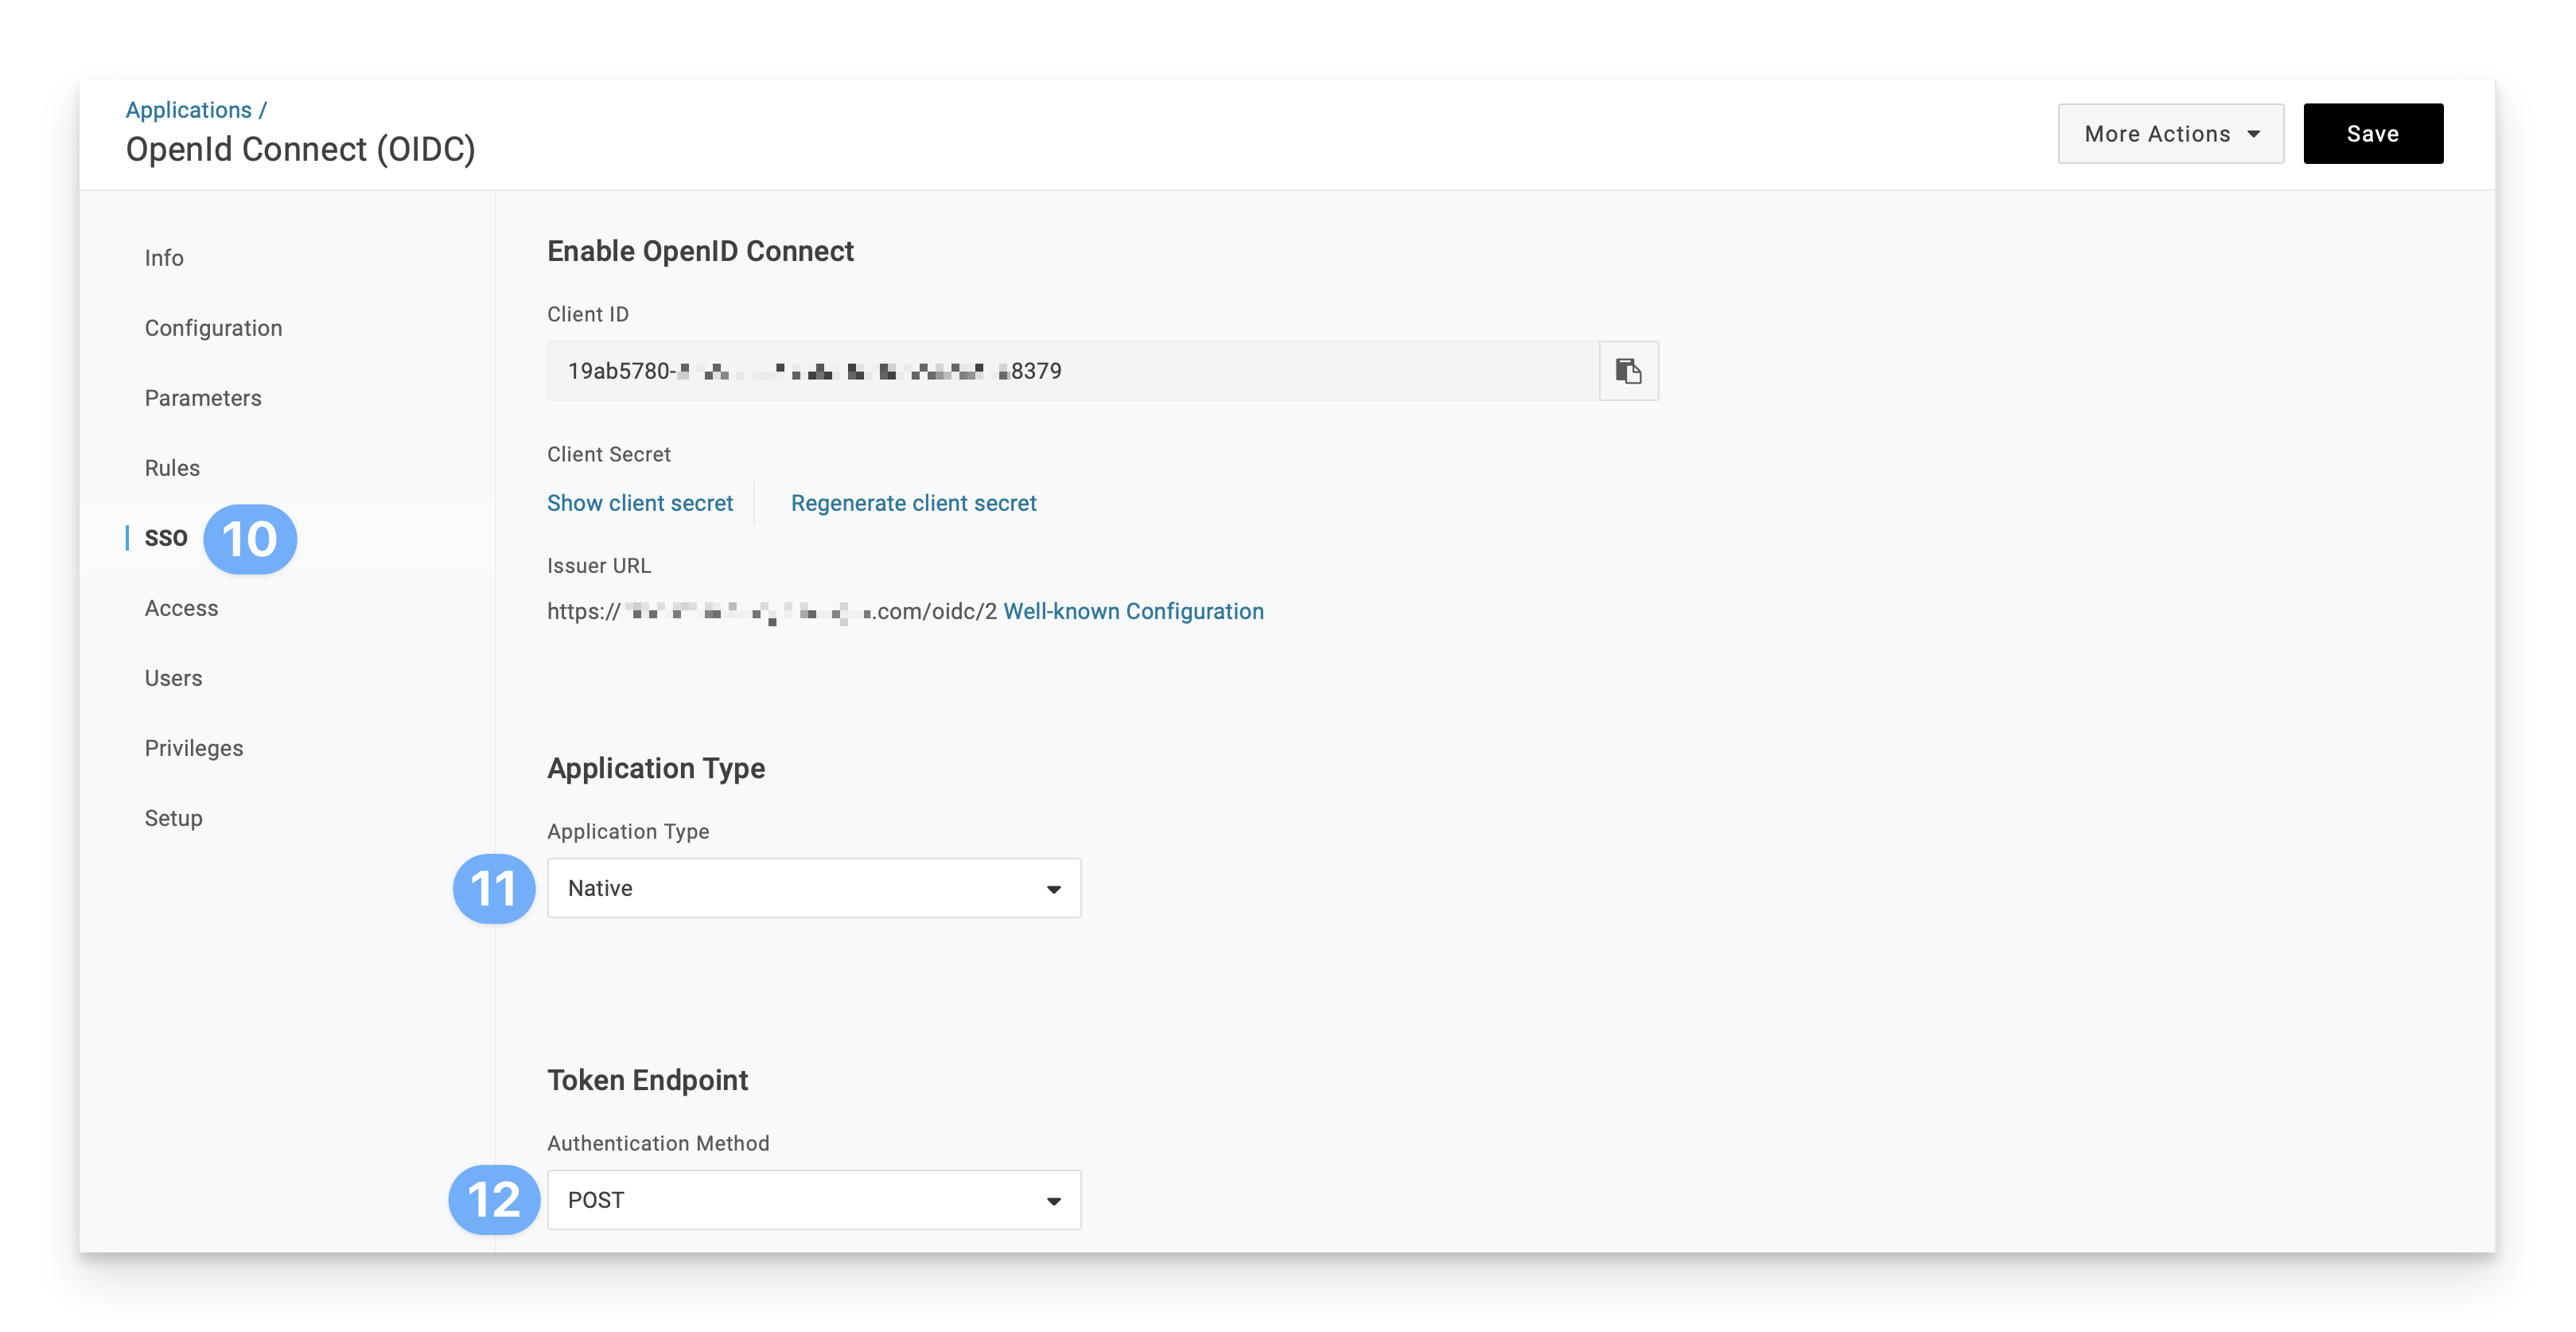
Click Save.
Open a secure text document that you can use to store values for this OIDC app. You will need the Client ID and Client Secret for this POST app when you configure the Passport library item. If you already have a secure document open from configuring the previous OIDC app, add a note that the new values are for the OIDC app for the Web Login authentication mode.
Copy the contents of the Client ID field.
Paste the Client ID into the secure text document.
Click Show client secret.
Copy the client secret.
Paste the client secret into the secure text document.
Save the secure document.
In OneLogin, assign the app to the users or groups who will be using Passport to log in to their Mac computers with the Passport library item with the authentication mode set to Web Login.
Configuring a User Account Type by Identity Provider Group in OneLogin
When configuring whether a user will be a standard user or an admin user, you will need to follow the step below.
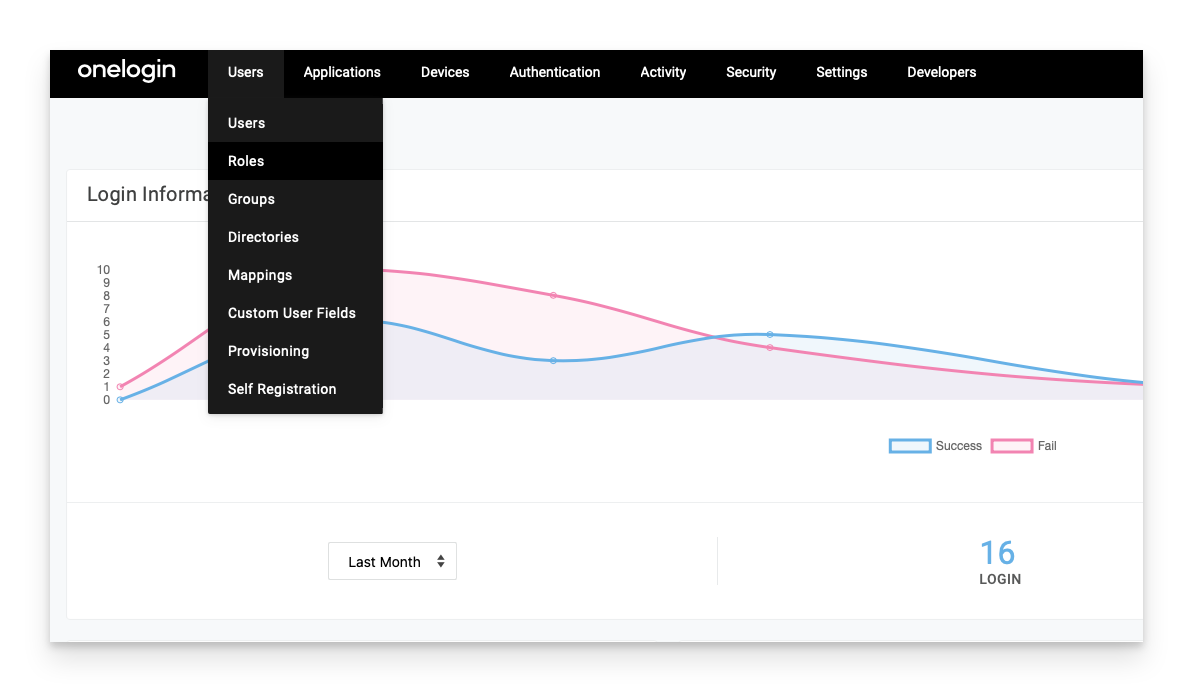
Log in to your OneLogin Console. Select Users > Roles
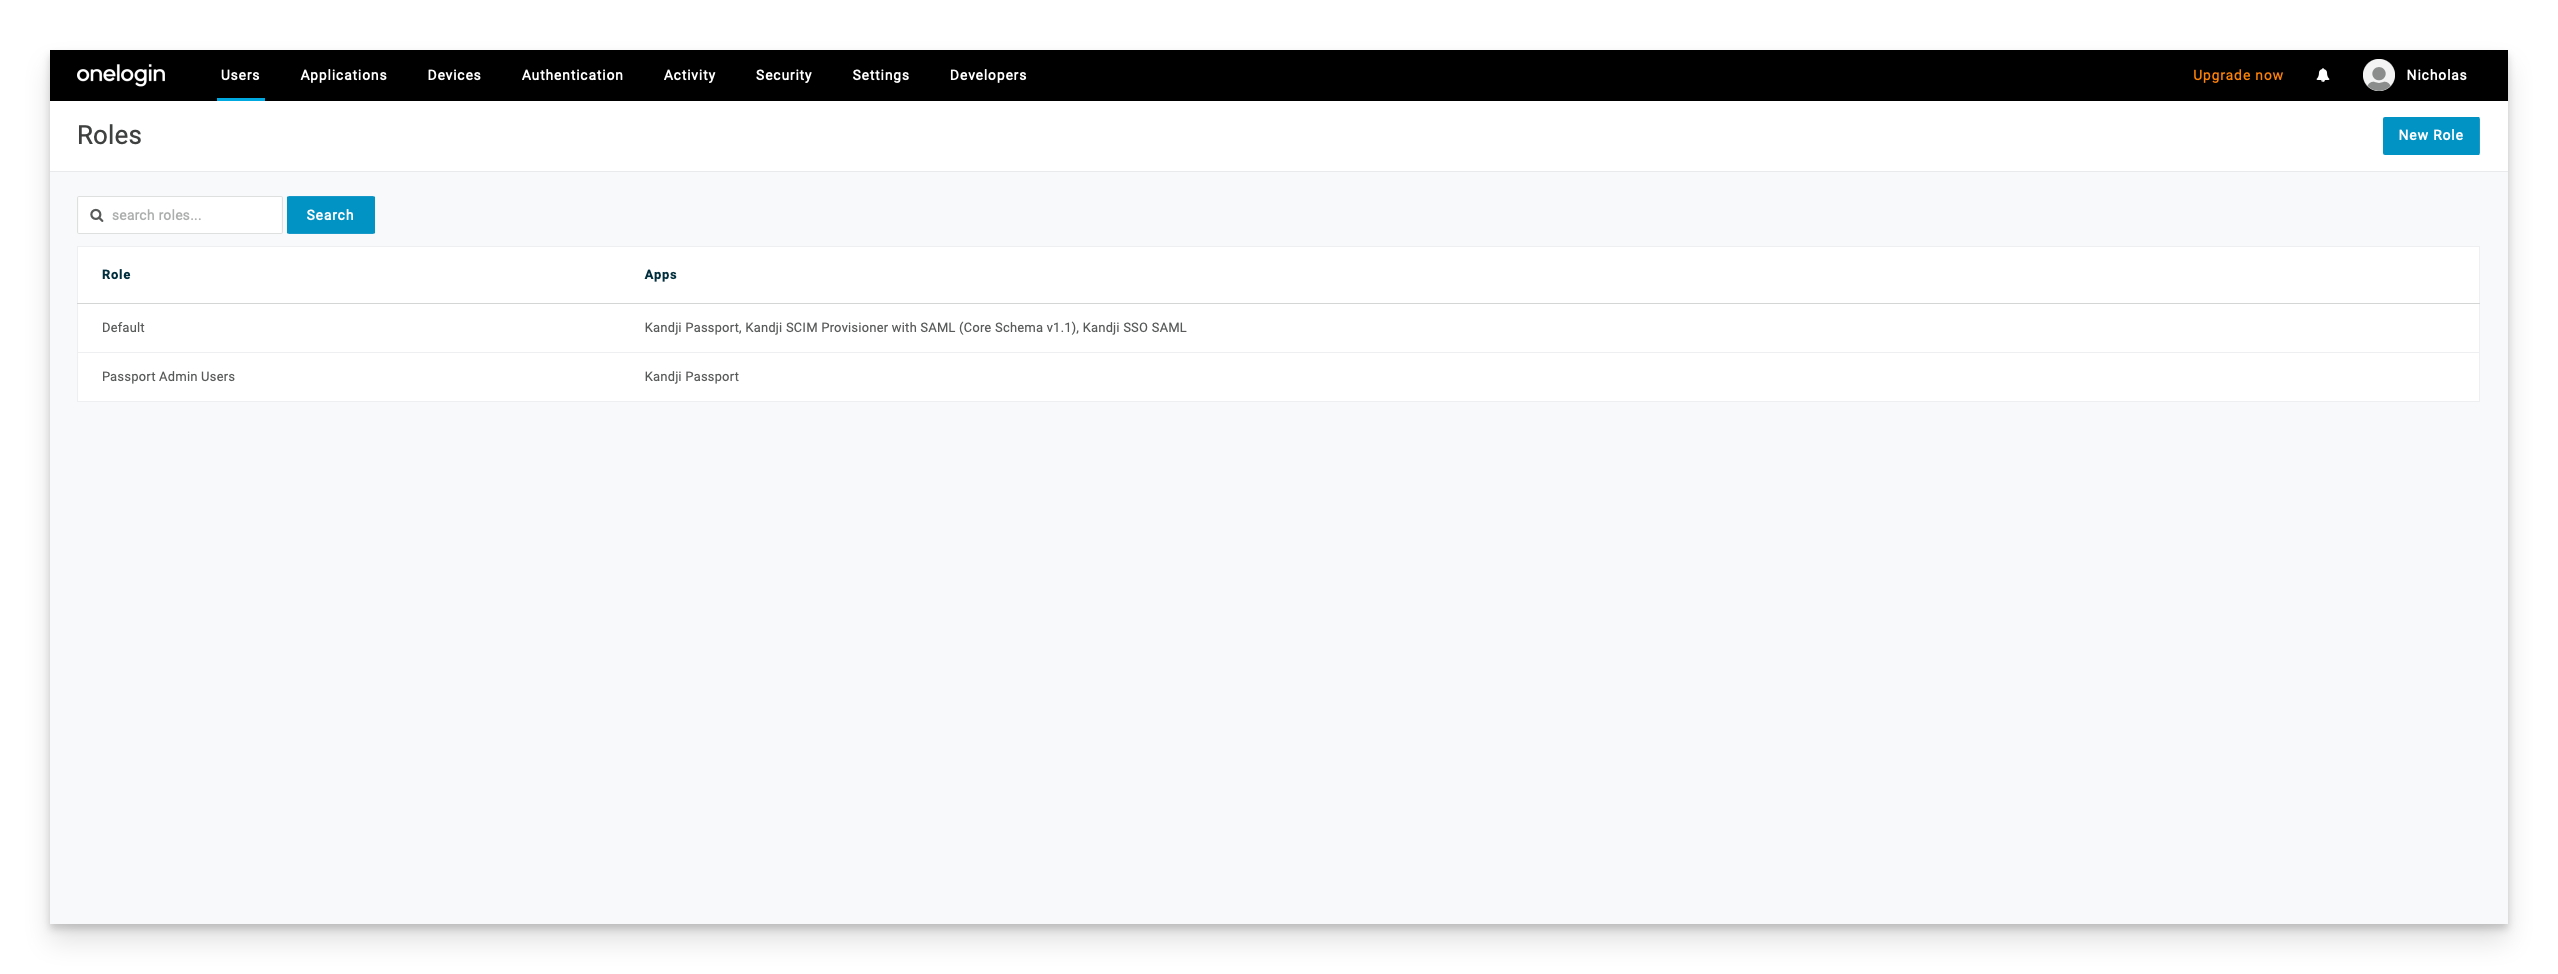
Select New Role on the top right of the screen, and name your role. (You will want to make sure your role name matches the IDP group name that you are using in your Kandji Passport configuration). In this example, I used Passport Admin Users. Finally, select your Kandji Passport app that you created in OneLogin and click Save, on the top right of the screen.
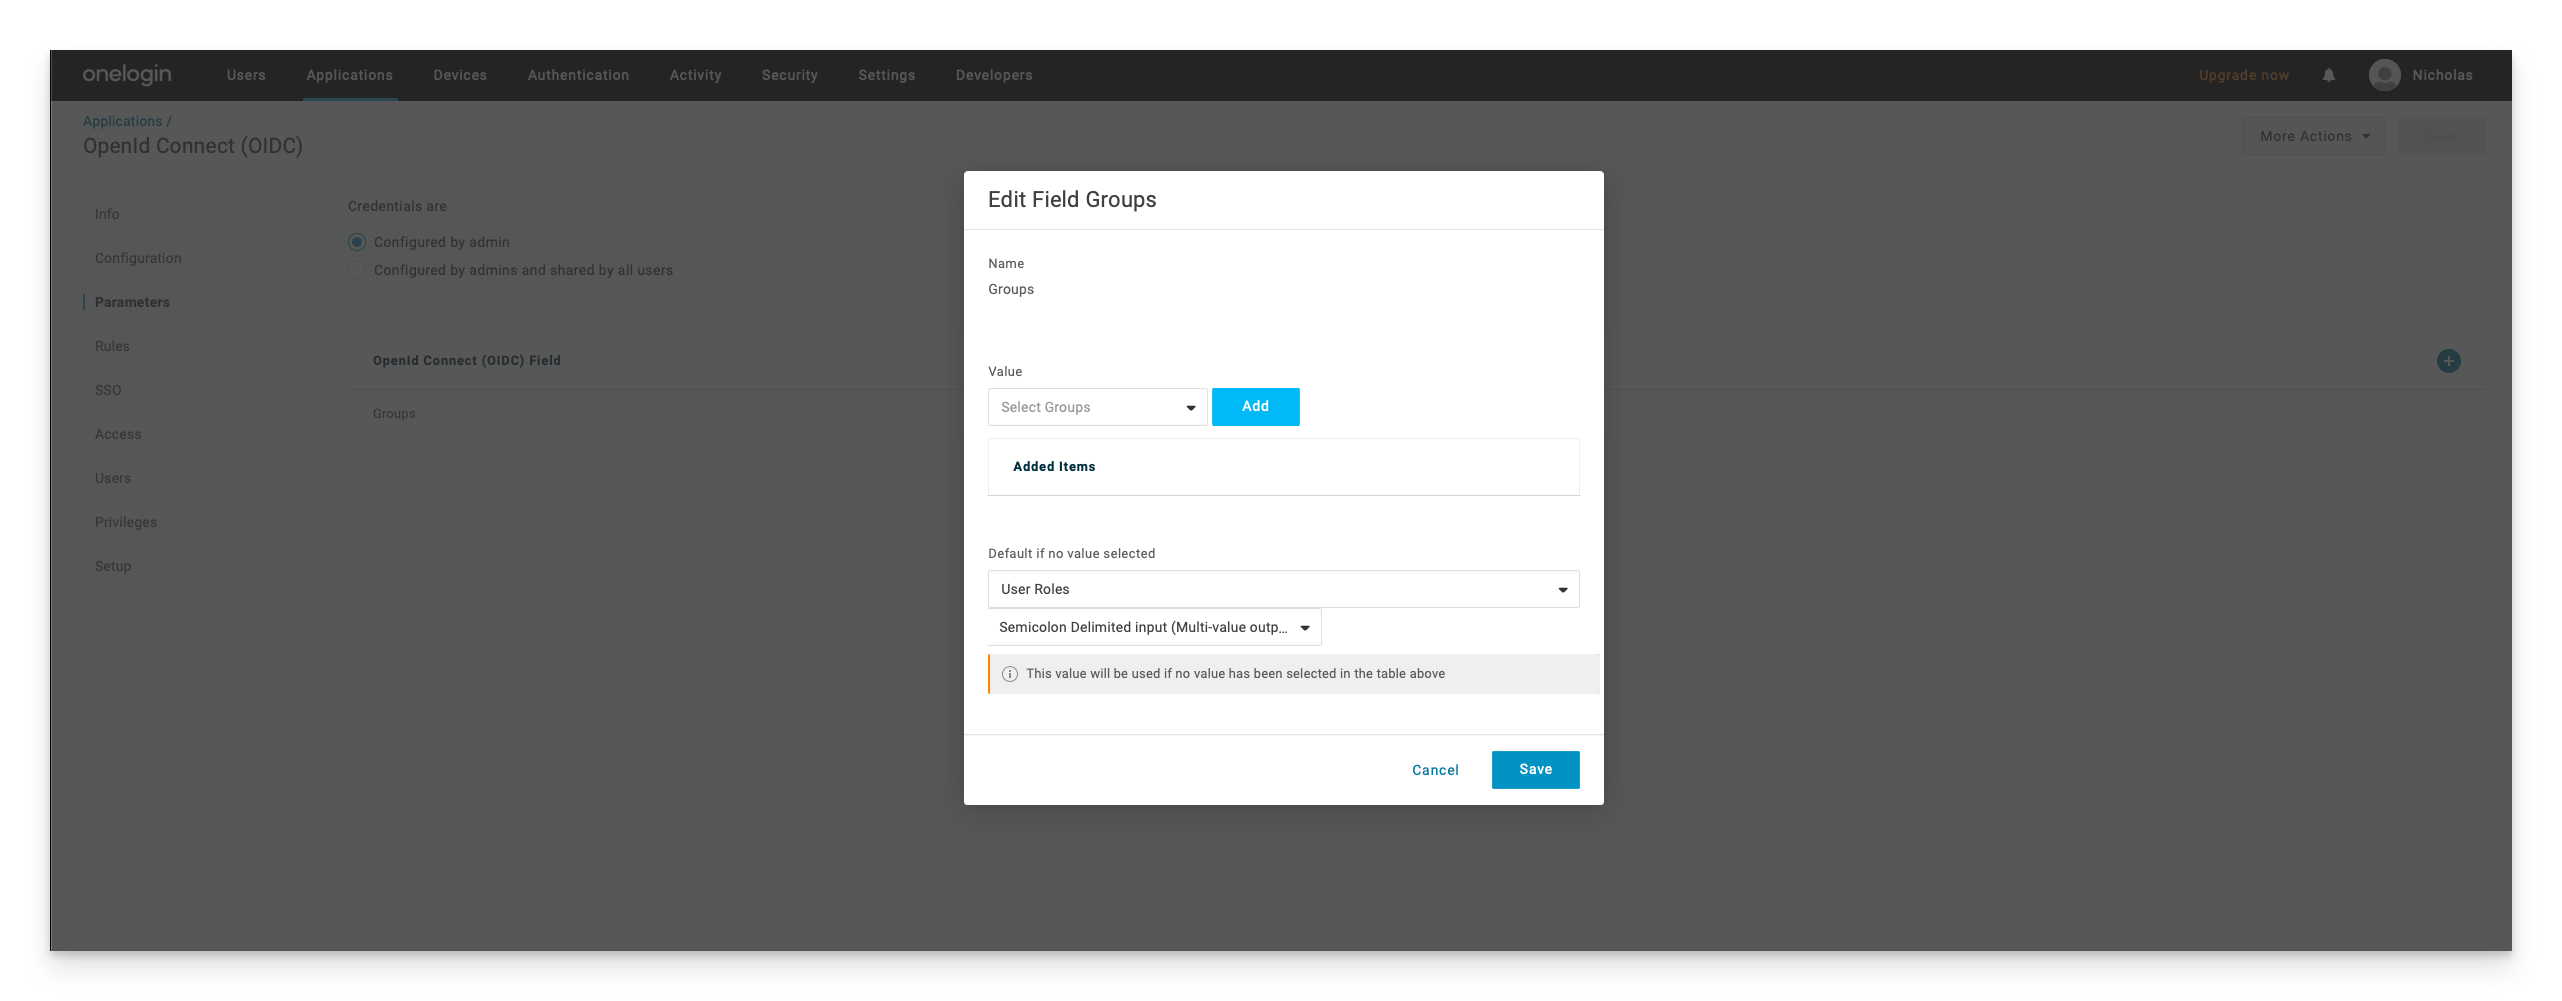
Next, navigate to the Kandji Passport app that you created in OneLogin. Select the parameters link and click on the Groups field.
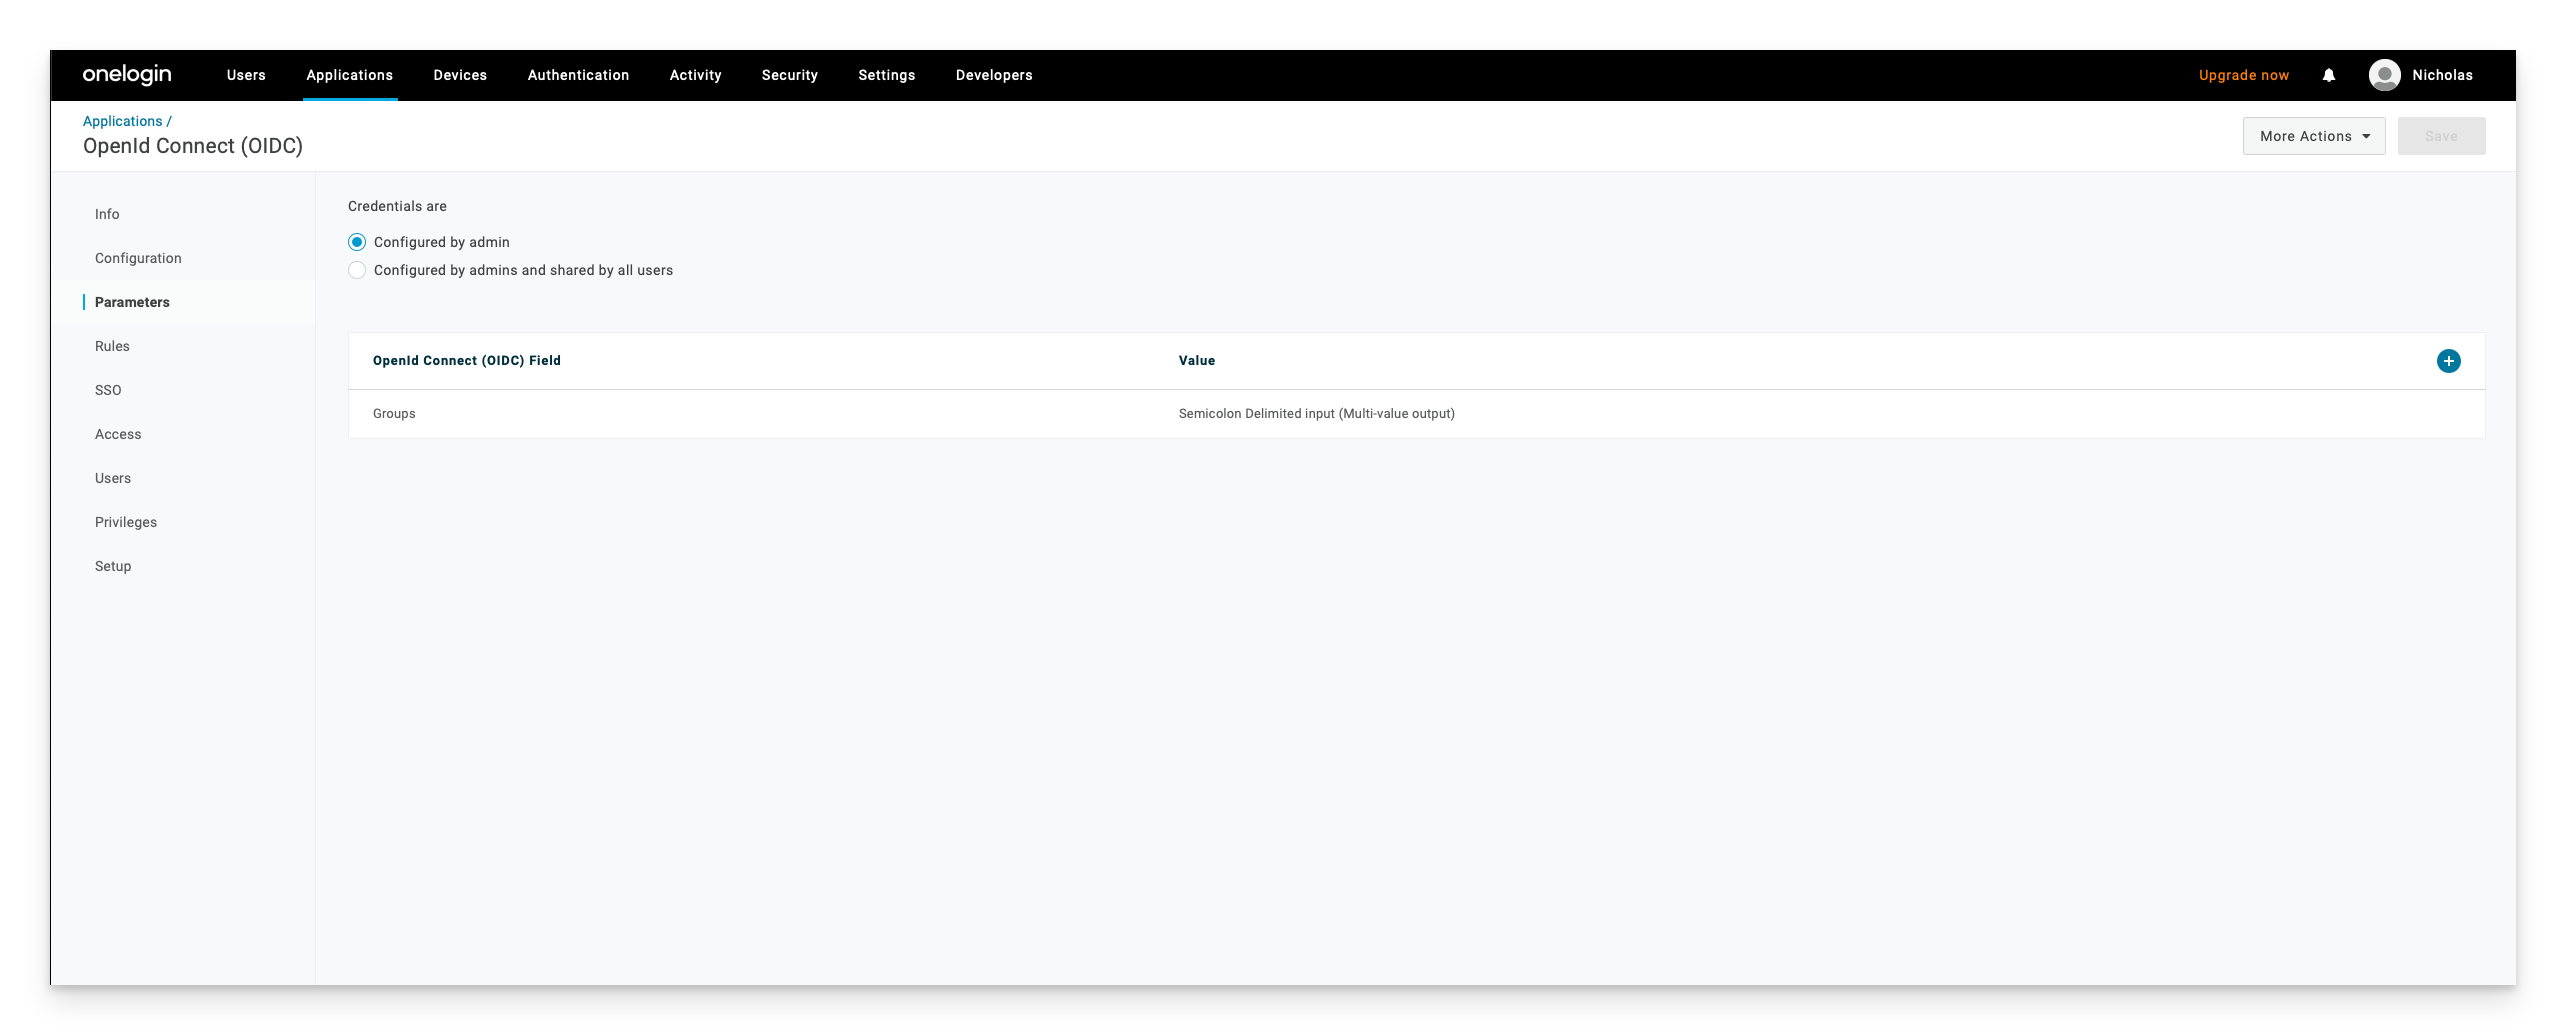
In the “Default if no value selected” section, select User Roles from the drop down list and make sure Semicolon Delimited Input is selected. Click Save
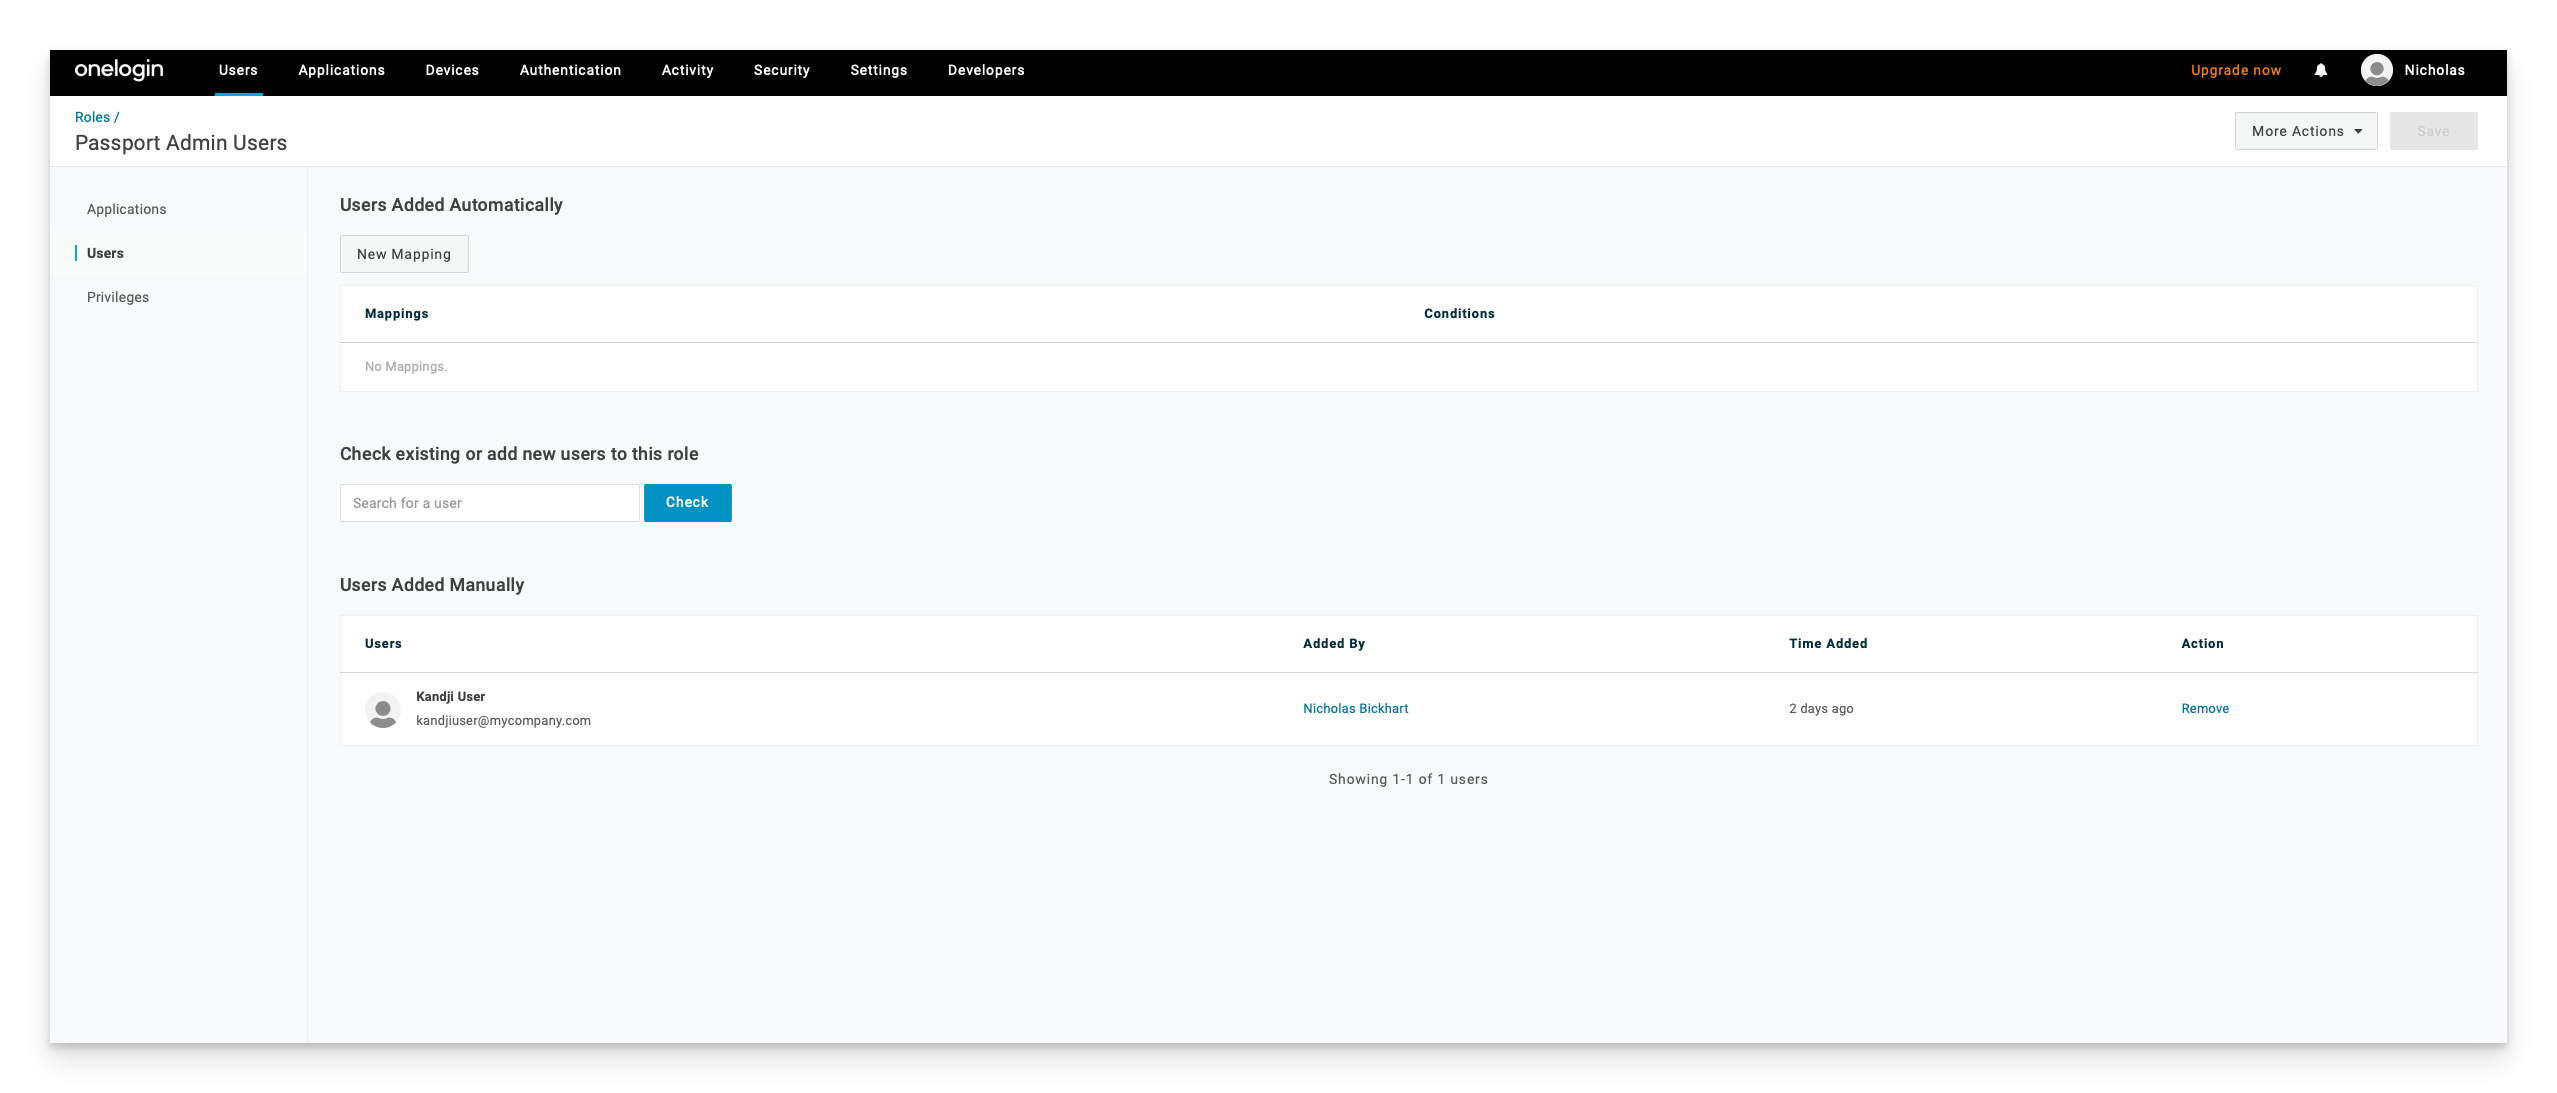
Finally, make sure your users are part of the role that you are creating, as well as a member of the Kandji Passport application in OneLogin. To add a user to a role, you will need to select Users>Roles>Passport Admin Users in my example, select the Users link, search for the user, click the blue check box, click the Add to Role link, and then click Save at the top right of the page.
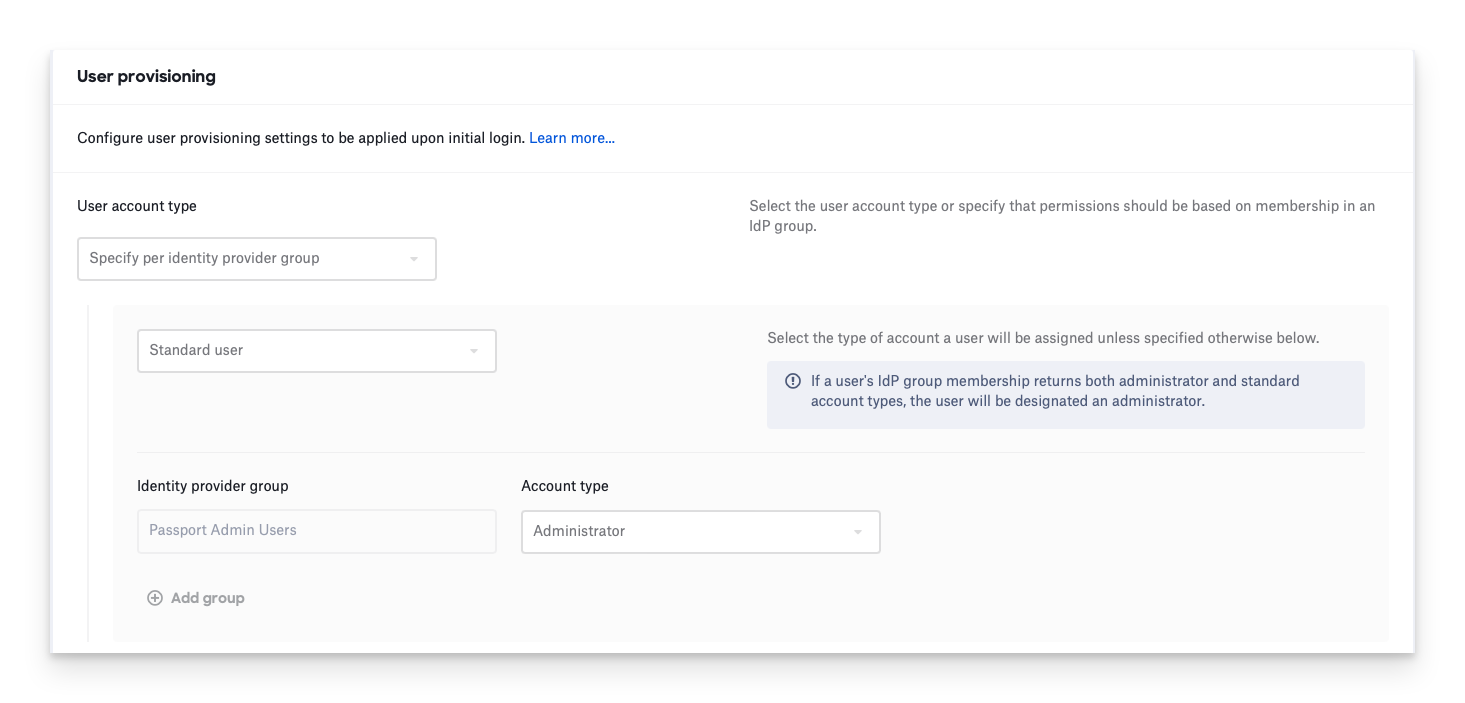
This is what your passport library item should look like if you are using the role, created above, to create admin users.
With the OneLogin configuration complete, go to thse Kandji web app to configure the Passport library item.
Troubleshooting Issues with Passport & OneLogin
If you experience any issues with Passport & OneLogin, read through our Passport Troubleshooting with OneLogin article for additional information.