Overview
Once you setup a Google Workspace, Entra ID (formerly Azure AD) or SCIM integration, users will automatically be imported into Kandji every 4 hours. Once imported, users can be assigned to devices, allowing you to view all devices assigned to a specific user. You can find more information about syncing users from Google Workspace or Azure Active Directory here.
Prerequisites
Before you can assign users, you must configure a directory integration to import users for assignment.
Assigning a User to a Device
Click Devices in the navigation menu.
Click the device you wish to assign to a user.
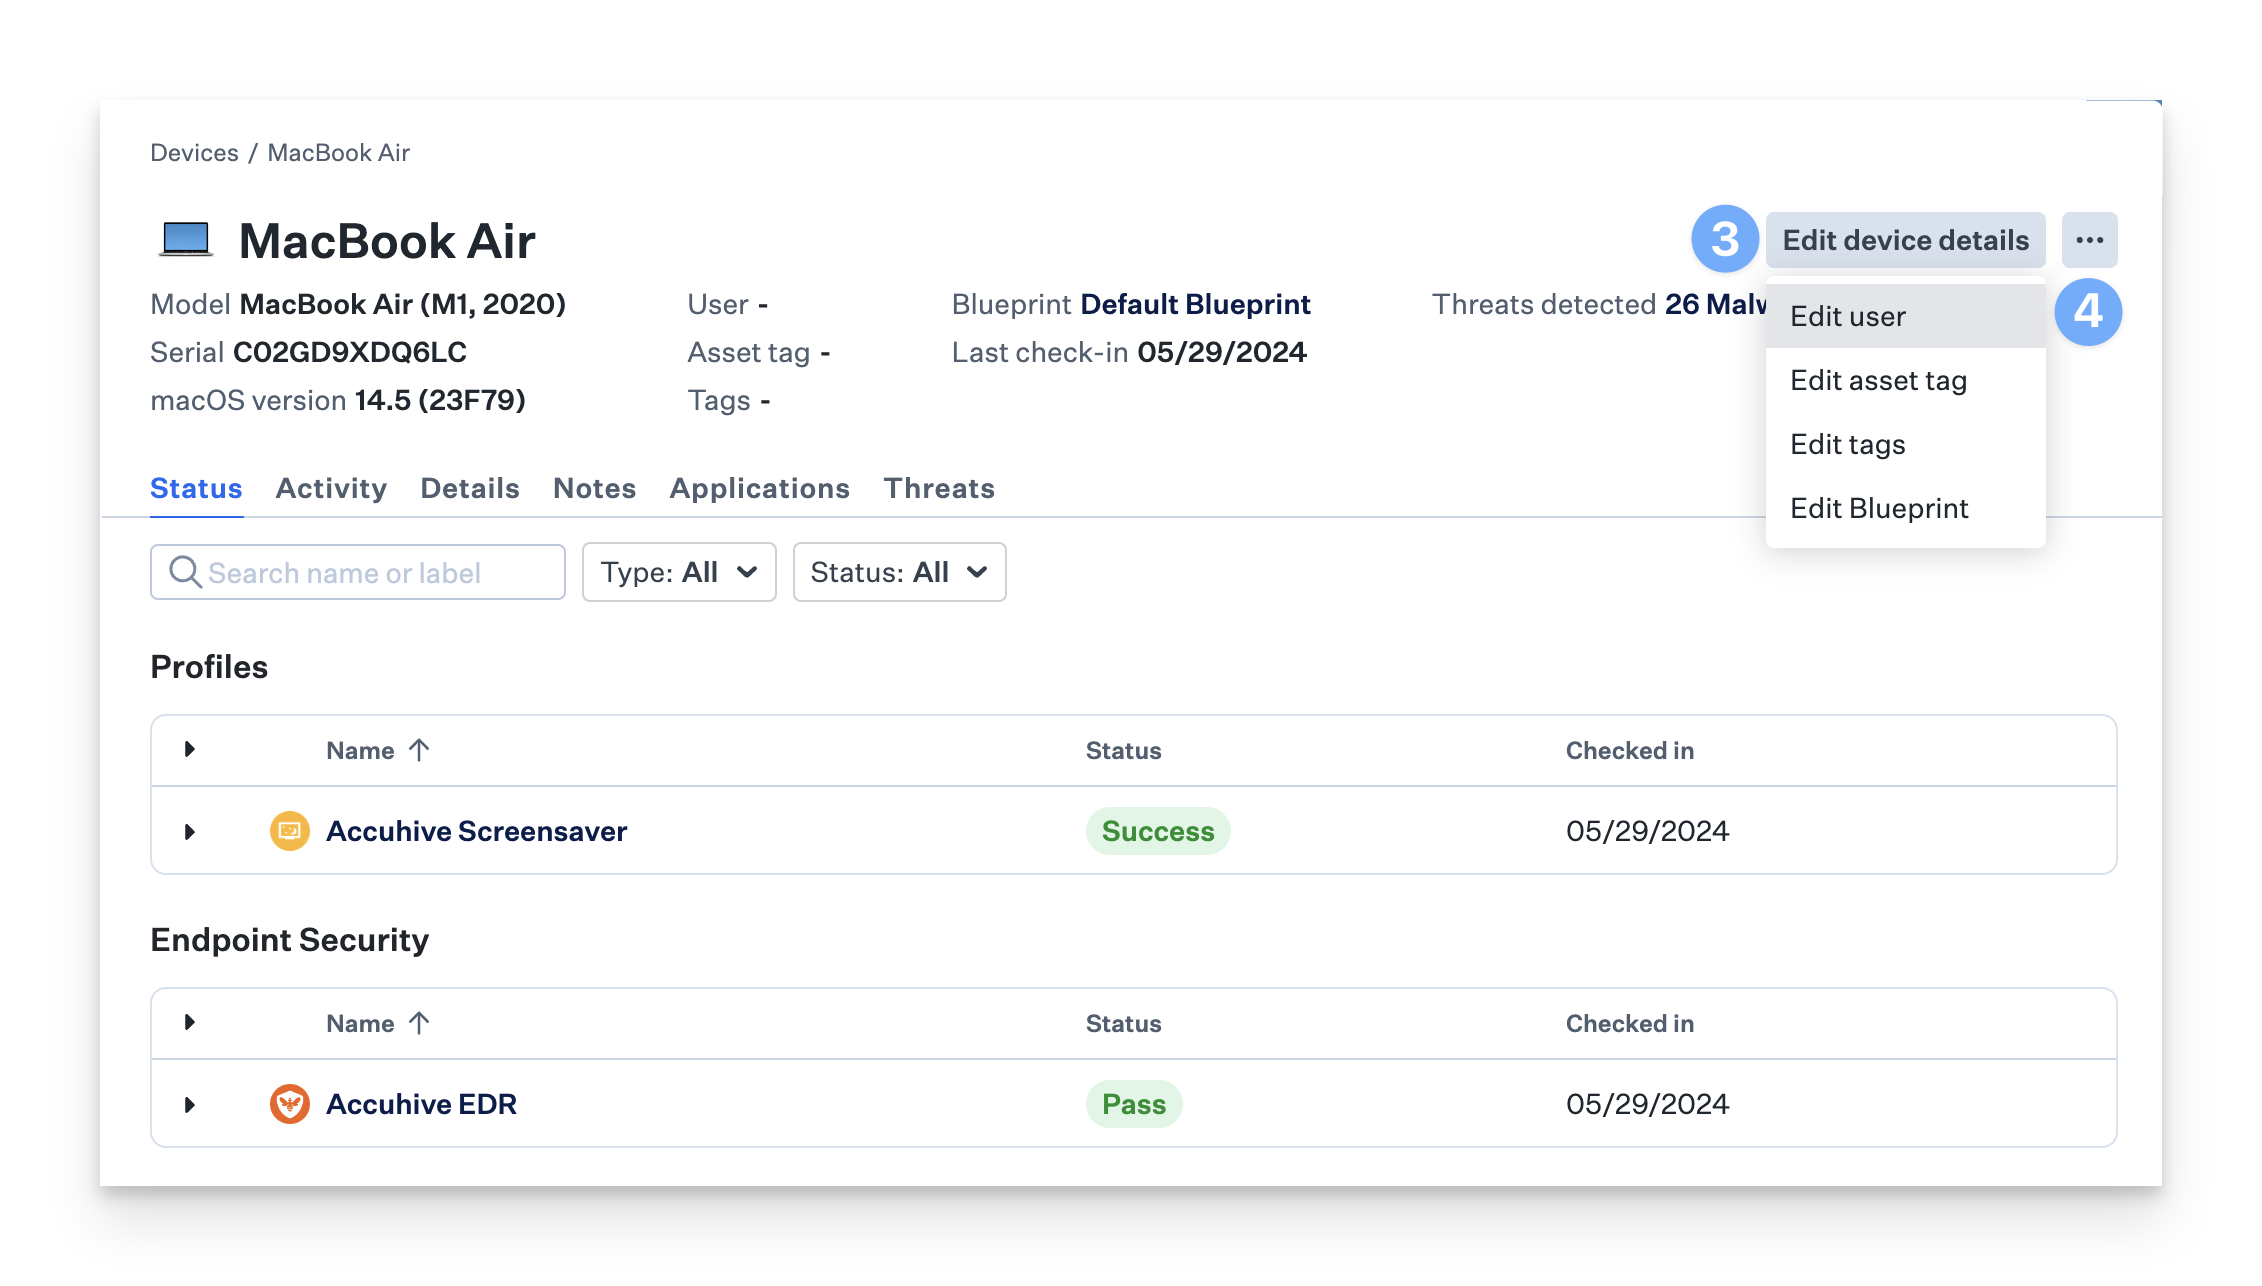
Click on Edit device details.
Click on Edit user.
Type the name you wish to assign to this device and click the Assign button.
The device will now display the user's name inside the user field.
Viewing devices assigned to a user
Click Users in the navigation menu.
Click on the User in the list to view devices assigned to them.
For more detailed information about taking action on devices, see the Devices section of our Knowledge Base.
Remove an assigned user from a device
Login to Kandji and click Devices in the navigation menu.
Click the device for which you wish to remove the user assignment.
Click on Edit device details.
Click on Edit user.
Click on the Unassign Device.

Considerations
Assigning or unassigning users to devices may result in Library Item assignment changes if you are leveraging user group-based Assignment Rules.
Assigning users to devices may result in changes to profiles on the device if you are leveraging Global Variables in any profile fields.