This article goes over configuring Passport to use Mac login. If you're using MFA, or want to configure Web Login, please see Configure Passport with Microsoft Entra ID - Web Login.
Before you begin
You will need access to a Microsoft Entra ID admin user account to grant the Passport app the proper permissions.
Create the App Registration
Sign in to the Microsoft Entra admin center using a Global Administrator account.
Open the portal menu and then select Identity.
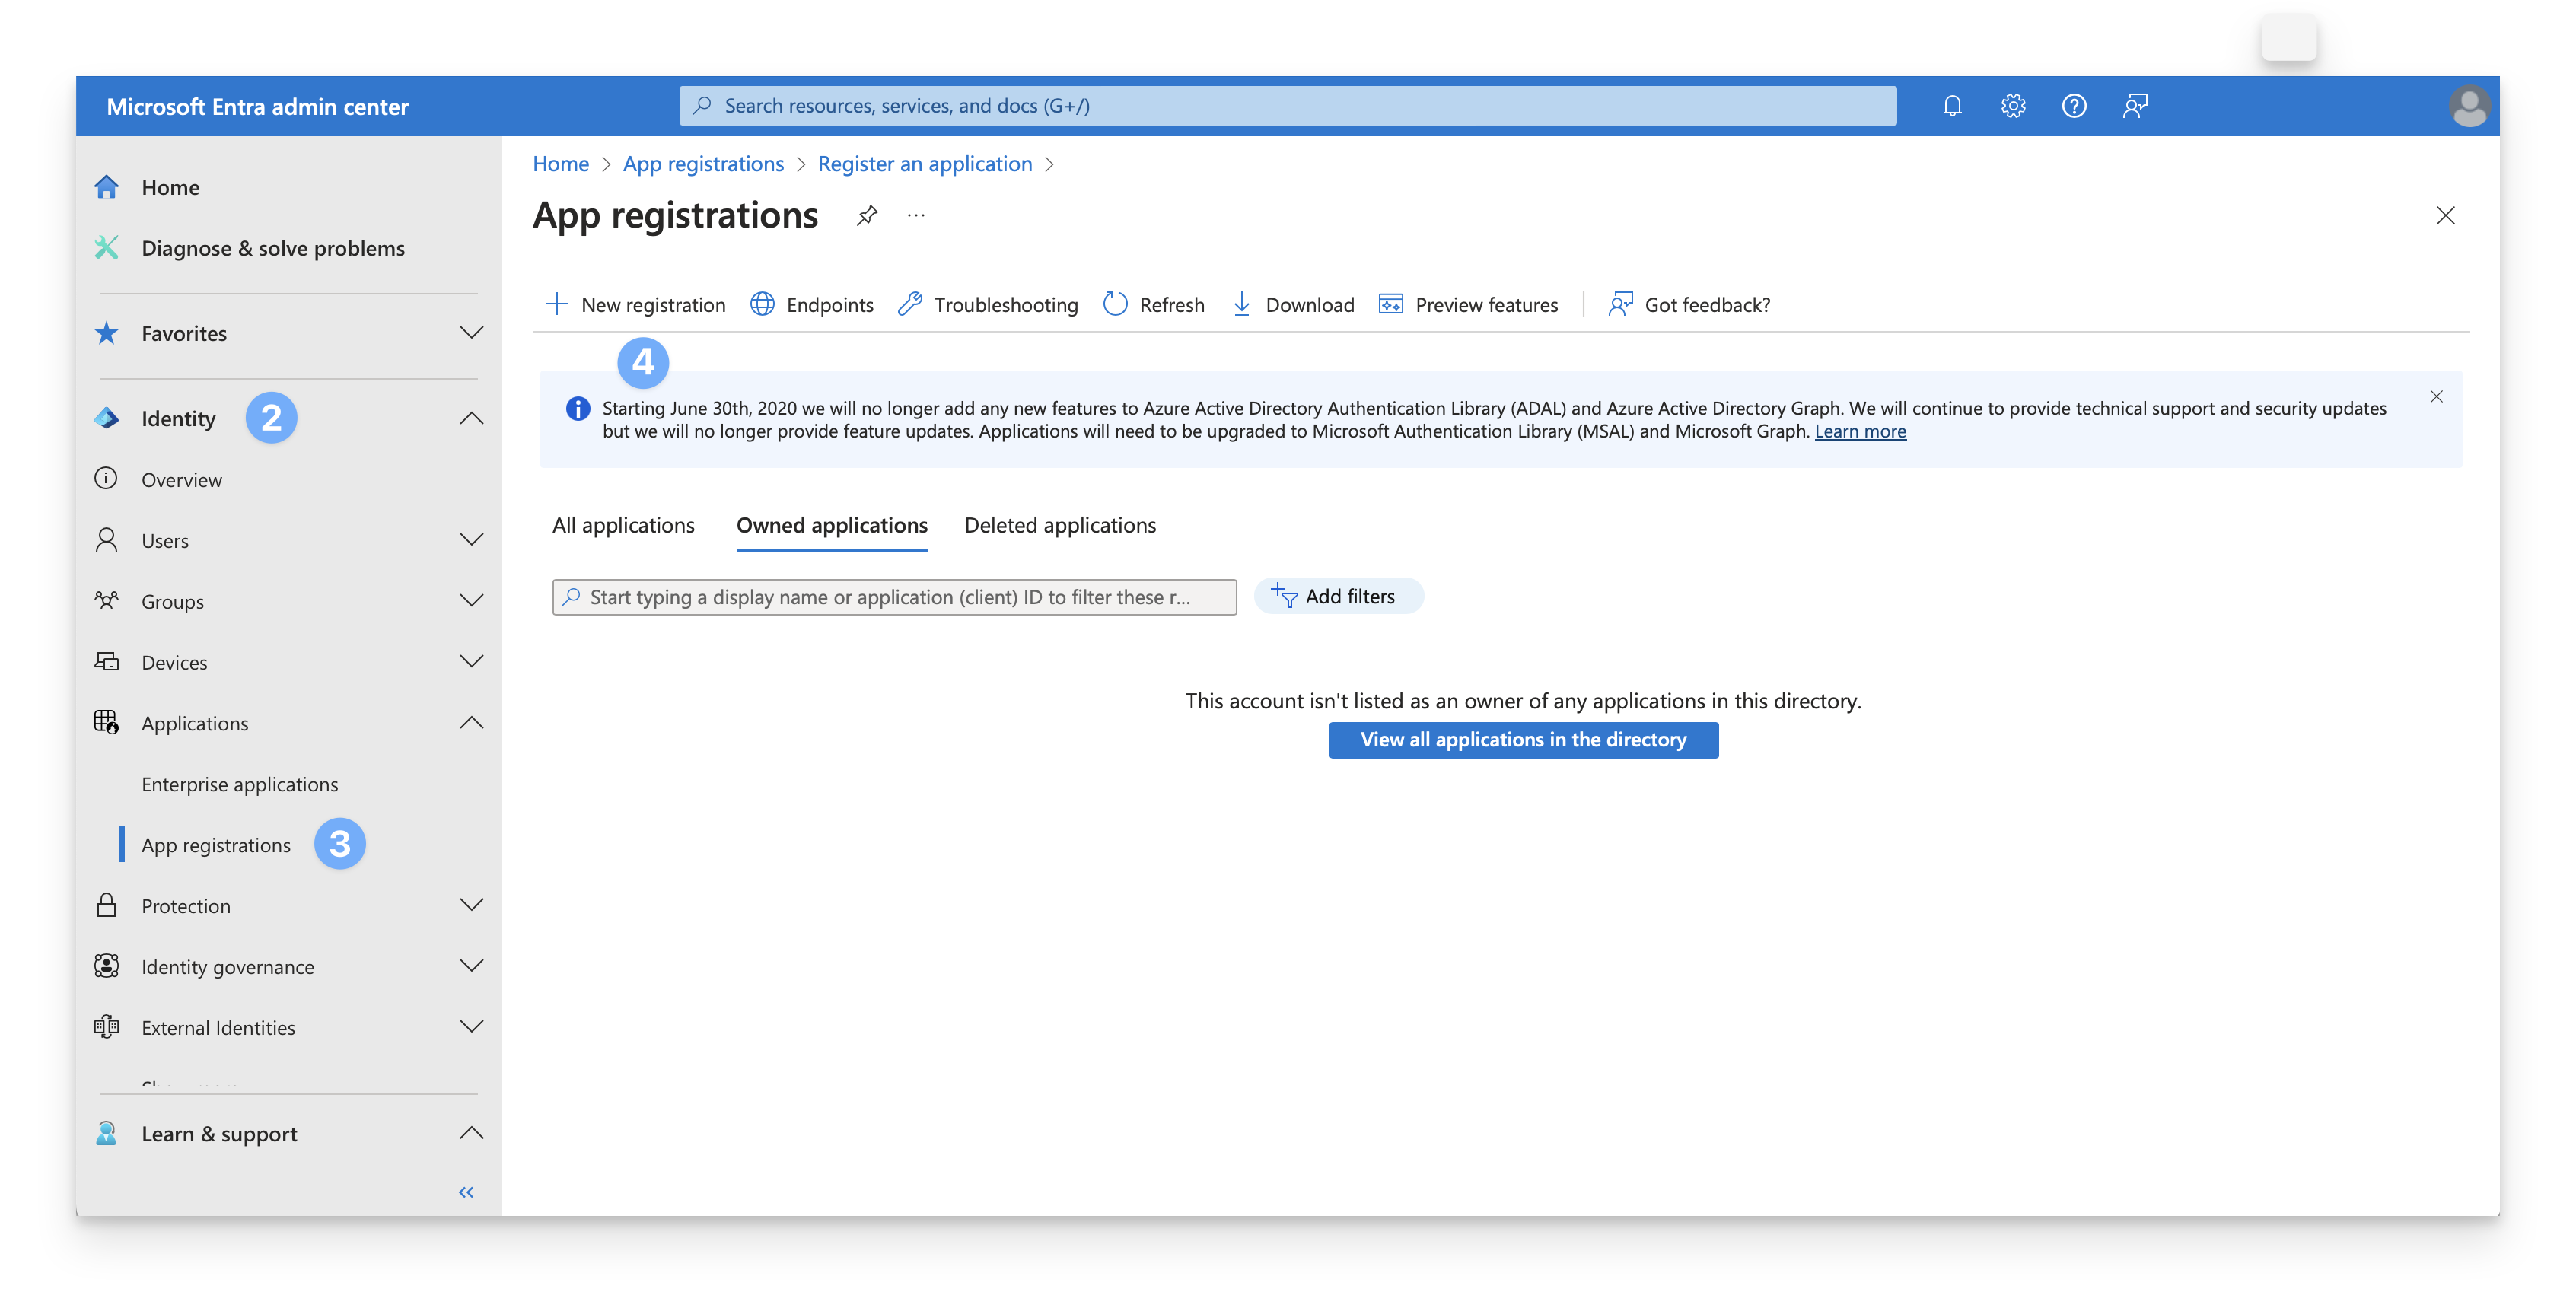
On the Identity menu, under Applications, select App registrations.
On the App registrations page, select + New registration on the menu.
On the register an application dialog, enter a name for the new application (such as Kandji Passport Mac Login).
Choose Accounts in this organizational directory only.
In the Redirect URI section, in the Select a platform drop-down, choose Web.
In the URI field, enter the following, https://localhost.redirect.
Click Register.

Open a secure text document where the values for this OIDC app can be temporarily stored. You will need these details when you configure the Passport Library Item.
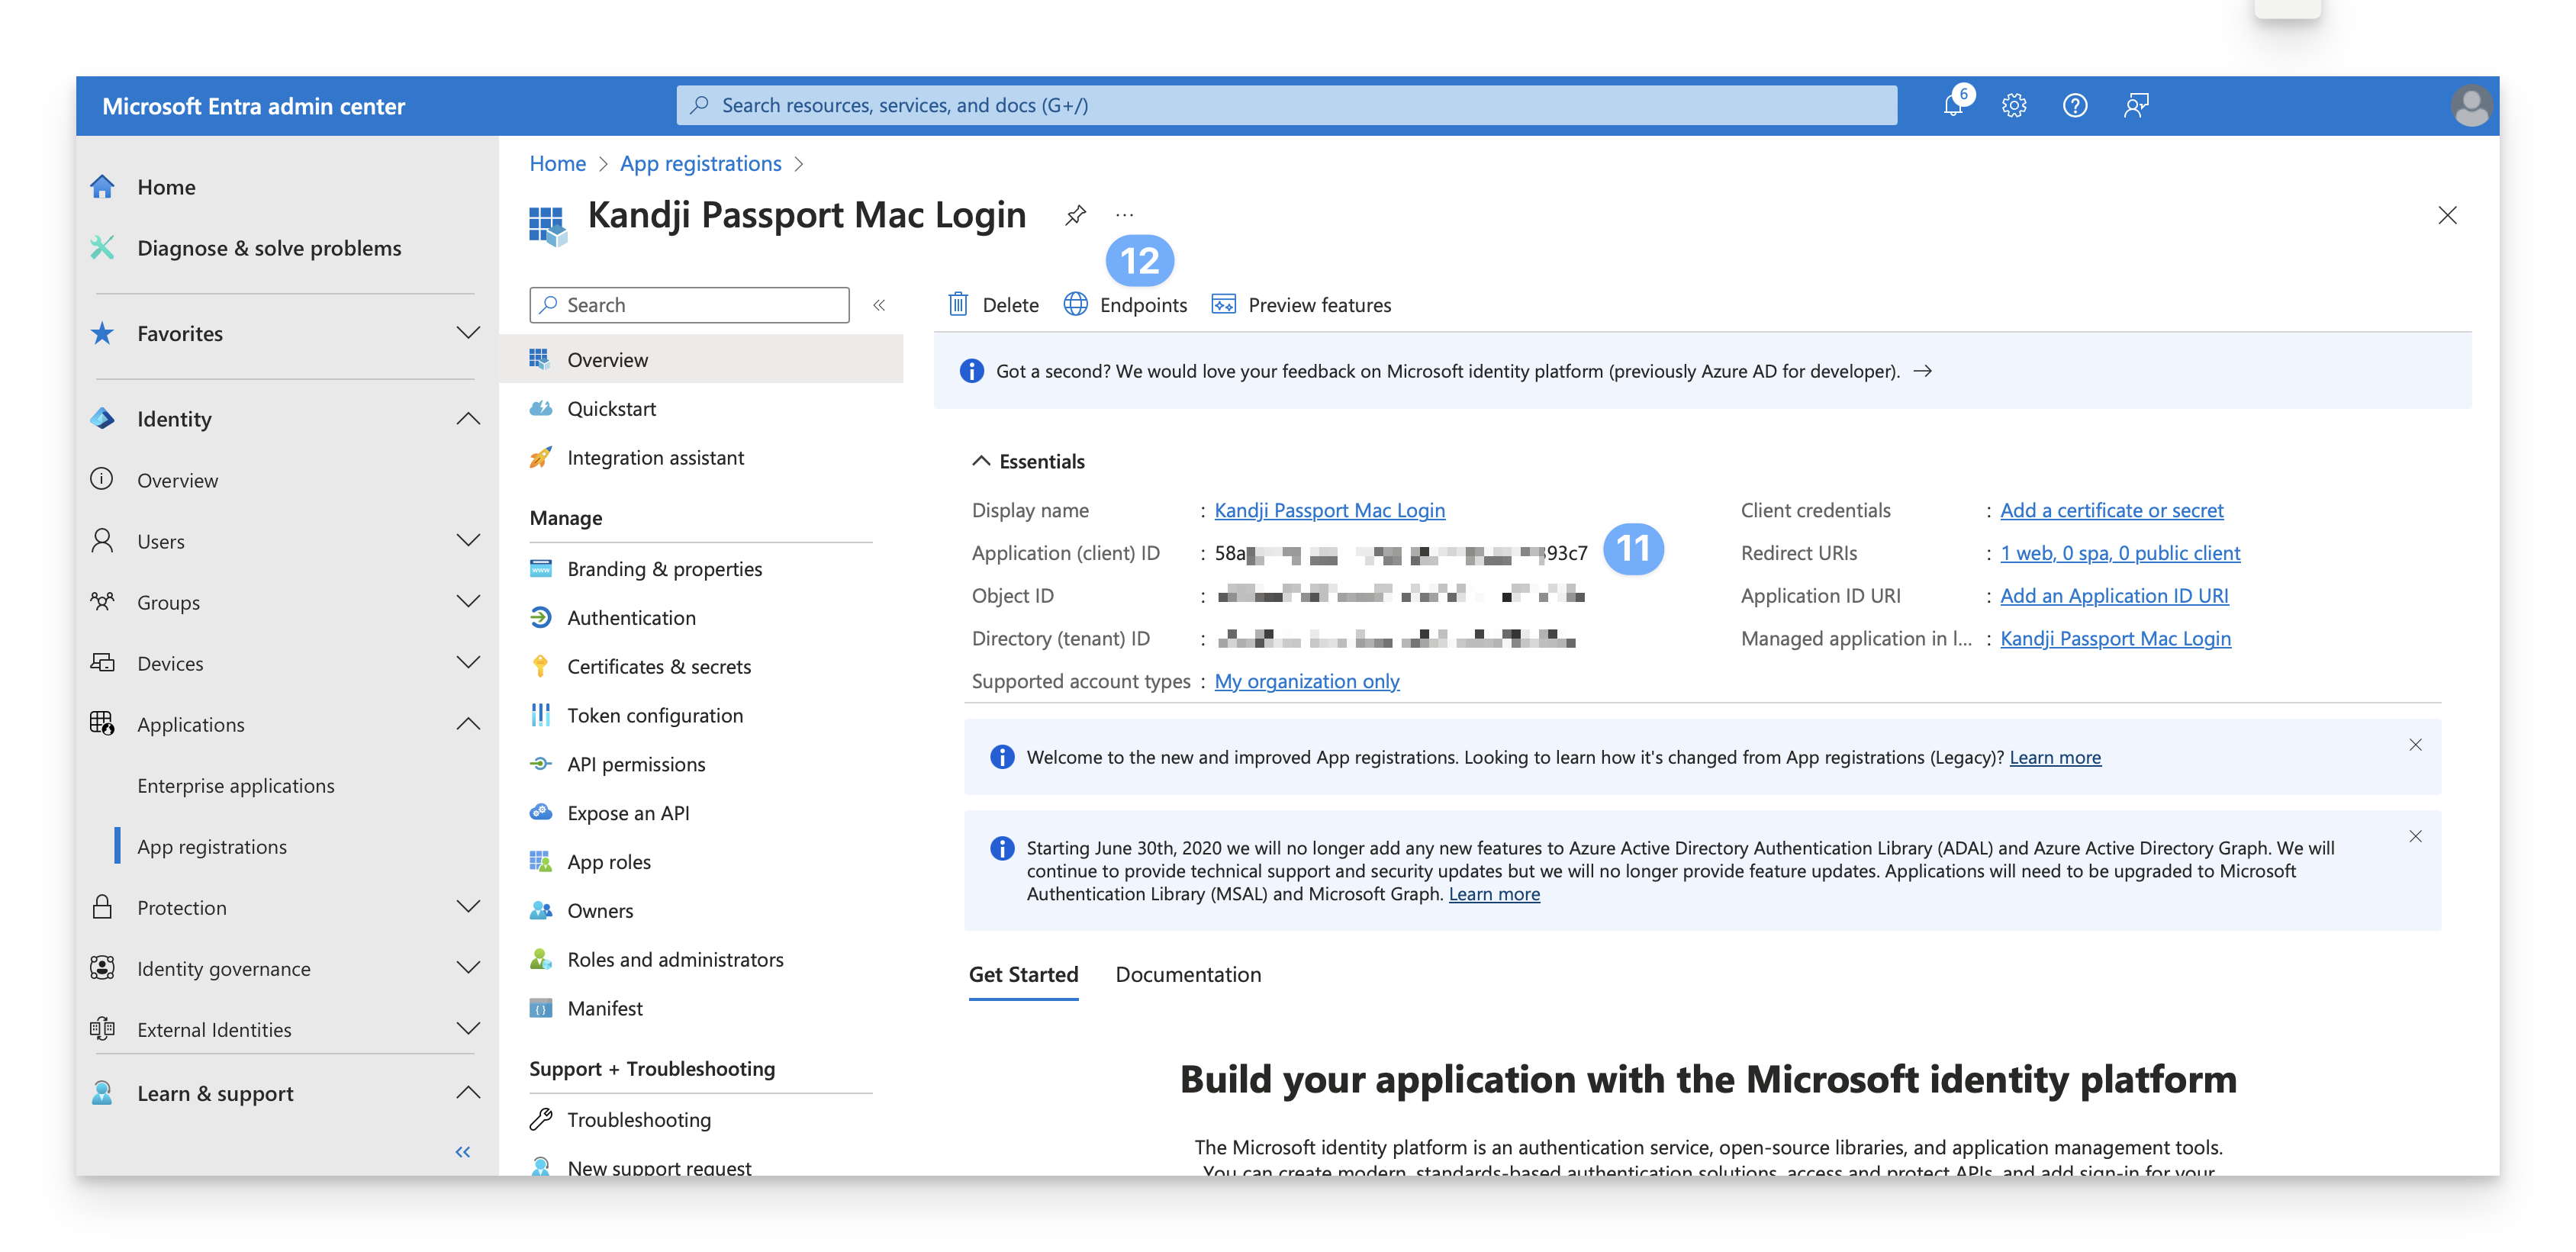
On the Overview page, copy the Application (client) ID to a temporary secure text document.
While still on the Overview page, click Endpoints.
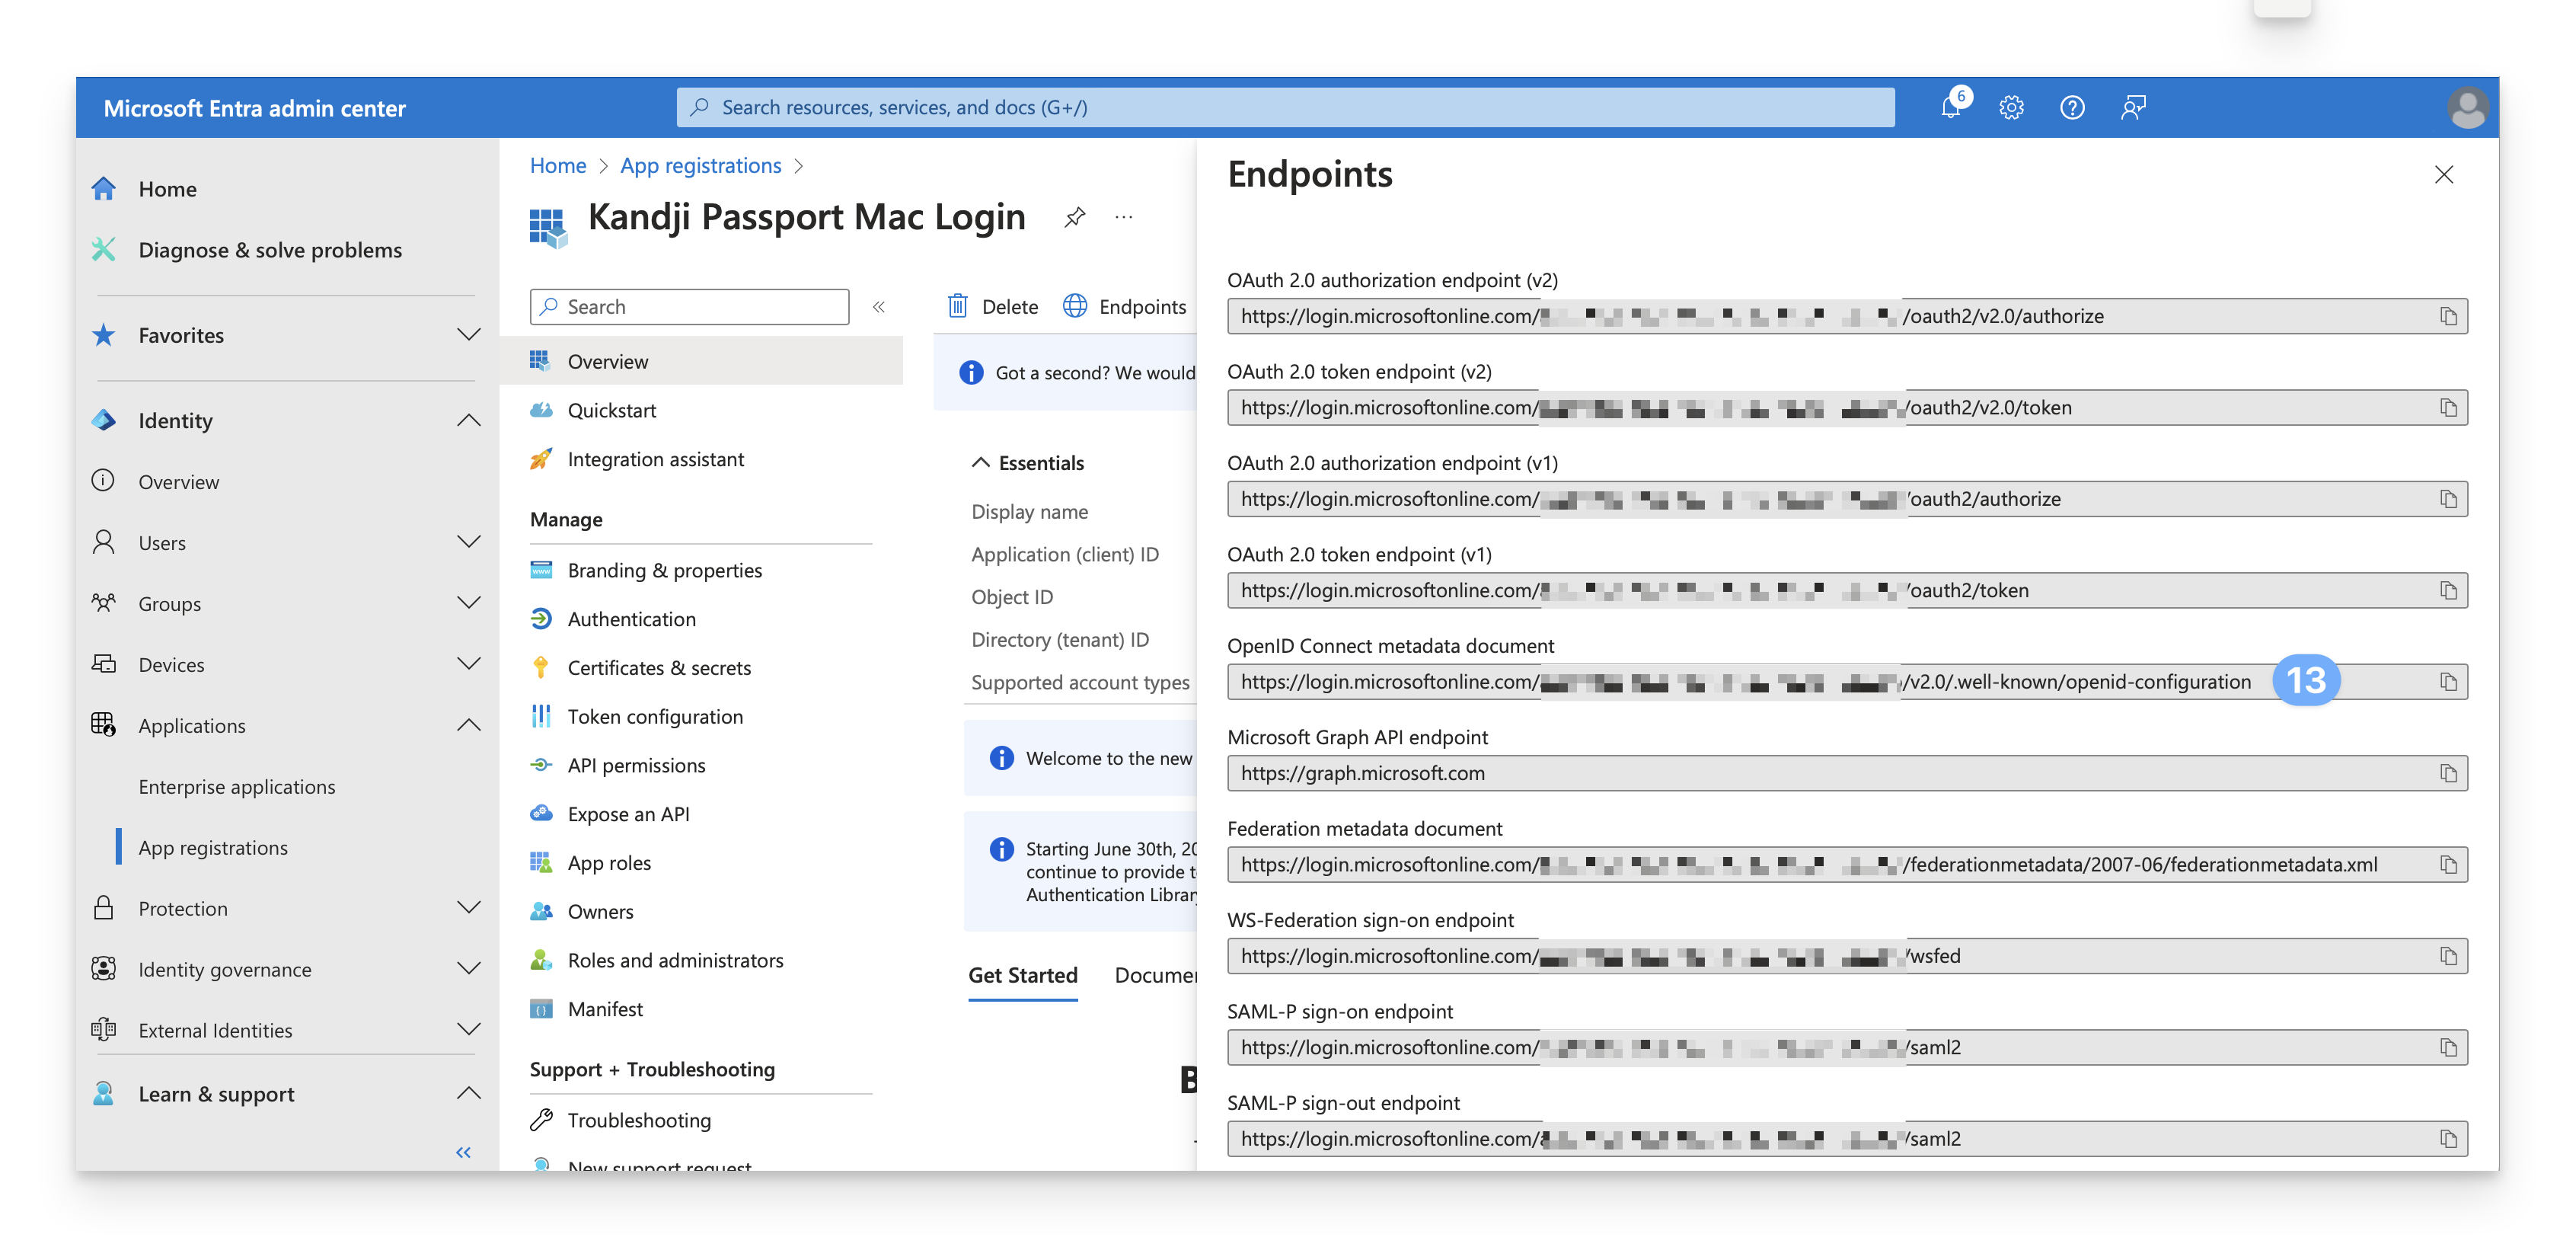
Copy OpenID Connect metadata document (identity provider URL) to a temporary secure text document.
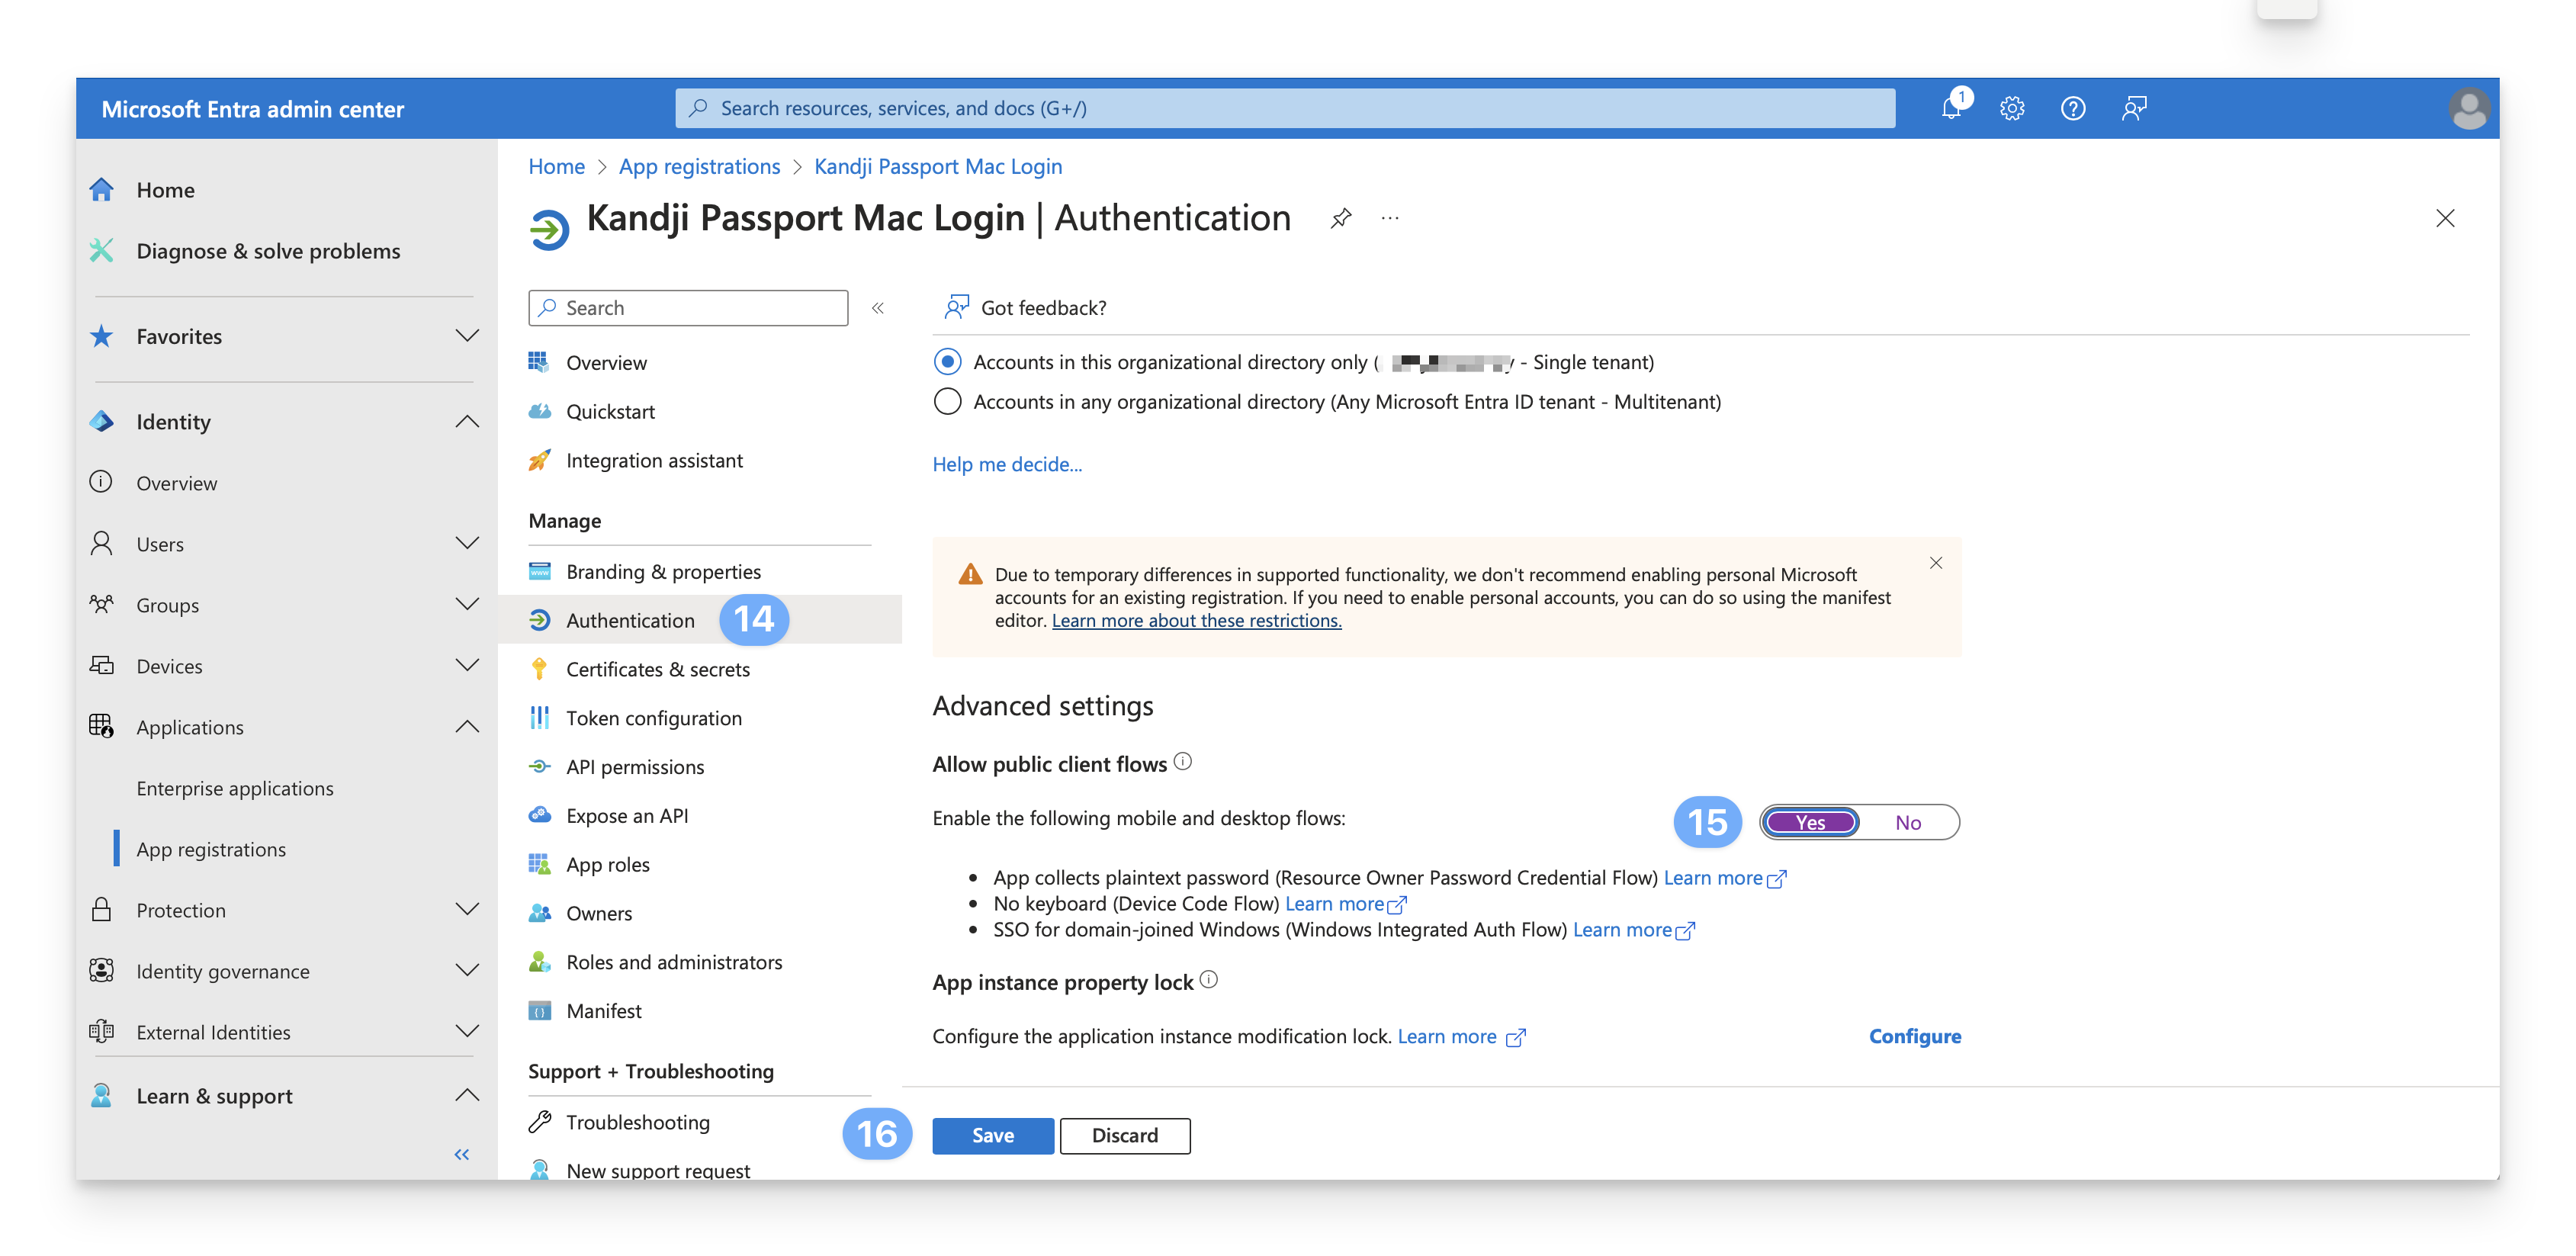
On the left, select Authentication.
Set Enable the following mobile and desktop flows to Yes.
Click Save.
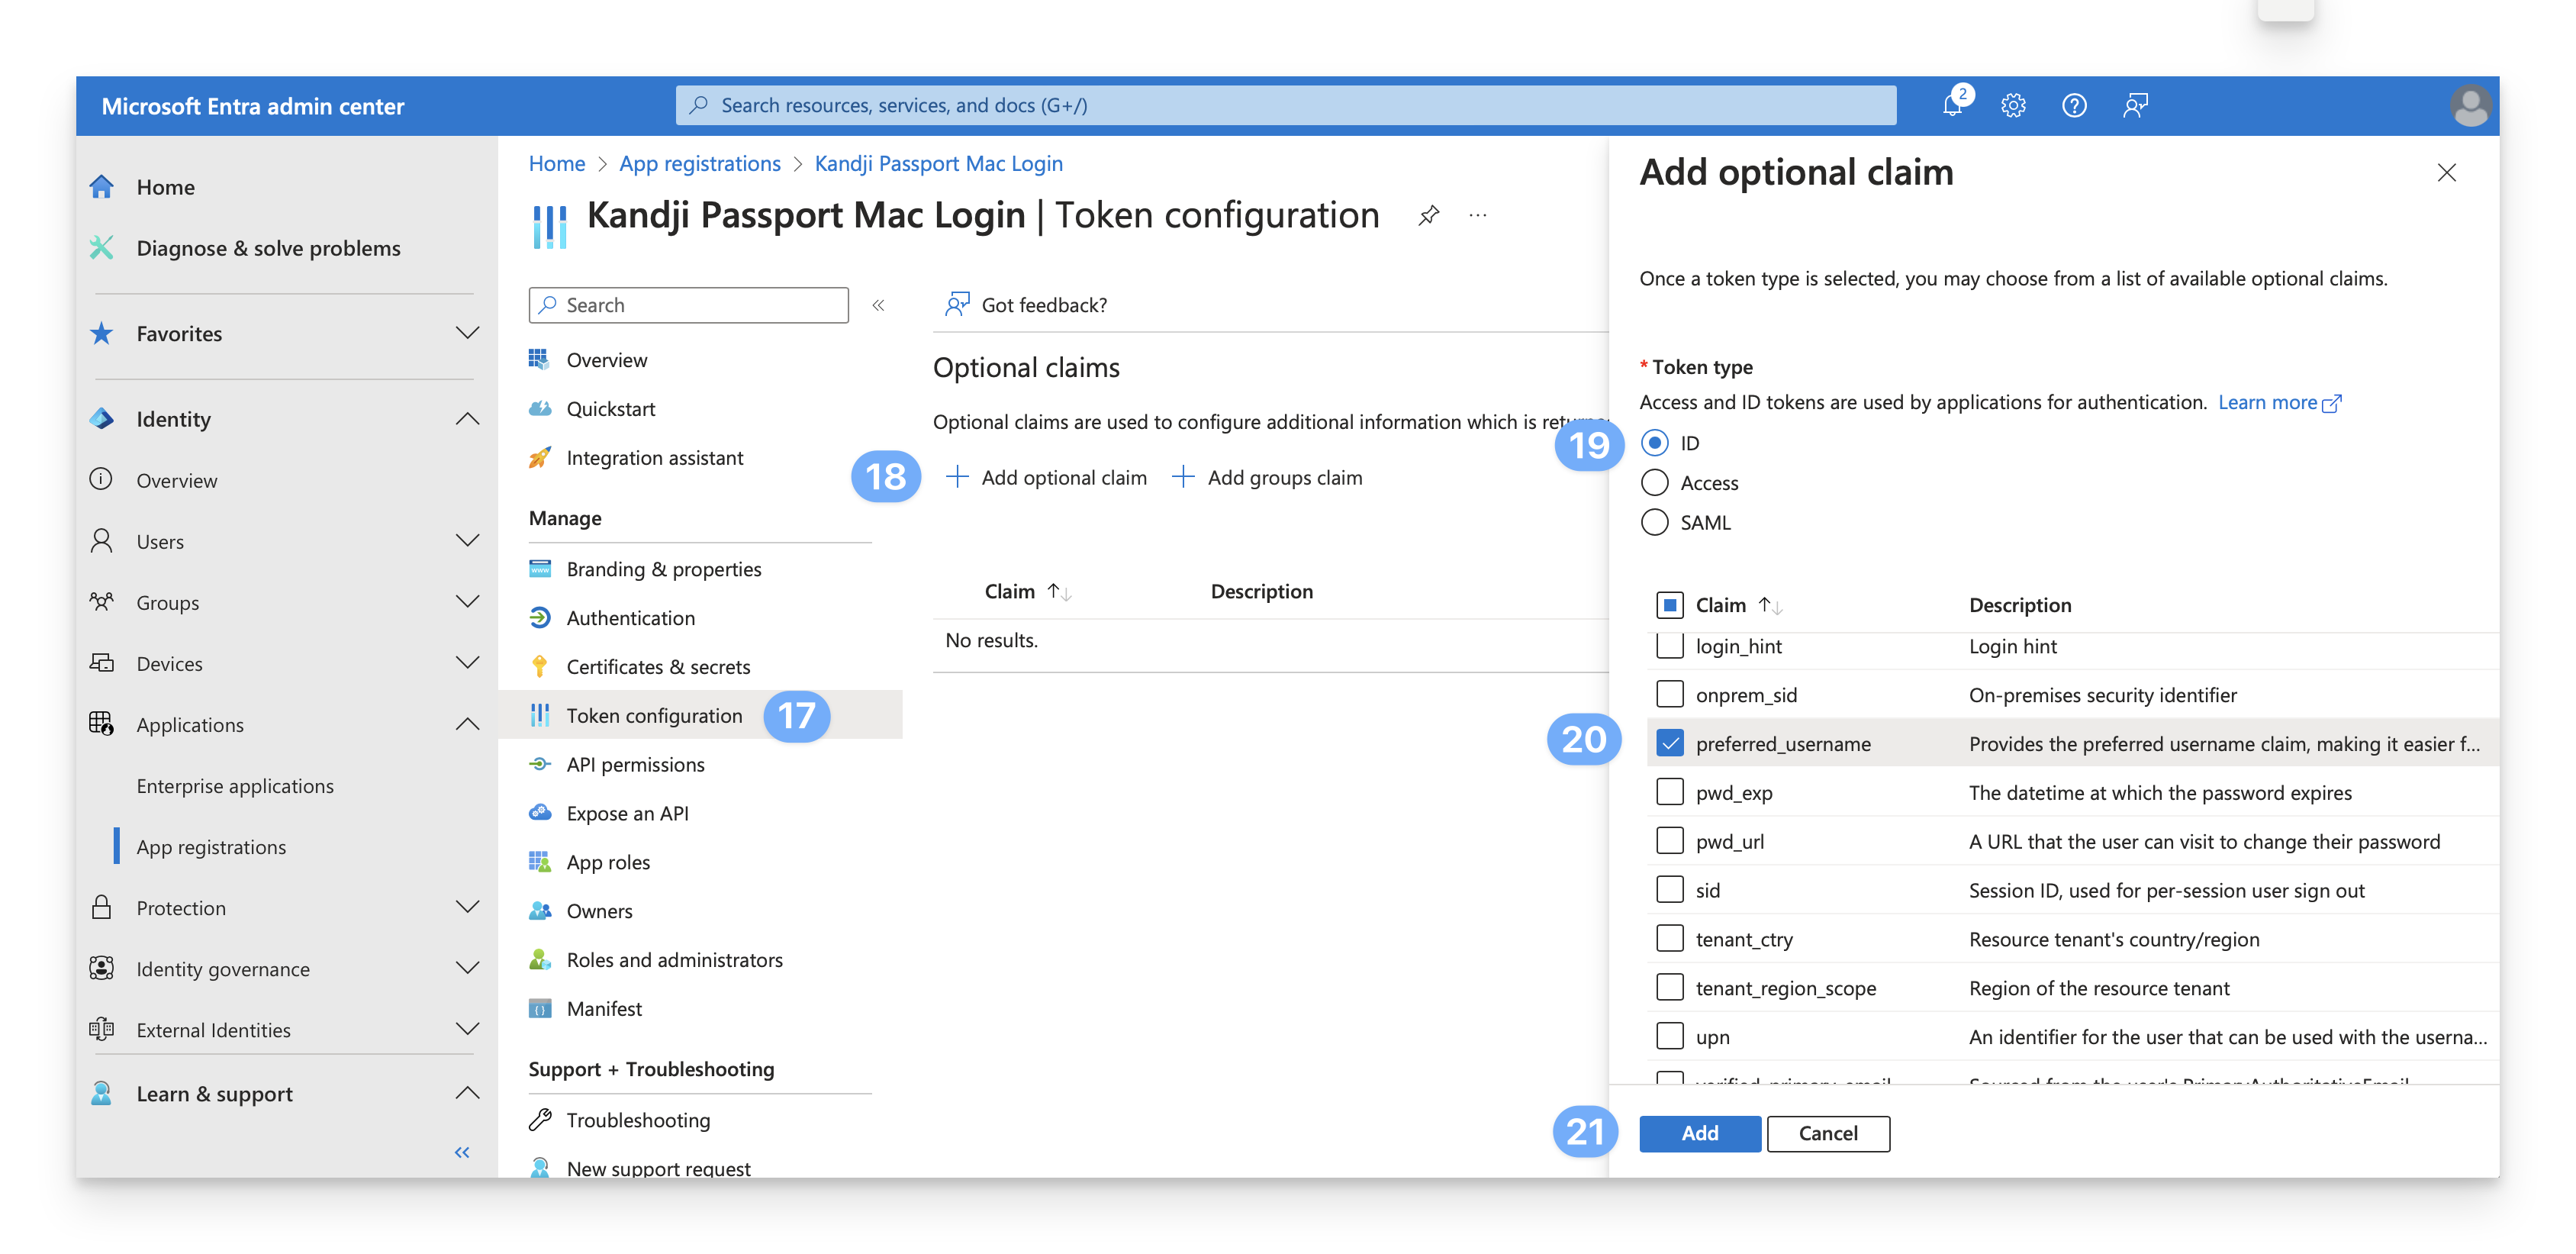
On the left, select Token configuration.
Click Add optional claim.
For the Token type, select ID.
For the Claim, select preferred_username.
Click Add.
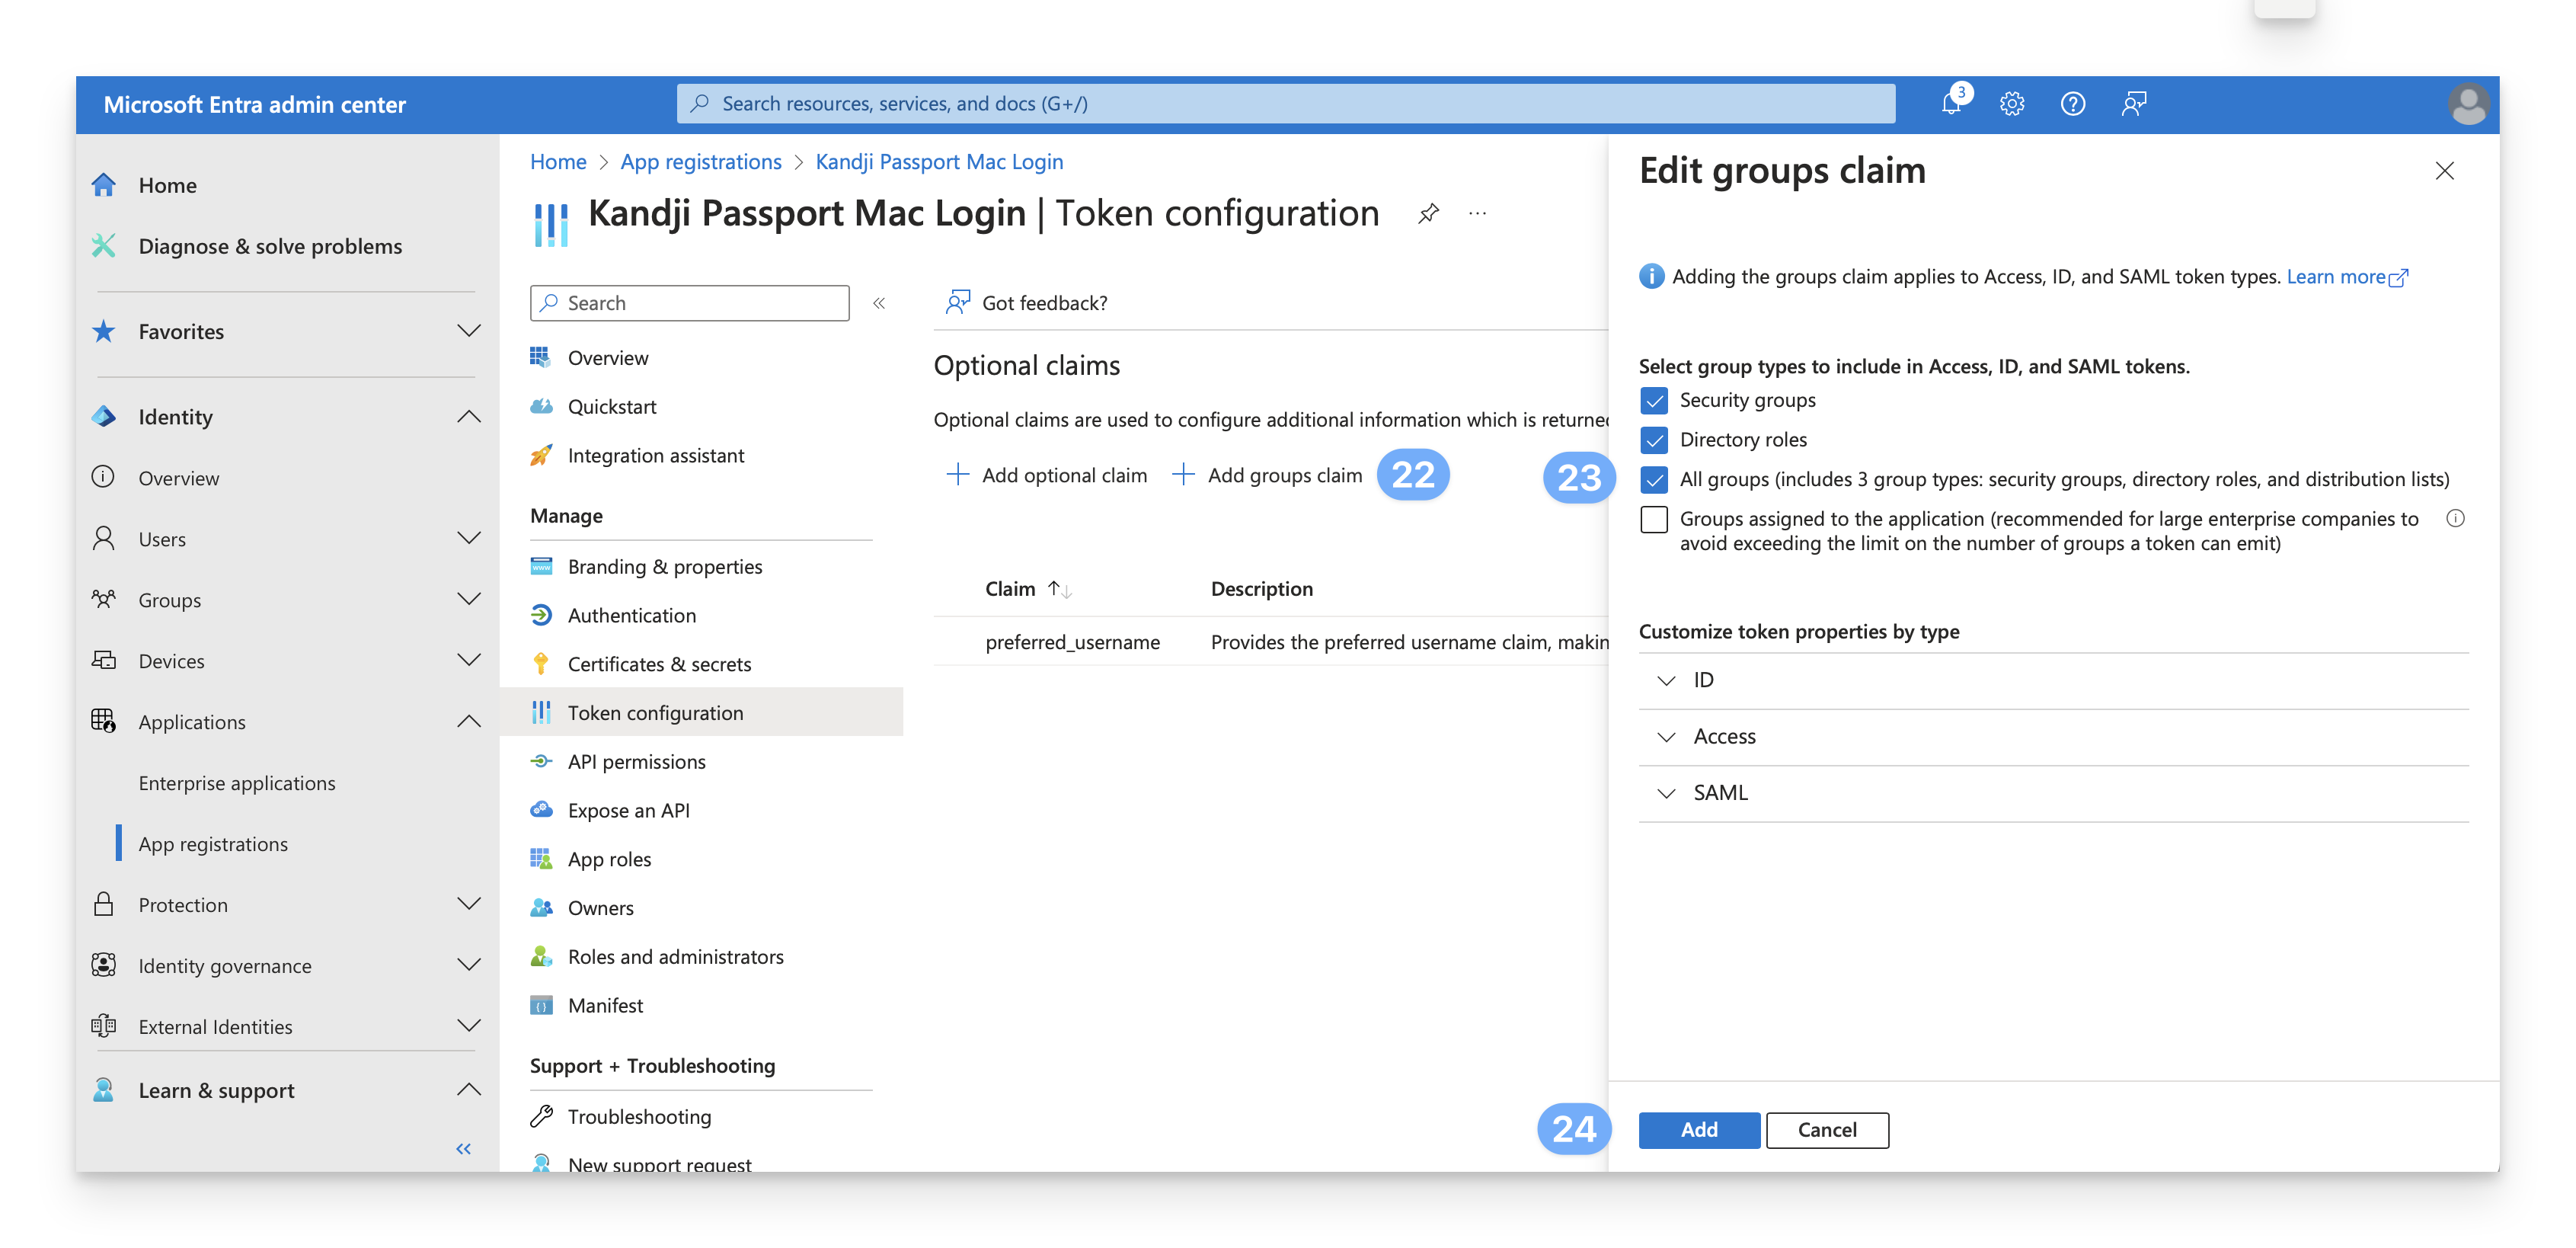
While still on the Token configuration page, click Add groups claim.
Select All groups.
Entra ID SAML only supports up to 150 security groups. If you have more than 150 security groups, you should not use All groups, but rather select specific groups. You can read more in Microsoft’s Configure group claims for applications by using Microsoft Entra ID article.
Click Add.
 Once you complete the token configurations, you will see both optional claims.
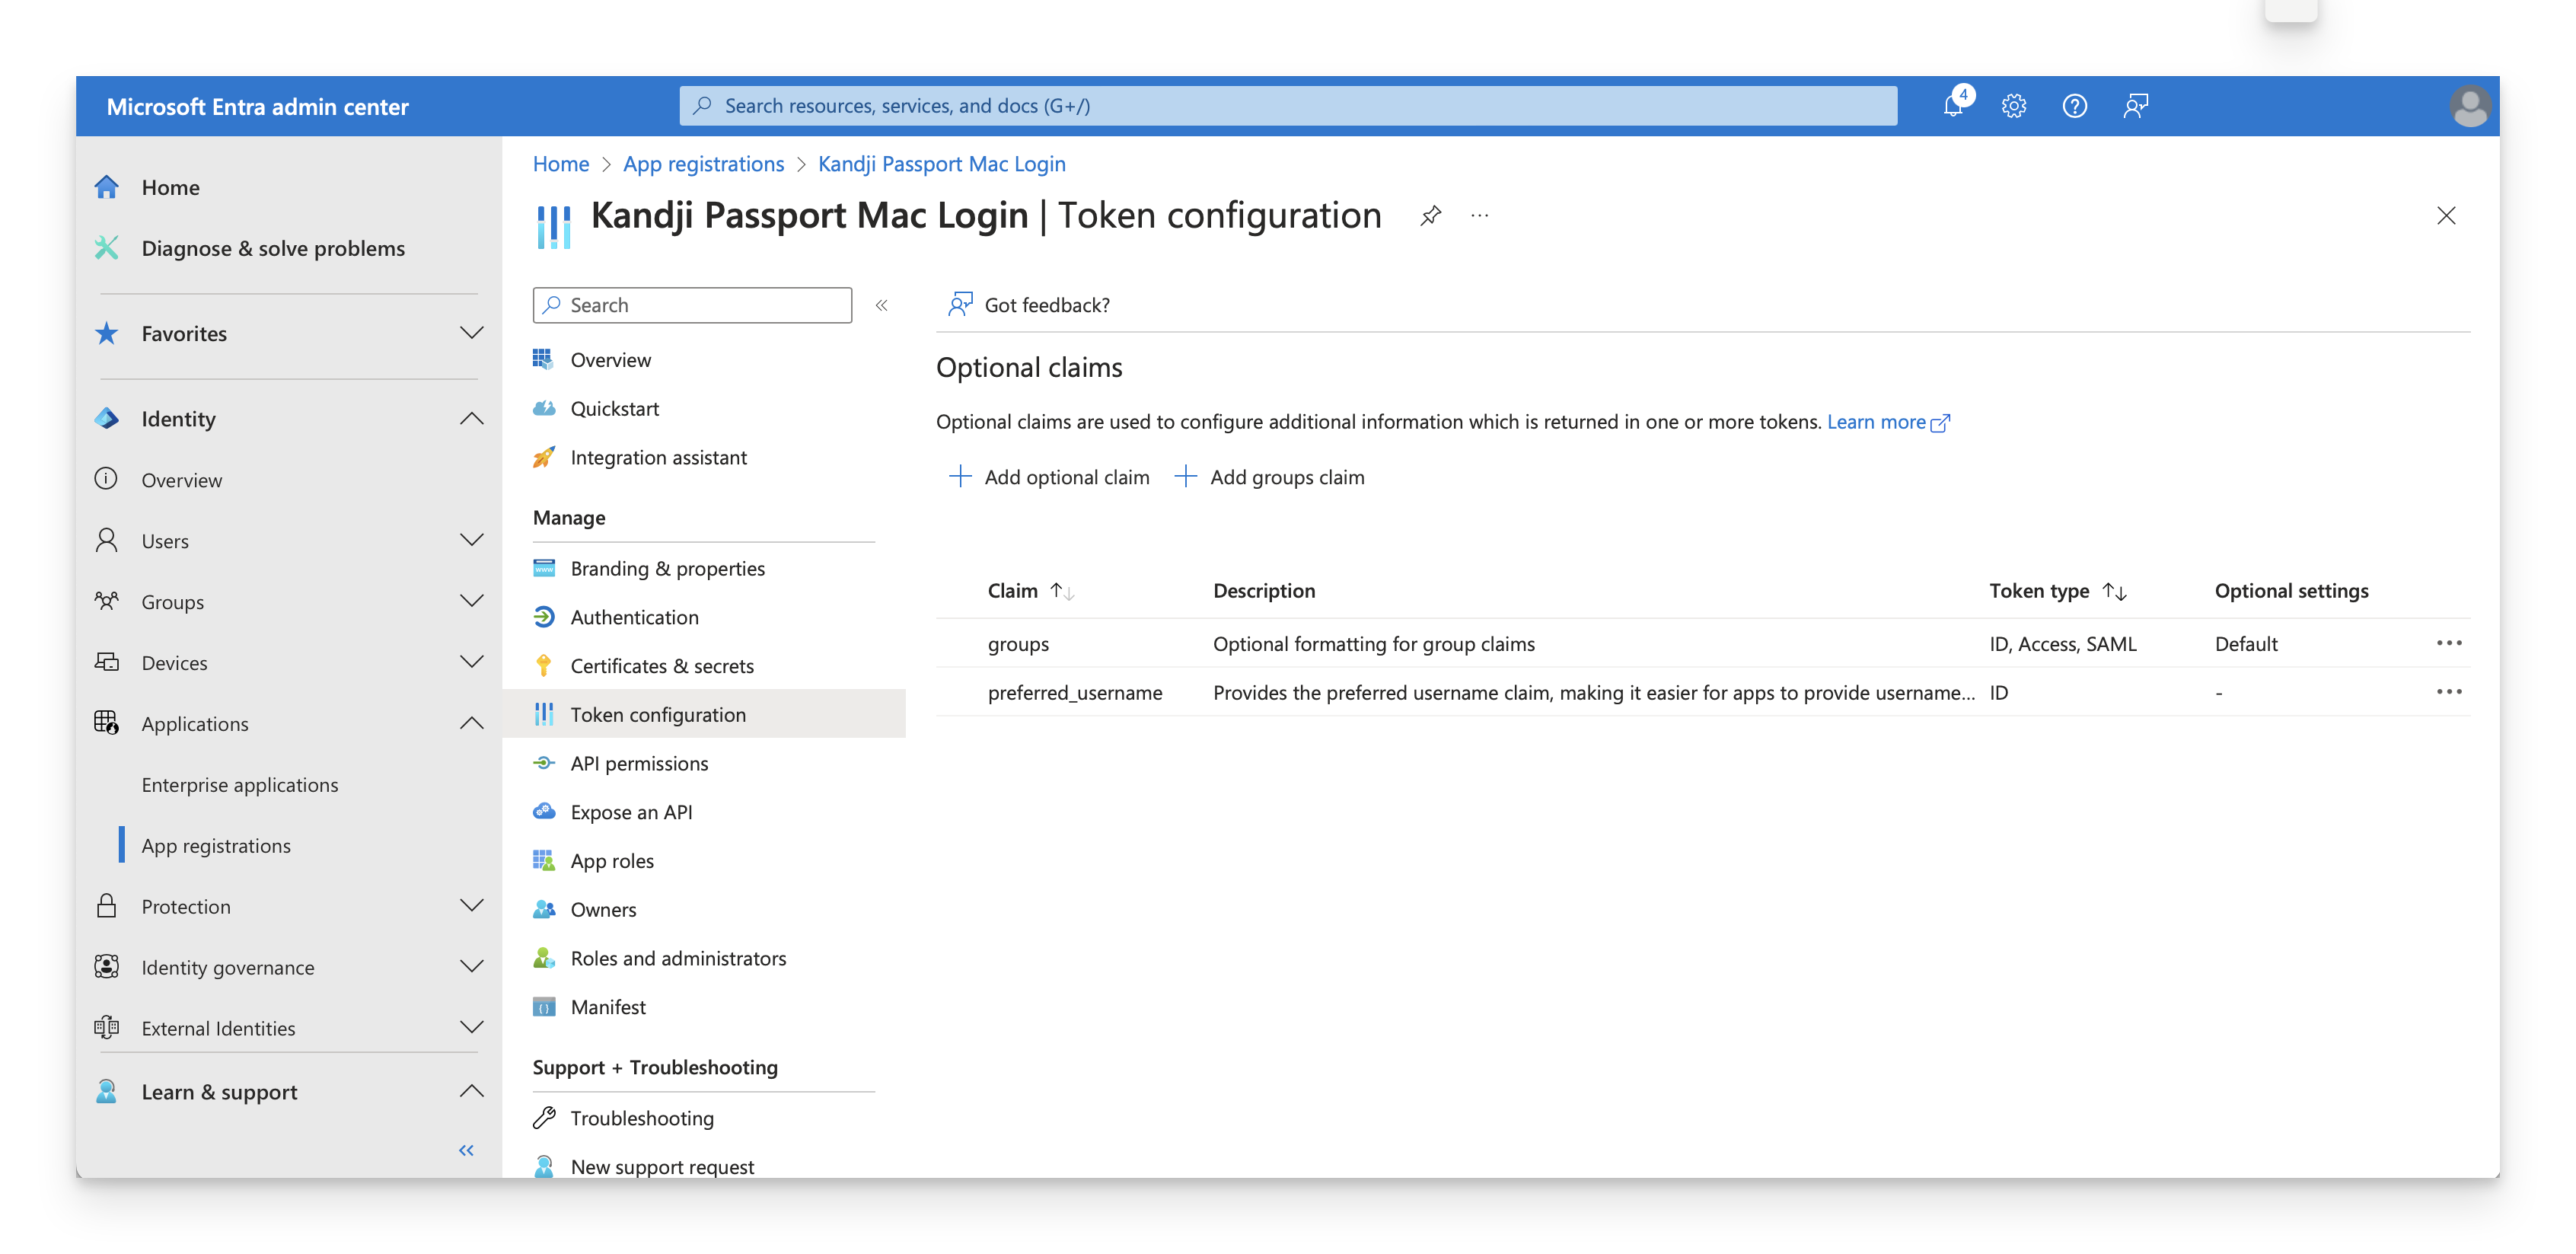
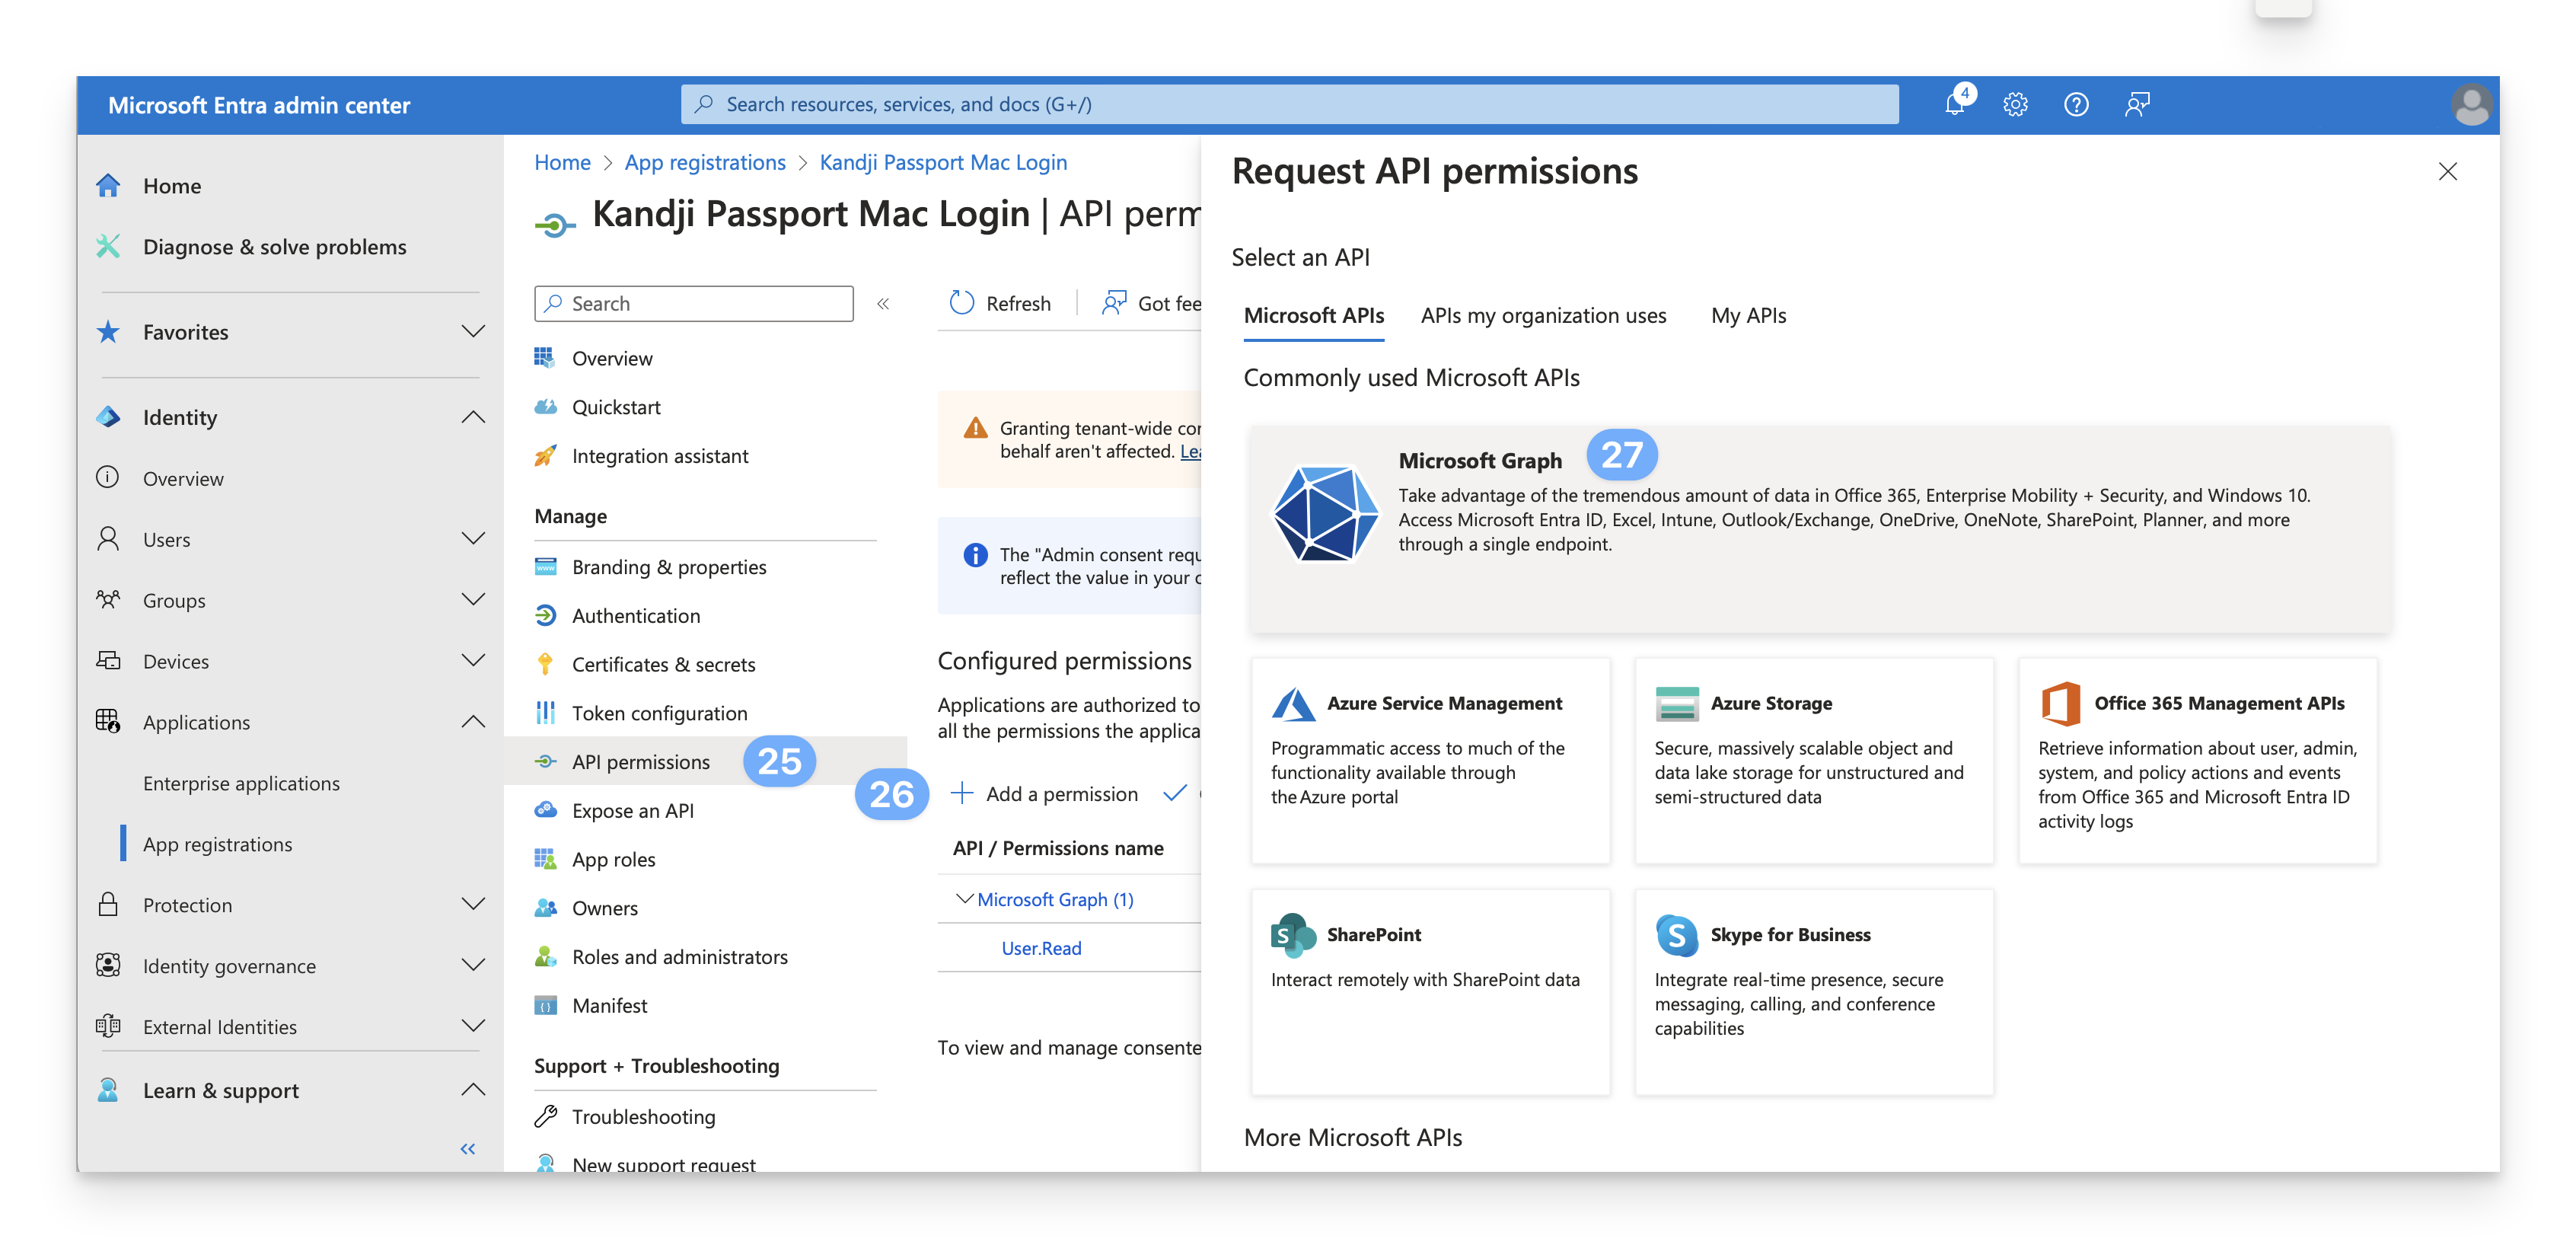
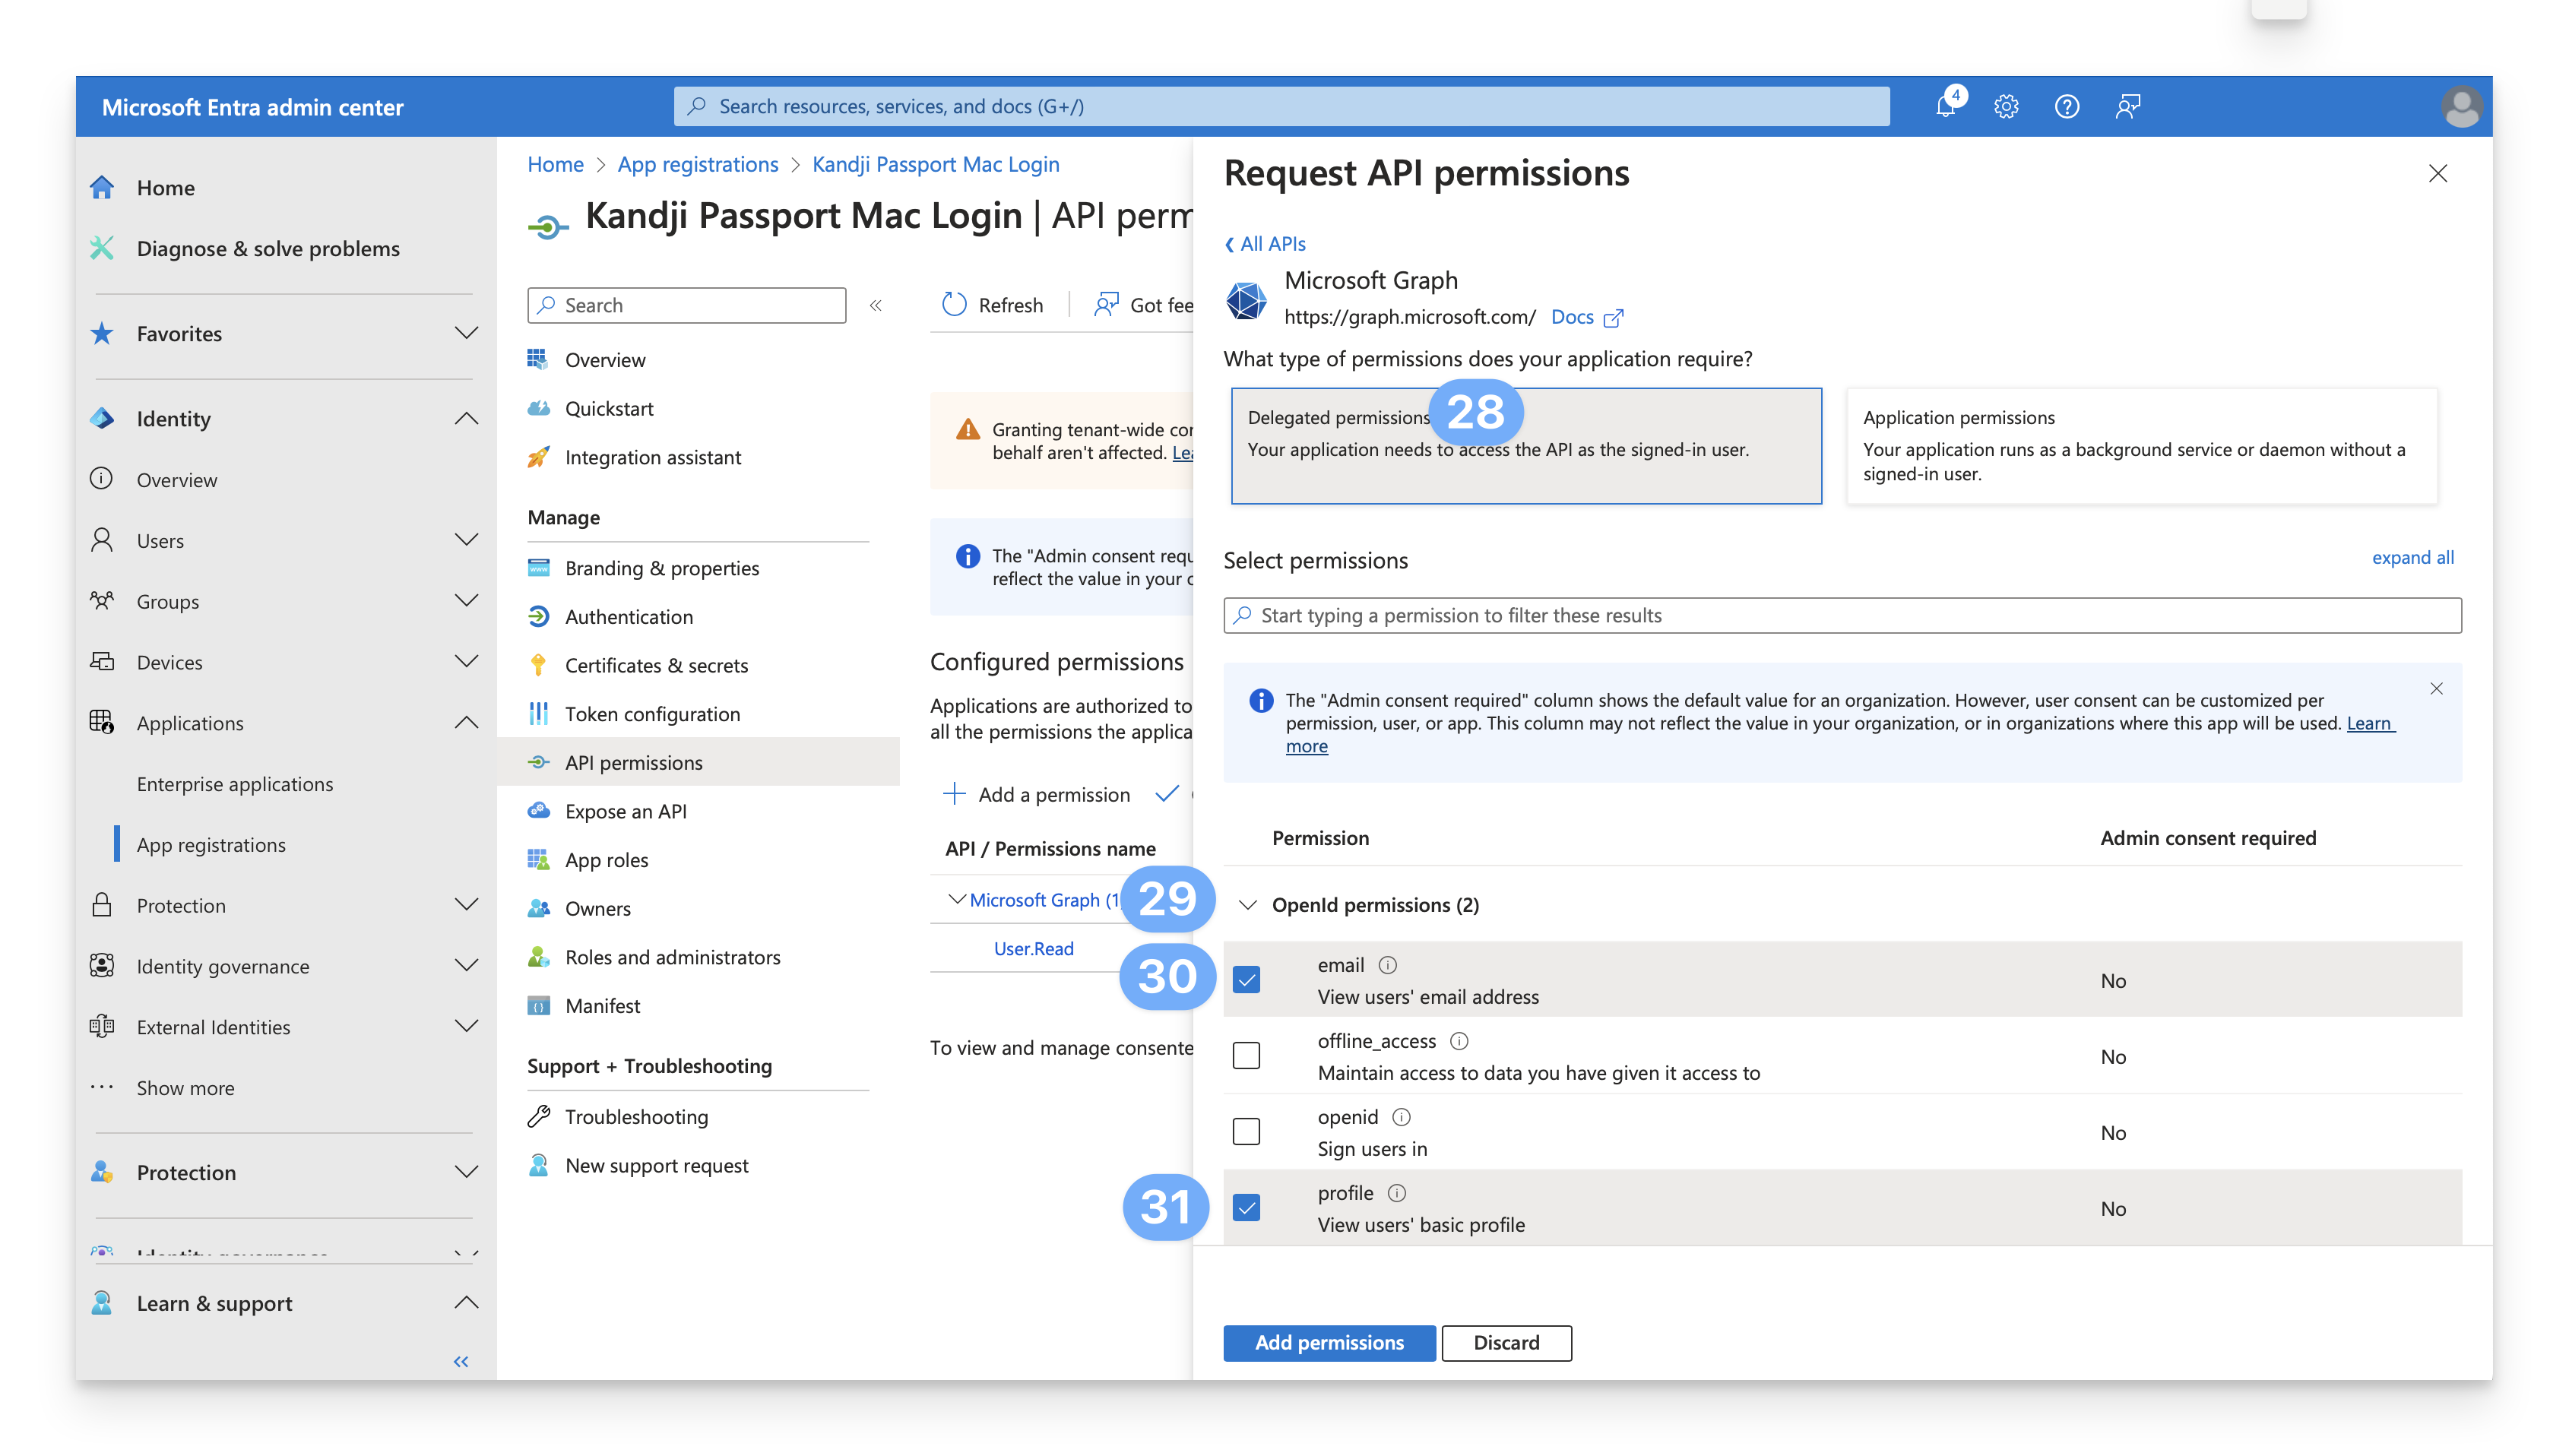
Select API Permissions.
Click Add a permission.
Click Microsoft Graph.
Select Delegated permissions.
Confirm that the OpenId permissions section is expanded. If the OpenID permissions section isn't expanded, click the icon next to the OpenId permissions section to expand it.
Select email.
Select profile.
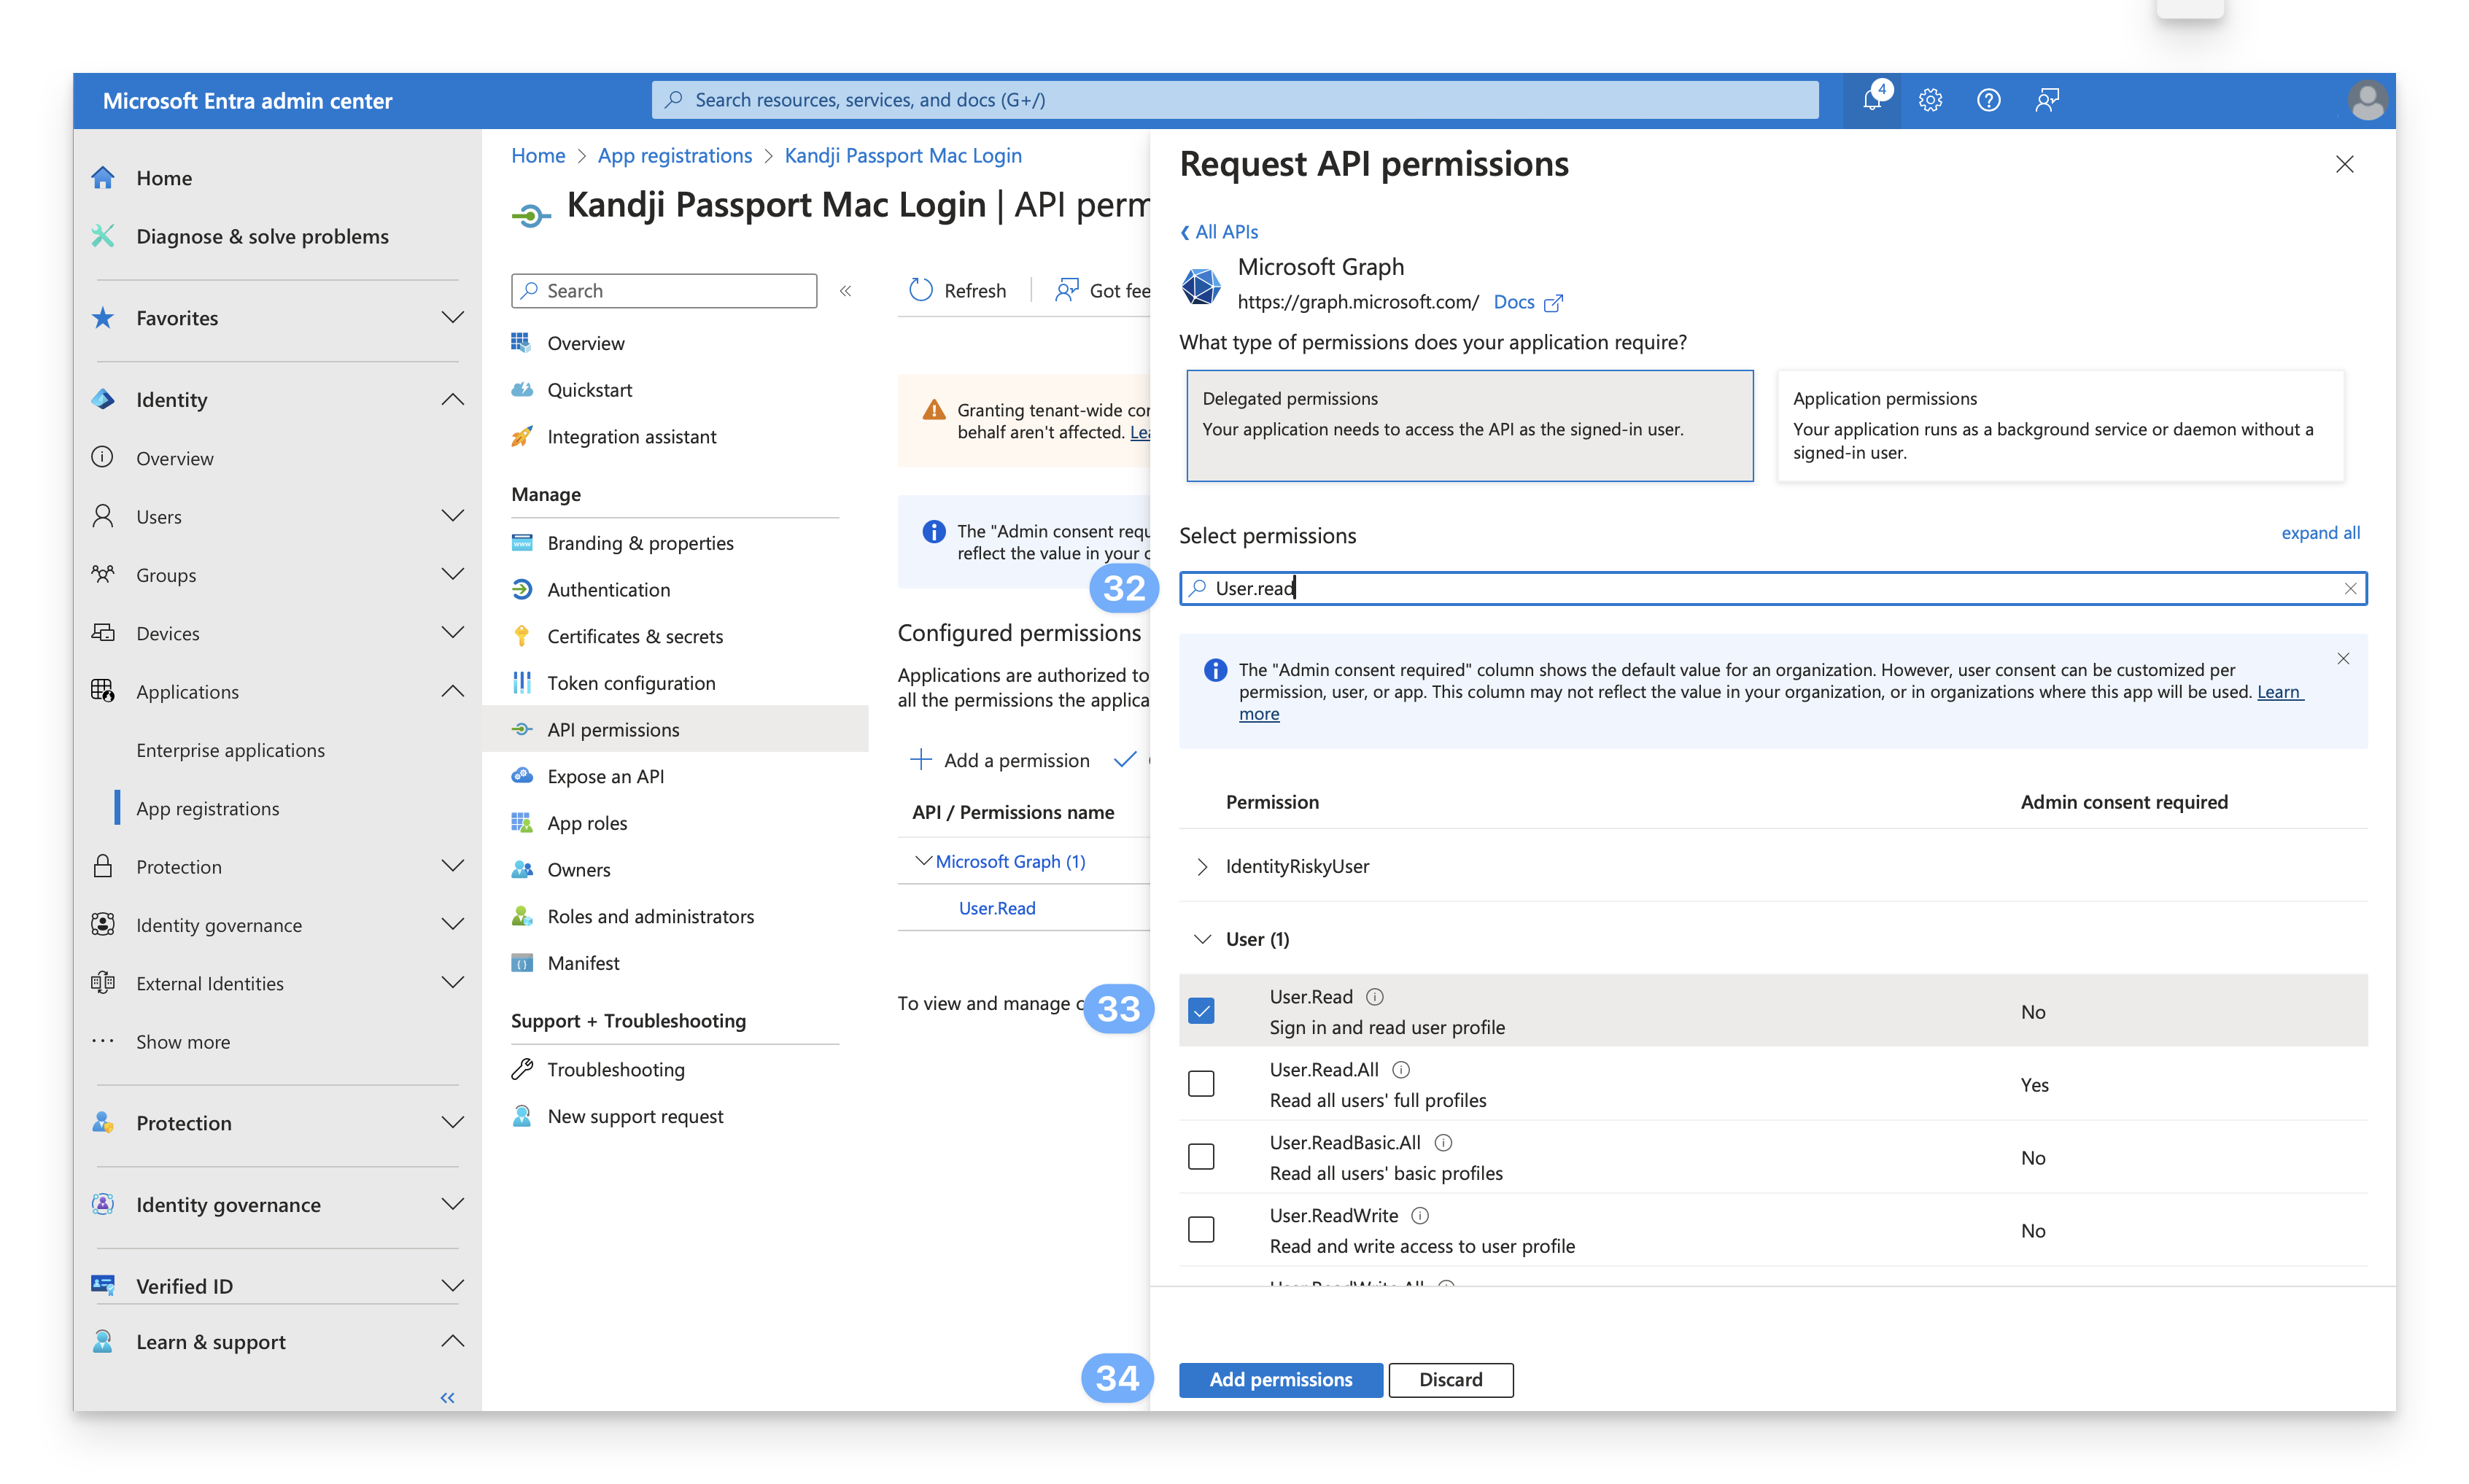
In the Select permissions field, enter User.Read.
In the User section, confirm that User.Read is already selected. If User.Read isn't selected, select it.
Click Add permissions.
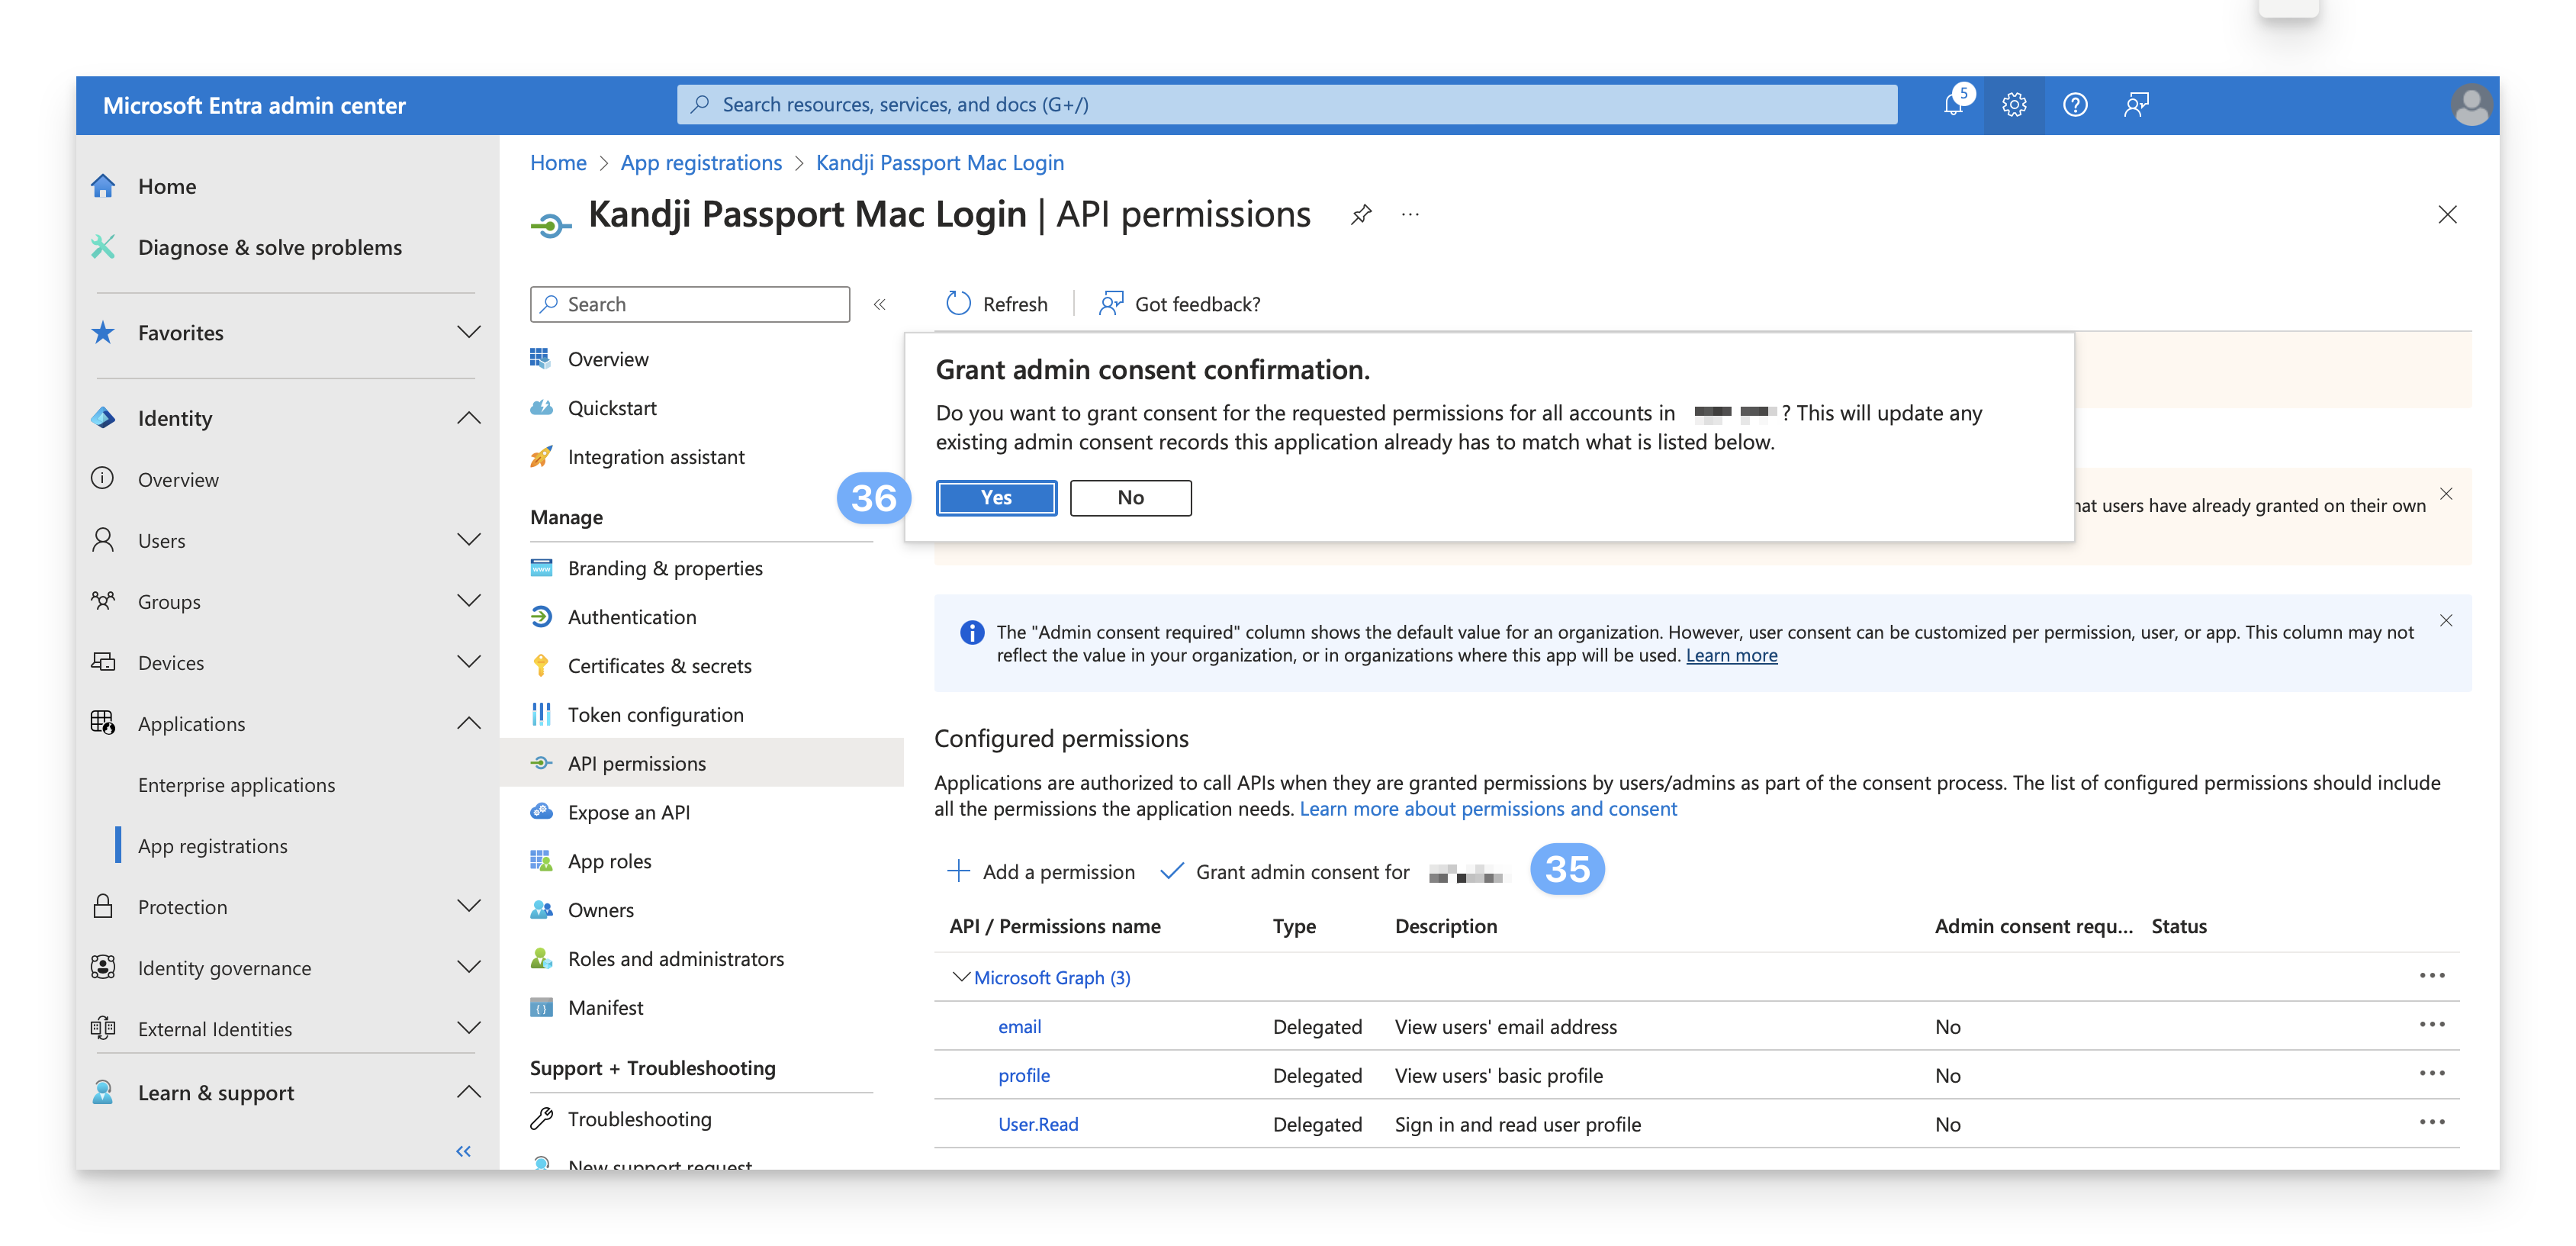
While still on the API permissions page, select Grant admin consent for <your_tenant_name>.
Select Yes.
 You should see a notification similar to the one below, and you should see a "Granted for <your_tenant_name> ..." message in the Status column next to each permission.
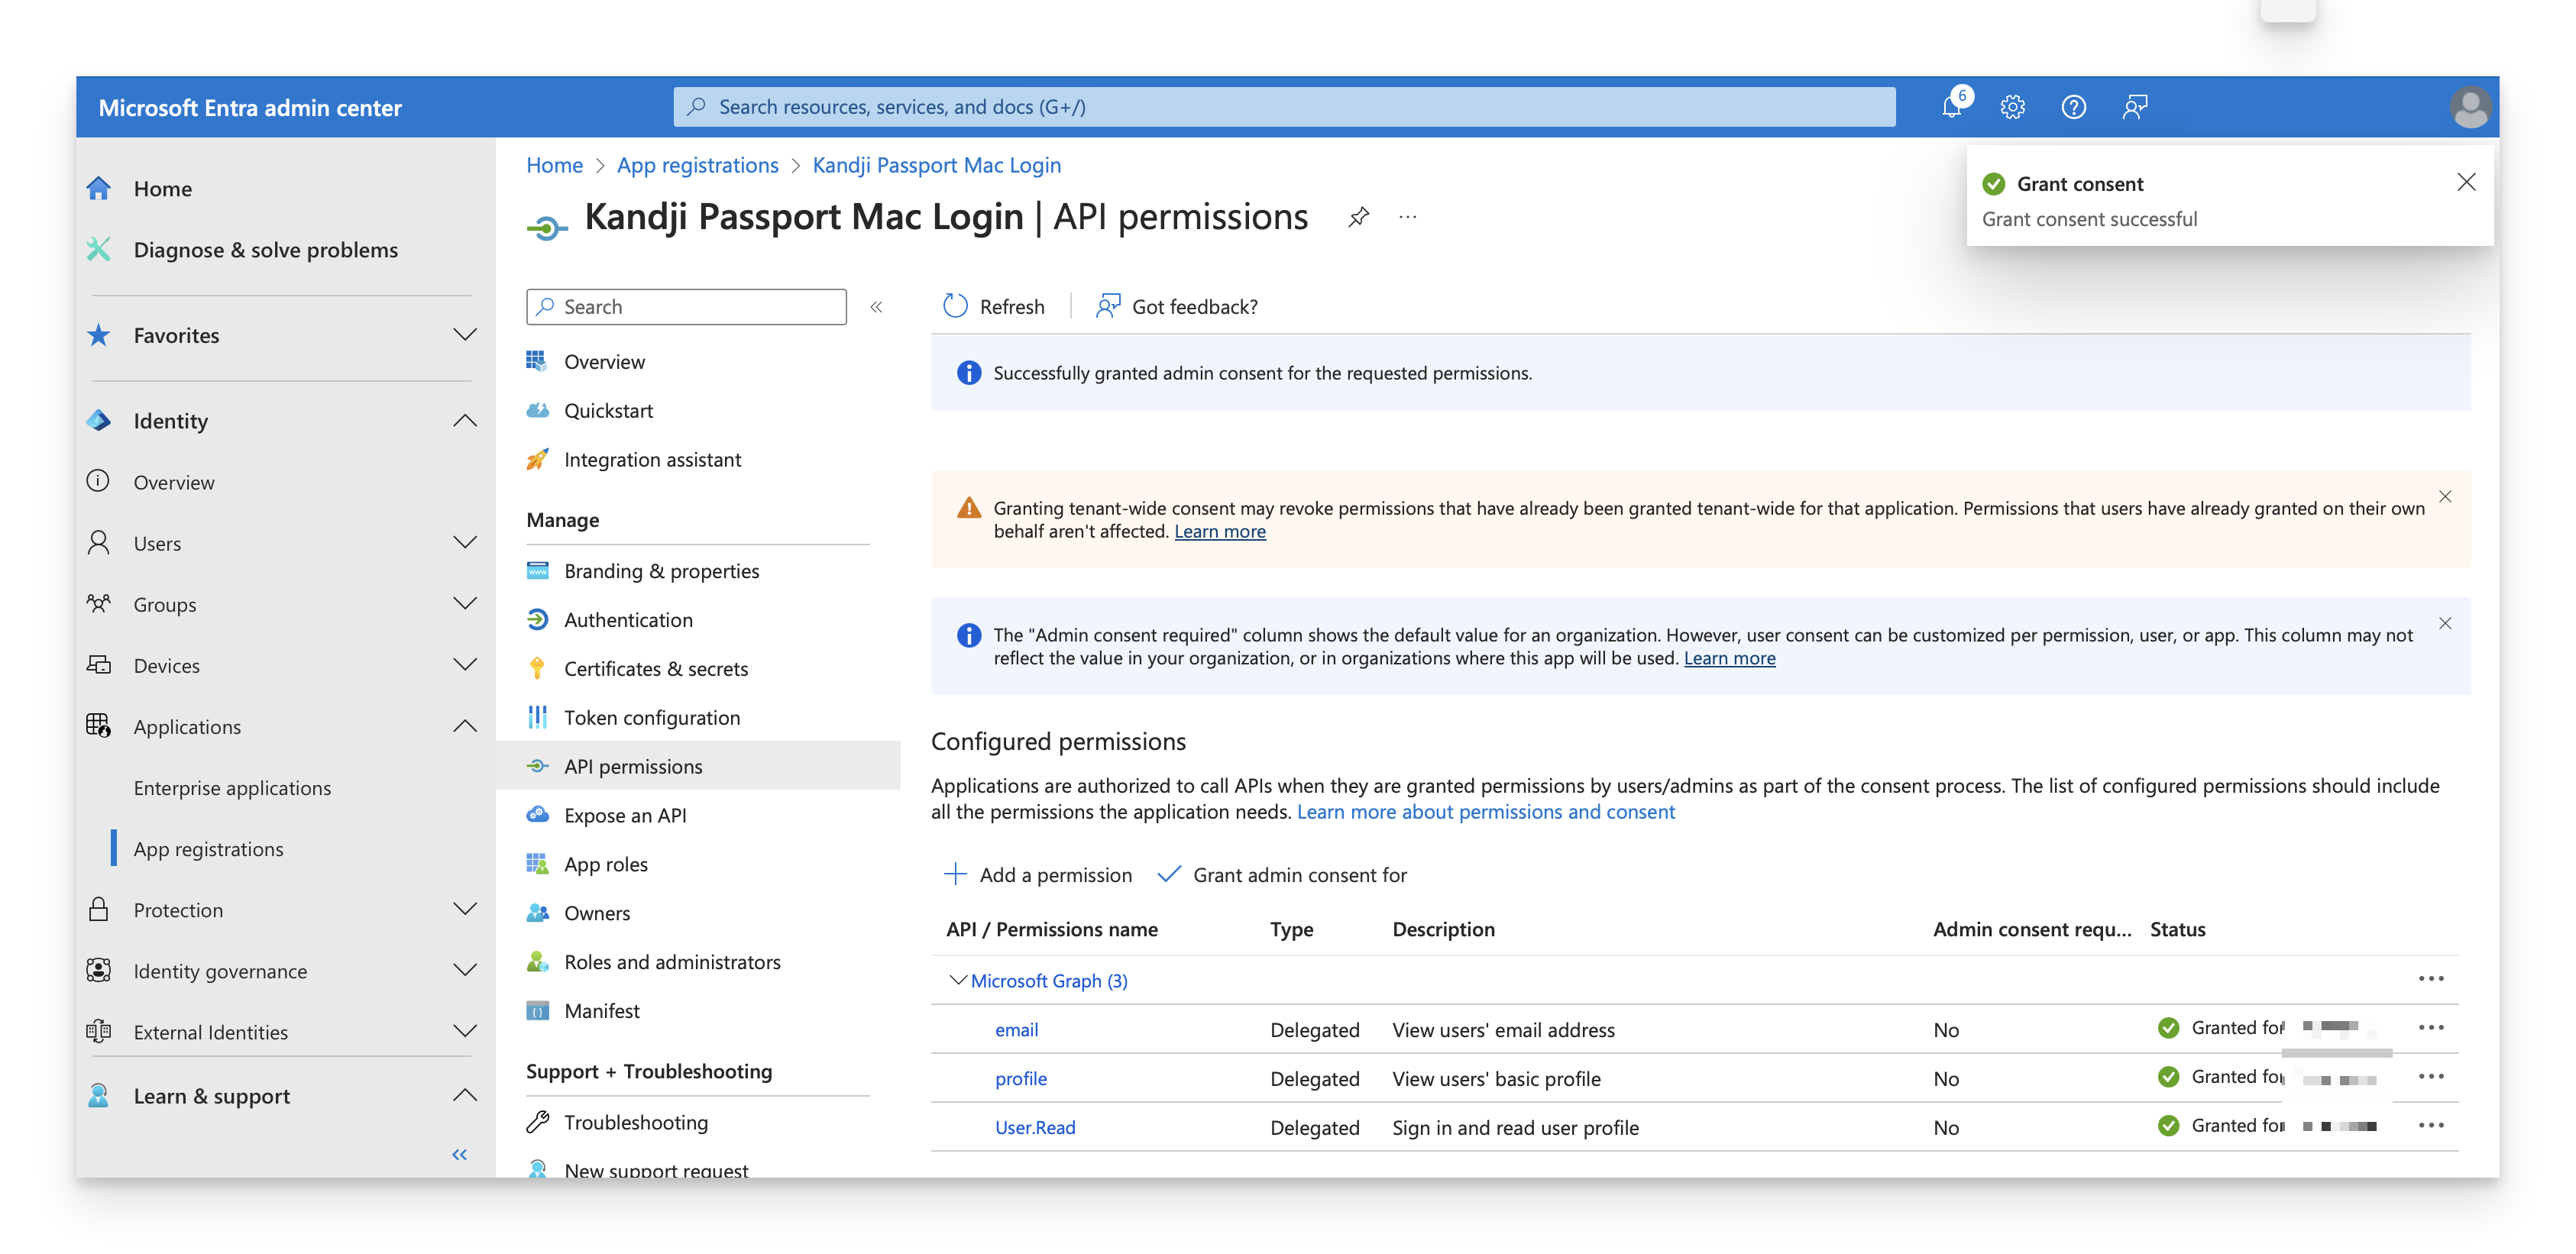
Continue to the next section.
Assign Users and Groups
By default, when you create a new App registration, the "Assignment required?" attribute is set to "No". However, if your Passport Enterprise app is set to require assignment, you will need to follow these steps to assign users in order to be able to use your Passport app.
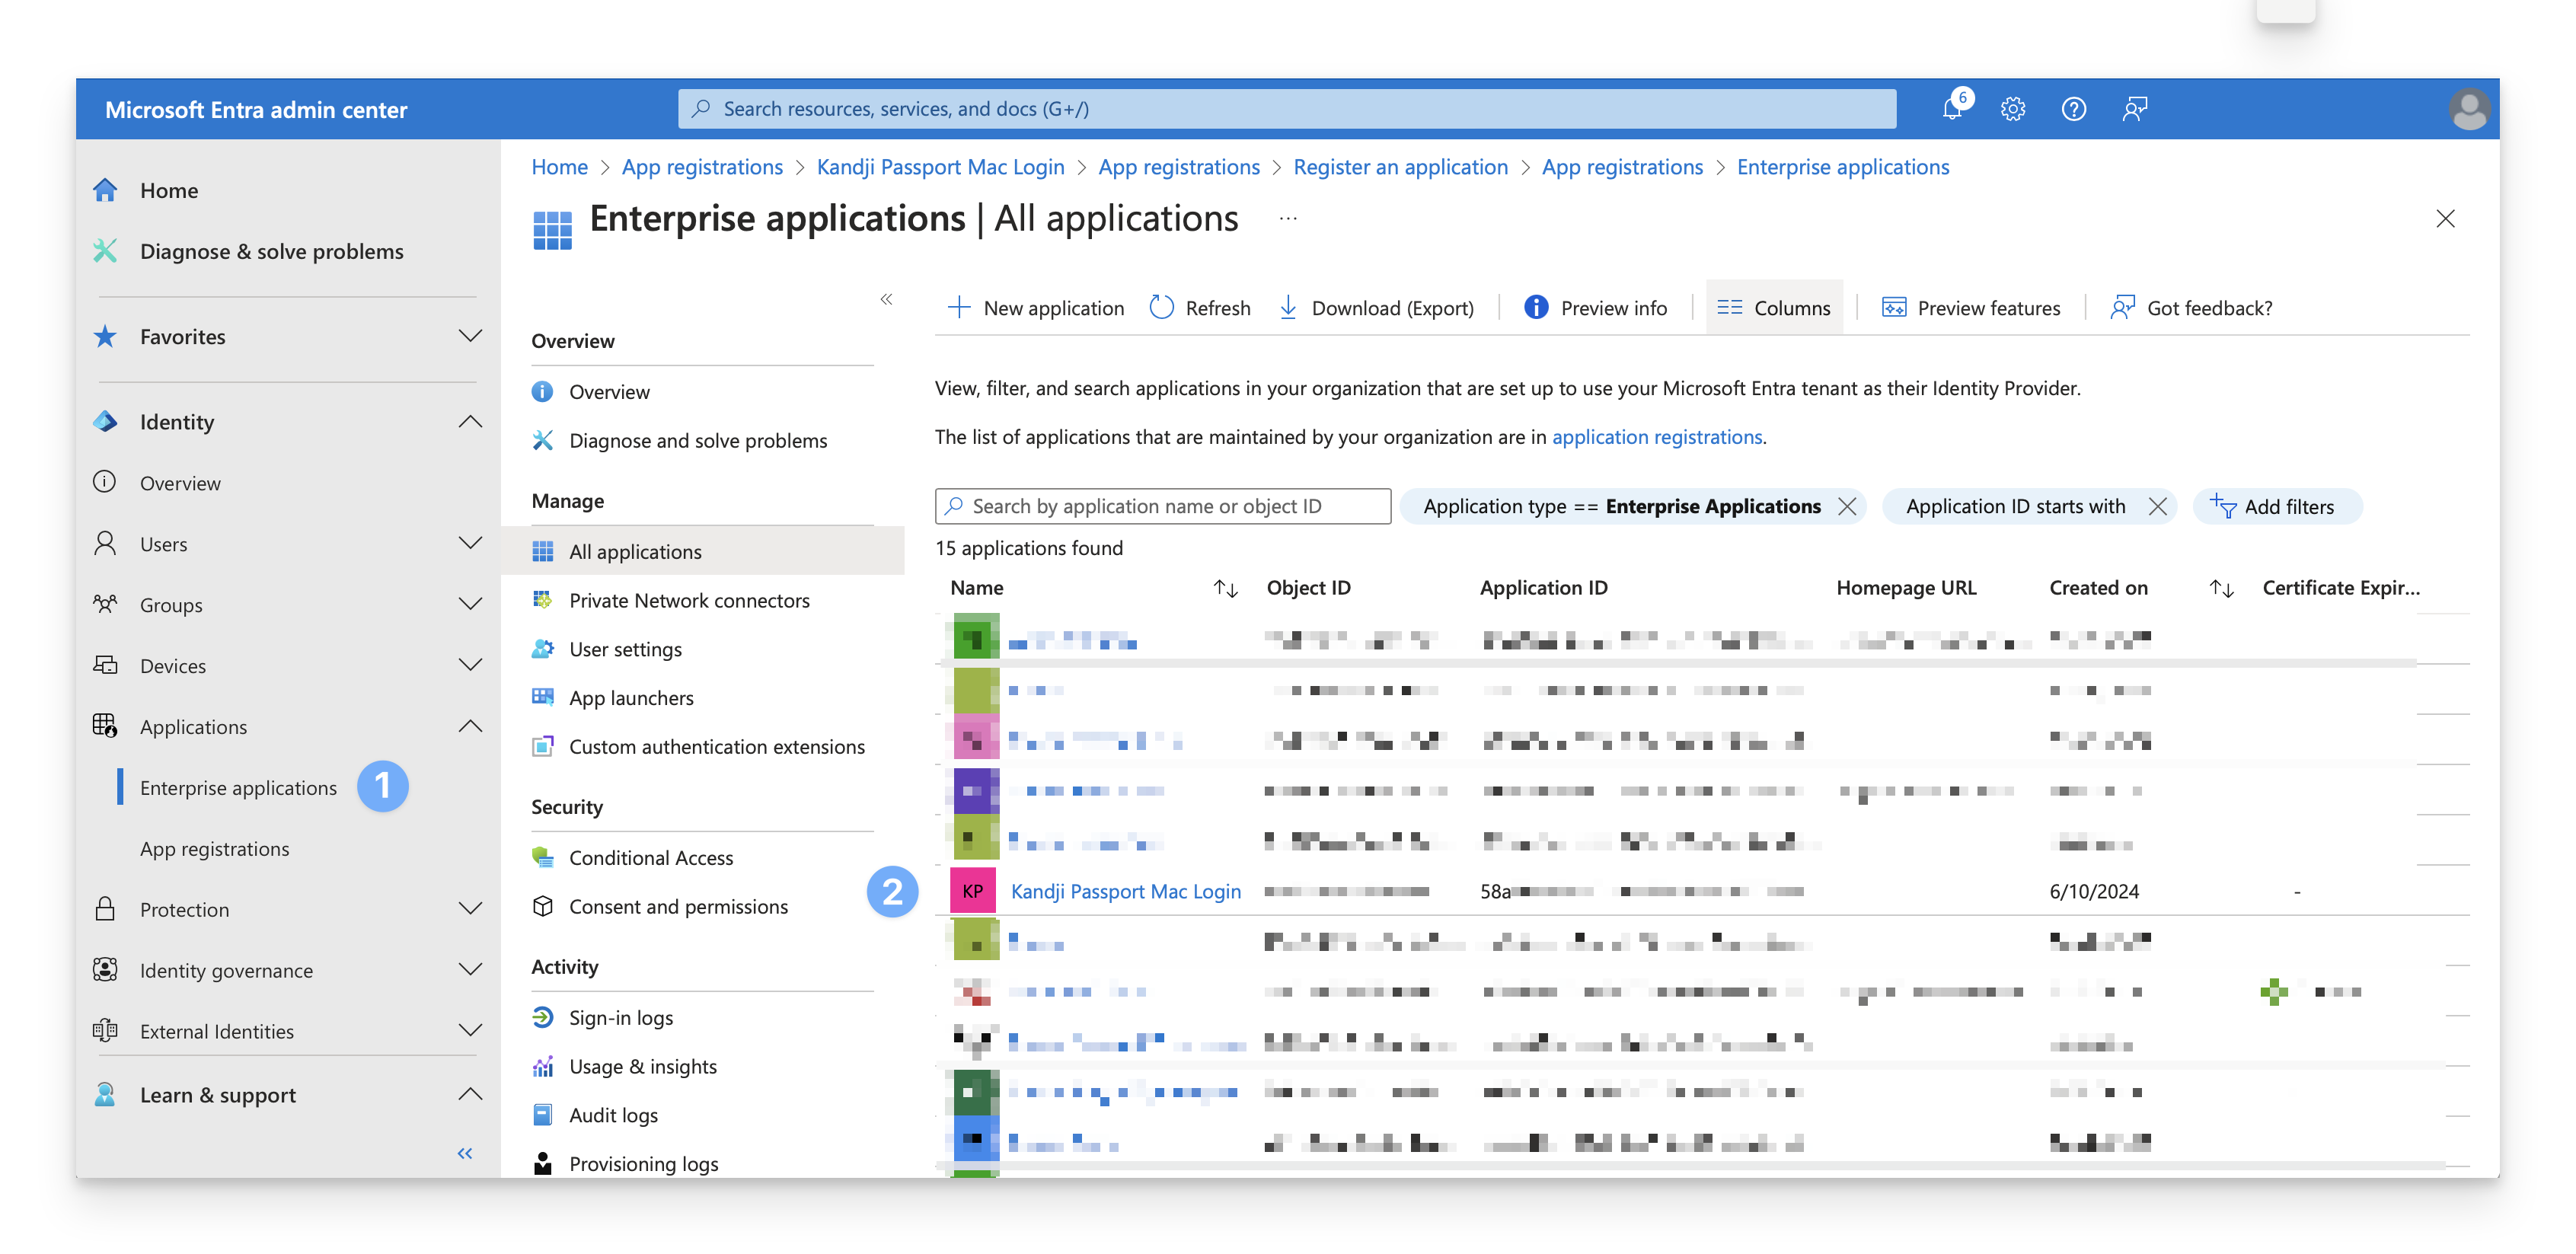
In the Identity navigation menu on the left, open Applications and select Enterprise Applications.
In the All applications list, select Kandji Passport Mac Login or whatever name you named the App registration in the previous section.
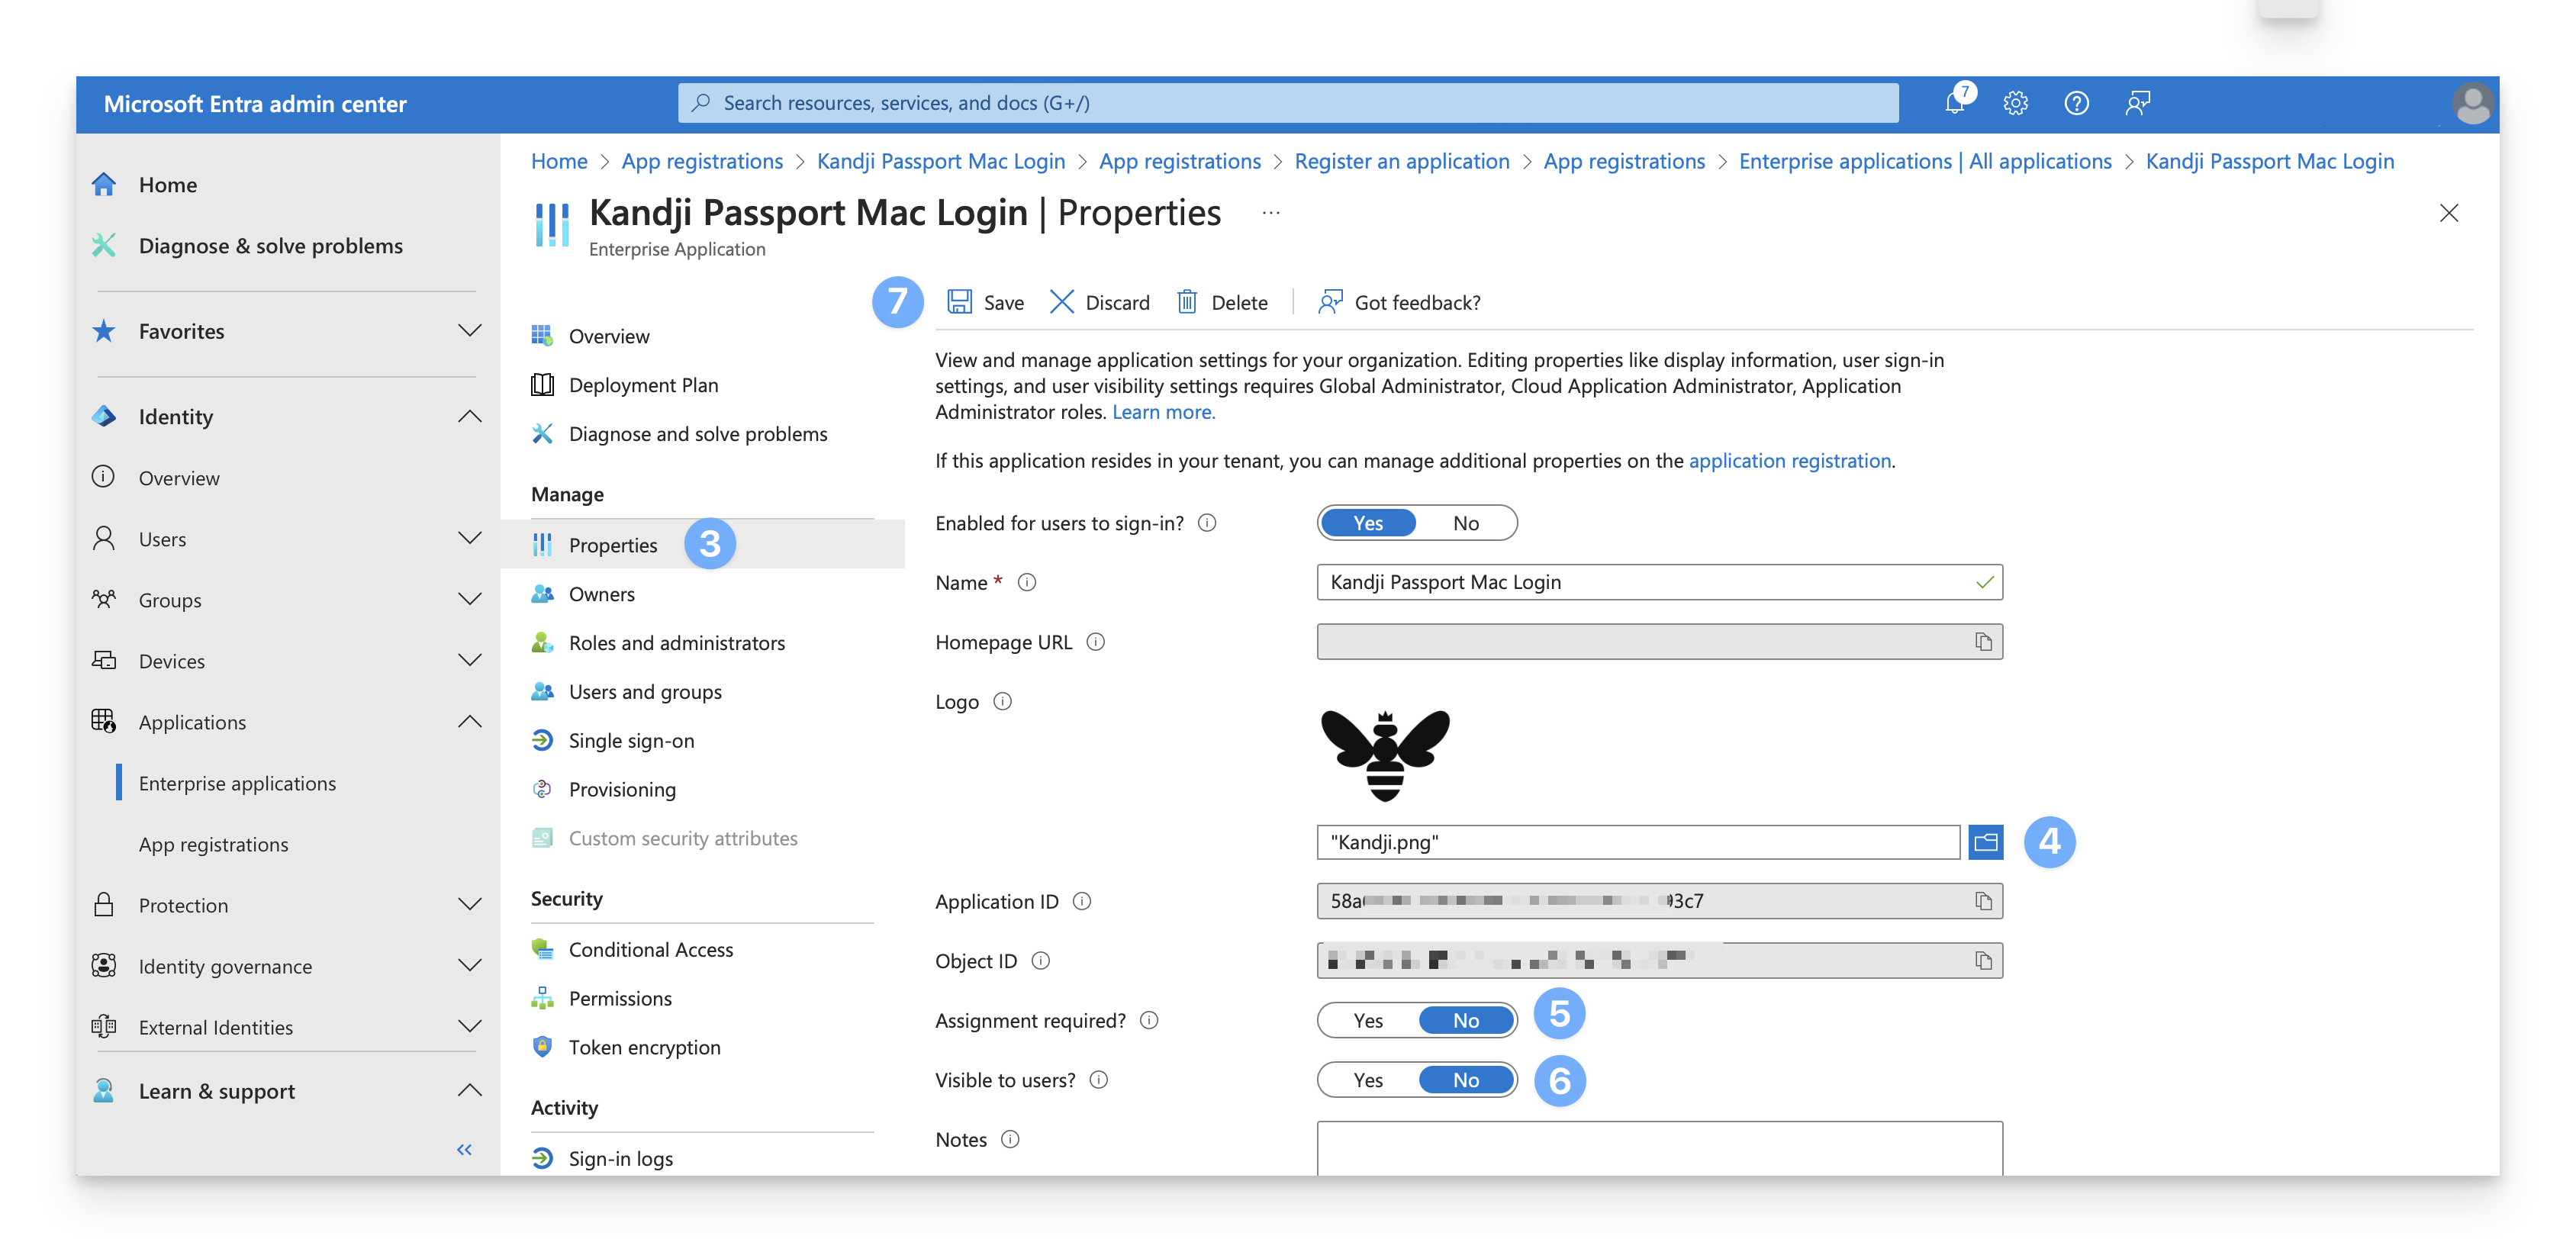
Under Manage, select Properties.
Optionally, add a logo to your Enterprise App.
Inspect the Assignment required? setting. If it is set to "No," then you can skip the rest of this section. All users in Entra ID will be able to use the Passport app.
Confirm that the Visible to users? setting is set toggled to "No"; otherwise, users will see it in their portal. The Passport app is only useful as a replacement for the macOS login window.
Click Save.
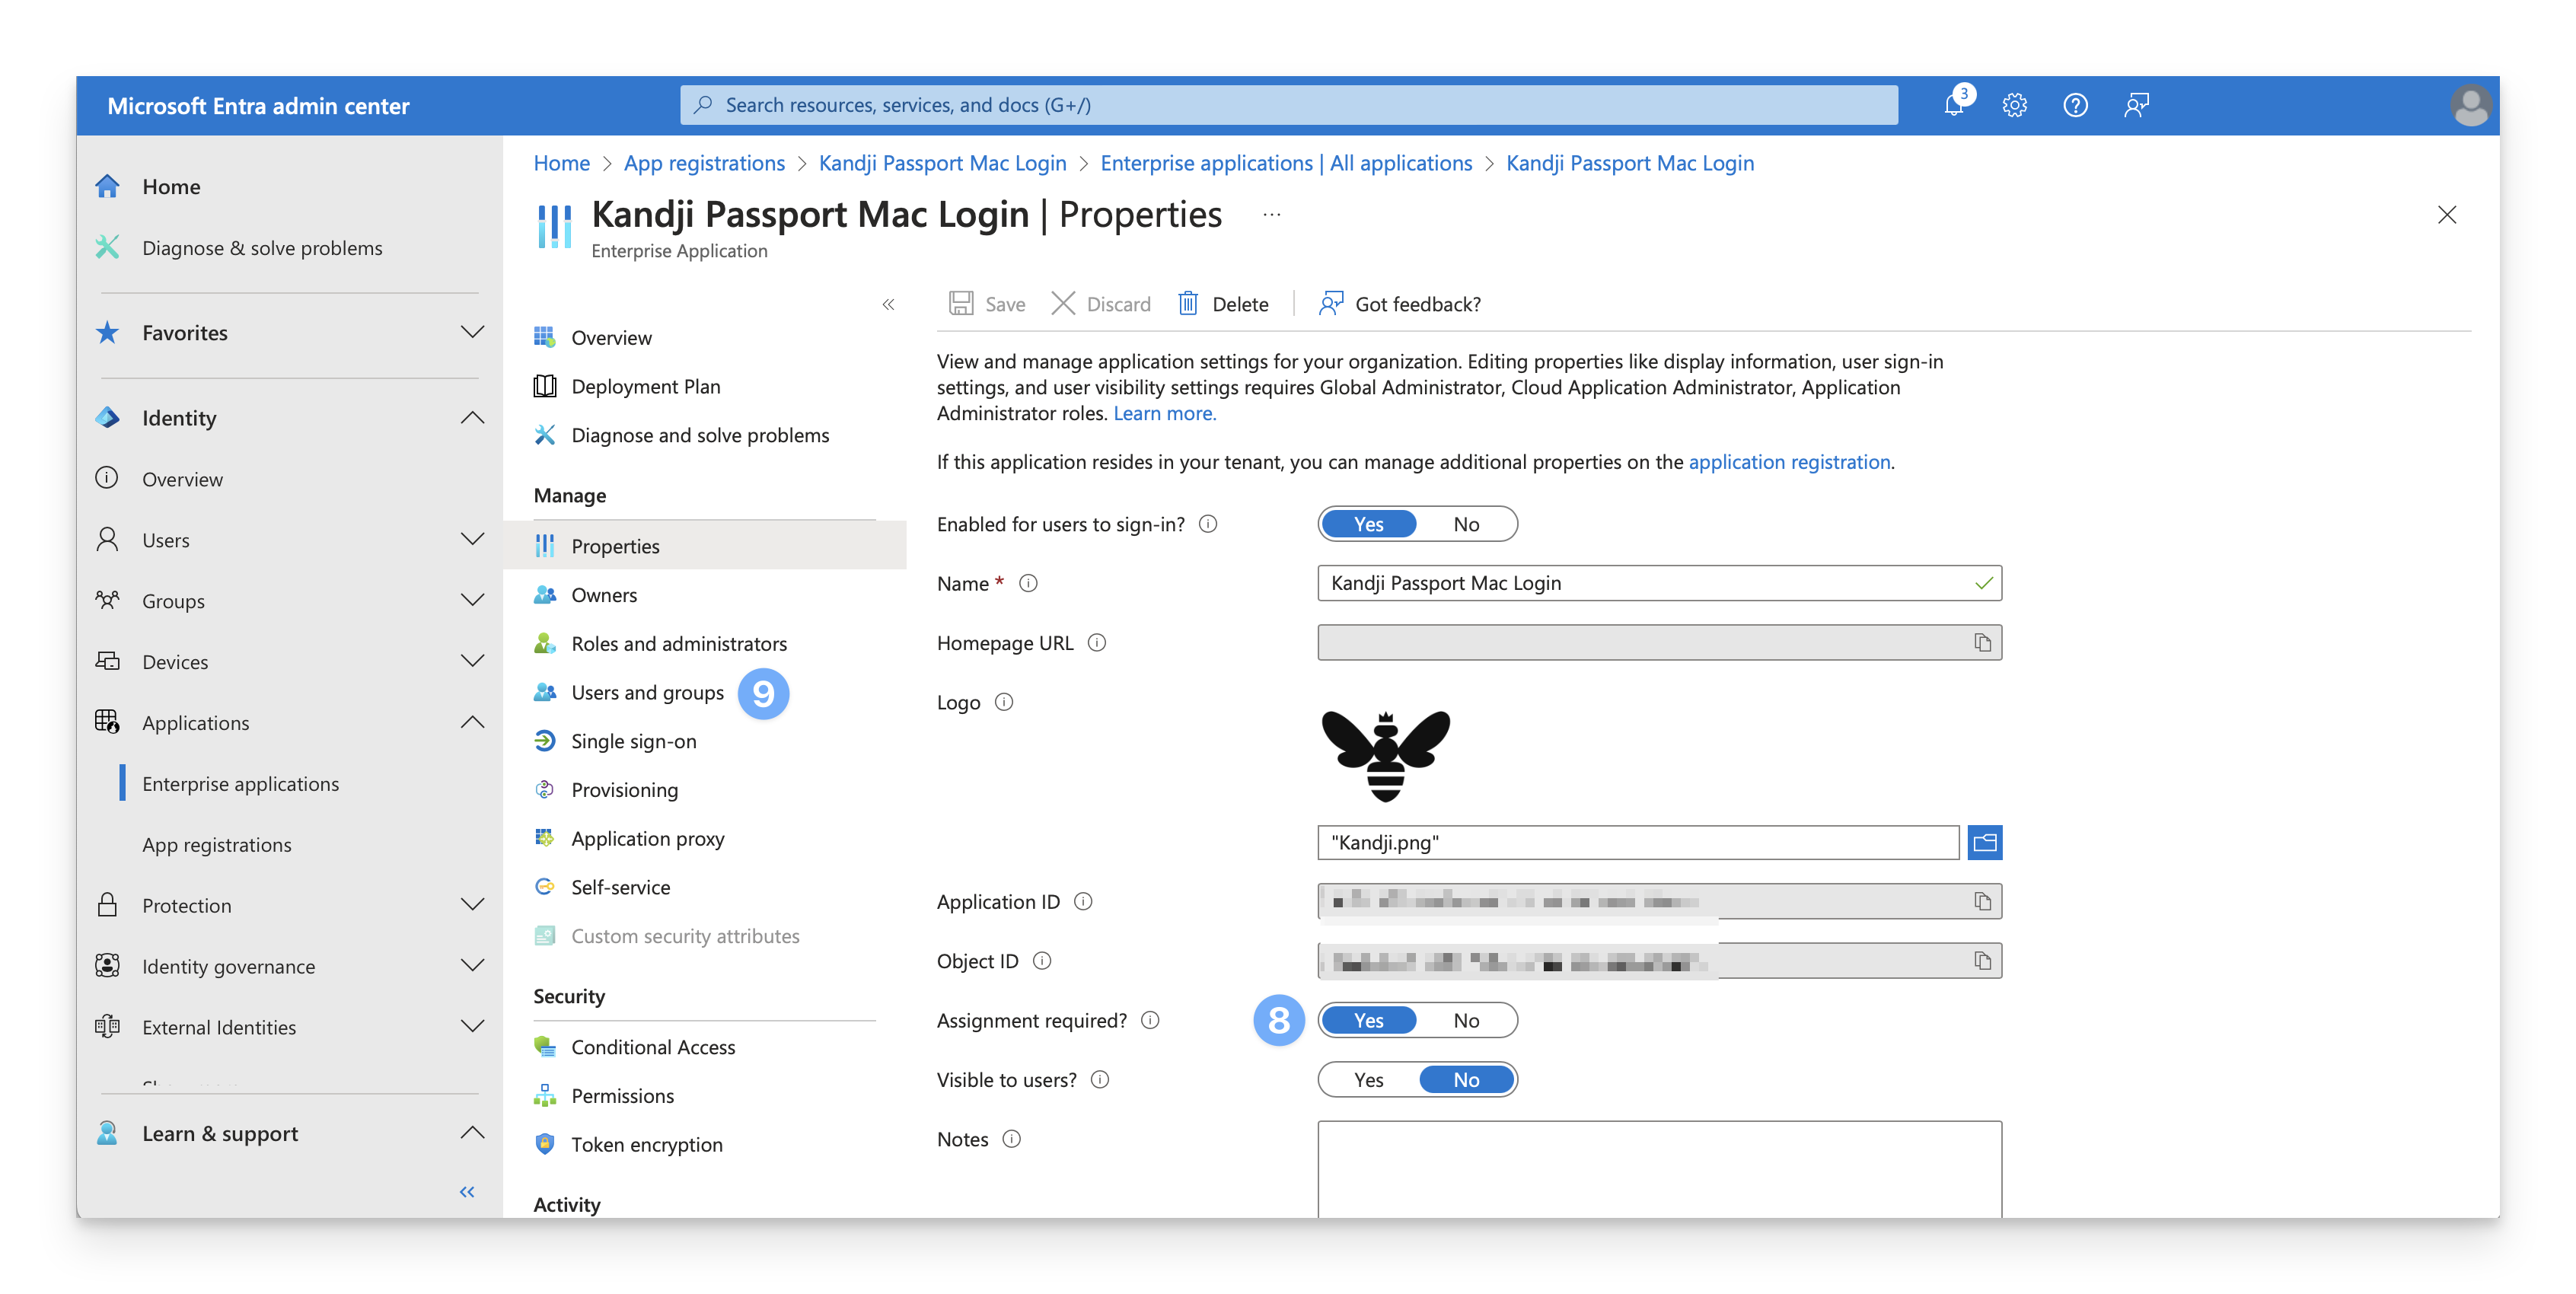
If the Assignment required? setting is set to "Yes," proceed with steps 9-16.
Under Manage, select Users and Groups.
On the menu, select + Add user/group.
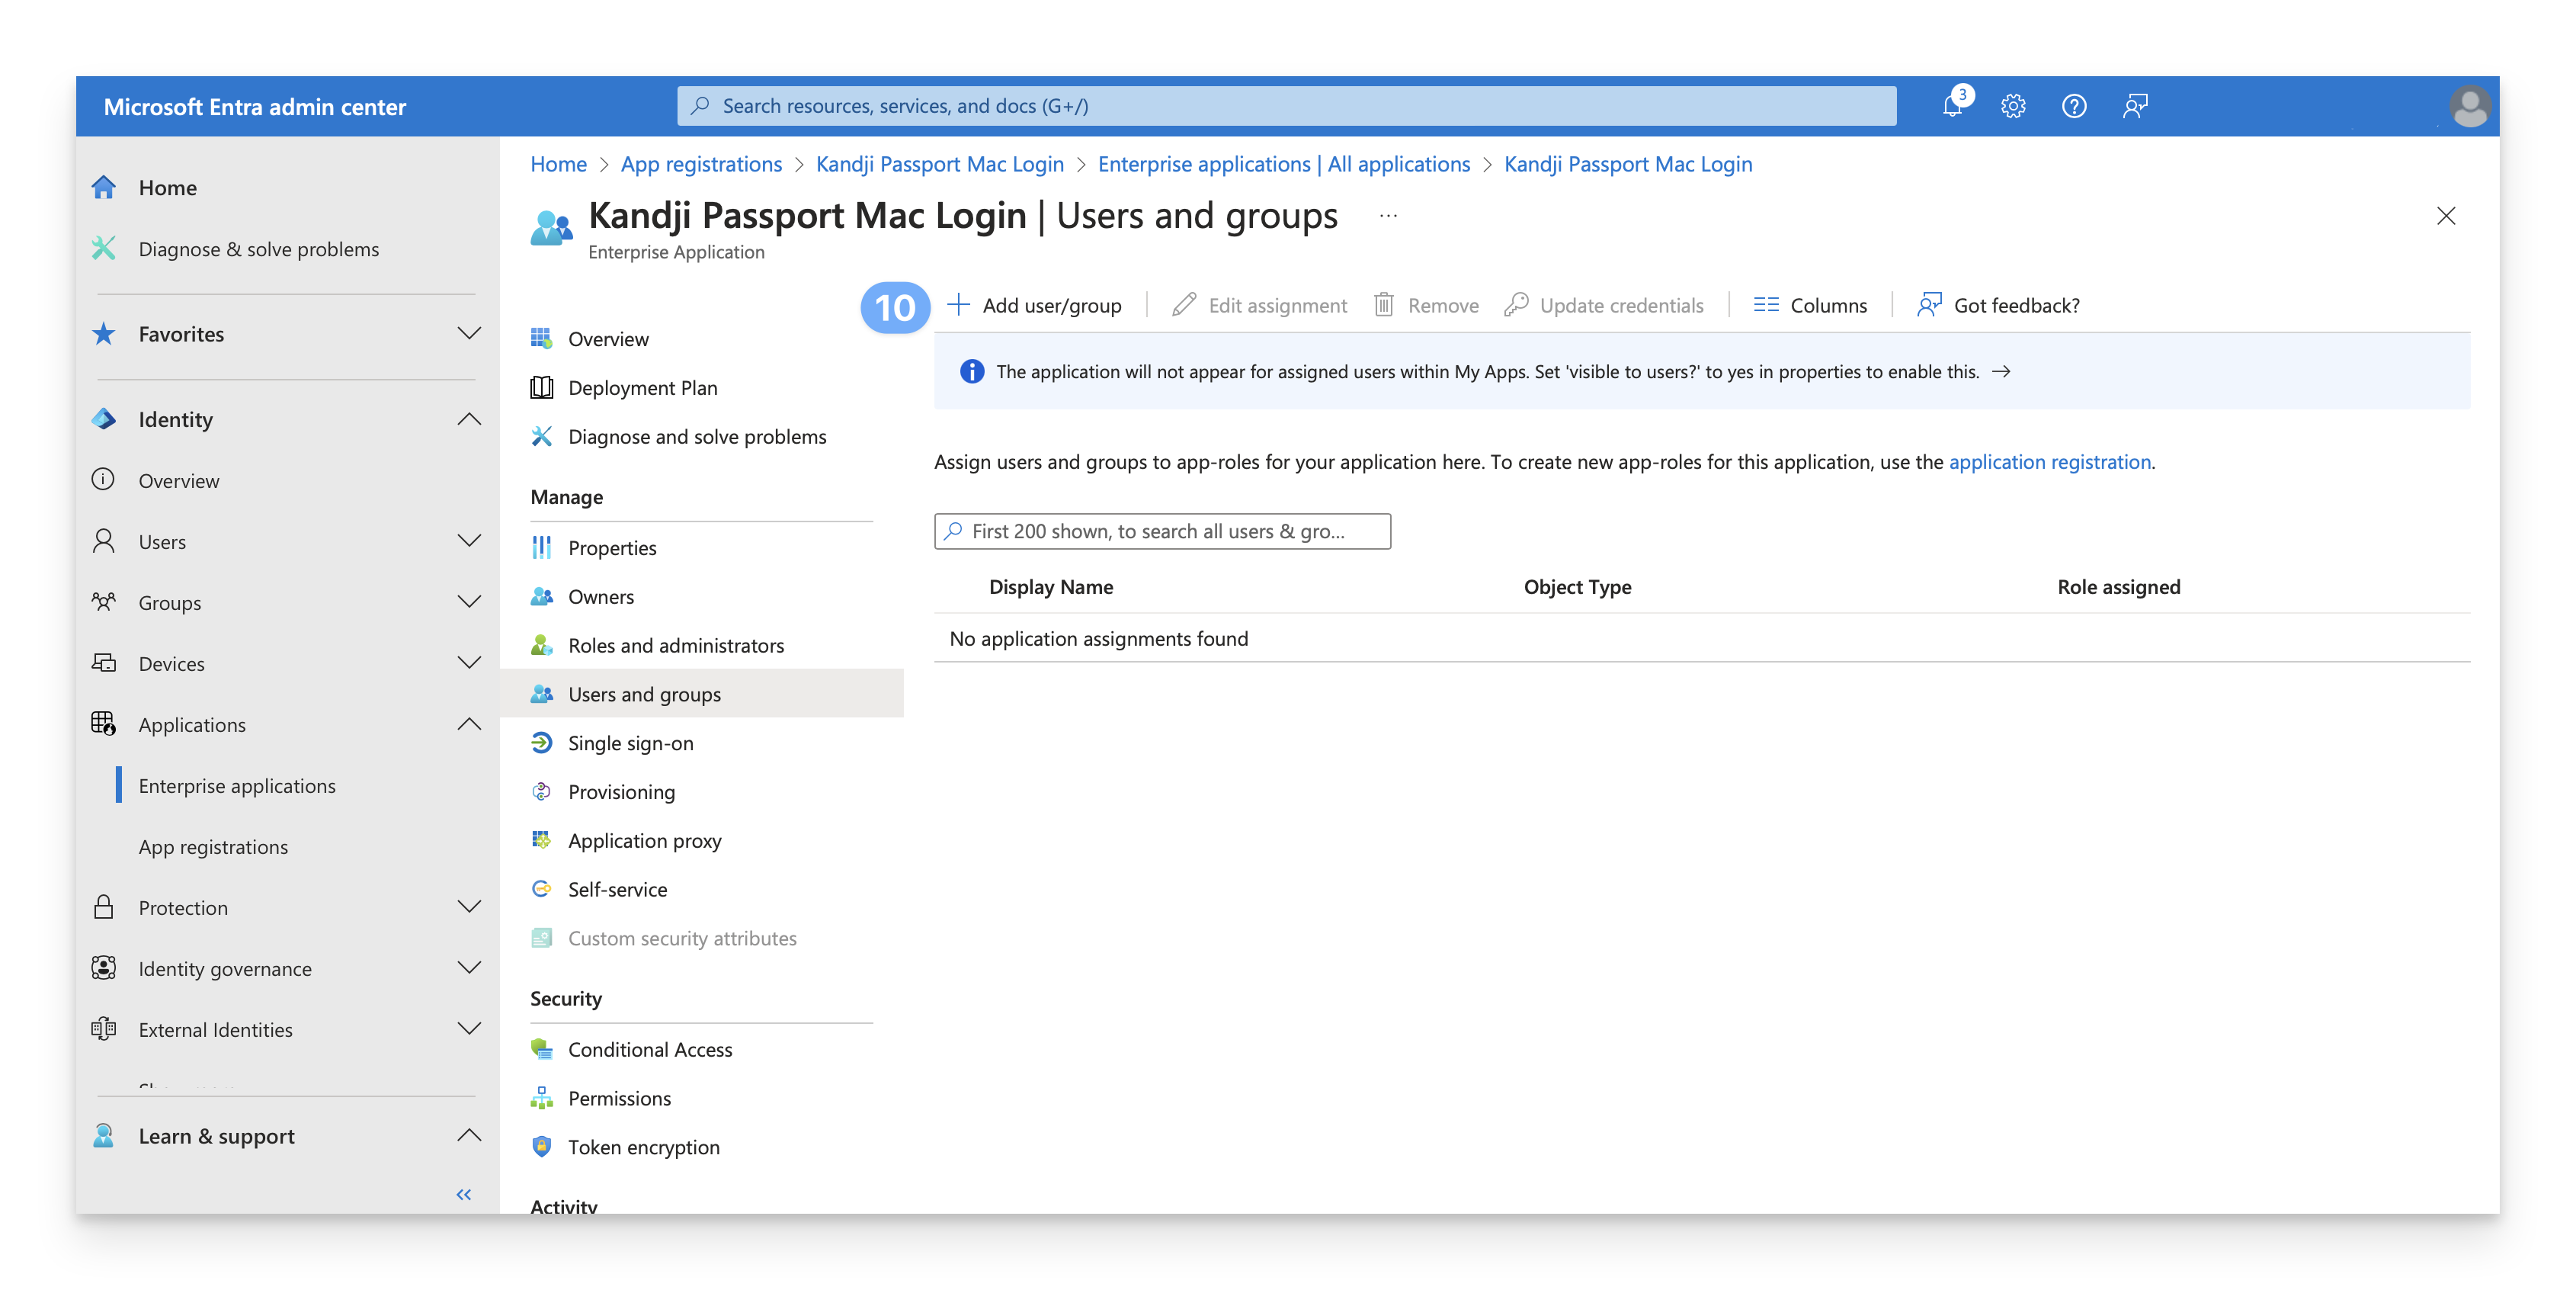
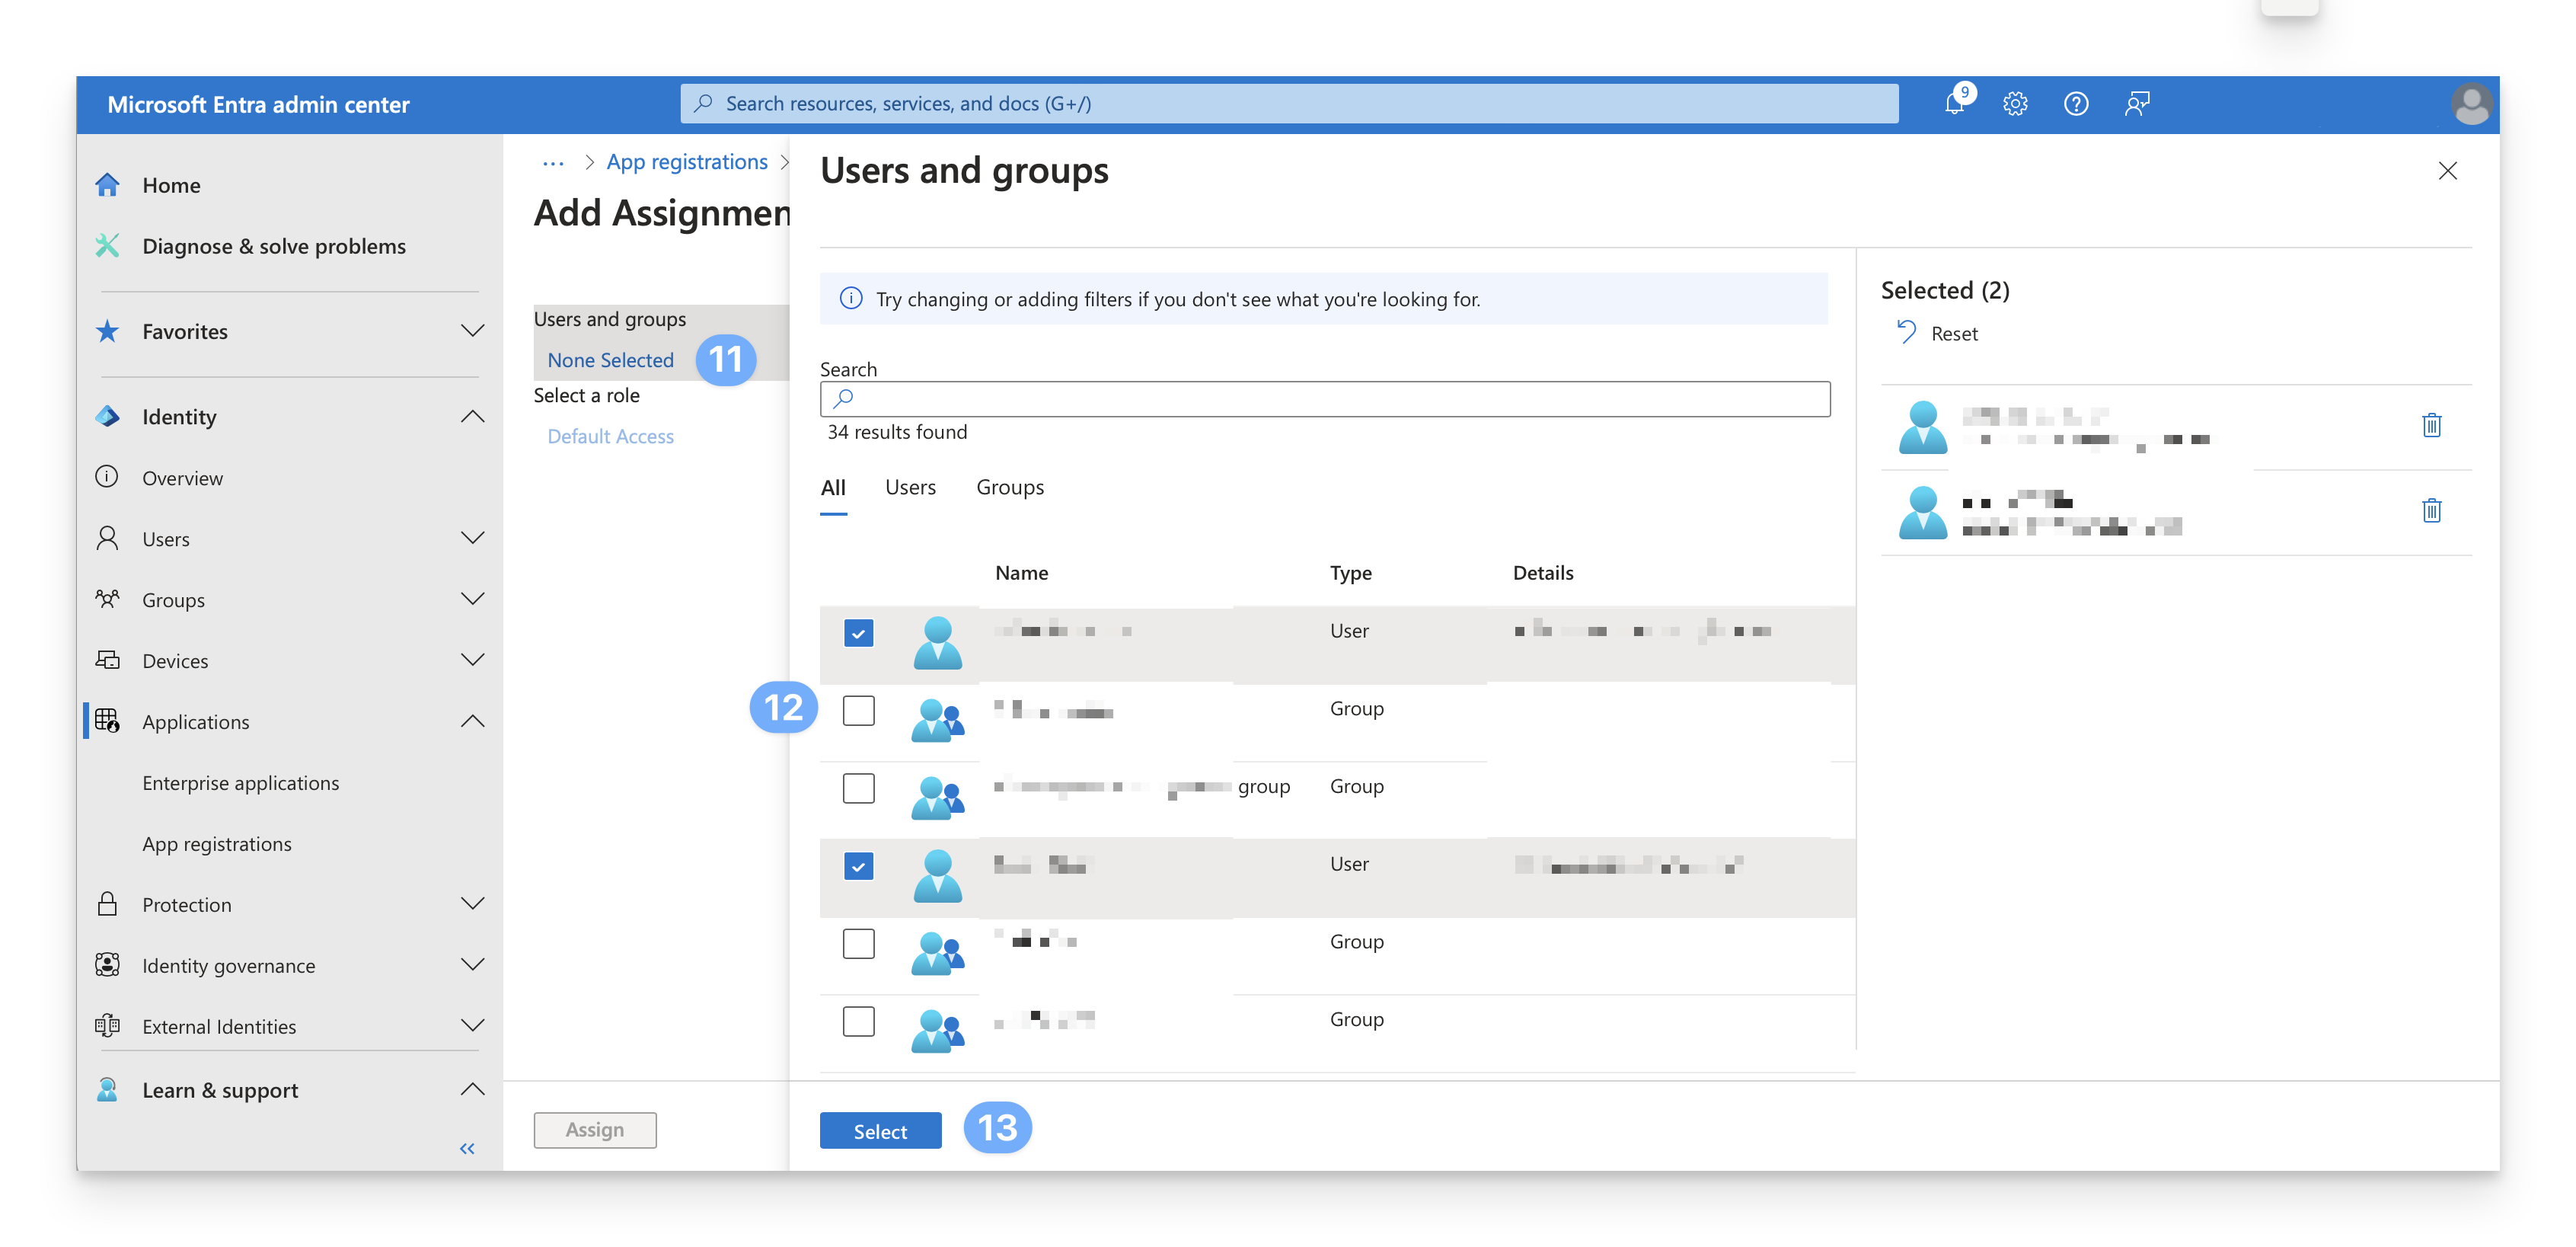
On the Add Assignment dialog, select the link under Users and groups.
A list of users and security groups is displayed. You can search for a specific user or group or select multiple users and groups that appear in the list.
After you have selected your users and groups, select Select.
 If you see the message below, it means that a free tier is being used. You can only add users (not groups) to the Passport Enterprise App.
 .png)
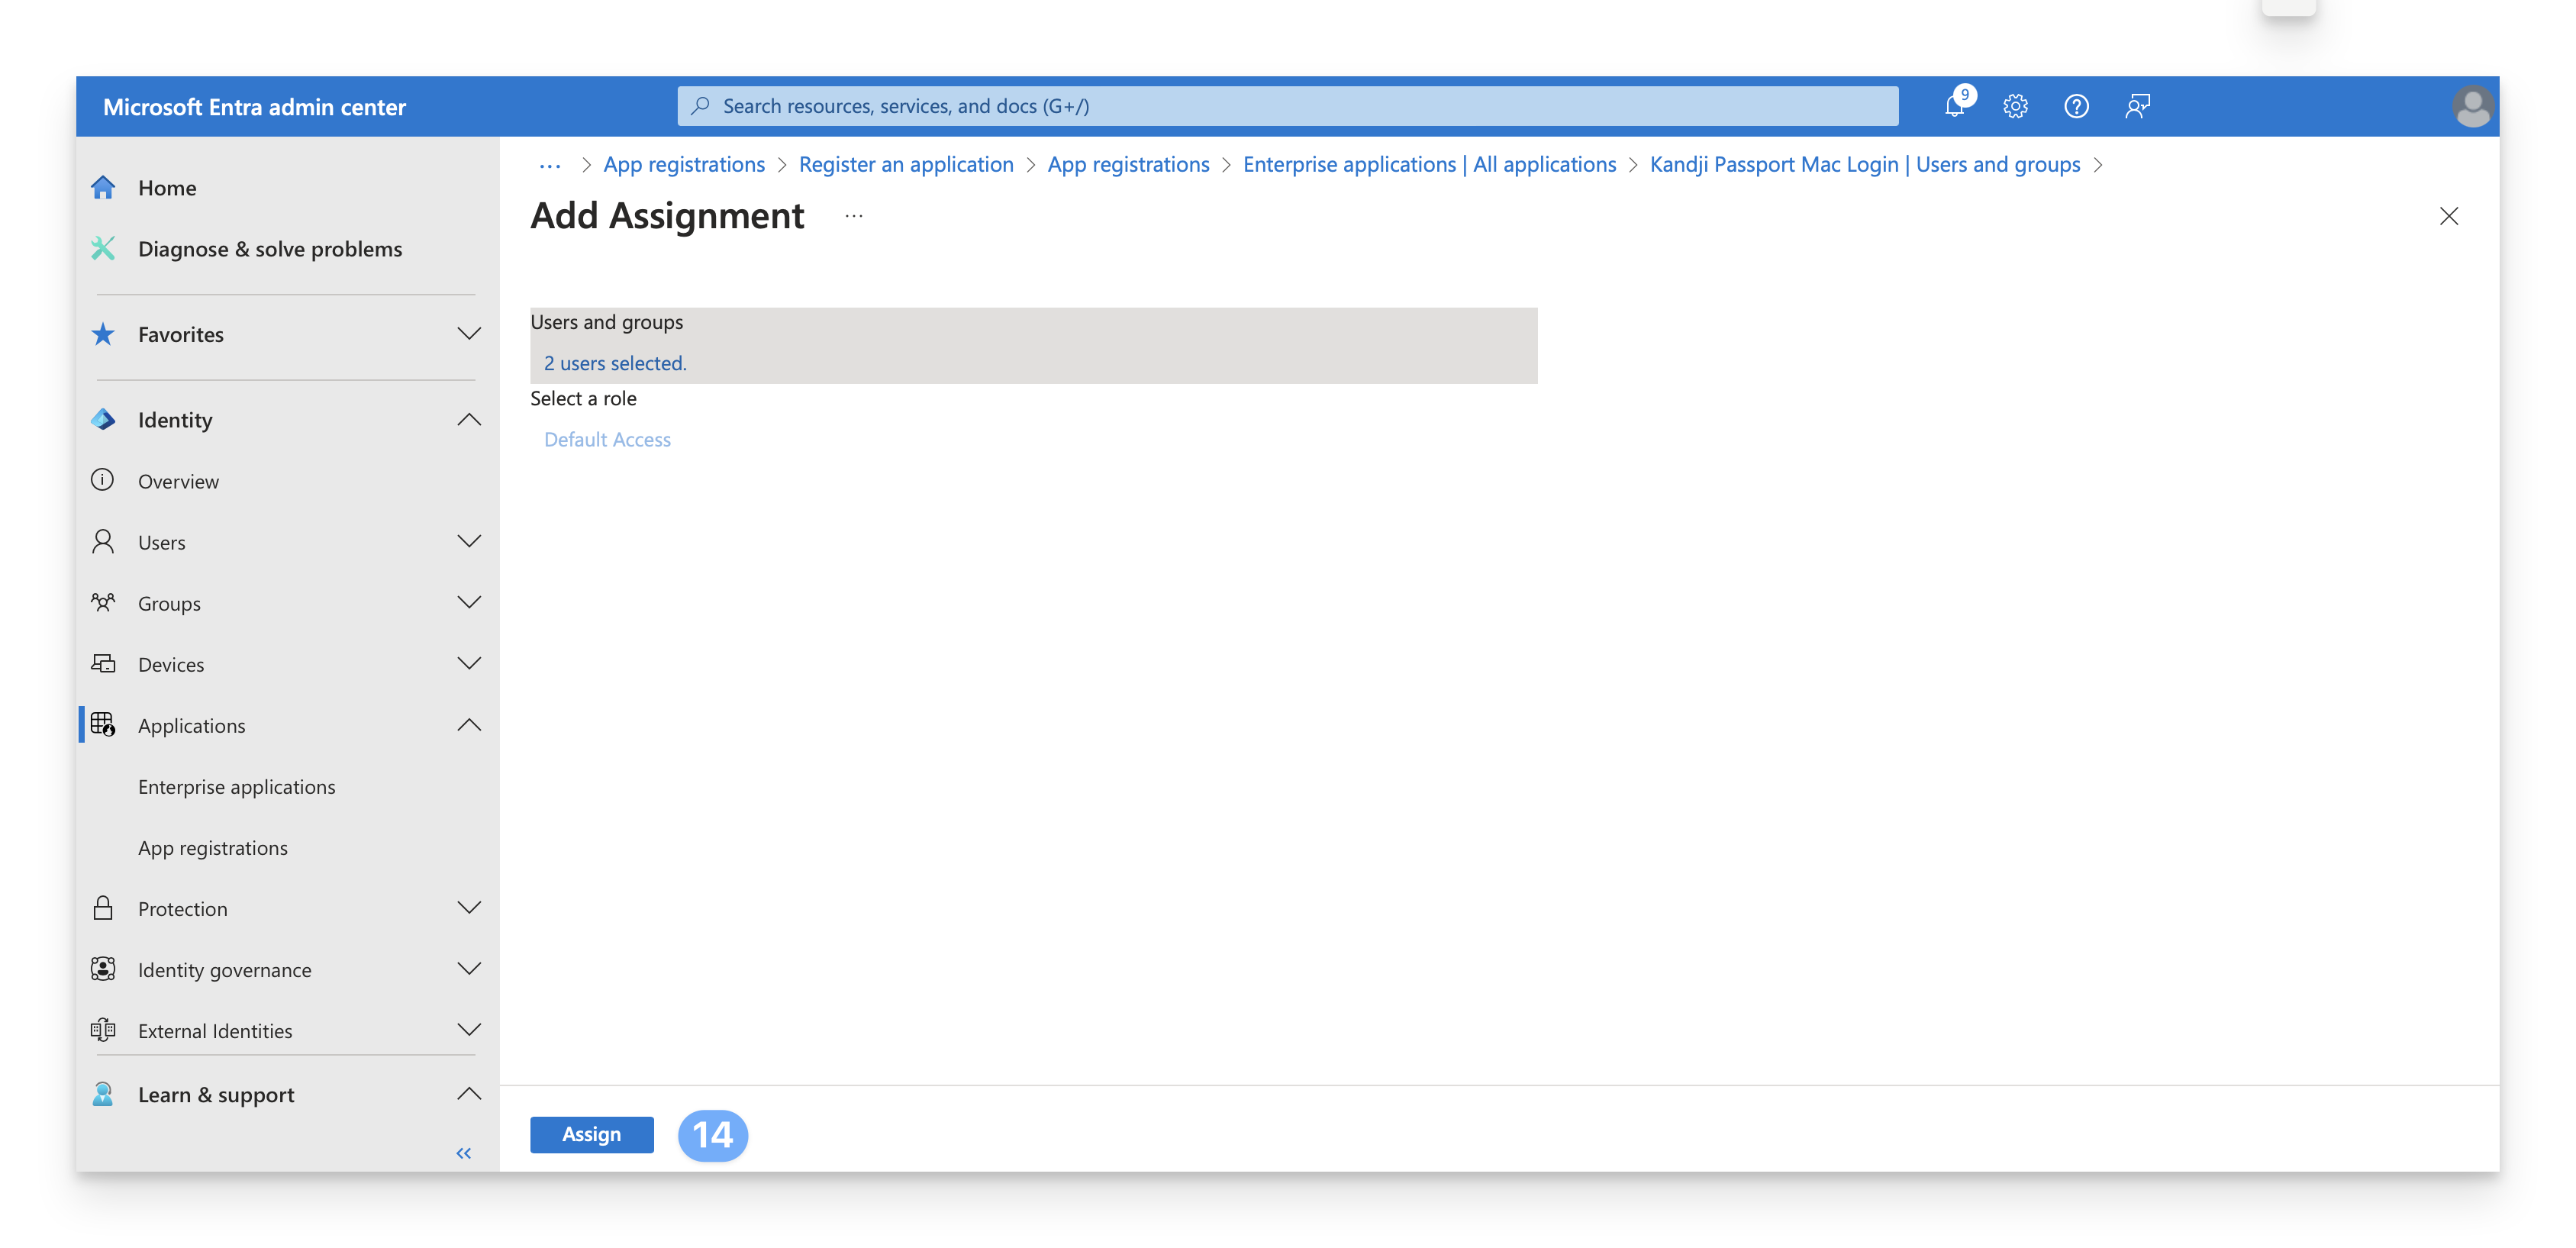
Select Assign to finish the assignment of users and groups to the app.
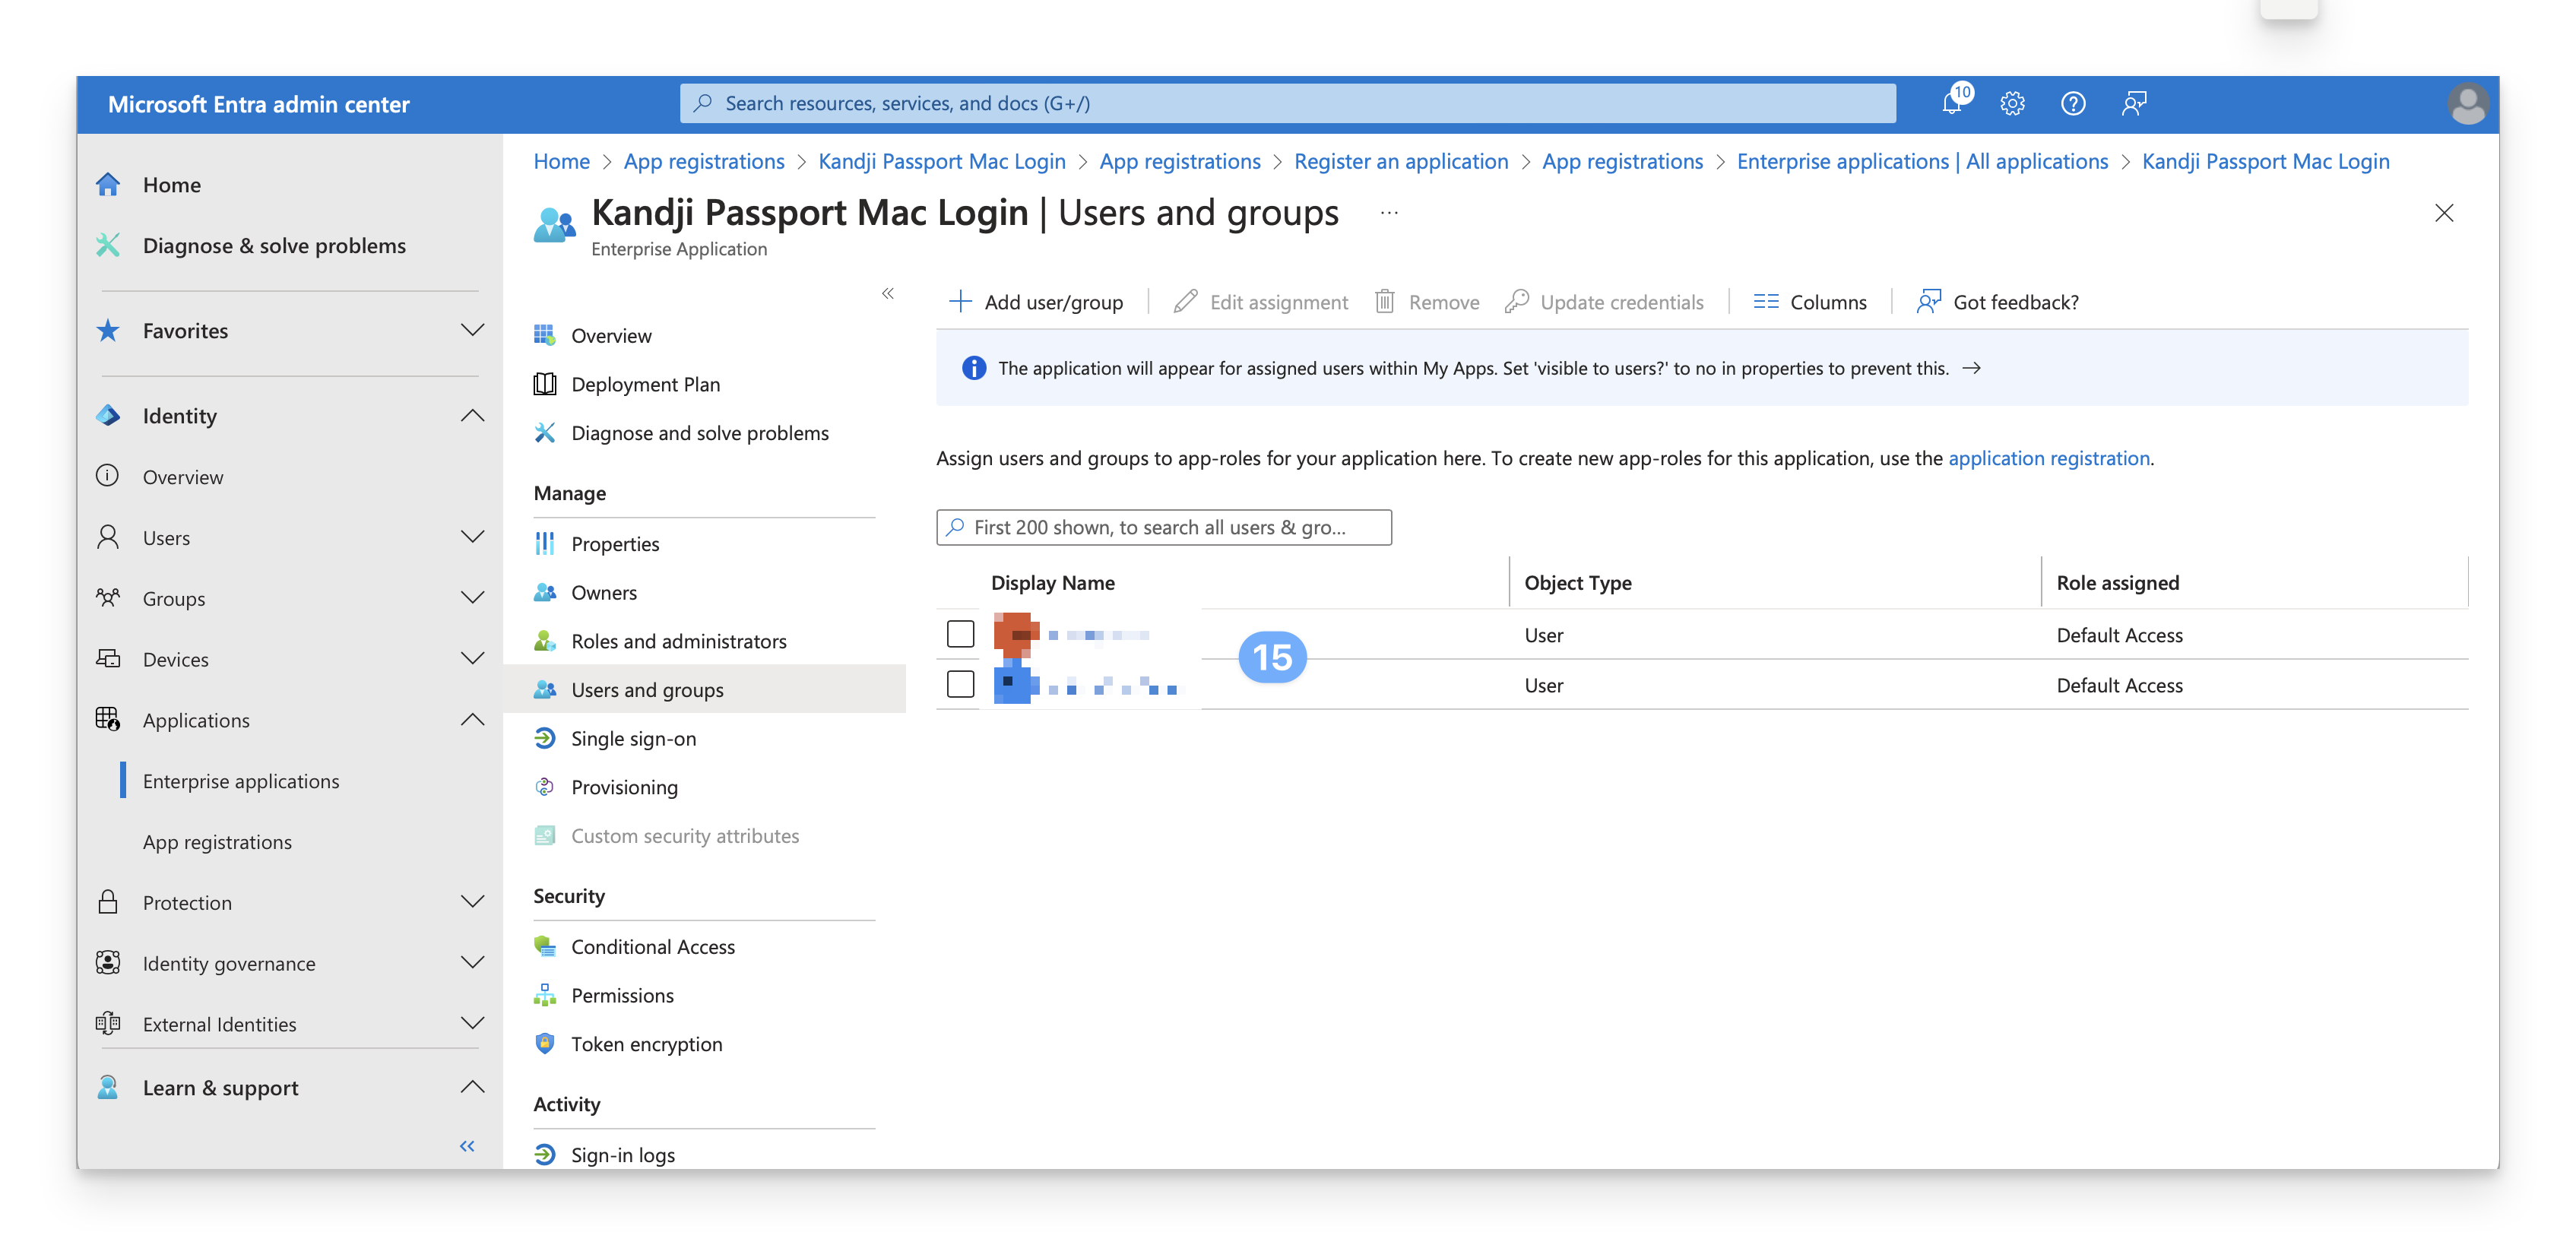
Confirm that the users and groups you added appear in the Users and groups list.
With this portion of the Entra ID configuration complete, review the remaining sections of this article for your Microsoft Entra ID environment.
Microsoft Entra ID Conditional Access Considerations
Microsoft Entra ID Conditional Access is included with Microsoft Entra ID Premium or better. Be sure to turn off both per-user MFA and Security defaults before you turn on Microsoft Entra ID Conditional Access policies.
When using the Mac Login Passport Configuration only: If Entra ID is configured with a Microsoft Entra ID Conditional Access policy that specifies MFA as a requirement and specifies all or specific cloud apps, you'll need to exclude the Enterprise application that you use for Passport from that policy. Another way to describe such a policy is that the policy uses both of these criteria:
Assignments: Target resources: Cloud apps: All cloud apps or Select apps
Access controls: Grant: Grant access: Require multifactor authentication
Here's an example of a policy that you don't need to modify because it doesn't use both of the criteria above (specifically, although it has the grant of Require multifactor authentication, it doesn't have the assignment for Target resources.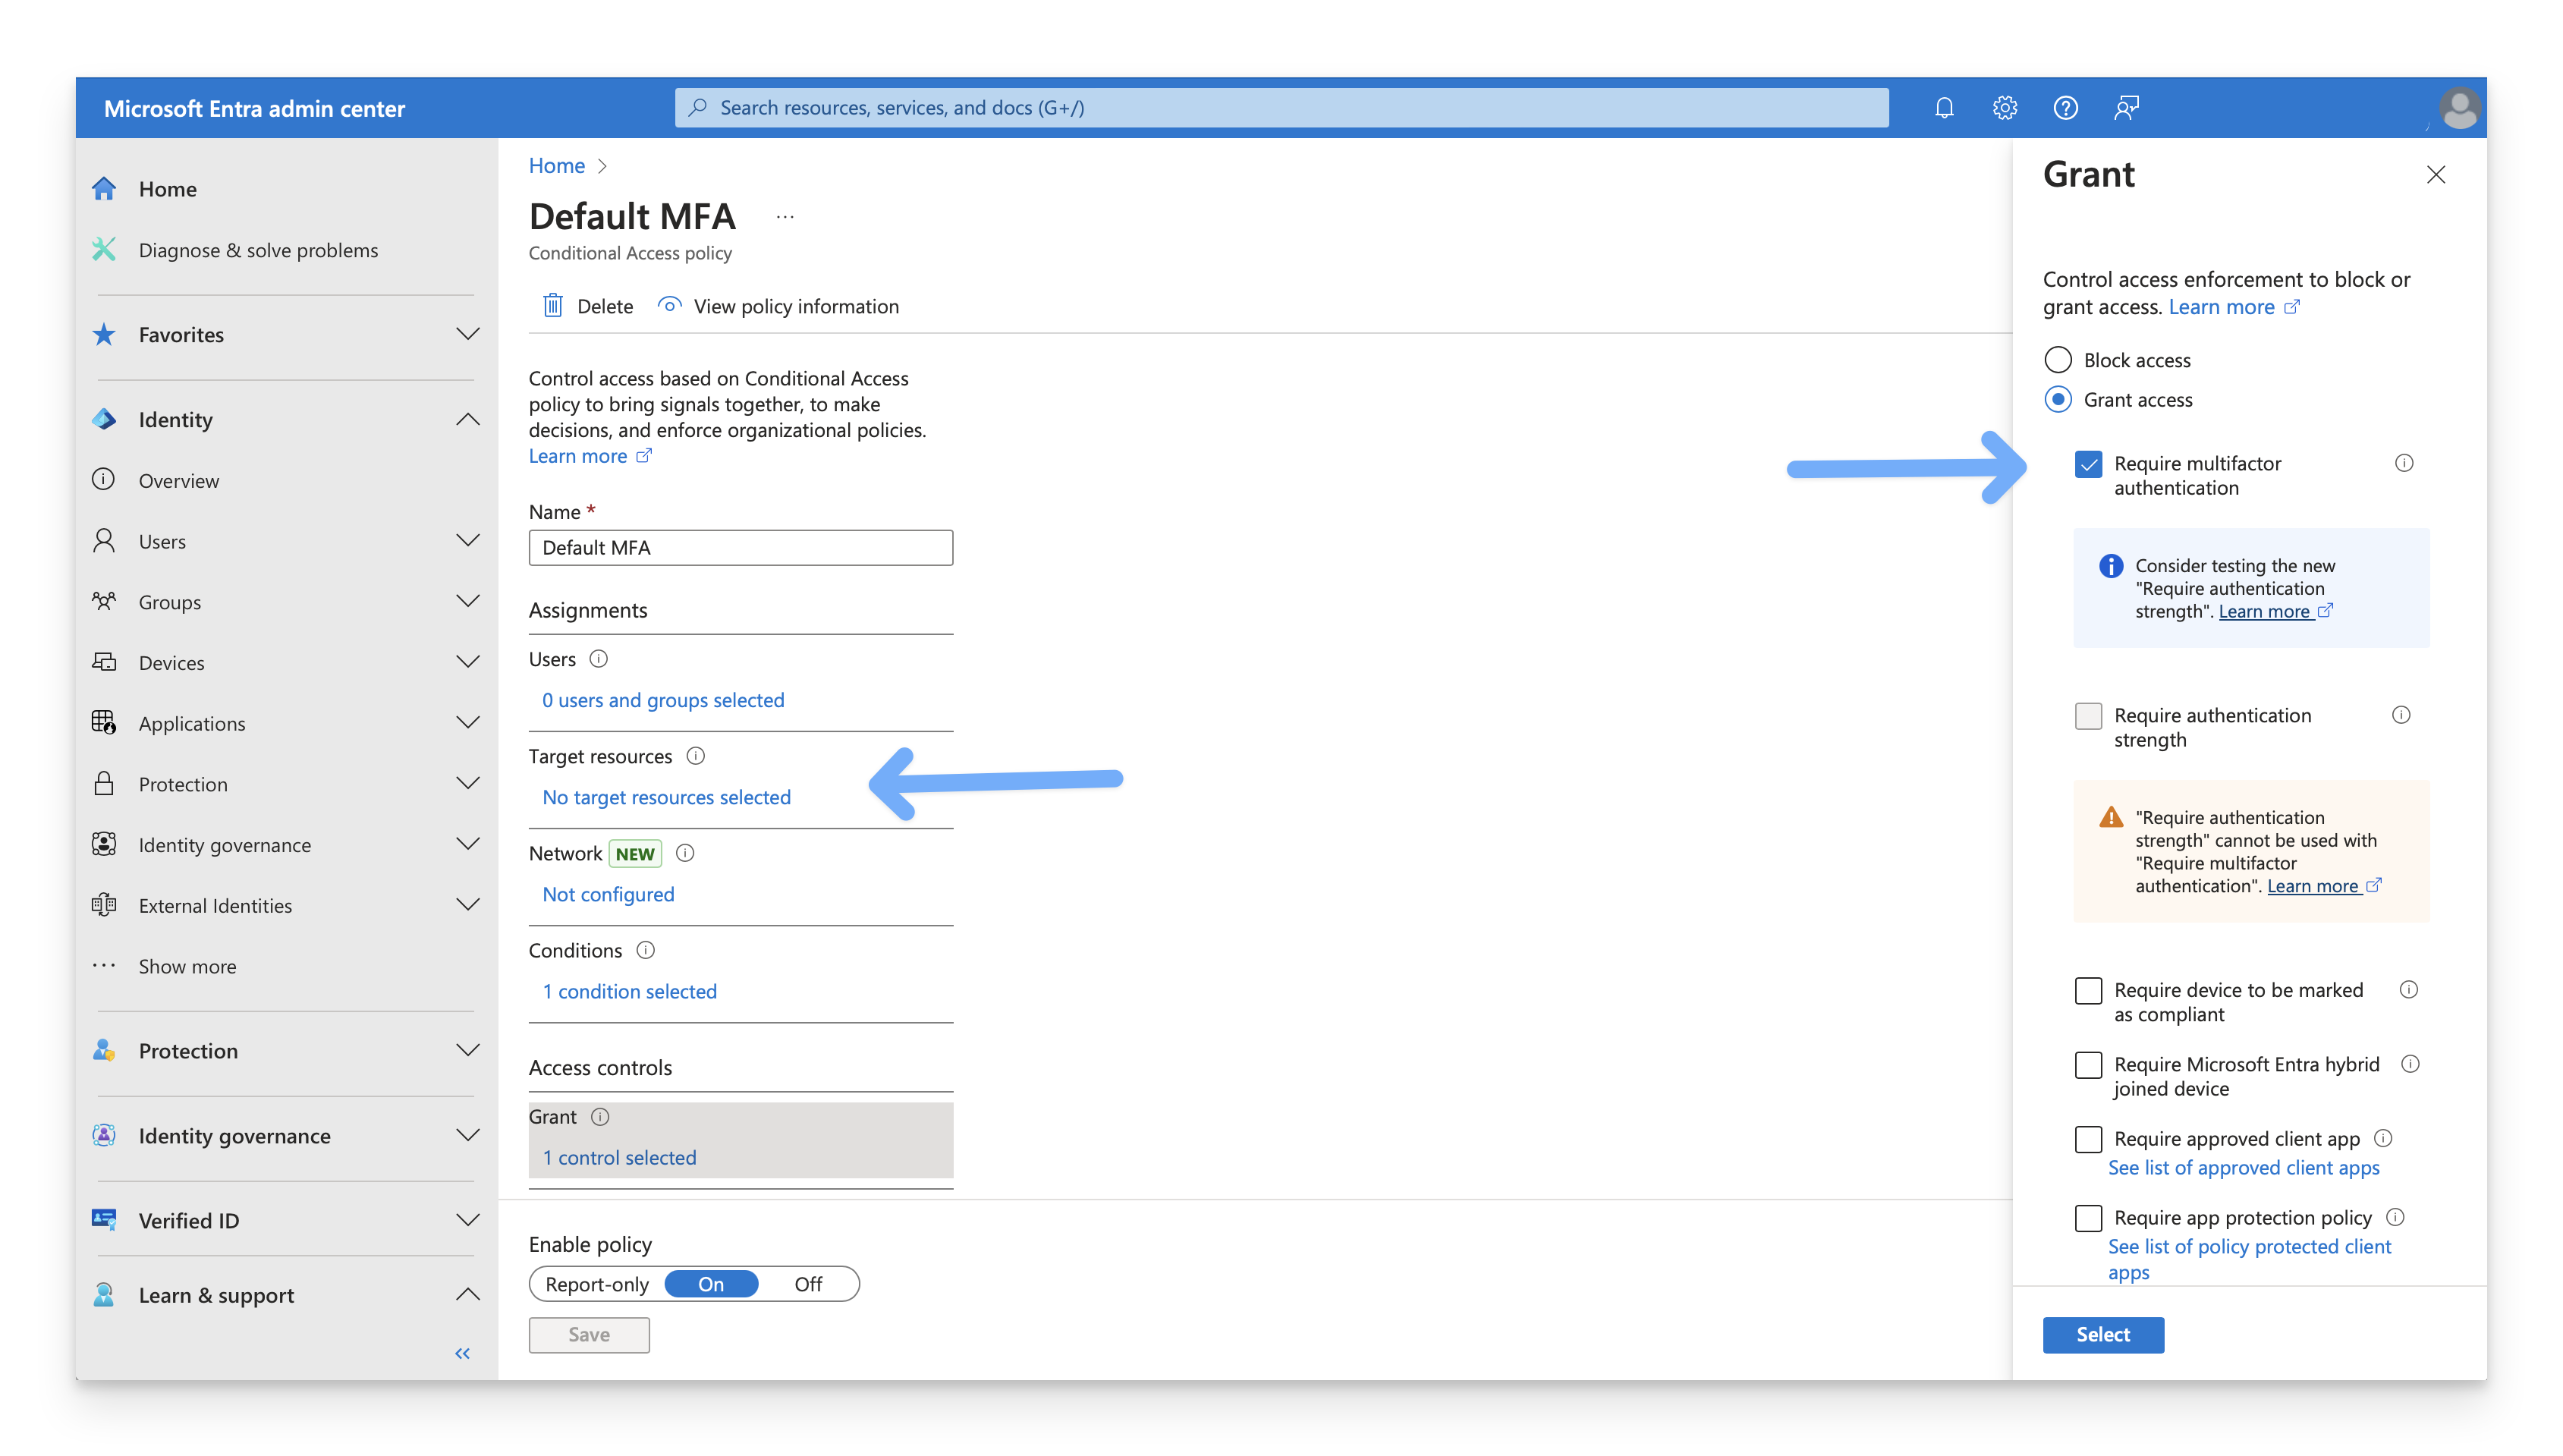 Here's an example of a policy that you do need to modify to exclude the Enterprise application for Kandji Passport because the policy uses both criteria:
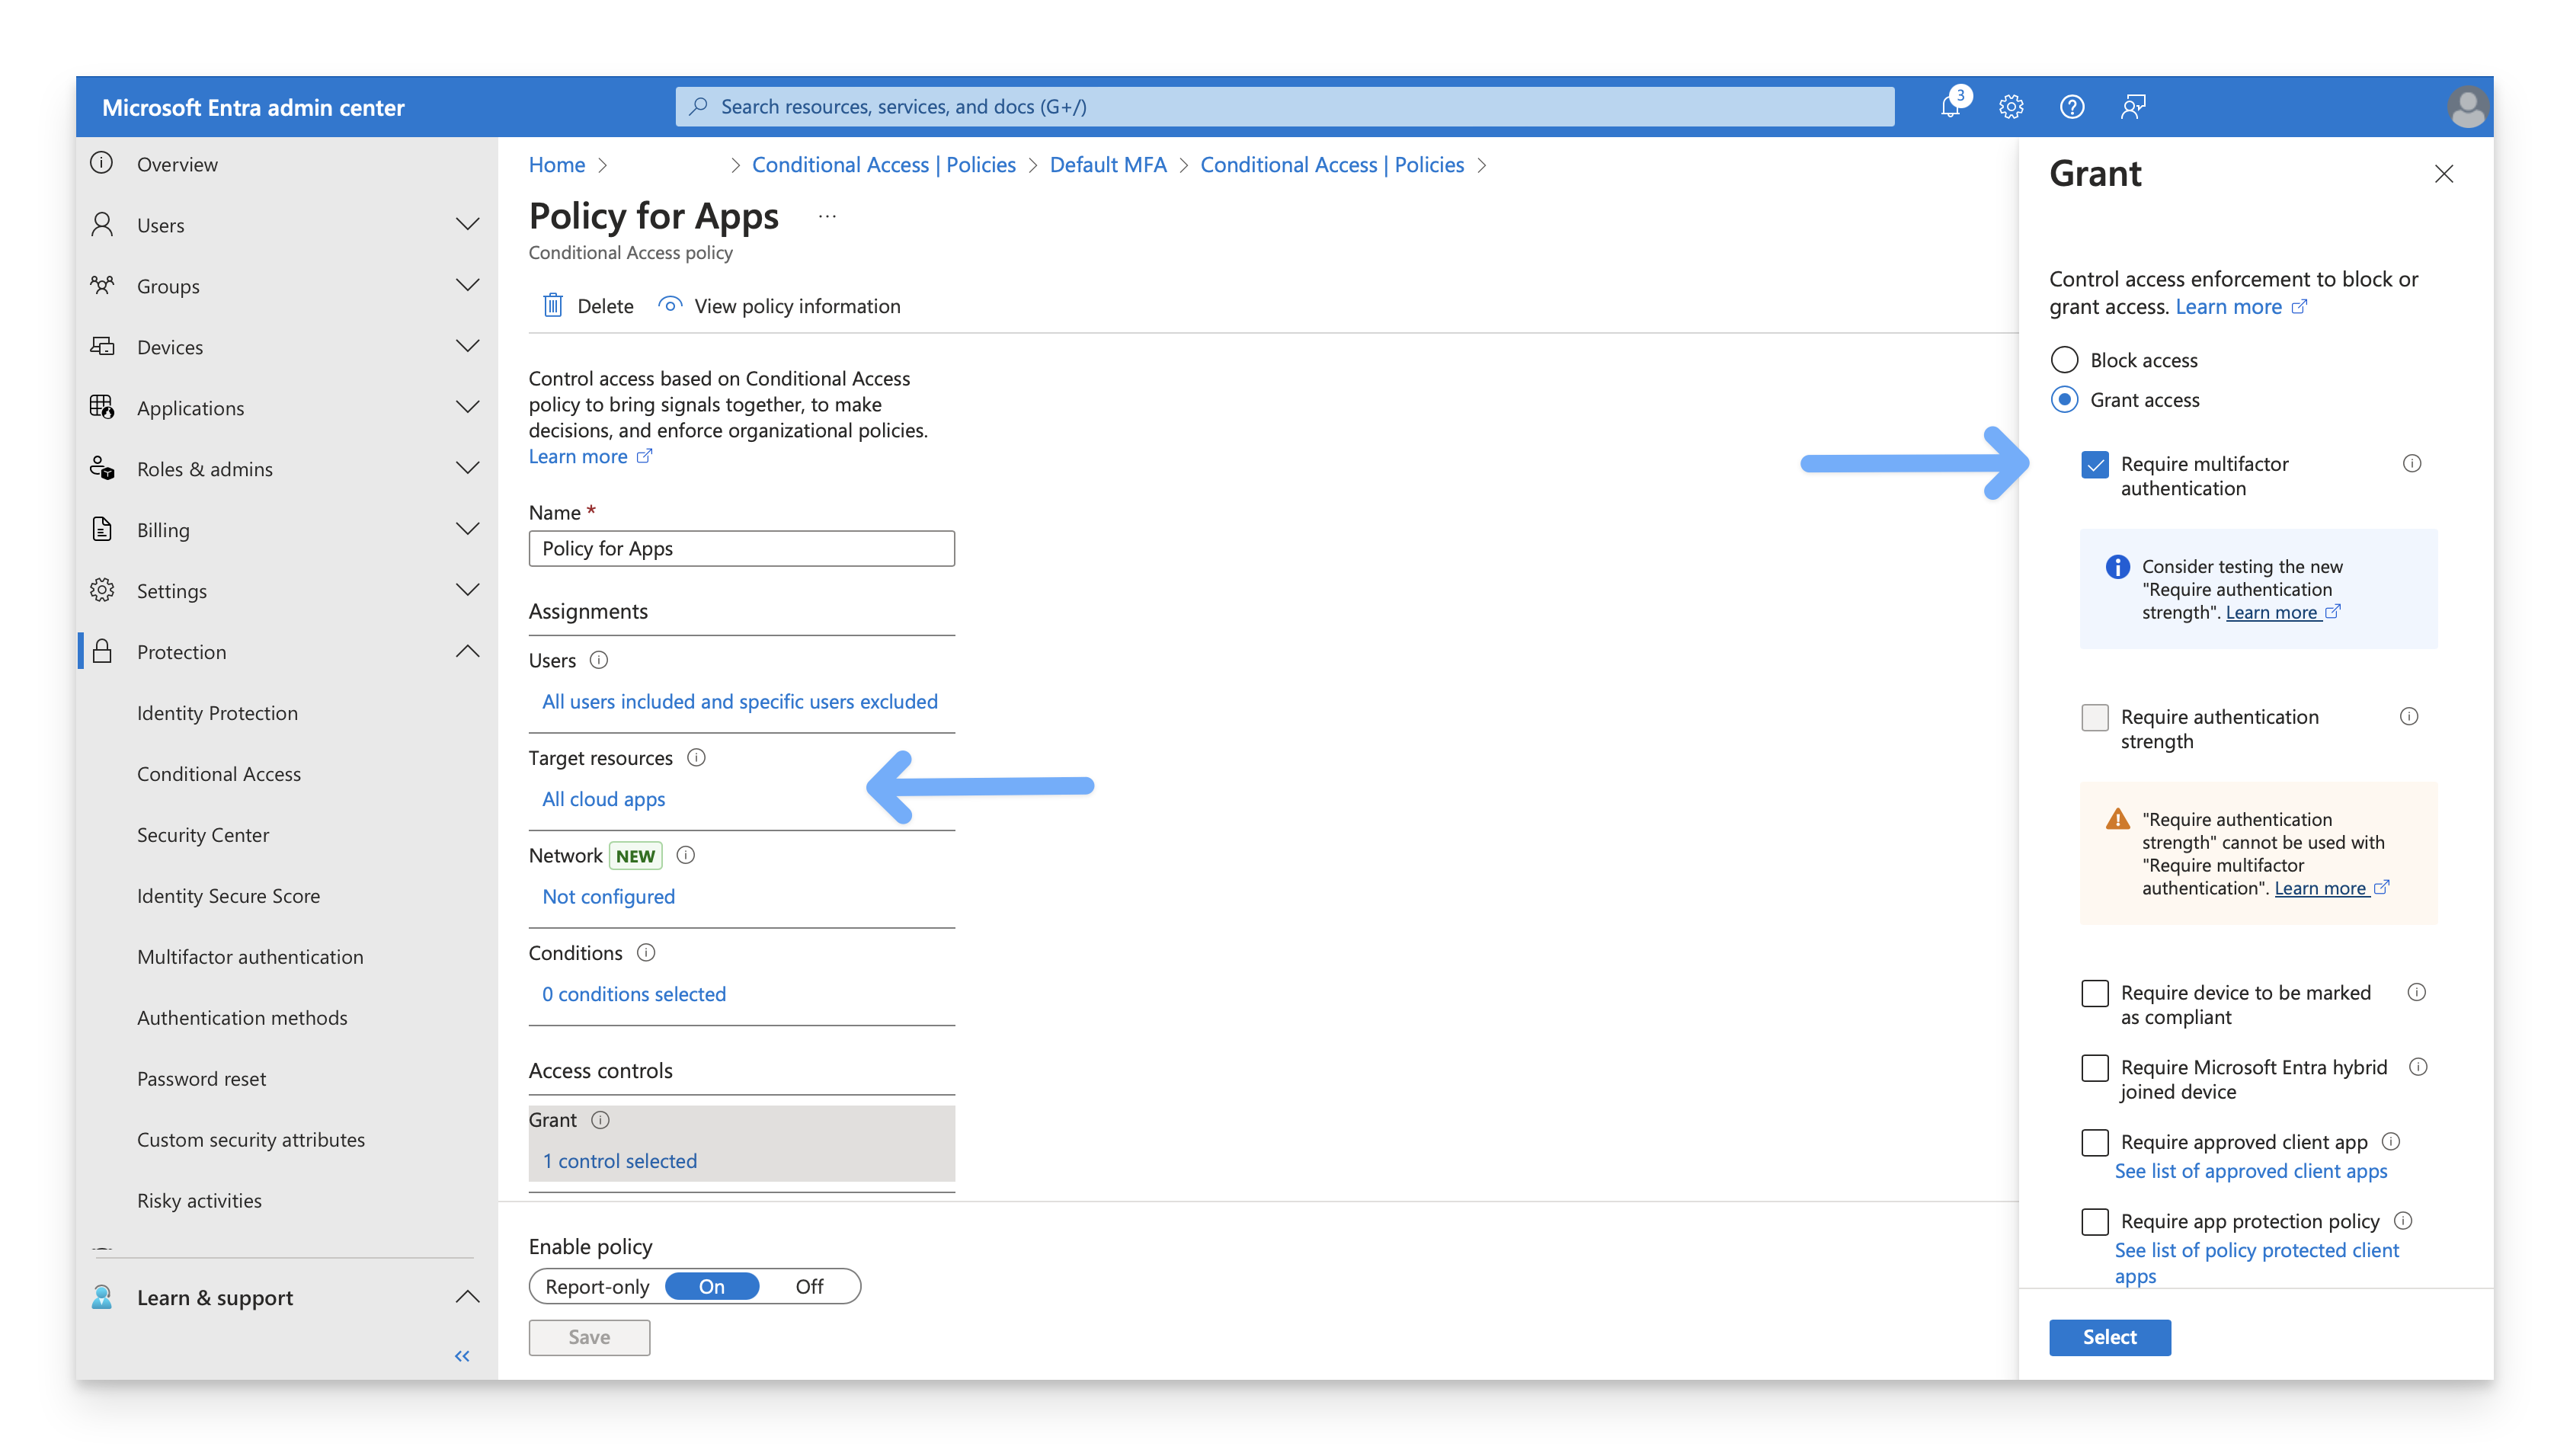
For you to exclude the Enterprise application, it needs to have a Redirect URI value, as seen in step 8 in the create the app registration section of this article.
Add the Cloud App Exclusion
Exclude the Enterprise app you use for Kandji Passport for each applicable policy.
In the Microsoft Entra admin center, open the portal menu and then select Protection.
On the Protection menu, select Conditional Access.
On the Conditional Access page, select Policies.
Confirm that the portal displays each policy with a Policy Name and a State (among other information).
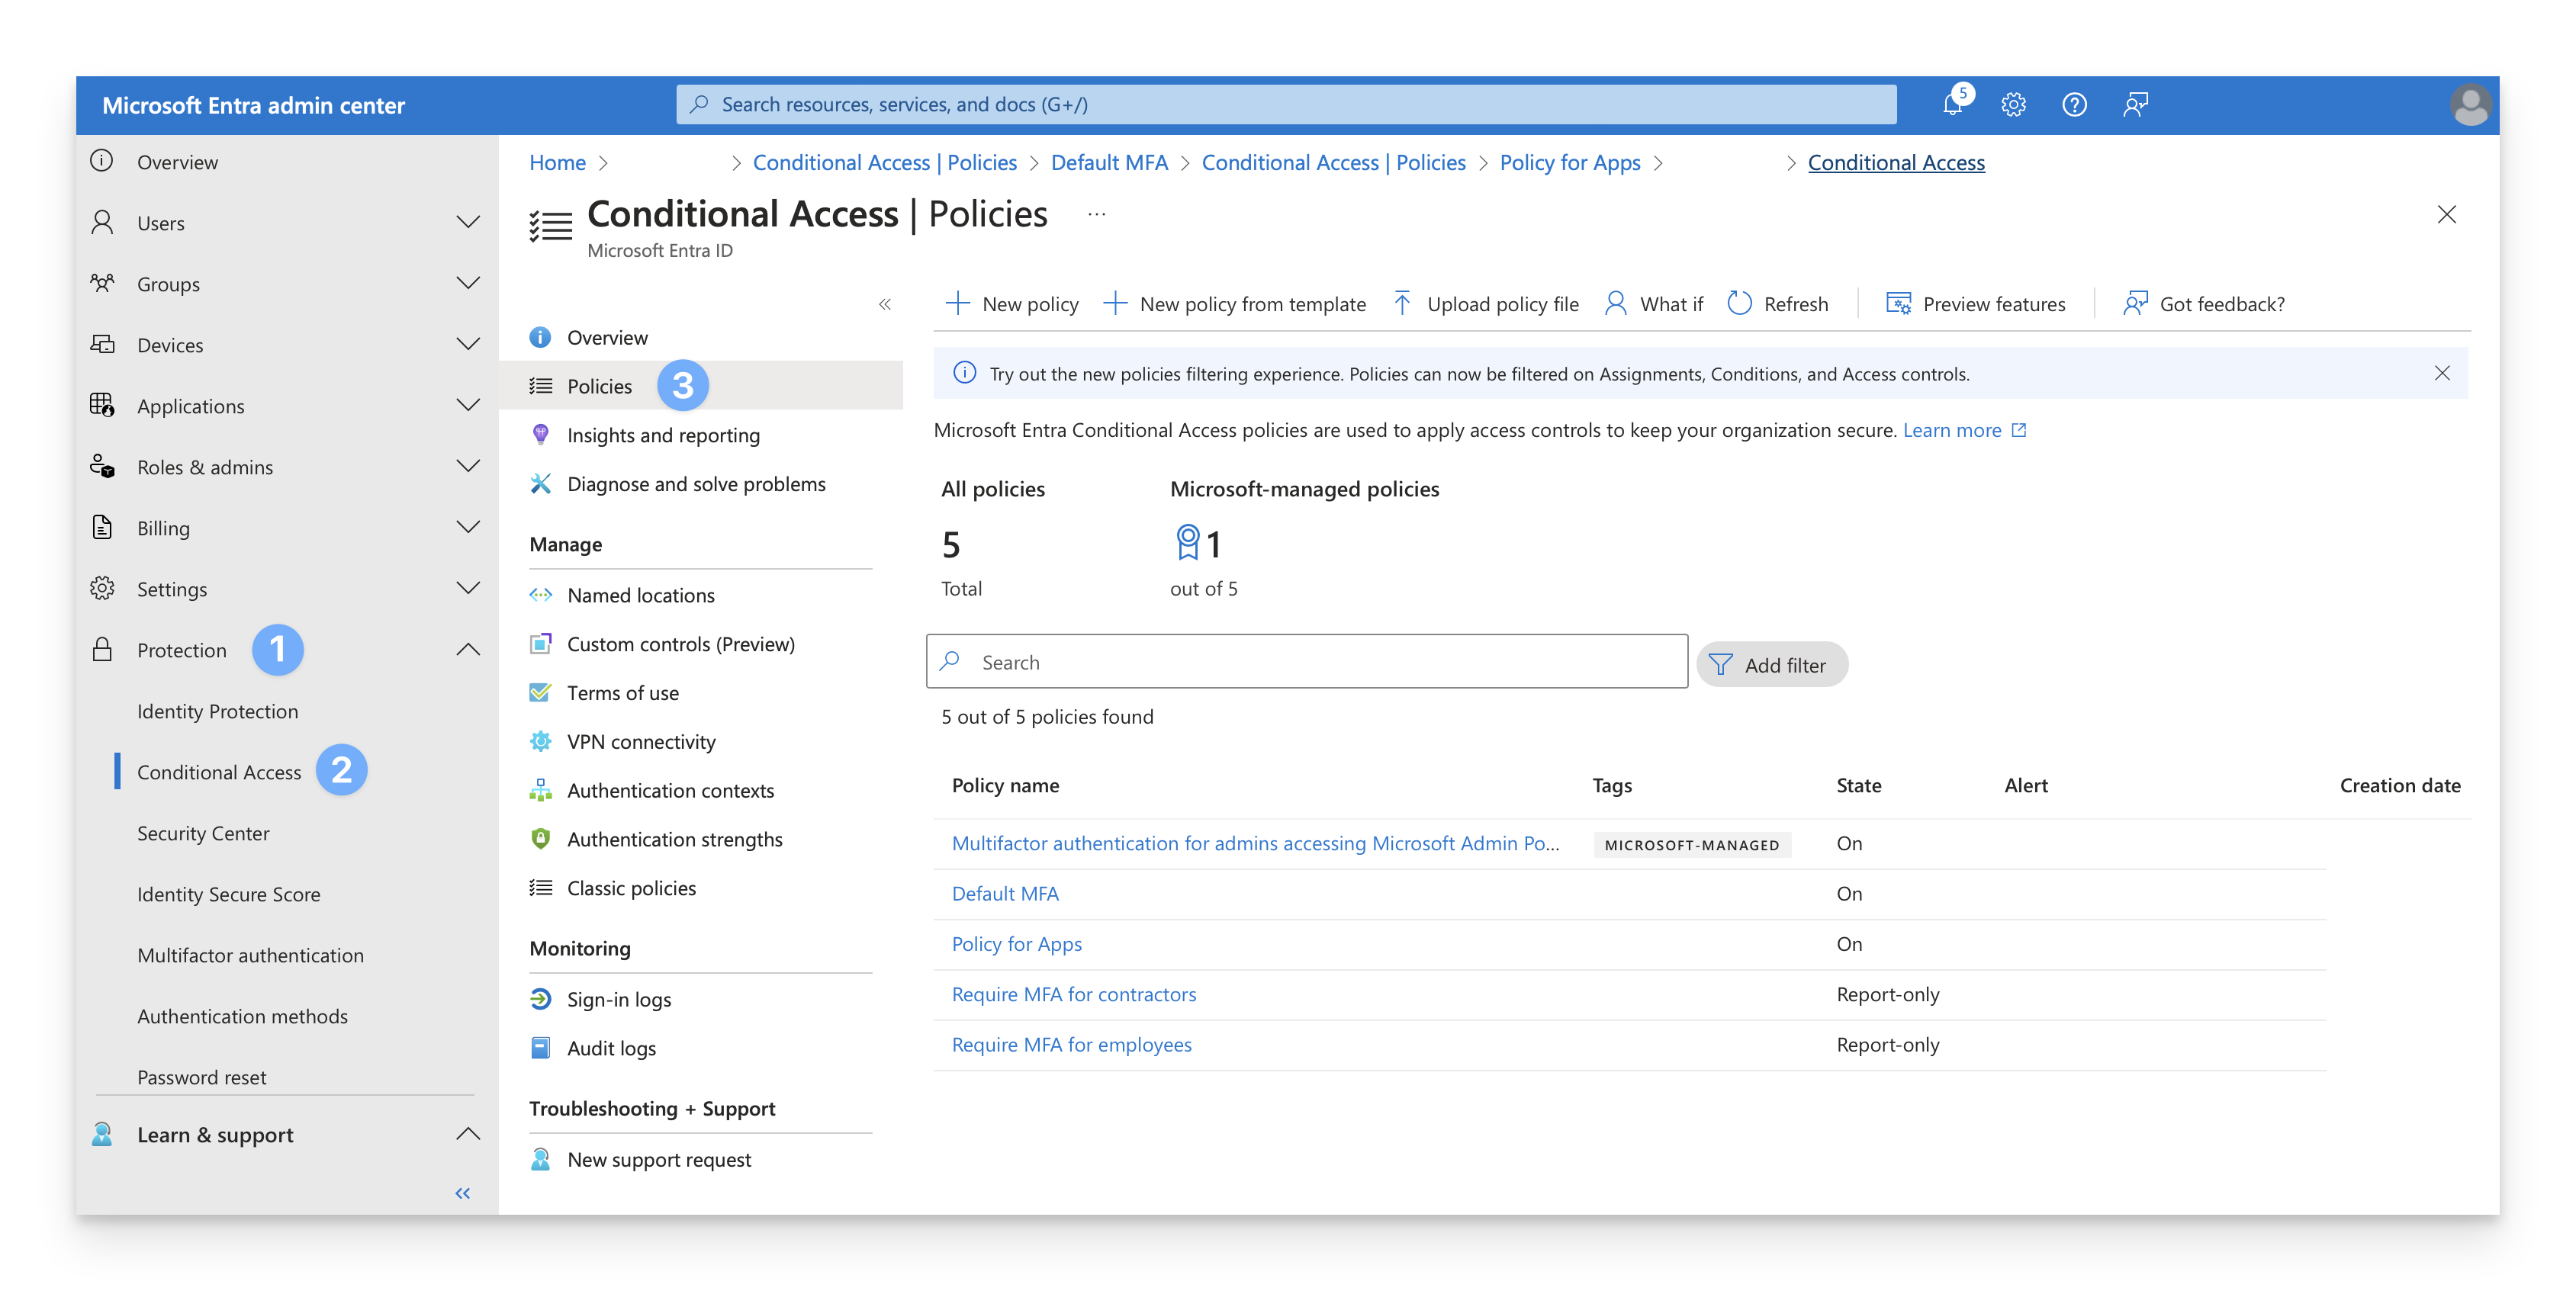
Select a policy that has the State of On.
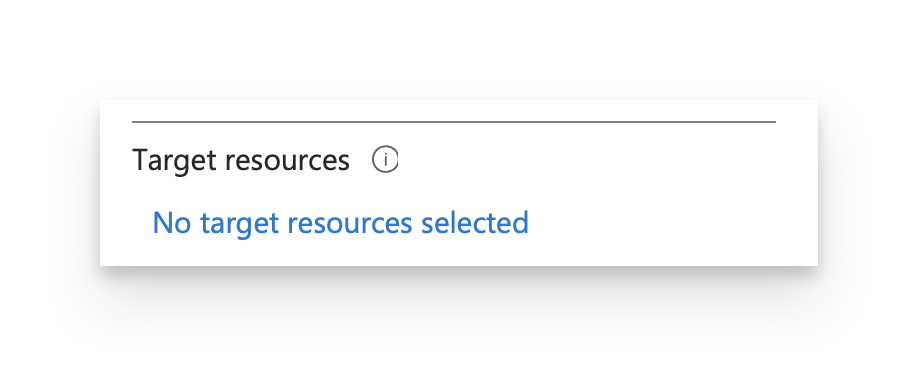
If the Target resources section displays No target resources selected, then return to the previous step and select the next policy.
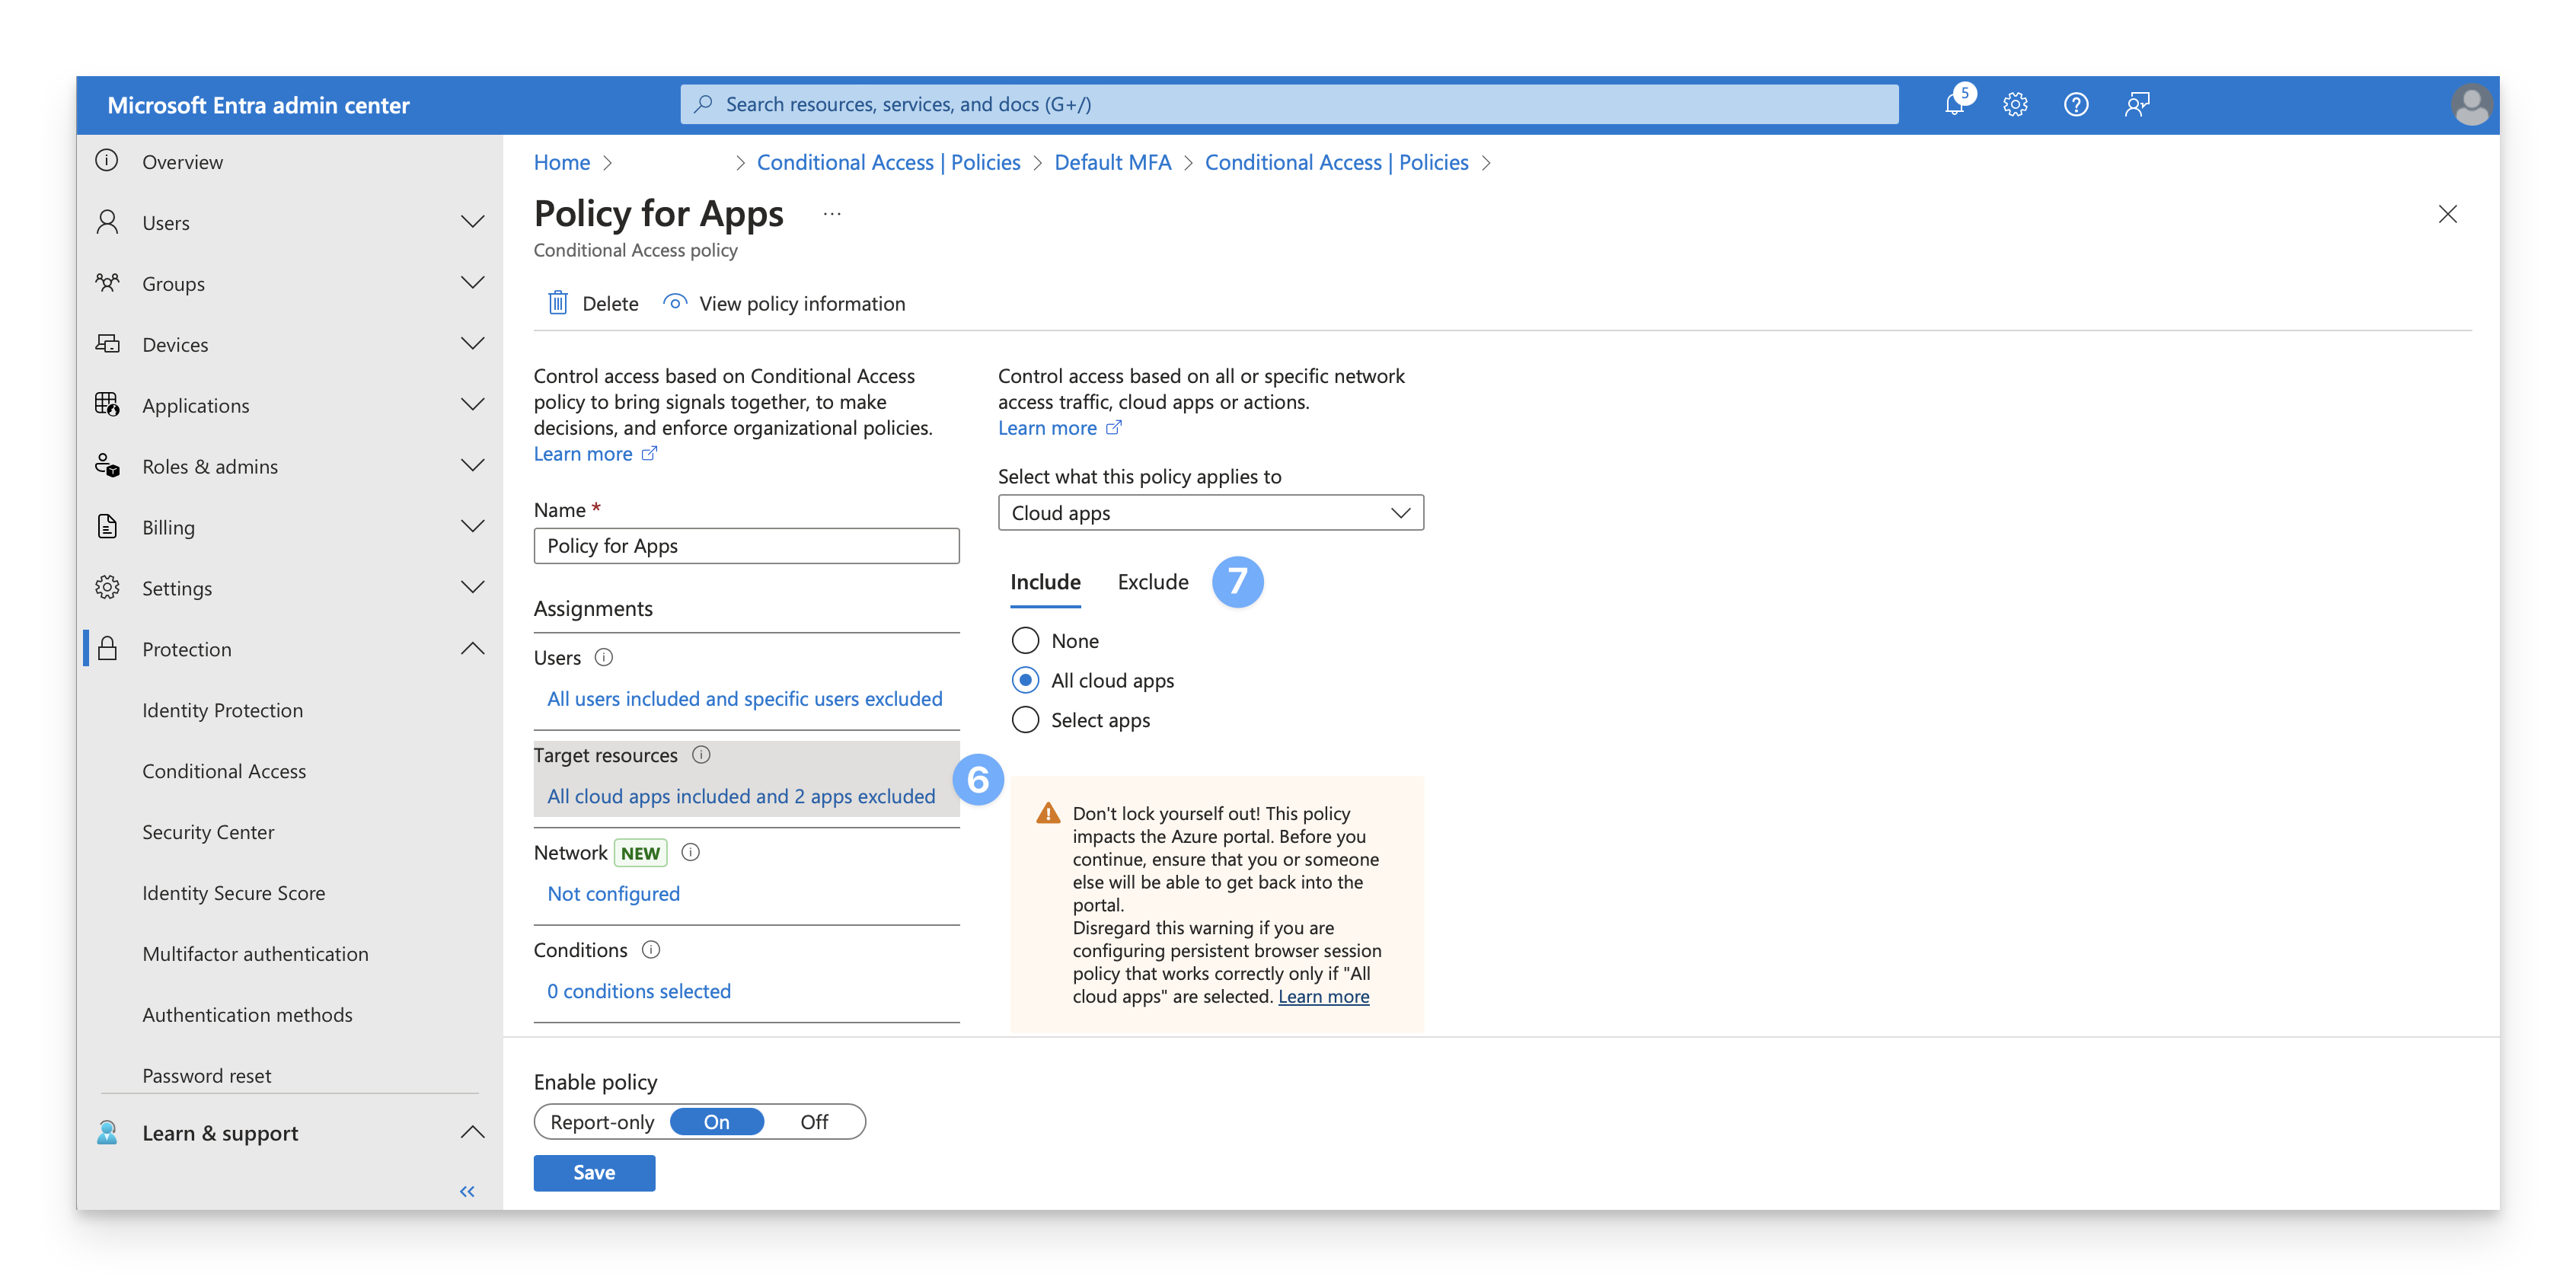
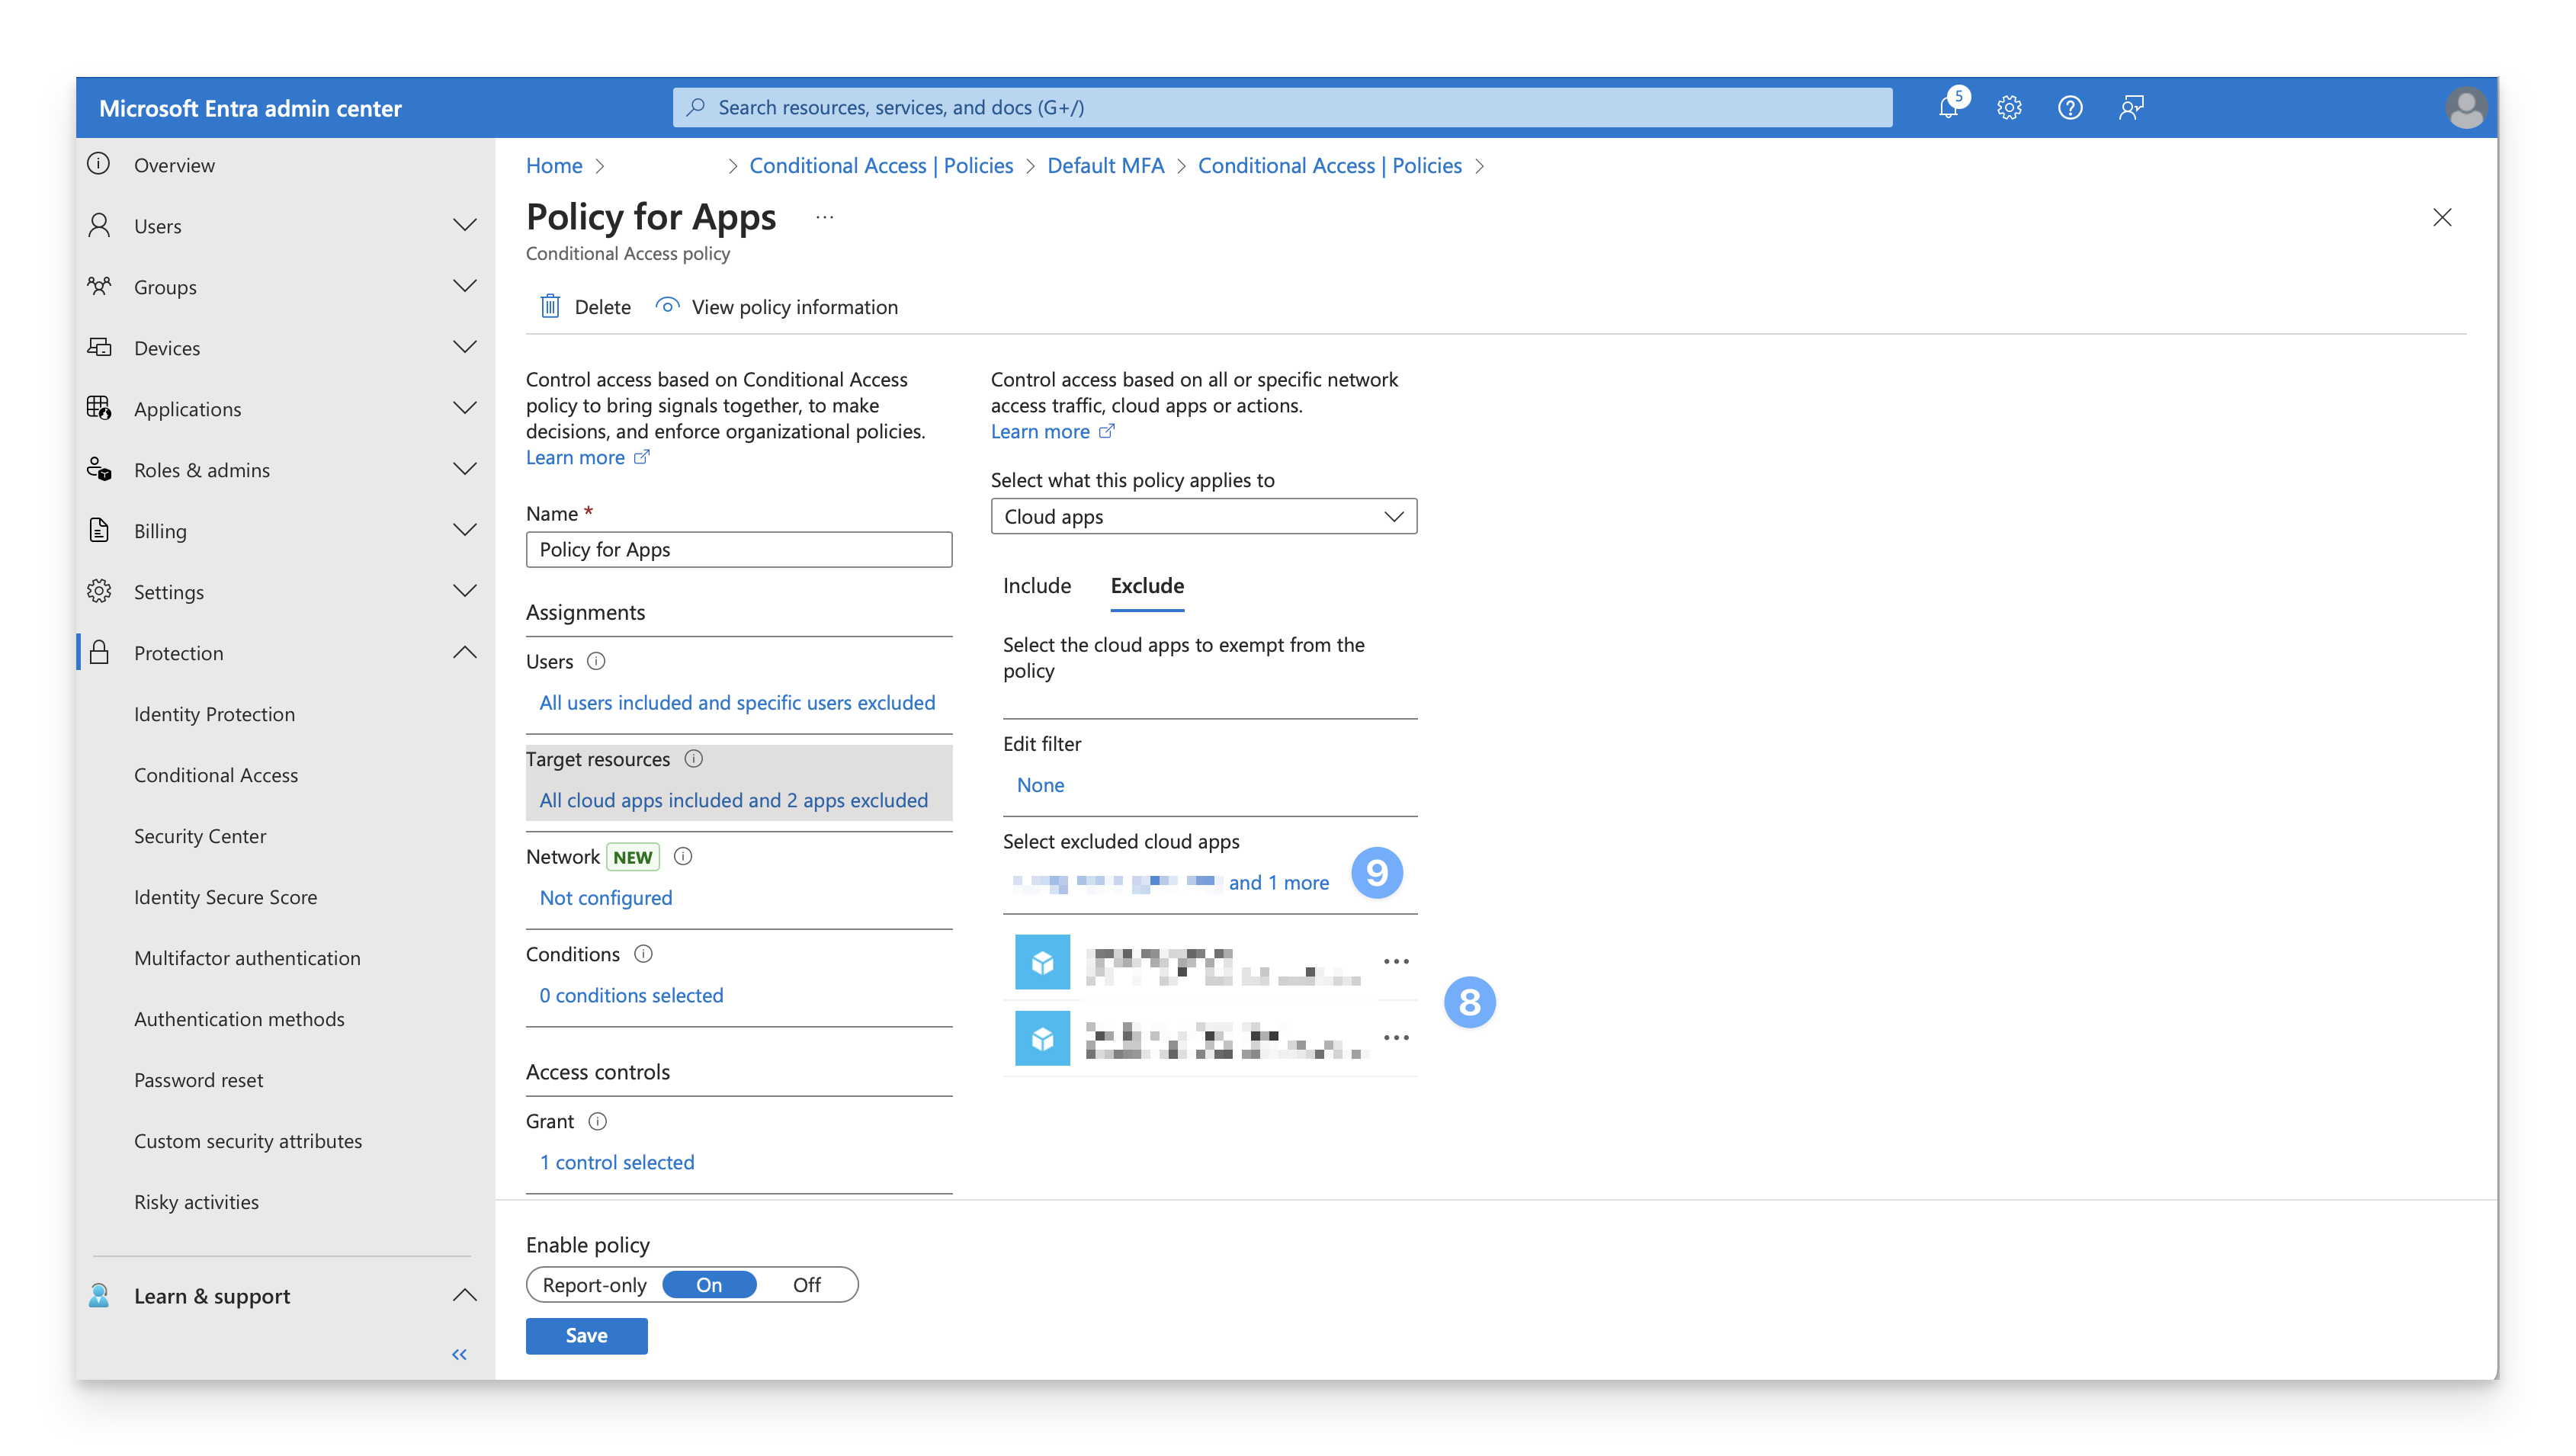
 Otherwise, click the link under Target resources.
Click Exclude.
Review the list of excluded cloud apps (there may be no excluded cloud apps). If the Enterprise app for Kandji Passport is already excluded, you can return to step 3 and proceed to the next policy.
Click the text link under Select excluded cloud apps.
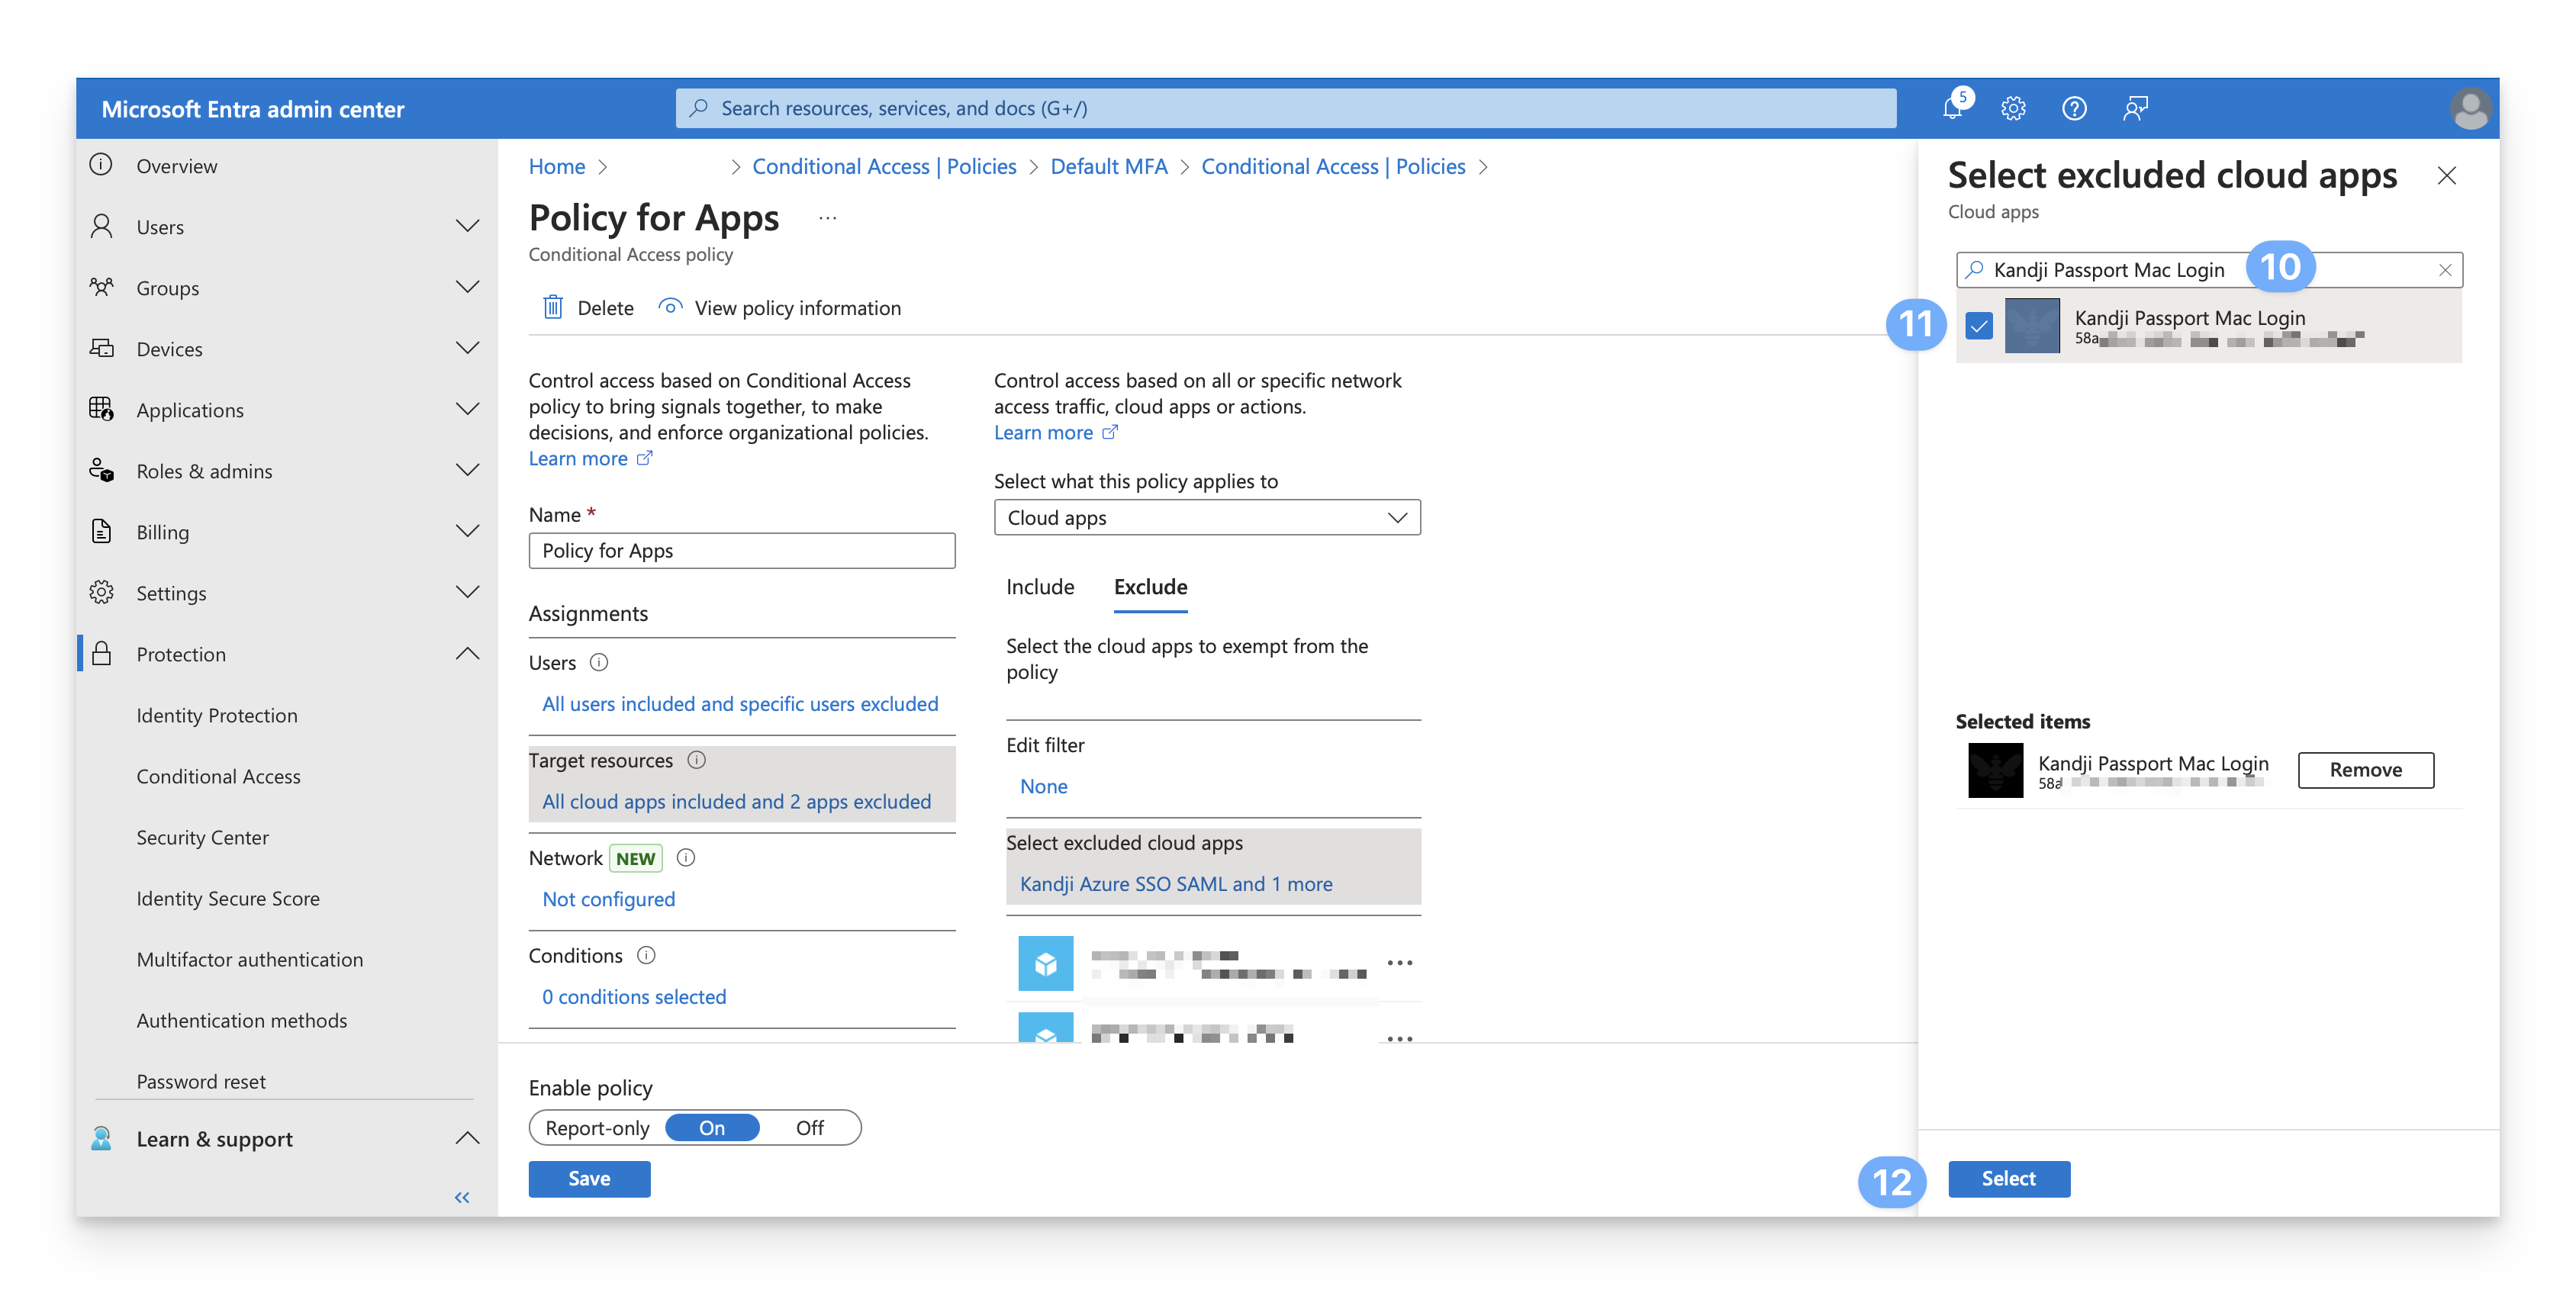
In the Search field, enter the name of the Enterprise app you use for Kandji Passport. Note that the search doesn't just search for any part of the name; you need to enter at least the start of the name.
Select the checkbox for your Enterprise app for Kandji Passport from the search results.
At the bottom of the Select excluded cloud apps blade, click Select.
Confirm that the Enterprise app was added to the list of excluded apps.
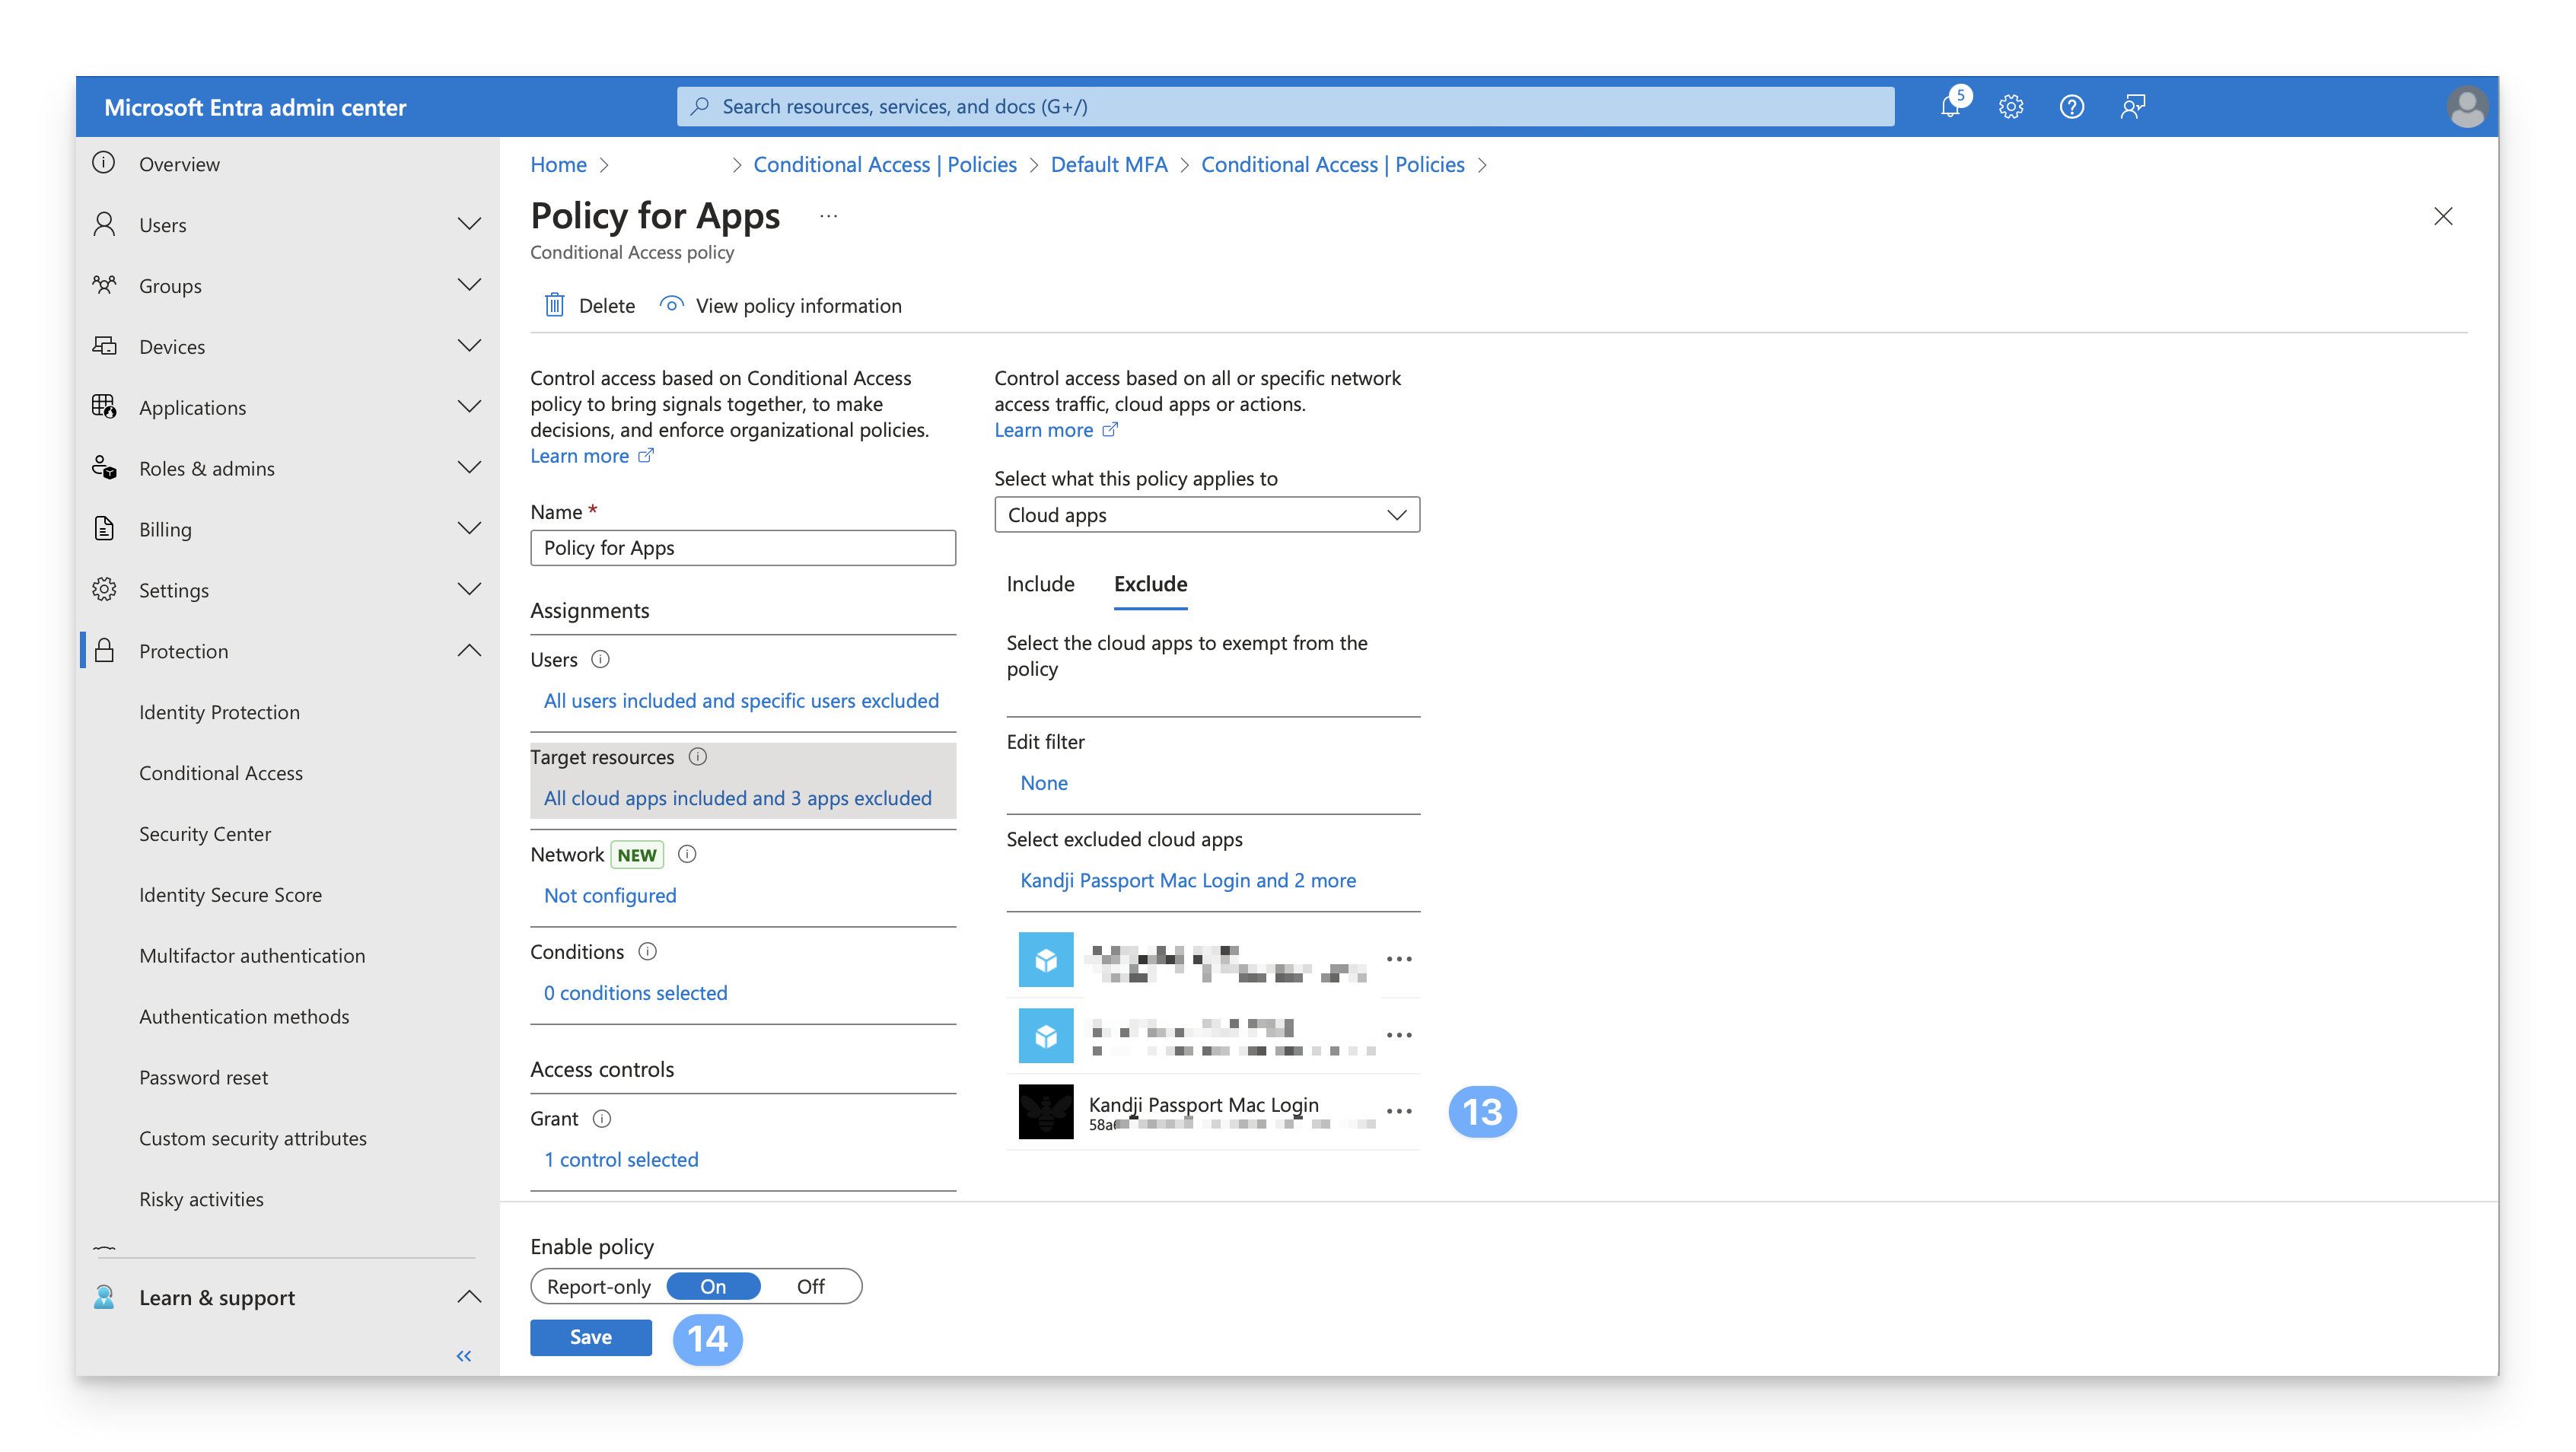
In the lower-left corner of the page, click Save.
Go back to step 3 and repeat for the next policy until you have examined or updated every Conditional Access policy.
User Account Provisioning via Passport
If you use Specify per identity provider group option in the Passport Library Item, use the Entra ID group ObjectID in the Identity provider group field.
The number of security groups supported by Entra is 150 for SAML assertions In larger organizations, the number of groups where a user is a member might exceed the limit that Microsoft Entra ID applies before emitting groups claims in a token. Exceeding this limit will cause Microsoft Entra ID completely omit sending group claims in the token.
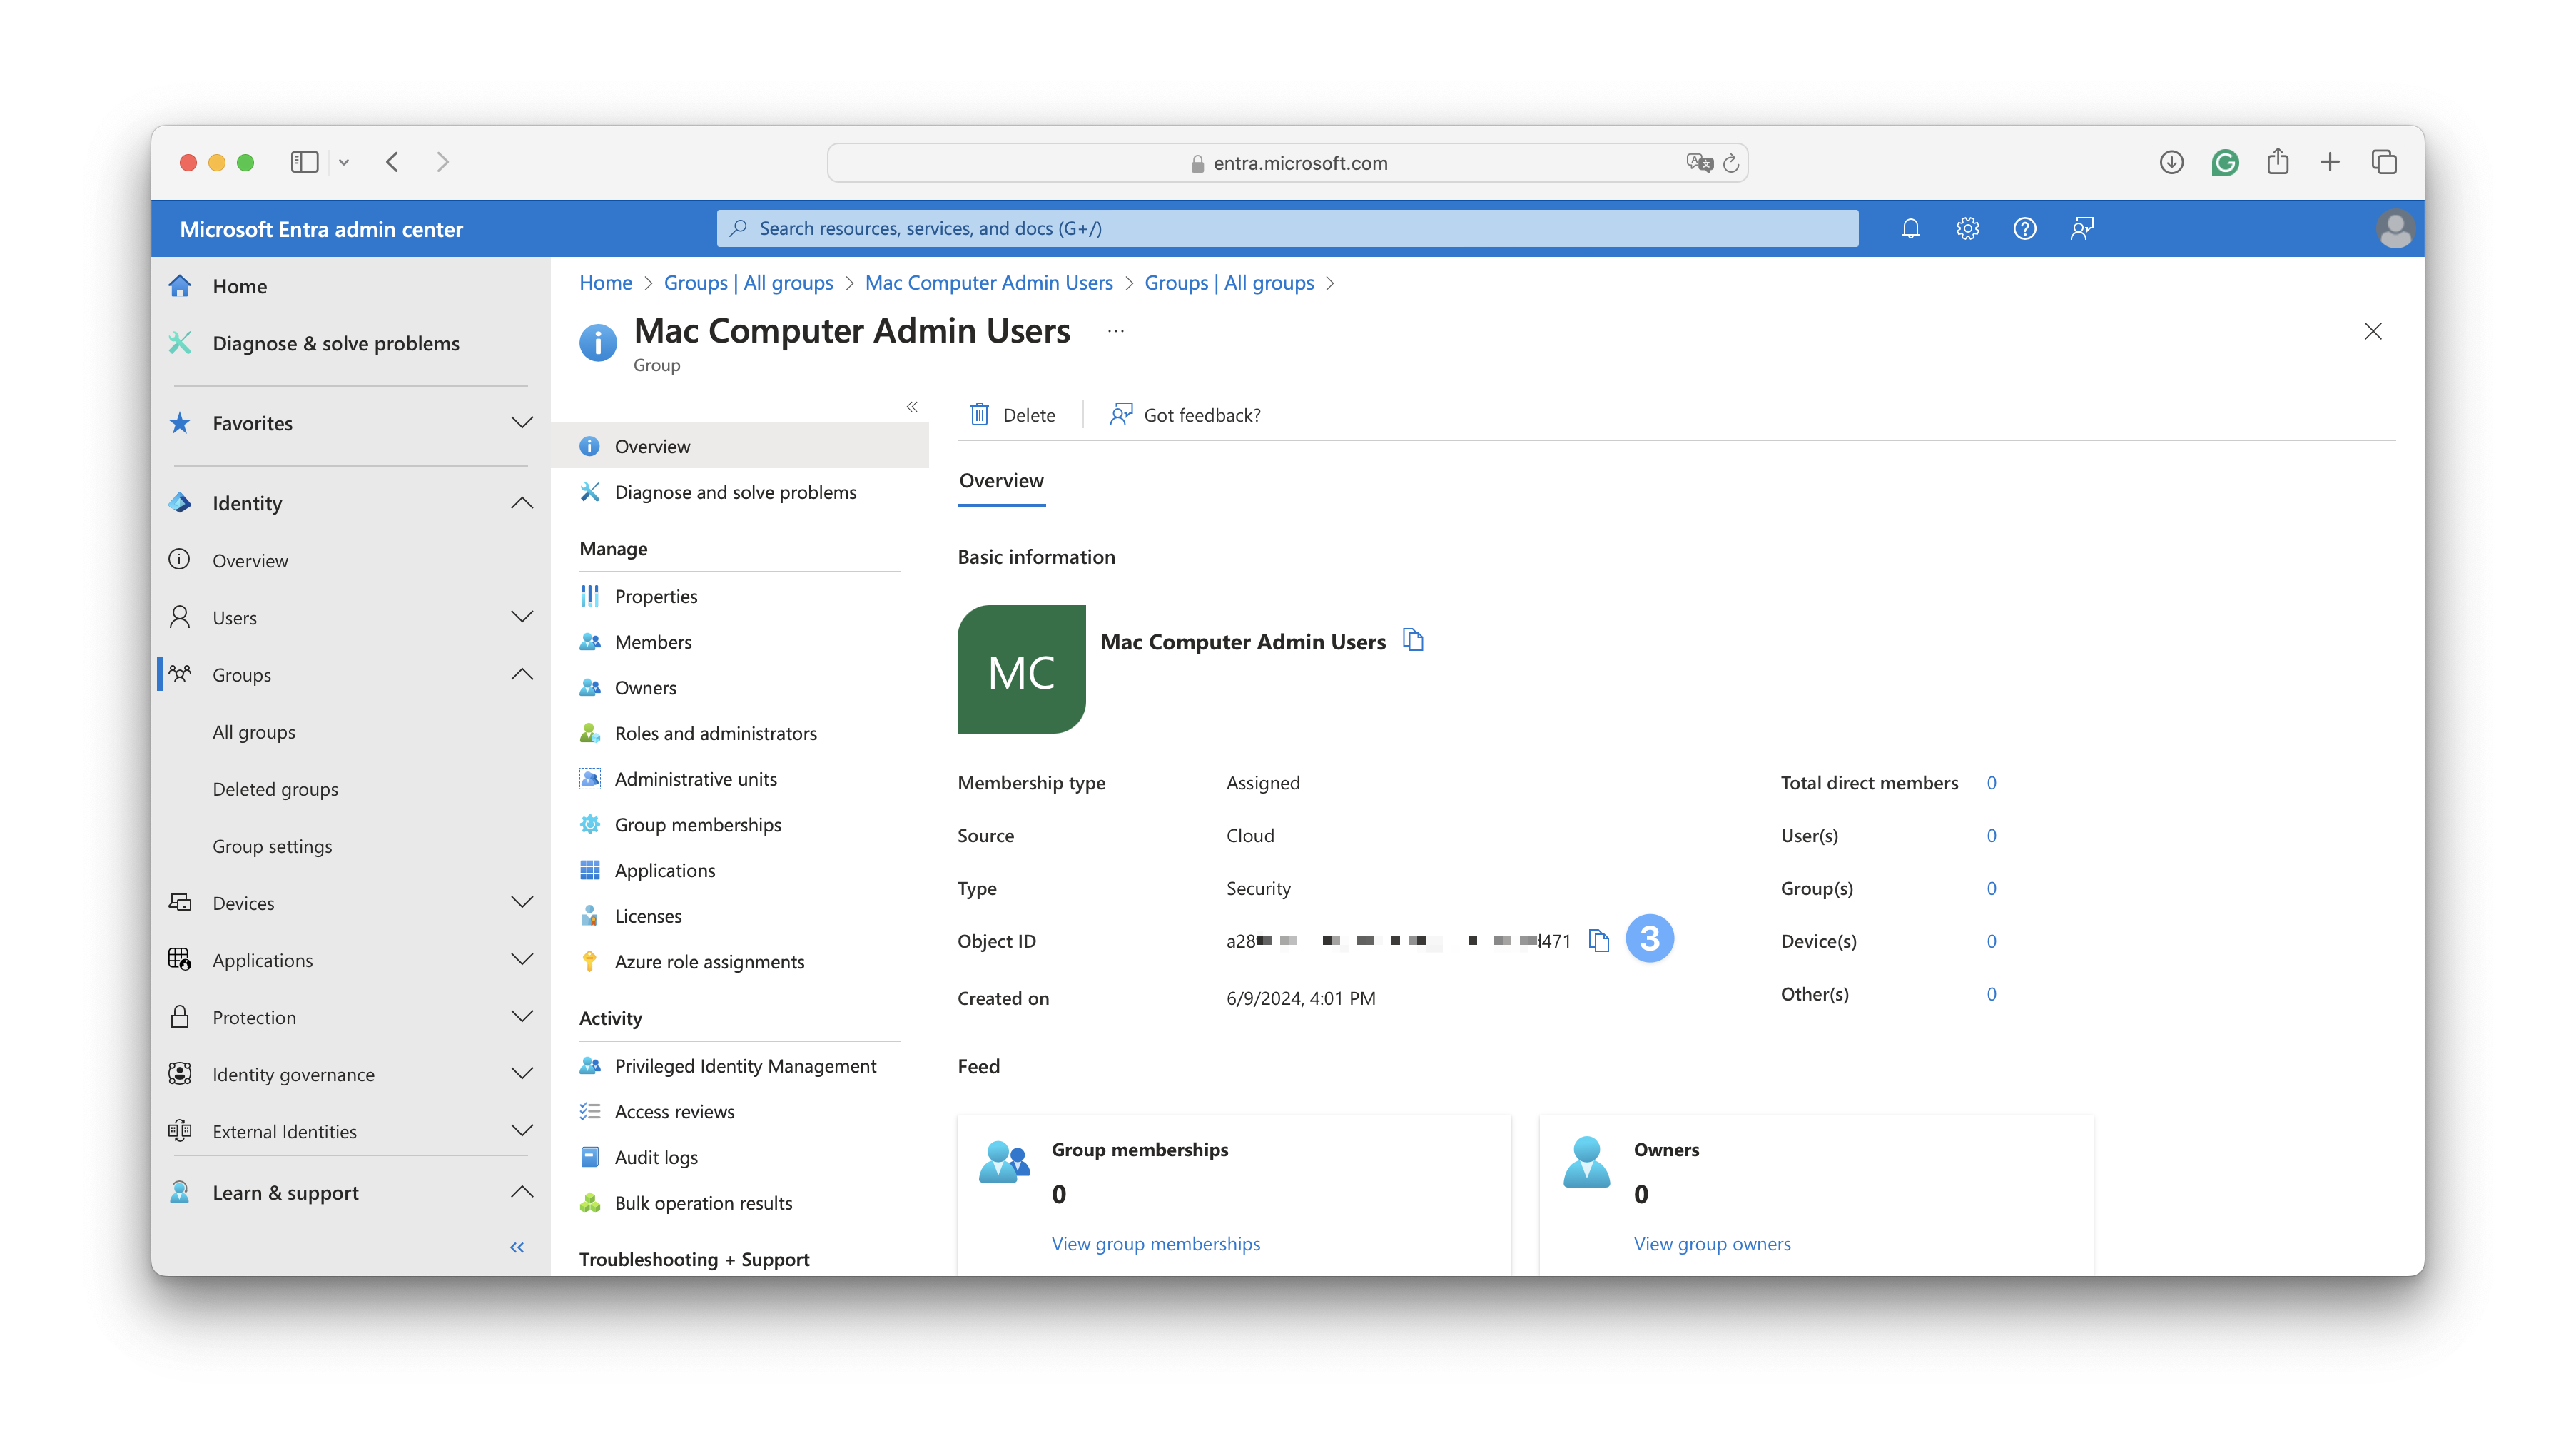
Sign in to the Microsoft Entra admin center. In the Identity navigation menu on the left, open Groups and select All groups.
Select the group that you want to use.
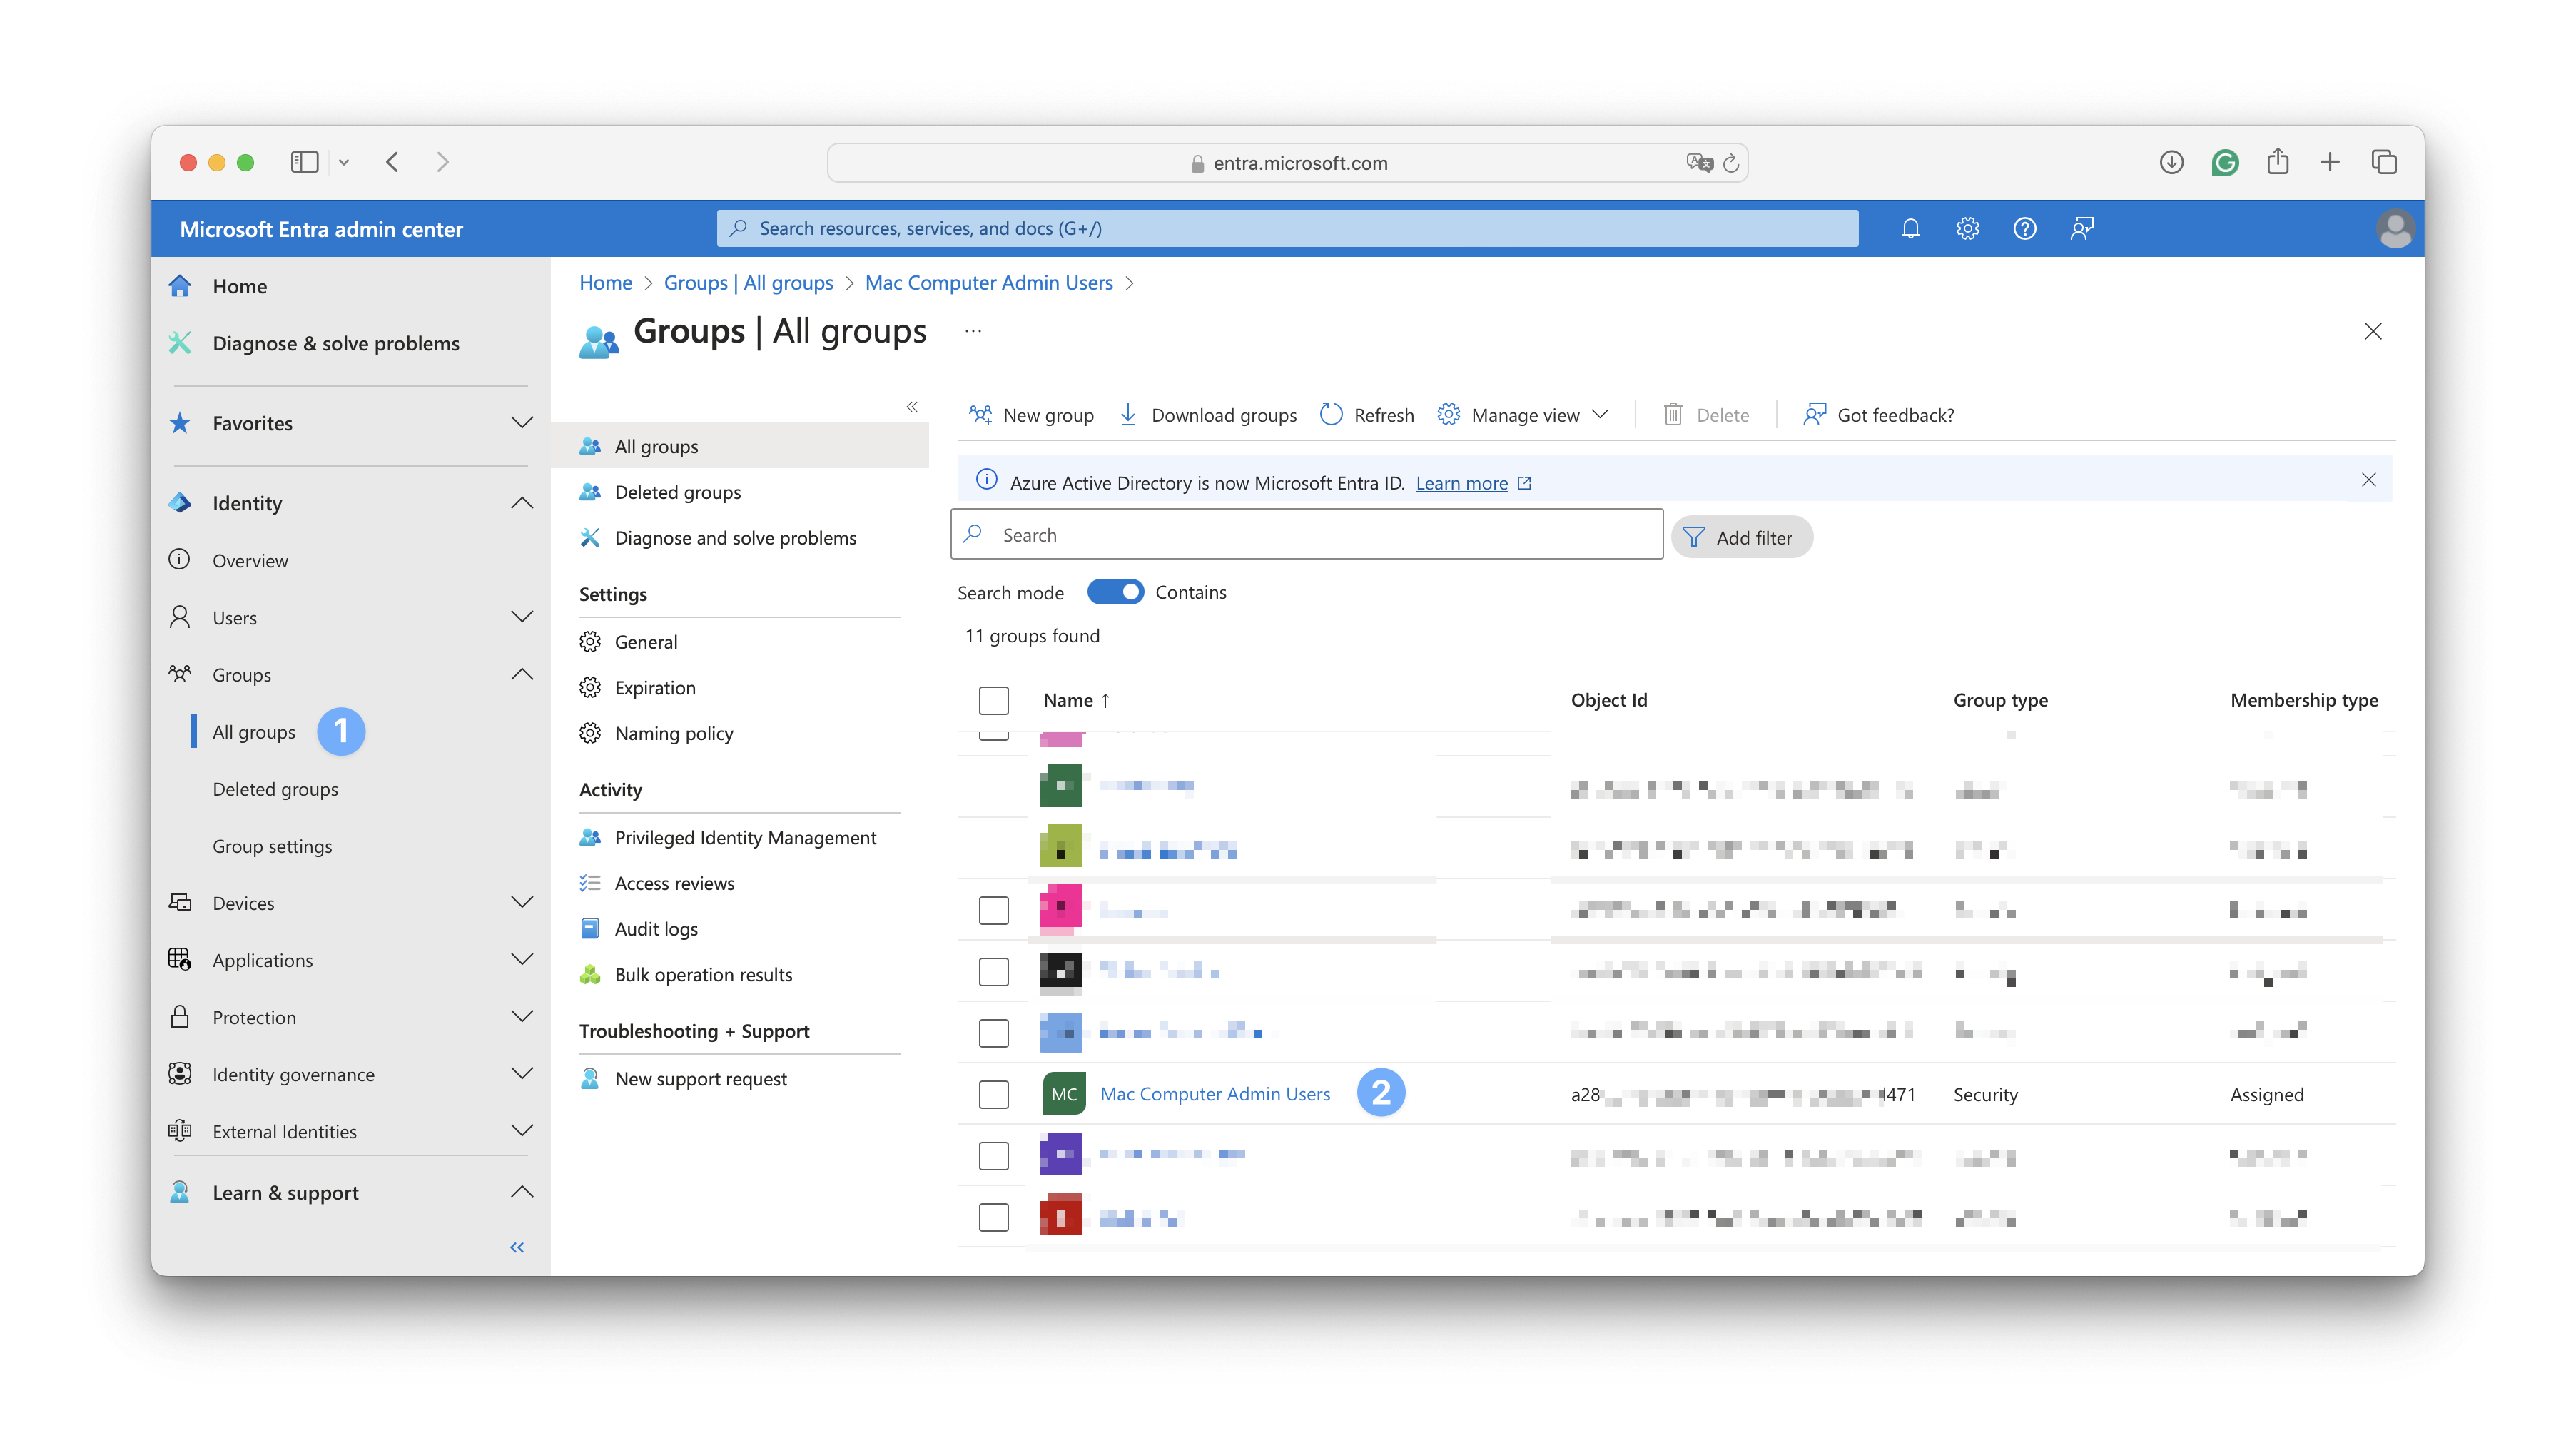
Copy the Object Id for that group.
In the Kandji Passport Library Item, in the User Provisioning section, paste the value from the previous section into the Identity provider group field.

Repeat the previous steps for each additional Entra ID group you want to use.
In the Passport Library Item, click Save.
Other Considerations
If you set the default account type to standard user, only add administrator account types in the Identity provider groups. Unless otherwise specified as administrators in your Identity provider groups, all users will be created as standard users by default.
If you set the default account type to administrators, only add standard account types in the Identity provider groups. All users will be created as administrators by default unless otherwise specified as standard users in your Identity provider groups.
Microsoft Entra ID Troubleshooting
If you are experiencing issues with Entra ID Passport, please visit our Passport Troubleshooting with Microsoft Entra ID (formerly Azure AD) support article to learn more about common troubleshooting steps.
Next Steps
Please proceed to the Configure the Passport Library Item support article to finalize your setup.