
What is PPPC?
Privacy Preferences Policy Control (PPPC) in macOS helps administrators manage app permissions and protect user data. Using a PPPC profile, you can pre-approve apps' access to system services like the camera, microphone, and file systems, eliminating the need for manual user approval and simplifying your deployment process.
How PPPC and TCC Controls Work
Due to Apple's privacy requirements, Camera, Microphone, and Screen Recording access will always require user interaction to approve.
Starting with macOS Mojave (10.14), Apple's PPPC payload allows you to configure Transparency, Consent, and Control (TCC) settings, which are crucial for safeguarding user information. PPPC profiles give administrators the ability to pre-approve or deny app access to system services like the camera, microphone, and file systems. Admins create these profiles using XML files that specify each app's permissions, bundle IDs, and code requirements. Once created, these profiles are deployed via MDM, which applies the settings to enrolled macOS devices.
Determining Which Apps Need a Privacy Profile
To determine if your app needs additional privacy permissions, follow these steps. Keep in mind that preference panes may vary between different macOS versions.
For macOS 13 Ventura or later
Install your app on a test device or a macOS virtual machine.
Launch the app and pay attention to any UI dialogues that appear, such as those requesting access to accessibility features or the Downloads folder.
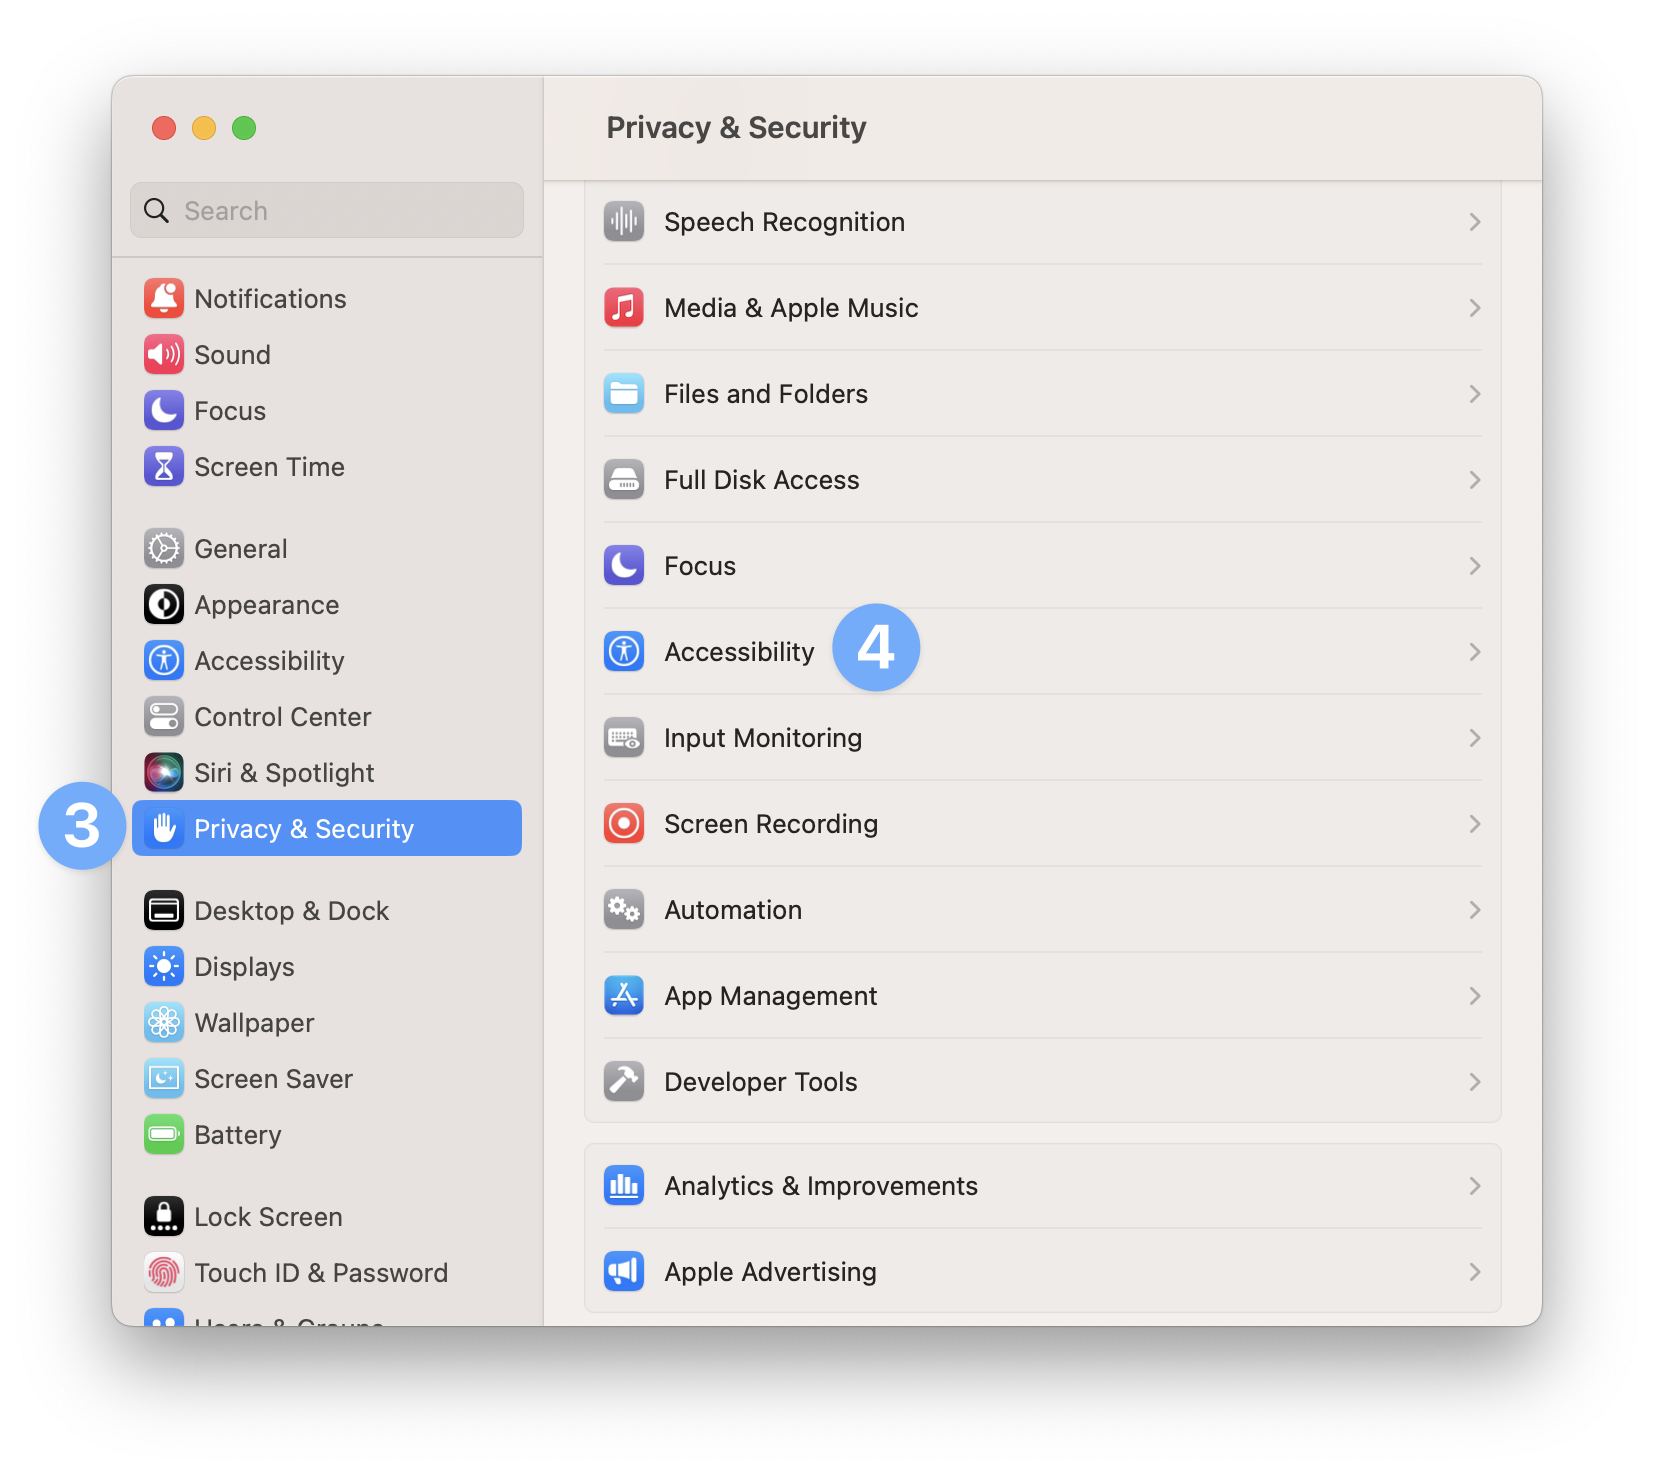
Navigate to System Settings and click on Privacy & Security.
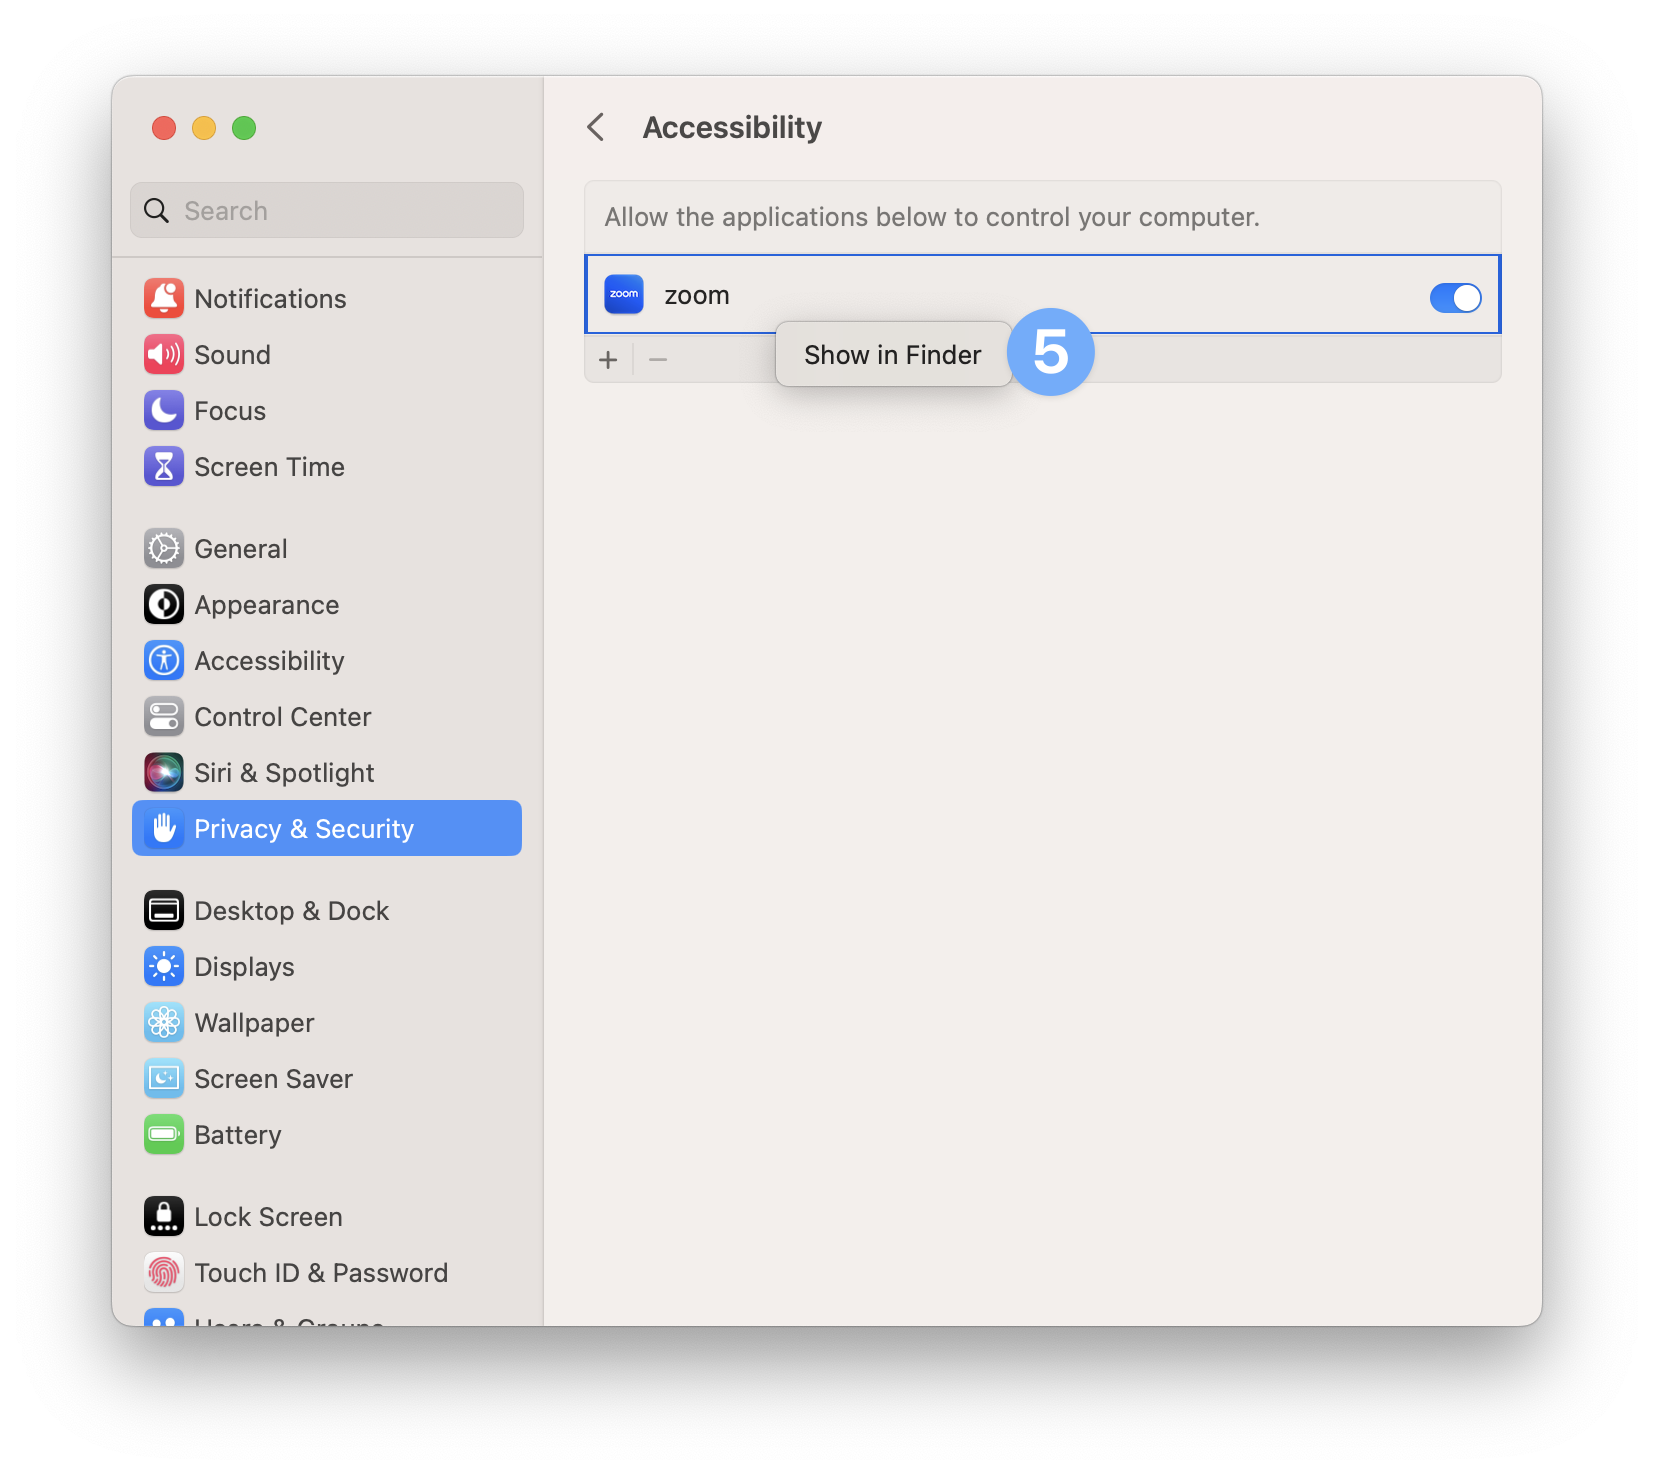
Select an option on the right-hand side, like Accessibility. If your app is listed here, it indicates that the app requires this PPPC permission.
Right-click on the app listed and select Show in Finder. Finder will launch with the app in question selected. You can drag and drop the application into Terminal to get its full path, which will be used in the next step.
For macOS versions prior to macOS 13 Ventura
Install your app on a test device or a macOS virtual machine.
Launch the app and pay attention to any UI dialogues that appear, such as those requesting access to accessibility features or the Downloads folder.
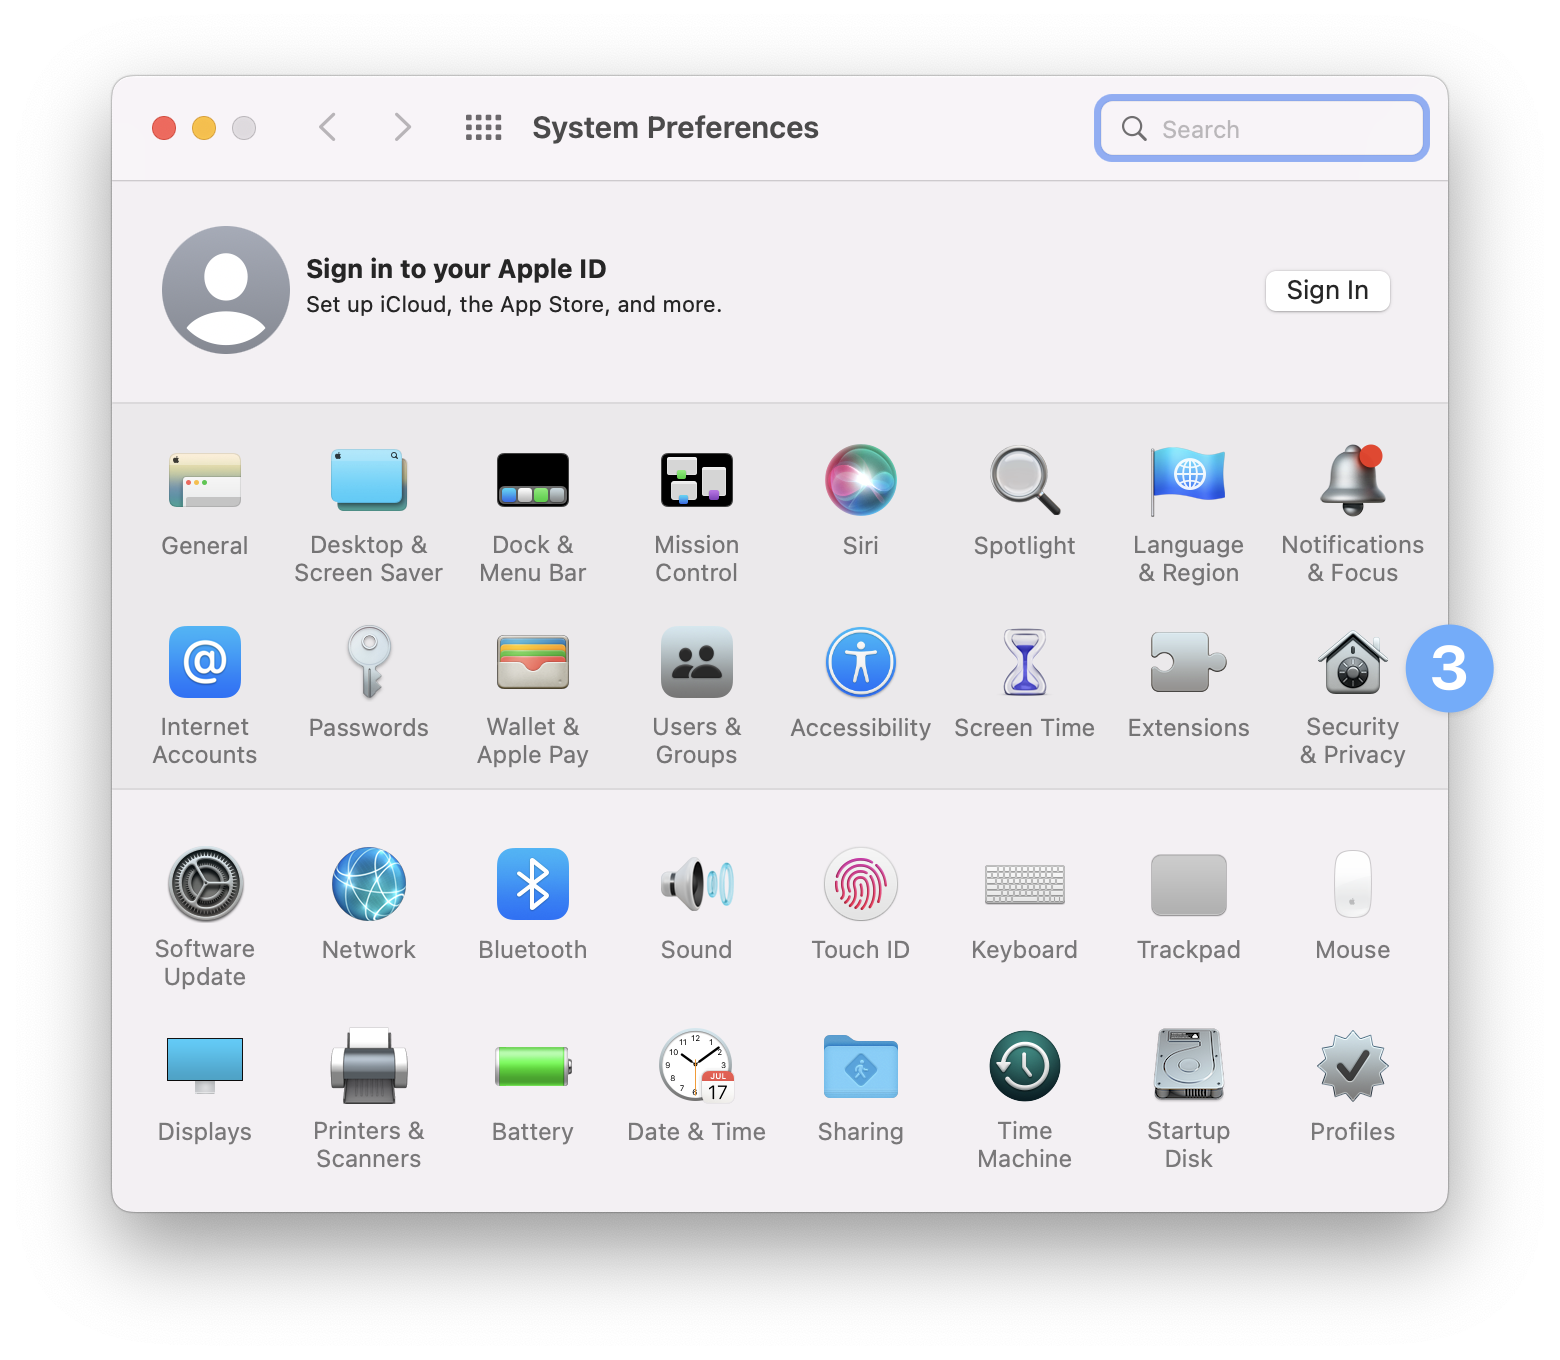
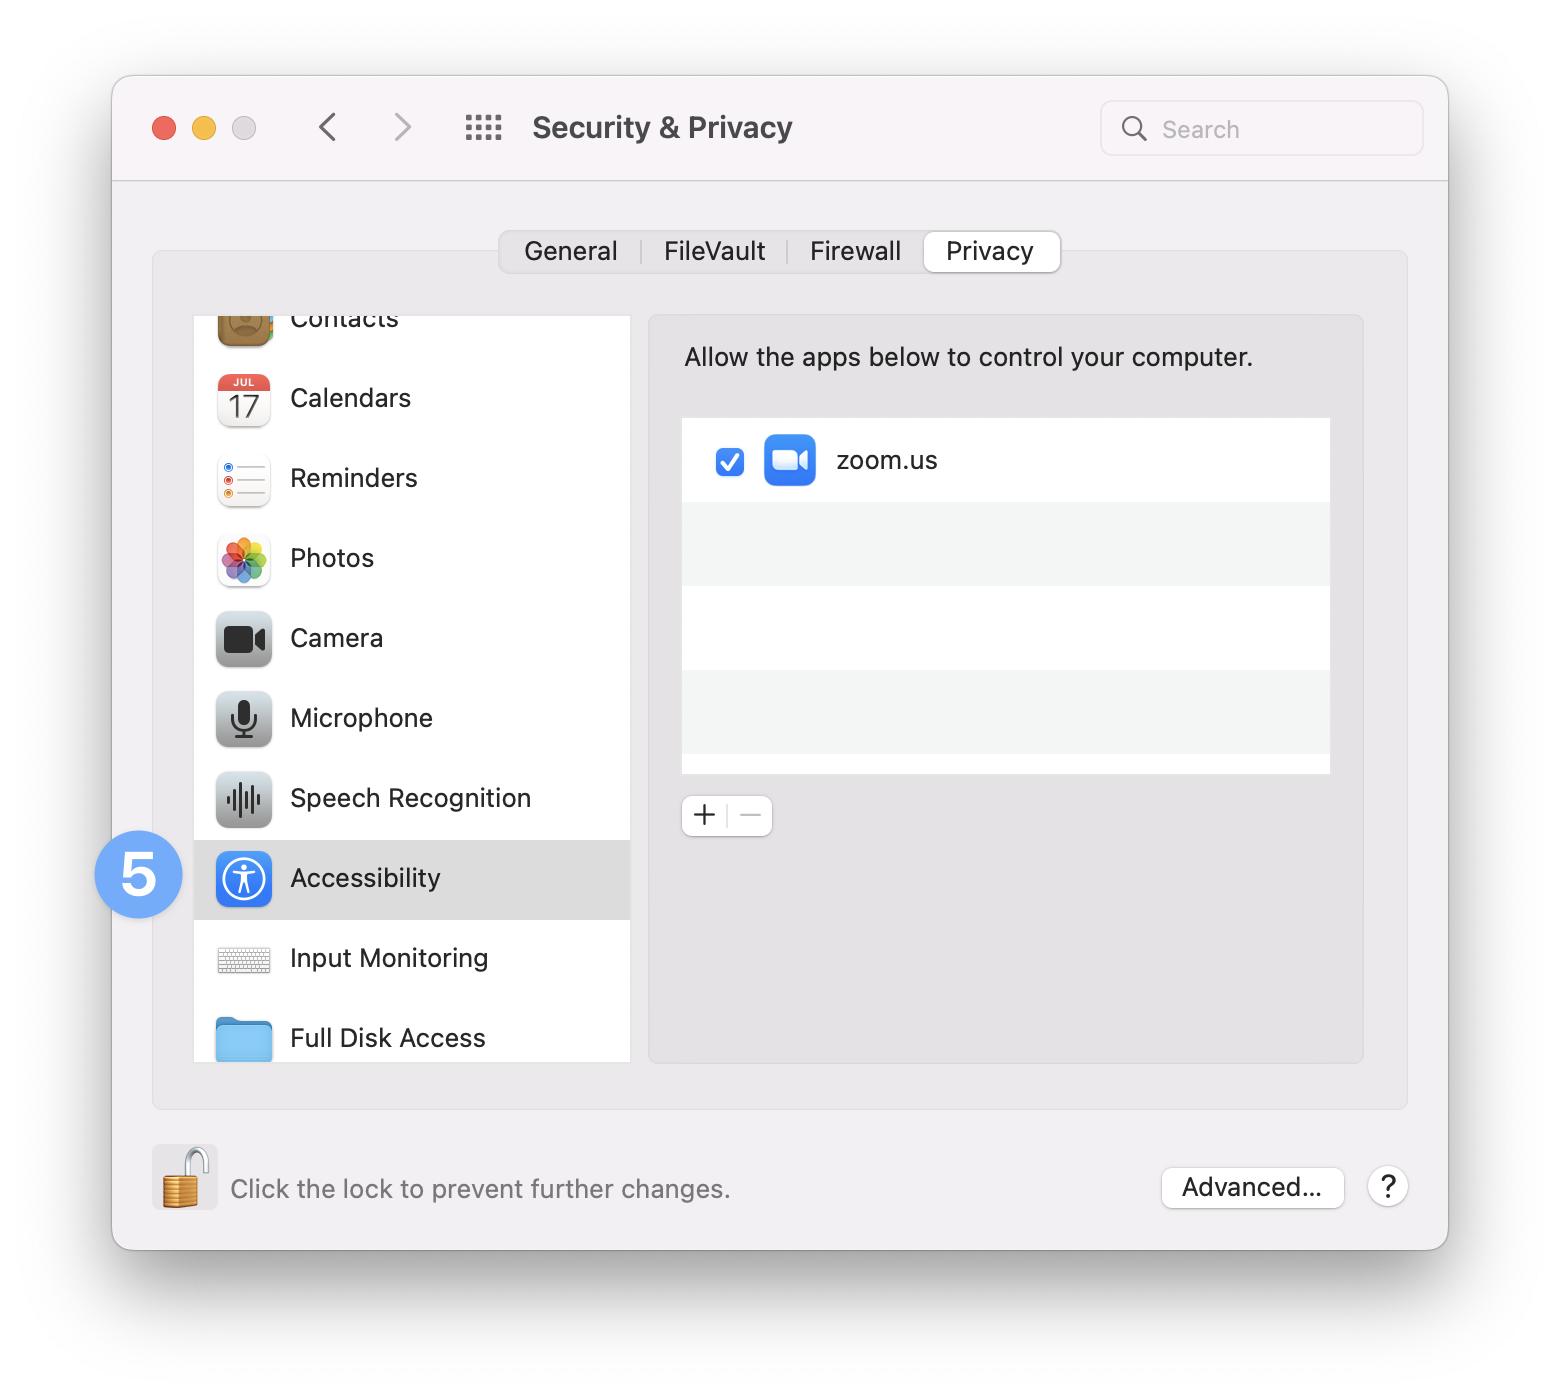
Navigate to System Settings and click on Security & Privacy.
Select the Privacy tab.
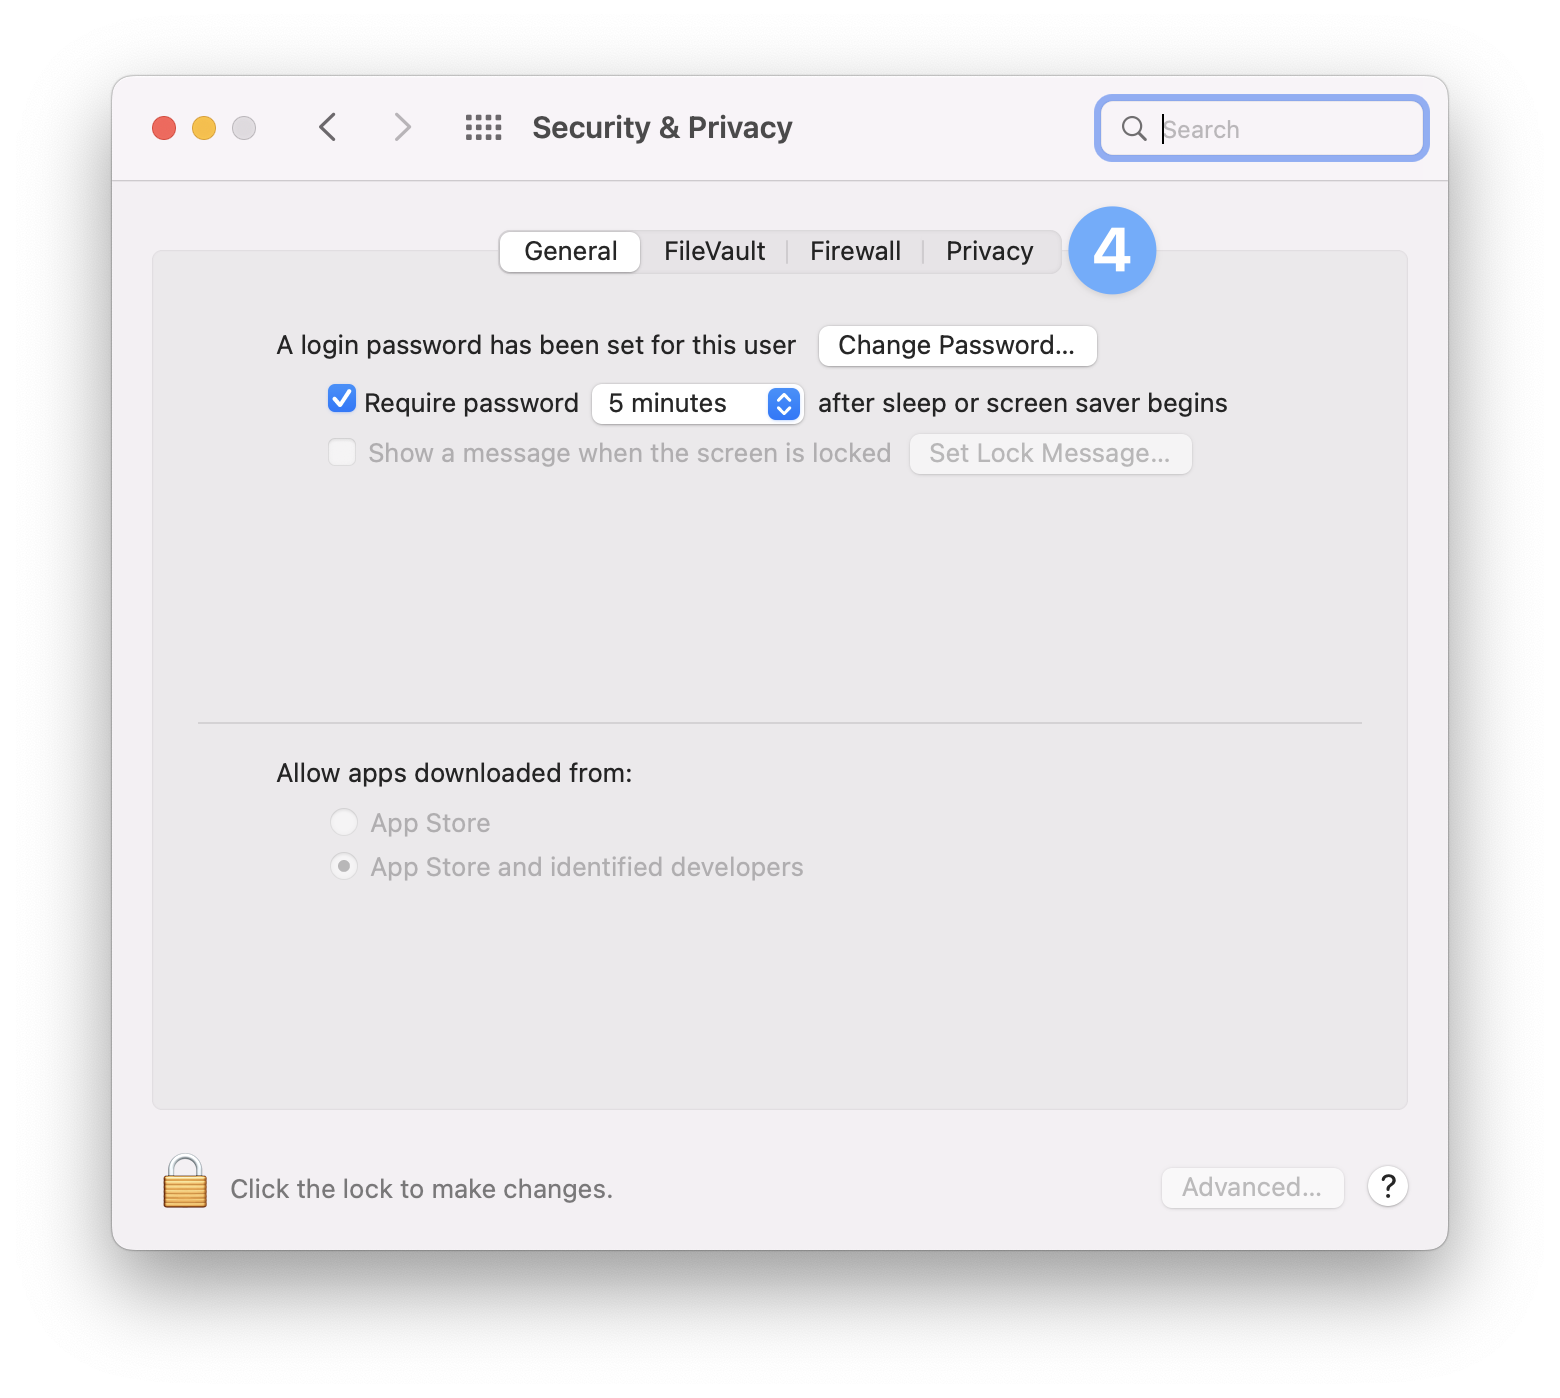
Select an option on the right-hand side, like Accessibility. If your app is listed here, it indicates that the app requires this PPPC permission.
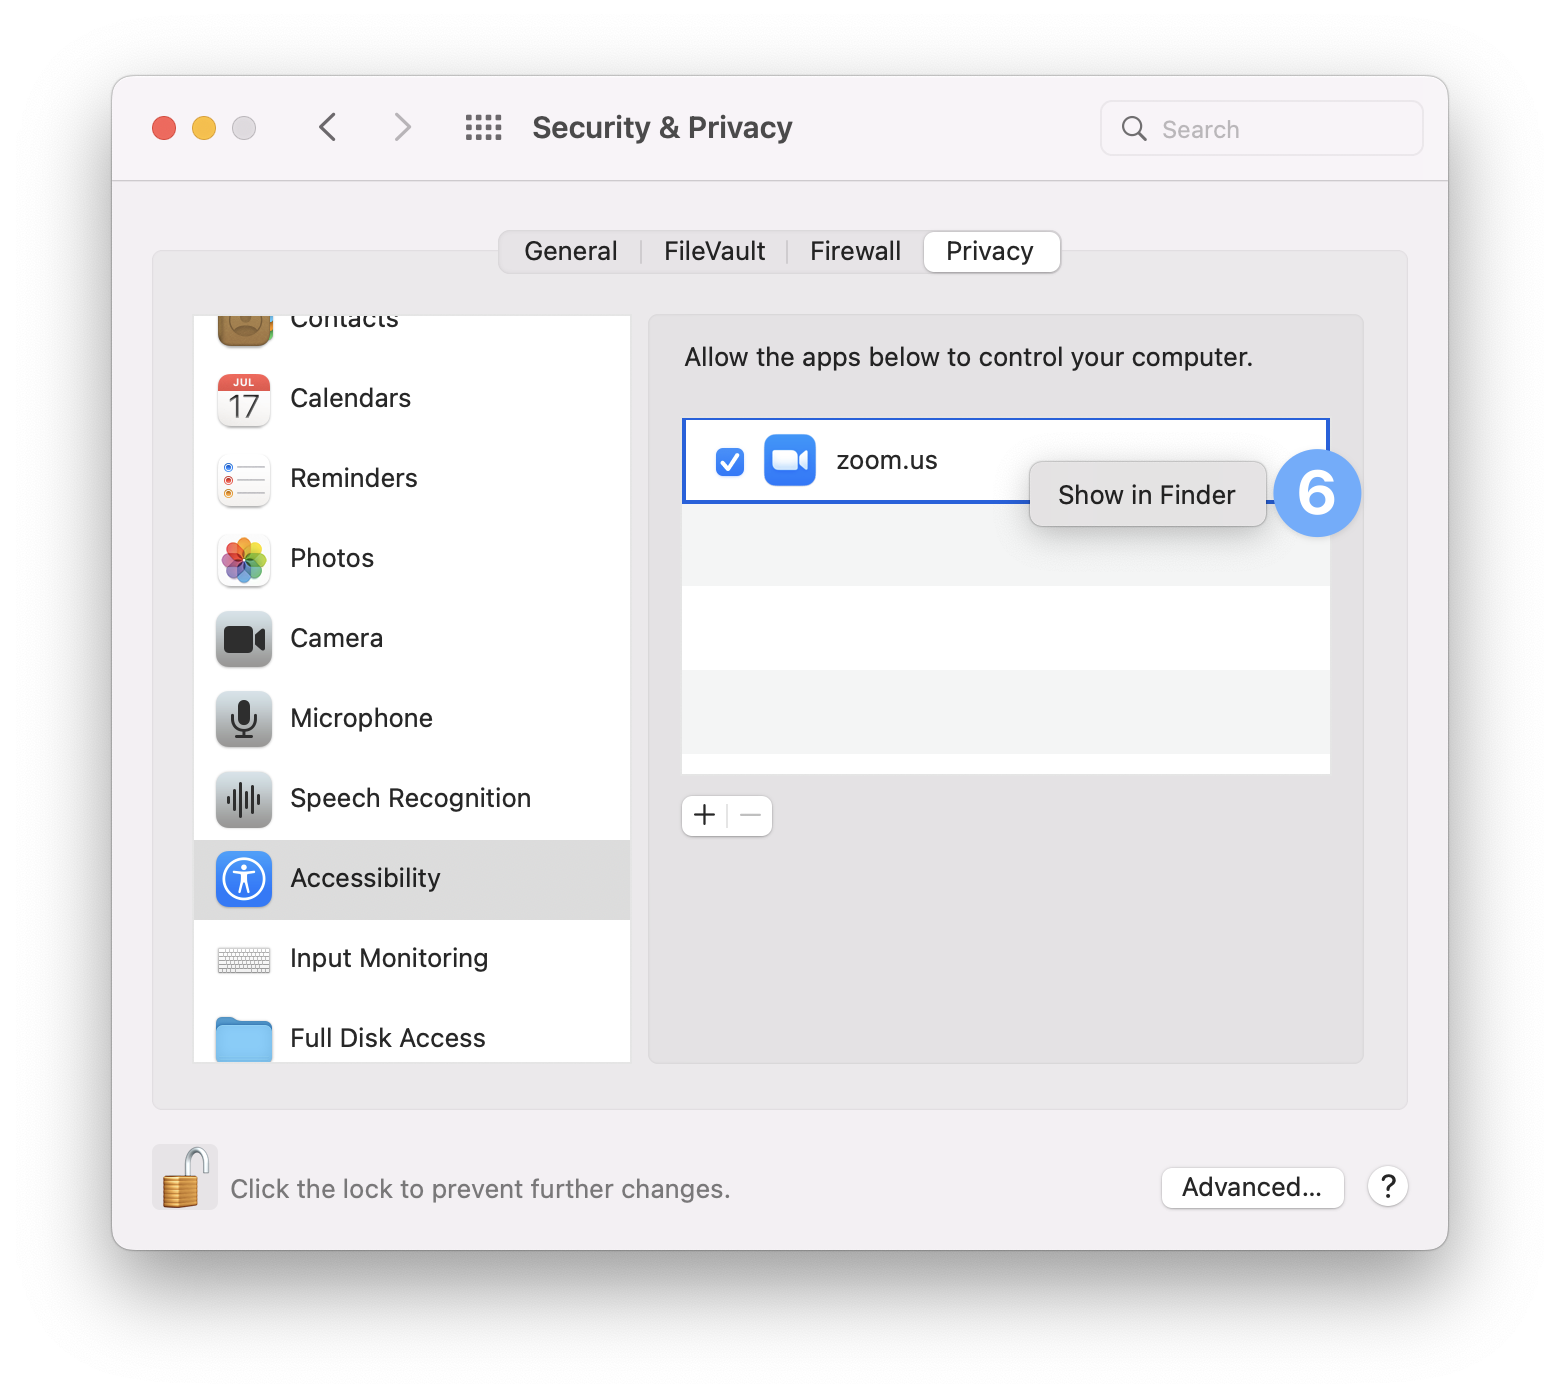
Right-click on the app listed and select Show in Finder. Finder will launch with the app in question selected. You can drag and drop the application into Terminal to get its full path, which will be used in the next step.
Determine the Identifier and Code Requirement
To create a PPPC profile, you need to know the application's code requirement and identifier. This information can easily be collected using Terminal on a Mac with the application installed.
Launch Terminal on a macOS device on which the application is installed.
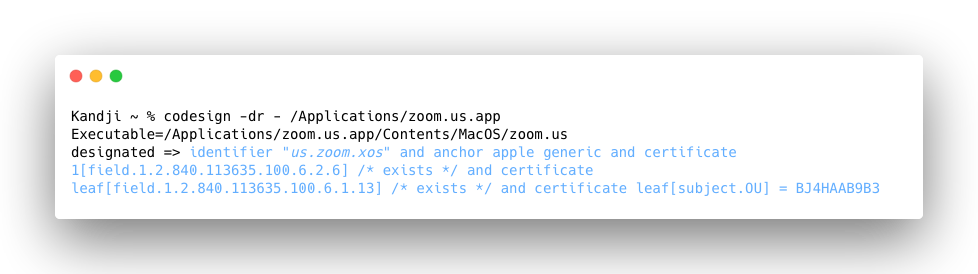
Run the following command, replacing /Applications/zoom.us.app with the path to your application.
codesign -dr - "/Applications/zoom.us.app"When the output results appear, copy all text after the => characters; do not copy any trailing or leading spaces. This output is the Code Requirement. The portion between the quotes, e.g. "us.zoom.xos", is the Identifier.
Configuring a Privacy Profile using Kandji
With your application information collected, you can create a Privacy profile in the Kandji web app.
Privacy settings deployed via MDM will not appear in the graphical user interface in System Settings.
Navigate to Library in the left-hand navigation bar.
Click on the Add New button in the upper right-hand corner.
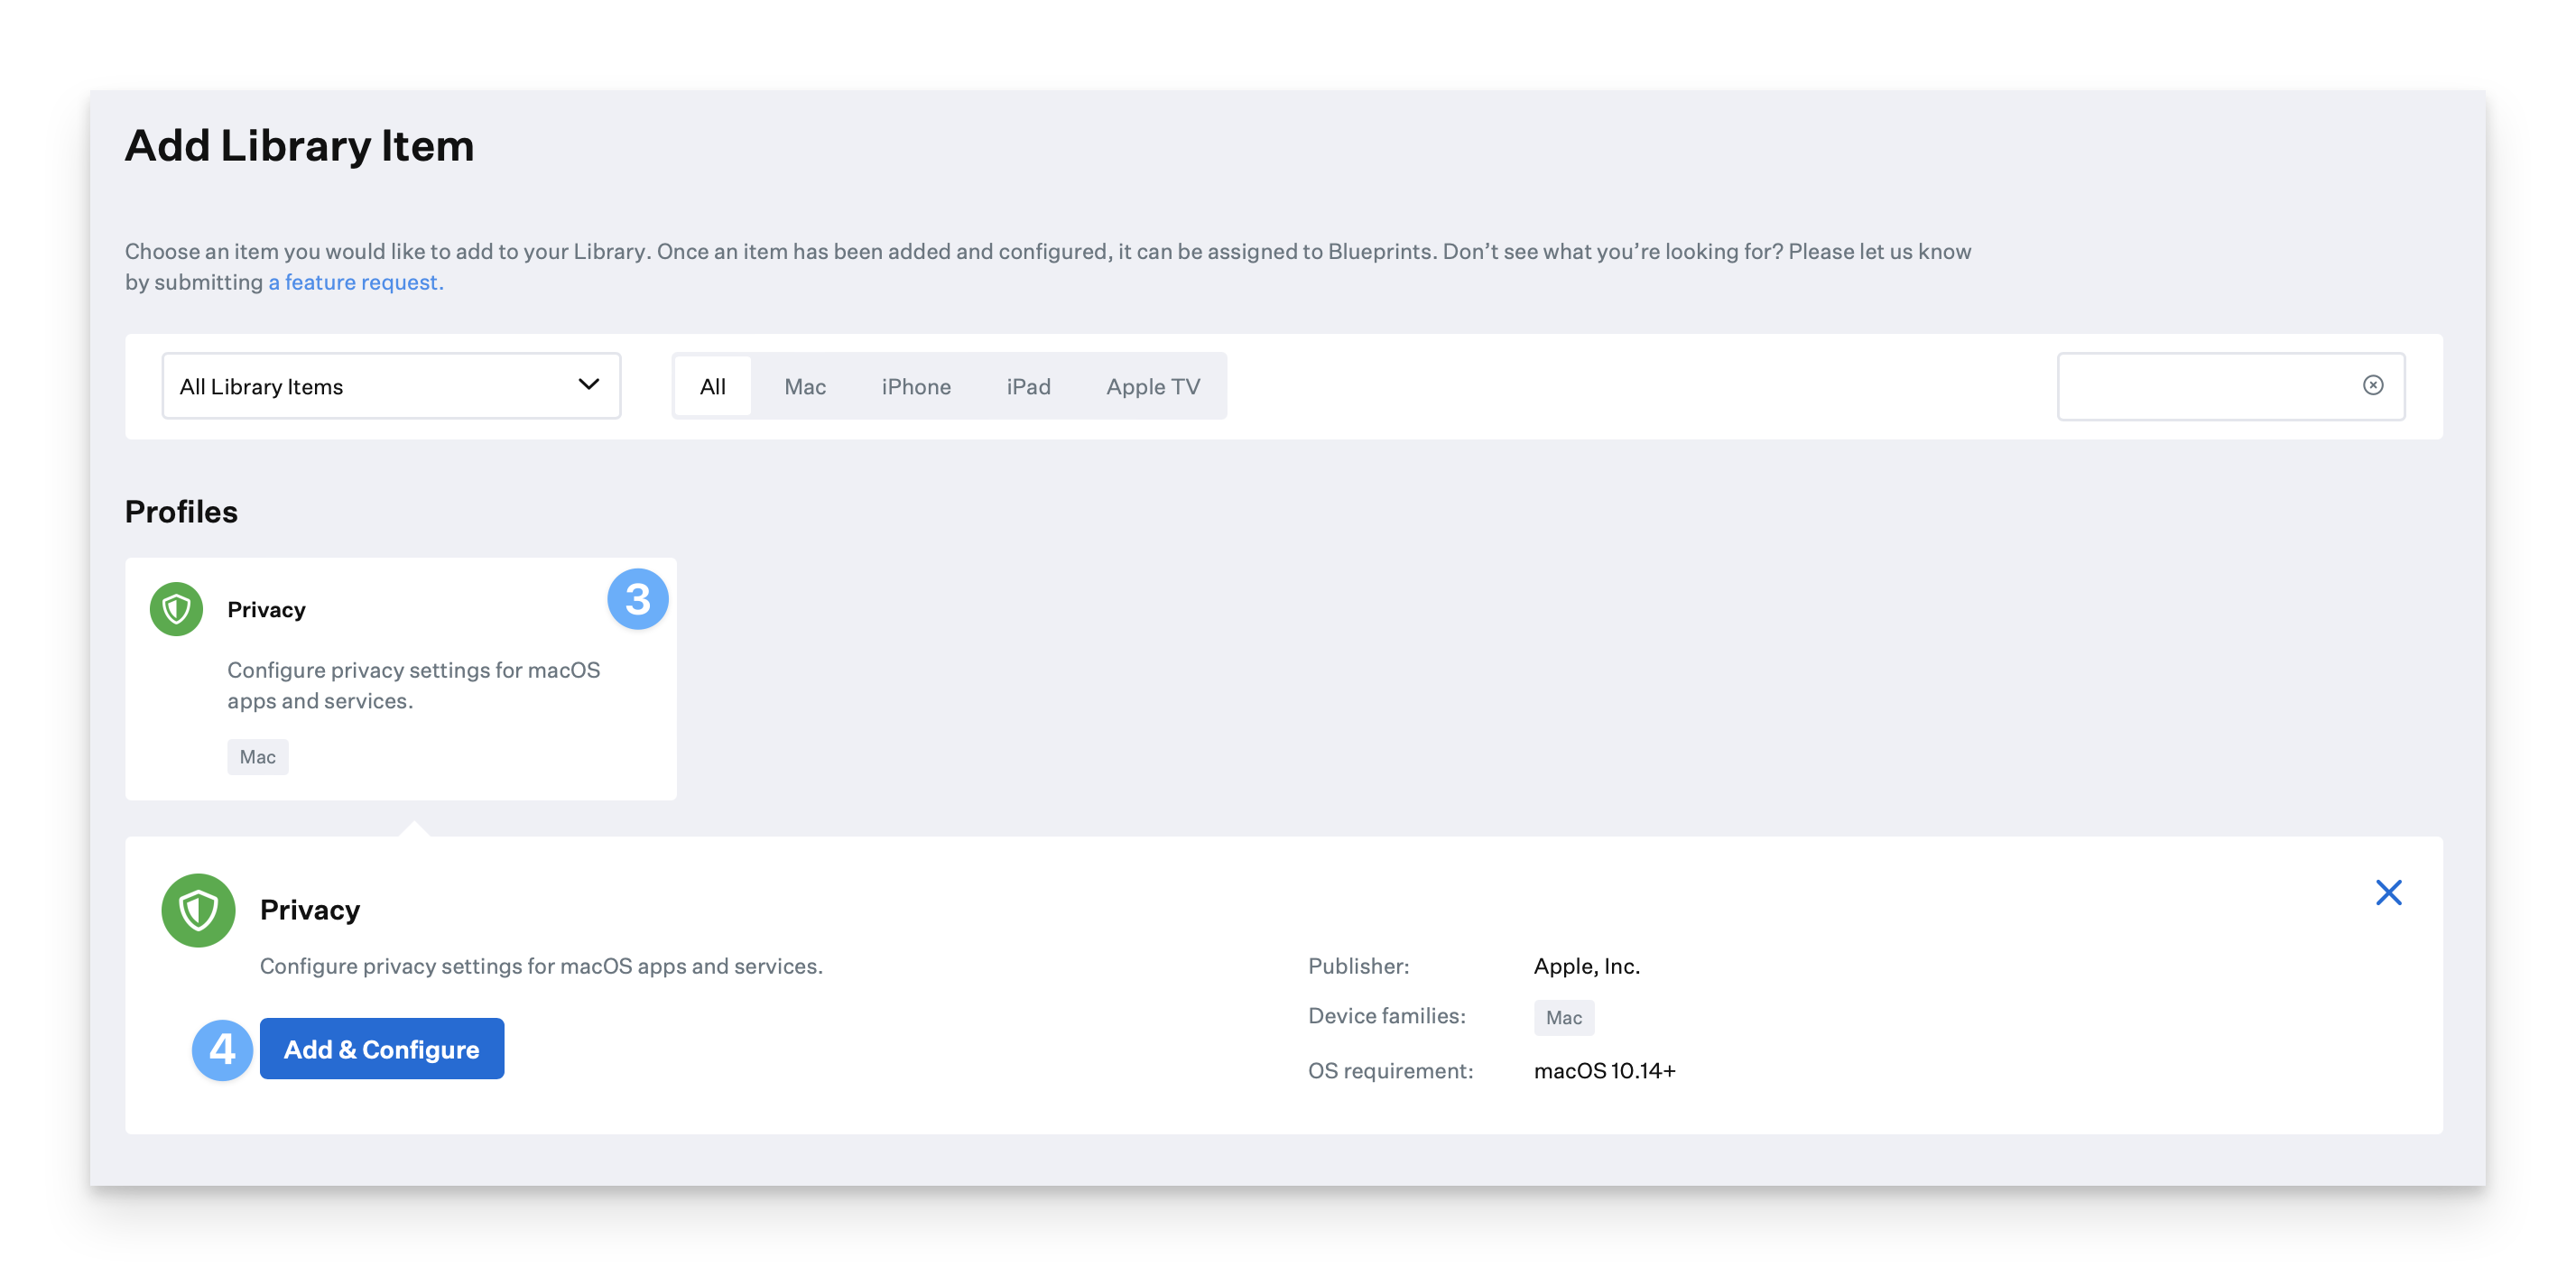
Locate the Privacy Library Item.
Click Add & Configure.
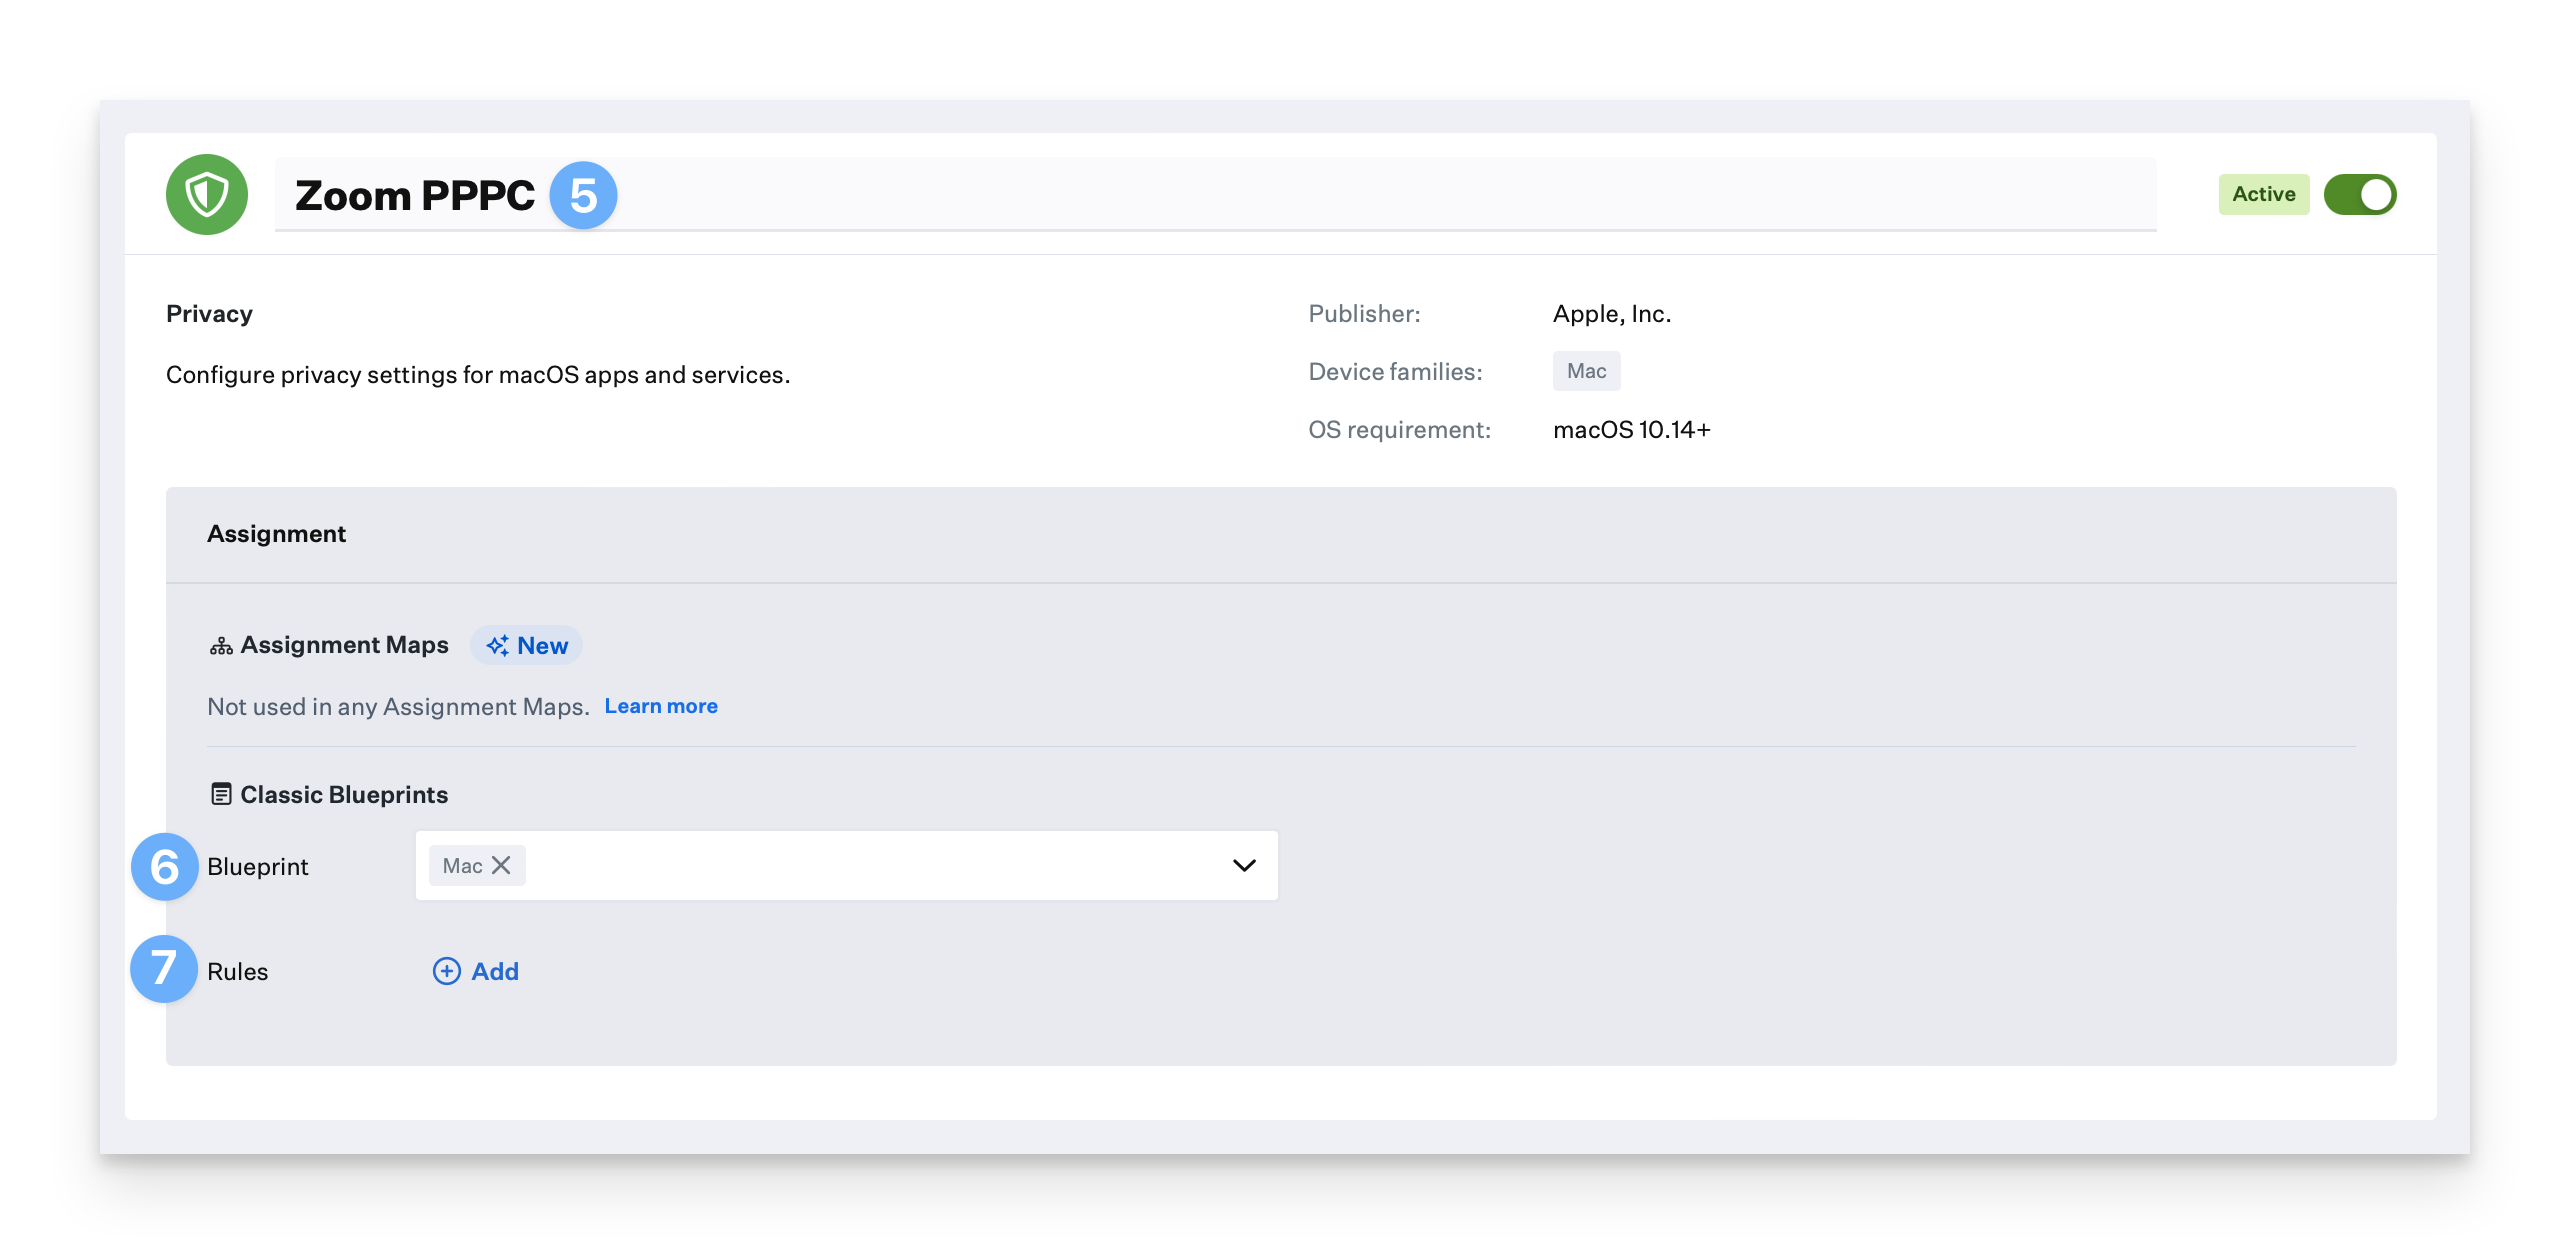
Give your profile a descriptive Name.
Select the Blueprint you wish to include from the Blueprint dropdown. You can add this Library Item to an Assignment Map from within the Assignment Map itself.
Optionally, configure Assignment Rules.
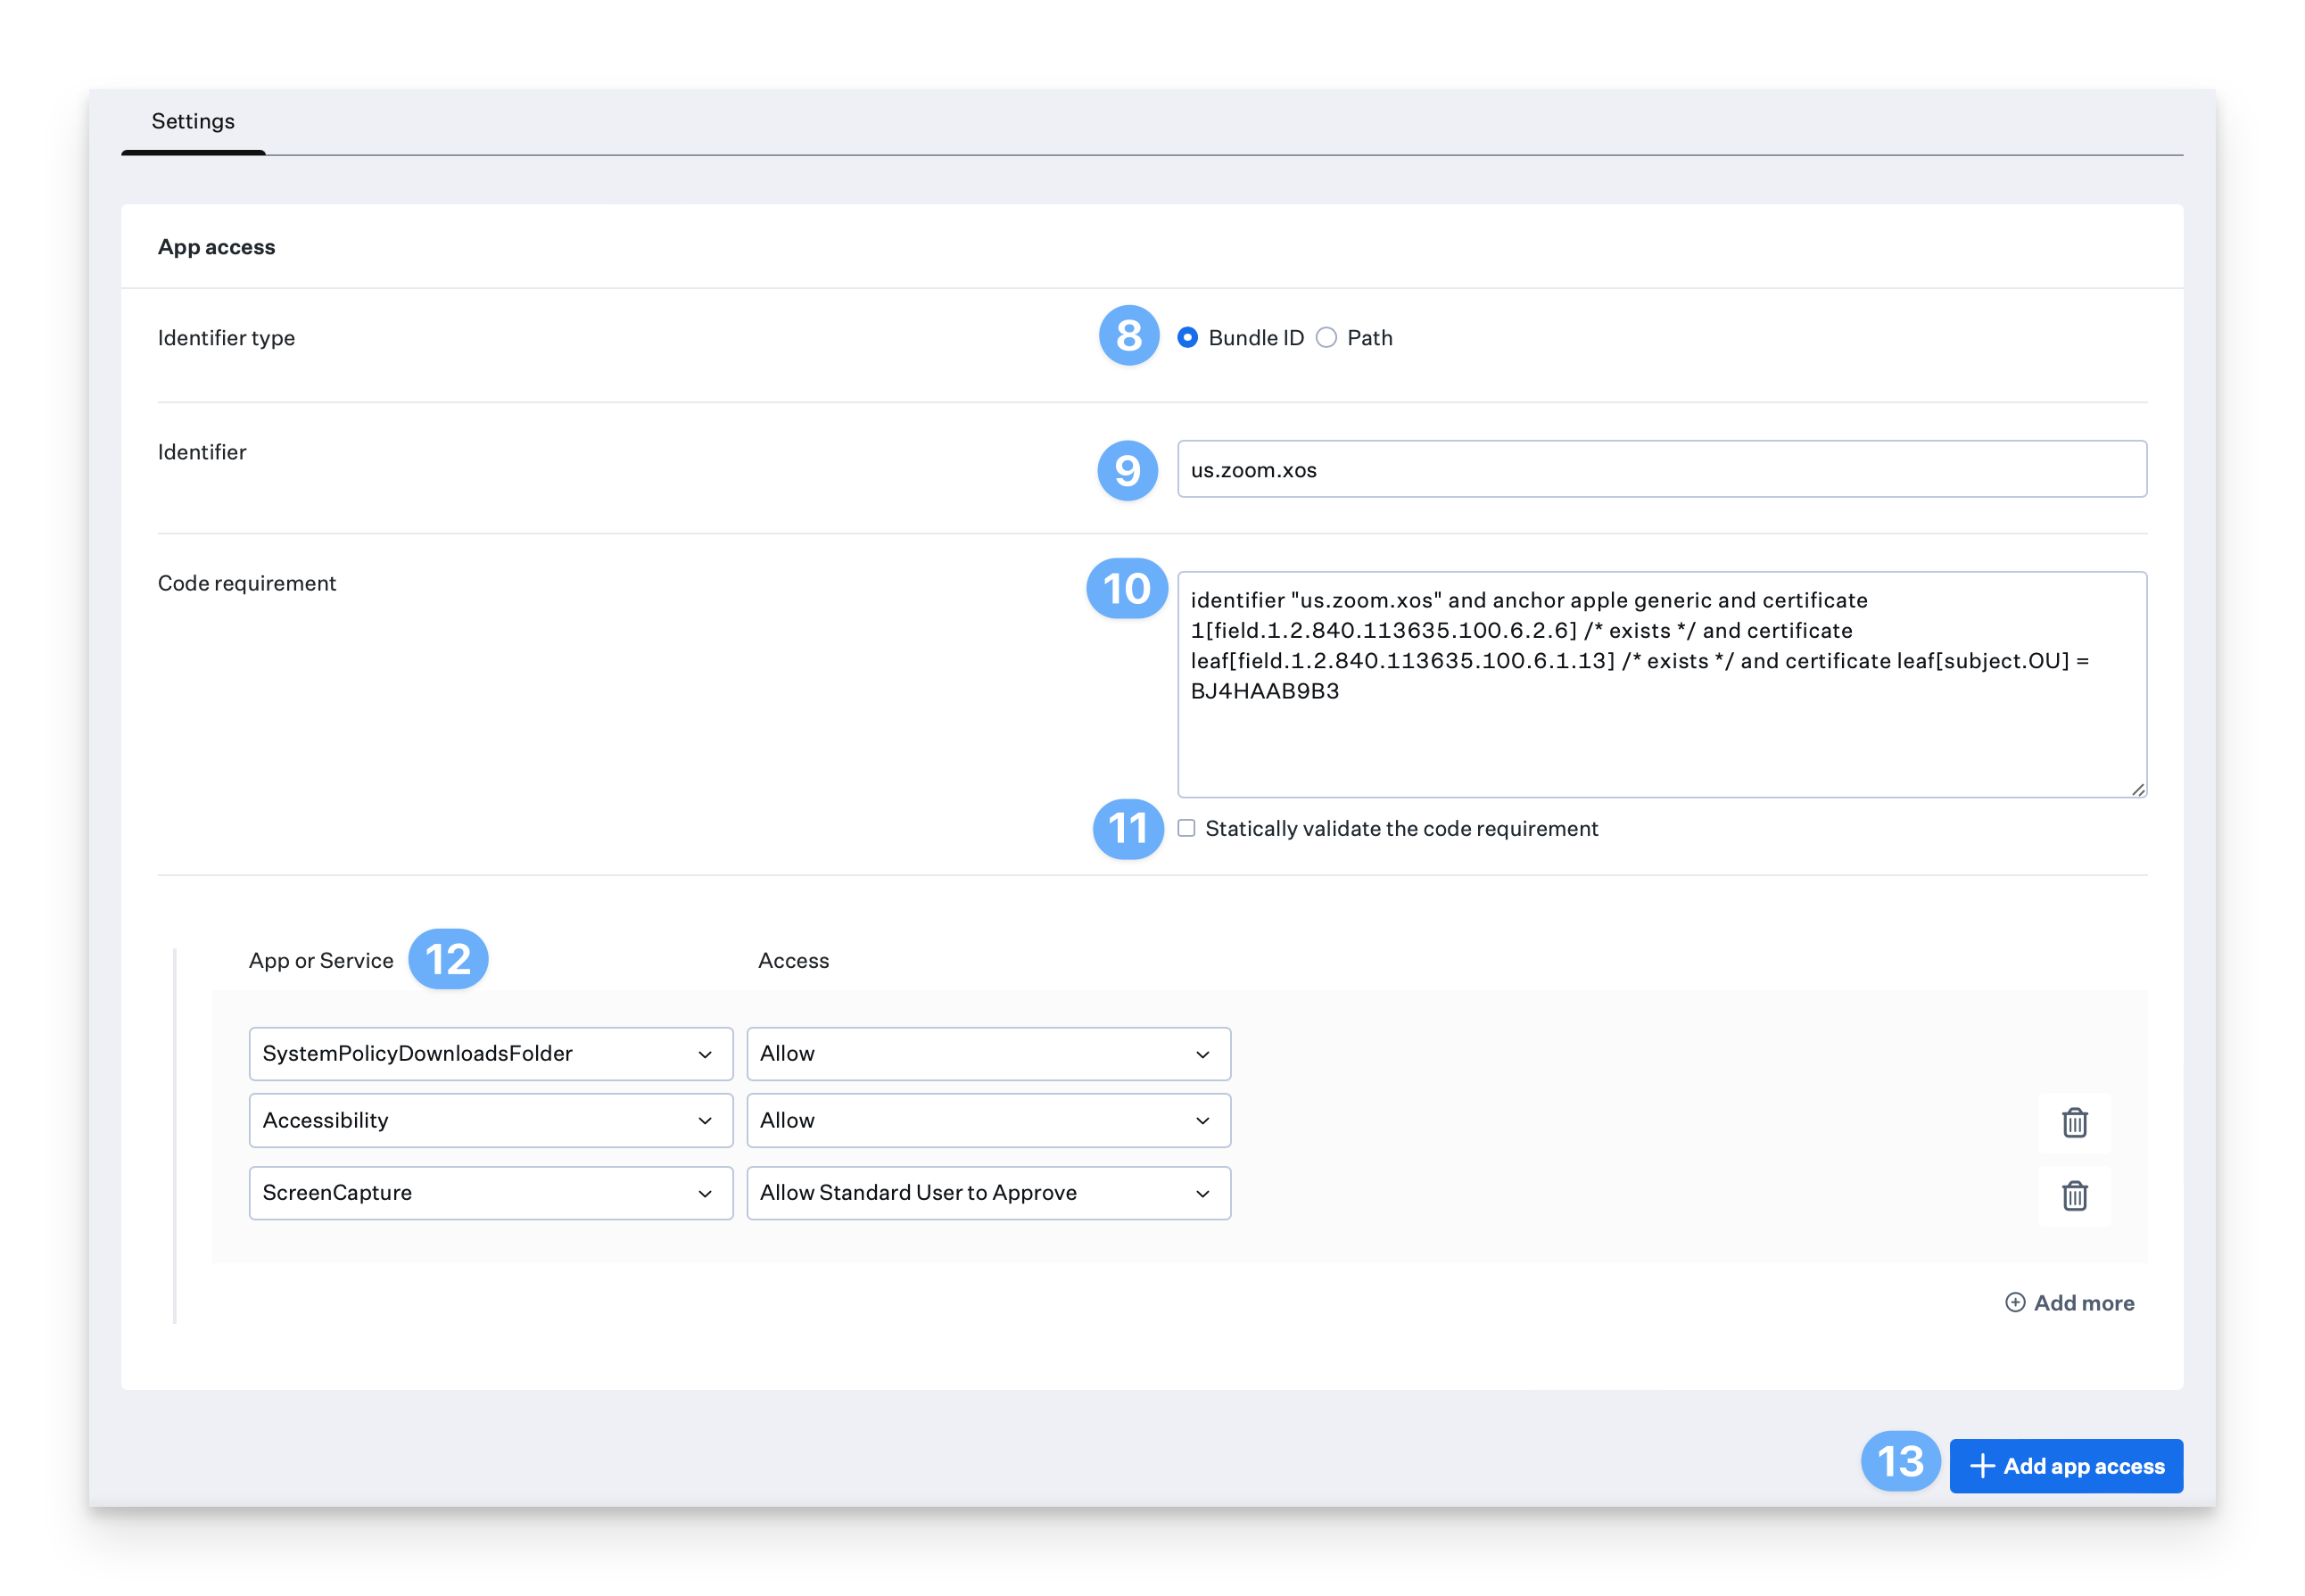
If your output includes an identifier in the first part of the code requirement, leave the Identifier type set to Bundle ID; otherwise, select Path.
Paste in the identifier found in the first part of the code requirement.
If you selected Path above, input the path for the profile.
Paste in the full code requirement that you copied from Terminal. Ensure that there are no leading or trailing spaces in the code requirement; unnecessary characters can prevent the profile from deploying.
Optionally, check the Statically validate the code requirement box. This option is used only if the process invalidates its dynamic code signature.
Select an option from the App or Service dropdown.
This selection depends on the application's requirements. For more information, refer to the Determine Which Apps Need a Privacy Profile section of this guide.
If needed, you can add additional app access to a PPPC profile by clicking Add app access.
Click Save in the bottom right corner.