Availability
Self Service acts as an internal app store for your users to self-install applications you make available to them.
Self Service is installed on all macOS devices enrolled in Kandji in the /Applications folder. In iOS, iPadOS, visionOS, Self Service is deployed as an App Store app and appears on users' Home Screens.
Configuring Self Service
Self Service allows users to install apps in macOS, iOS, iPadOS, and visionOS. Auto Apps and Managed OS are available only in macOS. To customize Self Service:
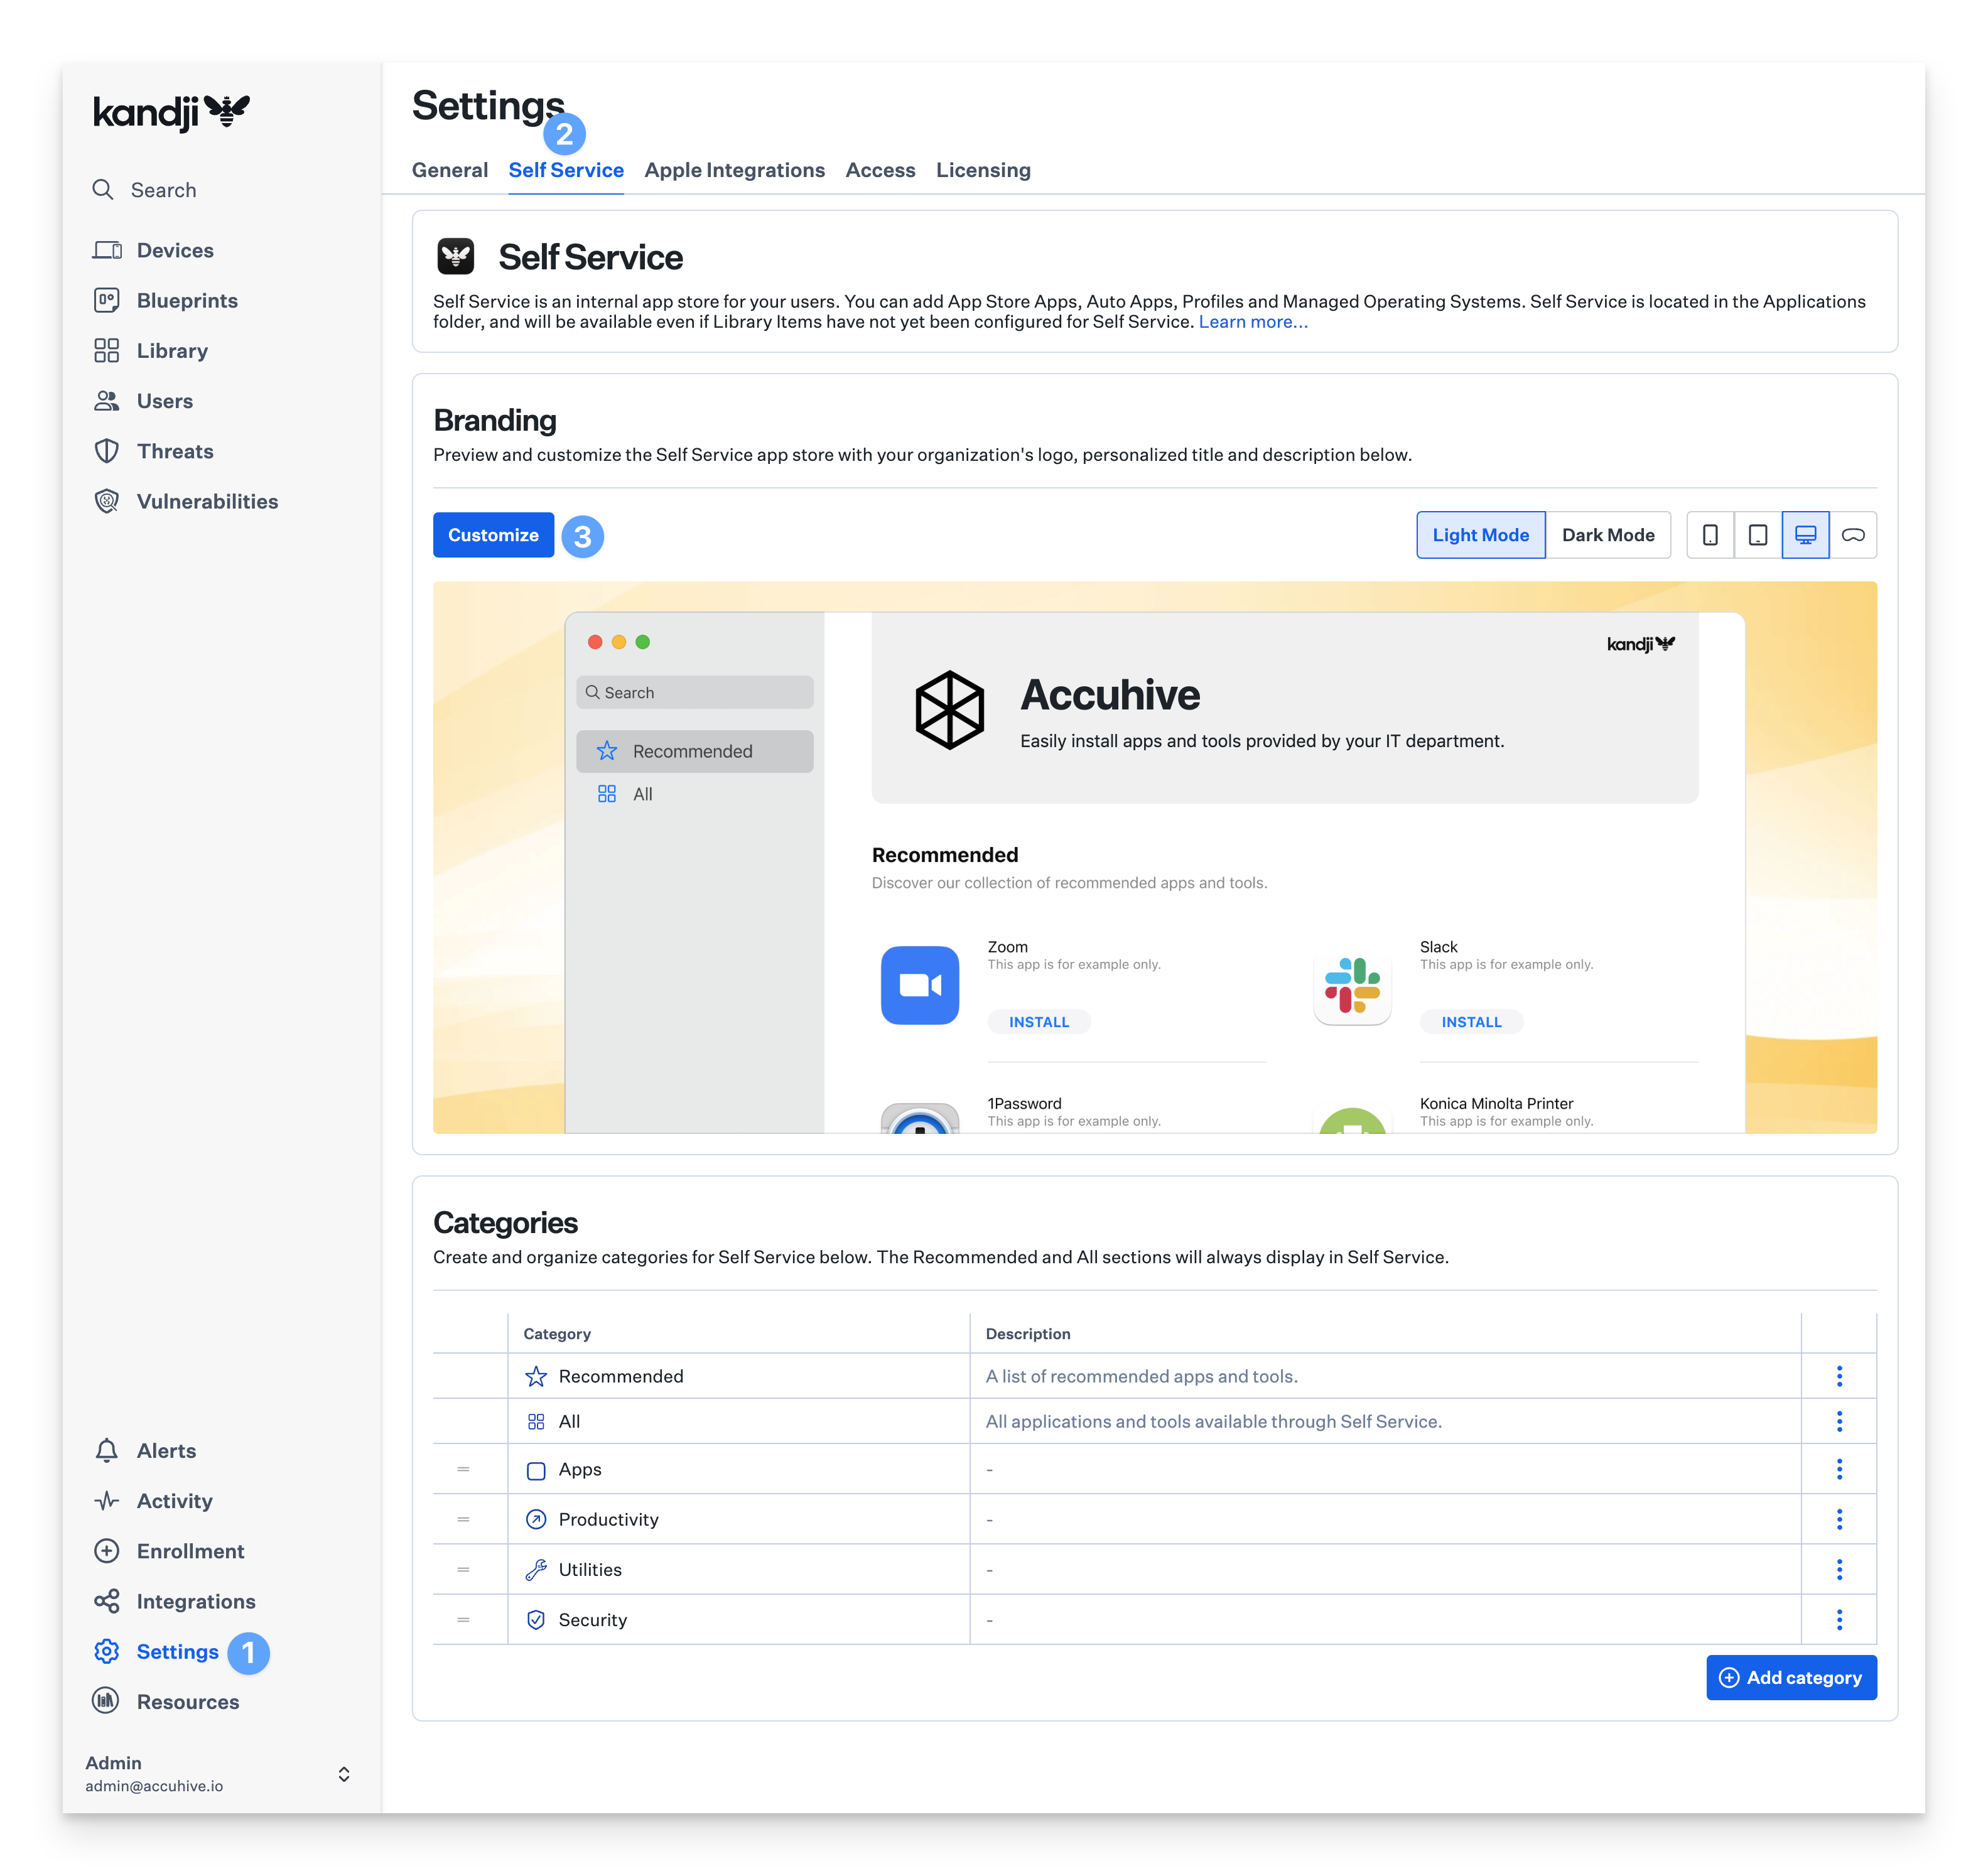
Navigate to Settings in the left-hand navigation bar.
Select the Self Service tab.
Click Customize.
Branding and Preview
You can customize the Self Service app with your company's name, logo, or other information. There are built-in previews to see how Self Service will look to your users, in both Light and Dark Modes and on each Apple platform.
The Self Service preview may not show up on lower-resolution displays, including Retina displays in High DPI mode.
Header and Subheader
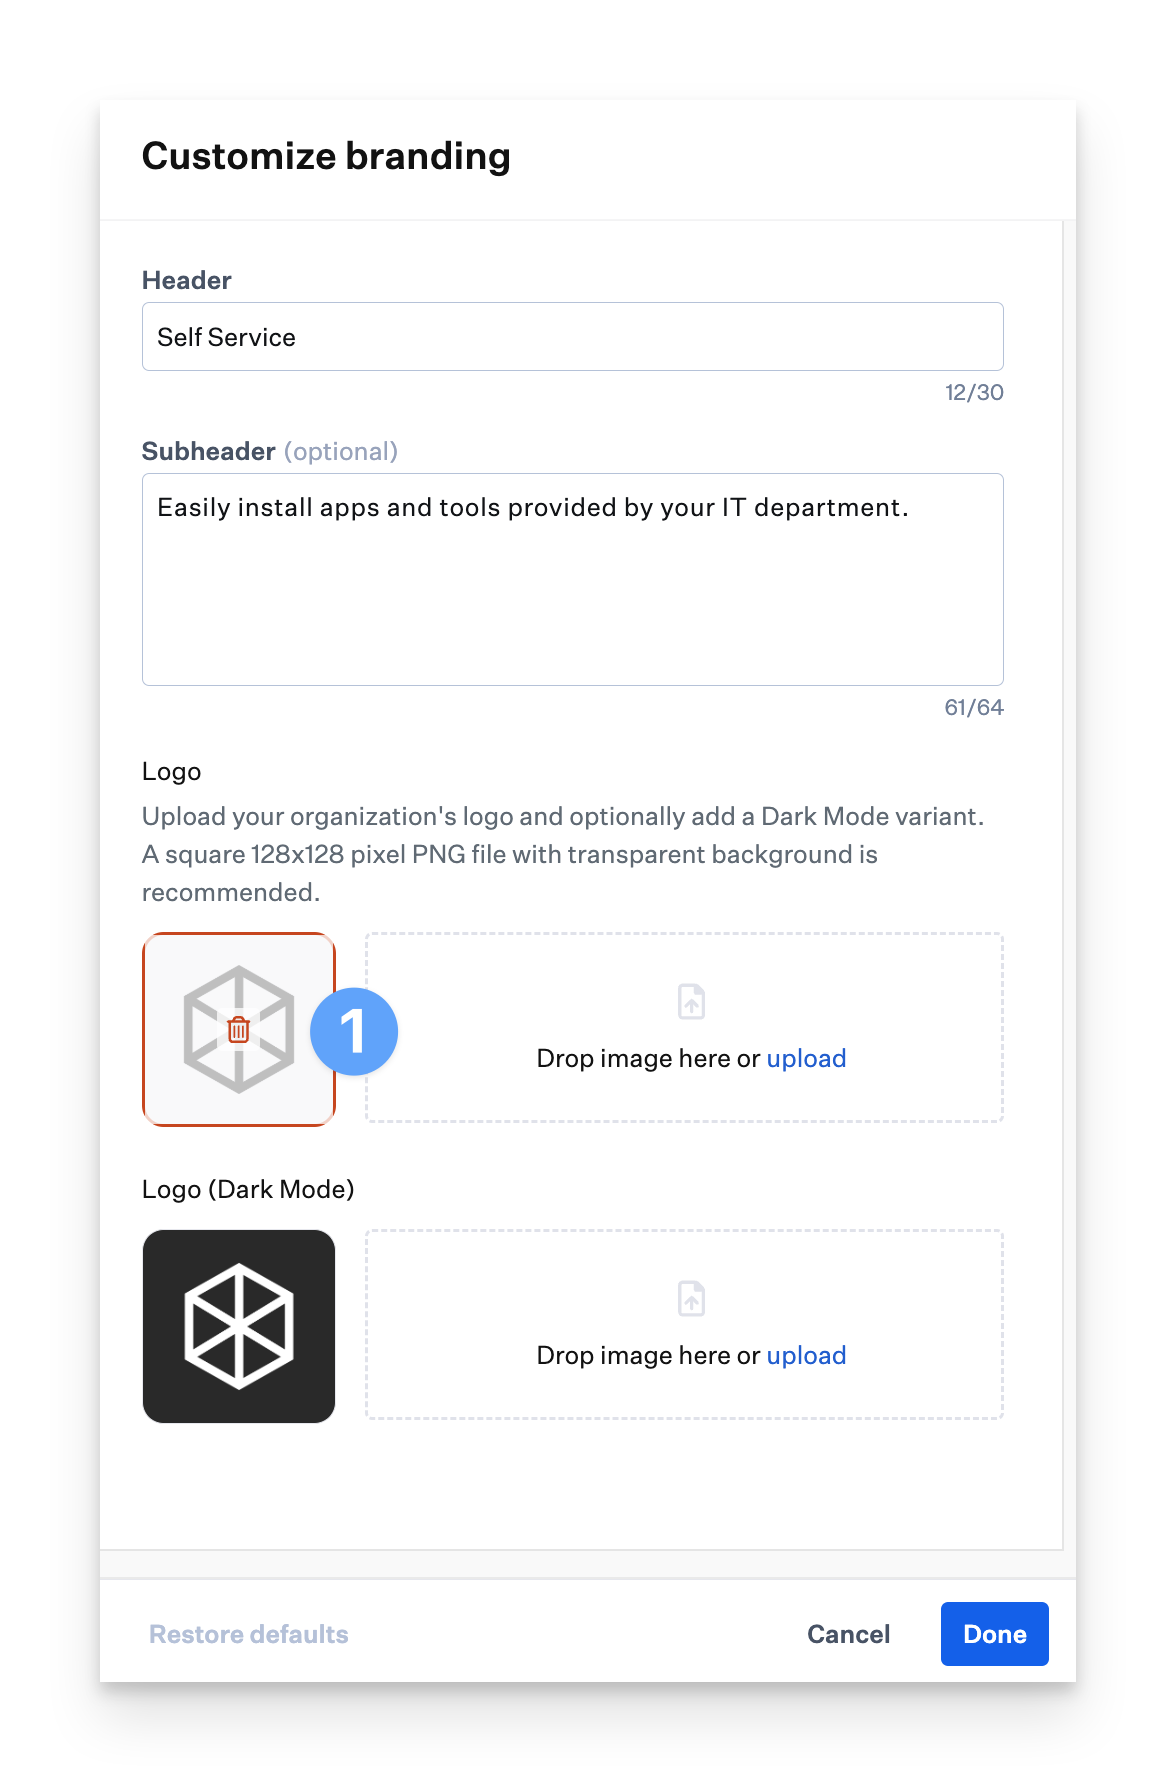
You can set a custom title and optional message for the Self Service banner. One good use of this space: to provide users IT-support contact information.
Enter Header text that will be displayed in the Self Service header banner.
Enter Subheader text that will be displayed under the header.
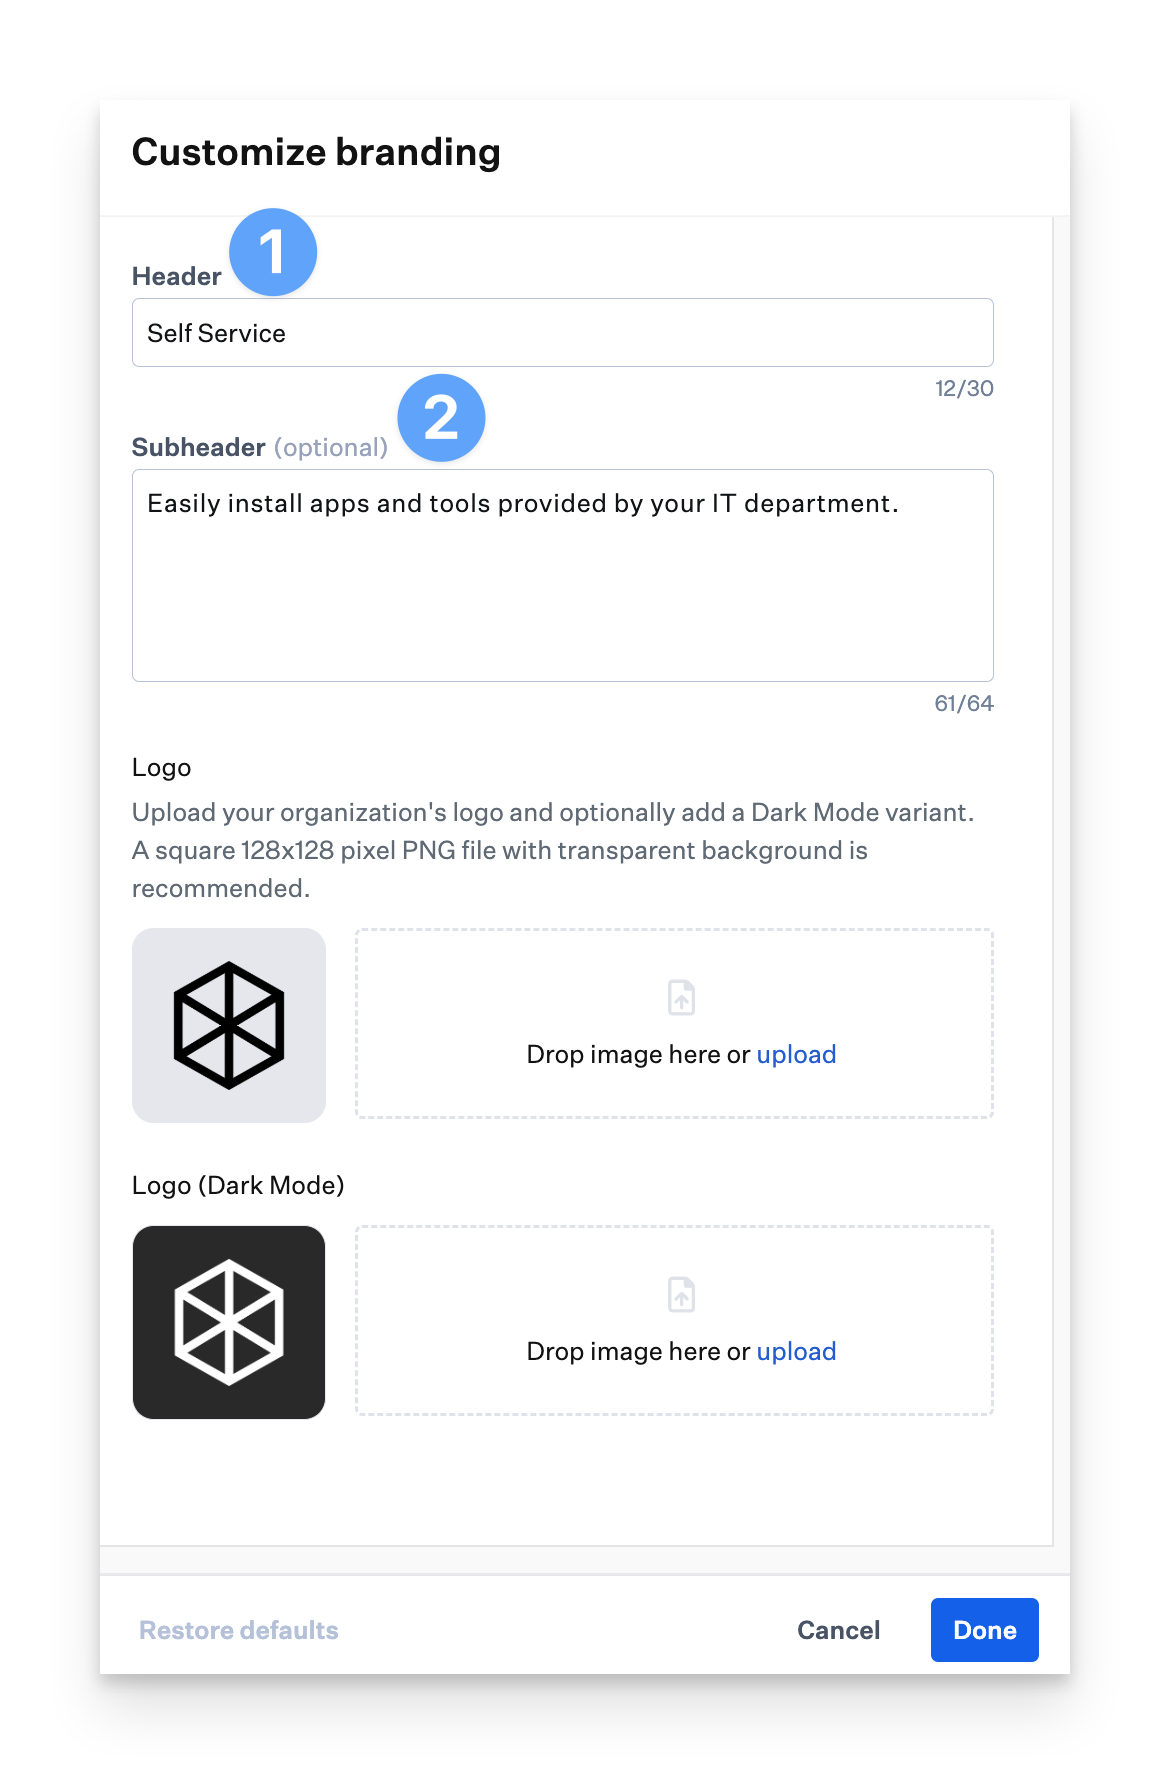
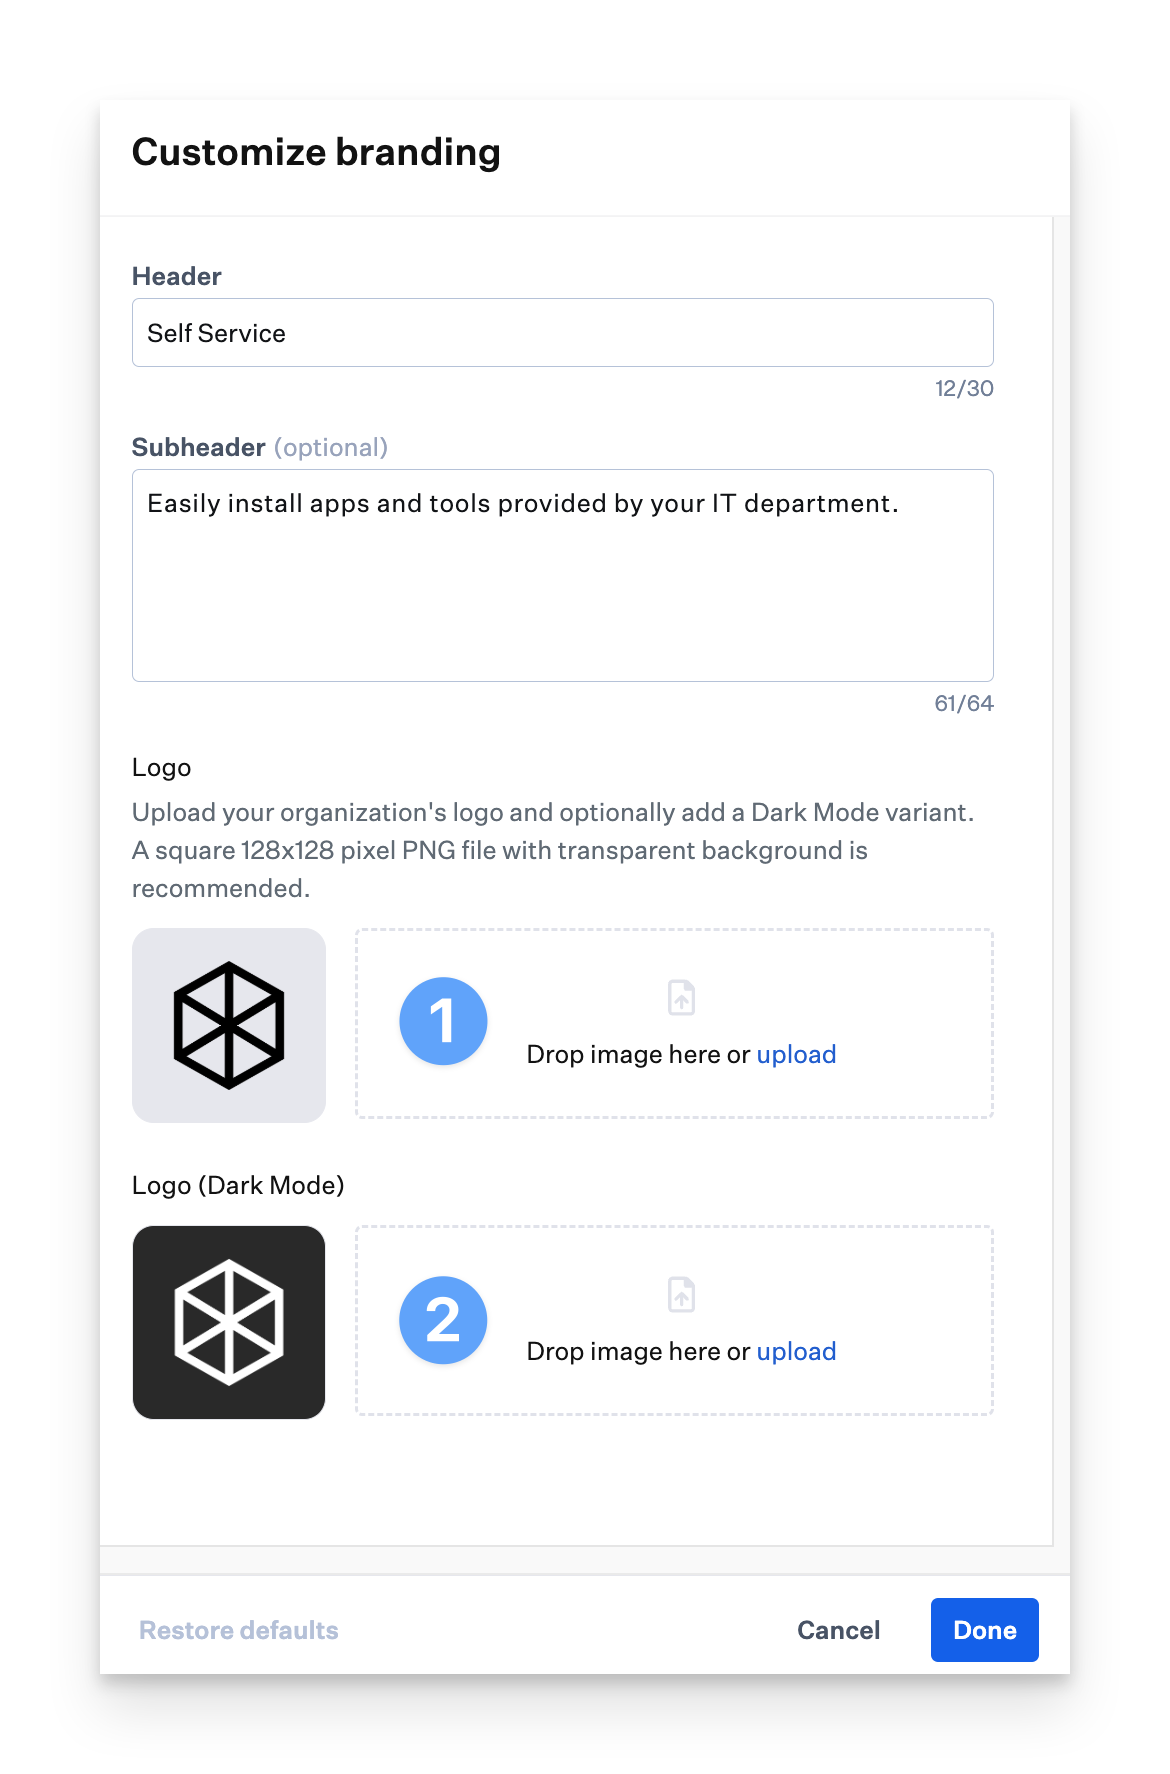
Logo
Upload your company’s logo, which will be displayed next to the header in Self Service. A square logo (128x128 pixels) in PNG format with a transparent background is recommended.
Click the Upload link, locate your logo in the Finder, and click the Open button.
Your logo will be displayed where the default logo was previously, and you will see it in the preview.
After you upload a custom logo, you can also add a logo for computers in Dark Mode.
To remove the custom logos:
Hover over the custom logo in the Customize Self Service panel.
Click the Trash button. Your custom logo will be be replaced with the default logo.
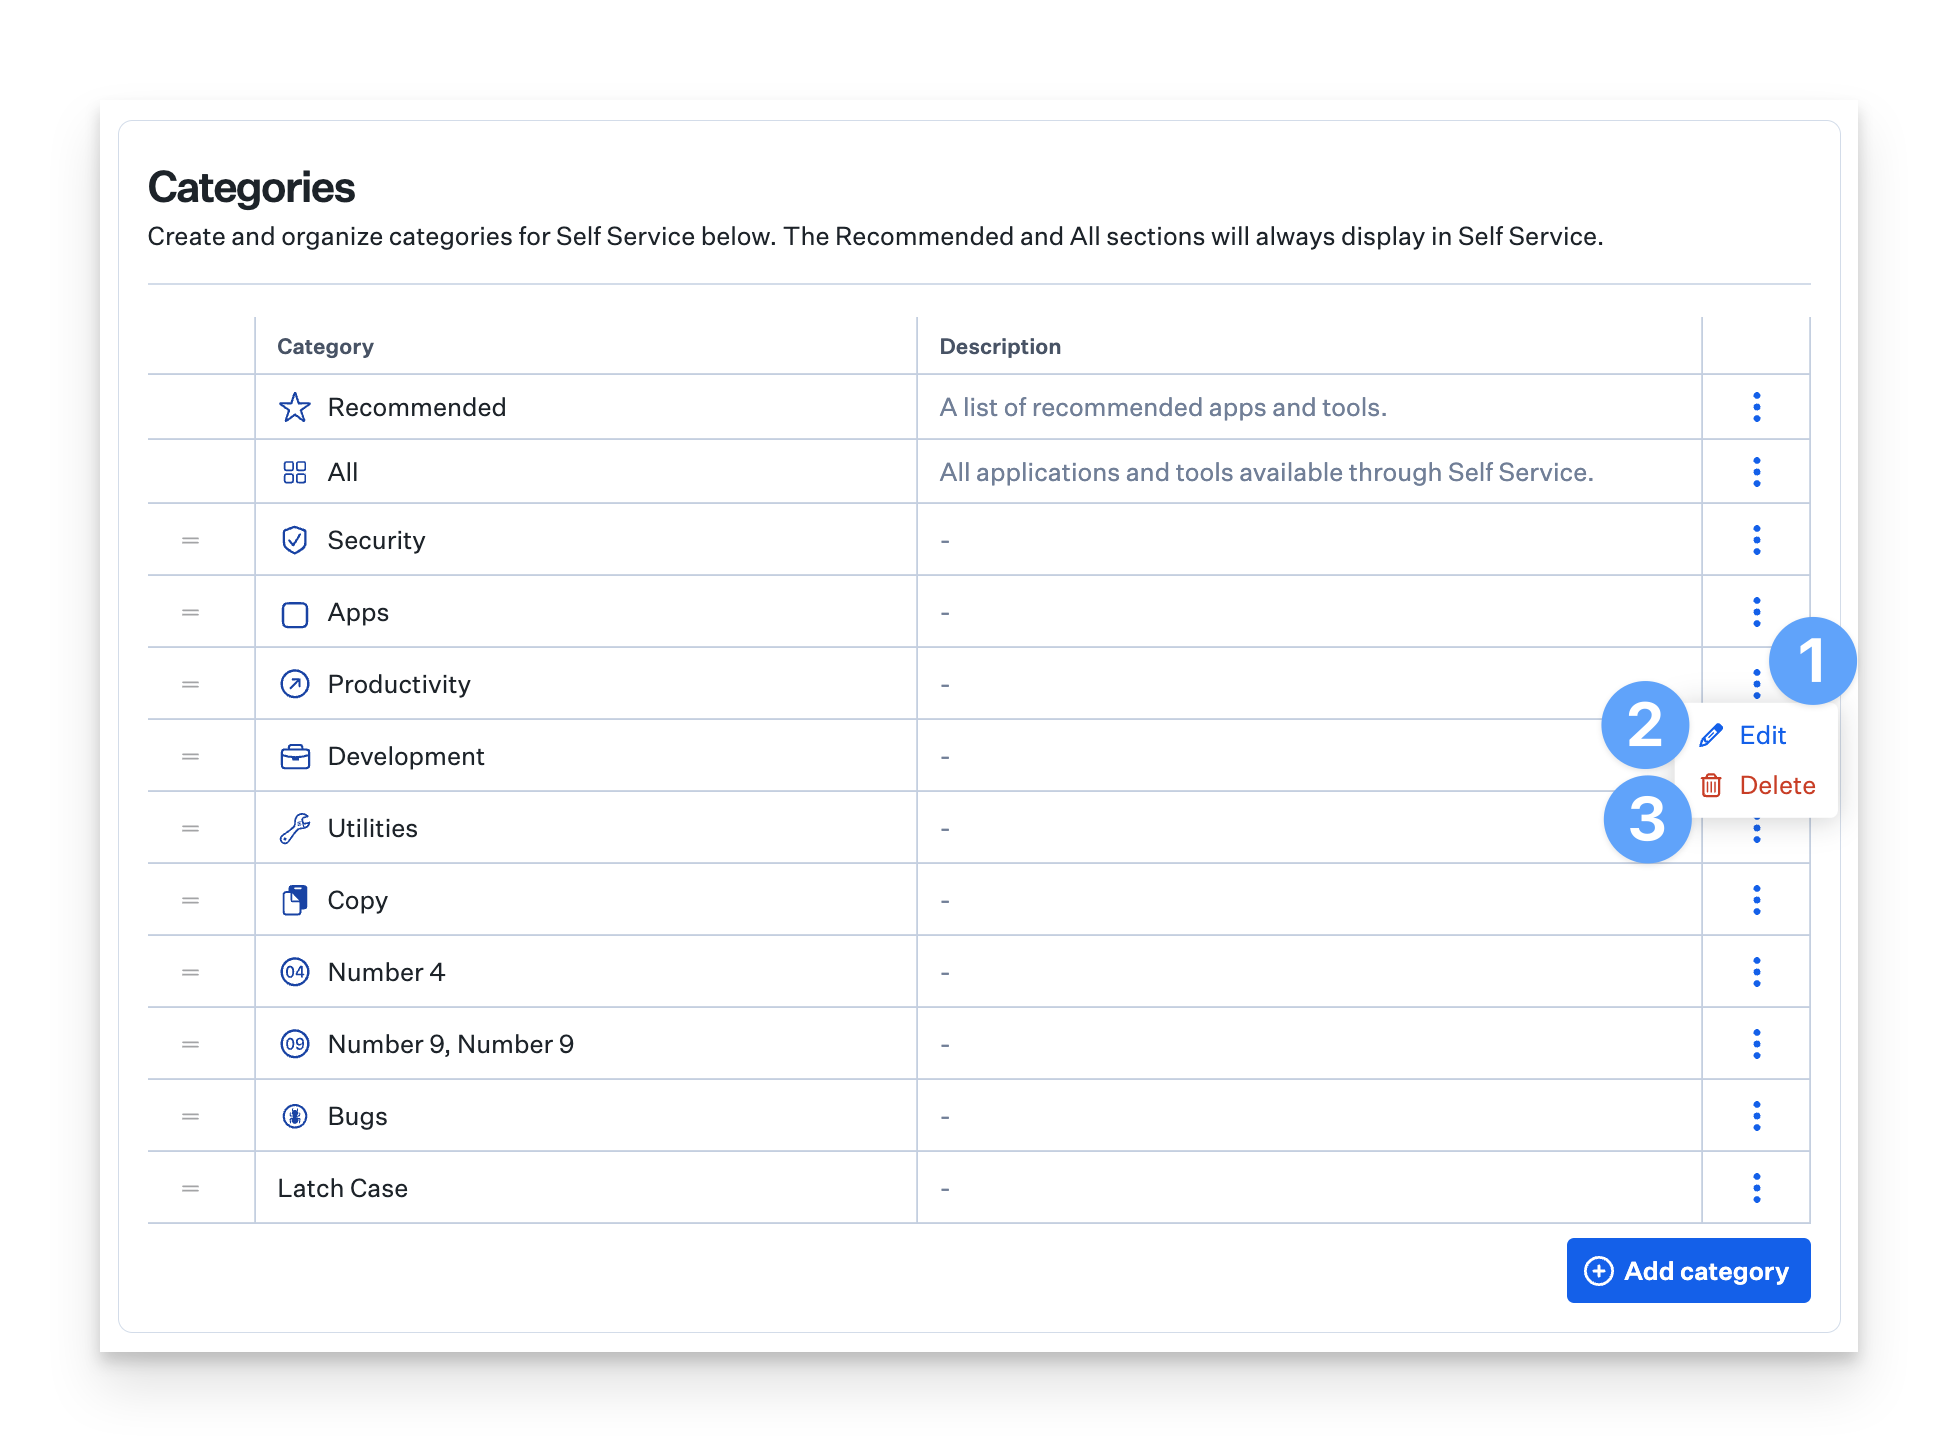
Categories
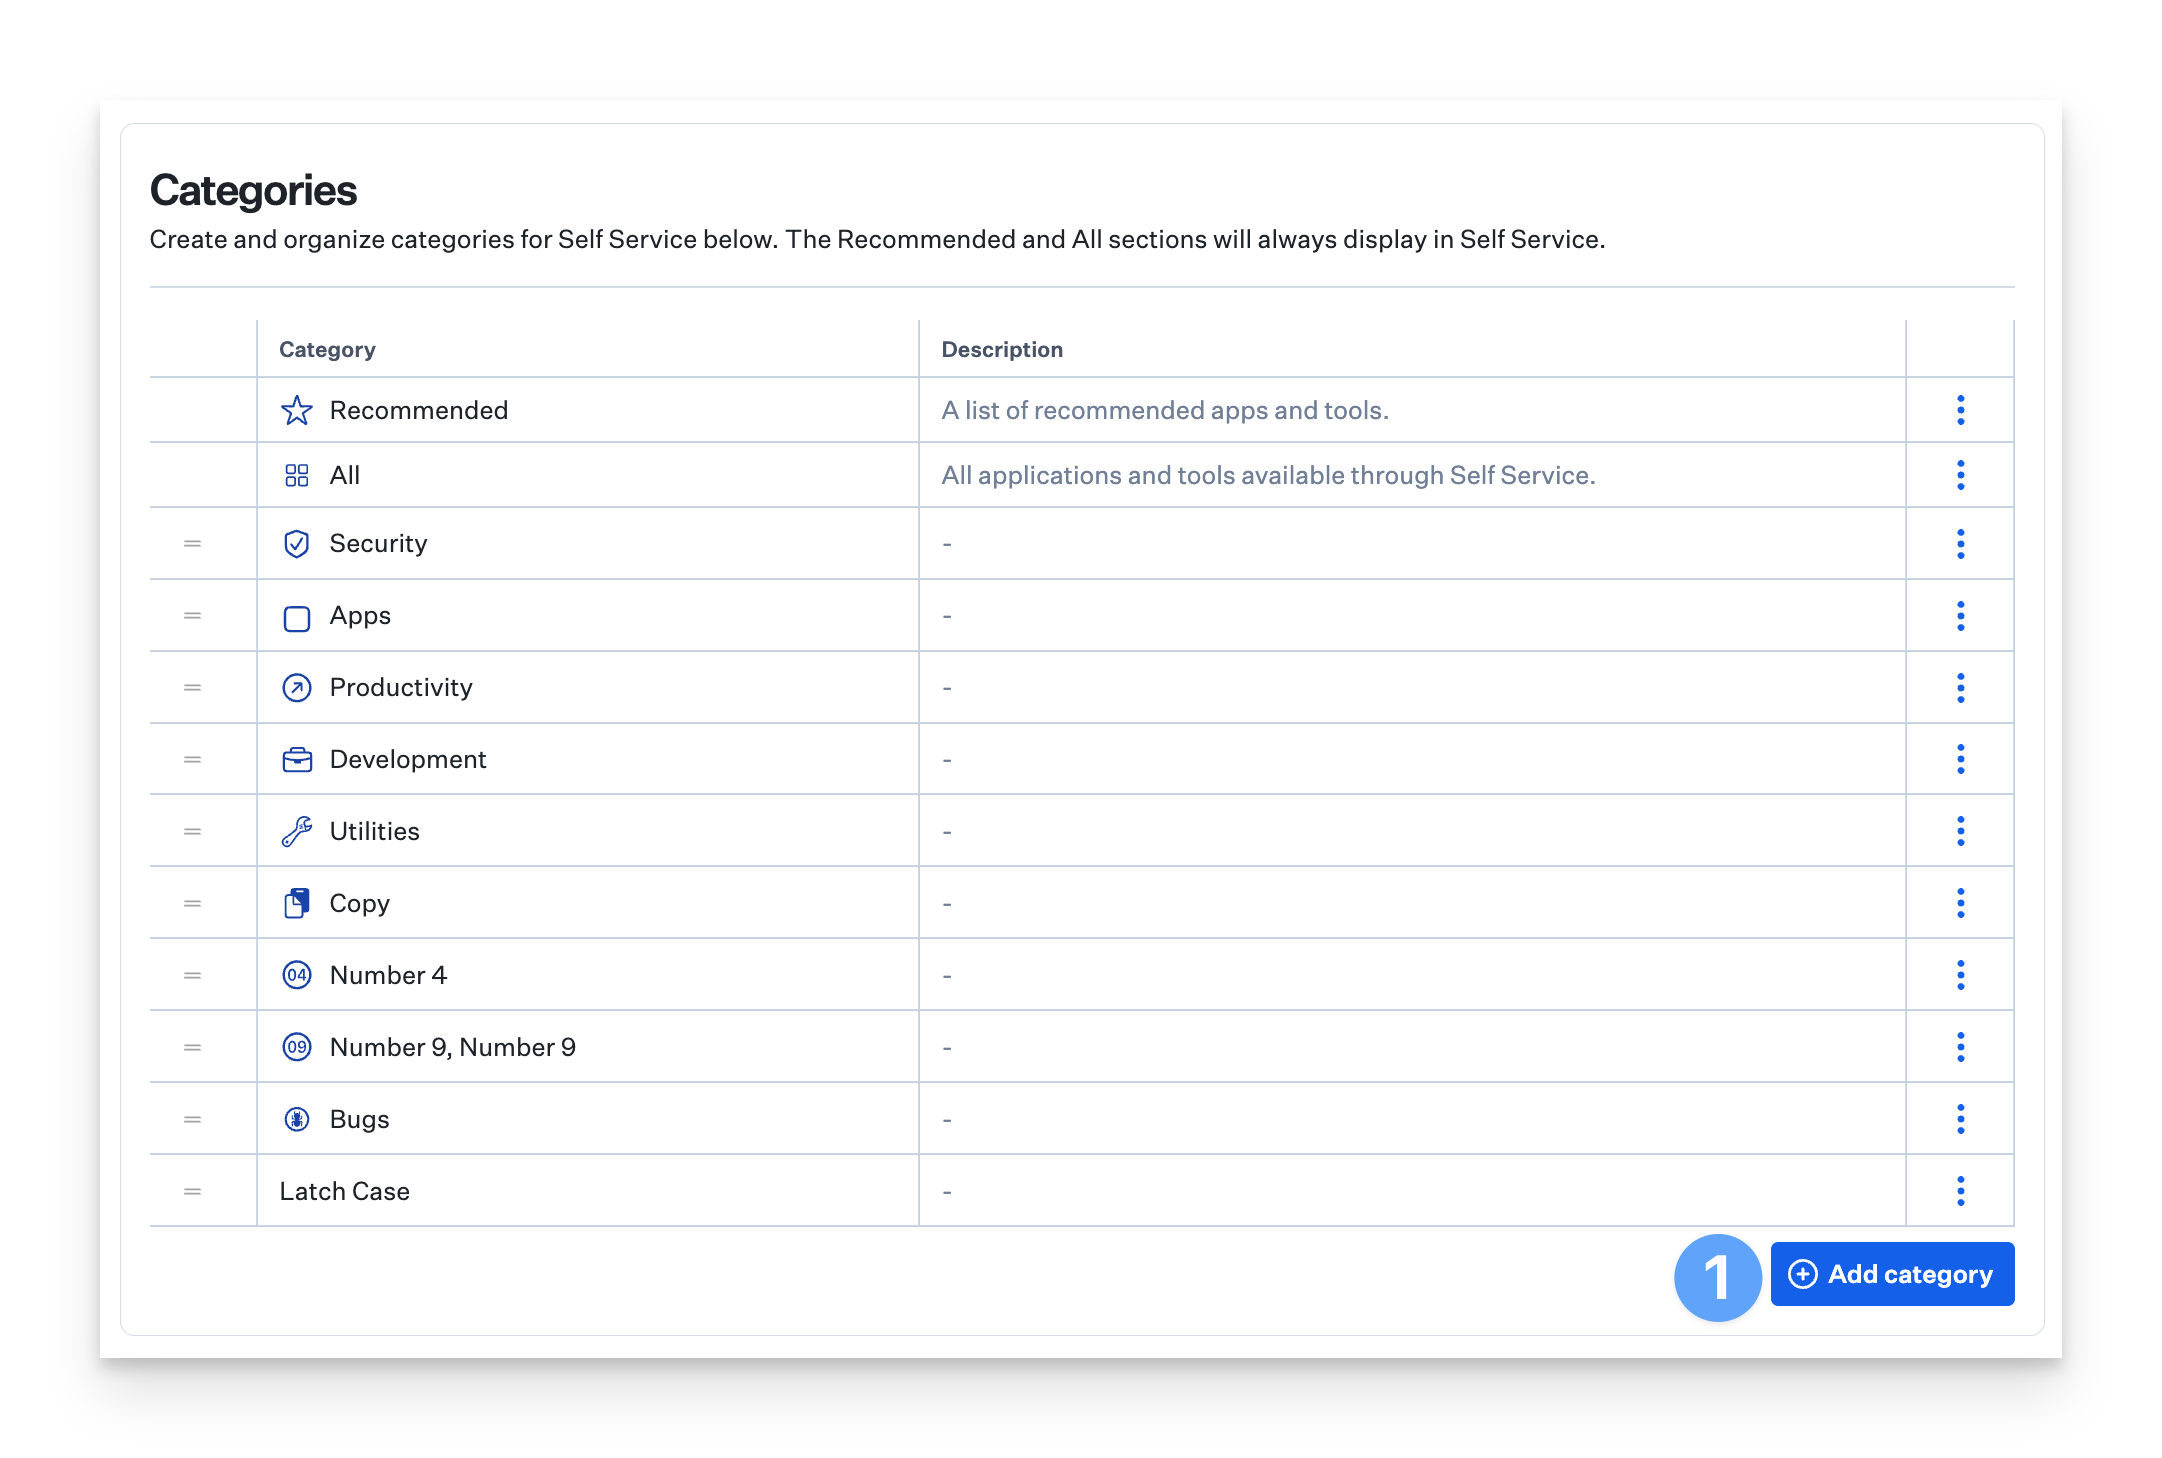
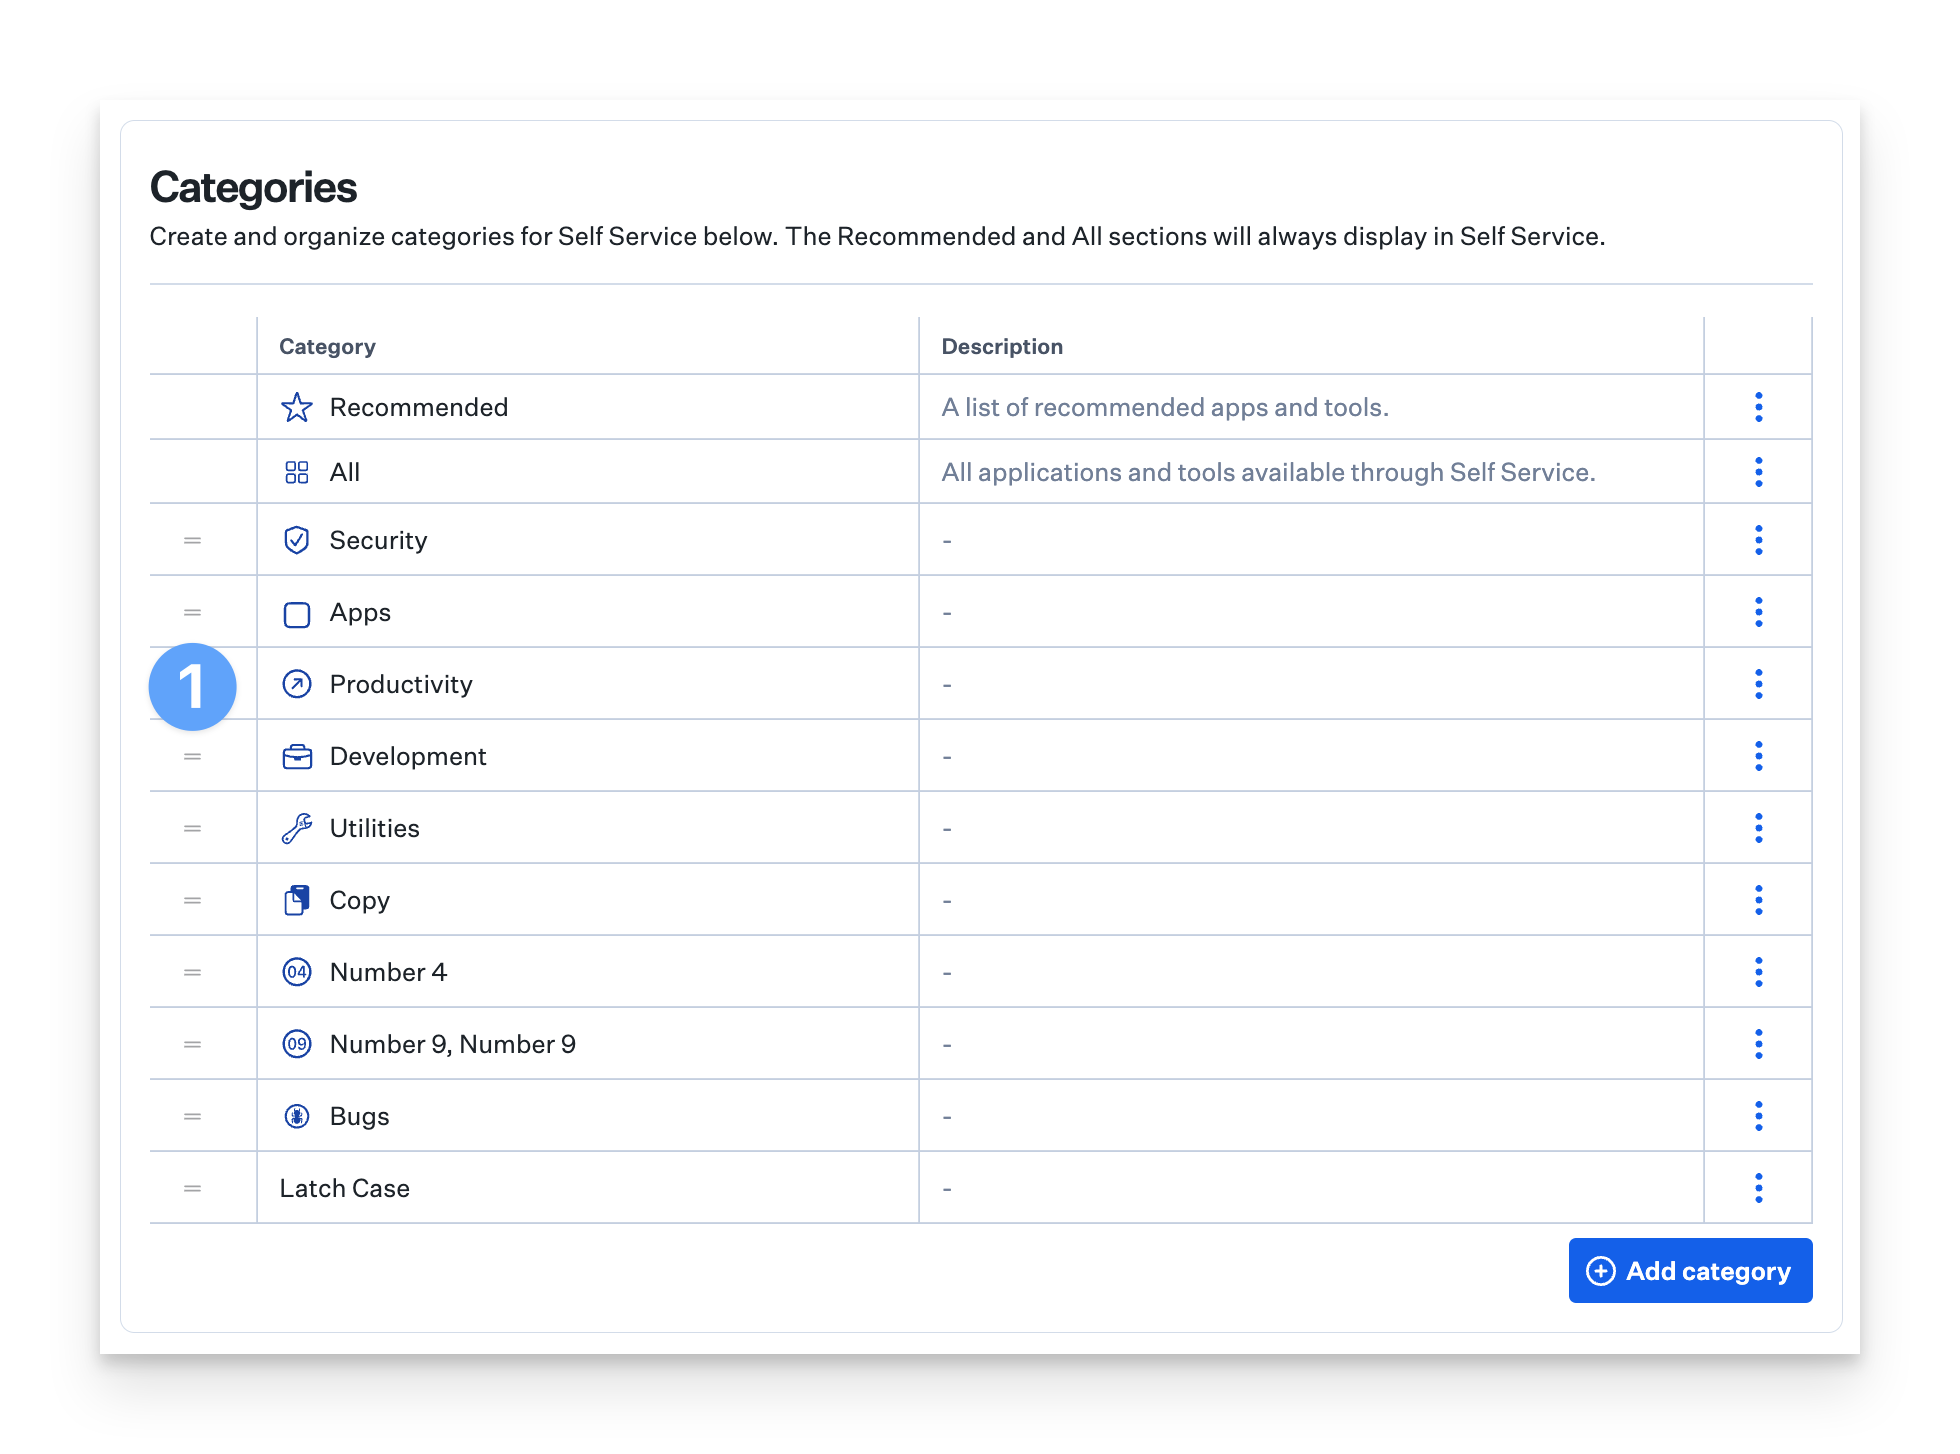
Several default categories are provided to help organize your Self Service apps. Recommended and All are the first two categories and will always be available. Other categories can be added, reordered, renamed, or deleted.
Add a Category
Click Add category in the bottom right corner of the Categories section.
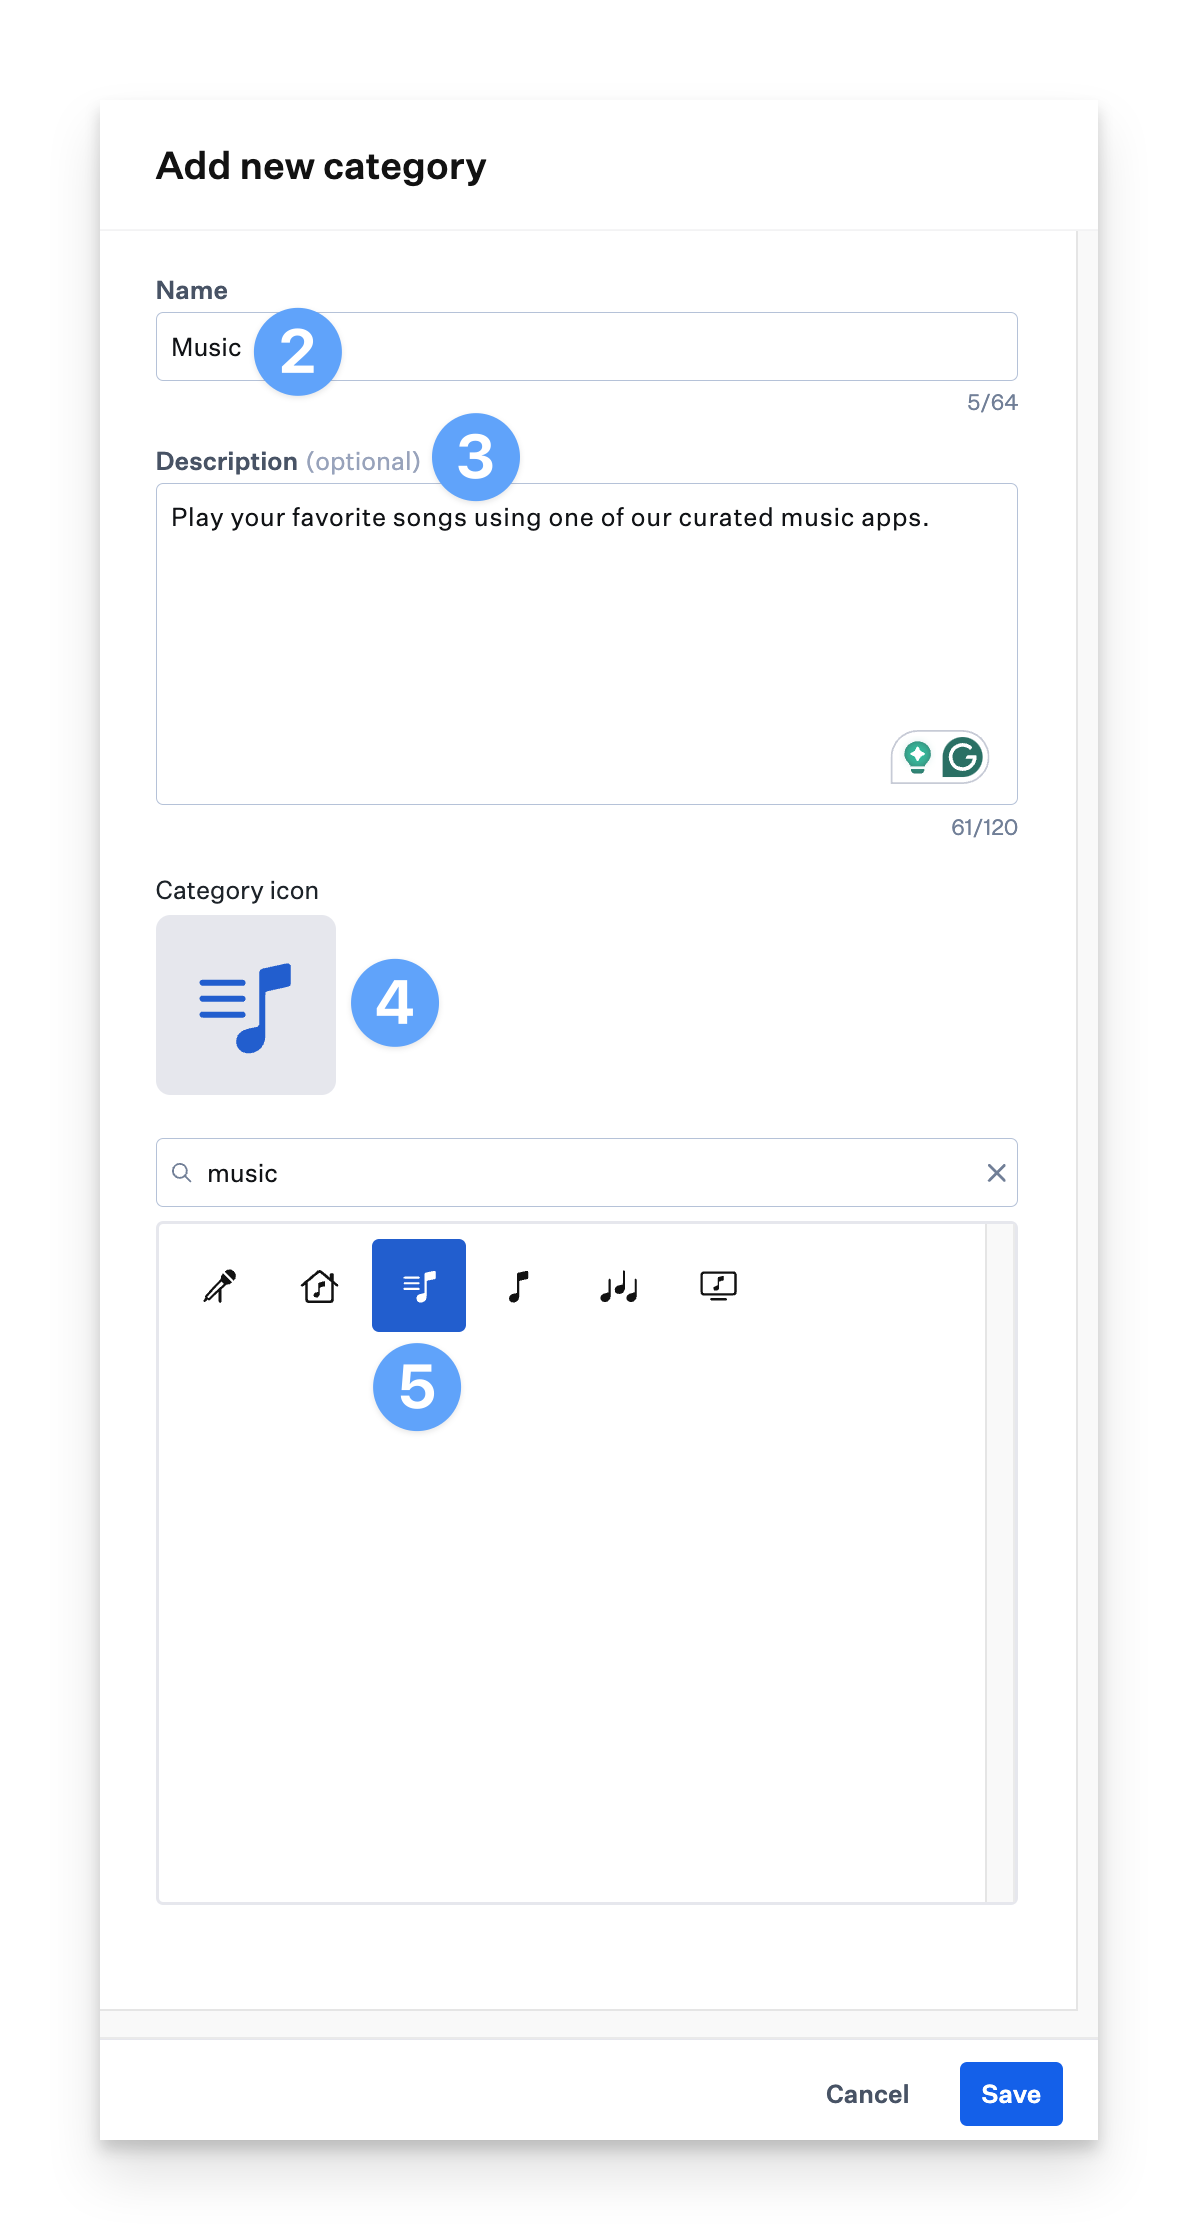
Enter a Name for the new category (maximum 64 characters in length).
Enter an optional Description for the category.
Optionally, enter a search term for an icon in the Search field.
Choose an icon for the category.
Change the Category Order
Categories will display in Self Service in the same order in which they appear on the Self Service Settings page.
Drag the categories using the slide bars on the left side of the Categories section.
Edit or Delete an Existing Category
Click the three dots to the right of the category you want to edit or delete.
Click Edit to change the category name, description, or icon.
Click Delete to delete the category. You can't delete the Recommended or All categories.