Deleting a device record from Kandji lets admins remove unwanted or unused devices from the Kandji Web App. If the device is online, the Kandji agent and MDM Profile will be removed as applicable.
The device must be powered on and have internet access for the uninstall to complete. Deleting the device record will remove all history of that device stored in Kandji and can not be recovered. This will not erase the device.
Device Record Removal Considerations
All related device record information is destroyed when a device record is deleted.
The following device secrets will be permanently removed from Kandji:
Device lock PIN code
Recovery password
FileVault Recovery Key
Activation Lock Bypass Code
All Parameter history will be lost.
The device will need to be re-enrolled into Kandji to regain management.
If the device is Automated Device Enrollment-eligible, it will automatically re-enroll with Kandji during Setup Assistant.
If the device is not Automated Device Enrollment-eligible, it must be manually re-enrolled using your Add Devices link.
Removing a Device from Your Kandji Tenant
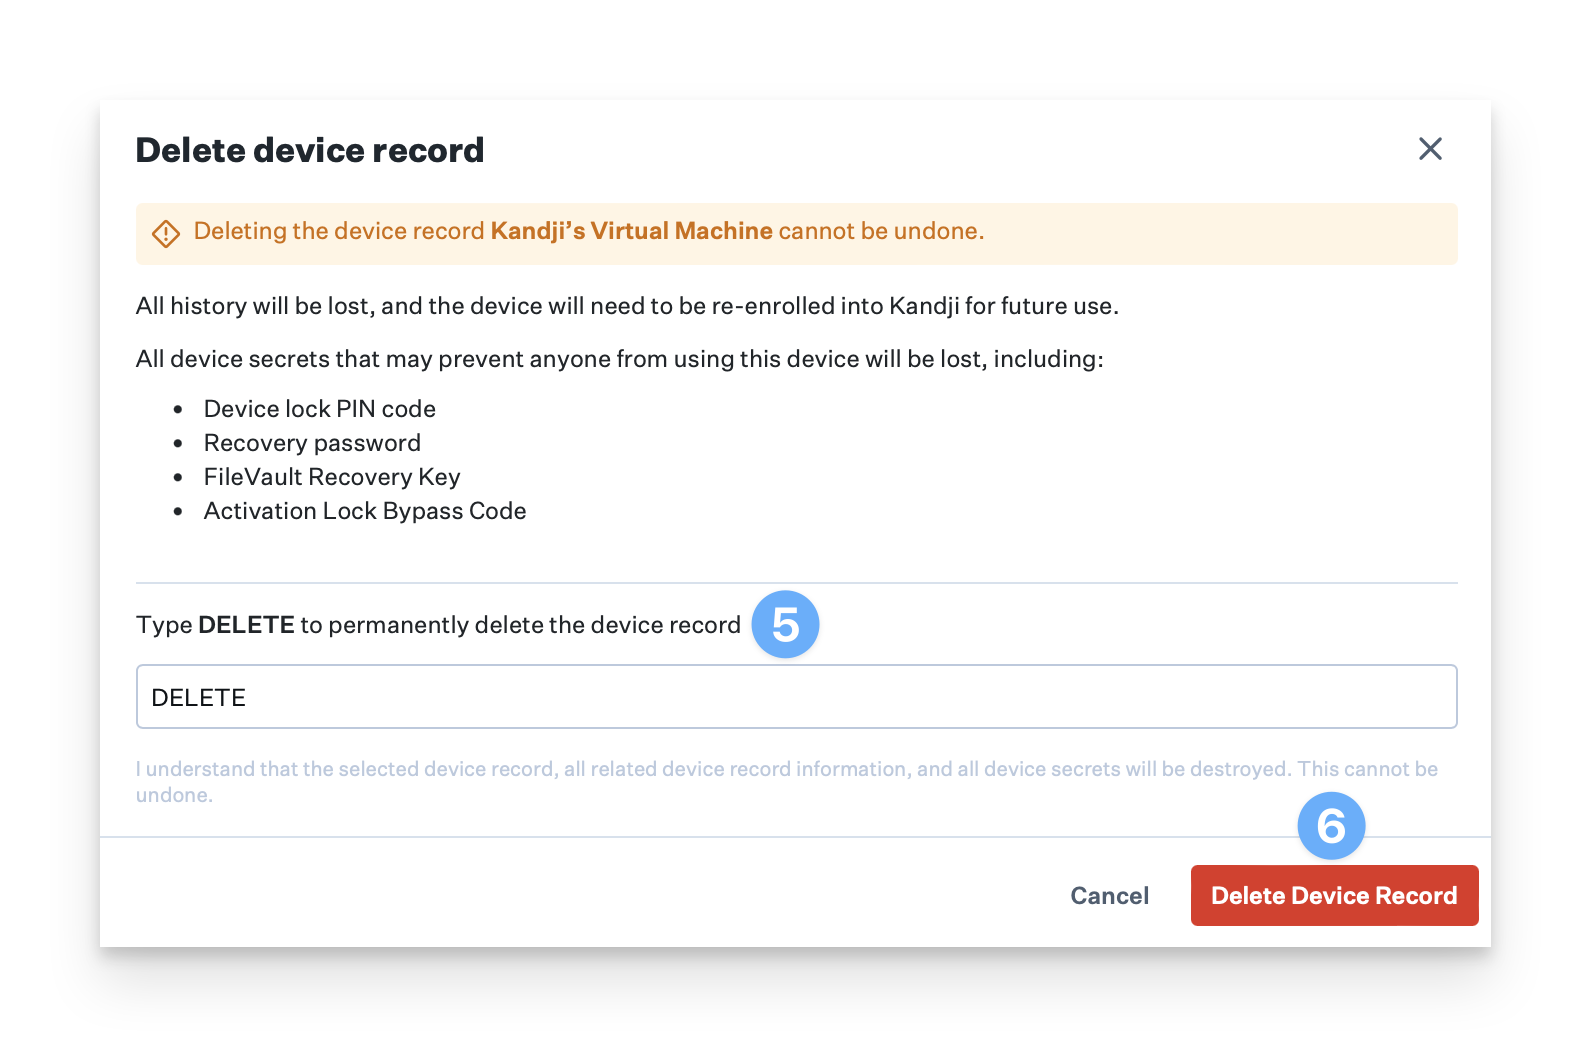
This action cannot be undone.
If you no longer wish to manage a device, you can uninstall Kandji from the device and remove its record from your Kandji account with one step. Here's how:
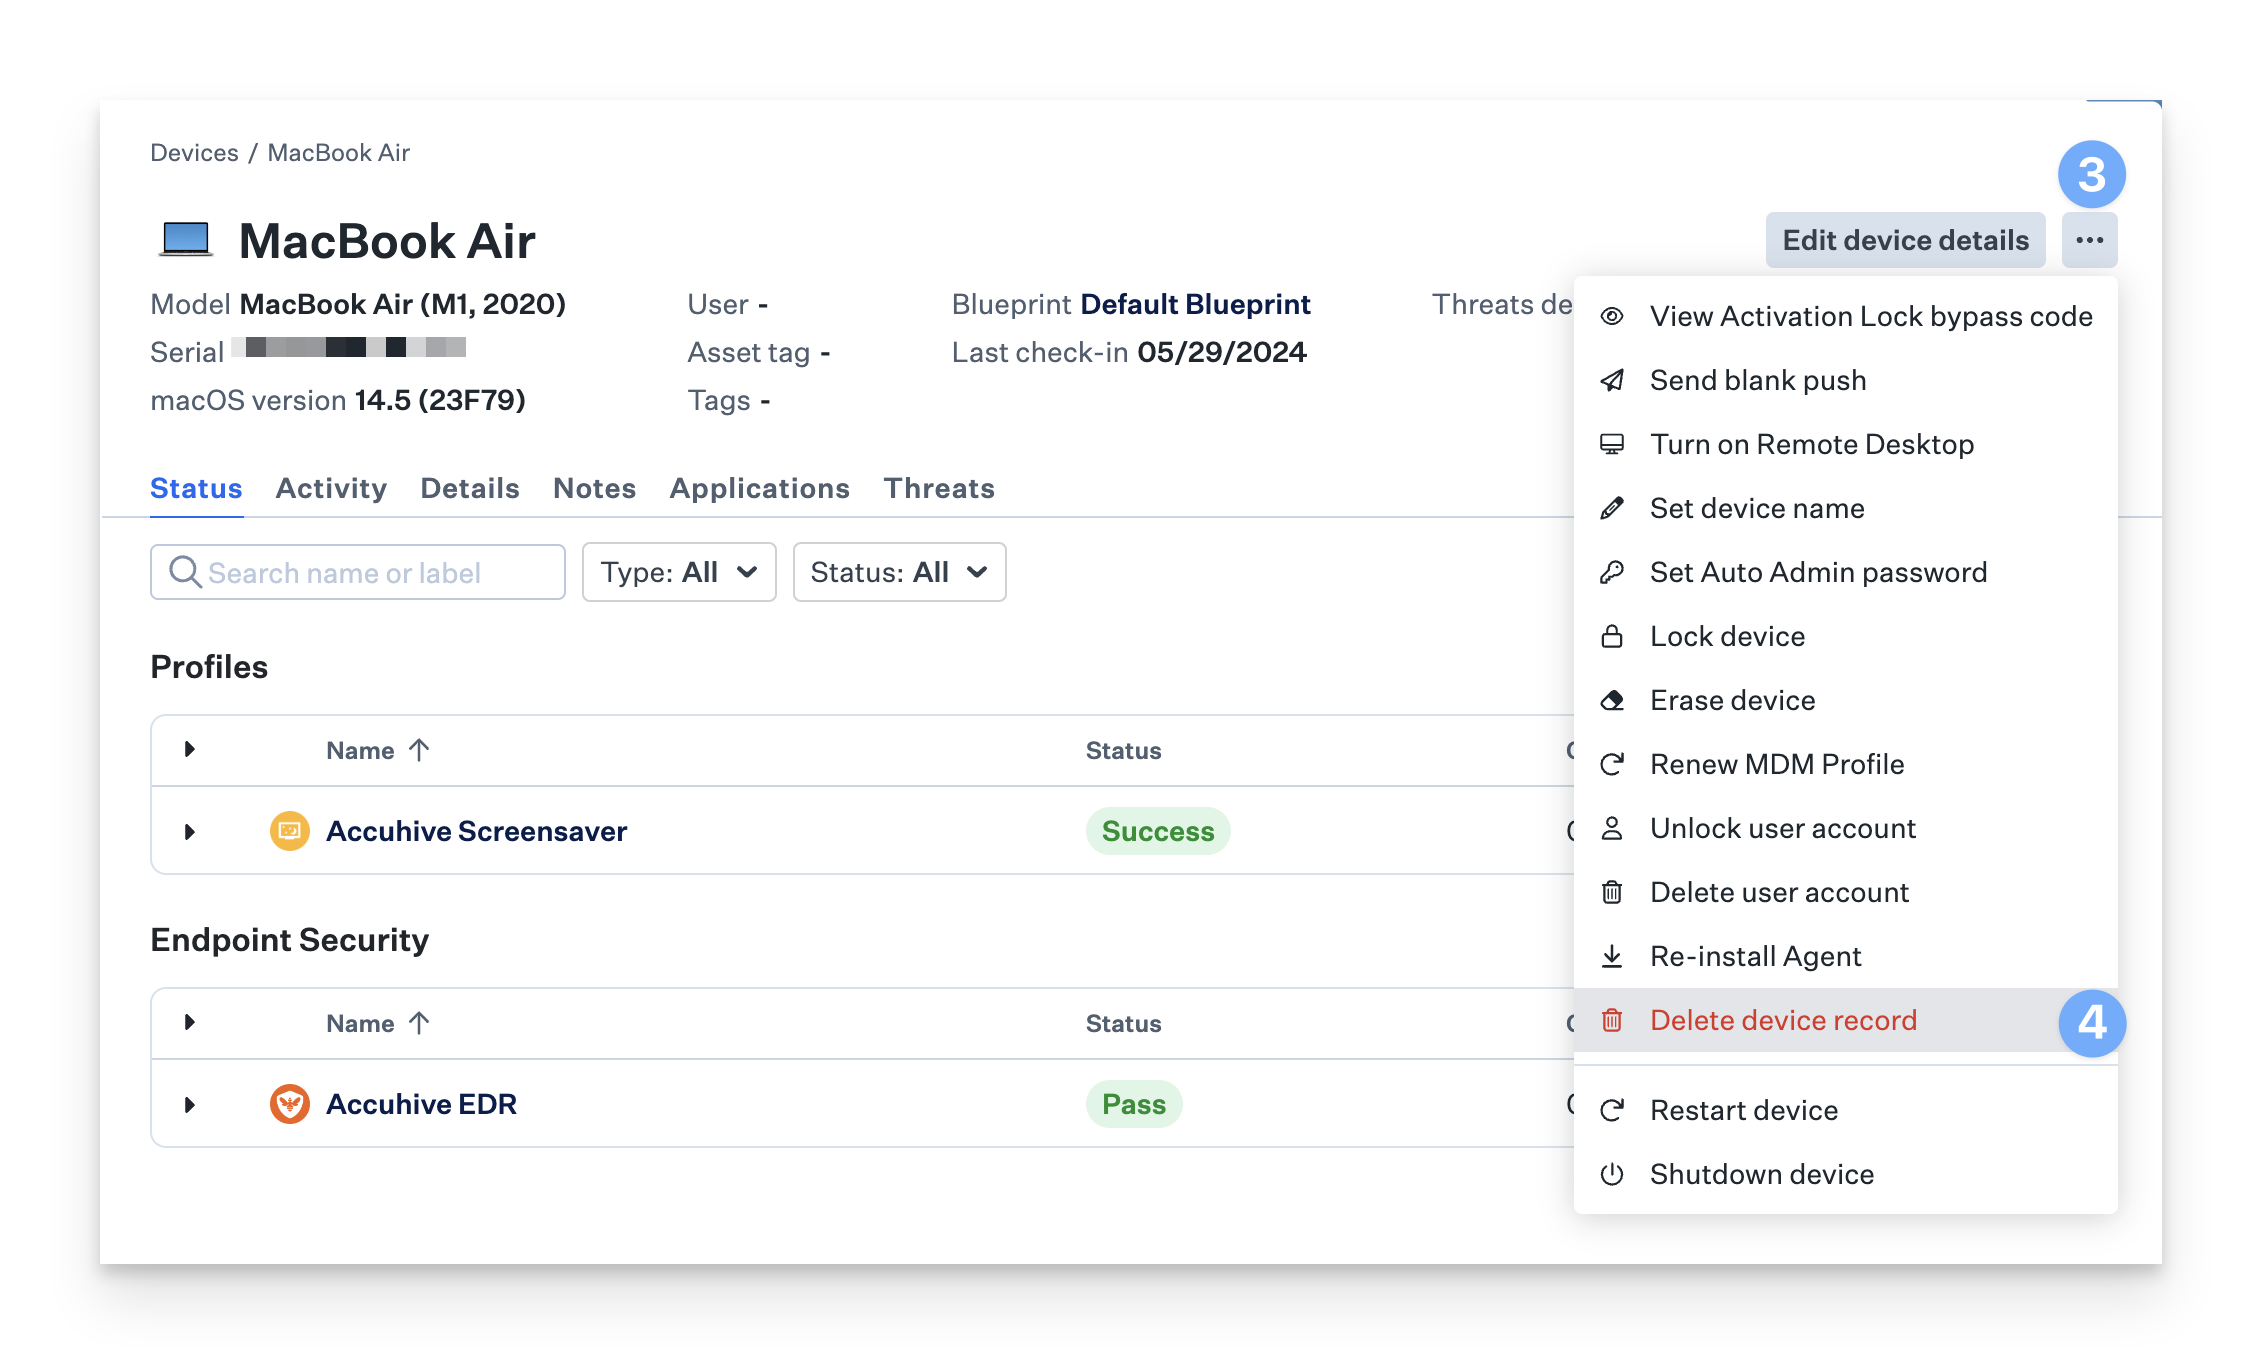
Log in to your Kandji account and open Devices.
Click on the device you wish to remove.
Click the Device Action Menu at the top right of the device record.
Click Delete Device Record.
In the confirmation pop-up window, type DELETE in the text field.
Click Delete Device Record.
The Kandji Agent will be notified on the next check-in (every 15 minutes) that the computer is no longer enrolled and uninstall itself automatically after removing installed profiles. When unenrollment is complete, the following items are removed from the device:
Kandji agent
Profiles installed via MDM
Apps deployed using Apps and Books
Removing Multiple Devices from your Kandji Tenant
Log into your Kandji account and open Devices.
Use the radio buttons on the left to select the devices you wish to remove.
Use the Bulk Action Menu at the top right of the devices list.
Click Delete devices.

Best practices for Reassigning Mac computers
In many organizations, there are instances where a computer is returned by one user and needs to be prepared for a new user. In such cases, it’s recommended to erase the computer and reinstall macOS completely. This process guarantees a fresh and clean setup for the new user, eliminating any concerns about residual data on the computer. If the computer is enrolled in Kandji, you can follow these steps to erase the device.
What happens when I erase a Mac remotely?
MacOS's behavior varies based on the version and hardware support. Specifically, one of two actions will be triggered: Erase All Content and Settings or Obliteration. The remote wipe behavior experienced is unique to each combination of hardware and macOS version, is subject to multiple conditions. These conditions are detailed in our Lock Device and Erase Device support article.
Can I erase a Mac locally?
There are a few options if you need to erase the computer locally. Apple has a support article on how to Erase your Mac and reset it to factory settings. That article shows how to Erase all Content and Settings on Apple Silicon computers and Intel devices with the Apple T2 Security Chip so that macOS doesn't have to be reinstalled once the device is erased. It also has additional article links that cover how to erase the device when that option isn't available. If macOS needs to be reinstalled, you can use Apple's support article on How to reinstall macOS from macOS Recovery.