
Getting Started
Before you create your Custom Printer library item, you will need two things:
The driver installer package associated with that printer and
The file path to the PPD installed by the package. Typically the correct PPD can be identified by the model name appearing in the filename.
After you have collected these two things, you will then need to gather the following information:
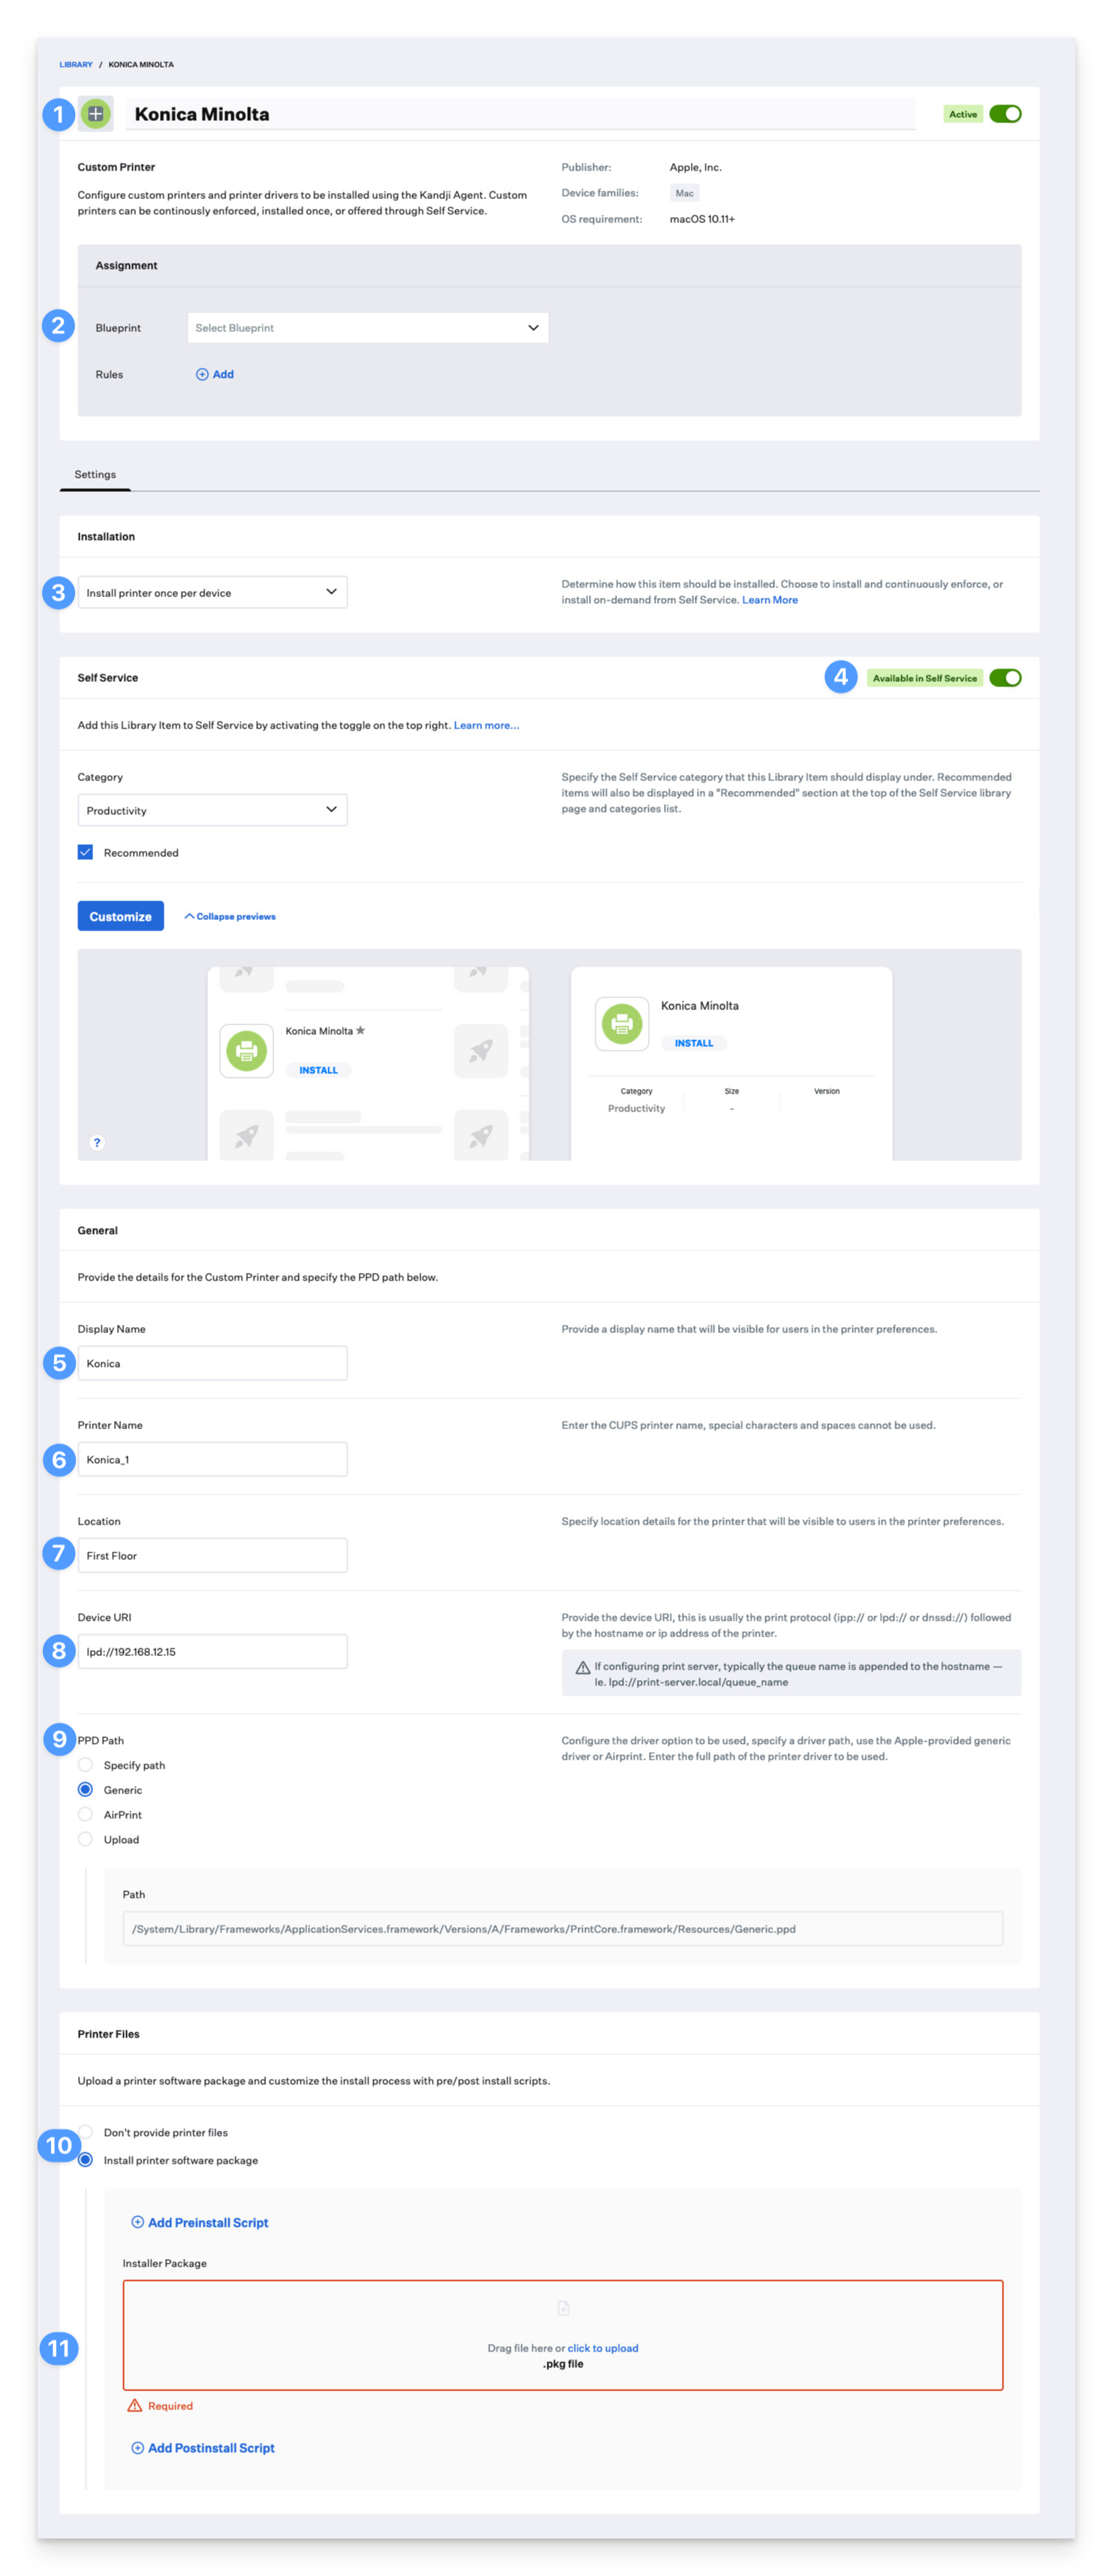
The display name of the printer (for example, Marketing Printer)
The CUPS name of the printer (for example, marketing_printer)
The location description (for example, 2nd Floor)
The printer URI (for example, lpd://192.168.0.43/queue_name or ipp://hostname.local/queue_name)
Creating a Custom Printer Library Item
Add a Custom Printer Item:
Click Library in the left-hand navigation bar.
Click Add New in the upper right-hand corner.
Click Custom Printer from the Add New window.
Click Add & Configure.
Configure the Custom Printer Item:
Give your Custom Printer a name and optionally upload a custom icon for it.
Assign your Custom Printer to a Blueprint.
Choose an option from the Installation pop-up menu:
Install printer once per device: This installation option will install the printer and associated driver once per device. Flushing the item status for a device will trigger a reinstall.
Install printer and continuously enforce: This installation option will install the printer and associated driver and continually enforce the installation by checking for the presence of the printer's configuration at every check-in.
Install on demand from Self Service: This installation option will install the printer only if the user triggers the install through Self Service.
Optionally configure Self Service options. Learn more about Self Service options
In the Display Name field, enter the display name that the user will see within printer preferences.
In the Printer Name field, enter the CUPS printer name. You should remove any special characters and replace spaces with underscore characters. Dashes are not allowed in CUPS queue names.
In the Location field, enter the location. This will be visible to the user in the location field of their printer preferences.
In the Device URI field, enter the device URI. This is usually the print protocol (ipp:// or lpd:// or dnssd://) followed by the hostname or IP address of the printer. If you are sending print jobs to a print server, you will typically see the queue name appended to the hostname (for example, lpd://print-server.local/queue_name).
Choose a PPD path, use the Apple-provided generic driver, AirPrint, or upload a custom PPD.
When uploading a custom PPD, the PPD file name must match the Printer Name.
You can retrieve a PPD file from a Mac with the printer already configured from the /etc/cups/ppd folder.
Optionally choose to provide a printer driver PKG file. This PKG will be installed as part of the printer installation. The installer file must be a PKG.
If you do choose the Install provided software package option, upload the PKG.
Click Save.
After the Kandji Agent installs a custom printer, macOS may take a few minutes to update the printer configuration file.